Removal Procedure
Tools Required
| • | J 24402-A Glass Sealant Remover (Cold Knife) |
| • | J 39032 Stationary Glass Removal Tool |
- Apply masking tape to the painted surfaces around the window in order to prevent damage to the paint.
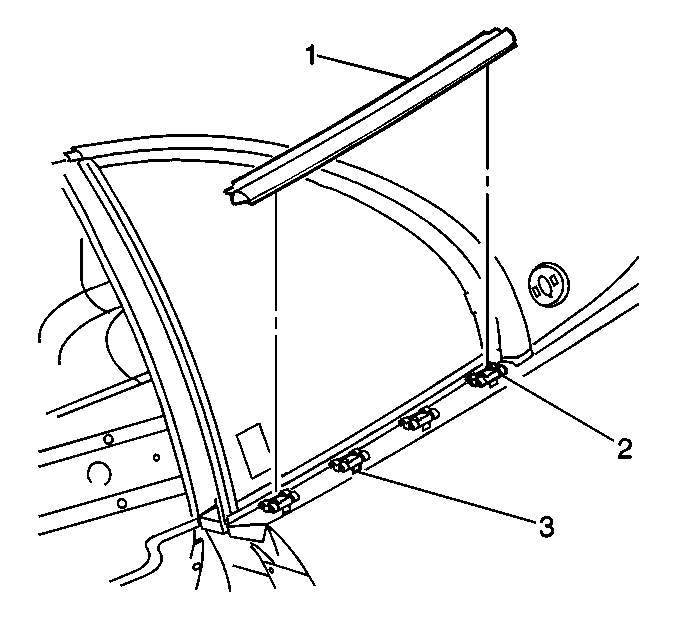
- Remove the outer belt line molding (1).
- Partially remove the door opening weatherstrip. Refer to Front Door Opening Weatherstrip Replacement in Doors.
- Remove the rear seat cushion. Refer to Rear Seat Cushion Replacement in Seats.
- Remove the rear quarter trim. Refer to Rear Quarter Trim Panel Replacement in Interior Trim.
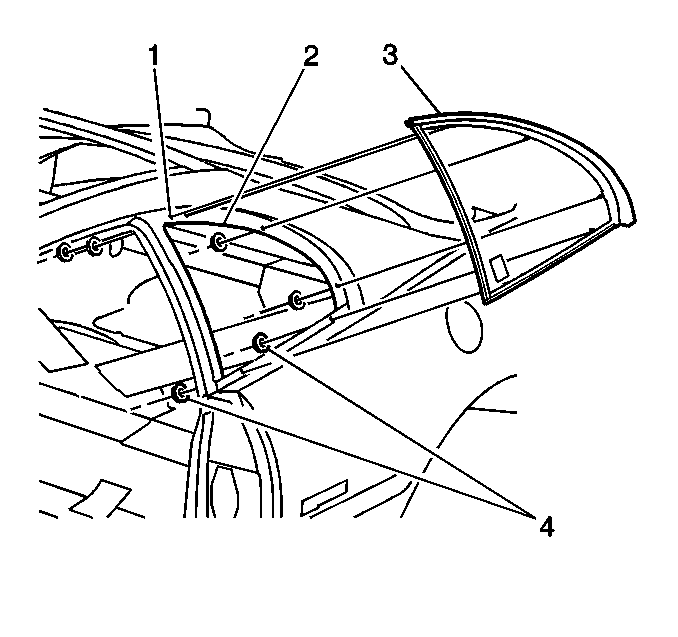
- Working inside the vehicle, remove the nuts (2) that retain the window (3).
- Working from the outside, use the J 39032 to cut the urethane adhesive along the front edge of the window (3).
- Using the J 39032 Stationary Glass Removal Tool cut the adhesive bead around the perimeter of the window. Cut the urethane adhesive from inside the vehicle.
- Remove the quarter window (3).
Caution: When working with any type of glass or sheet metal with exposed or rough edges, wear approved safety glasses and gloves in order to reduce the chance of personal injury.
Important: The studs that retain the window may interfere with the cutting tool. It may be necessary to push the window away from the vehicle in order to completely cut the urethane adhesive.
Installation Procedure
Important: If corrosion of the pinchweld flange is present, or if sheet metal repairs are necessary, refinish the pinchweld flange in order to present a clean, primer only surface. If repairs to the paint are required, mask the flange bonding area prior to the application of the color coat in order to present a clean, primer only surface. Use material such as BASF DE17, DuPont 2610, and PPG DP40.
Place the window inside up on a clean, protected surface.
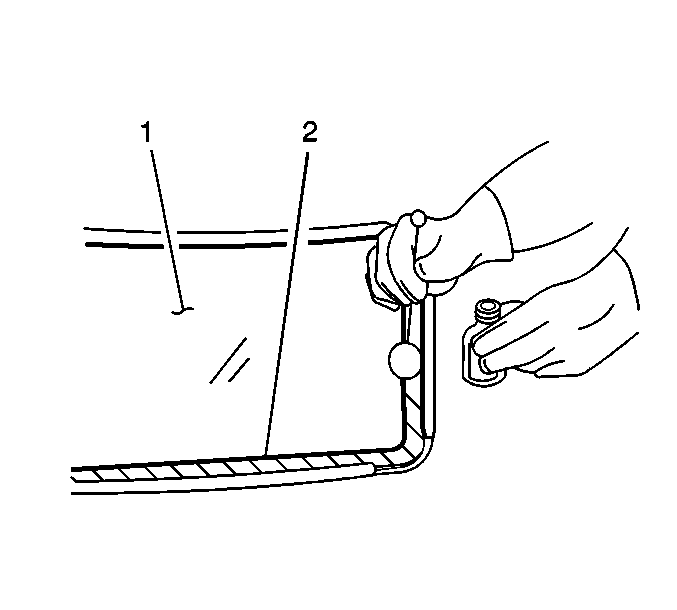
- Remove all but a thin film of the existing urethane adhesive from the window (1) using a utility knife or the equivalent.
- Clean the inside surface of the window using GM Glass Cleaner P/N 1050427 or the equivalent.
- Remove all but a thin film of the existing urethane from the pinchweld flange. There should be no loose pieces or mounds left.
- Thoroughly shake the pinchweld primer (#3 black).
- Using a new dauber, apply the primer to the urethane film on the pinchweld flange (2).
- Allow the primer to dry for 10 minutes.
- Using a new dauber, apply the window prep (#1clear) to an area approximately 10-16 mm (3/8-5/8 in) around the perimeter of the inner surface of the window.
- Apply the stationary window prep (#1 clear) to any exposed edges of the window.
- Immediately wipe the primed area with a clean cloth.
- Thoroughly shake the stationary window primer (#2 black).
- Apply the stationary window primer (#2 black) to the same areas where you applied the stationary window prep (#1 clear).
- Allow approximately 6 minutes for the primer to dry.
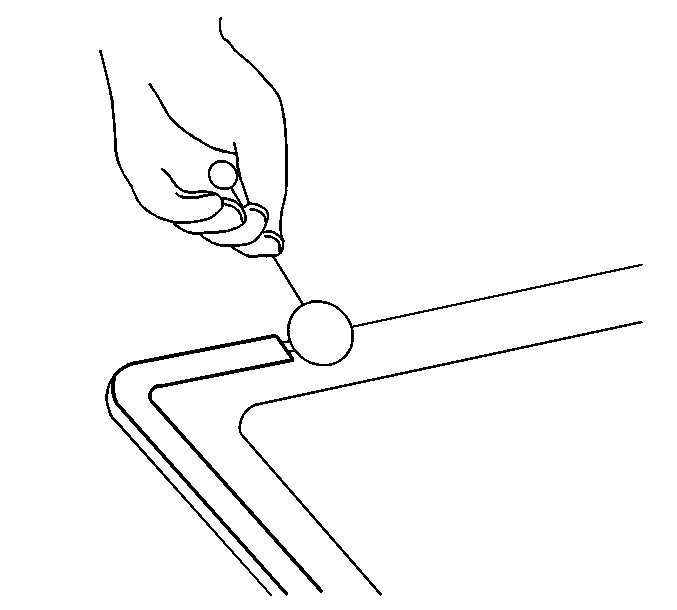
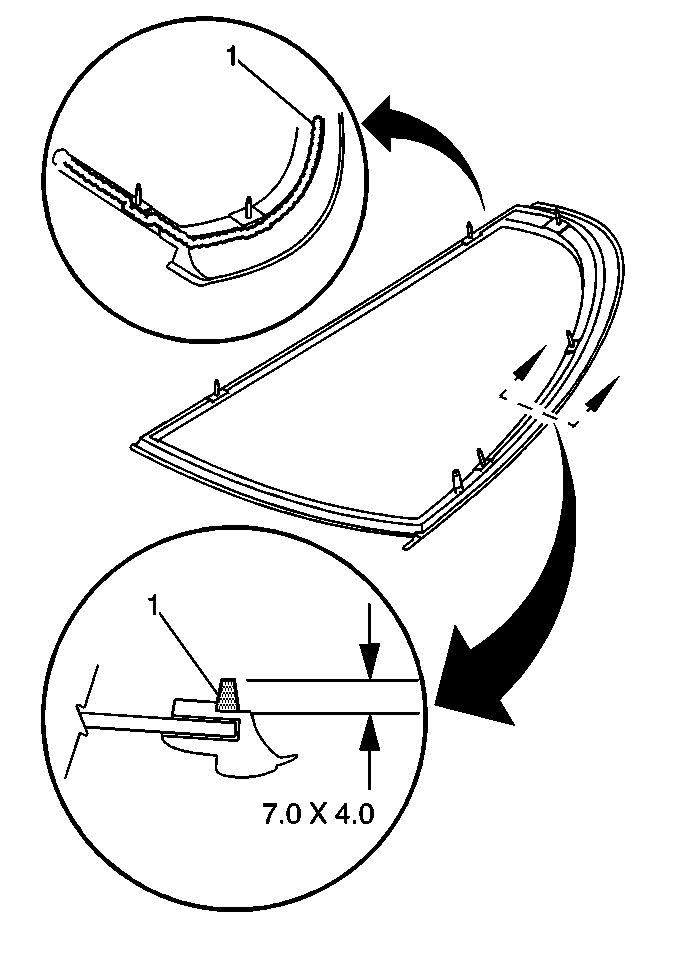
- Cut the tip of the applicator nozzle in order to provide an adhesive bead (1) of approximately 4-7 mm (0.17-0.28 in).
- Using a cartridge-type caulking gun, apply a smooth, continuous bead of urethane adhesive to the perimeter of the window, outside the studs.
- Firmly press the window (3) into the opening.
- Install the nuts (2).
- Install the rear quarter trim. Refer to Rear Quarter Trim Panel Replacement in Interior Trim.
- Install the rear seat cushion. Refer to Rear Seat Cushion Replacement in Seats.
- Install the door opening weatherstrip. Refer to Front Door Opening Weatherstrip Replacement in Doors.
- Install the outer belt line molding.
Important: Use care when applying the stationary window prep (#1clear) in order to prevent the window prep from running into the viewing area of the window. This liquid dries almost instantly and may stain the viewing area of the window.

Notice: Use the correct fastener in the correct location. Replacement fasteners must be the correct part number for that application. Fasteners requiring replacement or fasteners requiring the use of thread locking compound or sealant are identified in the service procedure. Do not use paints, lubricants, or corrosion inhibitors on fasteners or fastener joint surfaces unless specified. These coatings affect fastener torque and joint clamping force and may damage the fastener. Use the correct tightening sequence and specifications when installing fasteners in order to avoid damage to parts and systems.
Tighten
Tighten the nuts to 1.6 N·m (15 lb in).
