Floor Panel Carpet Replacement Buick
Removal Procedure

- Remove the front seats. Refer to
Seat Replacement
.
- Remove the rear seat cushion. Refer to
Rear Seat Cushion Replacement
.
- Remove the rear seat back. Refer to
Rear Seat Back Replacement
in Seats.
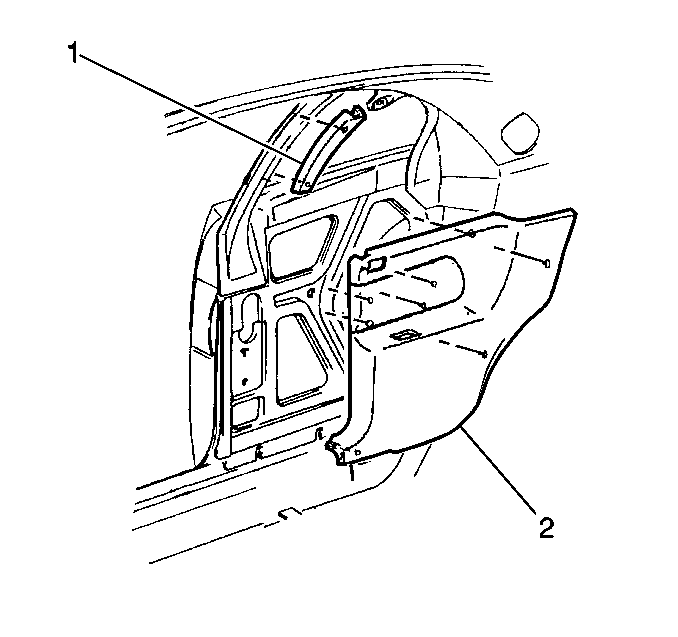
- Remove the rear quarter trim panels (2). Refer to
Rear Quarter Trim Panel Replacement
.
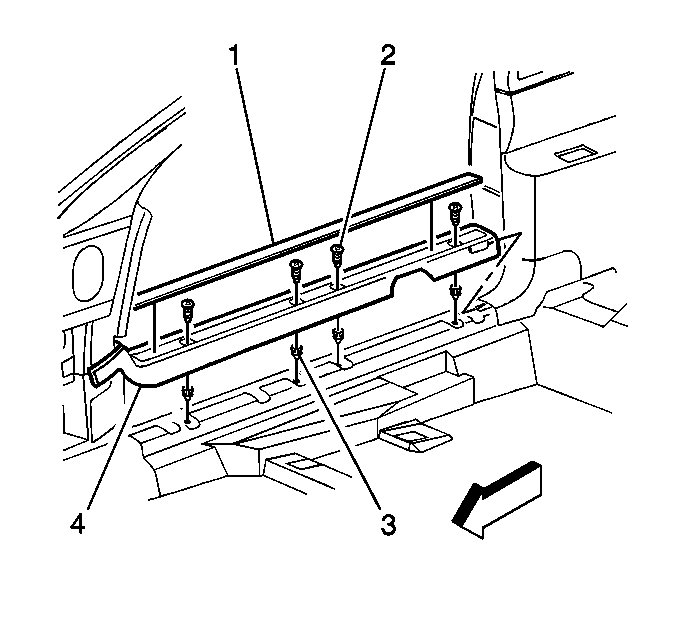
- Use the following steps in order to remove the carpet retainers (4) :
| 5.1. | Using a small flat-bladed tool, pry up on the insert (1). |
| 5.2. | Remove the insert (1). |
| 5.3. | Remove the fasteners (2) securing the carpet retainer (4). |
| 5.4. | Remove the carpet retainers (4). |
- Remove the center console, if equipped. Refer to
Console Replacement
.
- Remove the retainers (3) at the rear of the carpeting.
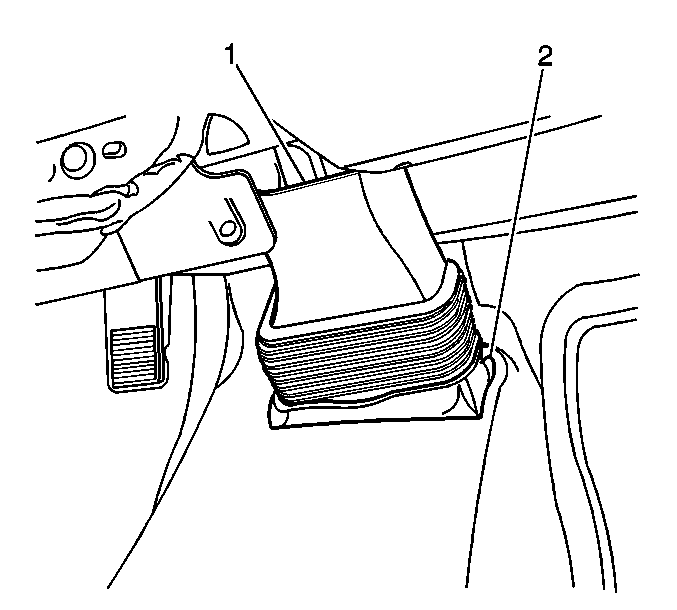
- Remove the HVAC auxiliary air duct (1) connector.
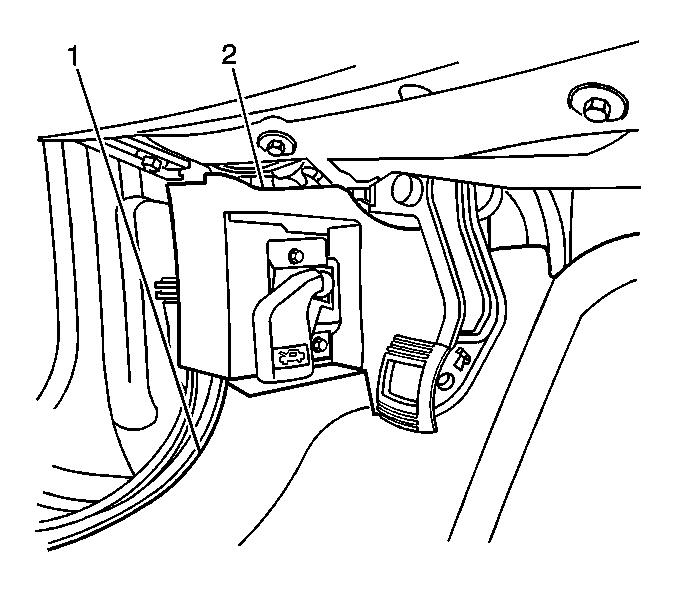
- Remove the hood latch release handle (2). Refer to
Hood Primary Latch Release Cable Handle Replacement
in Body Front End.
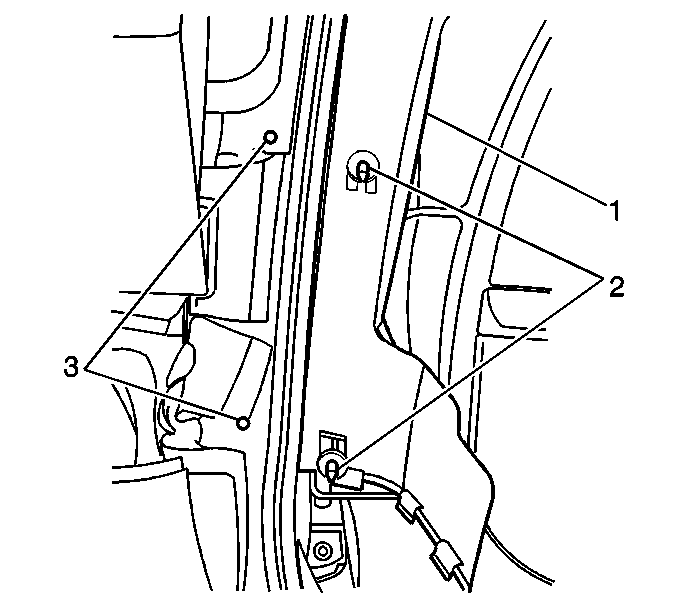
- Remove the passenger side garnish molding retainers (2) and molding (1).
- Carefully guide the electrical connectors through the opening in the carpeting.
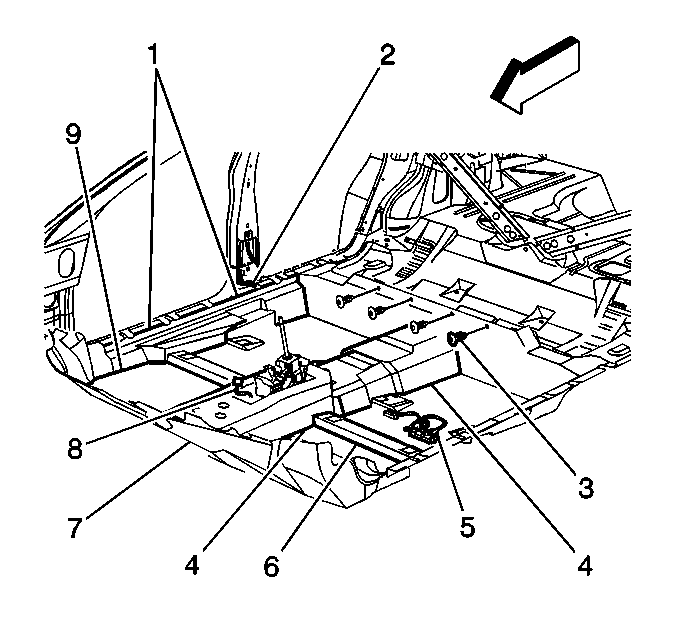
- Remove the floor carpet (9).
Installation Procedure
Caution: In order to avoid personal injury or vehicle damage when you repair or replace the carpet, use the same thickness and material size as the original installation. Always return the carpet to the original location.
- Install the floor carpet (9).
- Carefully guide the electrical connectors for the seats through the opening in the carpeting.

- Align the carpet (9) in order to ensure that the following conditions are present:
- The carpet does not cover any contact points.
- The seat has metal-to-metal contact.
- The carpet lies evenly.

- Install the passenger side garnish molding (1).
- Ensure that the garnish molding retainers (2) are not damaged or broken prior to installation.

- Install the hood latch release handle (2). Refer to
Hood Primary Latch Release Cable Handle Replacement
in Body Front End.

- Install the HVAC auxiliary air duct (1) connector.

- Install the carpet retainers (3) in order to secure the rear of the carpeting.
- Install the center console, if equipped Refer to
Console Replacement
.

Notice: Use the correct fastener in the correct location. Replacement fasteners
must be the correct part number for that application. Fasteners requiring
replacement or fasteners requiring the use of thread locking compound or sealant
are identified in the service procedure. Do not use paints, lubricants, or
corrosion inhibitors on fasteners or fastener joint surfaces unless specified.
These coatings affect fastener torque and joint clamping force and may damage
the fastener. Use the correct tightening sequence and specifications when
installing fasteners in order to avoid damage to parts and systems.
- Use the following steps in order to install the carpet retainers (4) :
| 13.1. | Align the carpet retainer (4). |
| 13.2. | Place the fasteners (2) into position. |
Tighten
Tighten the fasteners to 2.0 N·m (18 lb in).
| 13.3. | Snap the inserts (1) into position. |

- Install the rear quarter trim panels (2). Refer to
Rear Quarter Trim Panel Replacement
.
- Install the rear seat back. Refer to
Rear Seat Back Replacement
in Seats.
- Install the rear seat cushion. Refer to
Rear Seat Cushion Replacement
.
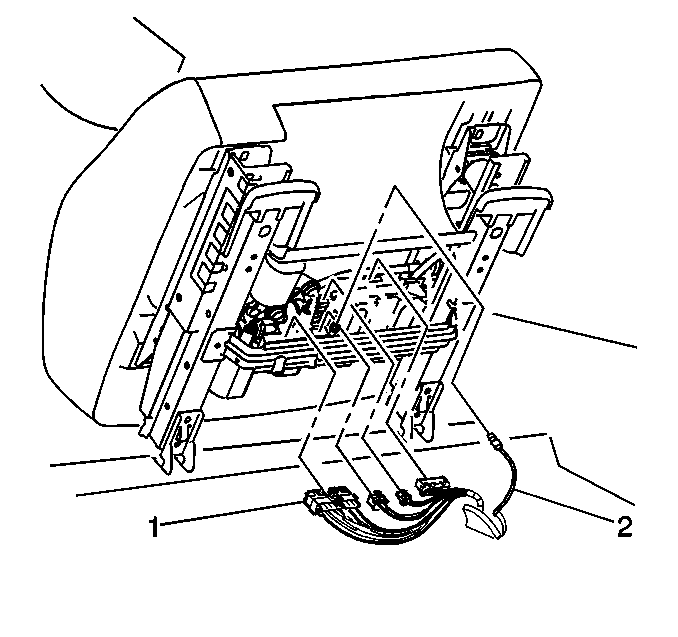
- Install the front seats and electrical connectors (1,2). Refer to
Seat Replacement
.
Floor Panel Carpet Replacement Oldsmobile
Removal Procedure
- Remove the front seats. Refer to
Seat Replacement
.
- Remove the rear seat cushion. Refer to
Rear Seat Cushion Replacement
.
- Remove the rear seat back. Refer to
Rear Seat Back Replacement
in Seats.
- Remove the lower center trim panel garnish molding. Refer to
Lower Pillar Garnish Molding Replacement
.
- Remove the shoulder belt retractor cover fasteners and covers.
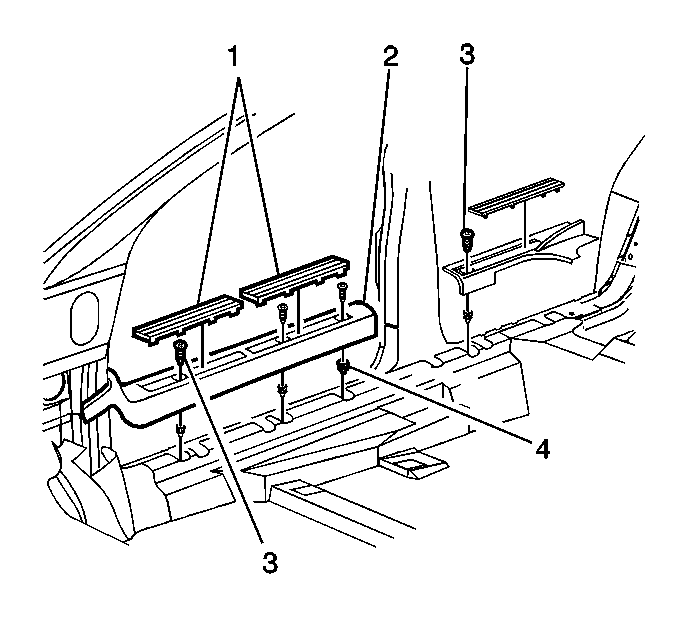
- Use the following steps in order to remove the carpet retainers (2) :
| 6.1. | Using a small flat-bladed tool, pry up on the insert (1). |
| 6.2. | Remove the insert (1). |
| 6.3. | Remove the fasteners (3) retaining the carpet retainer (2). |
| 6.4. | Remove the carpet retainers (2). |
- Remove the instrument panel end caps. Refer to
Instrument Panel Outer Trim Cover Replacement - Right Side
or
Instrument Panel Outer Trim Cover Replacement - Left Side
in Instrument Panel, Gauges and Console.
- Remove the passenger side garnish molding.
- Remove the hood latch release handle. Refer to
Hood Primary Latch Release Cable Handle Replacement
in Body Front End.
- Remove the driver side garnish molding.
- Remove the center console, if equipped. Refer to
Console Replacement
.

- Remove the HVAC auxiliary air duct connector (1).

- Remove the floor carpet (9).
Installation Procedure

Caution: In order to avoid personal injury or vehicle damage when you repair or replace the carpet, use the same thickness and material size as the original installation. Always return the carpet to the original location.
- Install the floor carpeting (9).
- Align the carpet to the dash panel area (7).
- Align the carpet to the rocker panel area (1).
- Align the carpet to the tunnel area (4).
- Align the carpet to the seat attachment area (6).
- Align the carpet to the rear seat support.
- Secure the carpet with the 6 retainers (3).
- Ensure the electrical connectors for the shoulder belt harness (2), seats harness (5) and the center console harness (8) are carefully pulled through the openings in the carpeting.
- Ensure that the following conditions are present:
| • | The carpet does not cover any contact points. |
| • | The seat has metal-to-metal contact. |
| • | The carpet lies evenly. |

- Install the HVAC auxiliary air duct connector (1).
- Install the center console, if equipped. Refer to
Console Replacement
.
- Install the passenger side garnish molding.
- Install the hood latch release handle. Refer to
Hood Primary Latch Release Cable Handle Replacement
in Body Front End.
- Install the instrument panel end caps. Refer to
Instrument Panel Outer Trim Cover Replacement - Right Side
or to
Instrument Panel Outer Trim Cover Replacement - Left Side
in Instrument Panel, Gauges and Console.

- Use the following steps in order to install the carpet retainer:
| 15.1. | Align the carpet retainer (2). |
Notice: Use the correct fastener in the correct location. Replacement fasteners
must be the correct part number for that application. Fasteners requiring
replacement or fasteners requiring the use of thread locking compound or sealant
are identified in the service procedure. Do not use paints, lubricants, or
corrosion inhibitors on fasteners or fastener joint surfaces unless specified.
These coatings affect fastener torque and joint clamping force and may damage
the fastener. Use the correct tightening sequence and specifications when
installing fasteners in order to avoid damage to parts and systems.
| 15.2. | Place the fasteners (3) into position. |
Tighten
Tighten the fasteners to 2.0 N·m (18 lb in).
| 15.3. | Press downward in order to secure the insert (1) into position. |
- Install the lower center trim panel garnish molding. Refer to
Lower Pillar Garnish Molding Replacement
.
- Install the shoulder belt retractor cover and fasteners.
- Install the rear seat back. Refer to
Rear Seat Back Replacement
in Seats.
- Install the rear seat cushion. Refer to
Rear Seat Cushion Replacement
.
- Install the front seats. Refer to
Seat Replacement
.


