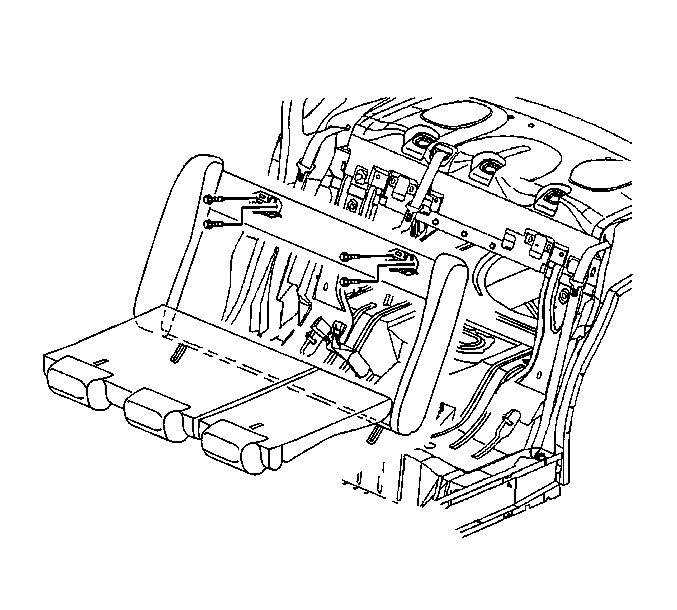
Rear Seat Back Cushion Replacement Non-folding
Removal Procedure
- Remove the rear seat cushion. Refer to Rear Seat Cushion Replacement .
- Remove the rear seat back nuts from the child seat latch bracket.
- Grasp the bottom of the rear seat back and lift upward to disengage offsets on the upper frame bar from the hangers.
- Remove the rear seat back from the vehicle.


Installation Procedure
- Position the rear seat back to the vehicle.
- Hook the seat back upper frame to the hangers on the rear shelf.
- Install the rear seat back nuts to the latch bracket.
- Install the rear seat cushion. Refer to Rear Seat Cushion Replacement .


Notice: Use the correct fastener in the correct location. Replacement fasteners must be the correct part number for that application. Fasteners requiring replacement or fasteners requiring the use of thread locking compound or sealant are identified in the service procedure. Do not use paints, lubricants, or corrosion inhibitors on fasteners or fastener joint surfaces unless specified. These coatings affect fastener torque and joint clamping force and may damage the fastener. Use the correct tightening sequence and specifications when installing fasteners in order to avoid damage to parts and systems.
Tighten
Tighten the rear seat back nuts to 10 N·m (89 lb in).
Rear Seat Back Cushion Replacement Folding
Removal Procedure
- Remove the rear seat cushion. Refer to Rear Seat Cushion Replacement .
- Remove the rear center seat belts. Refer to Seat Belt Replacement - Center Rear in Seat Belts.
- Remove the nut (1) from the child rear seat latch bracket.
- Remove the bolts (2) from each end of the latch bracket.
- Fold the rear seat back cushions down.
- Remove the bolts from the rear seat latches.
- Remove the rear seat latches from the rear seat back.
- Fold the rear seat back cushions up.
- Reposition the seat belts from the rear seat back.
- Remove the rear seat back from the vehicle.


Installation Procedure
- Position the rear seat back to the vehicle.
- Reposition the seat belts to the rear seat back.
- Apply a thread sealant, GM P/N 12345382 (Canadian P/N 10953489), Loctite 242, Permatex 24200 to the threads of the bolts (2) and also the stud for the bracket nut (1).
- Install the child seat latch bracket nut (1).
- Install the rear center seat belts. Refer to Seat Belt Replacement - Center Rear in Seat Belts.
- Fold the rear seat back cushions down.
- Install the rear seat latches to the rear seat back.
- Install the rear seat back latch bolts to the rear seat latches.
- Fold the rear seat back cushions up.
- Inspect the rear seat for proper operation.
- Install the rear seat cushion. Refer to Rear Seat Cushion Replacement .

Notice: Use the correct fastener in the correct location. Replacement fasteners must be the correct part number for that application. Fasteners requiring replacement or fasteners requiring the use of thread locking compound or sealant are identified in the service procedure. Do not use paints, lubricants, or corrosion inhibitors on fasteners or fastener joint surfaces unless specified. These coatings affect fastener torque and joint clamping force and may damage the fastener. Use the correct tightening sequence and specifications when installing fasteners in order to avoid damage to parts and systems.
Install the child seat latch bracket bolts (2) to each end of the latch bracket and also the latch bracket nut.
Tighten
Tighten the latch bracket nut and bolts to 42 N·m (31 lb ft).

Tighten
Tighten the rear seat back latch bolts to 6 N·m (53 lb in).
