Tools Required
J 25070 Heat Gun
Removal Procedure
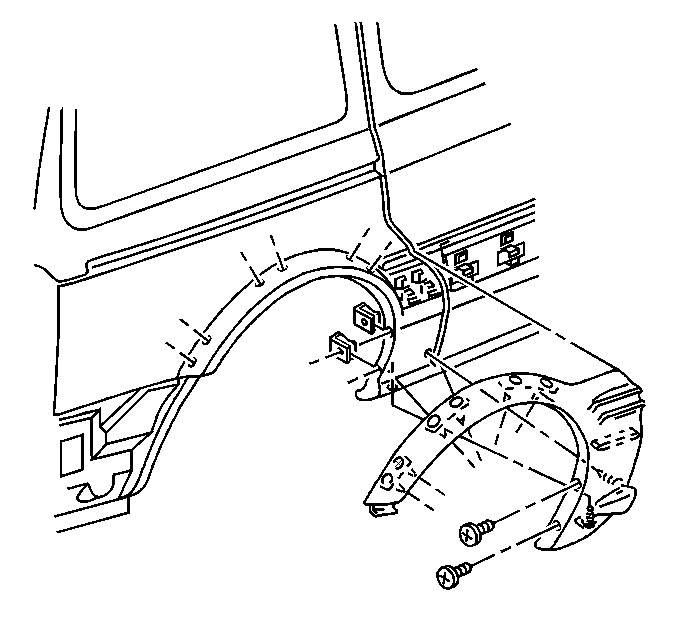
- Remove the screws from the lower front of the quarter wheel opening molding.
- Starting at the rear and working forward, pull up on the quarter wheel opening molding.
- Pull up and out in order to release the quarter wheel opening molding from the front support.
- Pull out and down in order to release the lower quarter wheel opening molding locating retainers.
- Remove the quarter wheel opening molding from the quarter panel.
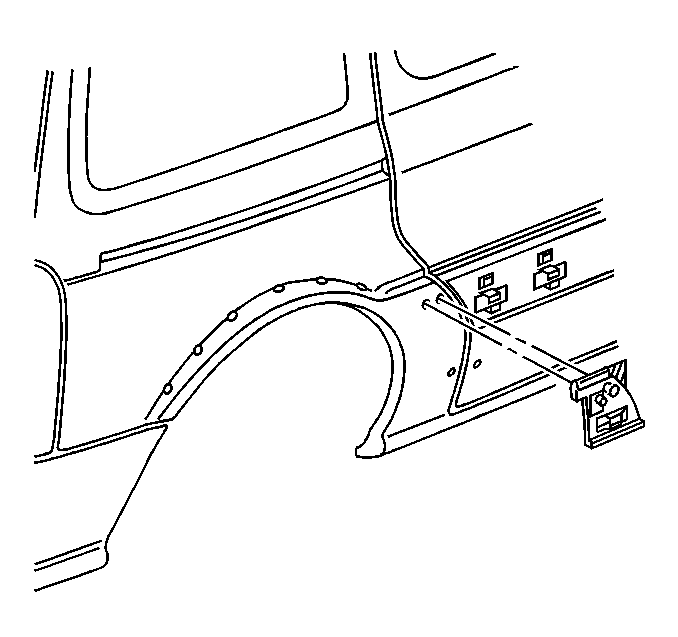
- Pull out the center pins of the quarter wheel opening molding support retainers.
- Use a J 25070 152 mm (6 in) from the surface in order to heat the quarter wheel opening molding support.
- Use a flat-bladed tool in order to peel the quarter wheel opening molding support from the surface.
- Remove the quarter wheel opening molding support from the quarter panel.
- Use oil-free naphtha or alcohol in order to clean the body panel.
- Remove all traces of adhesive from the body panel.
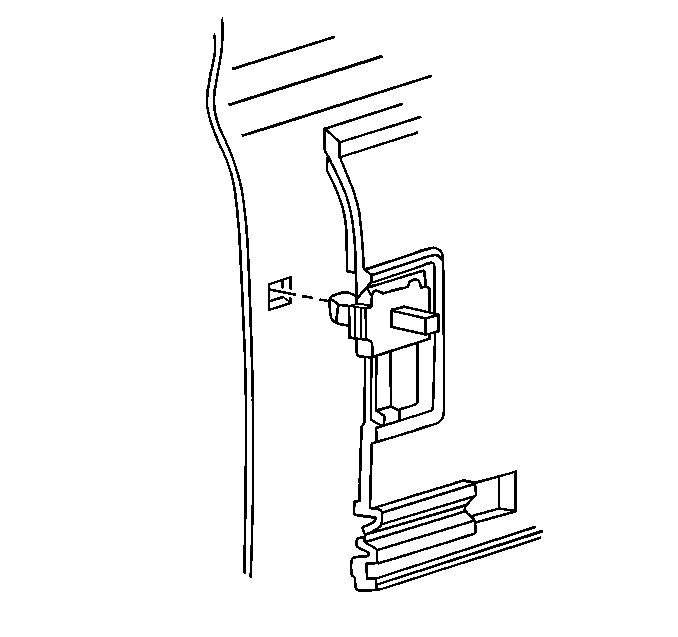
Use a circular motion in order to apply heat for 30 seconds.
DO NOT damage the paint.
Installation Procedure
- Remove the protective liner from the back side of the quarter wheel opening molding support.
- Use a heat lamp or heat gun in order to warm the quarter panel to a minimum of 21°C (70°F)
- Insert the quarter wheel opening molding support retainers into the holes in the quarter panel, starting with the front hole.
- Press the quarter wheel opening molding support in order to ensure the maximum bond to the quarter panel.
- Drive in the center pins of the retainers.
- Align the quarter wheel opening molding to the quarter panel flare flush with the body.
- Starting at the rear and working forward, align the quarter wheel opening molding retainers to the holes in the quarter panel.
- Tuck the front upper quarter wheel opening molding into the clips of the support.
- Snap in the lower locating retainers.
- Install the screws to the lower front of the quarter wheel opening molding.


Notice: Use the correct fastener in the correct location. Replacement fasteners must be the correct part number for that application. Fasteners requiring replacement or fasteners requiring the use of thread locking compound or sealant are identified in the service procedure. Do not use paints, lubricants, or corrosion inhibitors on fasteners or fastener joint surfaces unless specified. These coatings affect fastener torque and joint clamping force and may damage the fastener. Use the correct tightening sequence and specifications when installing fasteners in order to avoid damage to parts and systems.
Tighten
Tighten the lower front quarter wheel opening molding screws to 2 N·m
(18 lb in).
Tools Required
J 38778 Door Trim Pad and Garnish Clip Remover
Removal Procedure
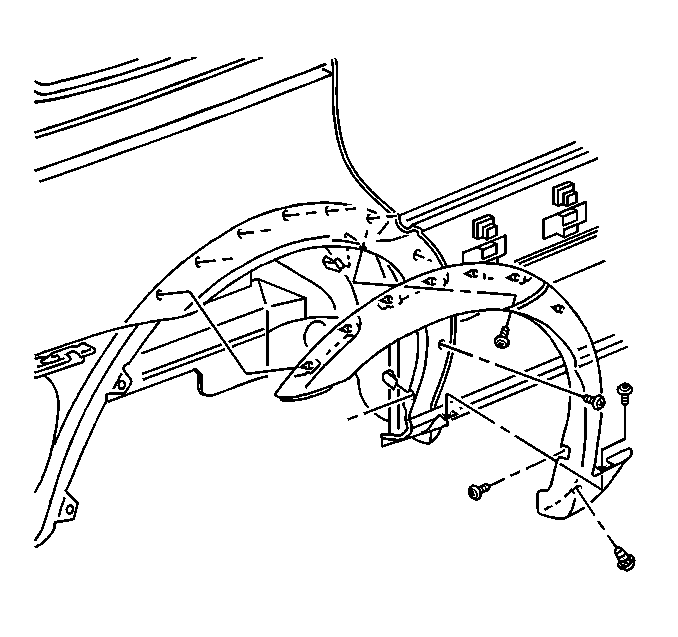
- Use the J 38778 in order to remove the push-in retainers from the lower front of the quarter wheel opening molding.
- Remove the screws from the front of the quarter wheel opening molding.
- Starting at the rear and working forward, pull up on the quarter wheel opening molding.
- Remove the quarter wheel opening molding from the quarter panel.
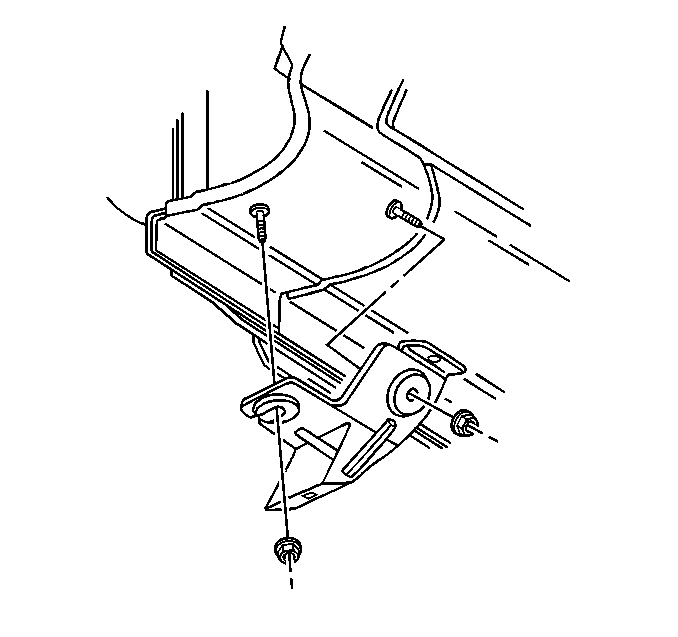
- Remove the nuts from the lower quarter wheel opening molding retainer.
- Remove the lower quarter wheel opening molding retainer from the quarter panel.
Installation Procedure
- Install the lower quarter wheel opening molding retainer to the quarter panel.
- Align the upper hole of the quarter wheel opening molding retainer to the upper stud.
- Align the lower slot in the quarter wheel opening molding retainer to the lower stud.
- Install the nuts to the lower quarter wheel opening molding retainer.
- Align the quarter wheel opening molding to the quarter panel flare flush with the body.
- Starting at the rear, align the quarter wheel opening molding retainers to the holes in the quarter panel.
- Working forward, press the quarter wheel opening molding retainers into the quarter panel.
- Install the screws to the front of the quarter wheel opening molding.
- Install the push-in quarter wheel opening molding retainers to the lower front of the quarter wheel opening molding.

Notice: Use the correct fastener in the correct location. Replacement fasteners must be the correct part number for that application. Fasteners requiring replacement or fasteners requiring the use of thread locking compound or sealant are identified in the service procedure. Do not use paints, lubricants, or corrosion inhibitors on fasteners or fastener joint surfaces unless specified. These coatings affect fastener torque and joint clamping force and may damage the fastener. Use the correct tightening sequence and specifications when installing fasteners in order to avoid damage to parts and systems.
Tighten
Tighten the lower quarter wheel opening retainer nuts to 2 N·m
(18 lb in).

Tighten
Tighten the front quarter wheel opening molding screws to 2 N·m
(18 lb in).
Removal Procedure
- Remove the quarter molding. Refer to Rear Quarter Molding Replacement .
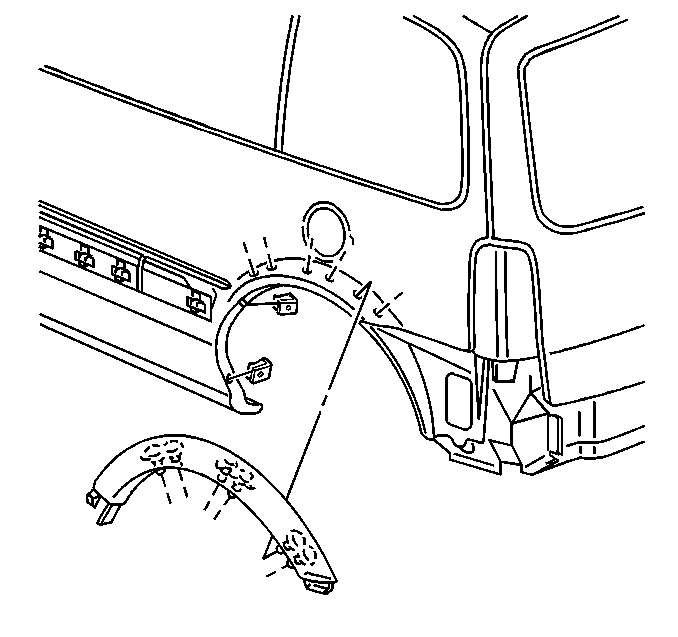
- Starting at the rear and working forward, pull up on the quarter wheel opening molding.
- Remove the quarter wheel opening molding from the quarter panel.
Installation Procedure
- Align the quarter wheel opening molding to the quarter panel flush with the body.
- Starting at the rear, align the quarter wheel opening molding retainers to the holes in the quarter panel.
- Working forward, press the retainers into the quarter panel.
- Install the quarter molding. Refer to Rear Quarter Molding Replacement .

