For 1990-2009 cars only
Removal Procedure
- Inspect the engine mounts for the following conditions:
- Raise and suitably support the vehicle. Refer to SECTION 0A.
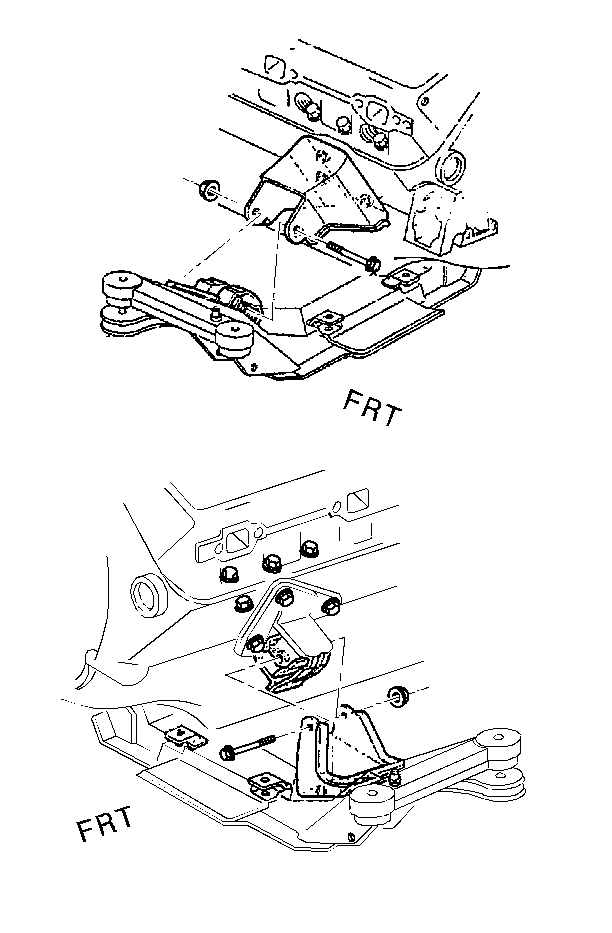
- Remove the engine mount through bolts and the nuts.
- Raise the engine with a jacking fixture.
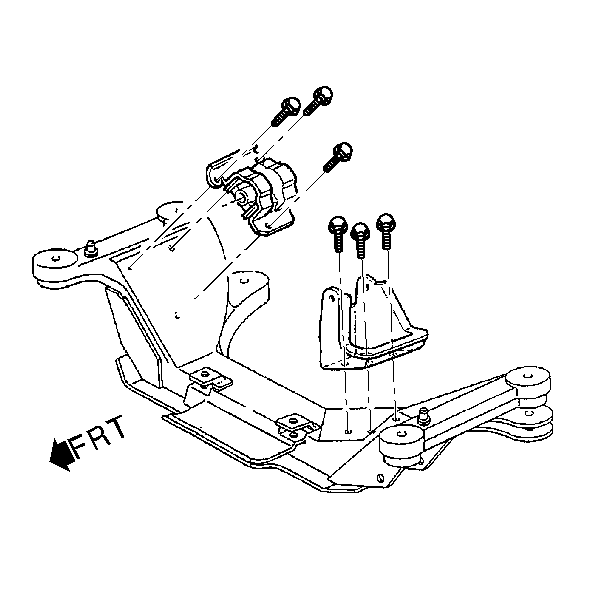
- Remove the engine mount bolts and mounts.
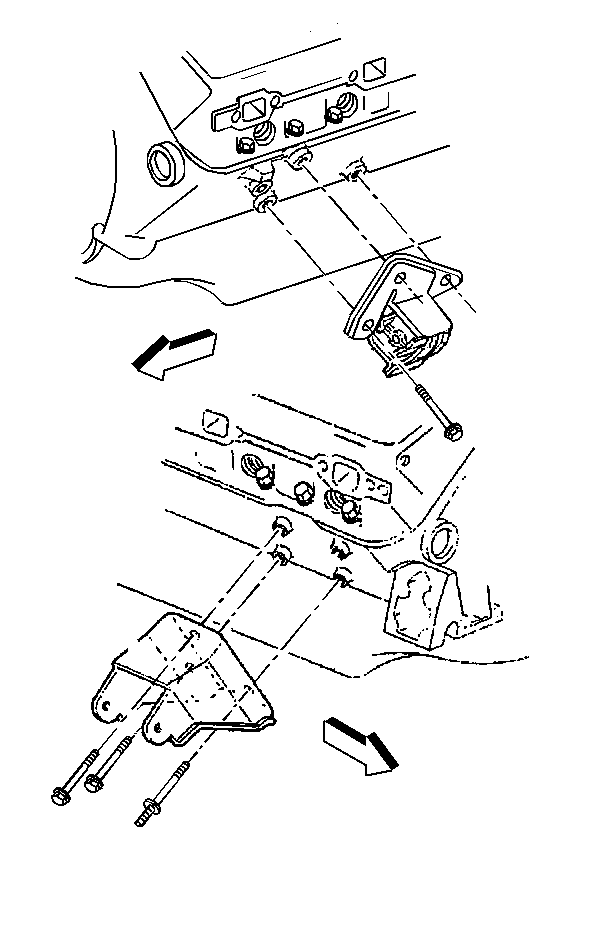
- Remove the engine bracket bolts, stud and brackets.
Notice: When raising or supporting the engine for any reason, do not use a jack under the oil pan, any sheet metal, or the crankshaft pulley. Due to the small clearance between the oil pan and the oil pump screen, jacking against the oil pan may cause the pan to be bent against the pump screen. This will result in a damaged oil pickup unit.

| • | Heat check cracks covering the rubber cushion |
| • | The rubber cushion separated from the mount plate |
| • | A split through the center of the rubber cushion |


Installation Procedure
- Install the engine brackets, bolts and stud.
- Install the engine mounts and bolts.
- Install the engine mount through bolts and nuts.

Tighten
Tighten the engine mount bracket bolts and stud to 58 N·m
(43 lb ft).

Tighten
Tighten the engine mount bolts to 50 N·m (37 lb ft).
Lower the engine.

Tighten
Tighten the engine mount through bolts to 95 N·m (70 lb ft)
