Decal or Stripe Replacement Directions
Removal Procedure
Tools Required
| • | Wetting solution, use a foaming type window cleaner that does
not contain ammonia |
| • | Varnish Makers and Painters (VMP) naphtha |
| • | A squeegee 100 mm (4 in) wide, plastic or rubber.
Deburr any sharp or rough edges on the squeegee to prevent scratching
of the stripe or decal |
| • | Water bucket and sponge or spray bottle |
| • | Sandpaper--800 grit or finer, wet or dry type |
| • | Clean, lint free wiping cloth |
| • | Scissors, a sharp knife, or a razor blade |
Important: Stripes and decal adhere to the painted surfaces using pressure sensitive
adhesive. The use of a wetting solution aids in lifting and positioning the
stripe or decal during installation. A wetting solution also ensures a better
bond between the stripe or decal and the panel. Repair and refinish operations
must be completed before the stripe or decal is installed. Freshly painted
surfaces must be allowed to dry thoroughly. Solvents in freshly painted surfaces
can lead to subsequent blistering problems if the stripe or decal is applied
before the paint is completely dry. The striping material highlights vehicle
surfaces imperfections. All panel surface imperfections, paint defects, and
uneven two--tone paint break lines must be eliminated before the stripe
or decal application.
- Remove necessary molding or trim, molding attaching clips, handles,
side marker lamps and/or other stripe or decal overlapping parts.
- Clean repair surfaces, adjacent panels and openings as required.
- Remove the stripe or decal by starting at one edge and peeling
stripe or decal from panel surface.
Application of heat to stripe or decal at point of removal will aid
the removal operation.
- Remove all traces of adhesive residue from the painted surfaces
with a silicone wax or grease remover solvent such as Prep-Sol, Acryli-Clean,
Pro-Kleano, or equivalent.
- If a new stripe or decal is not being applied, replace any moldings,
trim, clips, handles, side marker lamps or any other parts, that may have
been removed for stripe or decal removal.
Wet Method
The following is the procedure for installing the decal/stripe using
the wet method.
- Clean painted surface with a silicone, wax or grease remover,
such as Prep-Sol, Acryli-Clean, Pre-Kleano or equivalent.
- Remove any imperfections that would show through the stripe or
decal.
- Clean area where stripe or decal will be applied with a 50-50
(by volume) mixture of isopropyl alcohol and water.
- Wipe panel surface with a clean cloth while solvent is still wet
and allow to dry.
- Apply wetting solution to area where stripe or decal is to be
installed. remove backing material from strip or decal as necessary, put wetting
solution on adhesive side of stripe or decal.
- Apply strip or decal to panel. Wetting solution will allow movement
of stripe or decal for proper positioning.
- Working from the center where possible, squeegee stripe or decal
into position. Application of additional wetting solution may be necessary
to ease installation.
- Apply heat to stripe or decal at recessed areas. Press stripe
or decal into recess to obtain firm bond.
- Inspect stripe or decal from critical angle using adequate light
reflection to detect any irregularities that may have developed during installation.
Remove all air bubbles by piercing with a safety pin, needle or tool with
the same size piercing tip. NEVER use a razor blade or knife edge. Pierce
the bubbles on its outer edge and force the air out from the opposite edge
with the blade of the squeegee.
- Install previously removed parts and clean as required.
Dry Method
The following is the procedure for installing the decal/stripe using
the dry method.
- Clean painted surface with a silicone, wax or grease remover,
such as Prep-Sol, Acryli-Clean, Pre-Kleano or equivalent. Wipe surface with
a clean cloth and allow to dry.
- Remove any imperfections that would show through the stripe or
decal.
- Clean area where stripe or decal will be applied with a 50-50
(by volume) mixture of isopropyl alcohol and water.
- Wipe panel surface with a clean cloth while solvent is still wet
and allow to dry.
- Apply adhesive promoter to area where stripe or decal will be
applied using manufacturer's instructions.
- Remove backing material of stripe or decal as necessary.
- Working from the center where possible, squeegee stripe or decal
into position. Remove all air bubbles to assure a satisfactory bond.
- Remove paper or plastic pre-mask straight up off the stripe or
decal.
Once pre-mask has been removed, stripe or decal should never be repositioned
as stripe or decal will become distorted in shape and suffer finish damage.
- Re-squeegee the entire stripe or decal surface, especially the
outer perimeter and edges.
- Apply heat to stripe or decal at recessed areas. Press stripe
or decal into recess to obtain firm bond
- Inspect stripe or decal from critical angle using adequate light
reflection to detect any irregularities that may have developed during installation.
Remove all air bubbles by piercing with a safety pin, needle or tool with
the same size piercing tip. NEVER use a razor blade or knife edge. Pierce
the bubble on its outer edge and force the air out from the opposite edge
with the blade of the squeegee.
- Install previously removed parts and clean as required.
Decal or Stripe Replacement 30th Anniversary Decals
30th Anniversary Stripes
The 30th anniversary stripes are available only on the Pontiac Trans
Am as an option under RPO Z4C.
To install the stripes follow either the Stripe And Decal Installation-Wet
Method or Dry Method, refer to the following information for placement of
the stripes.
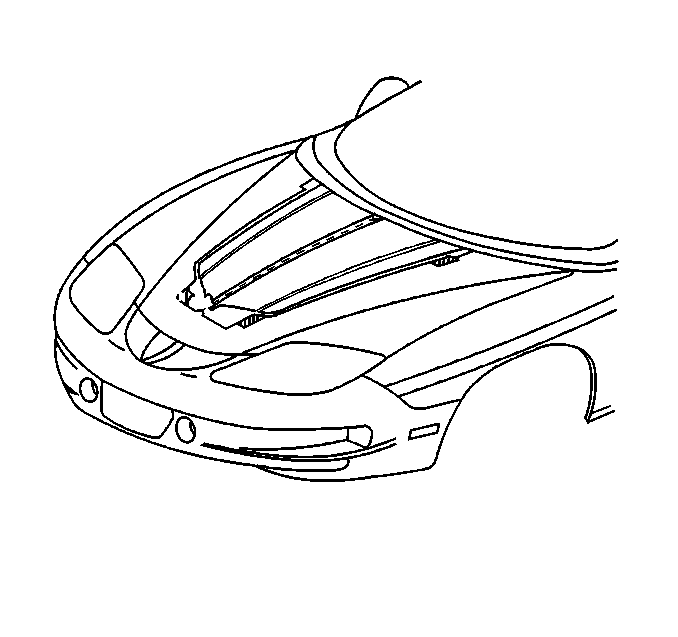
- Align the rear edge of the decal premask
with the hood center line.
- Perform wet-out application over entire surface of hood decal
using a squeegee. Begin at rear of hood and work forward maintaining a firm,
constant pressure.
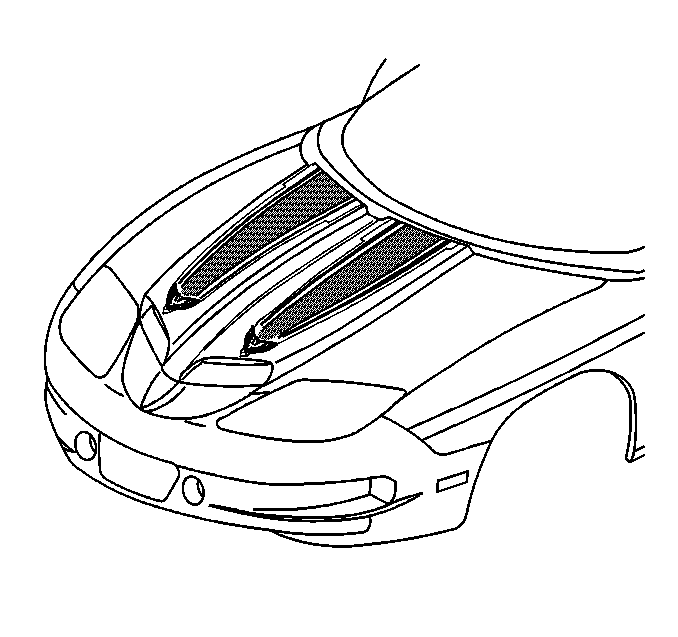
- Align the rear edge of the front hood
decal with the previously installed stripe on the hood.
- Apply decal to hood ensuring that mating stripes on front and
rear decals are in alignment with each other.
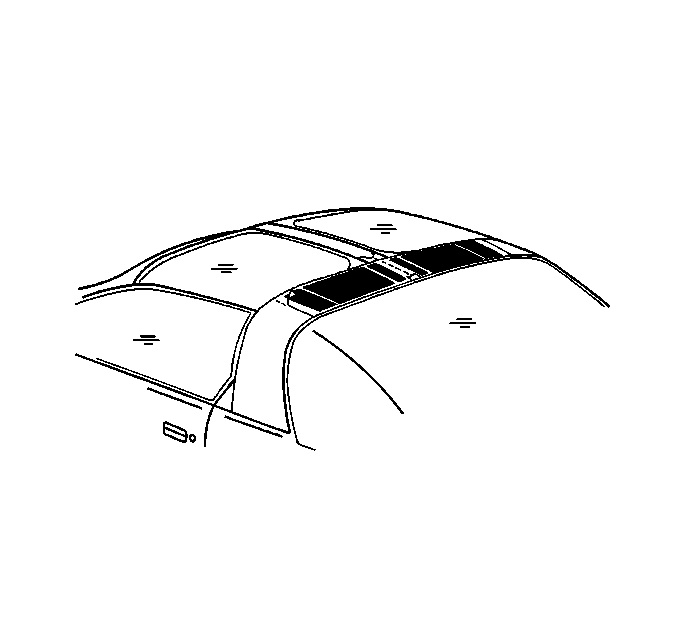
- Position decal to targa roof by aligning
the notched opening at the center of the decal premask with the roof panel
longitudinal bow molding.
- Align the rear edge of the decal premask with the rear edge of
the targa roof.
- Perform wet-out application over entire surface of roof decal
using a squeegee. Begin at leading edge of roof and work rearward maintaining
a firm, constant pressure.
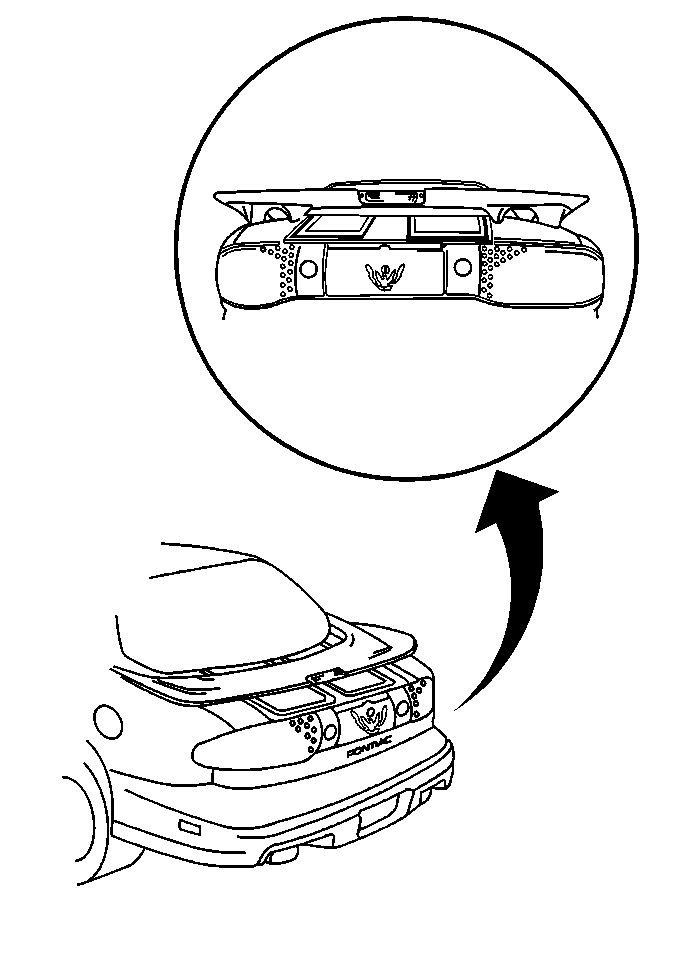
- Position rear deck lid decal to deck
lid by aligning leading edge of decal premask with leading edge contour or
rear deck lid.
- Align tabs on decal premask with edge of tail lamp center filler.
- Perform wet-out application over entire surface of roof decal
using a squeegee. Begin at leading edge of compartment lid and work rearward
maintaining a firm, constant pressure.
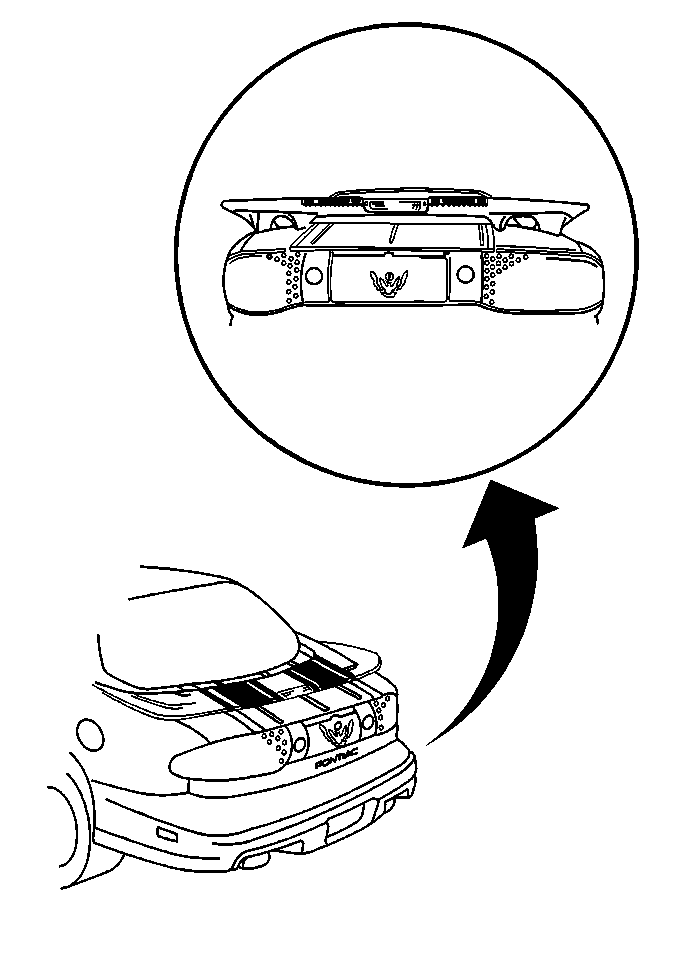
- Separate left/right hand lower spoiler
decal at perforation.
- Position decal to rear spoiler by aligning front edge of decal
premask with front edge of spoiler.
- Align cutout on decal premask with the high mount stop lamp opening.
- Perform wet-out application over entire surface of rear spoiler
decal using a squeegee. Begin at forward edge of spoiler and work rearward
maintaining a firm, constant pressure.
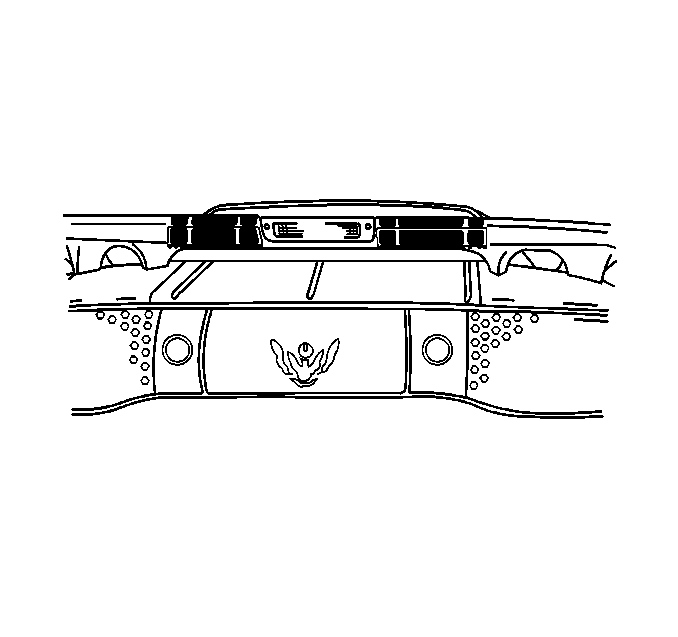
- Align mating stripes on lower spoiler
decal with overlap stripes on upper spoiler decal.
- Align edge cut-out on decal premask with high mount stop lamp
opening.
- Perform wet-out application over surface of decal using a squeegee.
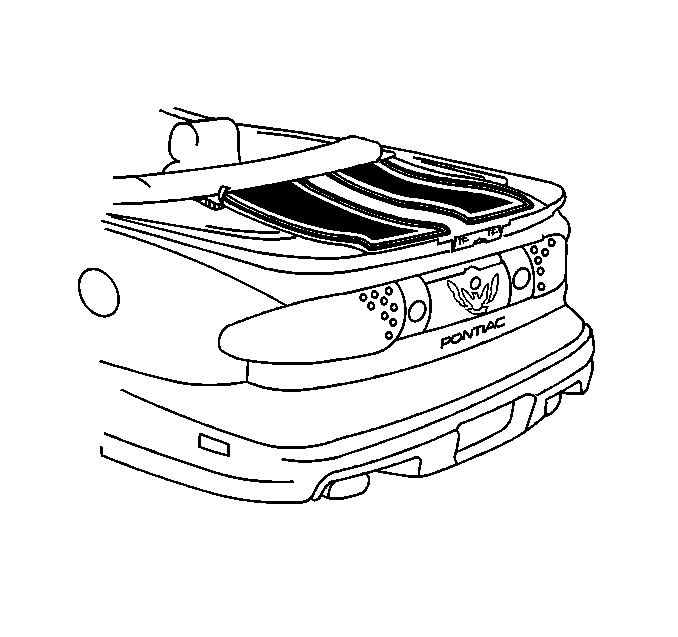
- Align leading edge of rear spoiler decal
premask with leading edge of upper spoiler.
- Perform wet-out application over entire surface of rear deck decal
using a squeegee. Begin at forward edge of deck and work rearward maintaining
a firm, constant pressure.


