Quarter Panel Replacement Convertible
Removal Procedure
The Camaro/Firebird convertible quarter panel assembly is specially designed for added strength and rigidity. Additional panels have been added to the service part to permit easier and faster service. The quarter panel assembly is attached to the vehicle structure with factory welds. To remove the quarter panel assembly, the welds must be drilled out.
Replacement procedures for the quarter panel assembly on convertibles are not the same as for the hardtop. On convertibles, the OEM quarter panel assembly must be cut just above where it is welded to the rocker panel. The service part is then trimmed and plug welded to the flange of the OEM panel.
- Remove all related panels and components.
- Visually inspect the damaged area.
- Restore as much of the damage as possible to factory specifications.
- Remove sealers and anti-corrosion materials as necessary.
- Locate all factory welds.
- Mark all factory welds.
- Drill out all factory welds.
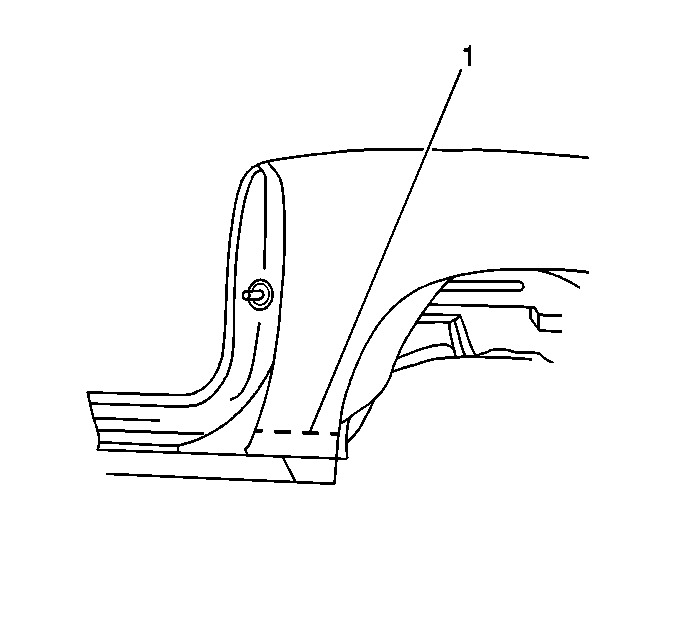
- Apply a piece of 1-inch tape at the bottom of the front lower section of the original quarter panel where it attaches to the rocker panel (1).
- Cut the original quarter panel at the top edge of the tape.
- Remove the panel from the vehicle.
- Remove the tape from the flange.
- Bend the remaining portion of the original quarter panel assembly up and inboard. This will allow the new panel to be positioned properly when it is installed.
Important: Note the number and location of welds for installation of the service assembly.
Installation Procedure
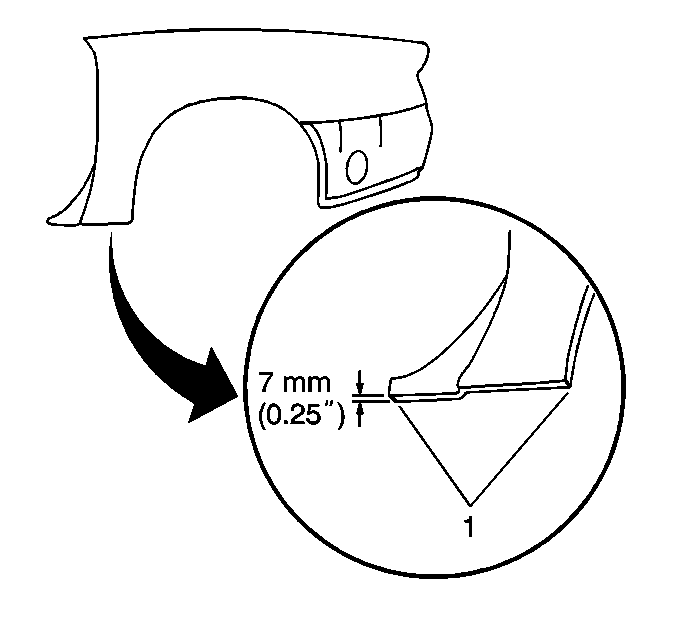
- Prepare the new quarter panel assembly by trimming the inner flange on the lower front section (1) to 7 mm (1/4 in).
- Prepare the mating surfaces.
- Position the new quarter panel to overlap the roof panel at the pillar.
- Check for proper fit.
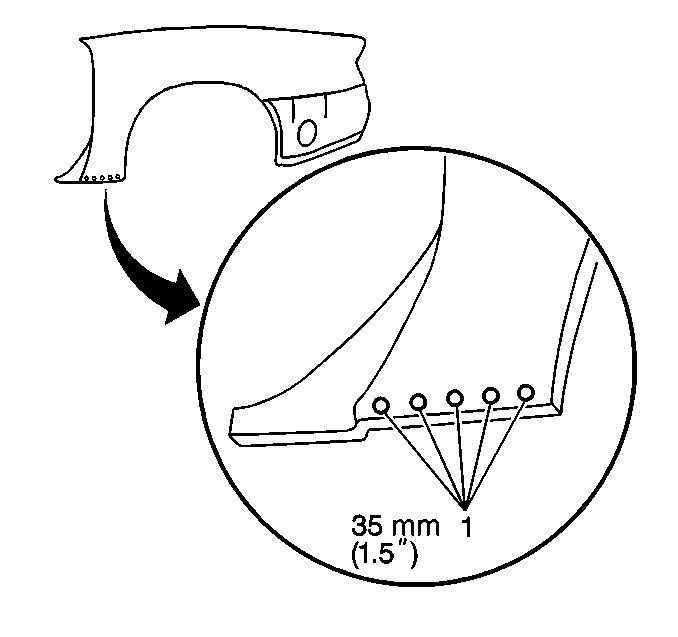
- Drill 8 mm (5/16 in) holes in the face if the front lower portion of the new quarter panel assembly. Space the holes evenly across the front surface approximately 35 mm (1 1/2 in) apart (1).
- Drill holes in the remaining locations as noted from the original quarter panel assembly.
- Position the new assembly.
- Mig plug weld all previously welded locations including five additional areas at the front lower portion of the new quarter panel.
- Clean and prepare all welded surfaces.
- Prime with 2-part catalyzed primer.
- Apply the sealers and the anti-corrosion materials as necessary.
- Install all related panels and components.
Important: If the original component is damaged beyond recognition or the location for replacement welds is unknown, locate the weld holes 35 mm (1 1/2 in) apart.
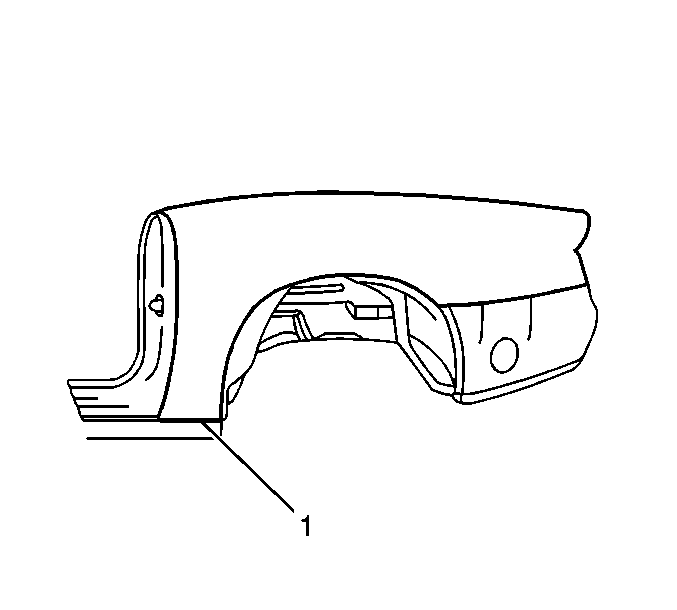
Important: Do not stitch weld at the front edge of the quarter where it contacts the rocker panel (1).
Important: Prior to refinishing, refer to GM 4901MD-99 Refinish Manual. Do not combine paint systems. Refer to paint manufacturer's recommendations.
Important: When you replace the quarter panel ensure that the fuel filler neck is properly sealed. Use SPO Sealing Strip (P/N 312399117) between the quarter panel and the filler neck. Install using the provided instructions.
