Rattle/Creak Noise Retractable Hard Top (RHT Convertible) (Adjust Roof)

| Subject: | Rattle/Creak Noise Retractable Hard Top (Convertible) (Adjust Roof ) |
| Models: | 2006-2007 Pontiac G6 |
| Built Prior to June 1, 2007 |
This bulletin is being revised to address new concerns with the top. Please discard Corporate Bulletin Number 06-08-59-003A (Section 08 - Body and Accessories).
Condition | See Correction |
|---|---|
Rattle/ticking type noise over bumps in colder weather from mid-roof area | 1,1A,1B |
Rattle/ticking type noise over bumps from the front top of the windshield header area | 2, 2A |
Creak/pop type noise over bumps from rear quarter panel area | 3, 3A, 3B |
Seal itch type noise | 4 |
Snap/ticking type noise over bumps from rear quarter glass area | 5, 5A, 5B |
Snap/knocking type noise over bumps from rear shelf/tonneau panel/flipper door area | 6, 6A, 6B |
Creak/pop/thump type noise over bumps in rear wheel well area | 7 |
Creak/pop/thump type noise over bumps in rear trunk area | 8 |
Important: U.S. Dealers: Technician should have viewed IDL course 12442.10V and 10206.13D. These courses will aid in the repair of the retractable hard top.
Condition 1
Noise over bumps in colder weather from the mid roof area.
Cause 1
The roof panel to panel pin to receiver may be making a rattle noise (either side of vehicle).
Correction 1
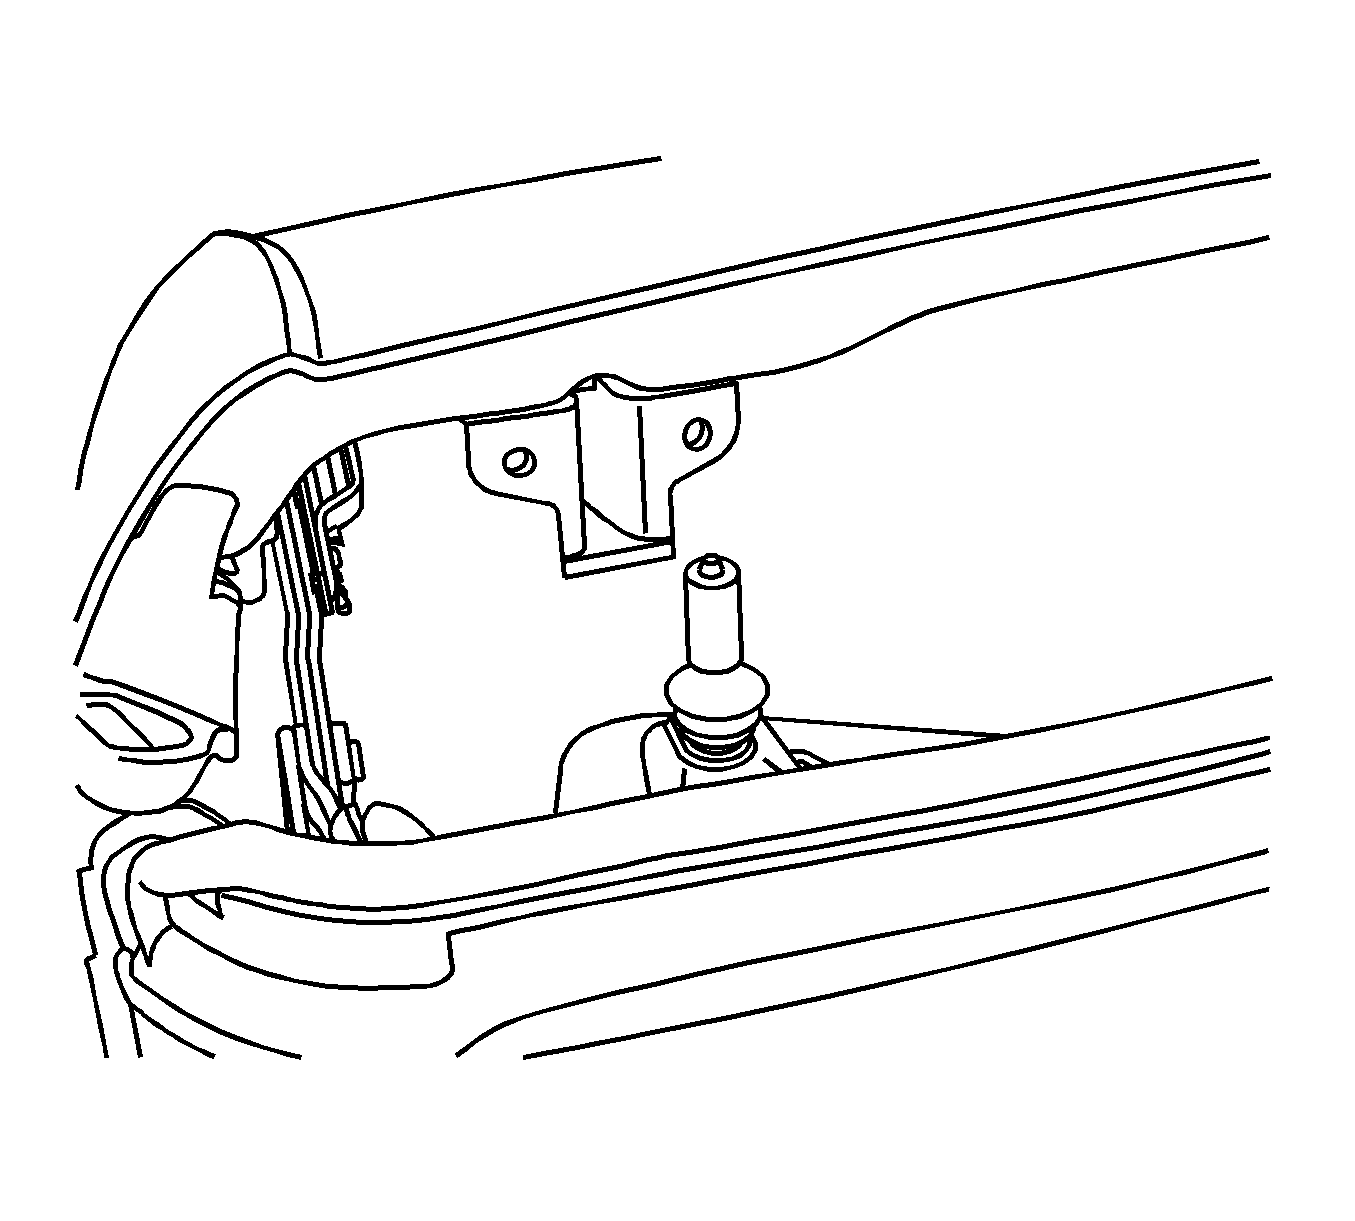
PROCEDURE FOR VEHICLES BUILT PRIOR TO 11/15/2006
Remove the existing rubber sleeve and grommet and install a new rubber sleeve (P/N 25898407) and a new rubber grommet (P/N 15815546) to each of the pins. Adjust both pin receivers to the fullest rearward position to create a better compression.
Important: If after performing Correction 1 the noise is still present, continue with Condition 1A.
Condition 1A
Noise over bumps from mid-roof area.
Cause 1A
The roof panel to panel side rod latch to striker may be out of adjustment, causing a rattle (either side of vehicle).
Correction 1A
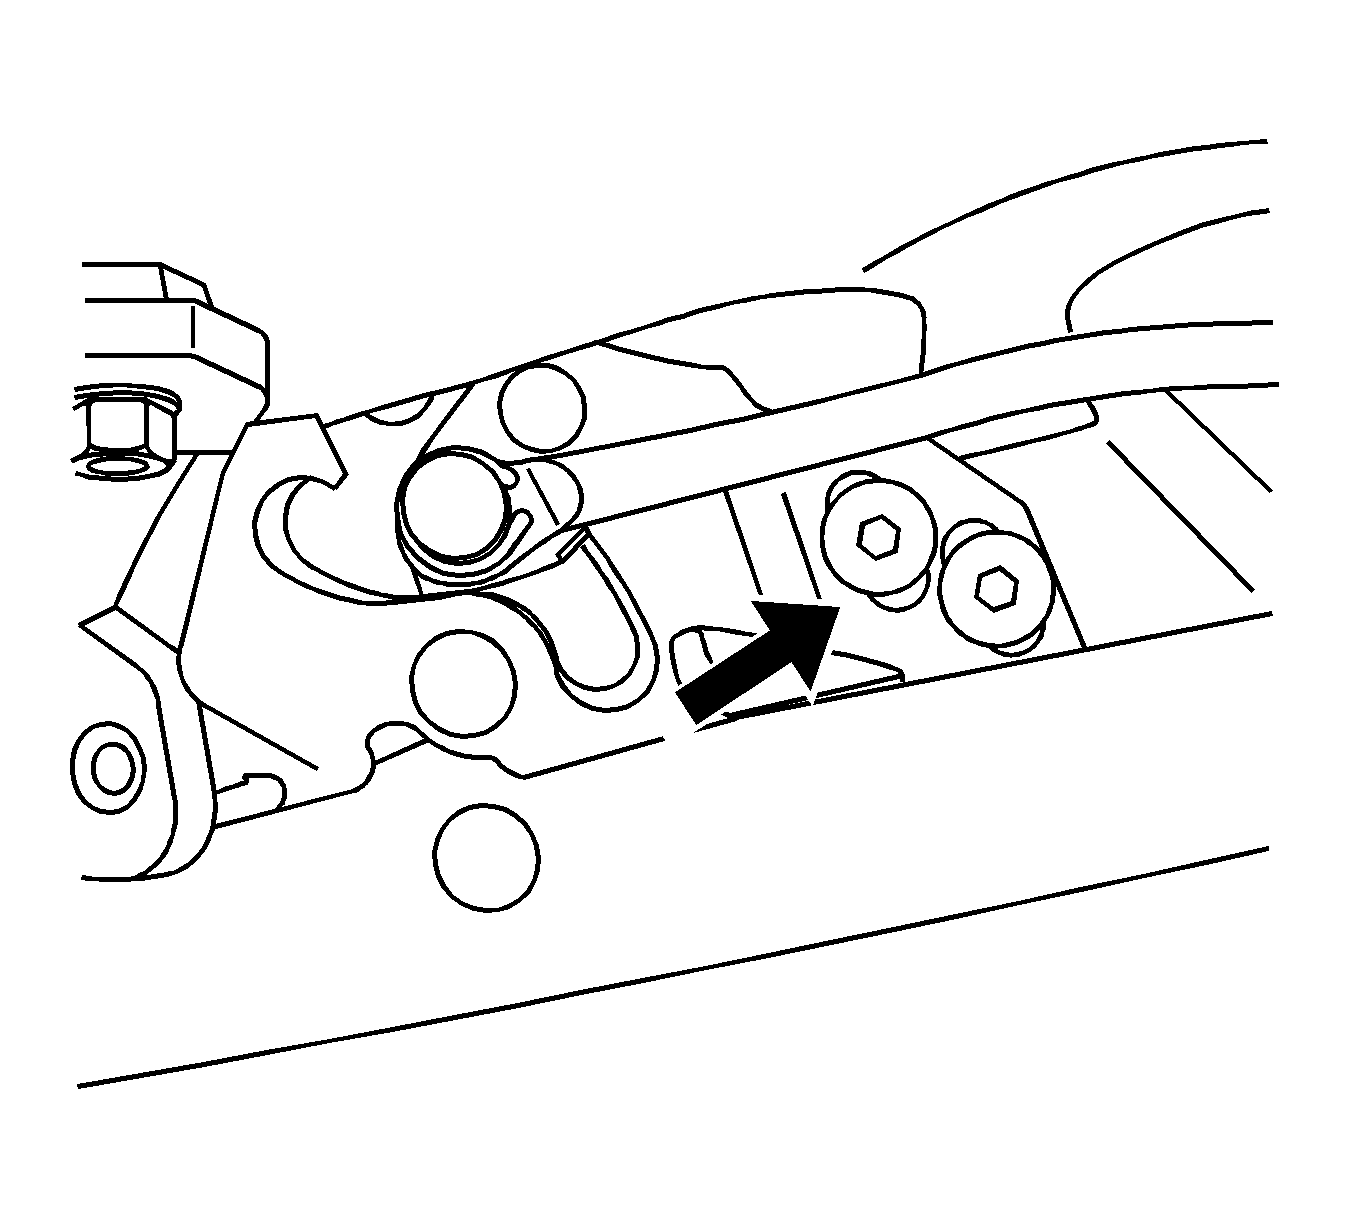
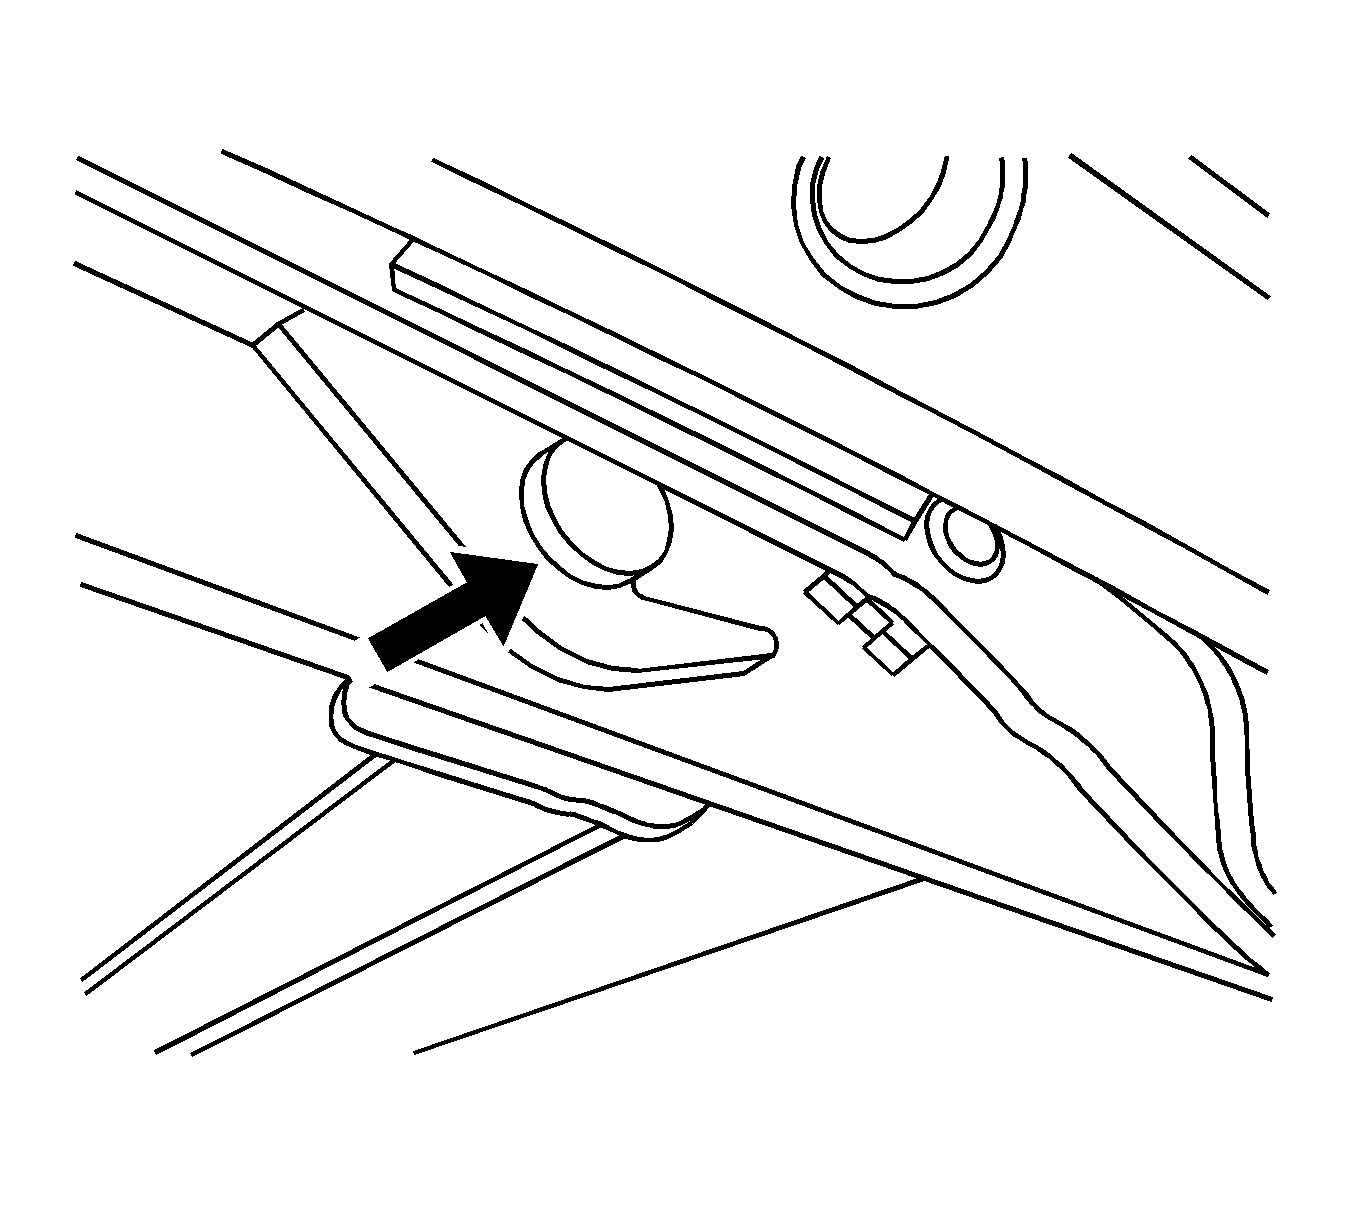
PROCEDURE FOR VEHICLES BUILT PRIOR TO 7/18/2006
Slightly loosen and adjust both panel to panel side rod latches to fit tighter to the striker when the roof is fully closed. If a loud pop noise is heard when opening the roof, the adjustment is too tight.
Condition 1B
Noise over bumps from rear roof area (either side of vehicle).
Cause 1B
The roof side arm UP stop rubber bumpers may come off or may be out of adjustment and create a creak/thumping noise (both sides of vehicle).
Correction 1B
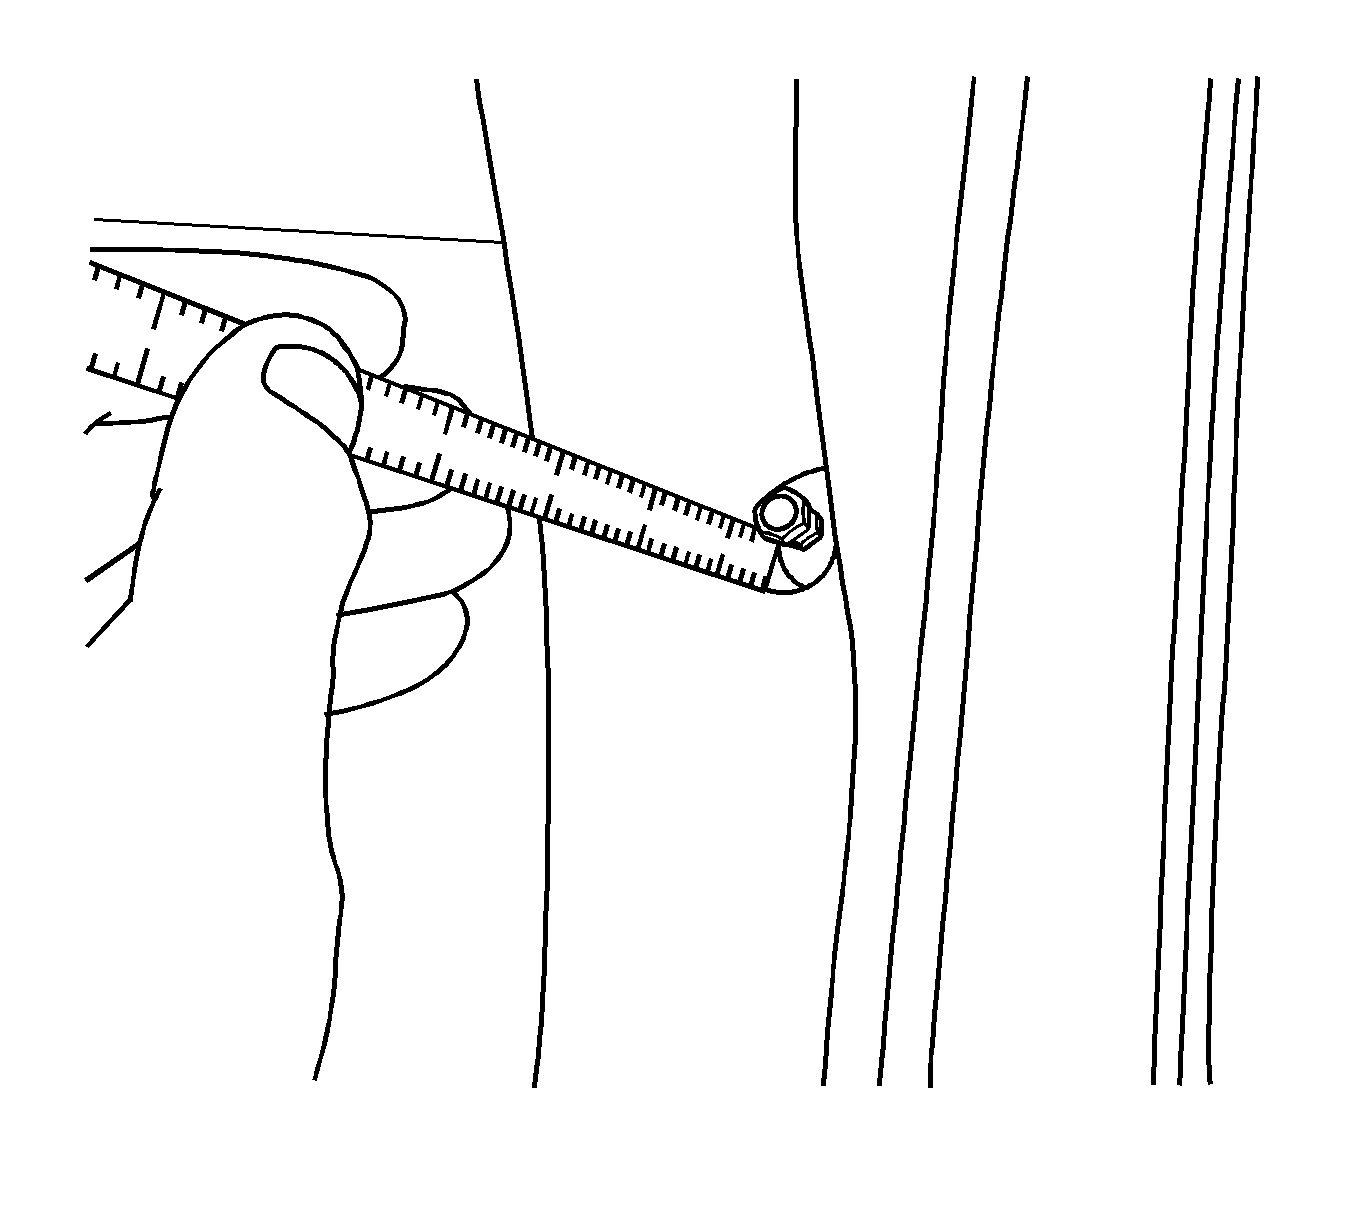
PROCEDURE FOR VEHICLES BUILT PRIOR TO 2/28/2006
Open the roof to the service position. Replace any missing rubber stops. Measure the height of the bumper screw from the bumper surface to the base of the attaching arm. Loosen the jam nut at the base of the bumper screw and adjust the bumper height to 13 mm (0.51 in). Tighten the jam nut.
Condition 2
Noise over bumps from the front roof area.
Cause 2
The front roof panel pins to the header bracket may be out of alignment making a ticking/rattling noise (either side of vehicle).
Correction 2
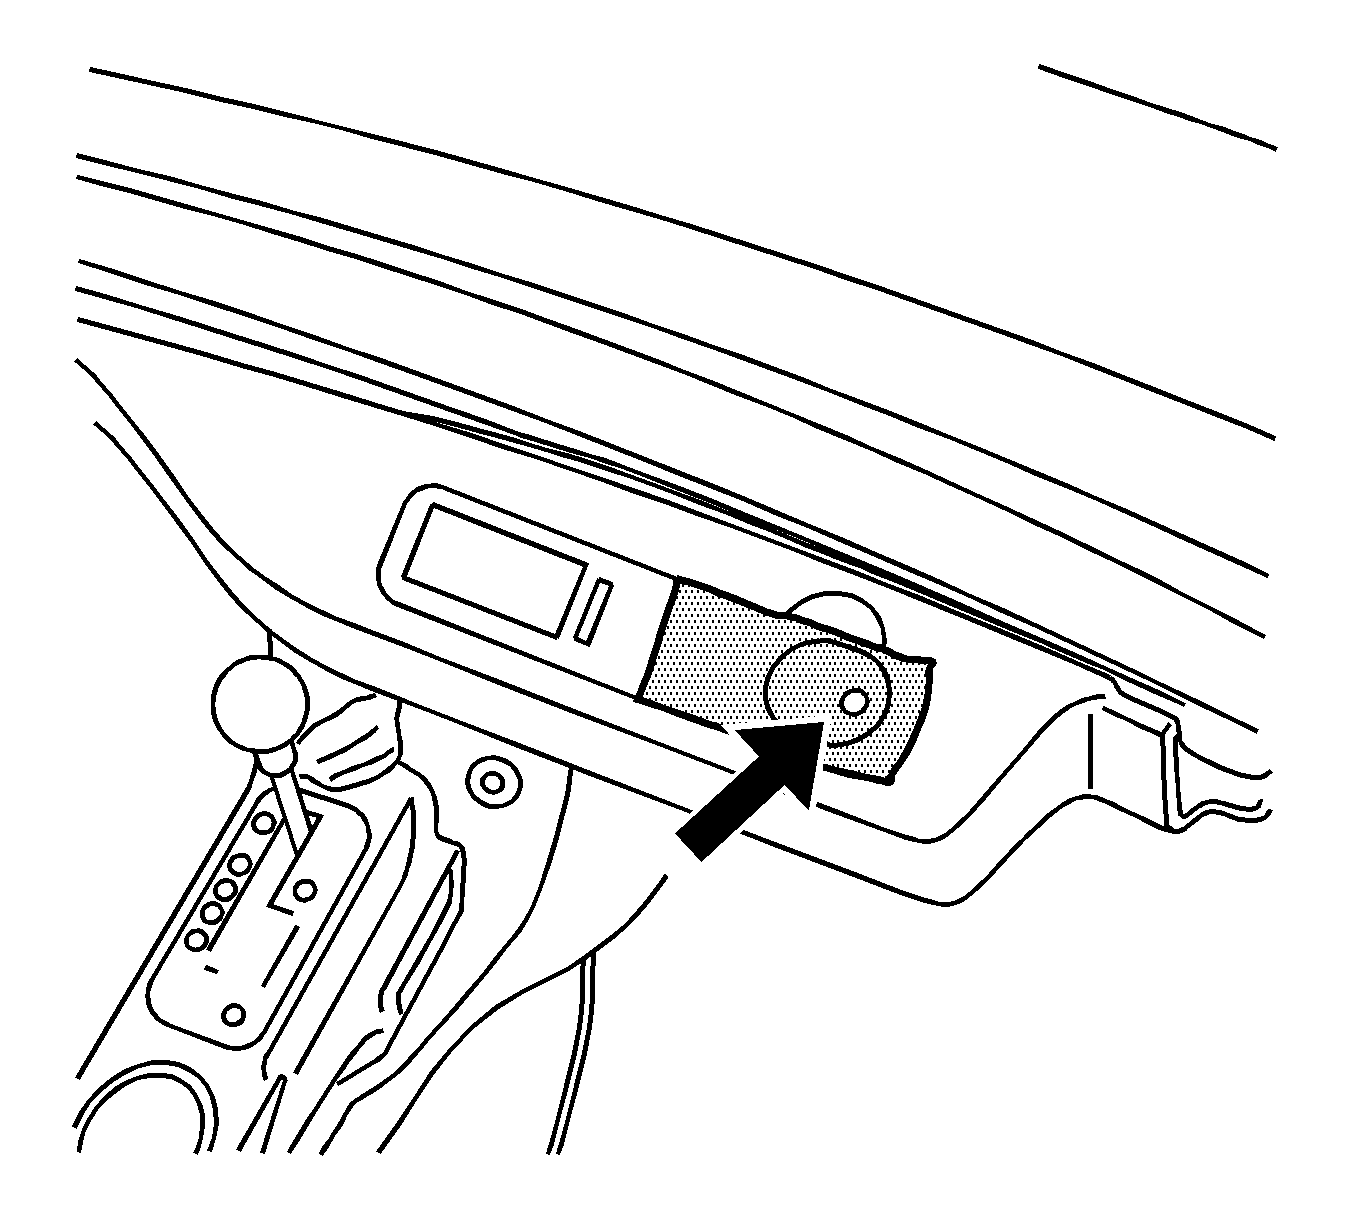
PROCEDURE FOR VEHICLES BUILT PRIOR TO 05/16/2007
Slightly open the roof. Place a piece of masking tape over the bracket hole. Close the roof enough to observe pin alignment. Remove the interior trim access cover behind the sunshade to expose the three receiver bracket screws. Adjust the bracket in the required direction to center the pins in the receiver bracket and tighten the screws.
Tighten
Tighten the screws to 10 N·m (89 lb in).
Condition 2A
Noise over bumps from front area with top closed.
Cause 2A
This ticking/rattling noise may be coming from the front header damper.
Correction 2A
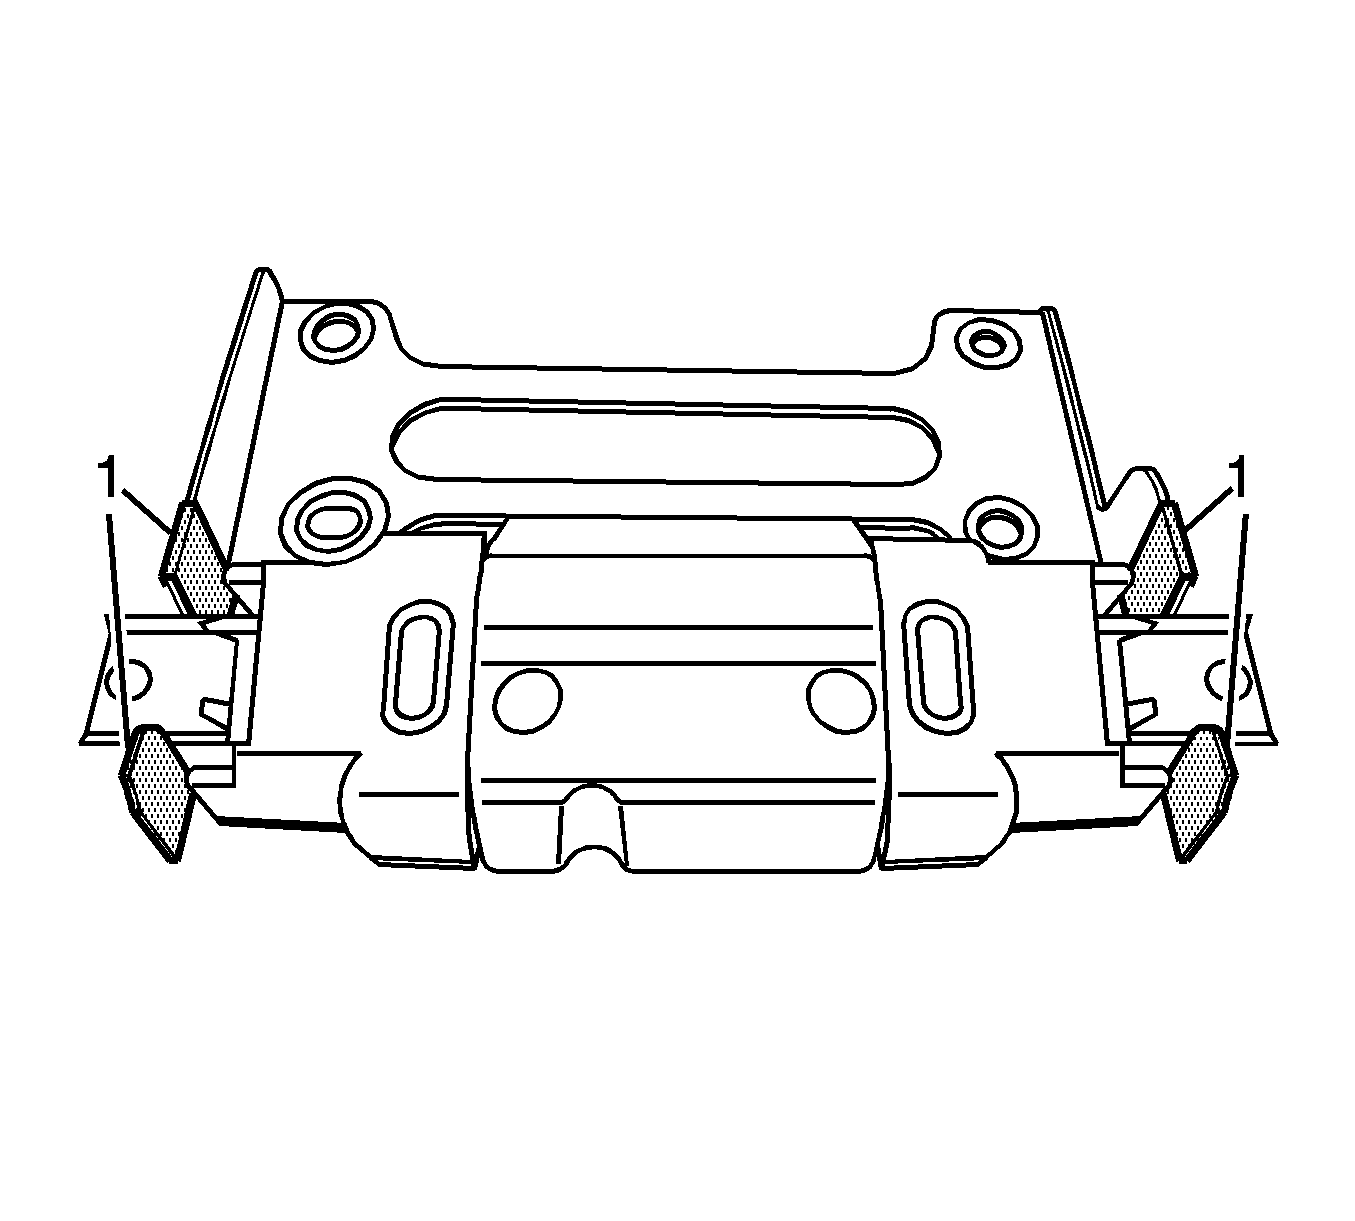
Clean the four fingers with alcohol and install flocking tape.
Condition 3
Noise over bumps from the rear upper quarter panel (either side of vehicle).
Cause 3
Rear quarter panel metal may be creaking.
Correction 3
FOR VEHICLES BUILT PRIOR TO 10/30/2006
Notice: Take precaution not to damage the outer sheet metal.
Remove the rubber seal from the top of the quarter panel and slightly move the inner sheet metal away from the outer sheet metal.
Condition 3A
Creaking/popping noise over bumps from the rear of the door (either side of vehicle).
Cause 3A
The door spring pin may be out of adjustment or frozen.
Correction 3A
Adjust the receiver to pin and lubricate the door spring pin.
Condition 3B
Deck lid area metal creak/pop noise over bumps (either side of vehicle).
Cause 3B
This noise may be caused by the stand-off bracket making contact with the paint.
Correction 3B
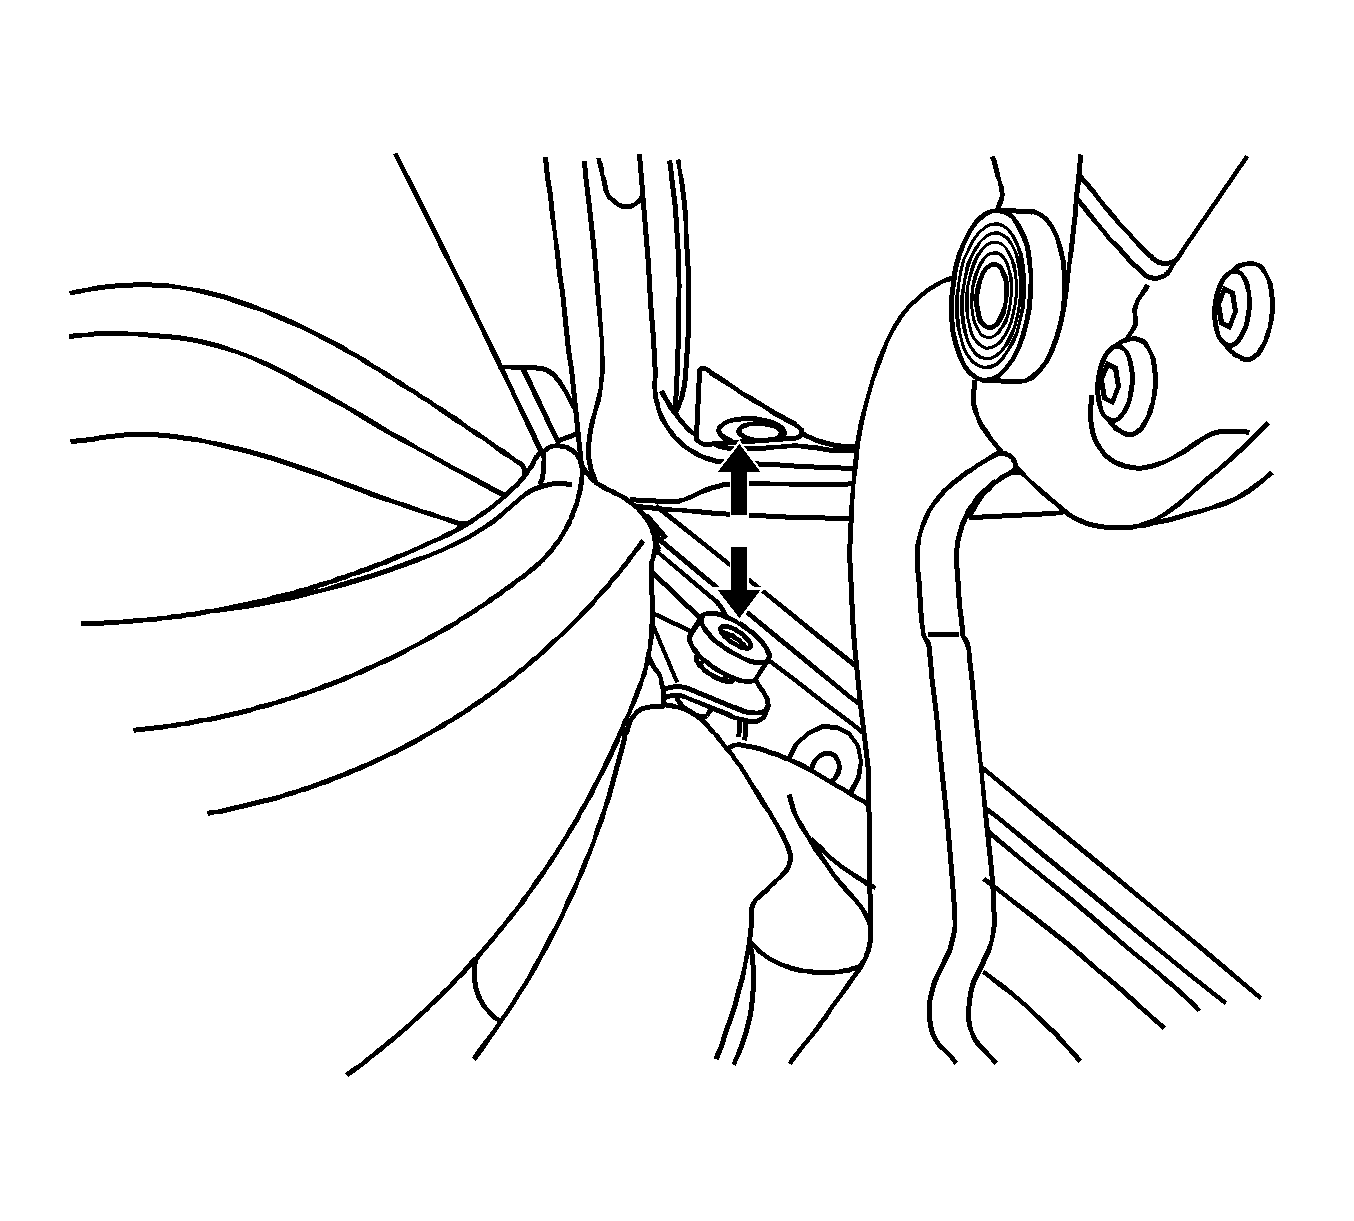
PROCEDURE FOR VEHICLES BUILT PRIOR TO 04/03/2006
Adjust the deck lid stand-off bracket and install a piece of mylar tape to cover the paint area. Use alcohol to clean the area.
Condition 4
Noise from roof seals.
Cause 4
The seal may be dry and making a noise.
Correction 4
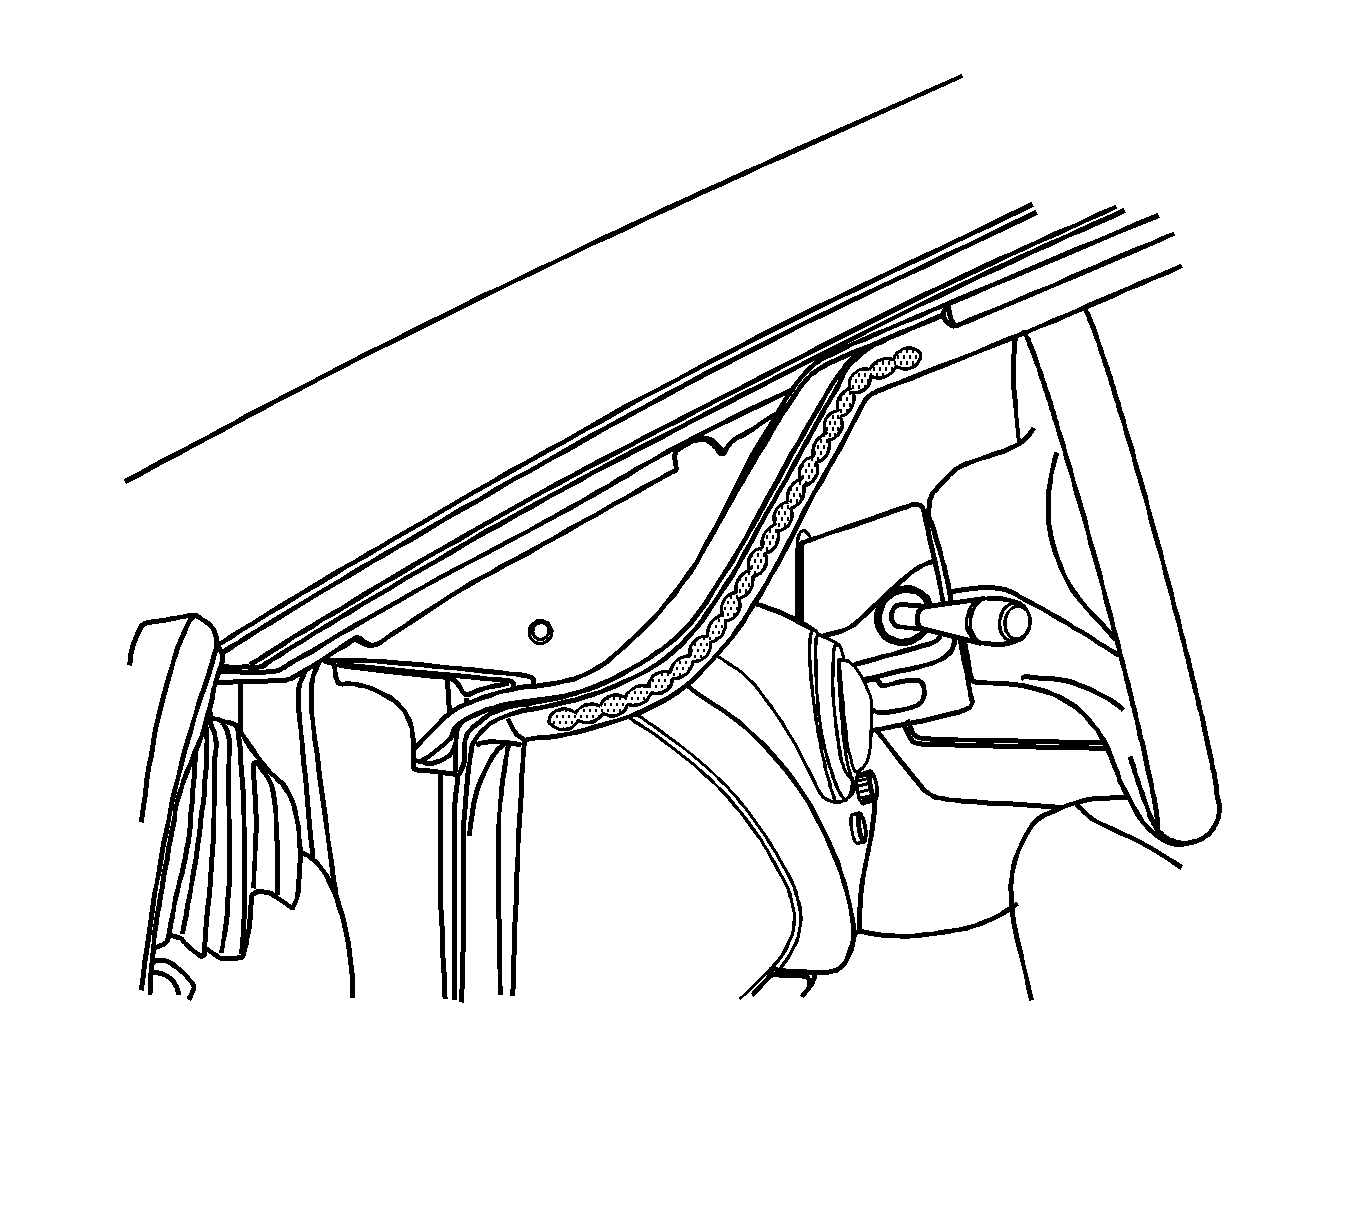
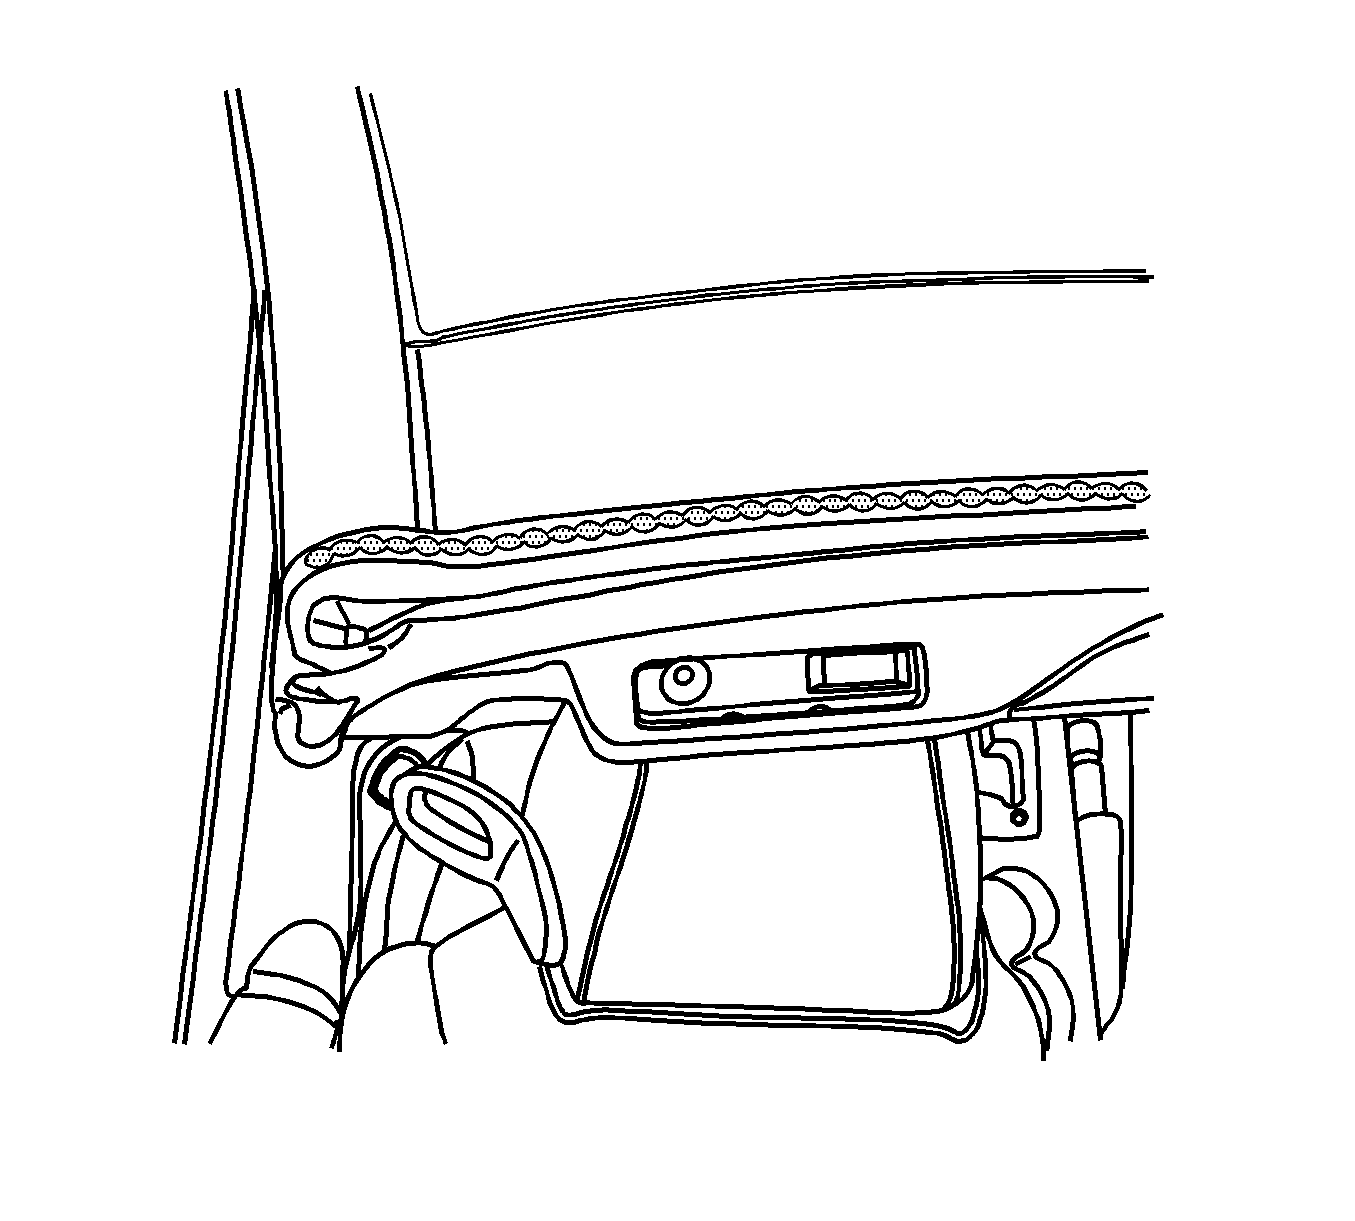
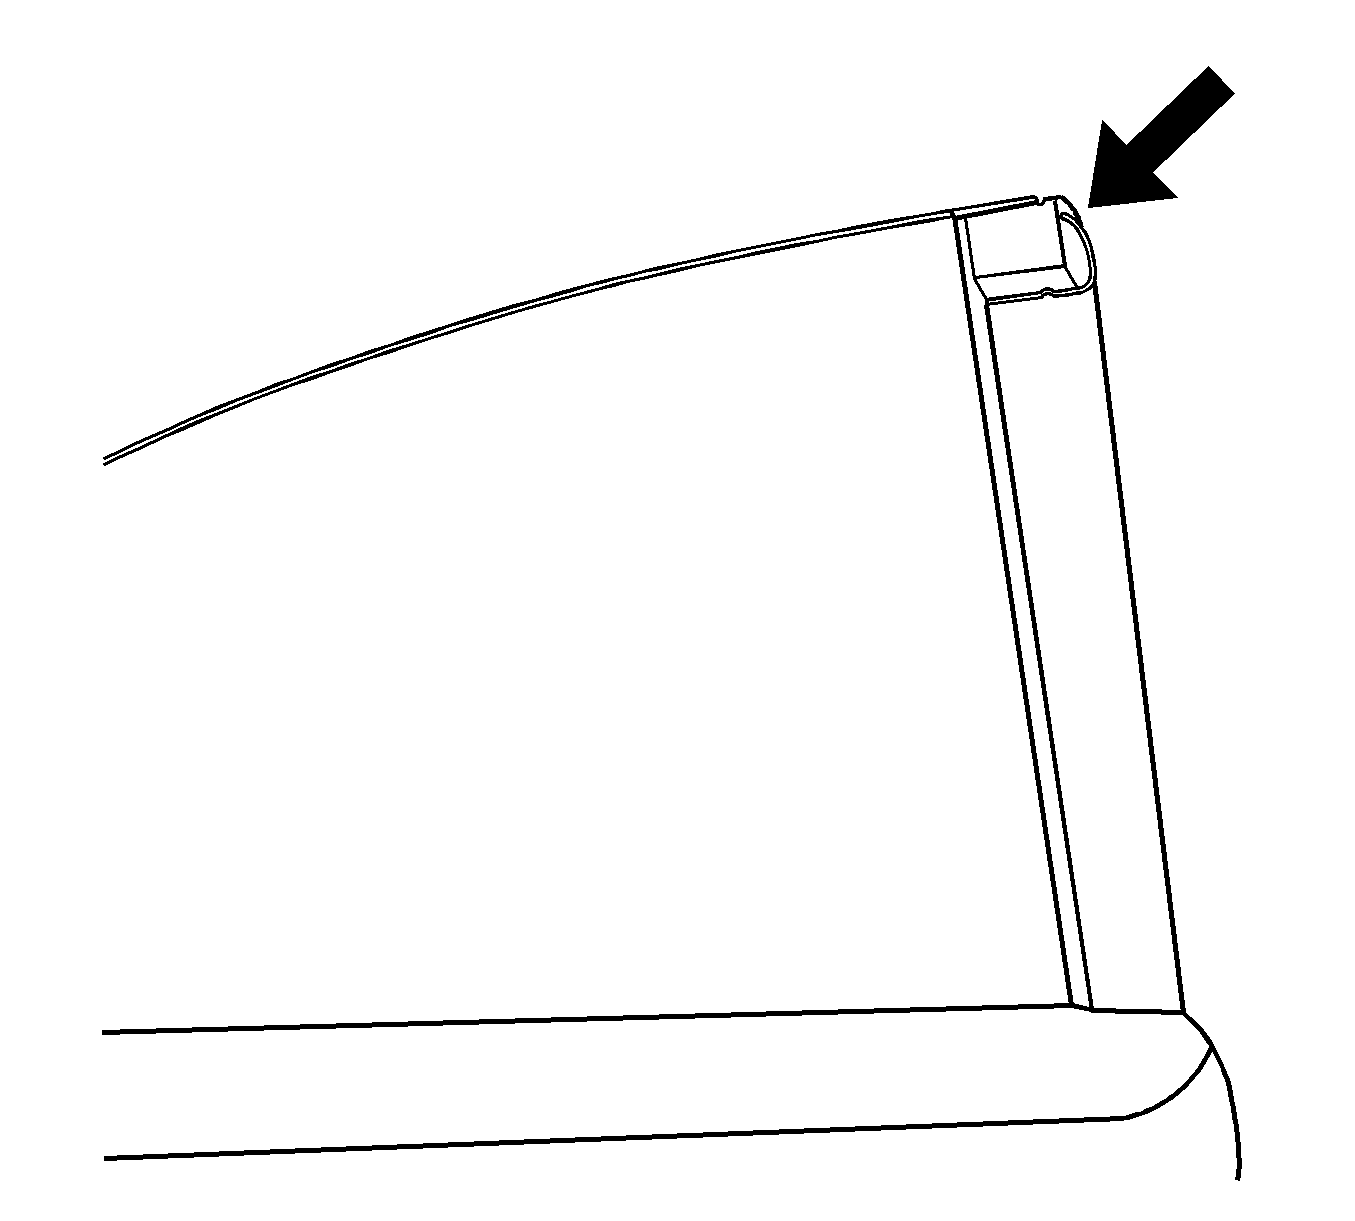
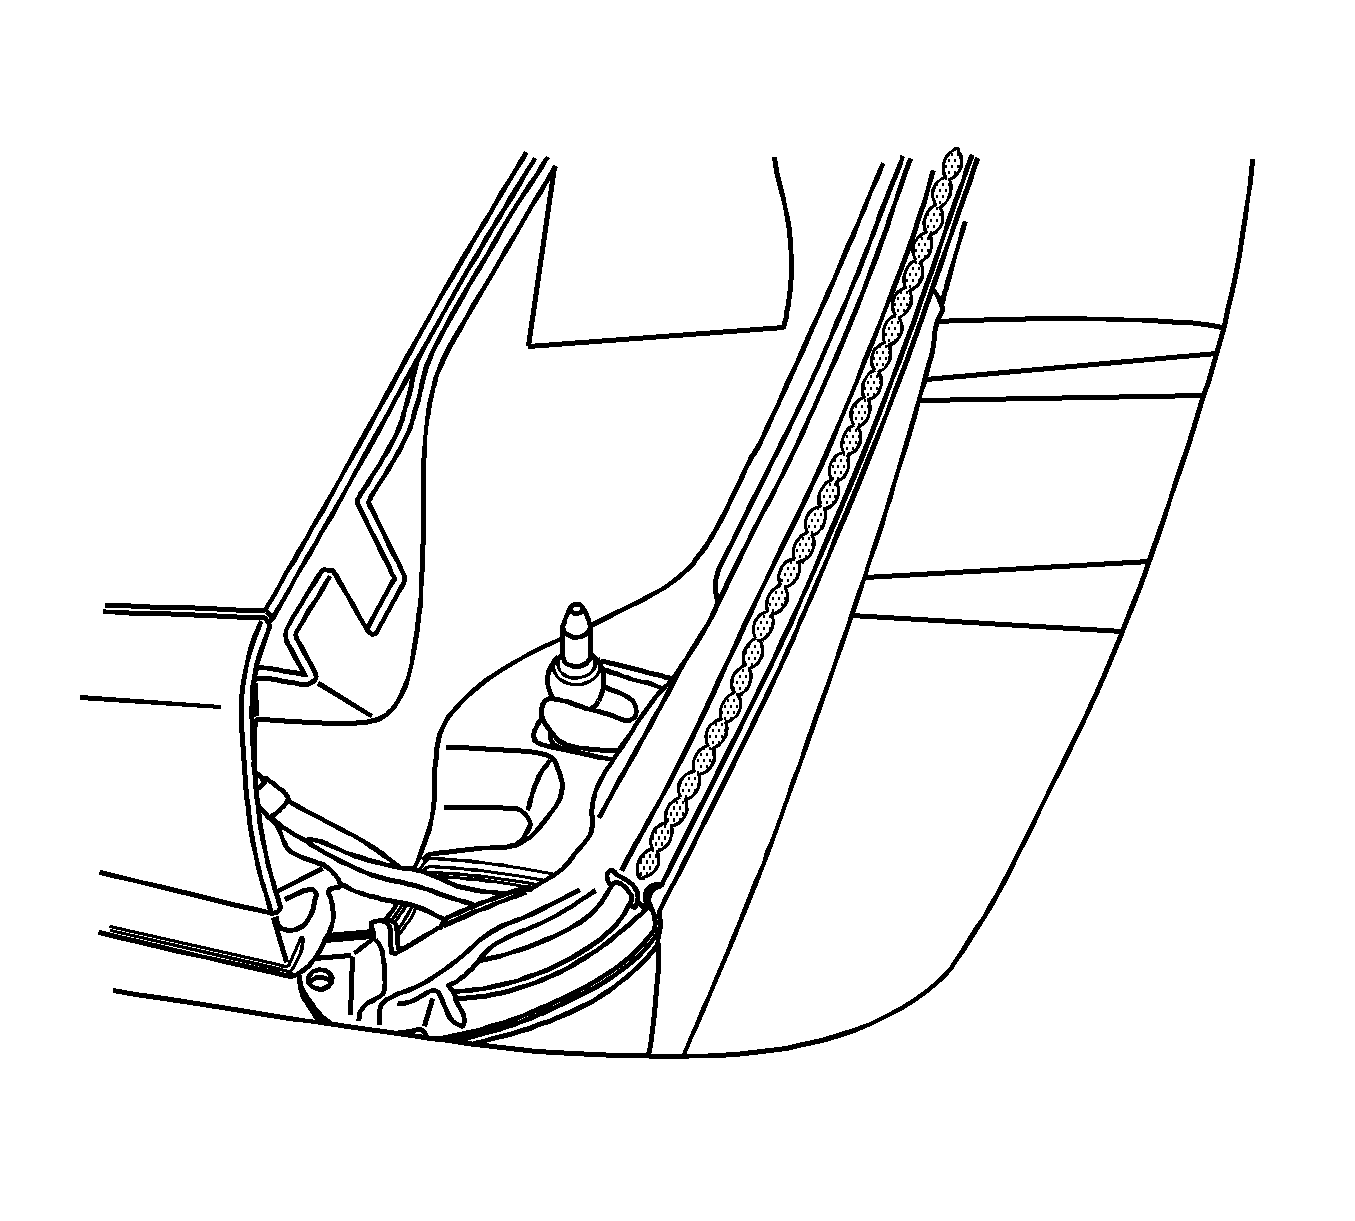
Lubricate all seals (refer to illustrations above) with GM Dielectric Silicone Grease.
Condition 5
Noise over bumps from top of the quarter panel and the base of the window (either side of vehicle).
Cause 5
The rear quarter panel window belt molding may be making a clicking/snapping noise.
Correction 5
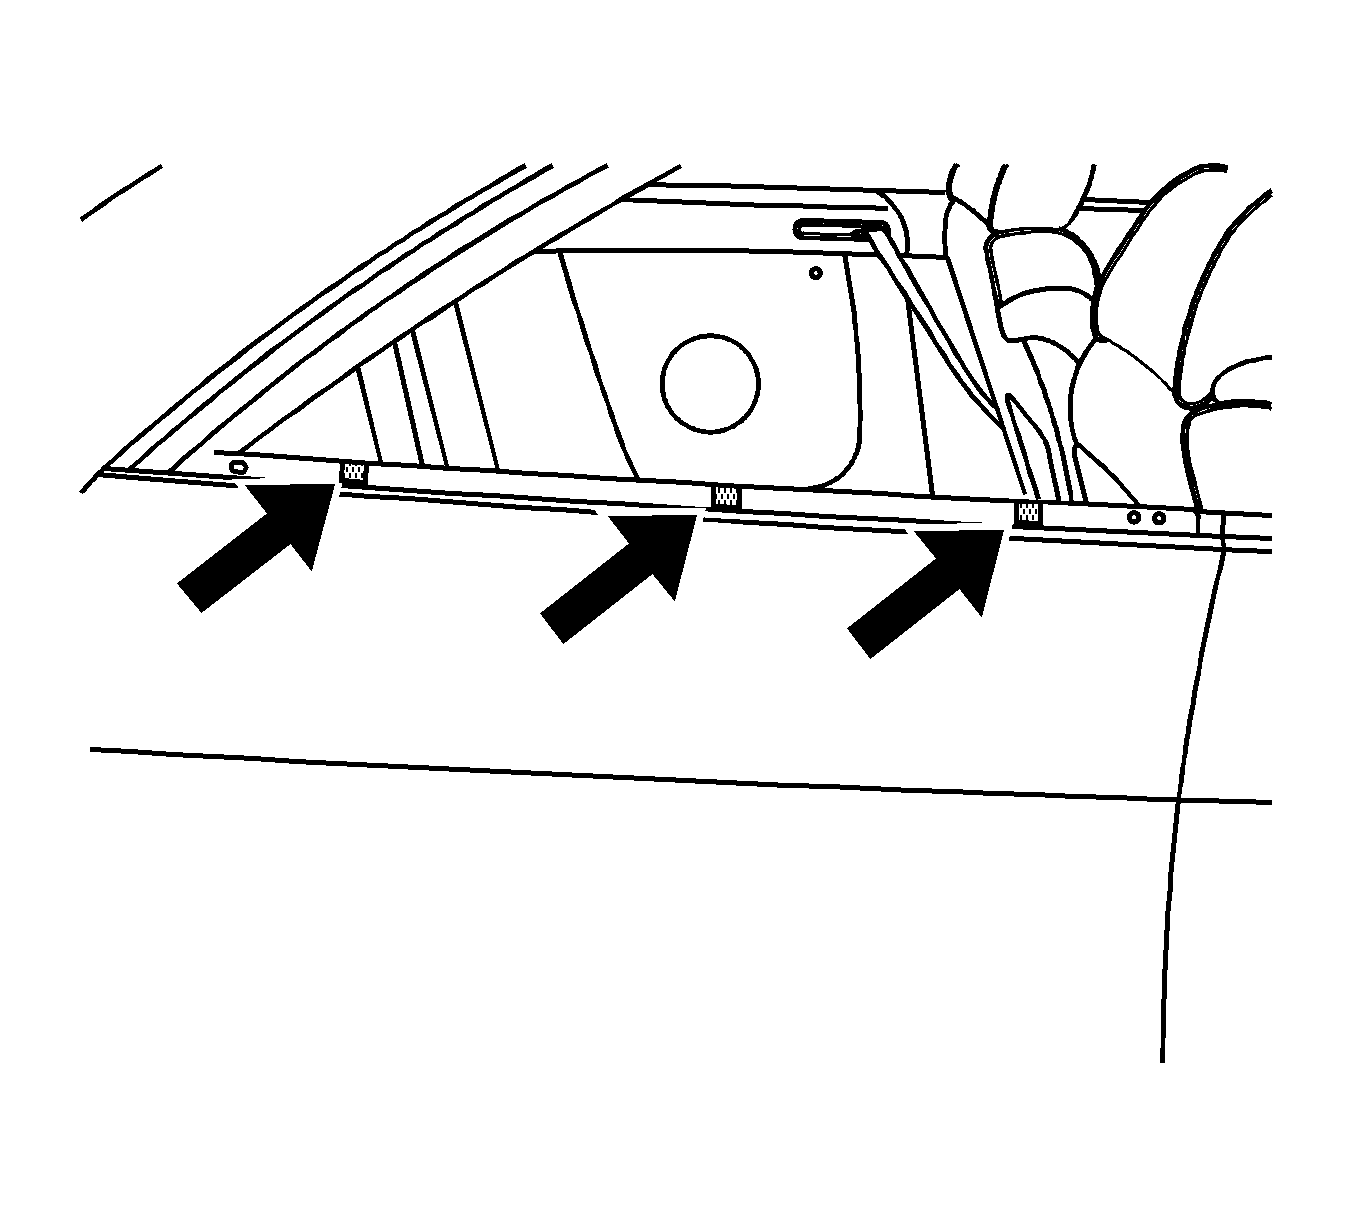
PROCEDURE FOR VEHICLES BUILT PRIOR TO 10/12/2006
Remove the window belt molding and clean the flange of the quarter panel with alcohol. Install three pieces of BRS Tape (flocking tape) to the flange and install the belt molding as shown above.
Condition 5A
Snapping noise from the rear quarter panel/roof area when cycling top open (either side of vehicle).
Cause 5A
This condition may be due to contact between the rear roof panel trim and the quarter panel upper trim.
Correction 5A
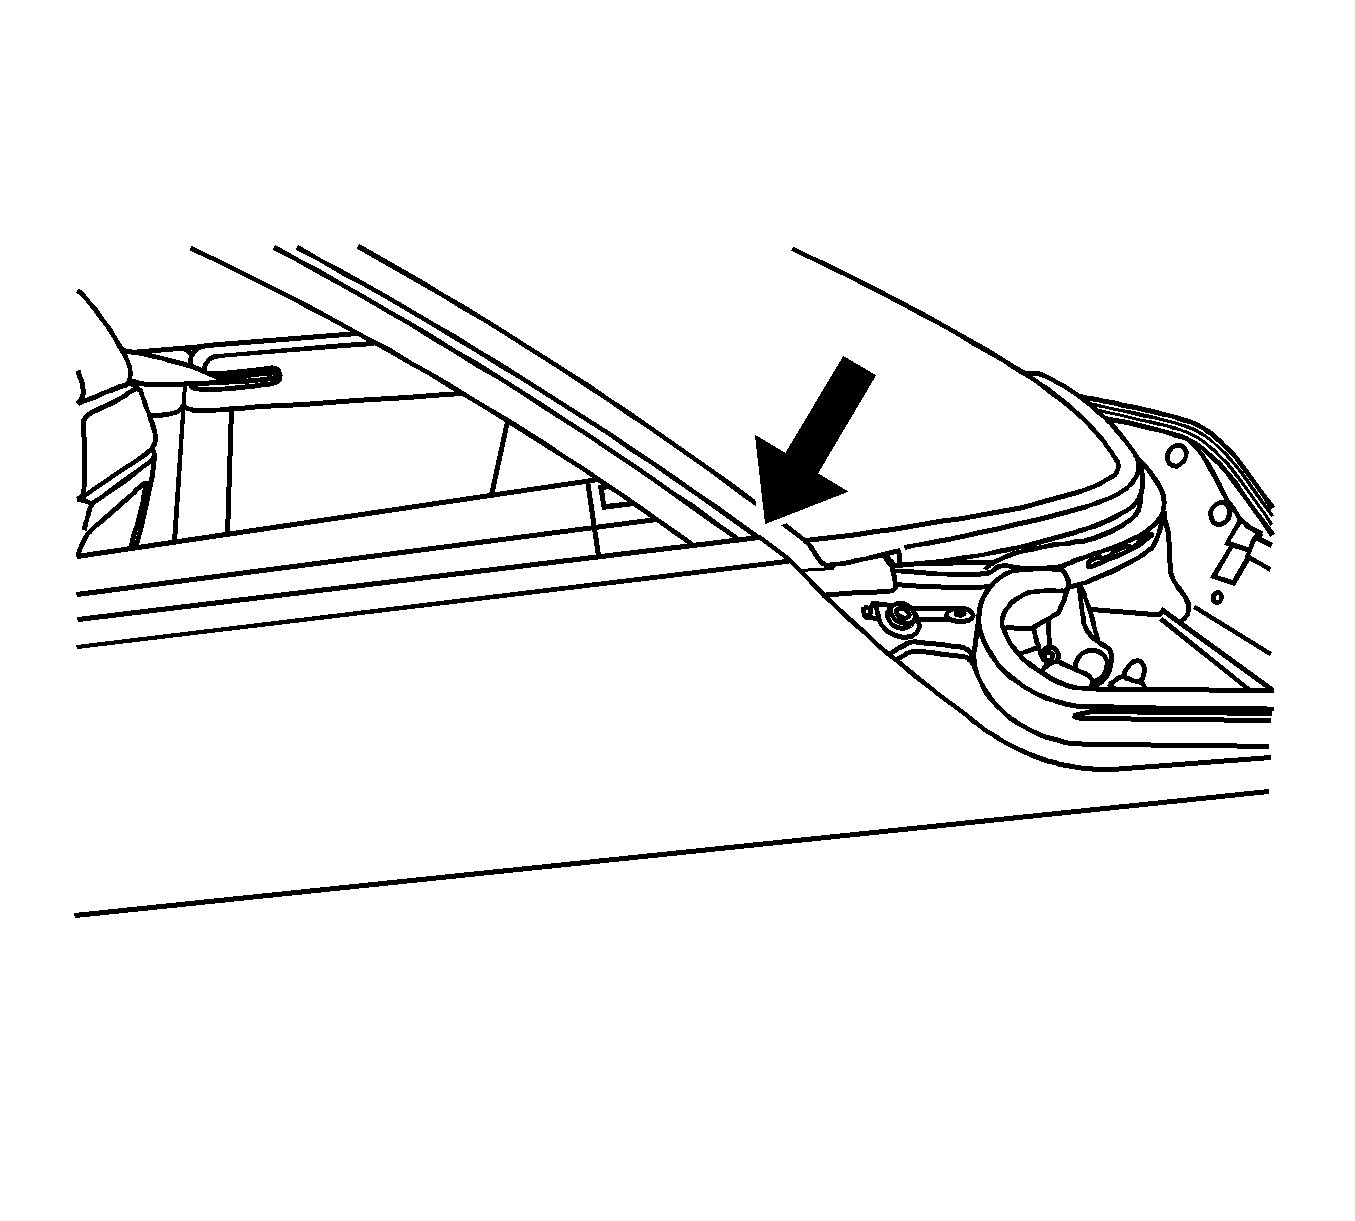
PROCEDURE FOR VEHICLES BUILT PRIOR TO 03/01/2006
Slightly adjust the quarter panel upper trim outward.
Condition 5B
Noise over bumps from mid-roof area (either side of vehicle).
Cause 5B
The top of the front door clip may be squeaking/itching or making a ticking noise.
Correction 5B
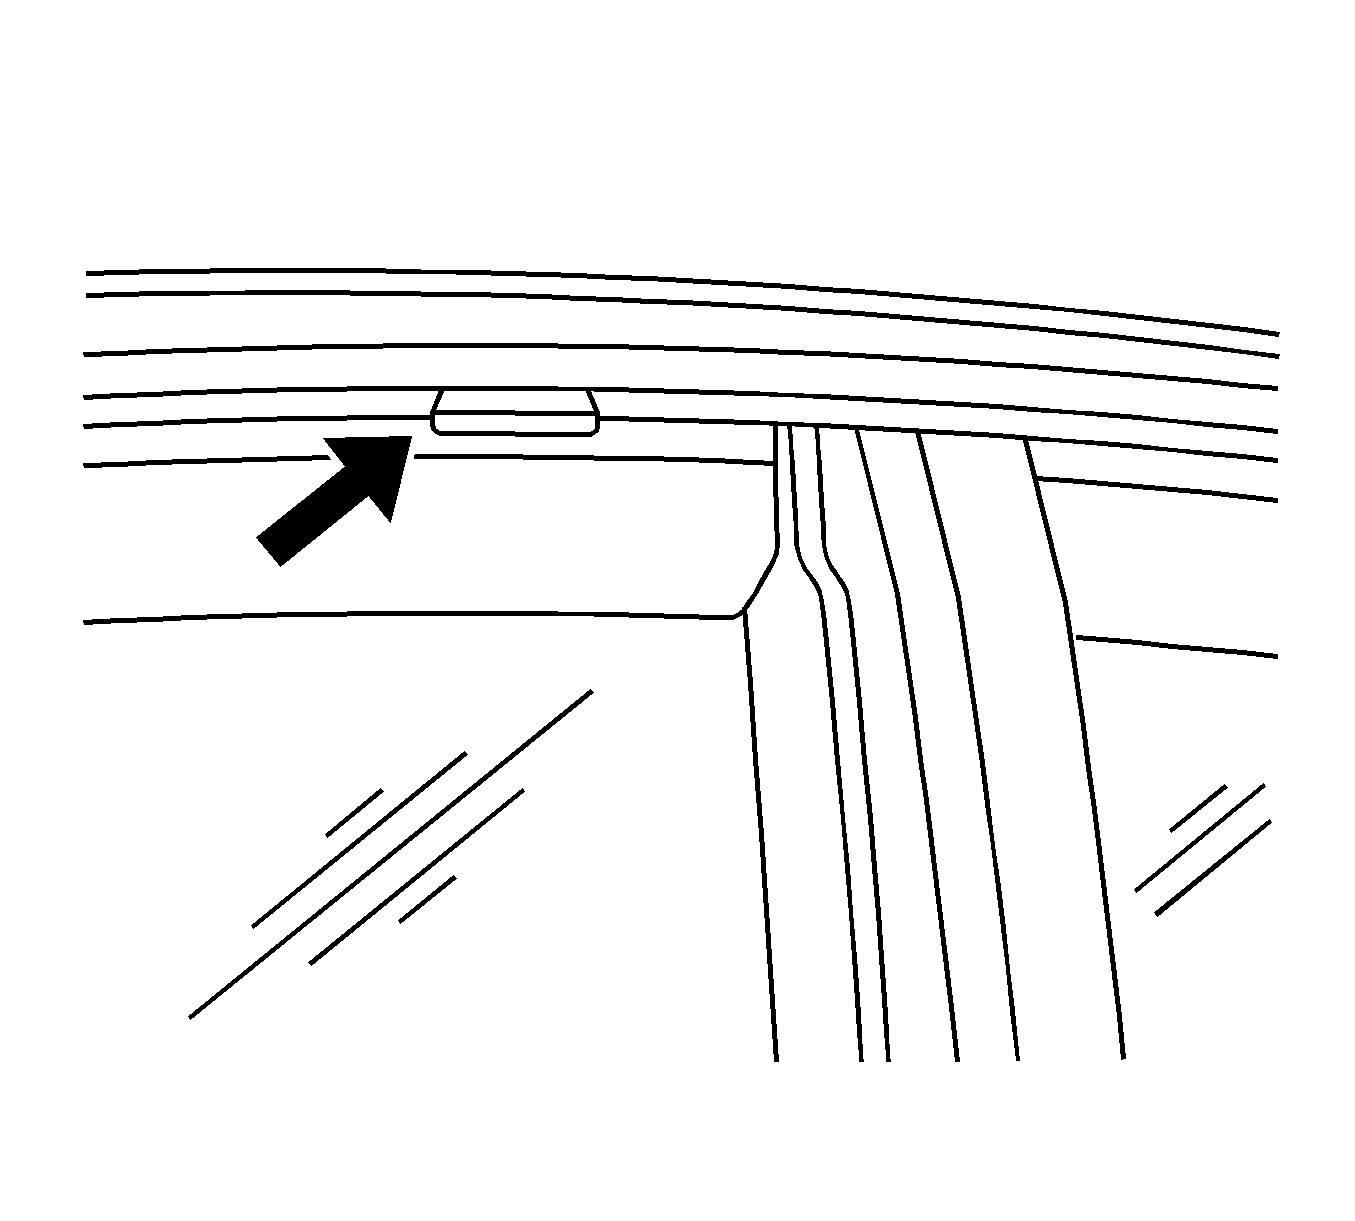
Adjust the door glass clip outward and lubricate with GM Dielectric Silicone Grease.
Condition 6
Snap noise from rear shelf area when cycling roof.
Cause 6
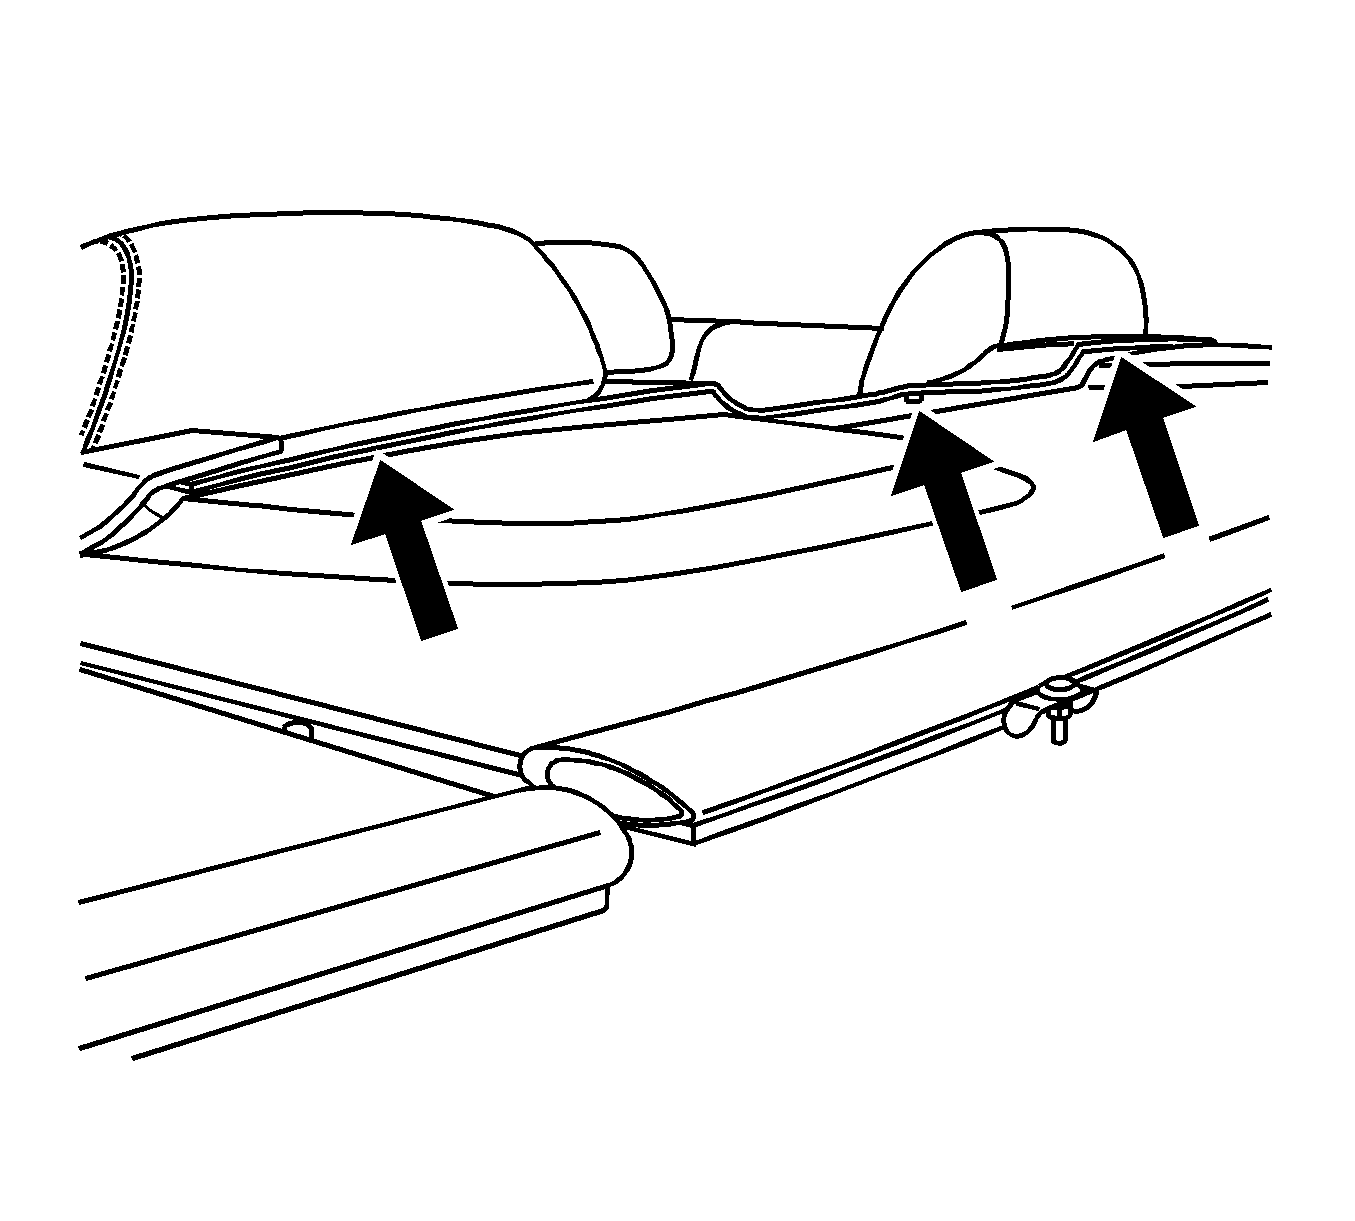
The bulkhead may be damaged from the rear seat upper trim that is not fully seated.
Correction 6
PROCEDURE FOR VEHICLES BUILT PRIOR TO 05/04/2007
Verify that rear seat upper trim is properly seated. Verify that the center tonneau and the flipper door area are adjusted properly or this issue may reoccur. Refer to Corporate Bulletin Number 06-08-67-013.
Condition 6A
Noise over bumps from the rear shelf area.
Cause 6A
The tonneau flipper door may be contacting the center panel while the roof is in the stored position (both sides of vehicle).
Correction 6A
PROCEDURE FOR VEHICLES BUILT PRIOR TO 03/30/2007
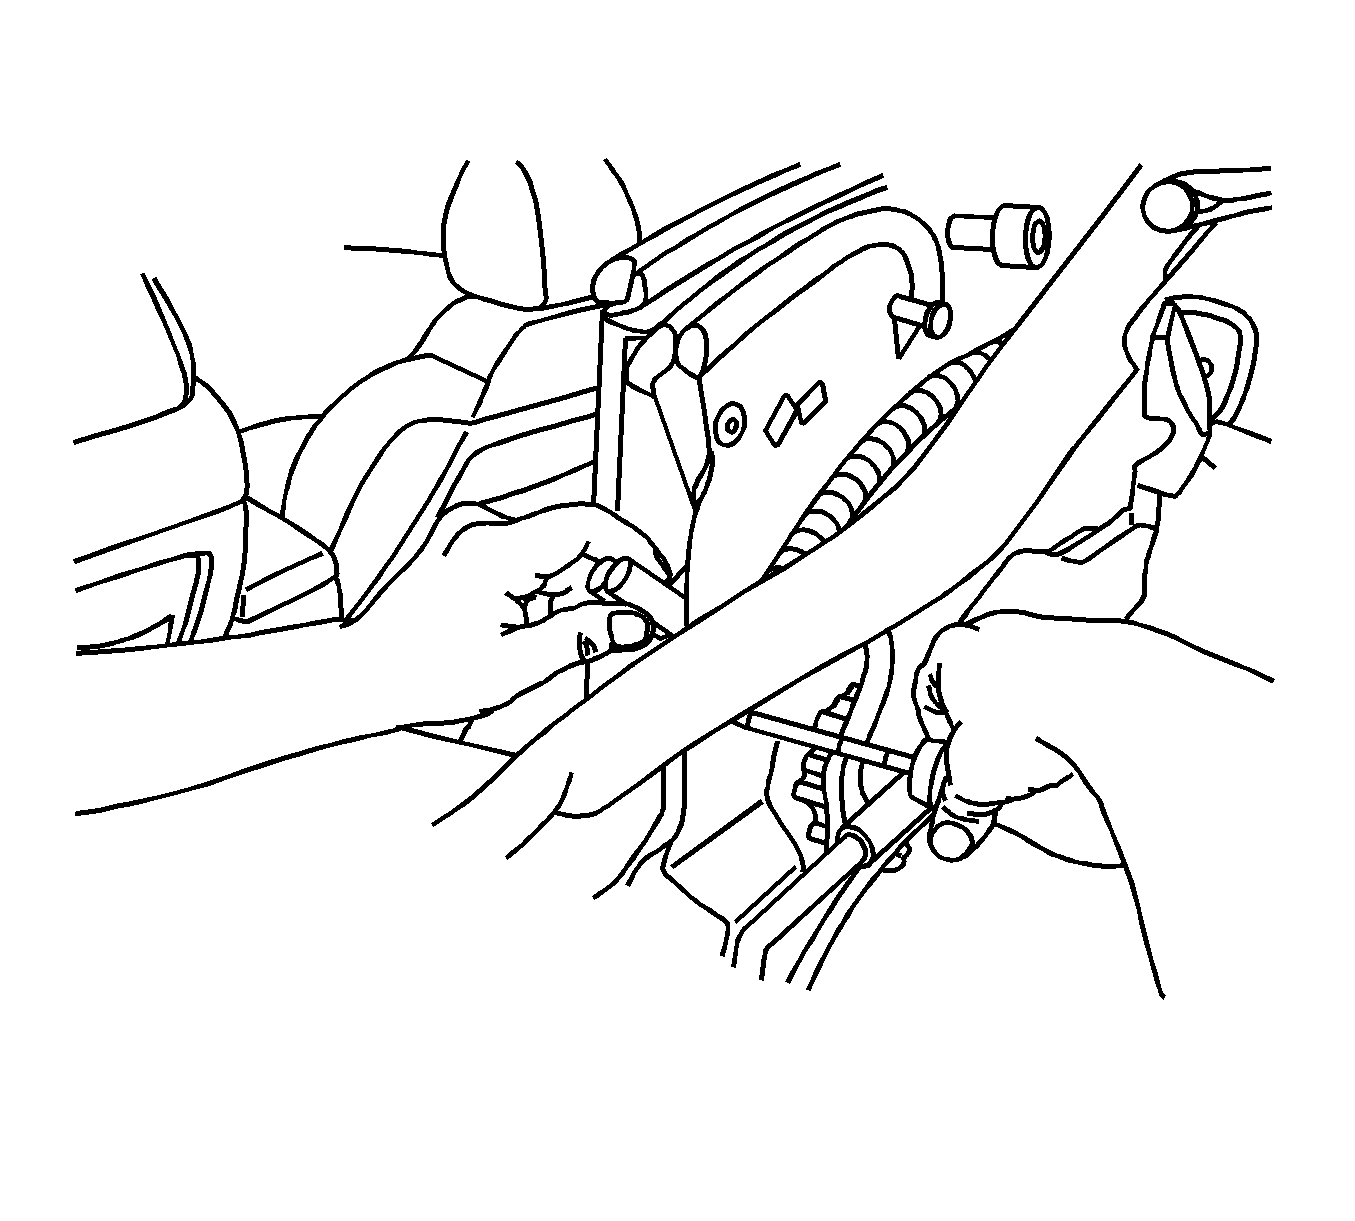
| • | From the side of the vehicle, observe the clearance of the flipper door to the underside of the center tonneau panel. The clearance should be 2-3 mm (0.079-0.12 in ). |
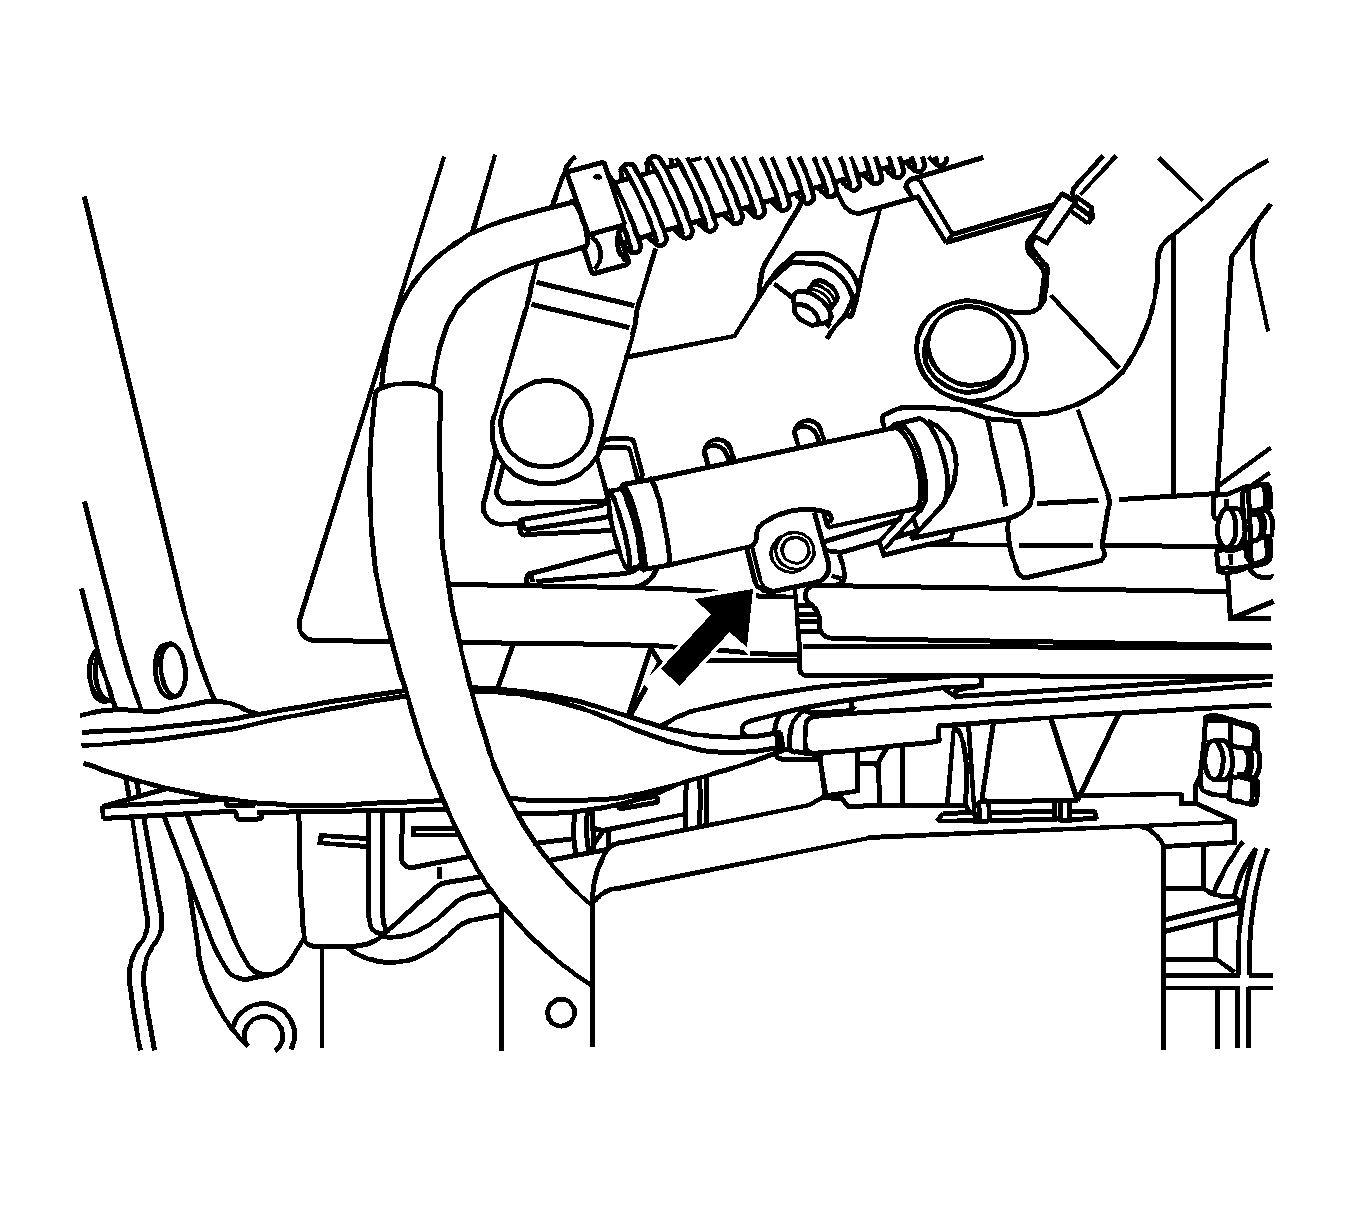
| • | If adjustment is required, locate the flipper door hinge set TORX® screw and adjust as needed. Refer to the illustration above. |
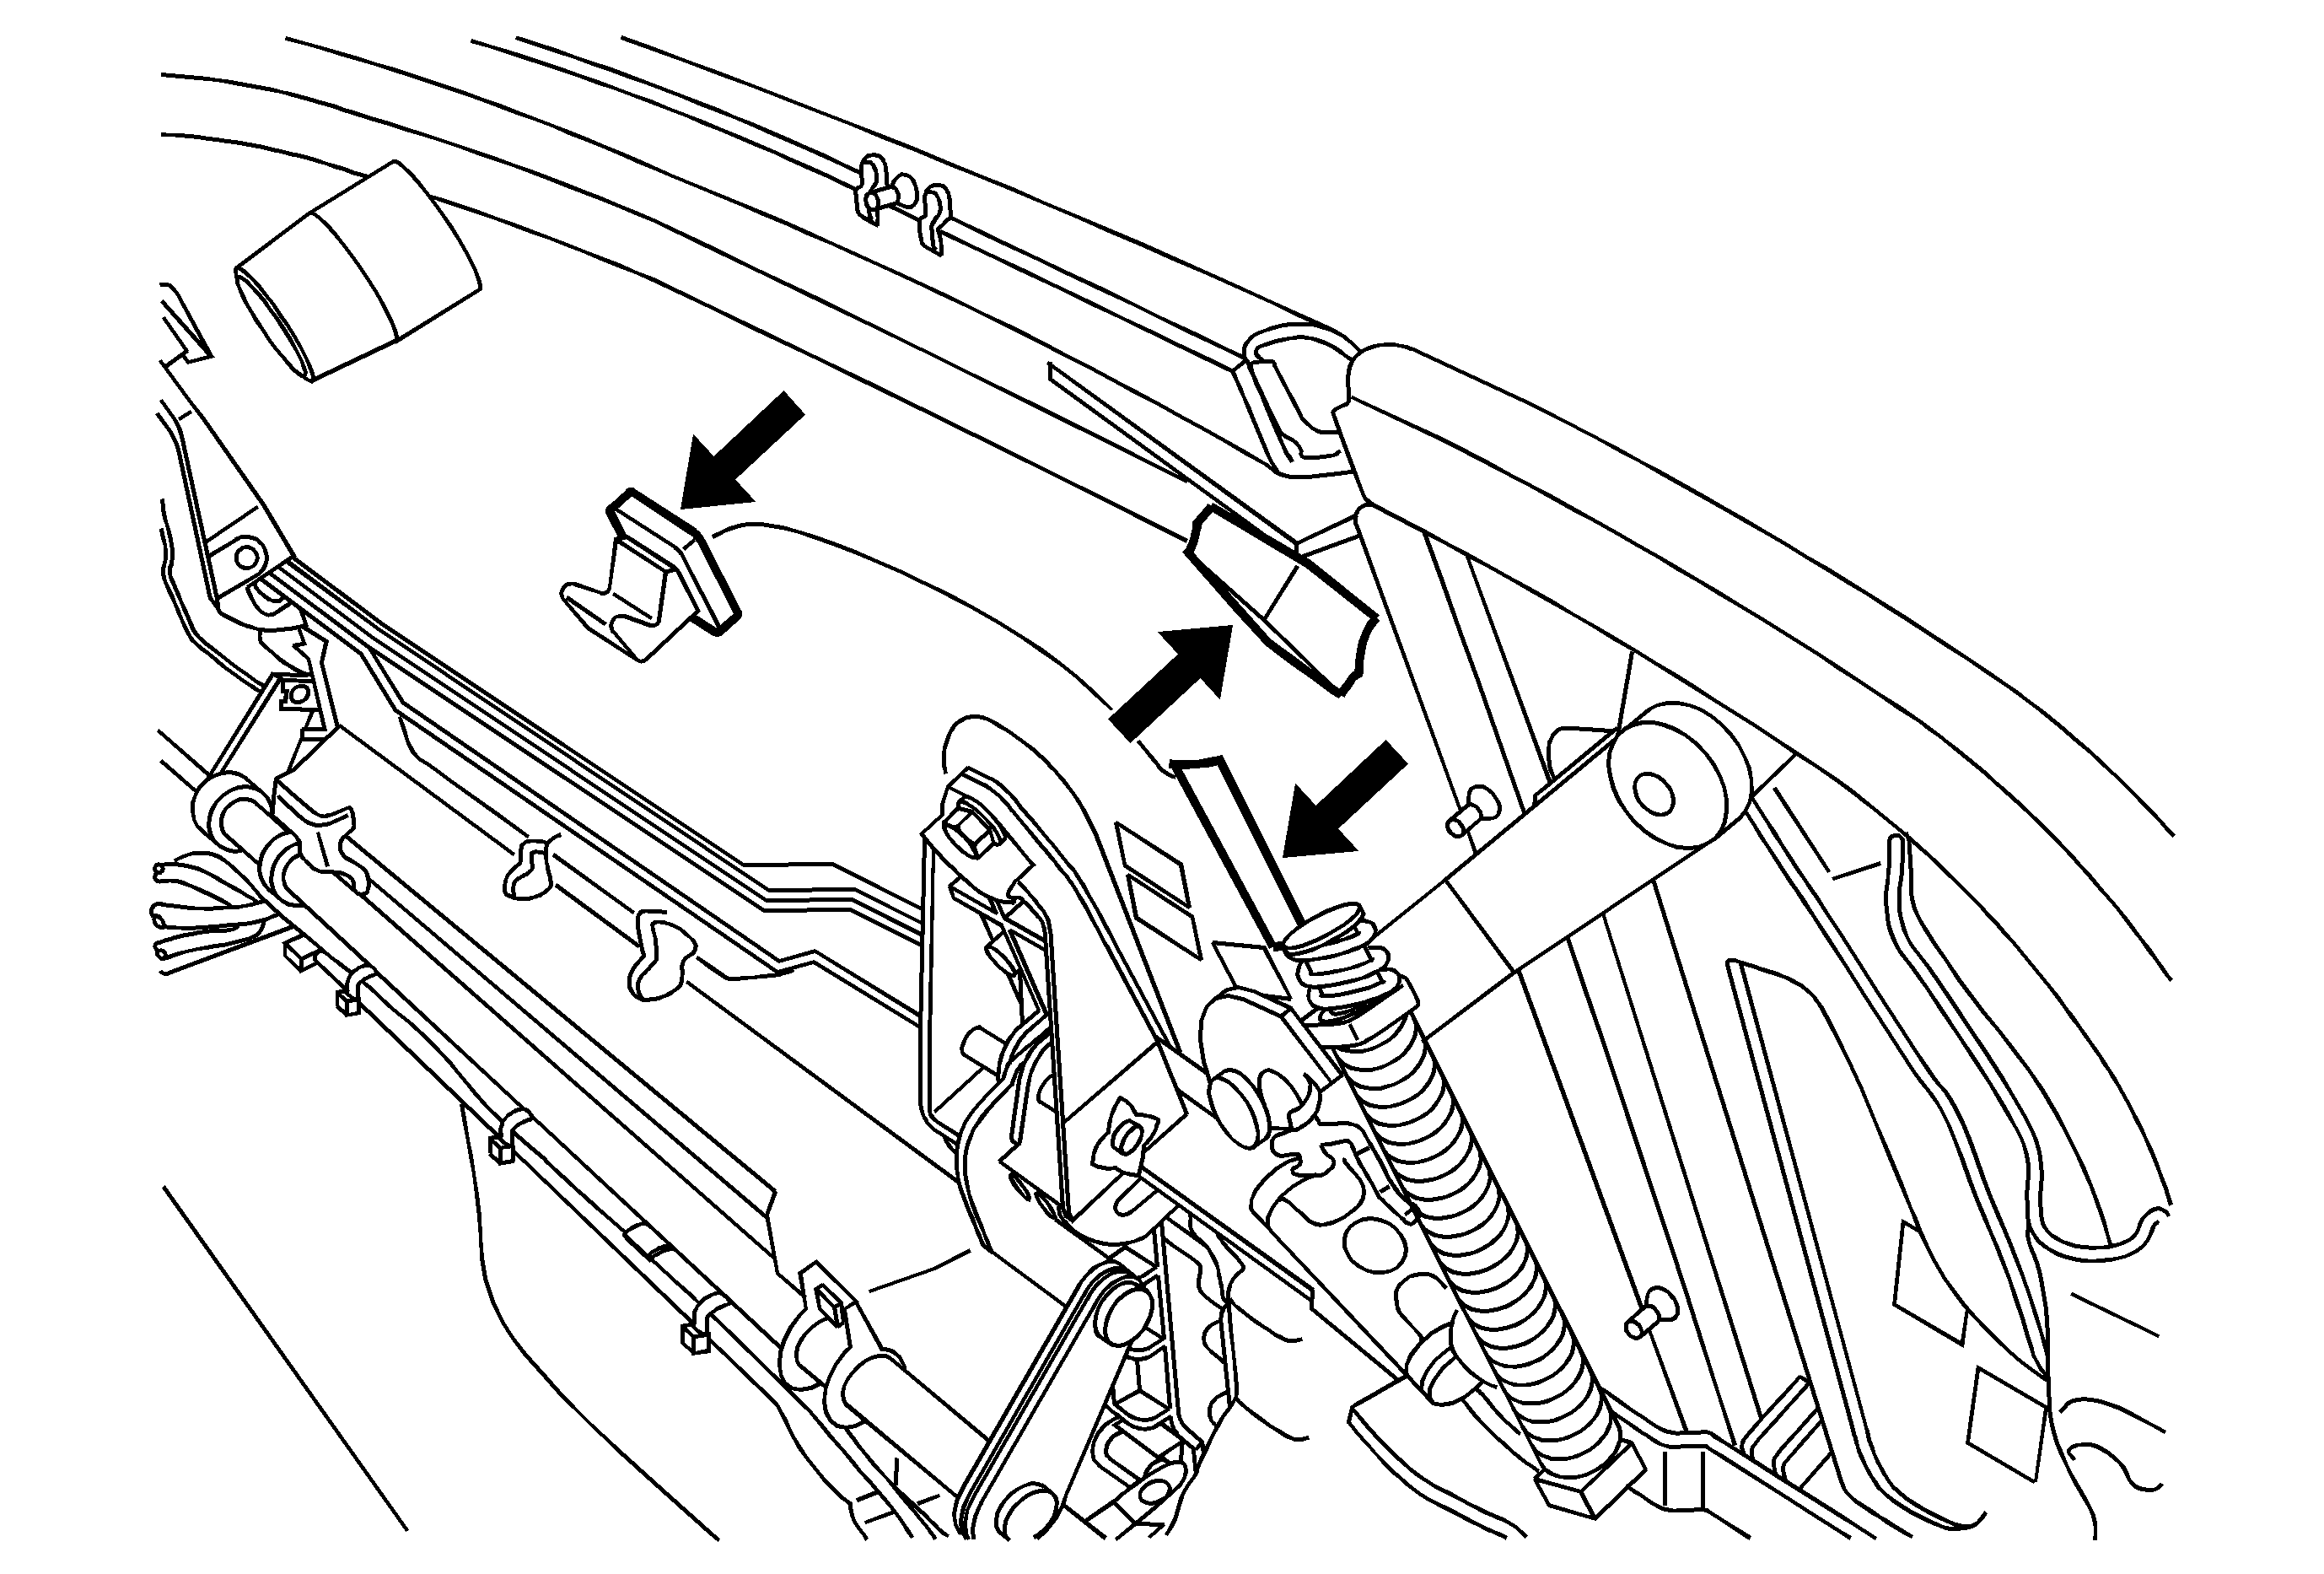
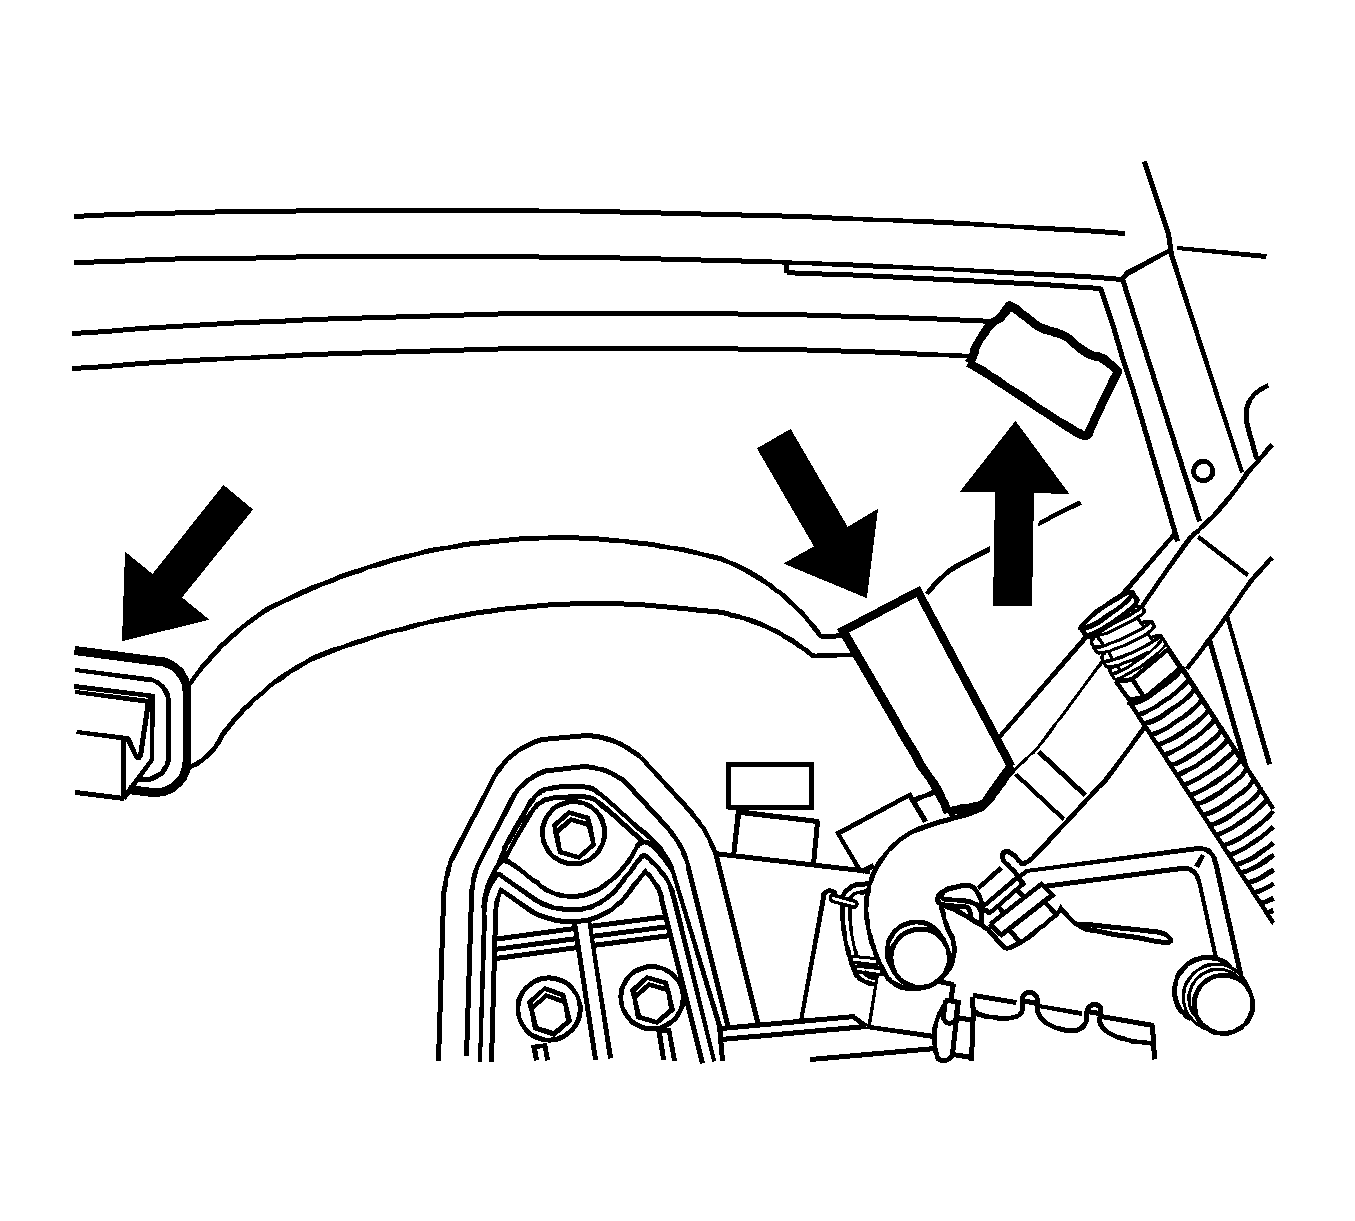
| • | Clear the center tonneau cover underside and install three pieces of flocking tape as shown above. |
Condition 6B
Noise from rear shelf over bumps.
Cause 6B
The rear center tonneau panel may be loose in the up bracket, creating a knocking noise (both sides).
Correction 6B
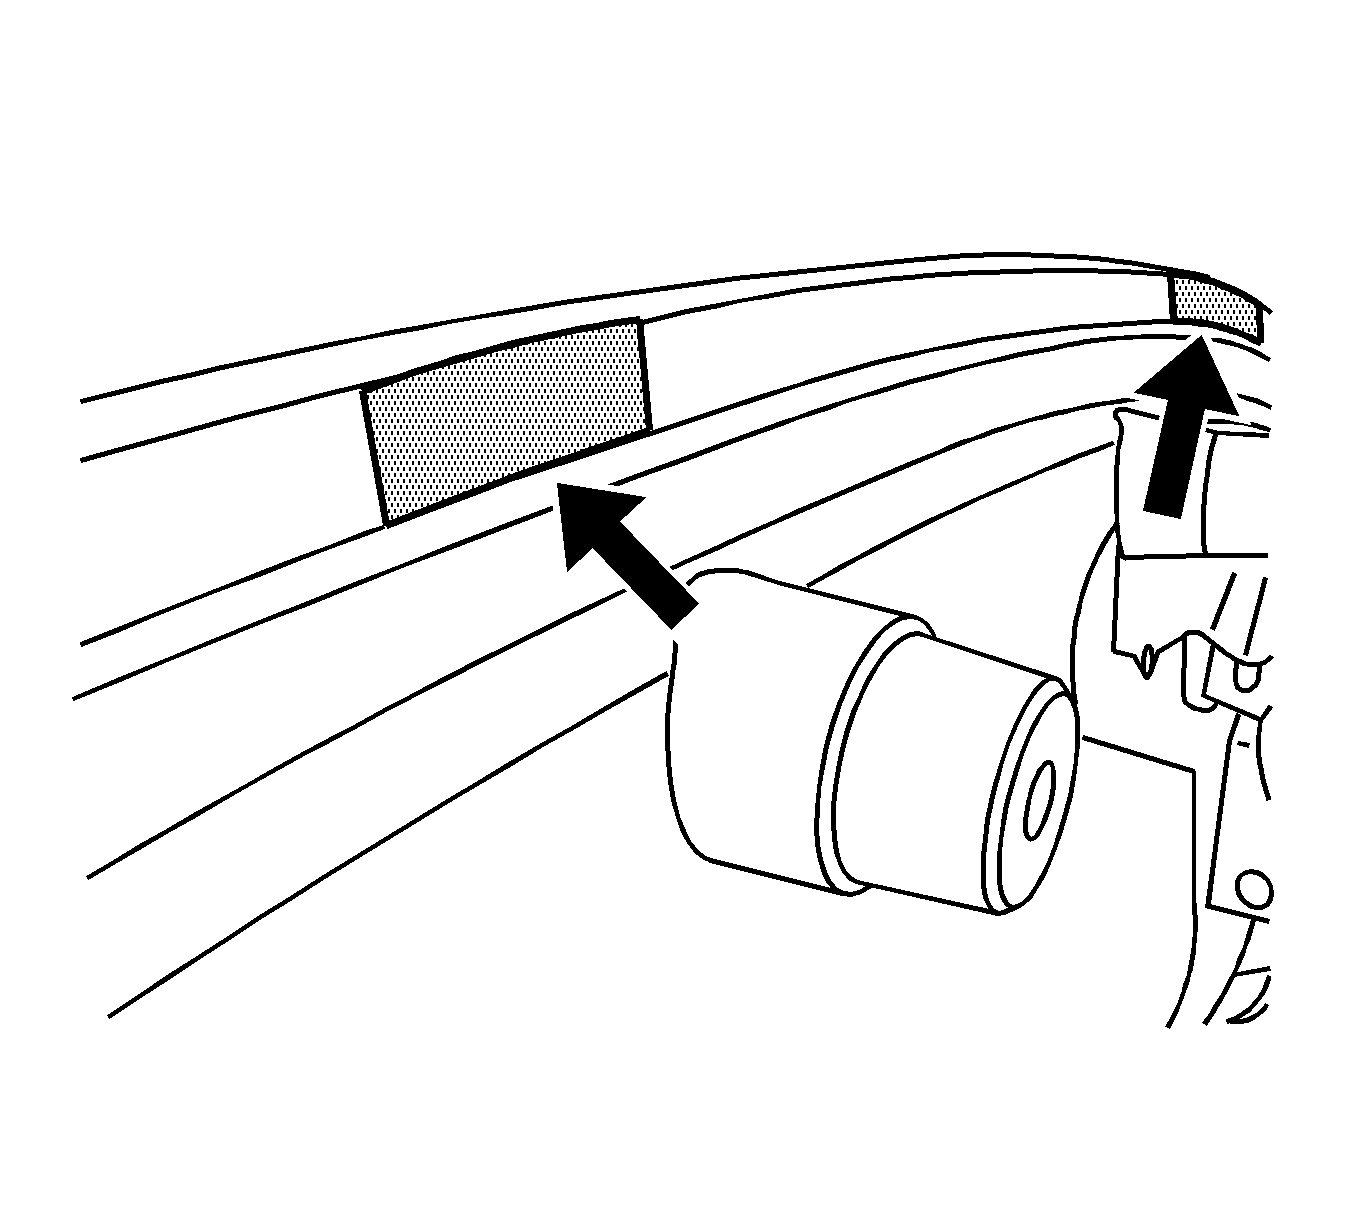
Clean the panel with alcohol and install two pieces of BRS Tape (flocking tap) to the bottom side on the tonneau panel.
Condition 7
Rear wheel well area metal creaking noise over bumps (either side of vehicle).
Cause 7
The metal bracket may be making contact with the shock.
Correction 7
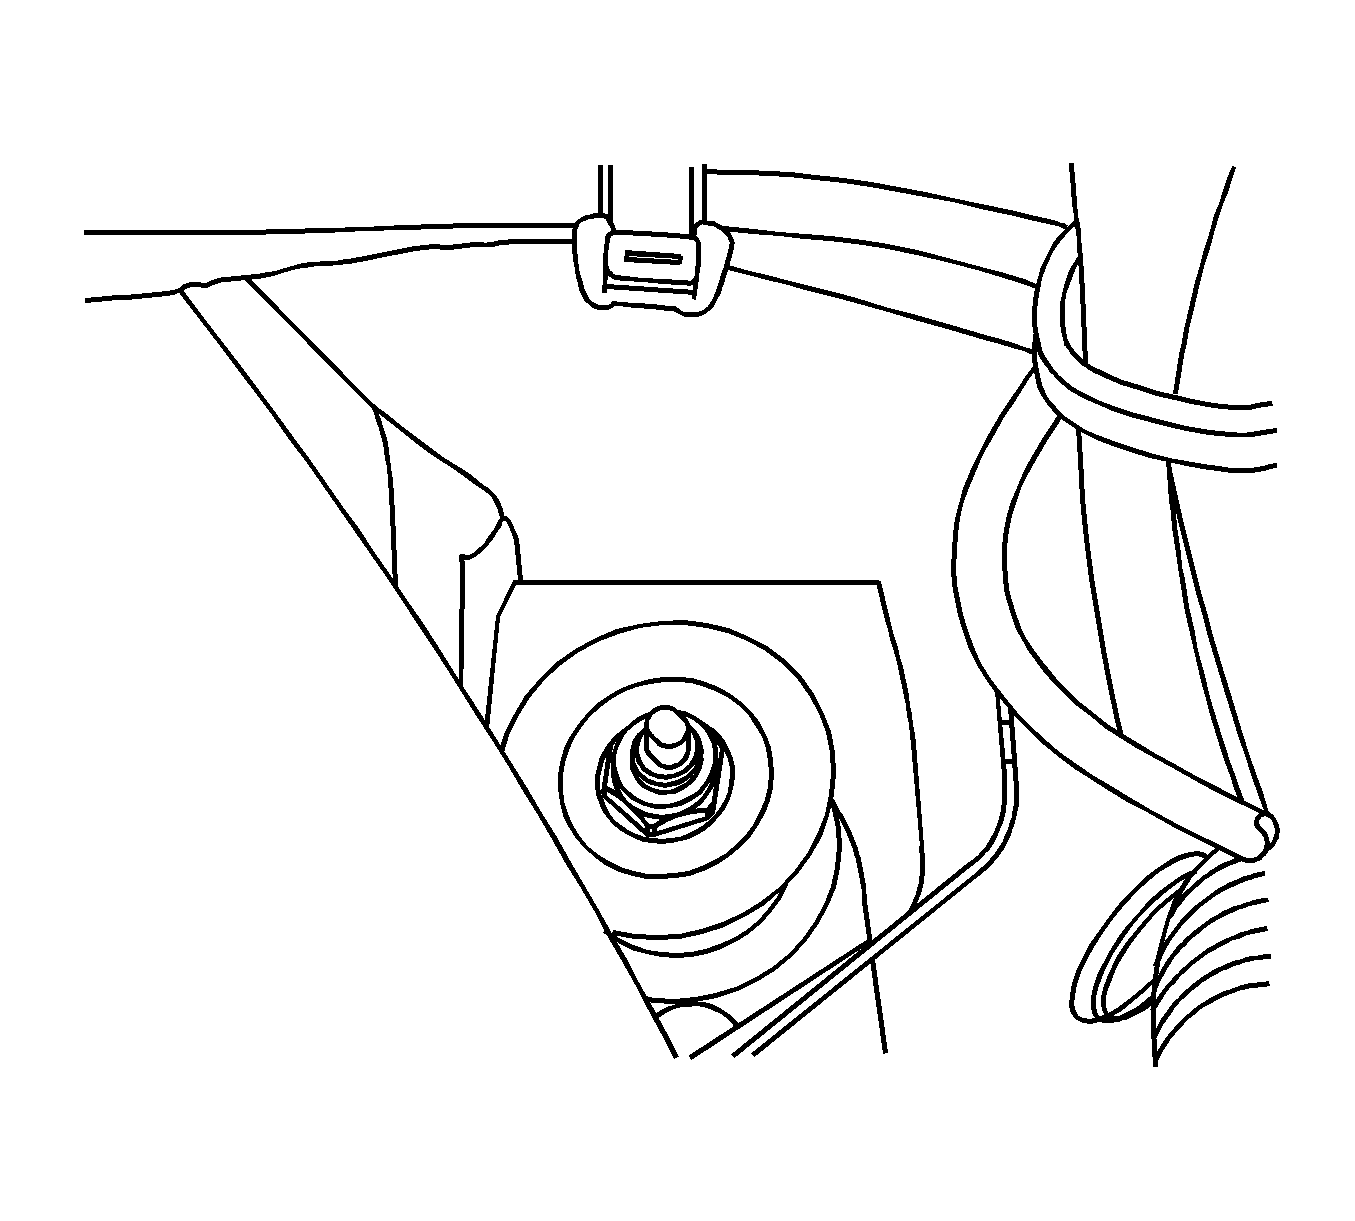
PROCEDURE FOR VEHICLE BUILT PRIOR TO 01/02/2007
Remove the trunk trim to gain access to the area and adjust the metal away from the shock.
Condition 8
Noise from rear trunk area over bumps.
Cause 8
The cylinder for the stowage compartment lid may be rattling.
Correction 8
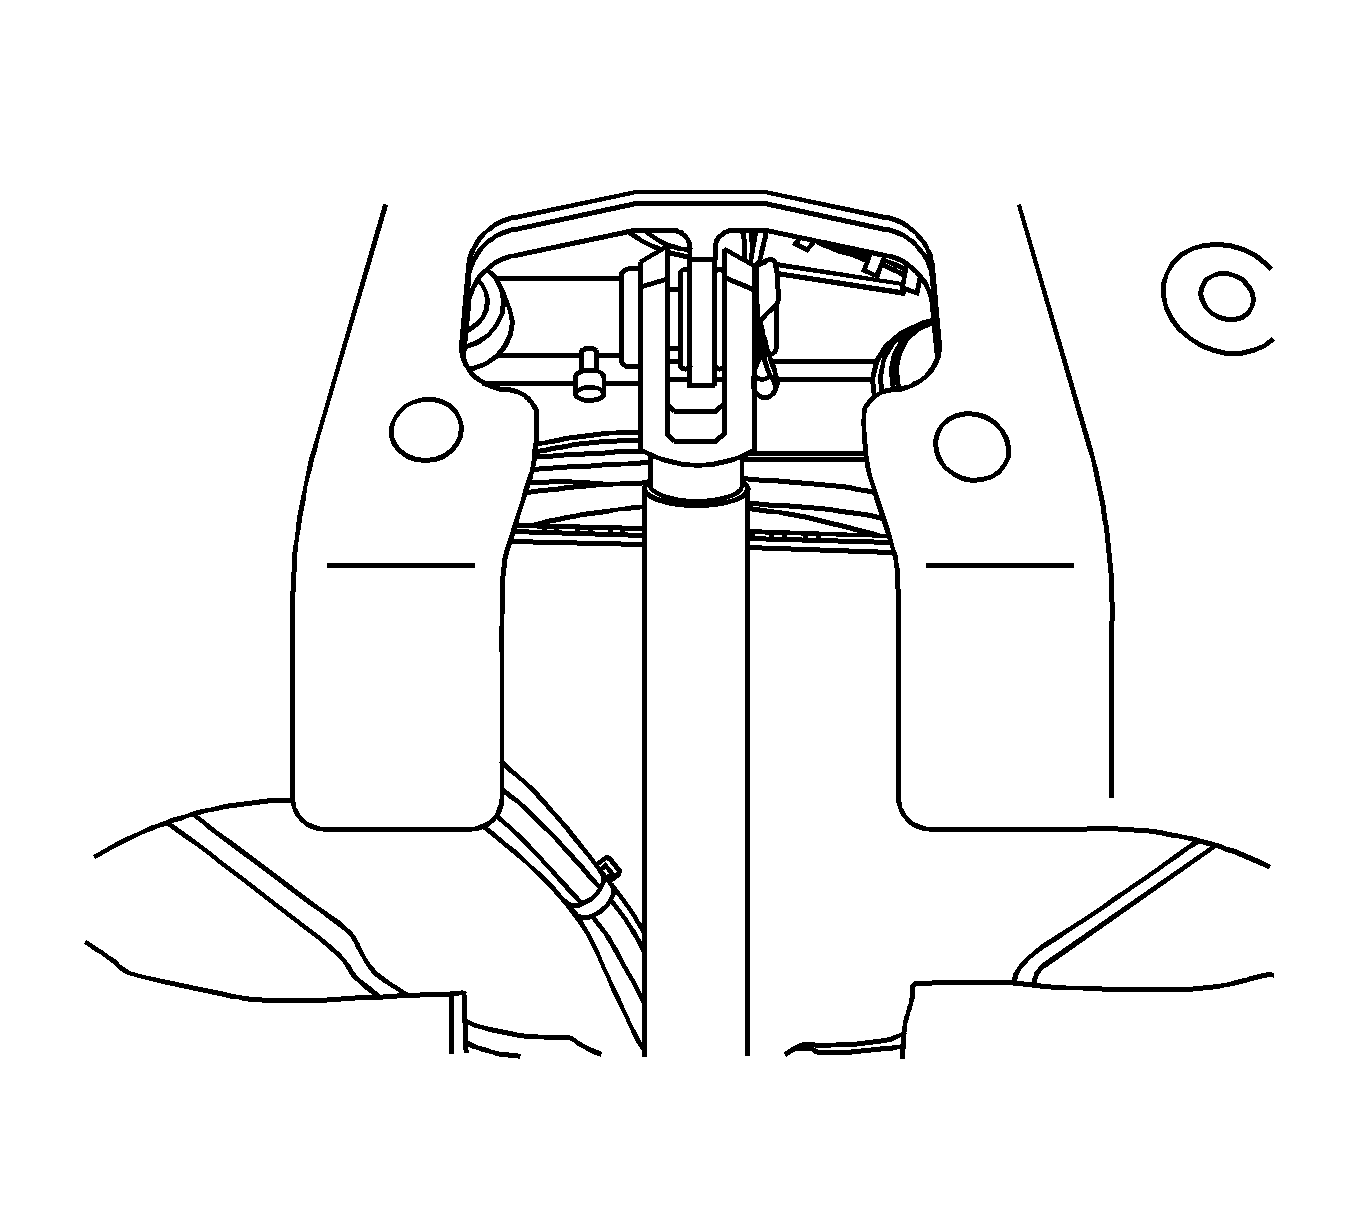
Remove the upper attachment pin and install a washer.
Parts Information
Purchase BRS Tape (Flocking Tape) and Anti-Squeak Film Tape from Kent Automotive.
| • | 1-888-YES-KENT Technical Service |
| • | 1-800-654-6333 Customer Service |
| • | Online at www.kentautomotive.com |
Part Number | Description | Qty |
|---|---|---|
12377900 (U.S.) | Dielectric Lubricant | 1 |
10953529 (Canada) | ||
25898407 | Sleeve | 2 |
15815546 | Grommet | 2 |
KT13512 | Anti-Squeak Film Tape |
|
KT13486 | Flocking Tape |
|
Warranty Information
Important: The intent of this bulletin is to identify the appropriate issues and apply the appropriate corrections pertaining to the customer's comments. Noting the build date of the vehicle VIN being serviced will also determine if the vehicle has already been built with the product issue update. To determine the final service labor operation time, use the initial base time and then apply the appropriate add times depending on the issue correction performed. Please note - only the items preformed on the vehicle being serviced should be used as the final repair time and the repair order must indicate the bulletin number and the condition numbers used.
For vehicles repaired under warranty, use:
Labor Operation | Description | Labor Time |
|---|---|---|
B9800* | Inspect Operation of Retractable Hard Top | 0.3 hr |
ADD | Adjust Pin Receiver, Install Rubber Sleeve (Condition 1) | 0.3 hr |
ADD | Adjust Panel to Panel Latch (Condition 1a) | 0.4 hr |
ADD | Adjust Bump Stop (Condition 1b) | 0.2 hr |
ADD | Adjust Roof Latch (Condition 2) | 0.6 hr |
ADD | Install Flocking Tape/Header Damper (Condition 2a) | 0.5 hr |
ADD | Adjust Sheet Metal -- Inner Quarter Panel (Condition 3) | 0.2 hr |
ADD | Adjust Door Pins (Condition 3a) | 0.2 hr |
ADD | Install Mylar Tape - Deck Lid (Condition 3b) | 0.1 hr |
ADD | Lubricate Weatherstrip Seals (Condition 4) | 0.3 hr |
ADD | Install Flocking Tape - Quarter Panel Belt Molding (Condition 5) | 0.2 hr |
ADD | Adjust Quarter Panel Belt Molding (Condition 5a) | 0.2 hr |
ADD | Adjust Window Glass Clip (Condition 5b) | 0.1 hr |
ADD | Adjust Flapper Doors and Install Flocking Tape Under Tonneau (Condition 6a) | 0.2 hr |
ADD | Install Flocking Tape Under Tonneau (Condition 6b) | 0.2 hr |
ADD | Adjust Sheet Metal (Shock Area) (Condition 7) | 0.4 hr |
ADD | Install Washer (Condition 8) | 0.1 hr |
*This is a unique labor operation for bulletin use only. It will not be published in the Labor Time Guide. | ||
