Rear Spoiler Replacement GXP Coupe D52
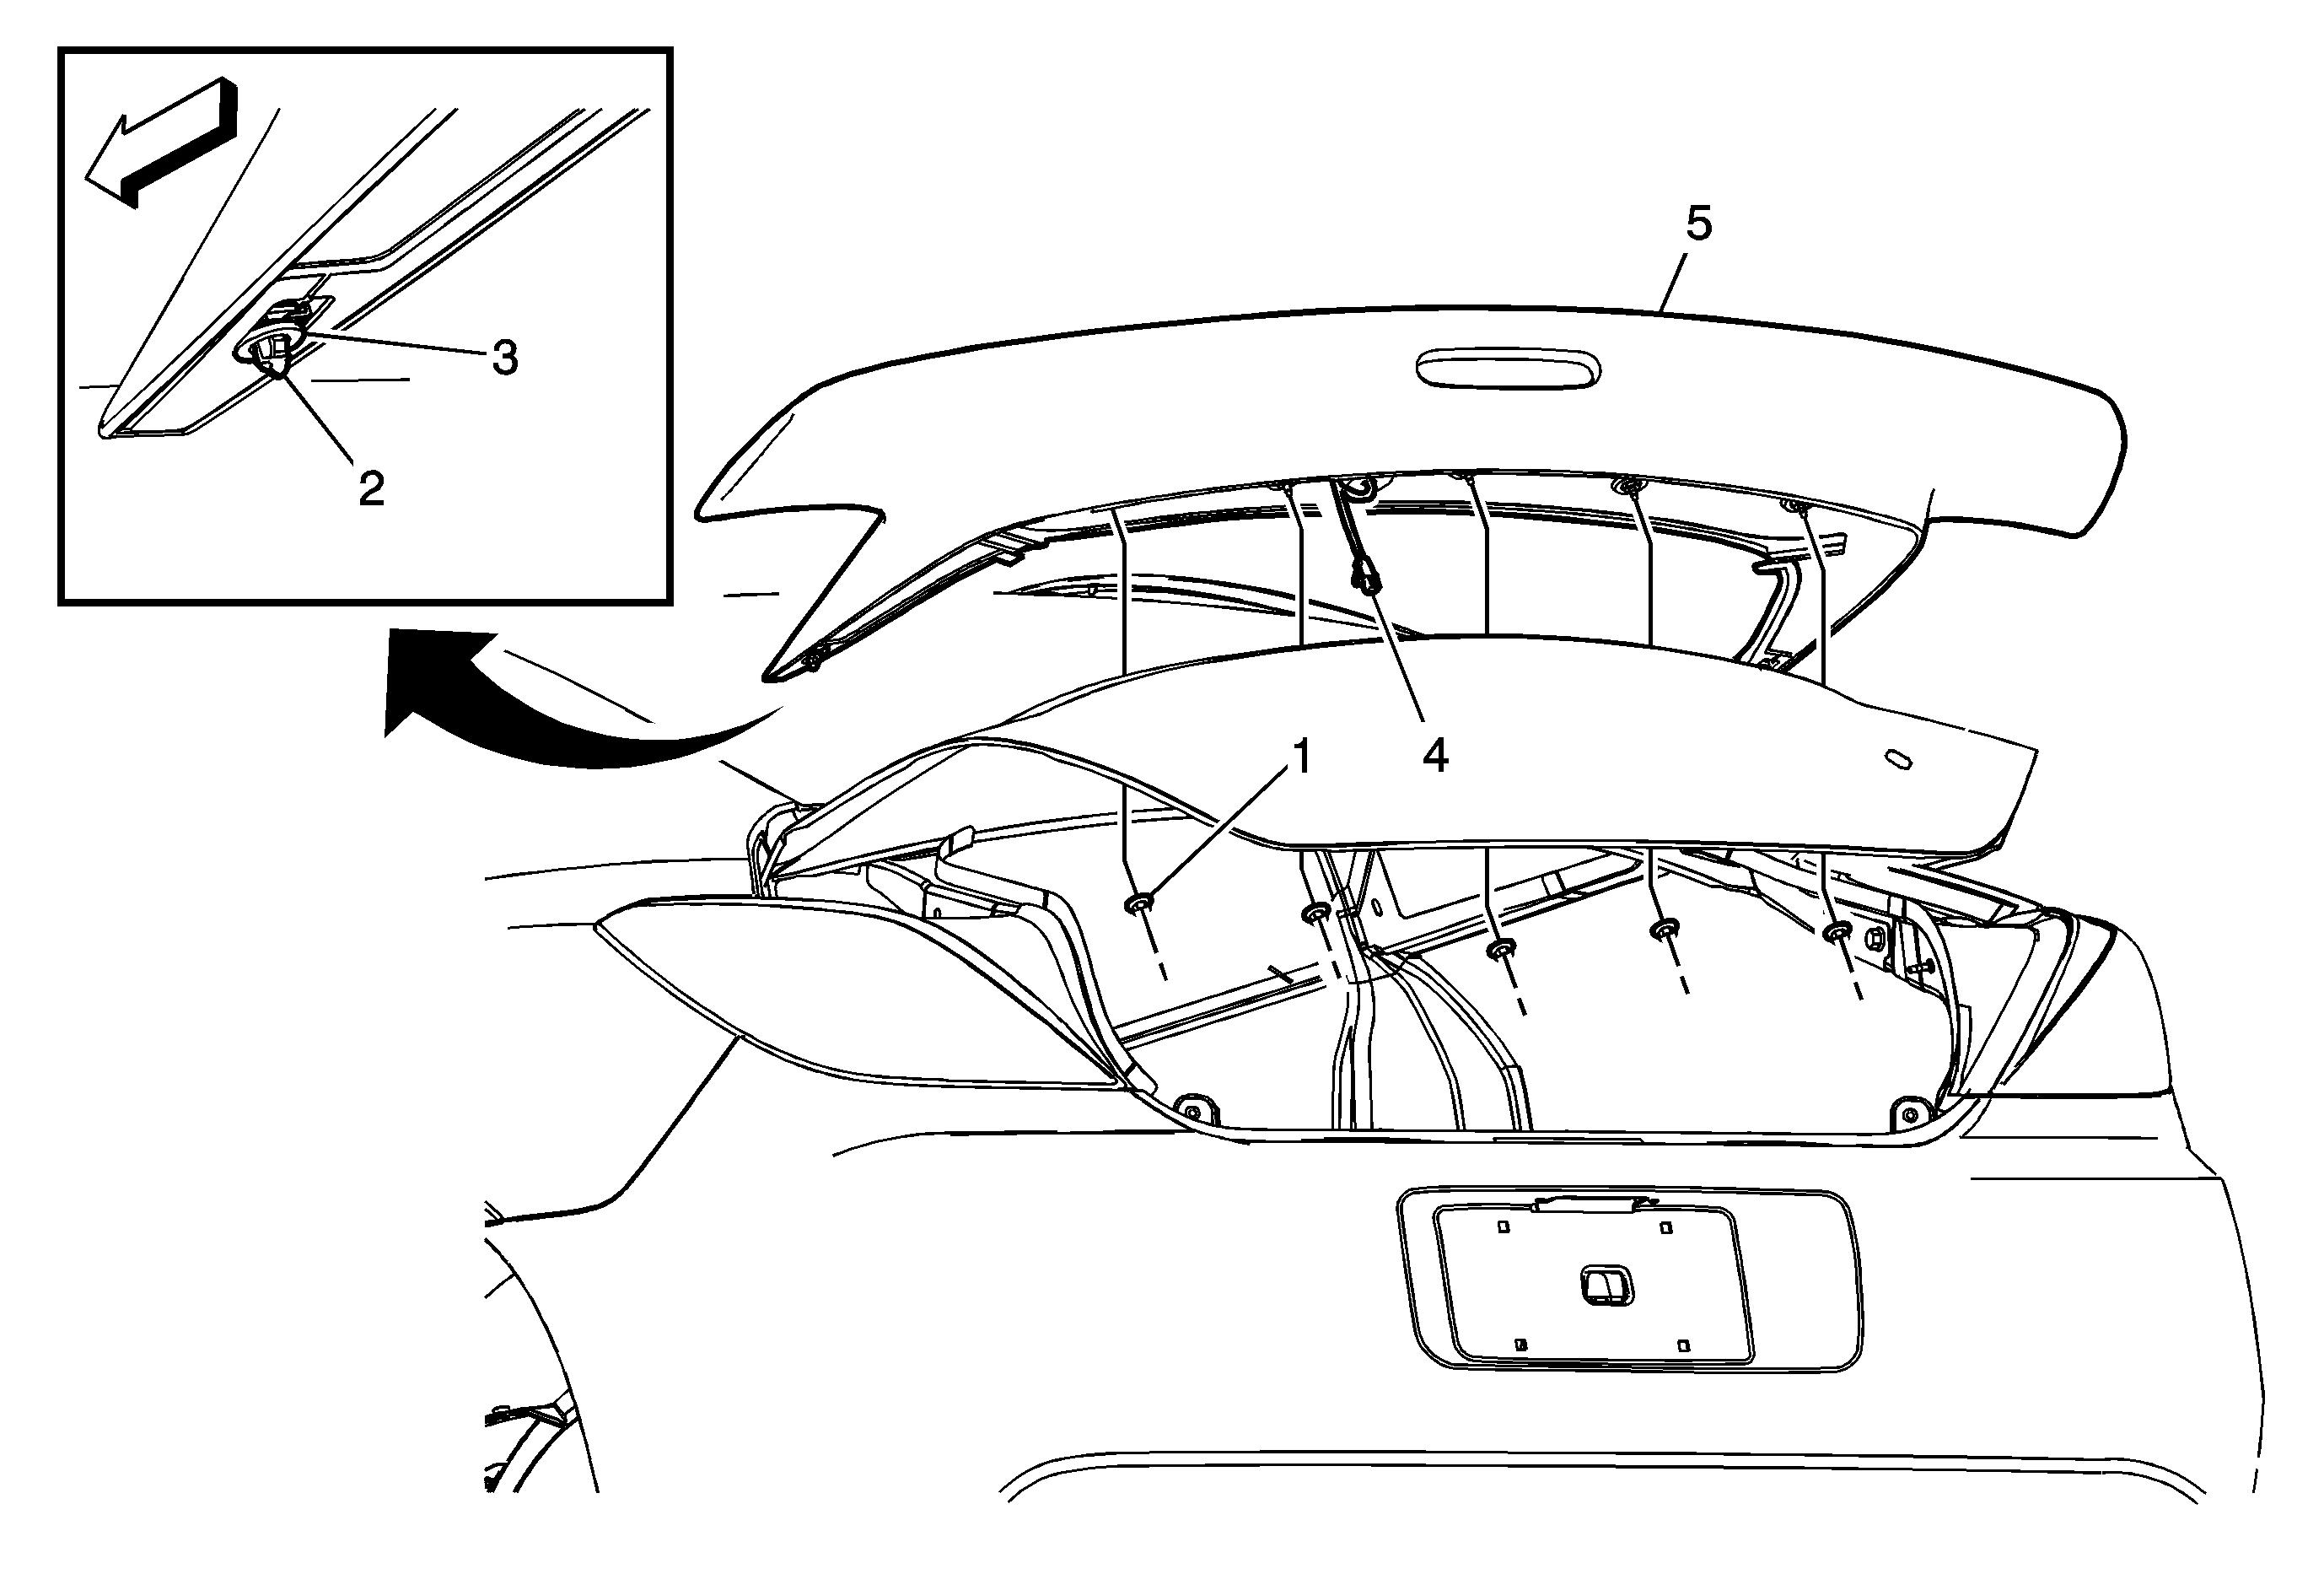
Callout | Component Name |
|---|---|
Preliminary ProcedureRemove the rear compartment lid inner panel trim. Refer to Rear Compartment Lid Inner Panel Trim Replacement. | |
1 | Rear Spoiler Assembly Nut (Qty: 5) Caution: Refer to Fastener Caution in the Preface section. Tighten |
2 | W-Clip (Qty: 2) Procedure
|
3 | Foam Seal (Qty: 2) |
4 | High Mount Stop Lamp Electrical Connector |
5 | Rear Spoiler Assembly Tip |
Rear Spoiler Replacement Sedan
Removal Procedure
- Open the rear compartment.
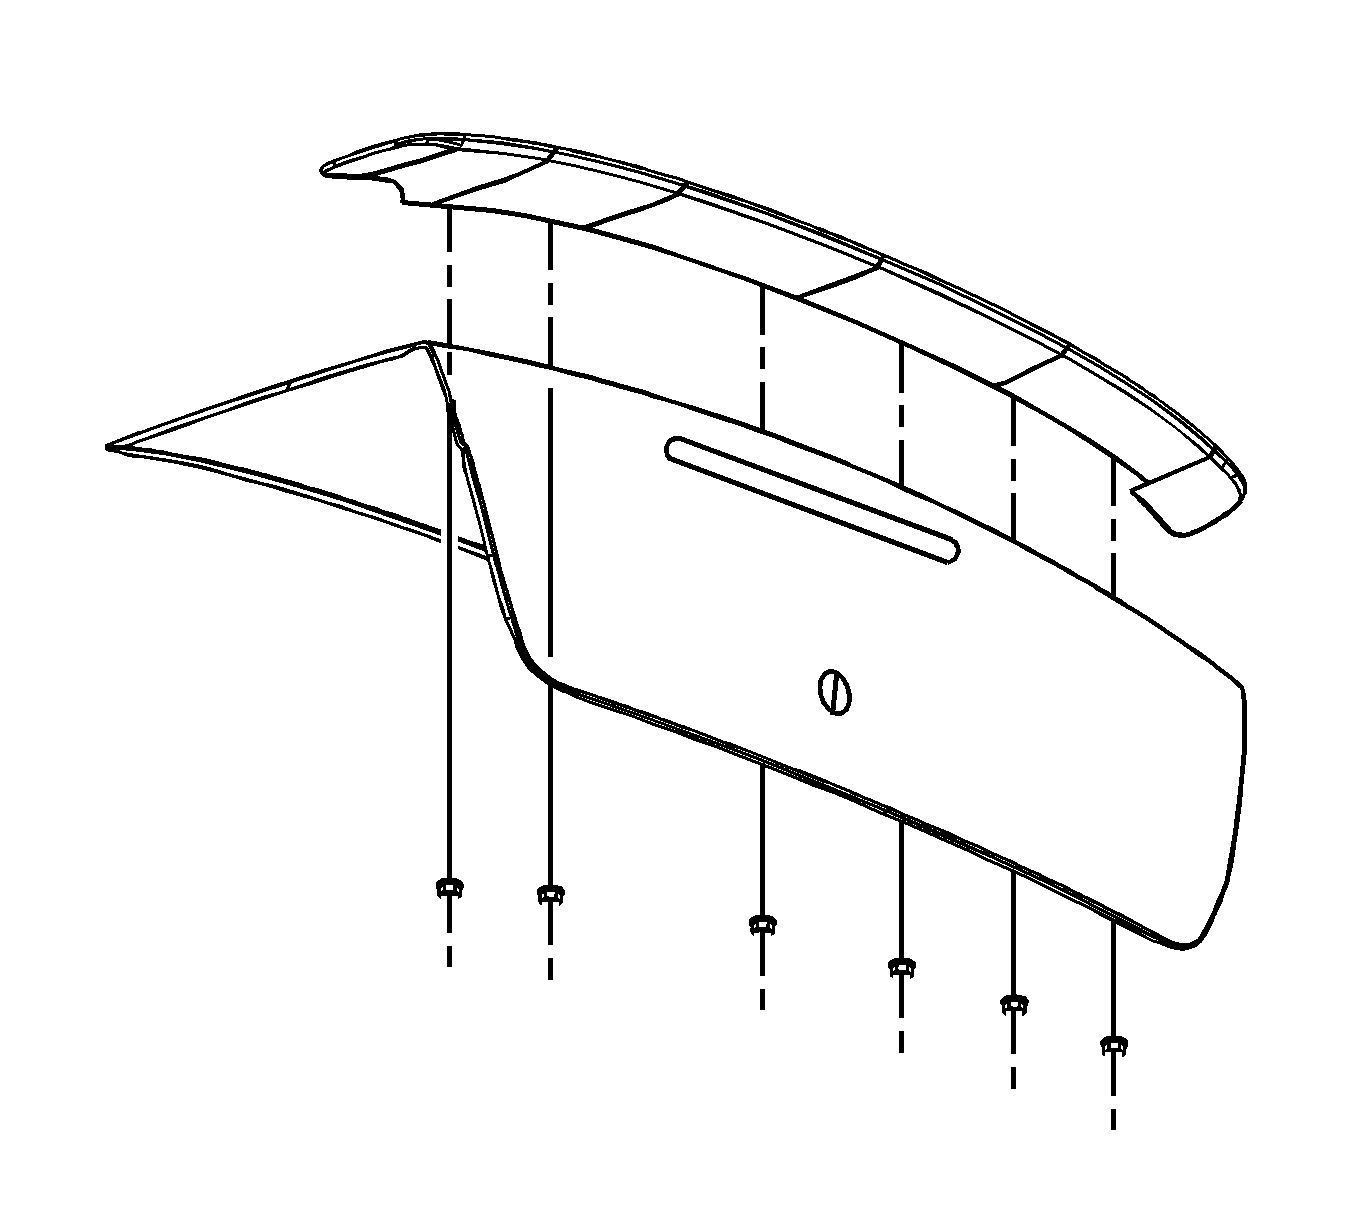
- Remove the nuts from the spoiler.
- Remove the spoiler from the rear compartment lid.
Caution: Use of harsh chemicals when cleaning can damage exterior lamps. Suggested cleaners are a mild soap and water, or Varnish Makers and Painters (VM&P) Naptha. VM&P Naptha is a specific type of naptha and should not be substituted by any other naptha.
Installation Procedure
- Position the studs of the spoiler into the clearance holes of the rear compartment lid.
- Install the nuts to the rear compartment lid spoiler.
- Close the rear compartment.

Caution: Refer to Fastener Caution in the Preface section.
Tighten
Tighten the nuts to 5 N·m (44 lb in).
Rear Spoiler Replacement GXP Sedan D52
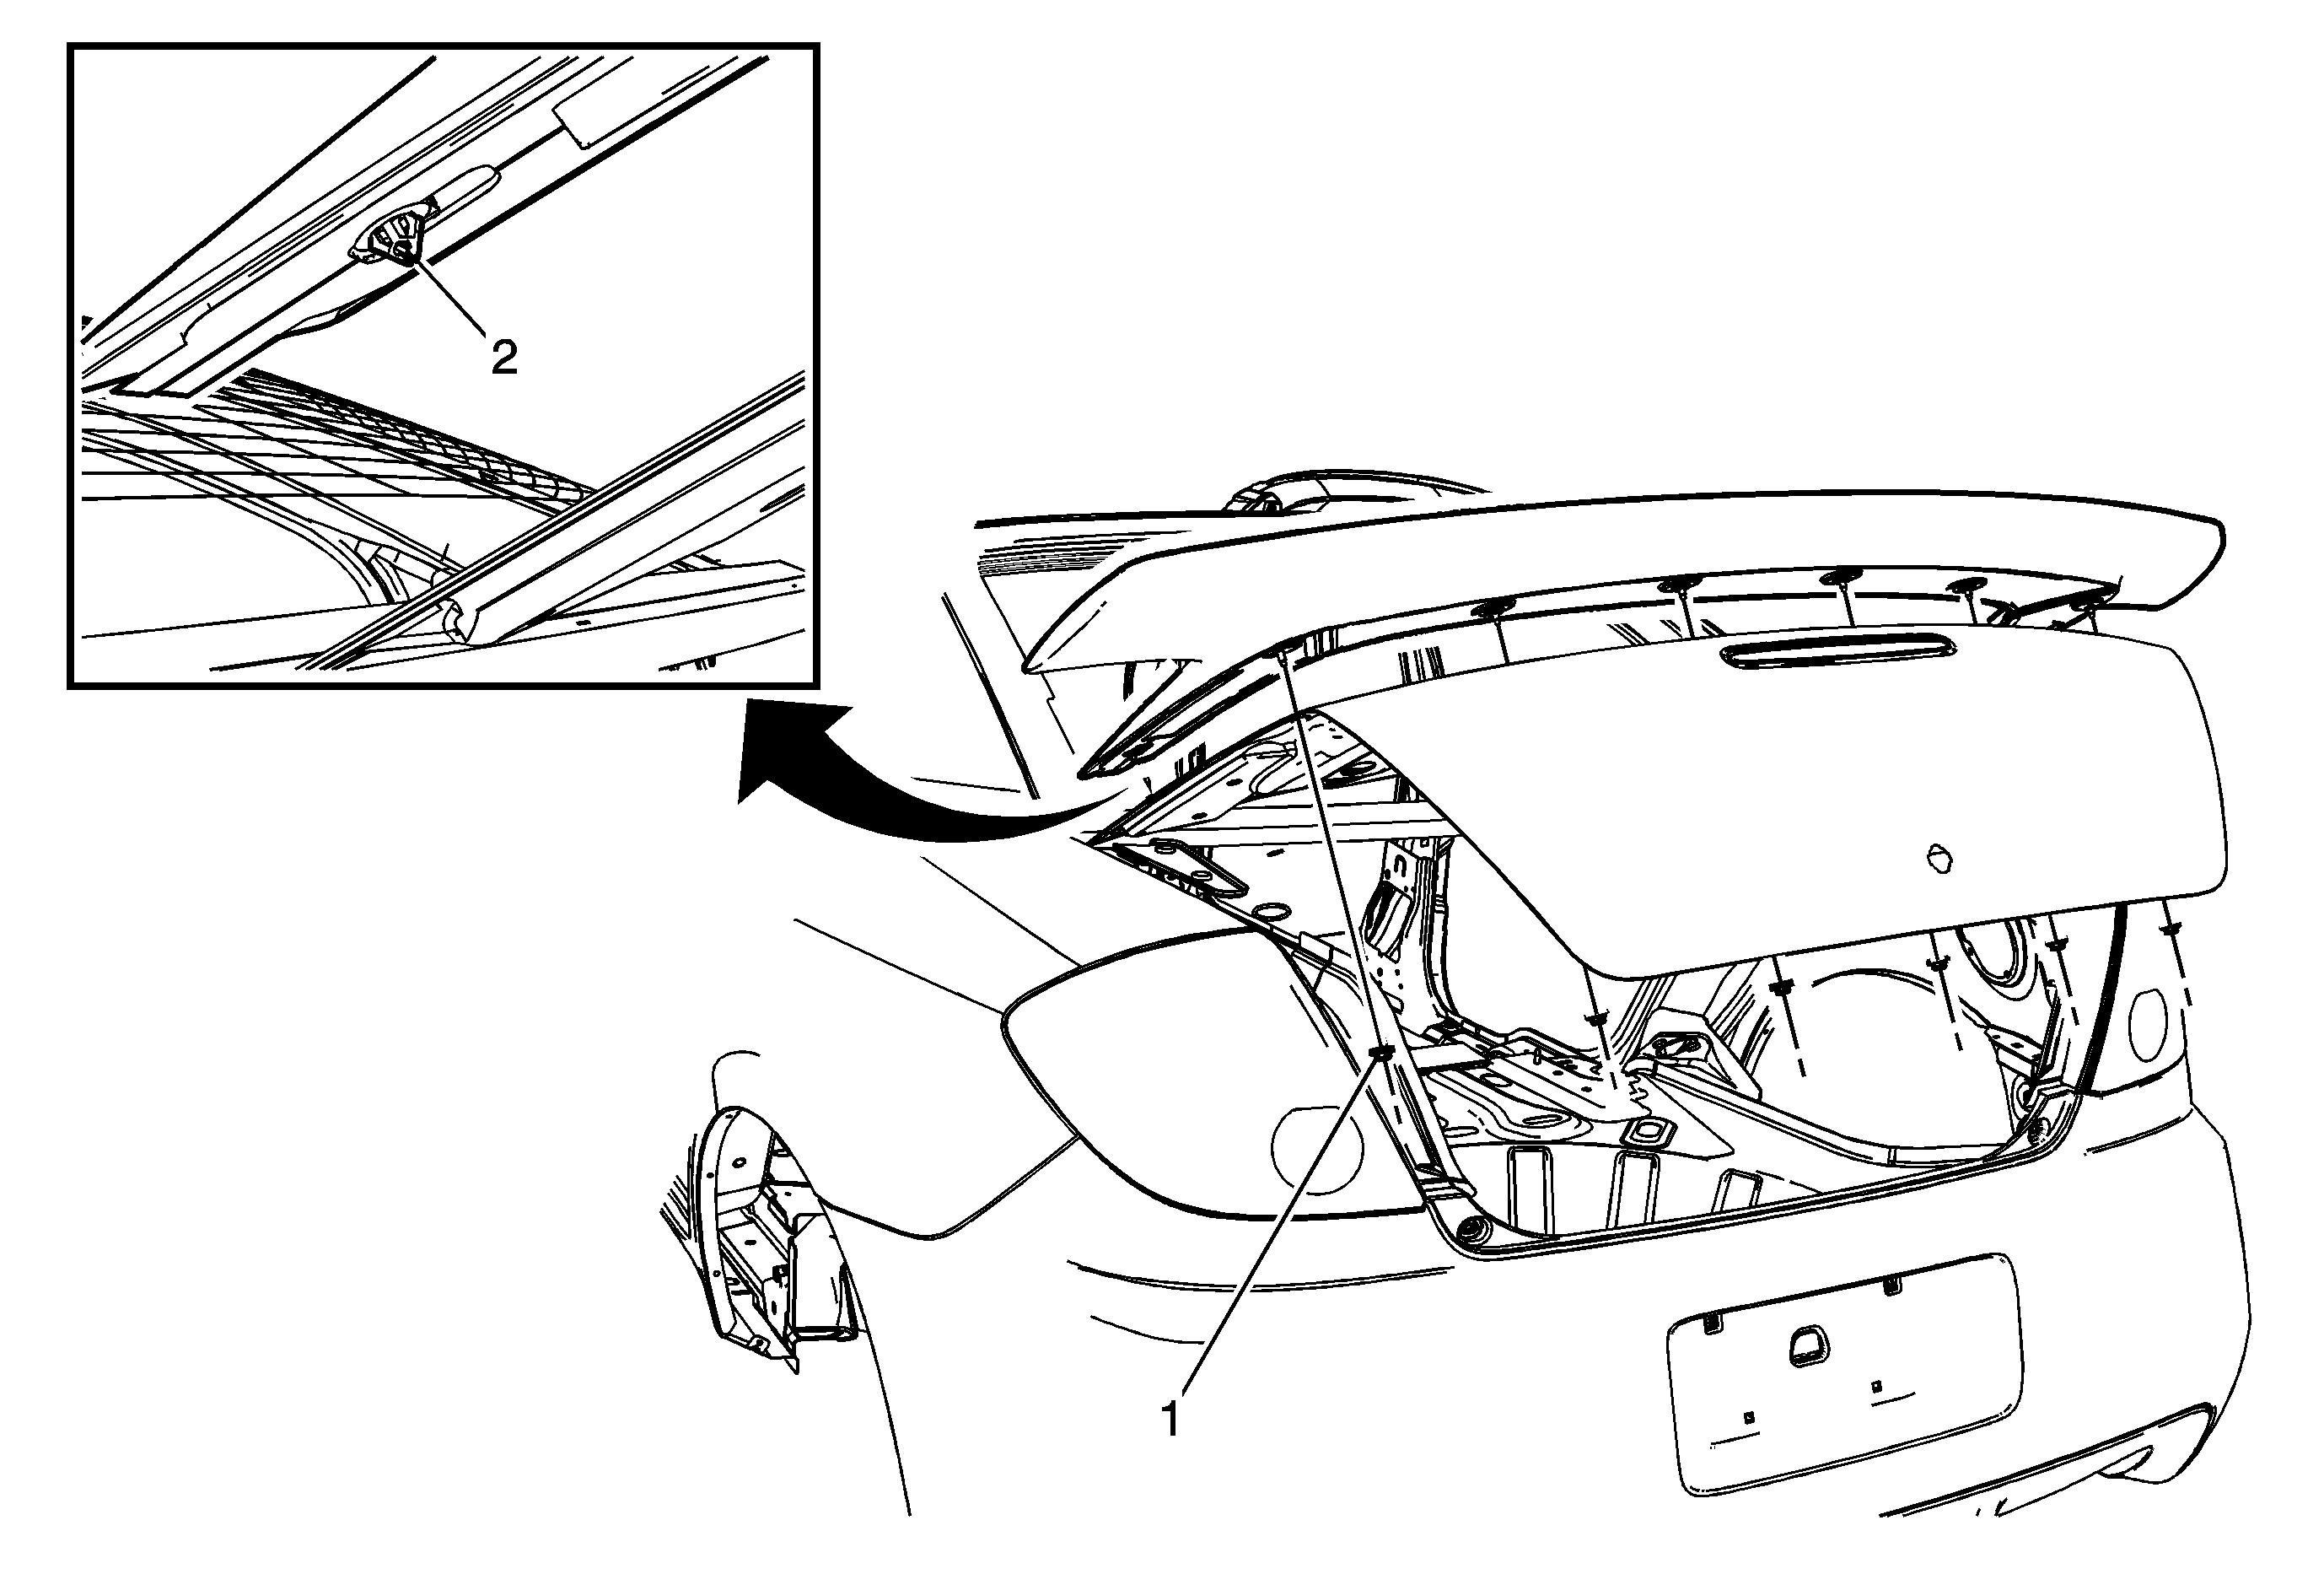
Callout | Component Name |
|---|---|
Preliminary ProcedureRemove the rear compartment lid inner panel trim. Refer to Rear Compartment Lid Inner Panel Trim Replacement. | |
1 | Spoiler Assembly Nut (Qty: 6) Caution: Refer to Fastener Caution in the Preface section. Tighten |
2 | W-Clip (Qty: 2) Procedure
|
Rear Spoiler Replacement Convertible T43
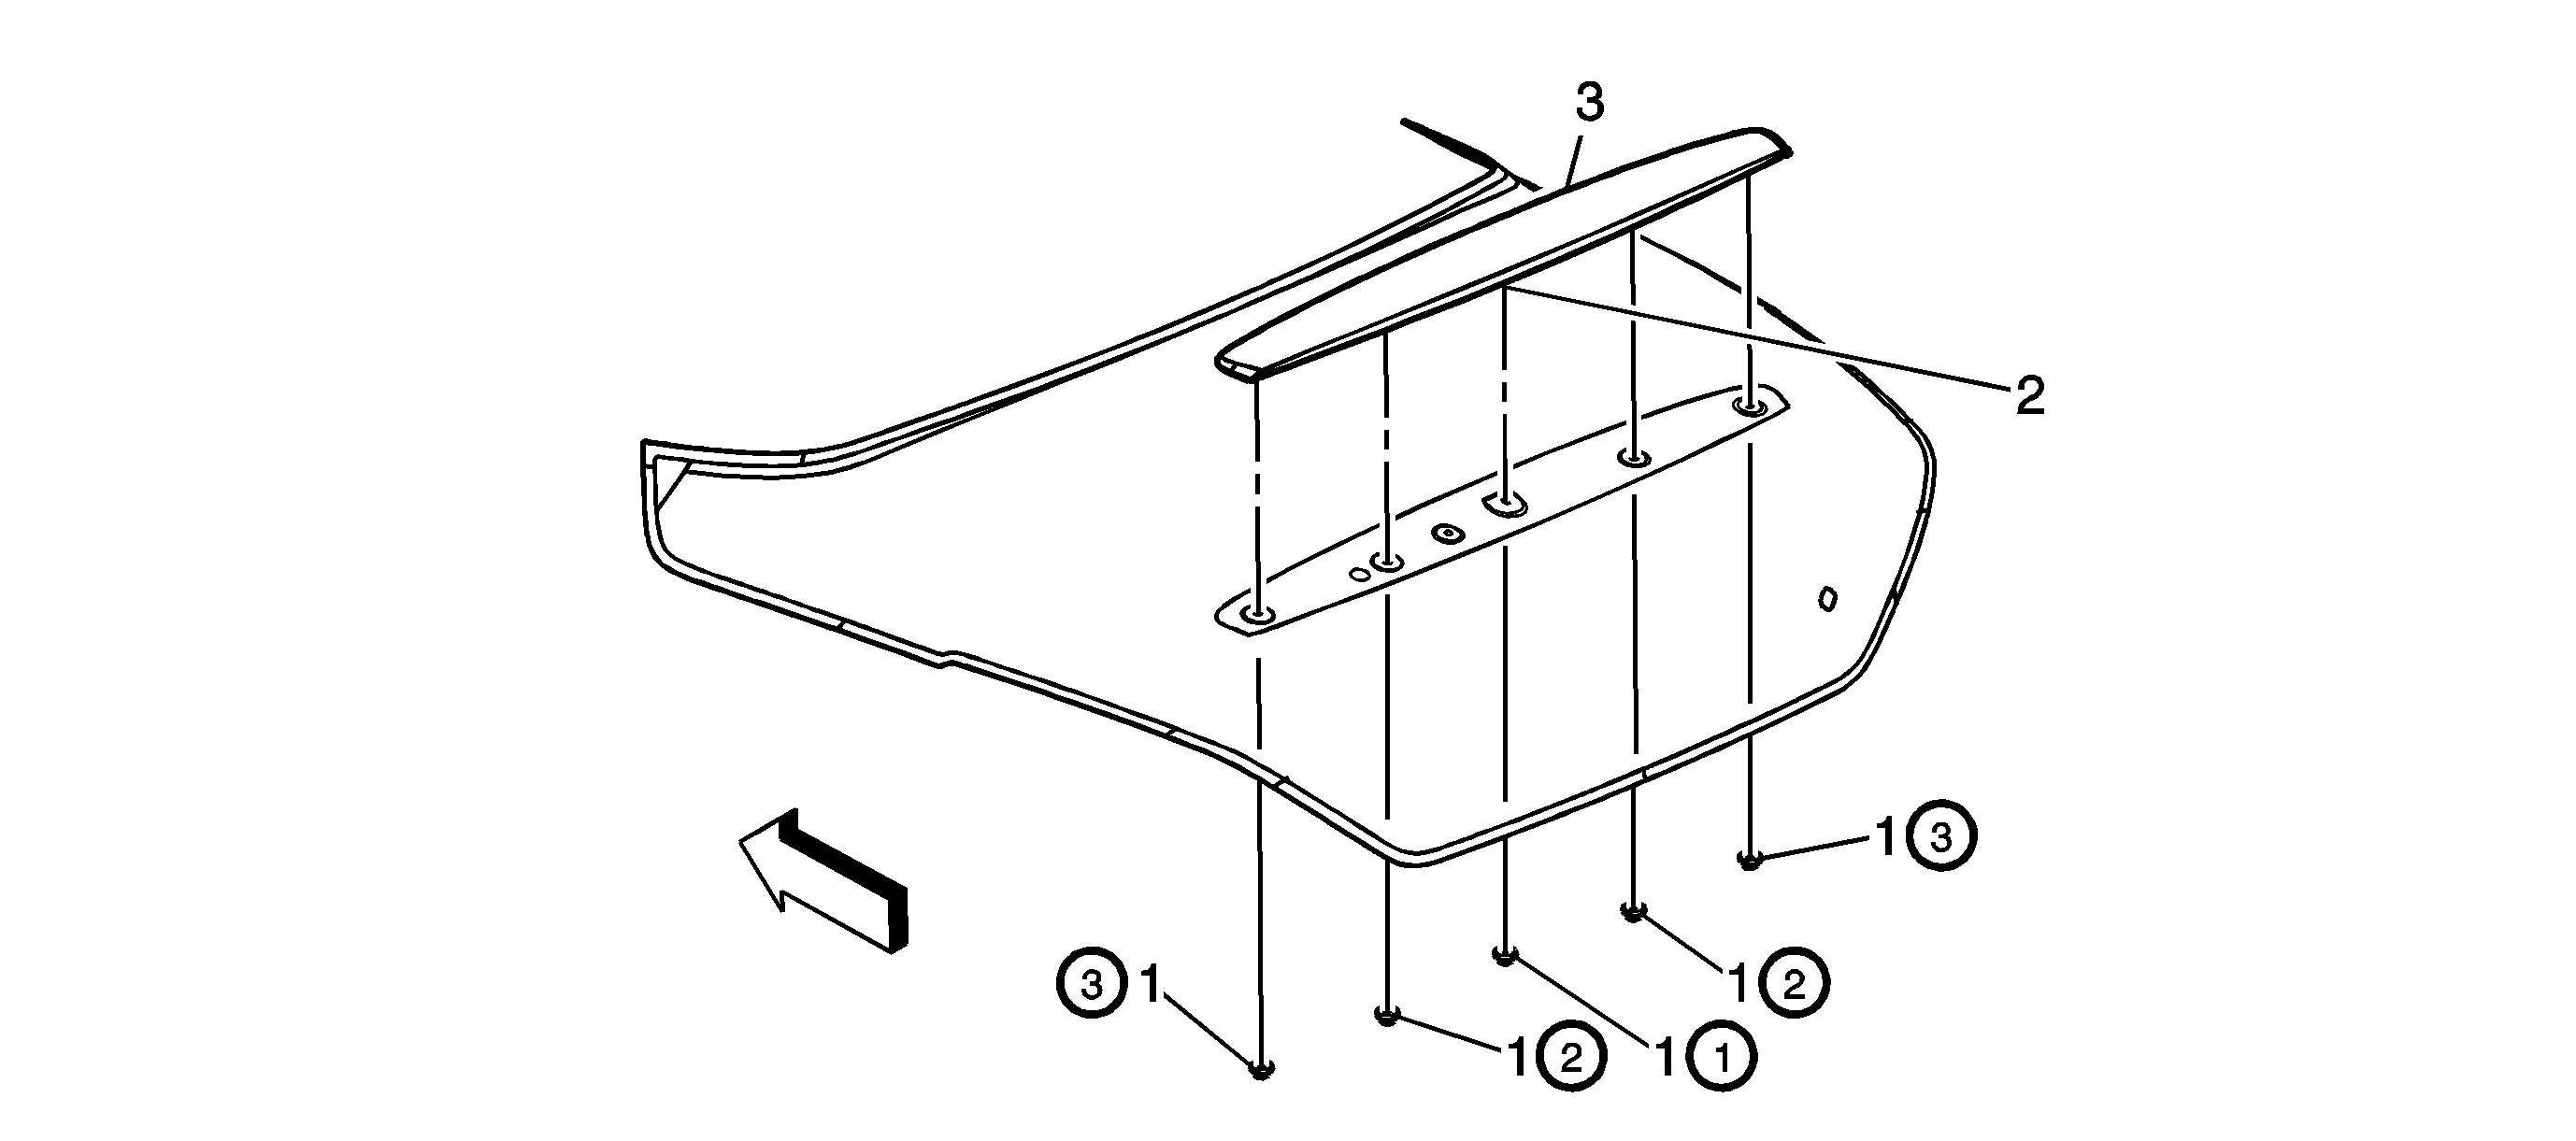
Callout | Component Name |
|---|---|
Preliminary ProcedureRemove the rear compartment lid inner panel trim. Refer to Rear Compartment Lid Inner Panel Trim Replacement. | |
1 | Rear Compartment Lid Applique Assembly Nuts (Qty: 5) Caution: Refer to Fastener Caution in the Preface section. Tighten |
2 | Integral Clip Procedure
|
3 | Rear Compartment Lid Applique Assembly |
Rear Spoiler Replacement Sedan TTV
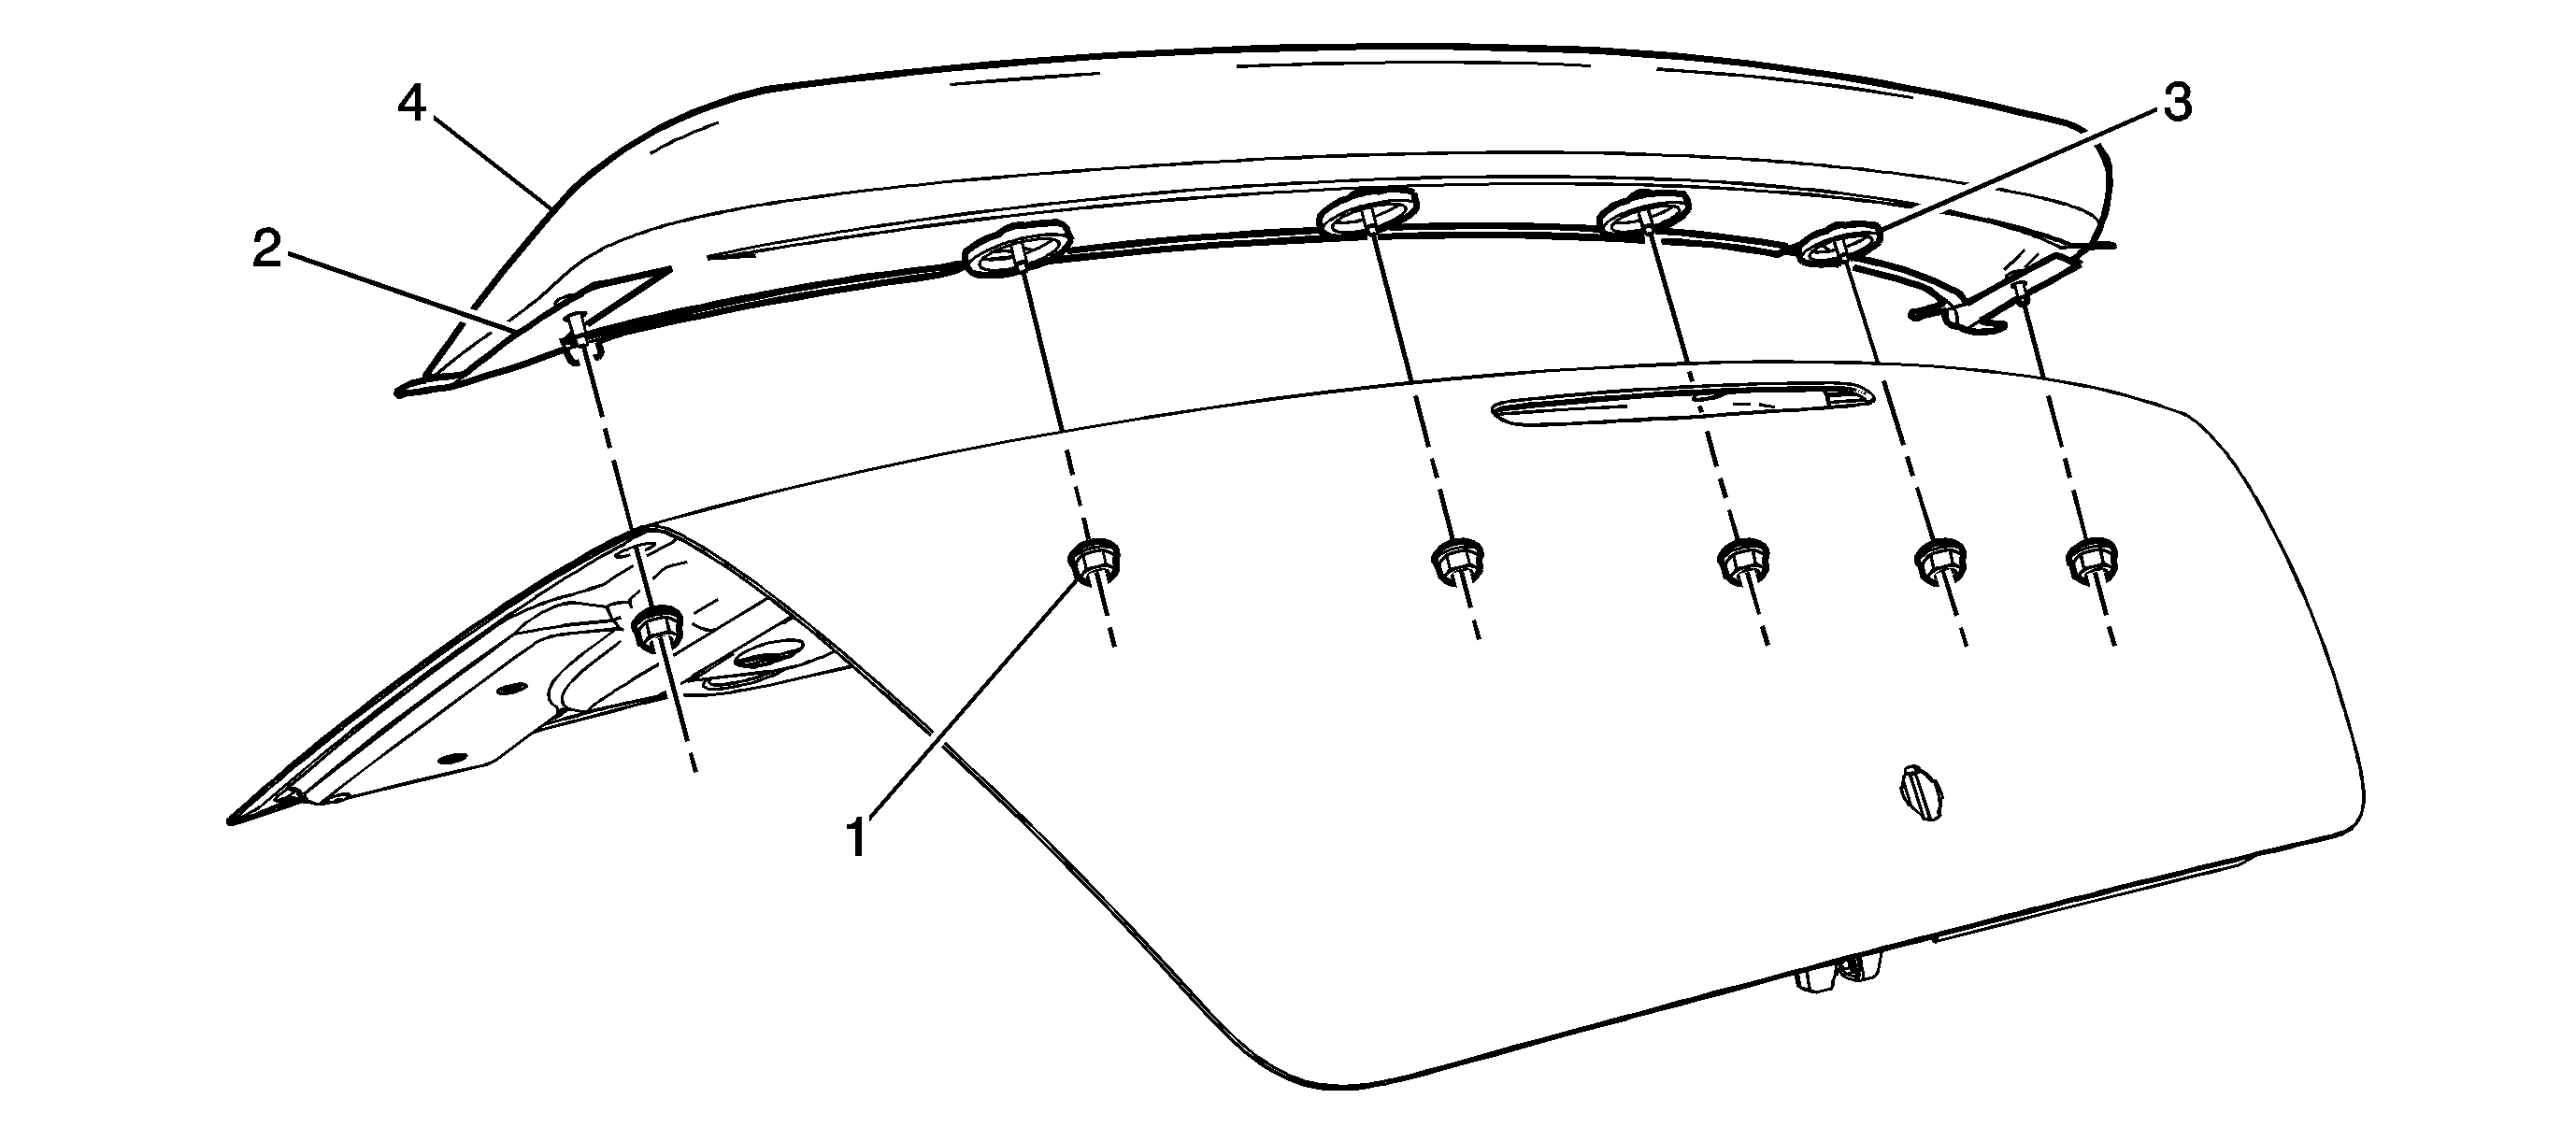
Callout | Component Name |
|---|---|
1 | Rear End Spoiler Assembly Nut (Qty: 6) Caution: Refer to Fastener Caution in the Preface section. Tighten |
2 | Adhesive Tape Tip |
3 | Weather Seal (Qty 4) Tip |
4 | Rear End Spoiler Assembly |
