Special Tools
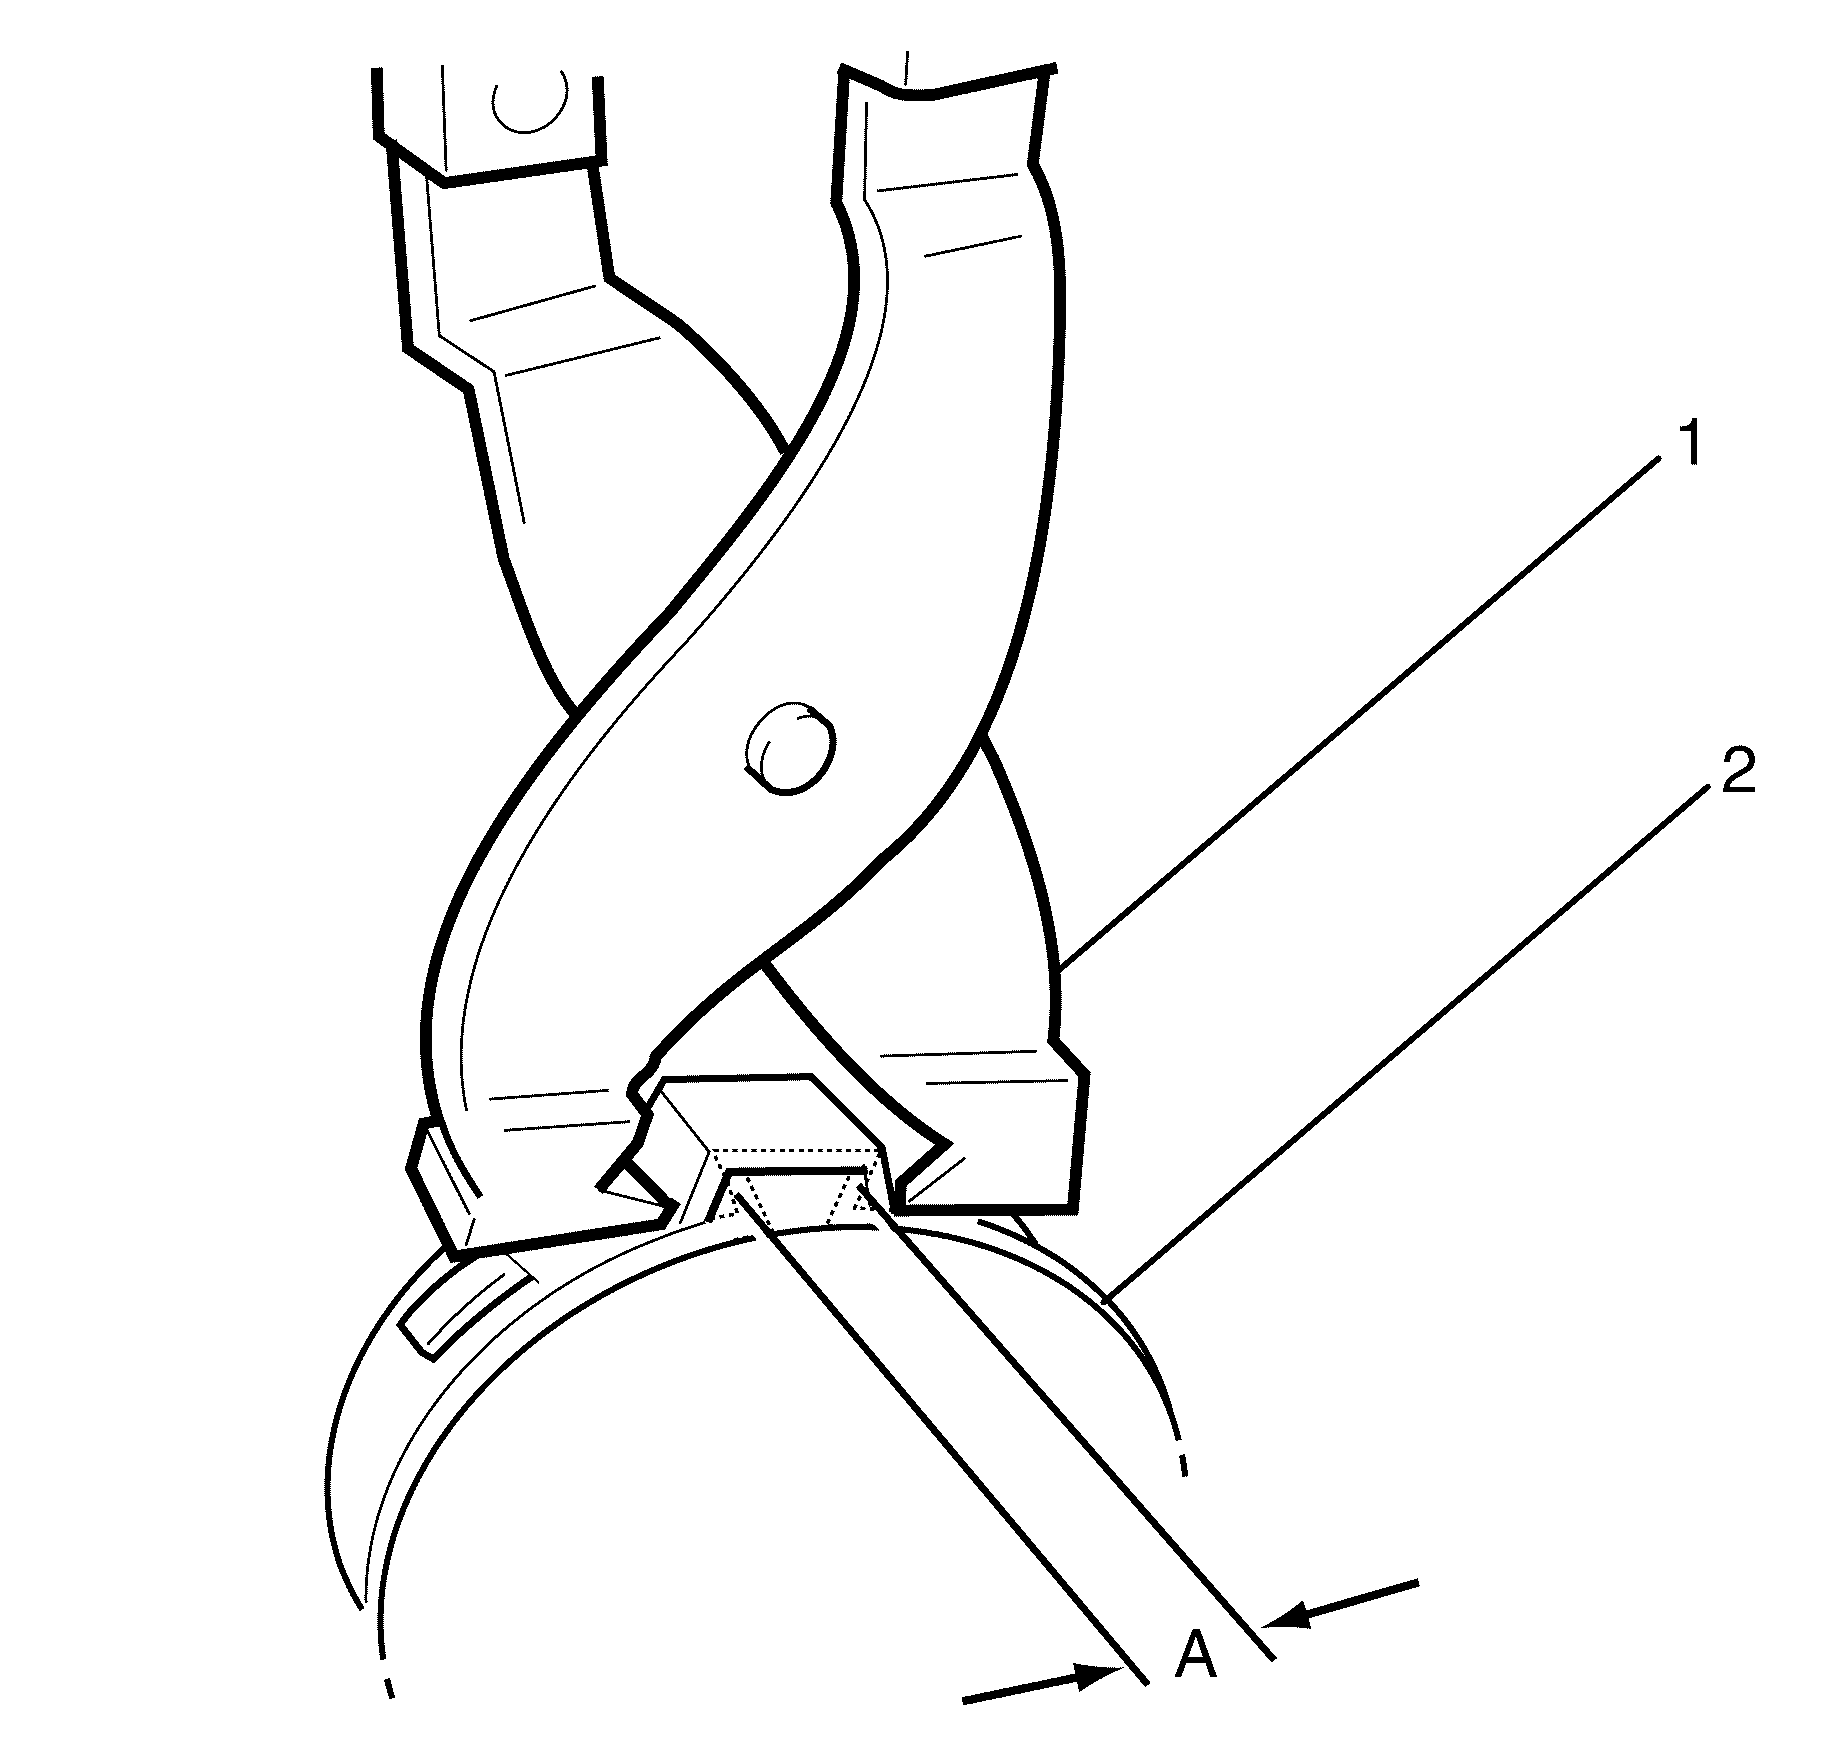
J 22610 Keystone Pliers
Removal Procedure
- Raise and support the vehicle. Refer to Lifting and Jacking the Vehicle.
- Remove the wheel drive shaft from the vehicle. Refer to Wheel Drive Shaft Replacement.
- Remove inner constant velocity joint and joint boot. Refer to Wheel Drive Shaft Inner Joint and Boot Replacement.
- Remove the outer joint boot large retaining clamp (1) and the outer joint boot small retaining clamp (2) from the outer joint boot (3).
- Remove the outer joint boot (2) from the outer constant velocity joint (1) along the interconnecting shaft (3).
- Clean the grease from the interconnecting shaft (3) and outer constant velocity joint (1).
Warning: Refer to Safety Glasses Warning in the Preface section.
Danger: To avoid any vehicle damage, serious personal injury or death when major components are removed from the vehicle and the vehicle is supported by a hoist, support the vehicle with jack stands at the opposite end from which the components are being removed and strap the vehicle to the hoist.
Note: When the outer joint boot is replaced the inner joint boot must always be replaced.

Note: The outer joint boot small retaining clamp (2) and outer joint boot large retaining clamp (1) are single use parts and must be discarded after use.
Discard the clamps.

Discard the outer joint boot.
Note: All traces of old grease and any contaminates must be removed.
Installation Procedure
- Install the NEW outer joint boot (2) along the interconnecting shaft (3).
- Install the NEW outer joint boot (2) to the outer constant velocity joint (1).
- Use J 22610 (1) to crimp retaining clamp (2). The crimped distance (A) must be between 1.2-4 mm.
- Position the NEW outer joint boot large retaining clamp (1) and the NEW outer joint boot small retaining clamp (2) to the NEW outer joint boot (3).
- Crimp the NEW outer joint boot large retaining clamp (1) and NEW outer joint boot small retaining clamp (2) to the NEW outer joint boot (3).
- The outer constant velocity joint dimension A is 248 mm (9.8 in) for V6 and 254.3 mm (10 in) for V8.
- Fully cycle the outer constant velocity joint several times to disperse grease throughout the outer constant velocity joint.
- Install the inner constant velocity joint and joint boot. Refer to Wheel Drive Shaft Inner Joint and Boot Replacement.
- Install the wheel drive shaft to the vehicle. Refer to Wheel Drive Shaft Replacement.
- Remove the safety stands.
- Lower the vehicle to the ground.

Note: Install grease into the outer constant velocity joint (1) and the NEW outer joint boot (2). Refer to Adhesives, Fluids, Lubricants, and Sealers.


Note: The NEW outer joint boot (1) must not be dimpled, stretched, or deformed. Always equalize the air pressure in the NEW outer joint boot with the joint in the center of its plunge position and shape properly by hand.
