For 1990-2009 cars only
Removal Procedure
- Using a suitable tool remove the inside door handle to door retaining screw cover (1) from the door trim panel (3).
- Remove the inside door handle to door retaining screw (2).
- Remove the door trim panel to door retaining screws (1).
- Detach the top of the door trim panel in order to release the inner belt seal clips (1).
- Remove the door trim panel from the door to allow access to door handle cable, door lock cable.
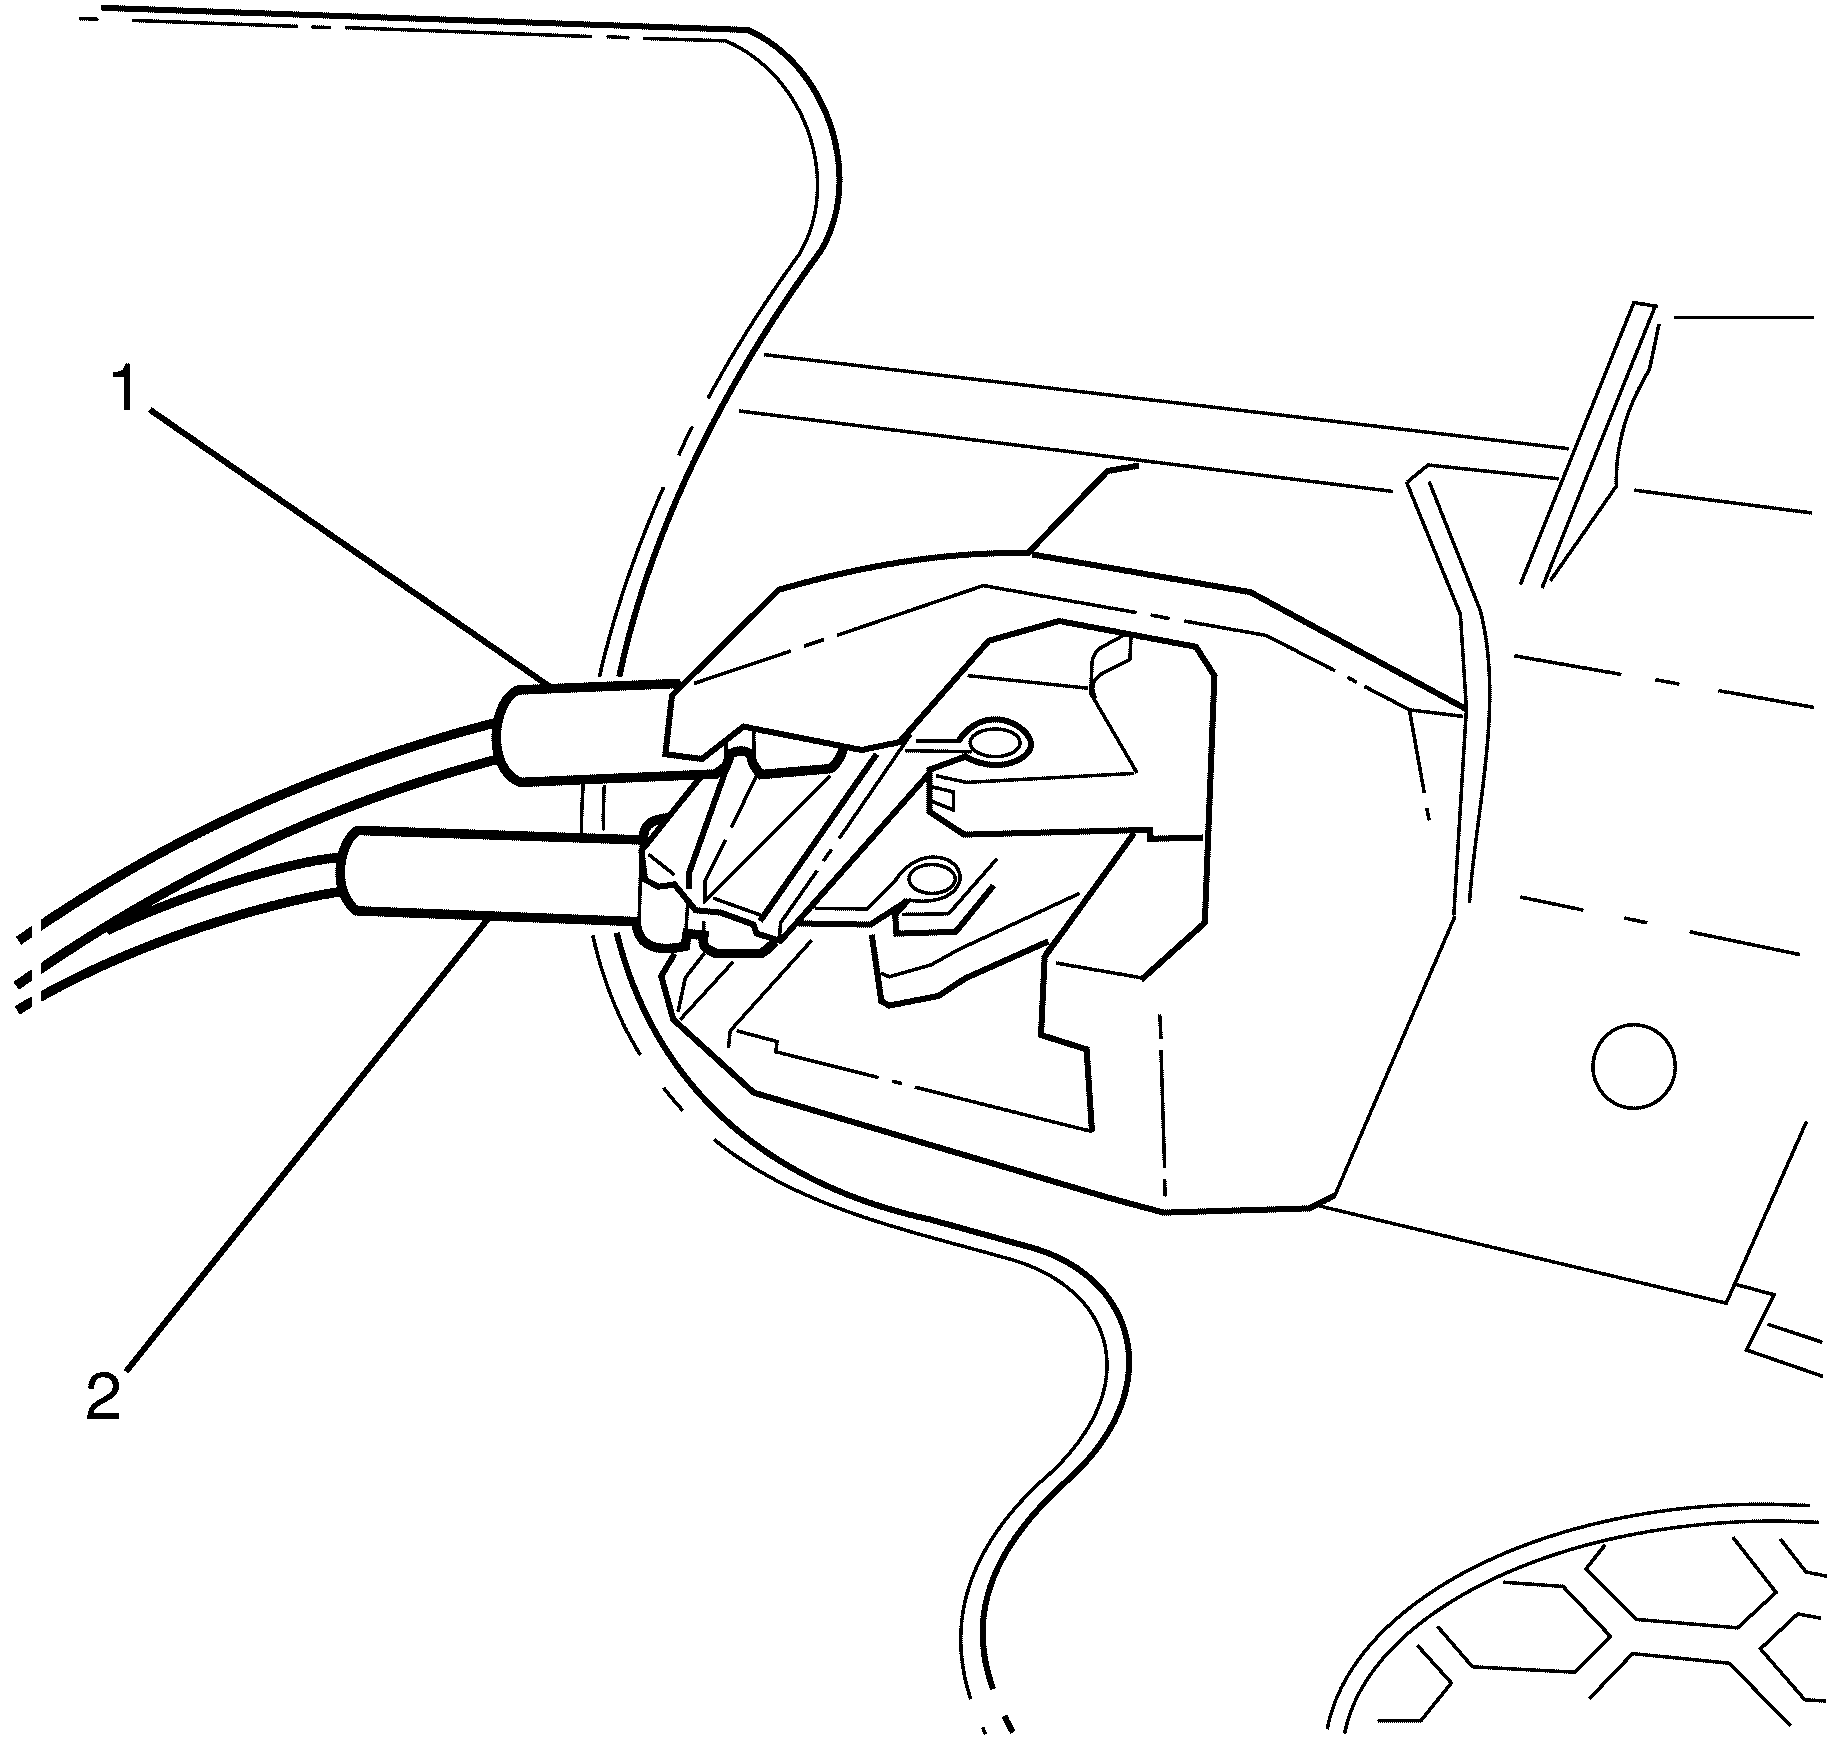
- Disconnect the inside door handle cable (1) and door lock cable (2) from the door trim panel.
- Remove the door trim panel from the door.


Note: Firmly pull the armrest handle outwards to release the door trim panel to door retaining clips.

Note: The door handle and lock cables slide out and lift up to remove from the door trim panel.
Installation Procedure
- Make sure that all of the retaining clips are on the door trim panel and not still attached to the sheetmetal.
- Position the door trim panel to the door.
- Connect the inside door handle cable (2) and door lock cable (1) to the door trim panel.
- Position the door trim panel (3) to the door.
- Install the door trim panel to door retaining screws (1) and tighten to 3 N·m (27 lb in).
- Install the inside door handle to door trim panel retaining screw (2) and tighten to 3 N·m (27 lb in).
- Install the inside door handle to door retaining screw cover (1) to the door trim panel (3).
Note: The green retaining clips are along the front edge and the white retaining clips are along the back edge.
Note: Do not fully install the door trim panel at this stage. The inside door handle cable and door lock cable have to be attached first.

Note: The door handle and lock cables slide down and in to the door trim panel to install.

Note: Datum pins (1, 2) assist in aligning the door trim panel to the door.
Apply pressure around the door trim panel (3) to secure the retainers to the door.Caution: Refer to Fastener Caution in the Preface section.


