For 1990-2009 cars only
Removal Procedure
- Remove the instrument panel pad. Refer to Instrument Panel Upper Trim Pad Replacement .
- Remove the fuse and relay panel.
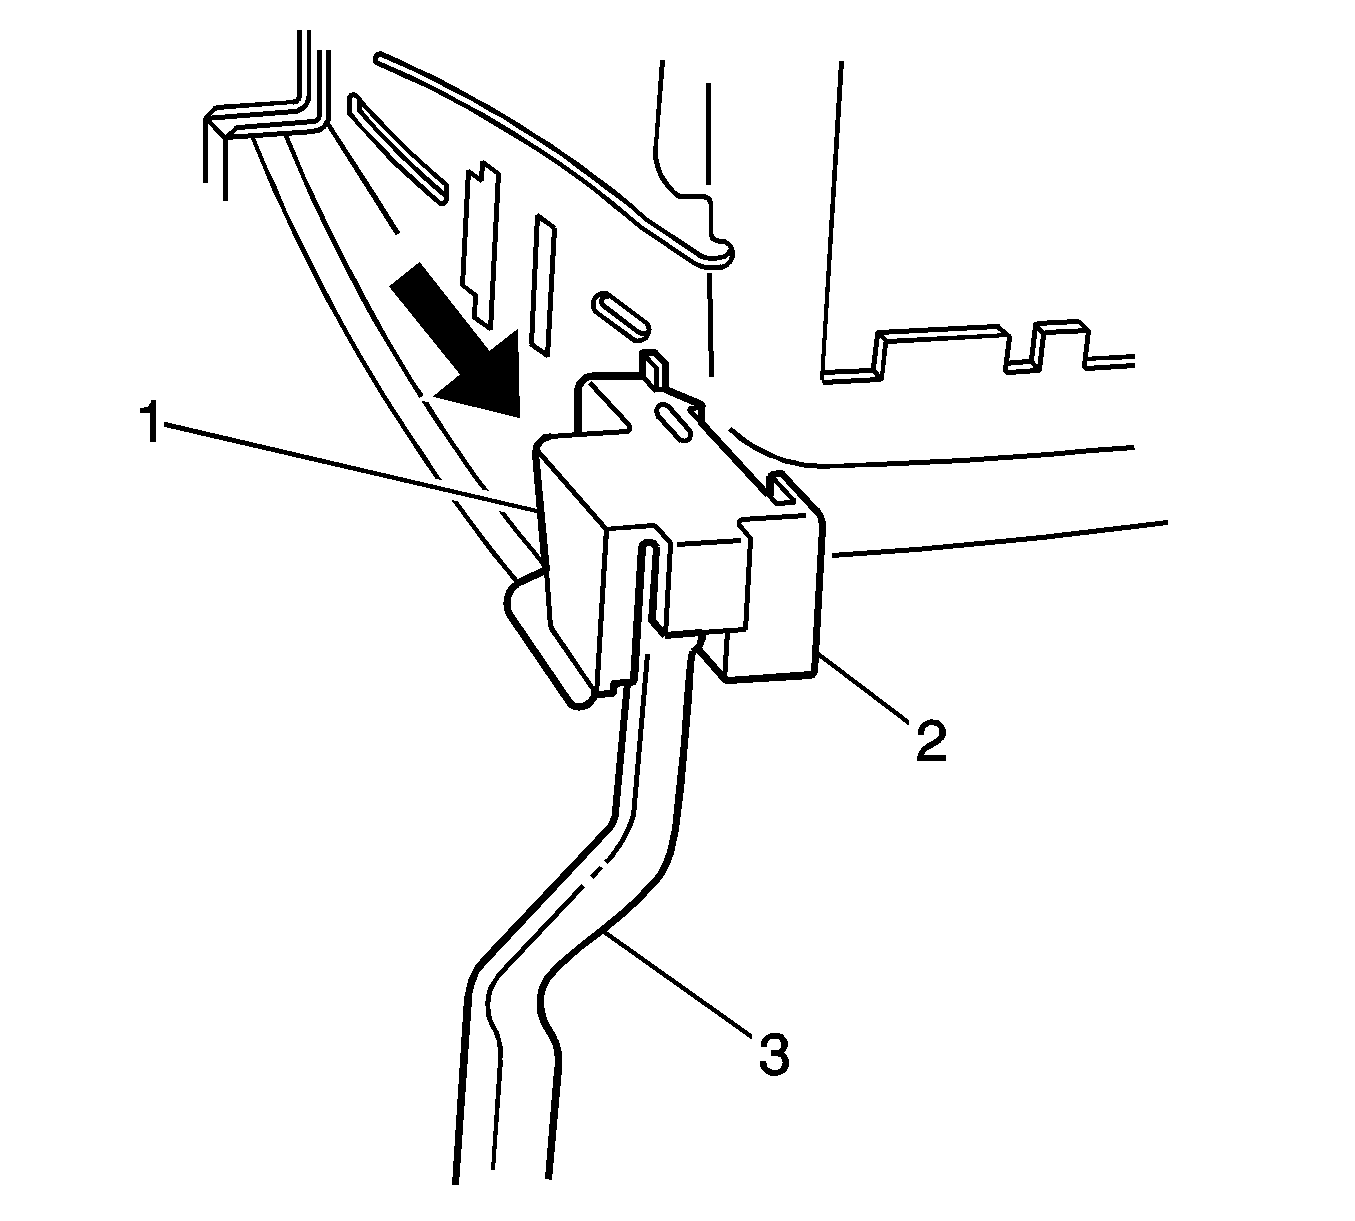
- Using a flat-bladed tool, lever the retaining tabs (1) top and bottom on the hood release lever bracket (2 and slide the lever assembly (3) rearward.
- Remove the drivers knee bolster reinforcement. Refer to Driver Knee Bolster Reinforcement Replacement .
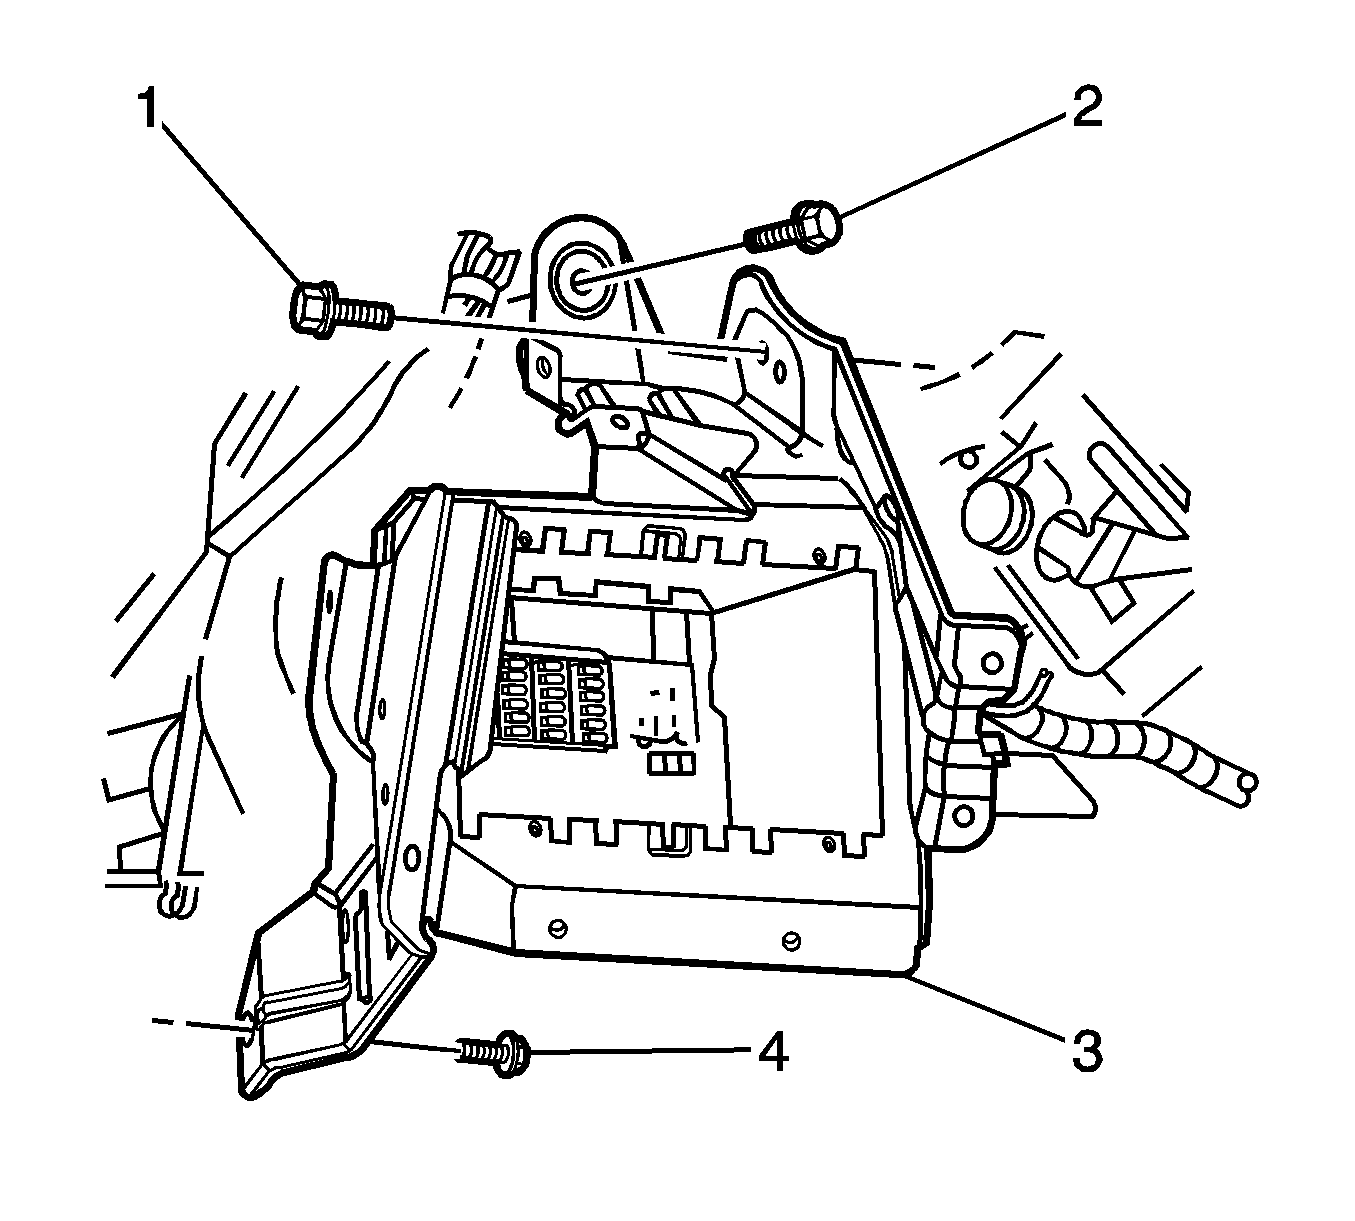
- Remove the screw (4) attaching the end left bracket (3) to the vehicle.
- Remove the screw (1) attaching the end left bracket (3) to the steering column bracket.
- Remove the screw (2) attaching the end left bracket (3) to the dash panel.
- Remove the end left bracket assembly (3) from dash panel.


Installation Procedure
- Install the end left bracket assembly (3) to the dash panel.
- Install the screw (2) attaching the end left bracket (3) to the dash panel.
- Install the screw (1) attaching the end left bracket (3) to the steering column bracket.
- Install the screw (4) attaching the end left bracket (3) to the vehicle.
- Install the driver's knee bolster reinforcement. Refer to Driver Knee Bolster Reinforcement Replacement .
- Install the hood latch release cable lever (3) to the bracket (2), ensuring the retaining tabs (1) fasten.
- Install the fuse and relay panel.
- Install the instrument panel pad. Refer to Instrument Panel Upper Trim Pad Replacement .

Notice: Refer to Fastener Notice in the Preface section.
Tighten
Tighten the screw to 9 N·m (80 lb in).
Tighten
Tighten the screw to 9 N·m (80 lb in).
Tighten
Tighten the screw to 9 N·m (80 lb in).

