Removal Procedure
Caution: Refer to Battery Disconnect Caution in the Preface section.
- Disconnect the negative battery cable.

- Lift the locking lever on the mass air flow (MAF) sensor, then disconnect the
MAF sensor electrical connector (1).
- Lift the locking lever on the intake air temperature (IAT) sensor, then
disconnect the IAT sensor electrical connector (2).
- Loosen the two intake duct clamps (3), then remove the duct.
- Remove the cooling fan and shroud. Refer to
Engine Cooling Fan Replacement
.
- Remove the radiator outlet hose. Refer to
Radiator Outlet Hose Replacement
.
- Remove the inlet hose. Refer to
Radiator Inlet Hose Replacement
.
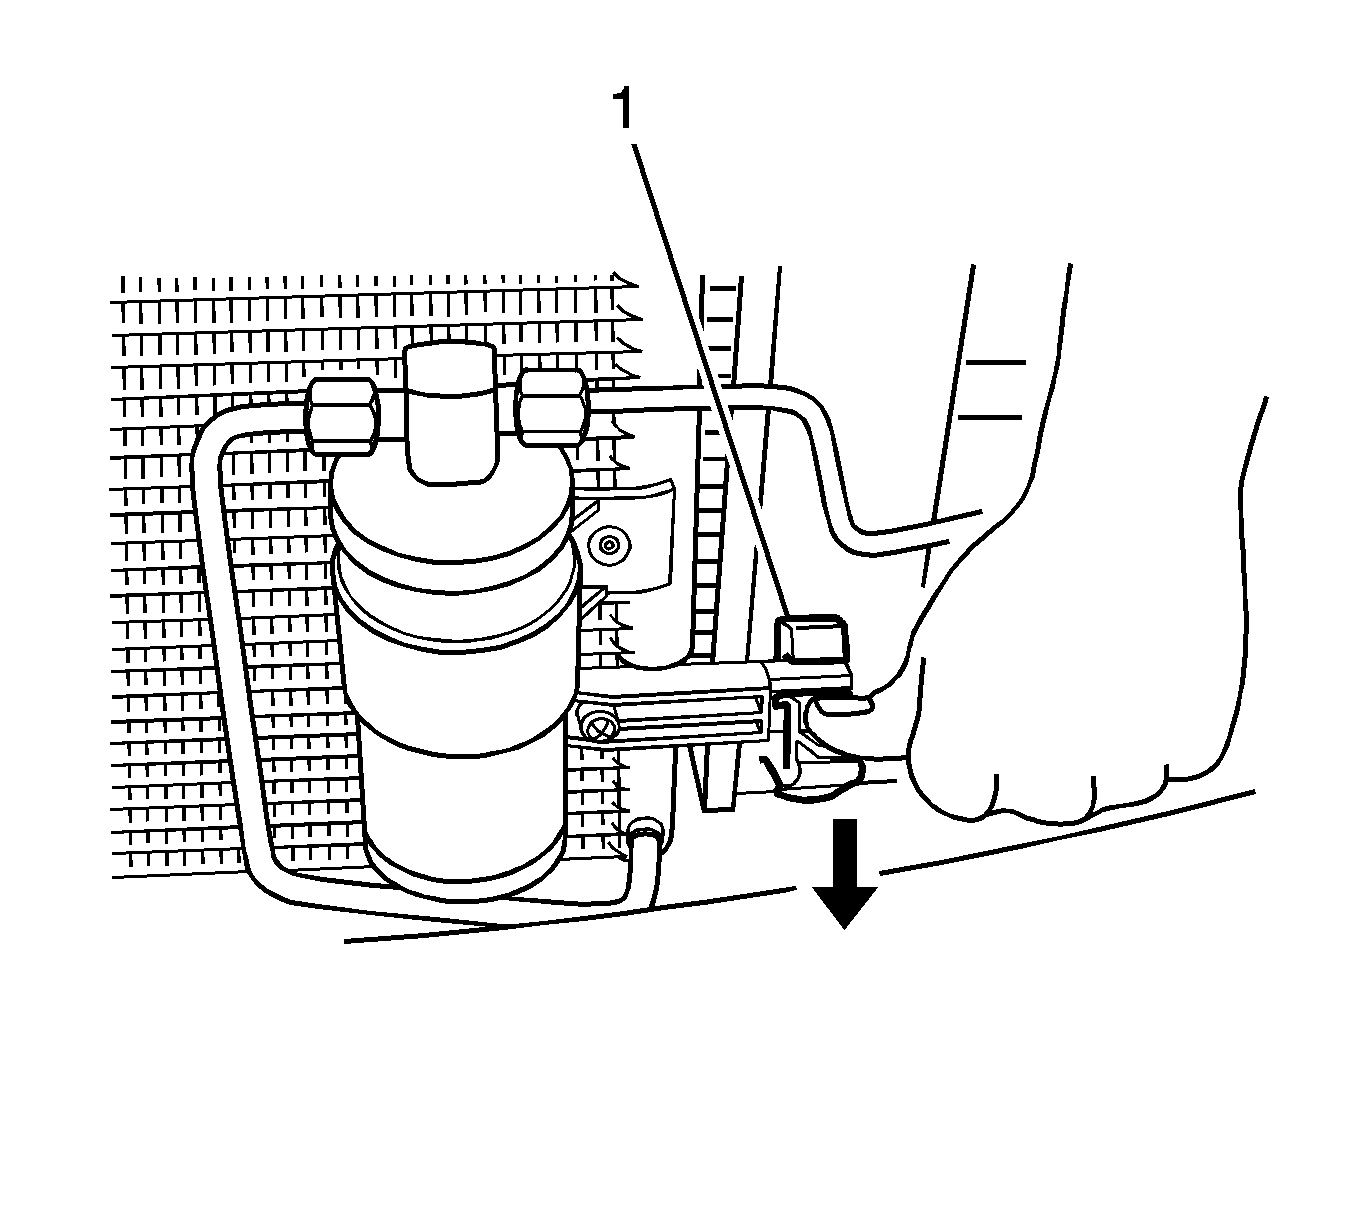
- Release the refrigerant pipe-to-receiver drier retaining
clip on the left side of the radiator.
- Remove the bumper front fascia. Refer to
Front Bumper Fascia Replacement
in Bumpers.

- Release the two condenser-to-radiator retaining clips
as follows:
| 10.1. | Press down on the 1st locking tab (1) while lifting on the condenser assembly. |
| 10.2. | Press down on the 2nd locking tab while lifting on the condenser assembly,
then slightly pull the condenser assembly forward to clear the radiator mounting lugs. |
- Disconnect the transmission cooler lines, if equipped. Refer to
Transmission Fluid Cooler Hose/Pipe Replacement
in Automatic
Transmission.

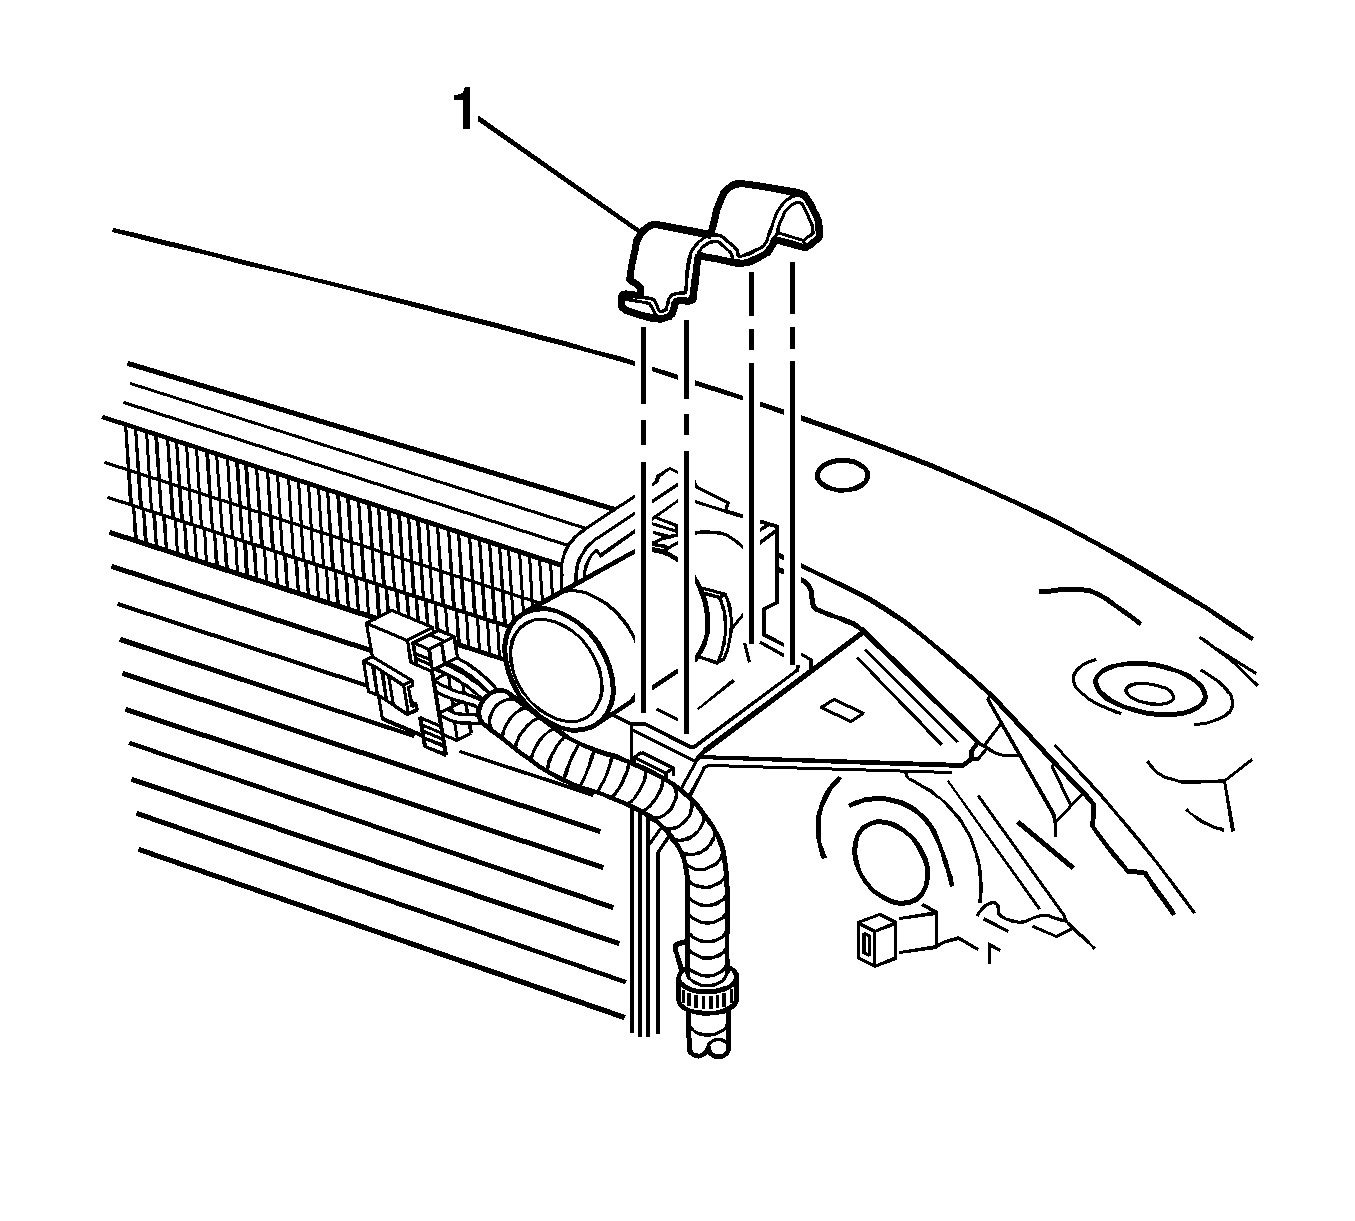
- Remove the two radiator upper mounting brackets (1).
- Remove the radiator as follows:
| 13.1. | Lift the radiator upwards. |
| 13.2. | Move the radiator rearwards on the left side, then across to the left
side to allow the right side to clear the mounting brackets. |
Installation Procedure
- Install the radiator as follows:
| 1.1. | Move the radiator rearwards on the left side, then across to the left
side to allow the right side to clear the mounting brackets. |
| 1.2. | Lower the radiator into the lower insulators. |

- Install the two radiator upper mounting brackets (1).
- Connect the transmission cooler lines, if equipped. Refer to
Transmission Fluid Cooler Hose/Pipe Replacement
in Automatic
Transmission.

- Install the two condenser-to-radiator retaining clips
as follows:
| 4.1. | Slightly pull the condenser assembly forward to clear the radiator mounting
lugs. |
| 4.2. | Ensure both locking tab (1) are seated. |
- Install the bumper front fascia. Refer to
Front Bumper Fascia Replacement
in Bumpers.
- Install the refrigerant pipe-to-receiver drier retaining
clip on the left side of the radiator.
- Install the coolant inlet hose. Refer to
Radiator Inlet Hose Replacement
.
- Install the coolant outlet hose. Refer to
Radiator Outlet Hose Replacement
.
- Install the cooling fan and shroud. Refer to
Engine Cooling Fan Replacement
.

- Position the intake duct then install two intake duct clamps (3).
- Connect the IAT sensor electrical connector (2).
- Connect the MAF sensor electrical connector (1).
Caution: Refer to Battery Disconnect Caution in the Preface section.
- Connect the negative battery cable.
Important: Watch for a potential overheating condition
while the engine is operating with the radiator cap off.
- Start and run the engine until the coolant is at operating temperature.
- On vehicles with an automatic transmission, check the transmission fluid
level.
- Tighten any loose connections, as necessary.


