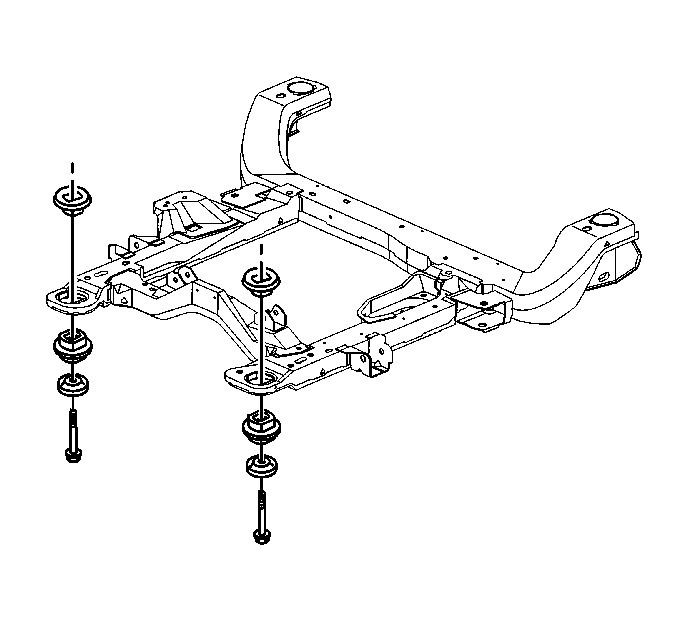
Removal Procedure
- Raise and support the vehicle. Refer to Lifting and Jacking the Vehicle in General Information.
- Remove the front tires and wheels. Refer to Tire and Wheel Removal and Installation in Tires and Wheels.
- Install a jackstand under the frame near the rear cage nut that you are replacing.
- If you are replacing the FRONT cage nut, remove the front impact bar to gain access. Refer to Front Bumper Impact Bar Replacement in Bumpers.
- Using a small flat-bladed tool, remove the access panel of the right rear cage nut.
- In order to remove the access panel of the left rear cage nut, remove the fuel line bracket bolt and position the fuel lines slightly forward.
- Using a small flat-bladed tool, remove the access panel of the left rear cage nut.
- Remove the rear frame-to-body bolts.
- In order to break the spot welds free on the rear cage nut retainer, insert an air-hammer and a 152 mm (6 in) punch or equivalent through the rear frame insulator and position the air-hammer against the rear cage nut.
- Hold the air-hammer firmly and apply pressure in order to free the rear cage nut.
- Reach into the access opening and carefully raise the rear cage nut retainer up.
- Remove the rear cage nut.
If you are replacing the REAR cage nut, perform the following steps to gain access.


Caution: Approved safety glasses and gloves should be worn when performing this procedure to reduce the chance of personal injury.
Caution: The edges of the rear cage nut retainer are sharp. In order to avoid personal injury, use care when removing the rear cage nut from the access opening.
Installation Procedure
- Install the rear cage nut into the access opening.
- Press the retainer over the rear cage nut in order to hold the nut in place.
- Loosely install the rear frame bolts through the frame and into the rear cage nut. Hold the rear cage nut down with your finger in order to start the rear frame bolt.
- Install the access panel of the right rear cage nut.
- Install the access panel of the left rear cage nut.
- If necessary, install the fuel line bracket bolt.
- Remove the jackstand.
- Install the tires and wheels. Refer to Tire and Wheel Removal and Installation in Tires and Wheels.
- Lower the vehicle.
Caution: The edges of the rear cage nut retainer are sharp.In order to avoid personal injury,use care not to cut your fingers when installing the rear cage nut into the access opening.

Notice: Use the correct fastener in the correct location. Replacement fasteners must be the correct part number for that application. Fasteners requiring replacement or fasteners requiring the use of thread locking compound or sealant are identified in the service procedure. Do not use paints, lubricants, or corrosion inhibitors on fasteners or fastener joint surfaces unless specified. These coatings affect fastener torque and joint clamping force and may damage the fastener. Use the correct tightening sequence and specifications when installing fasteners in order to avoid damage to parts and systems.
Tighten
Tighten the rear frame bolts to 165 N·m (122 lb ft).


Tighten
Tighten the fuel line bracket bolt to 20 N·m (15 lb ft).
