For 1990-2009 cars only
Removal Procedure
- Remove the rear compartment sill plate. Refer to Rear Compartment Sill Trim Plate Replacement .
- Remove the rear bumper fascia. Refer to Rear Bumper Fascia Replacement in Bumpers.
- Use a grease pencil to mark the location of the rear compartment lid lock striker to the rear compartment for its location at installation.
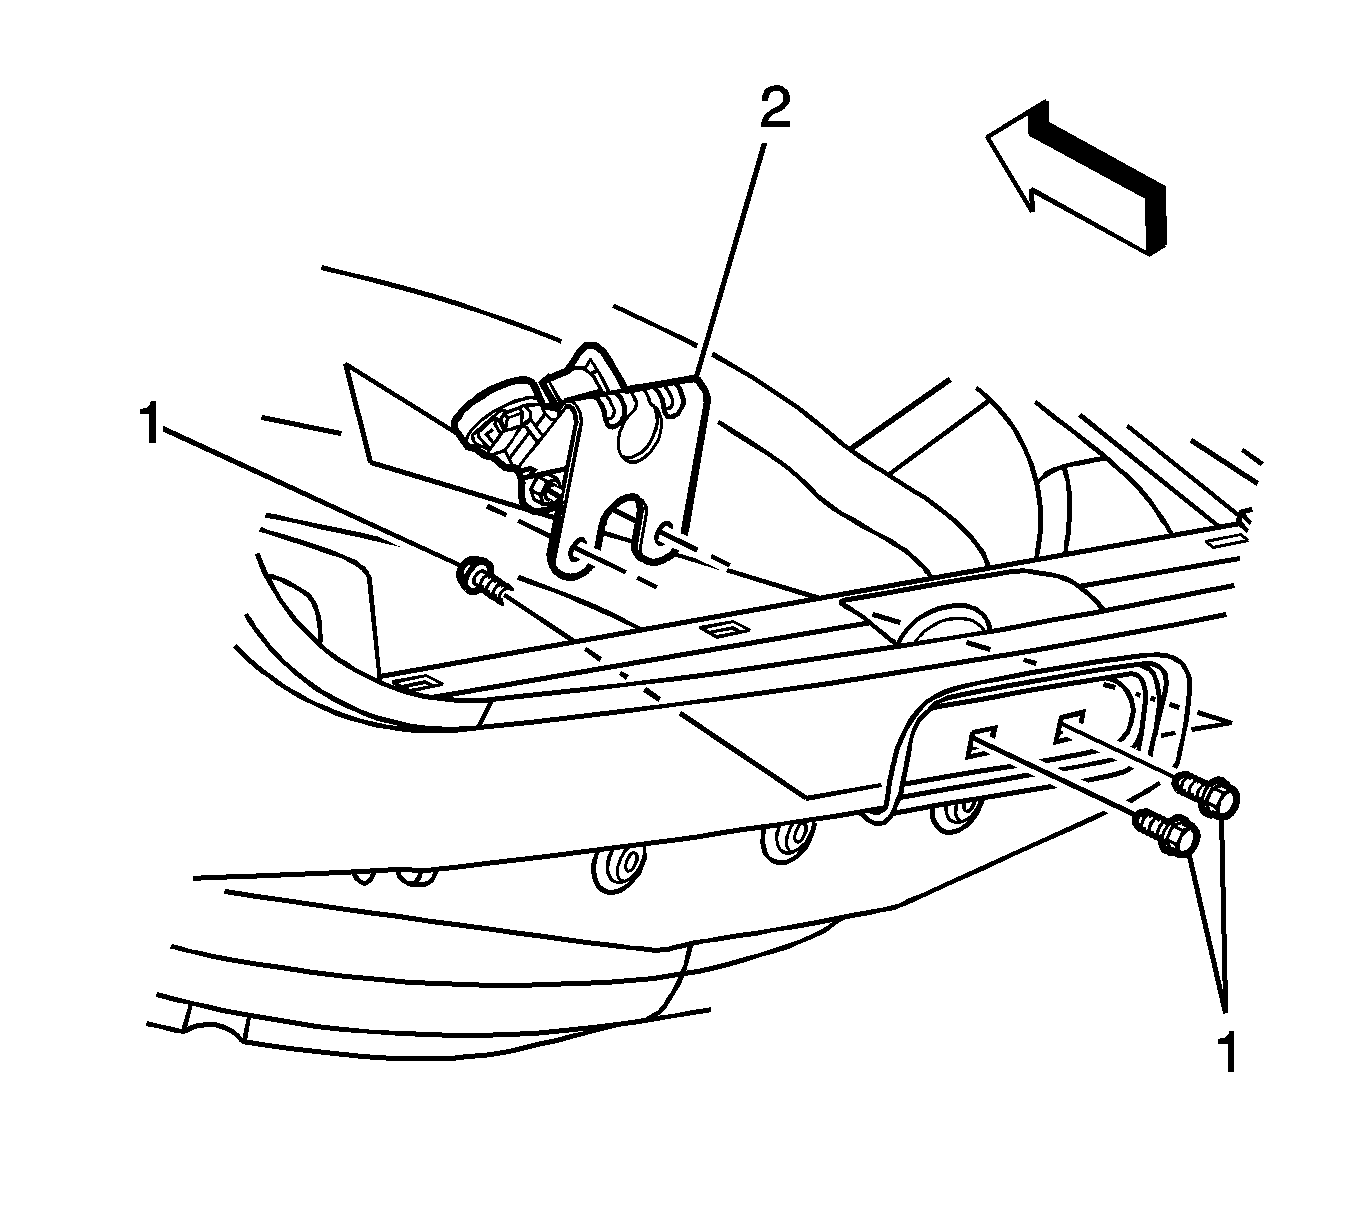
- Remove the rear compartment lid lock striker bolts (1) from the striker (2).
- Remove the rear compartment lid lock striker (2) from the vehicle.

Installation Procedure
- Position the rear compartment lid lock striker (2) to the rear compartment body panel.
- Install the rear compartment lid lock striker bolts (1) to the striker (2).
- Tighten the bolts part way allowing for the adjustment of the rear compartment lid lock striker.
- Close the rear compartment lid in order to set the adjustment of the compartment lid striker.
- Raise the rear compartment lid.
- Tighten the rear compartment lid lock striker bolts.
- Install the rear bumper fascia. Refer to Rear Bumper Fascia Replacement in Bumpers.
- Install the rear compartment sill plate. Refer to Rear Compartment Sill Trim Plate Replacement .
- Close the rear compartment.

Notice: Refer to Fastener Notice in the Preface section.
Tighten
Tighten the bolts to 16 N·m (12 lb ft).
