For 1990-2009 cars only
Removal Procedure
- Raise and support the vehicle. Refer to Lifting and Jacking the Vehicle in General Information.
- Support the rear axle with adjustable jack stands.
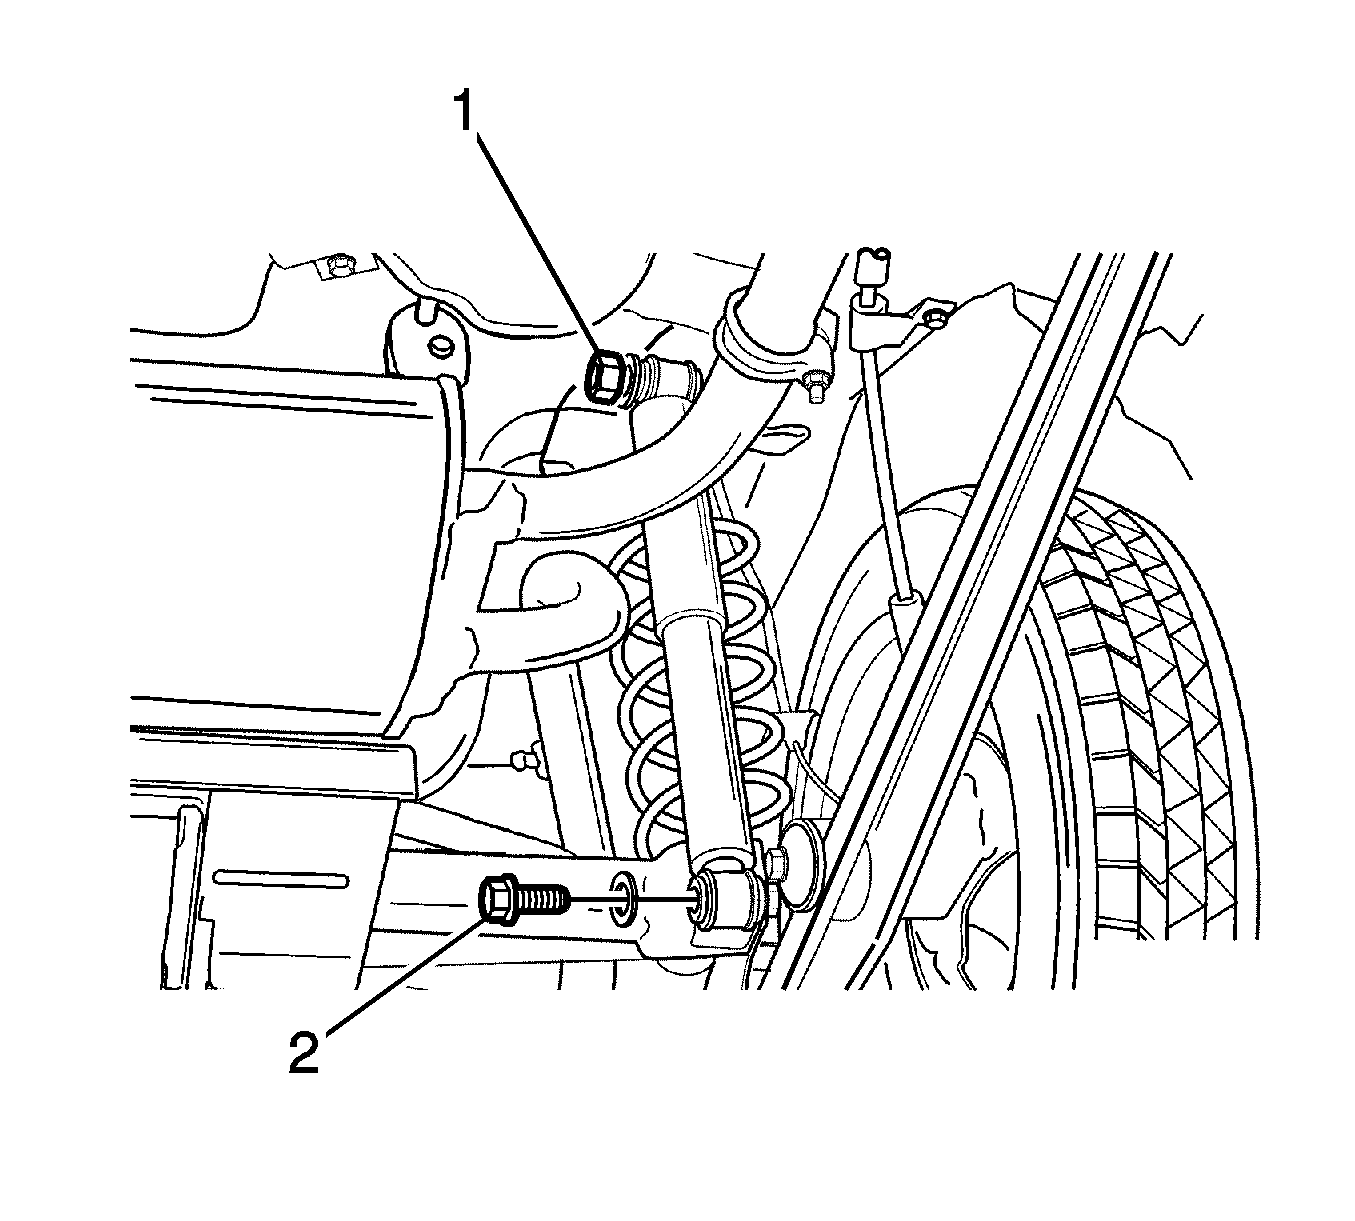
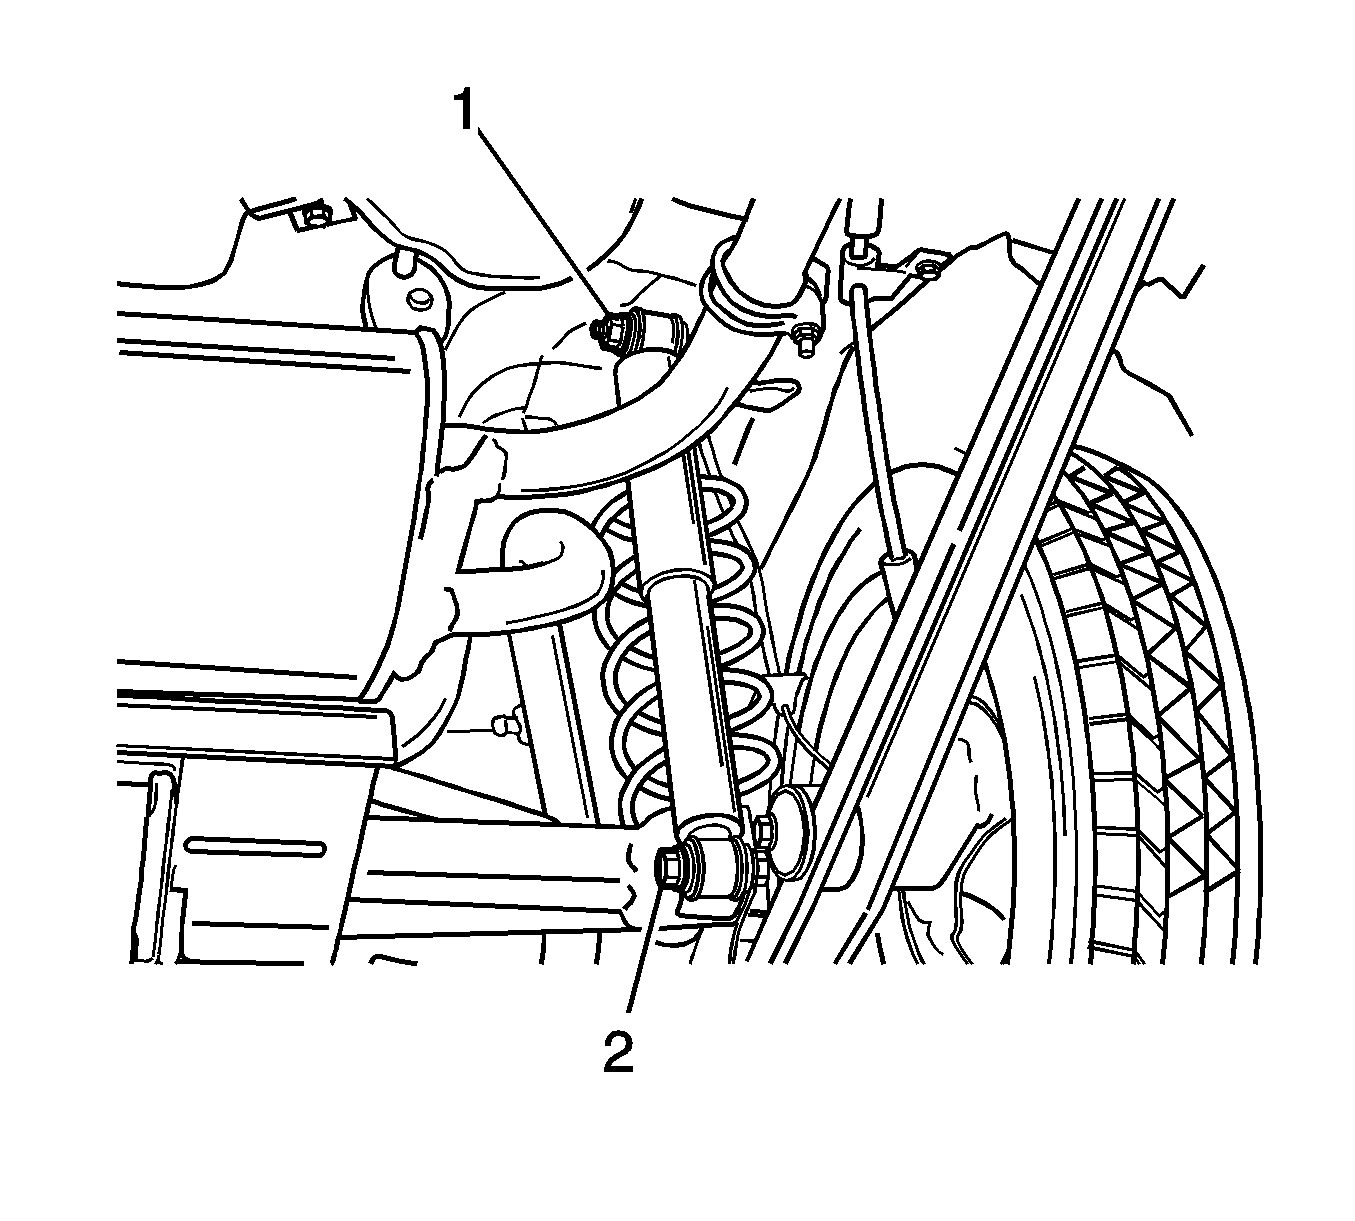
- Loosen the bracket nut (1) that secures the shock absorber to the body.
- Remove the bolt (2) that secures the shock absorber to the rear axle. Remove the washer, if equipped.
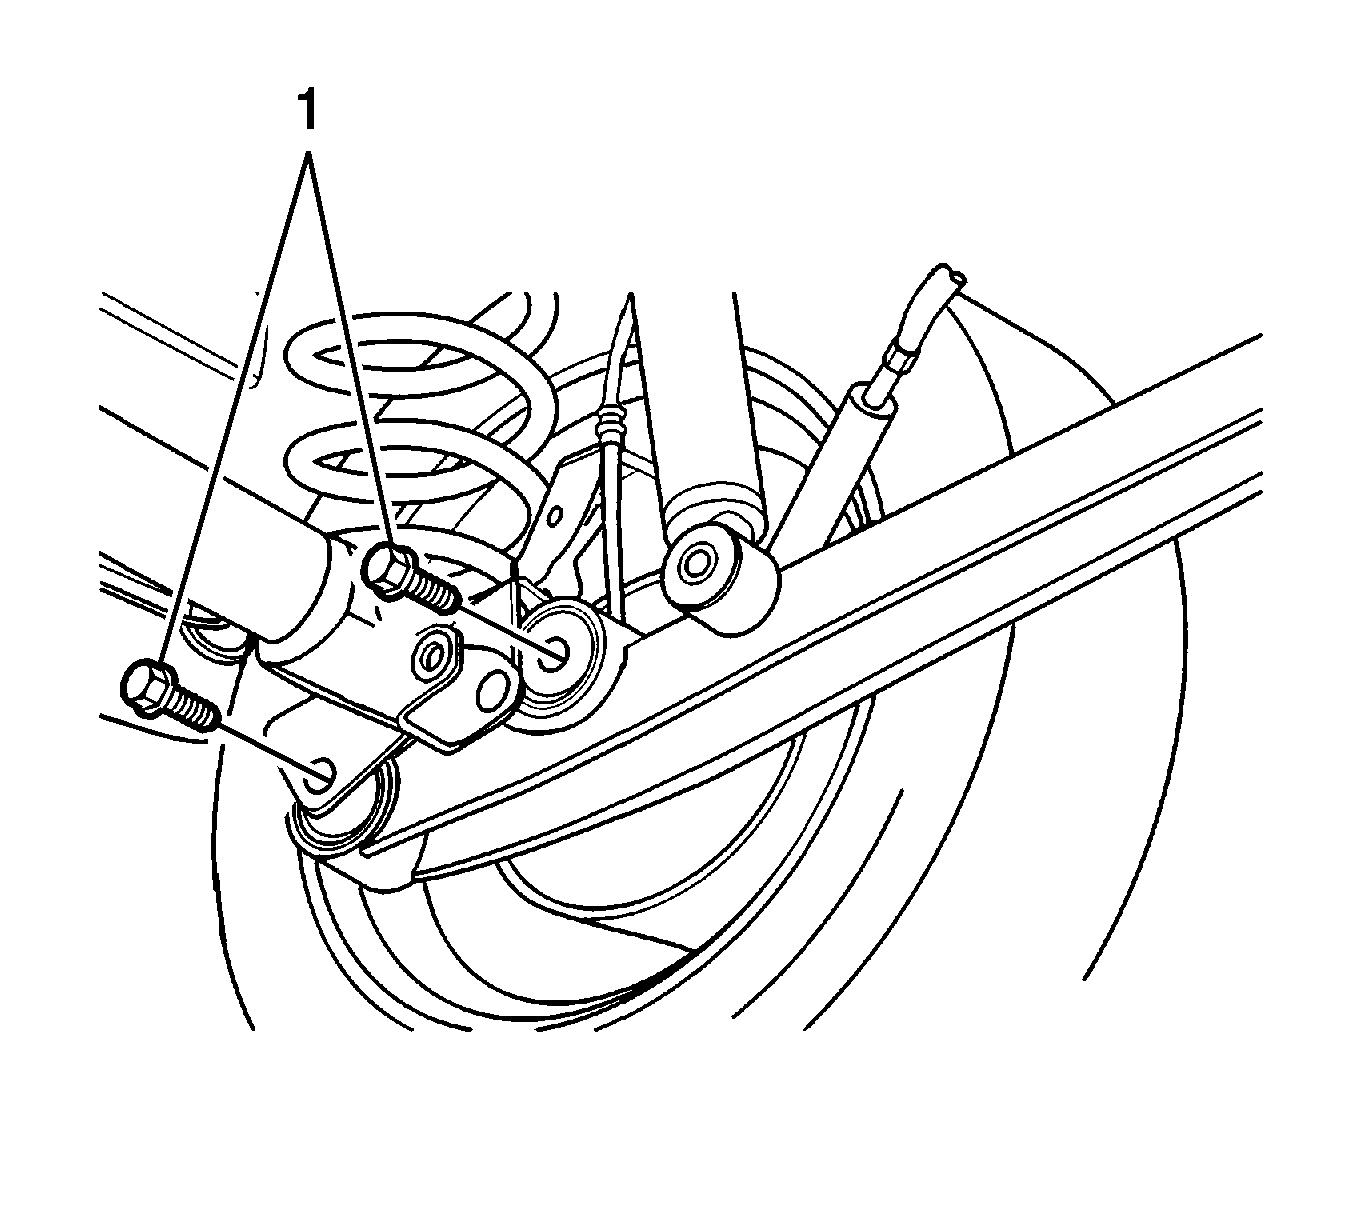
- Remove the bolts (1) that secure the trailing arm to the rear axle.
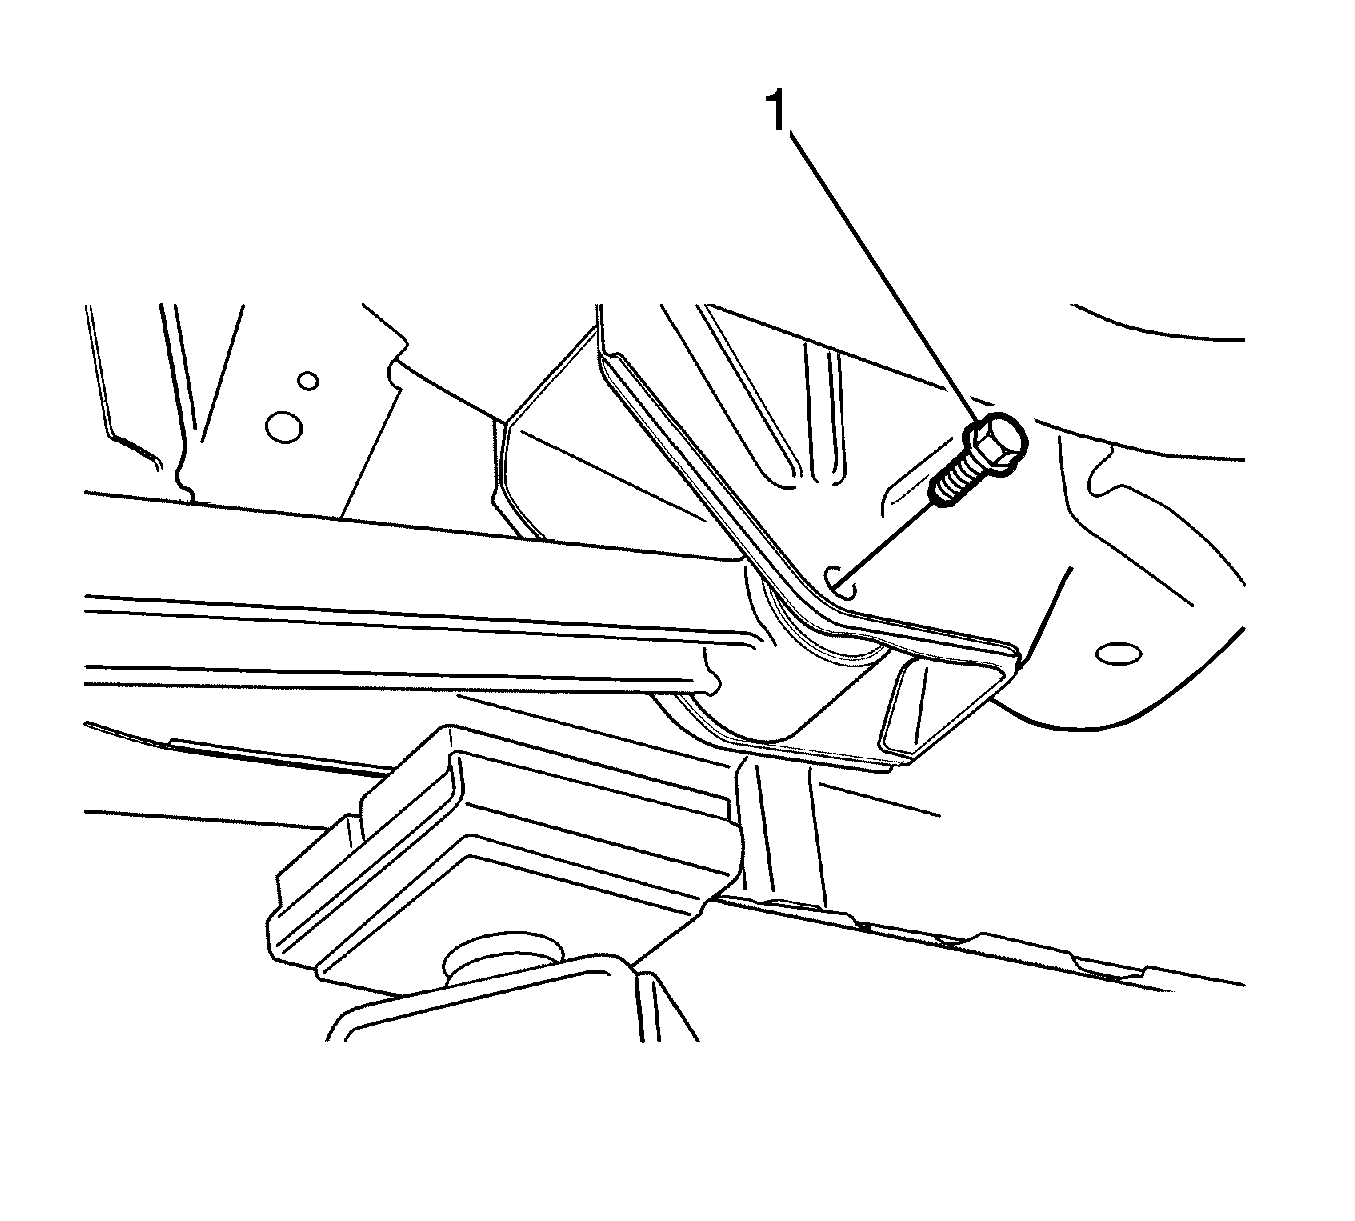
- Remove the bolt (1) that secures the trailing arm to the body bracket.
- Remove the trailing arm.
Installation Procedure
- Install the trailing arm.
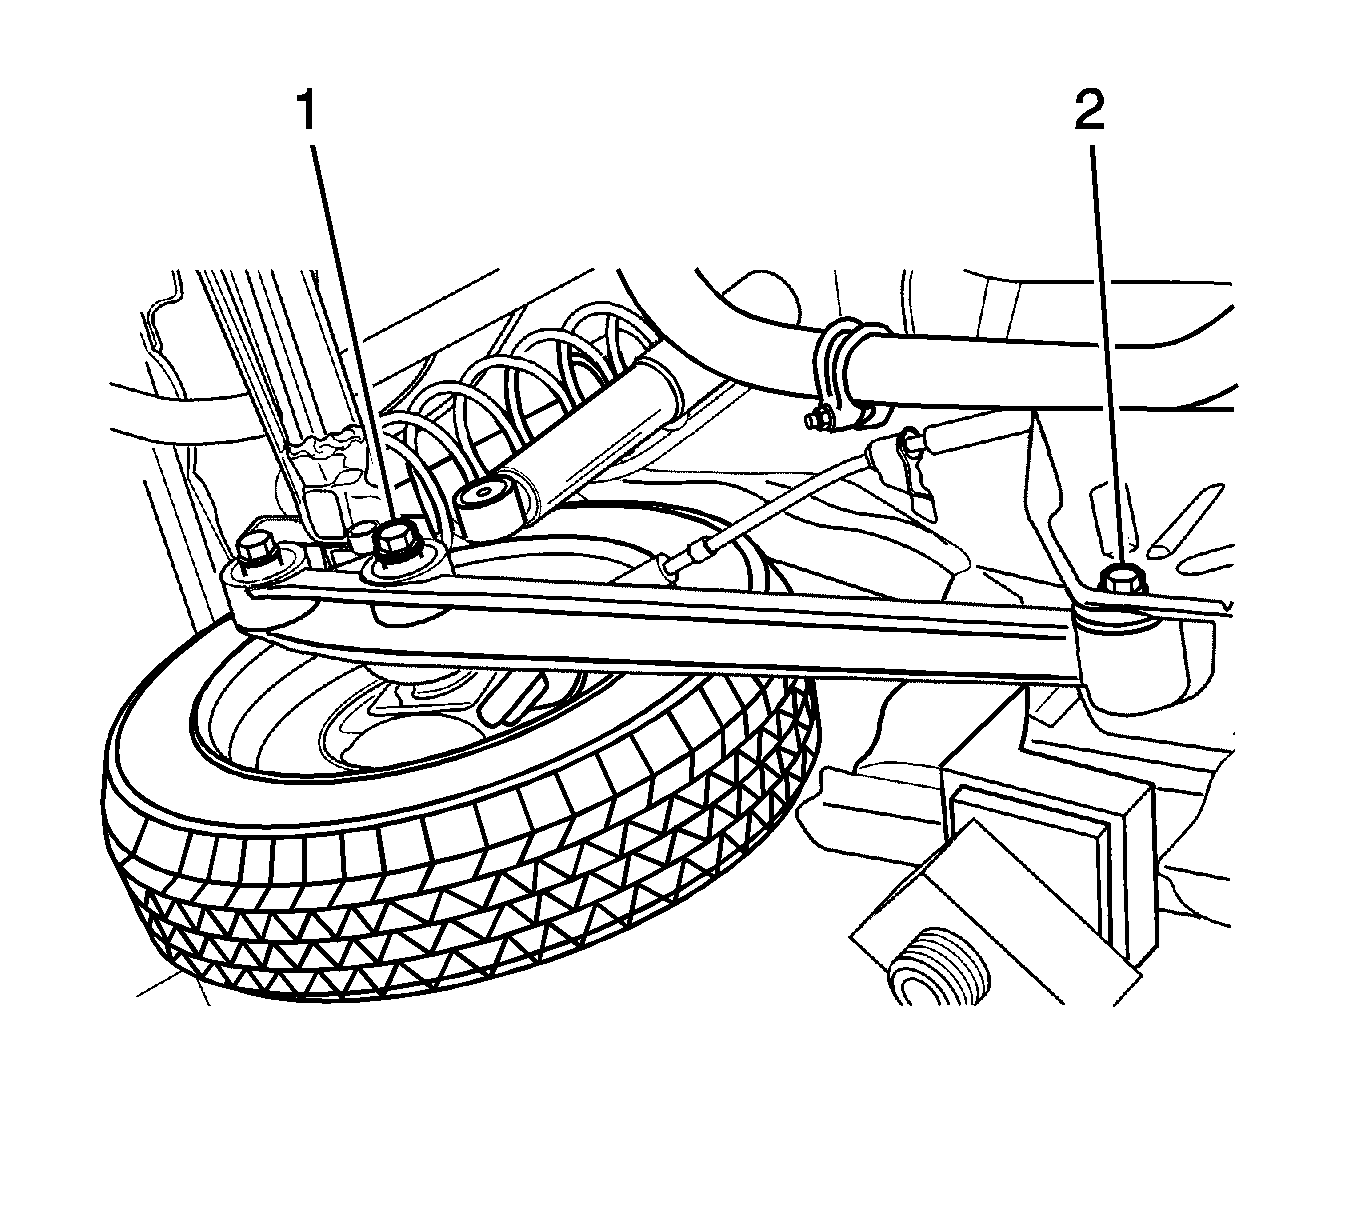
- Install the bolt (2) that secures the trailing arm to the body bracket.
- Install the bolts (1) that secure the trailing arm to the rear axle.
- Install the rear shock absorber to the trailing arm.
- Install the washer and the bolt (2) that secures the shock absorber to the rear axle.
- Tighten the nut (1) that secures the shock absorber to the body bracket.
- Remove the jack stands and lower the vehicle.
Notice: Refer to Fastener Notice in the Preface section.
Tighten
Tighten the bolt to 70-90 N·m
(55-66 lb ft).
Tighten
Tighten the bolts to 80-90 N·m
(59-66 lb ft).
Tighten
Tighten the bolt to 45-70 N·m
(33-52 lb ft).
Tighten
Tighten the nut to 45-70 N·m
(33-52 lb ft).
