Refrigerant Tubes Replacement High
Removal Procedure
- Disconnect the negative battery cable.
- Remove the front bumper fascia. Refer to Front Bumper Fascia Replacement in Bumpers.
- Discharge and recover the refrigerant. Refer to Refrigerant Recovery and Recharging .
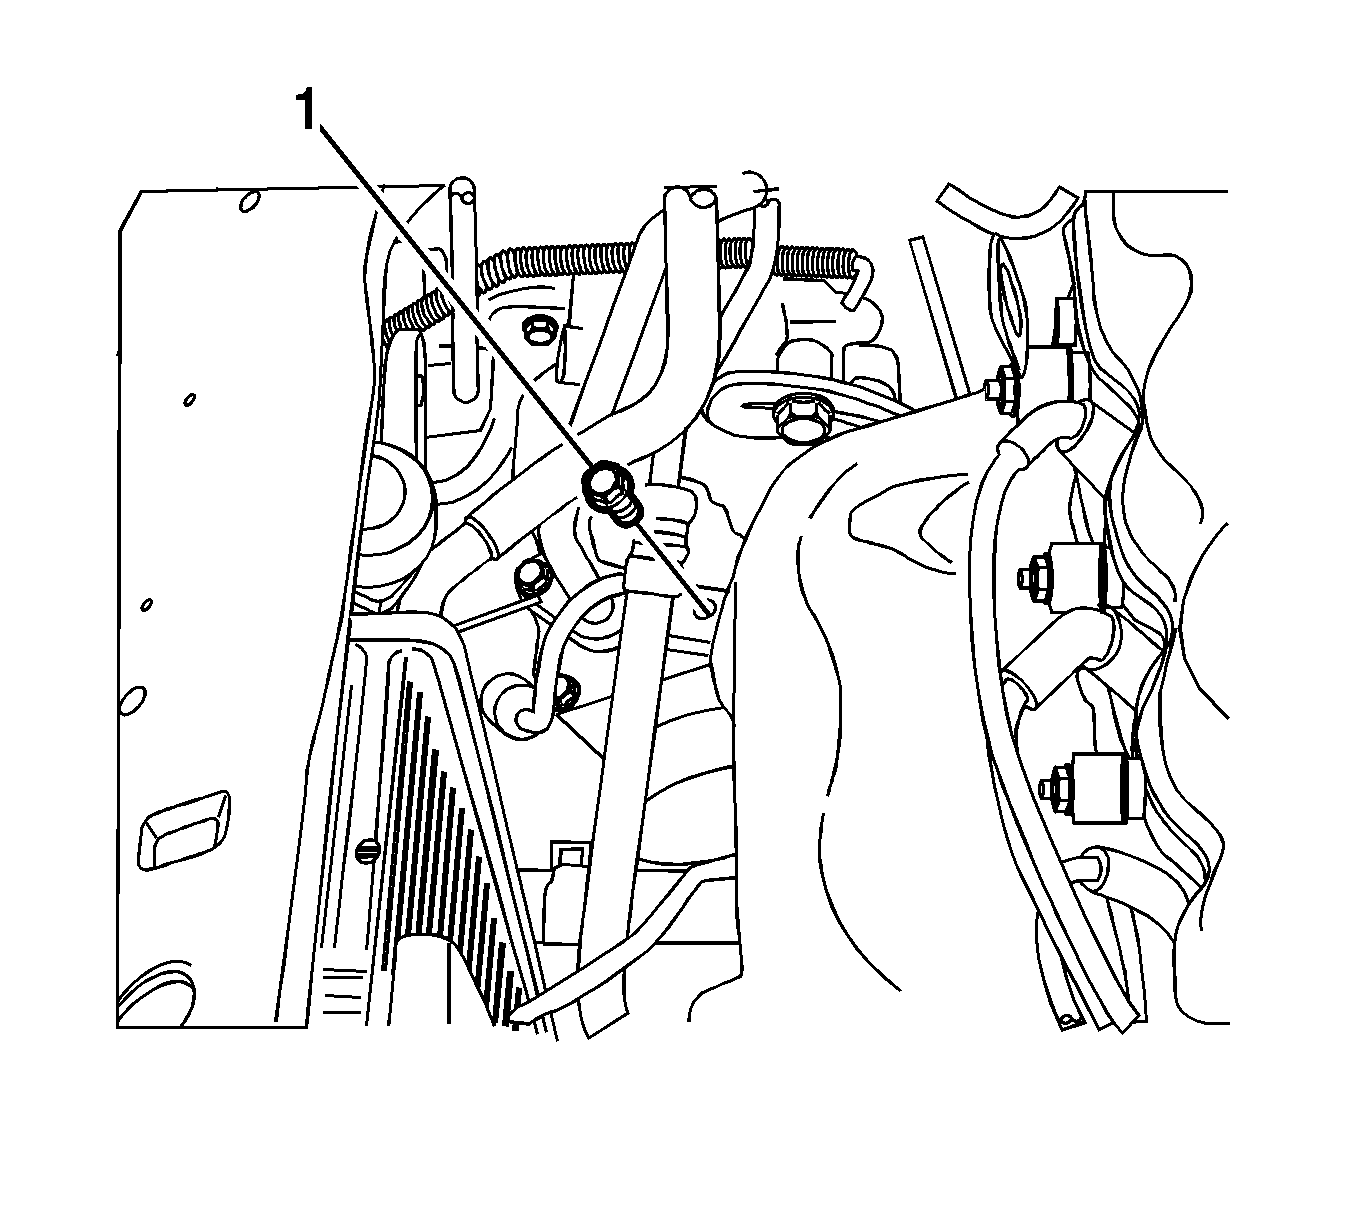
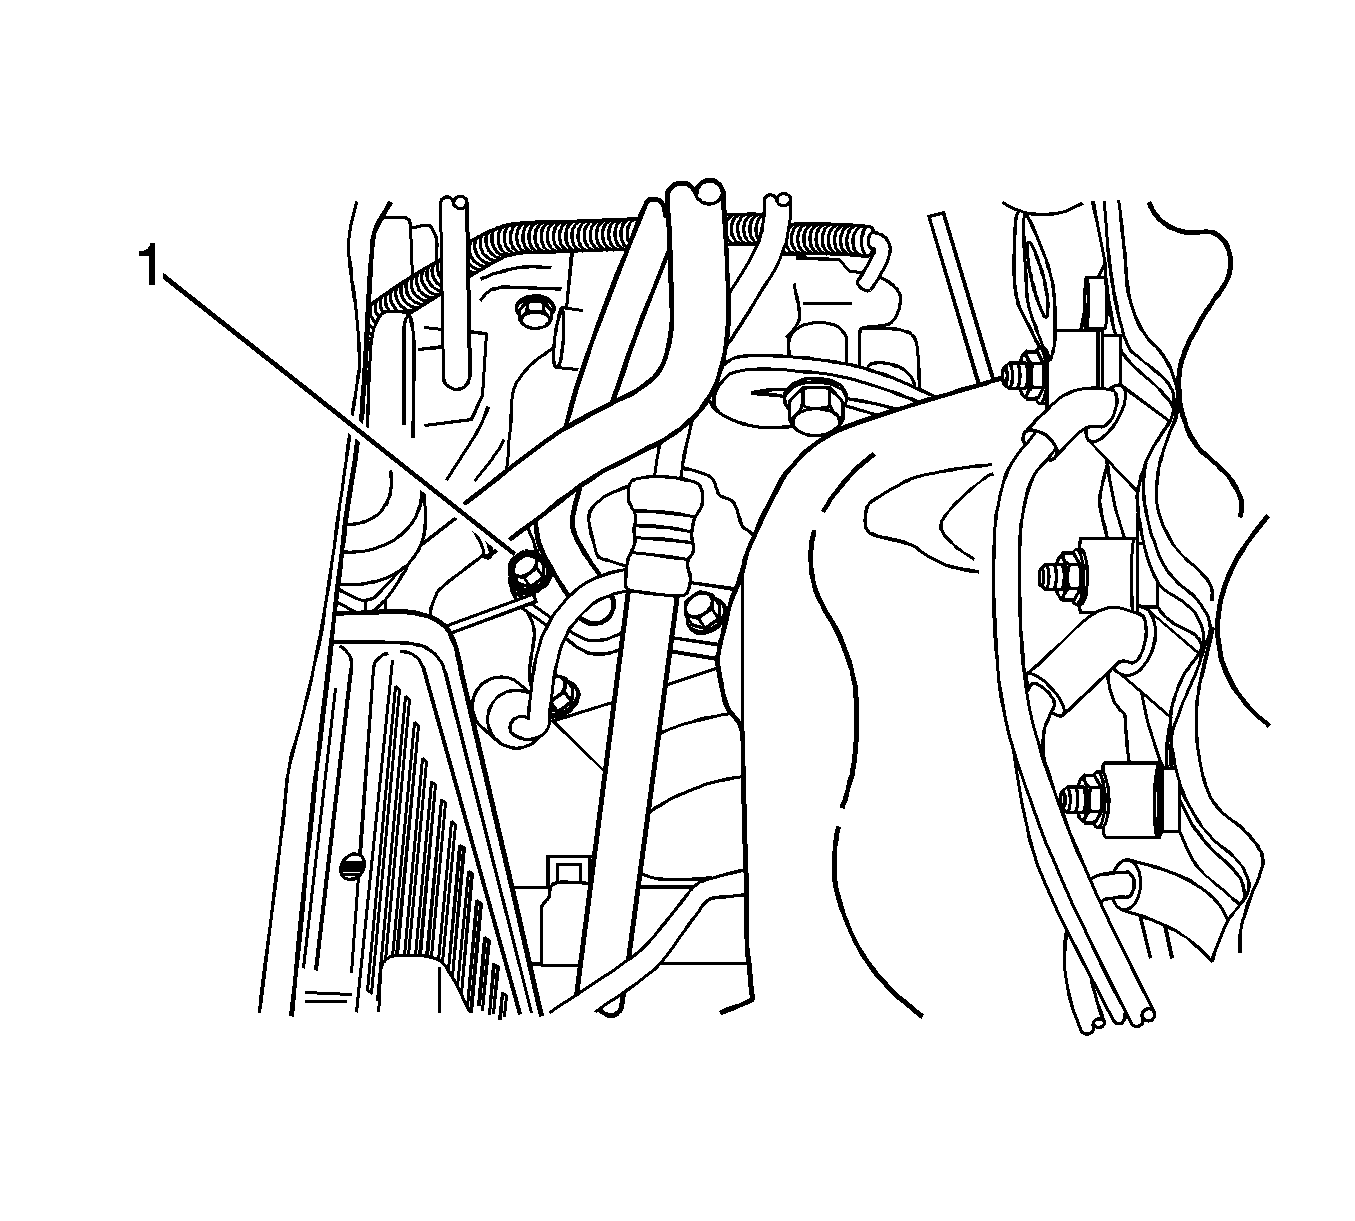
- Remove the bolt securing the high pressure pipe line to the compressor (1).
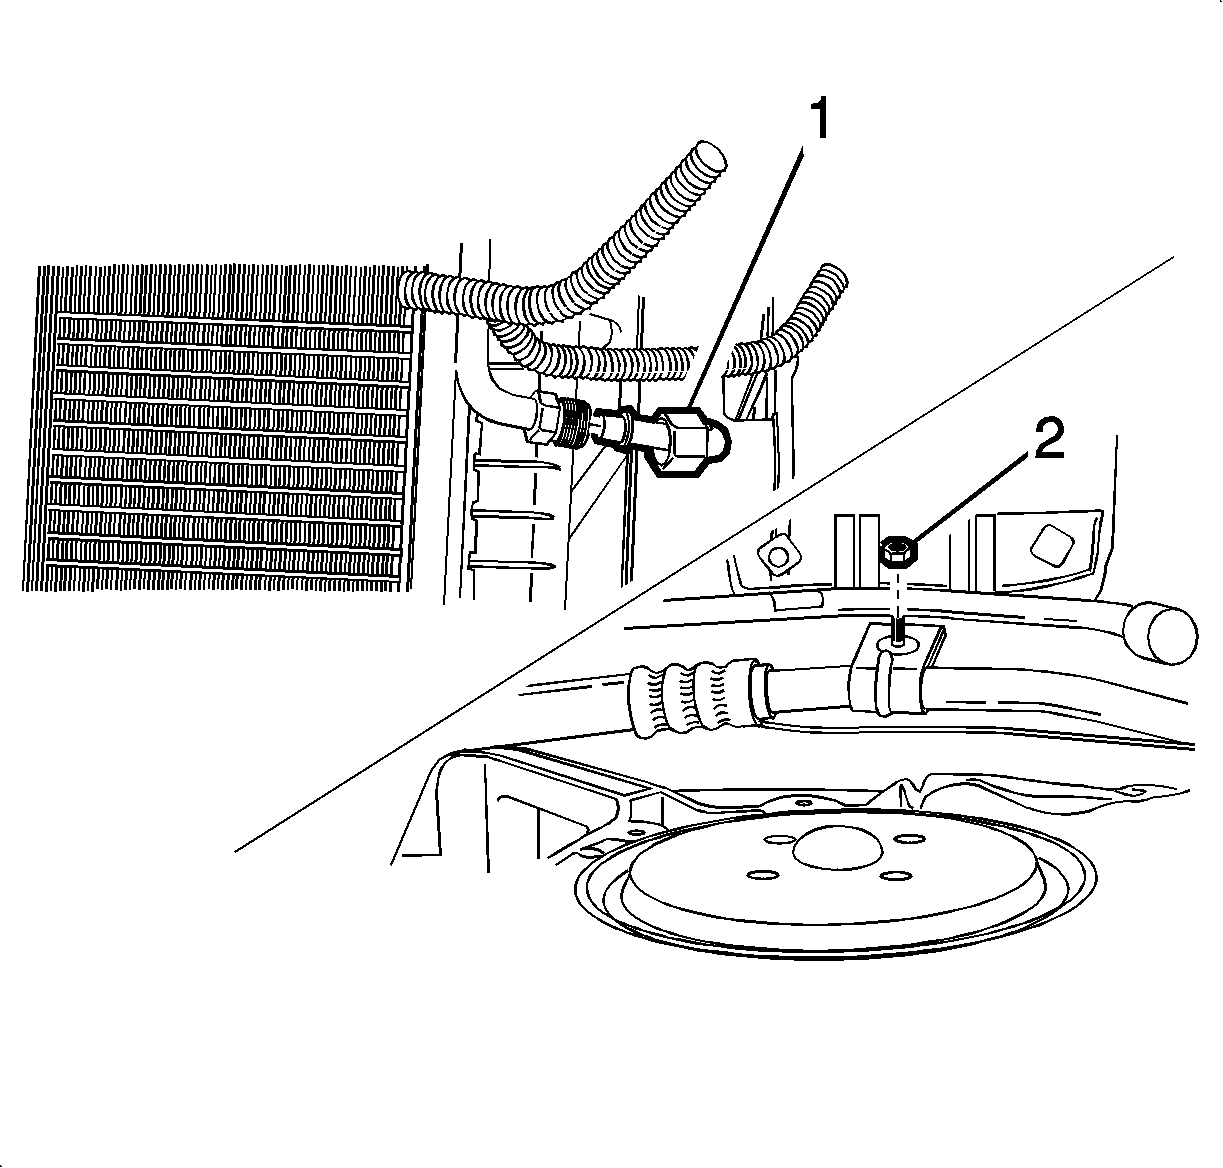
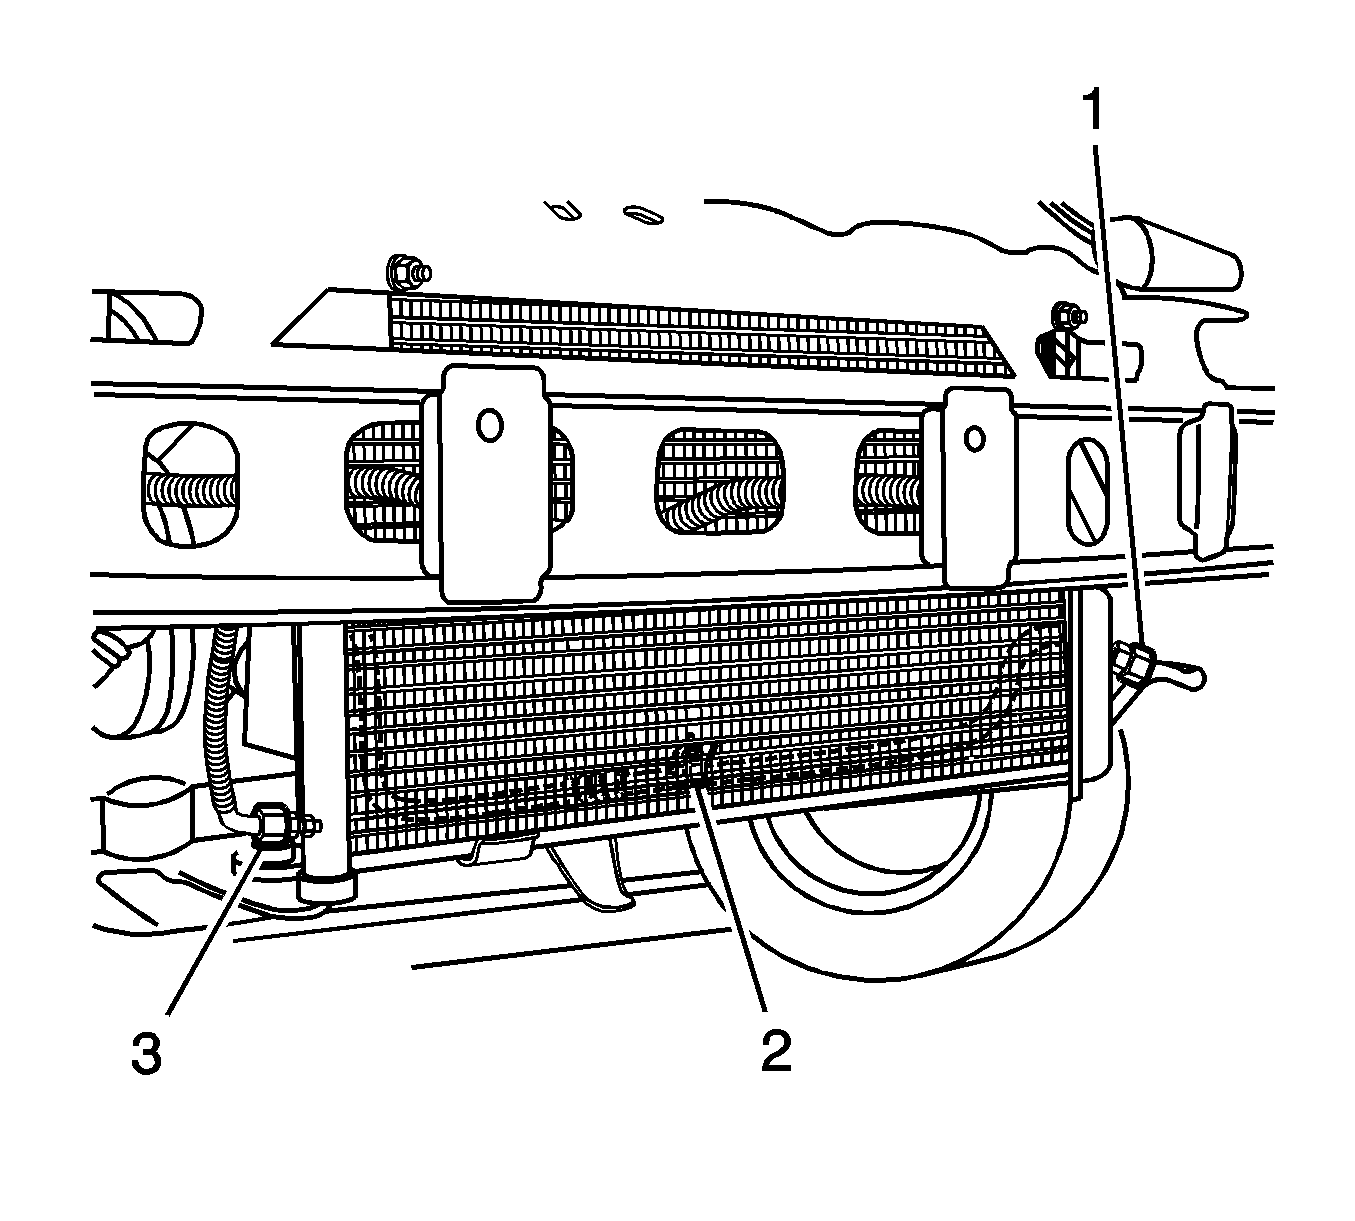
- Loosen the fitting securing the high pressure pipe line to the condenser pipe line (1).
- Remove the clamp nut (2).
- Remove the A/C high pressure pipe line between the compressor and the condenser.
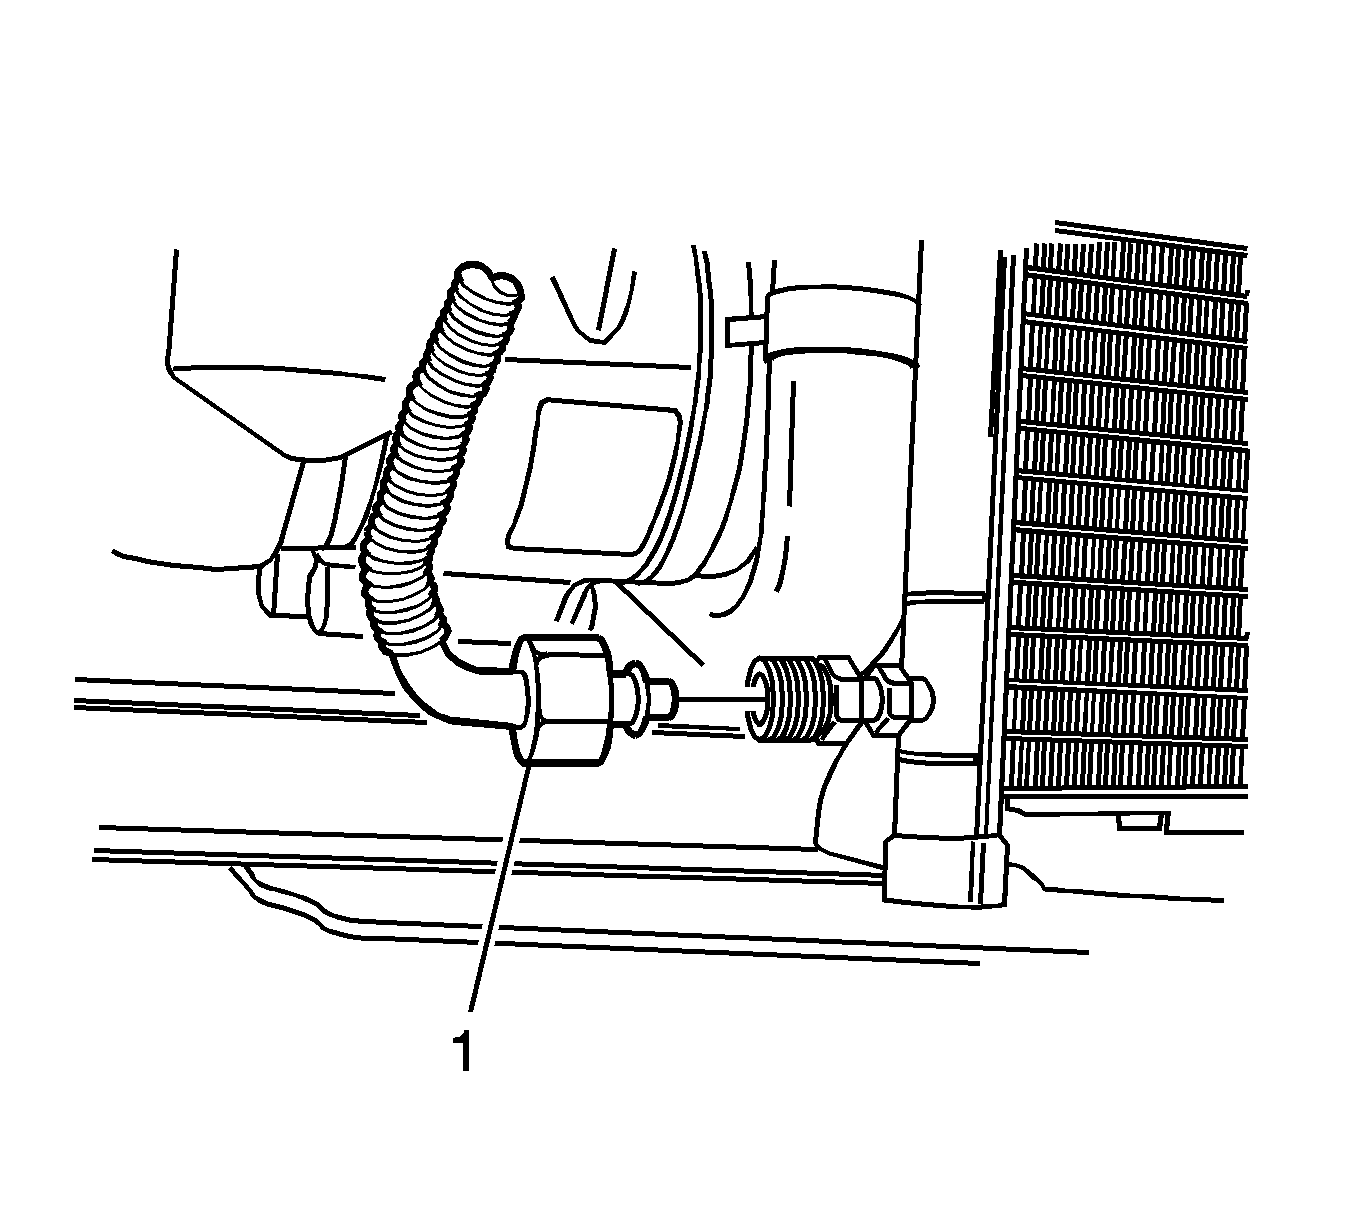
- Loosen the fitting securing the receiver dryer to the condenser (1).
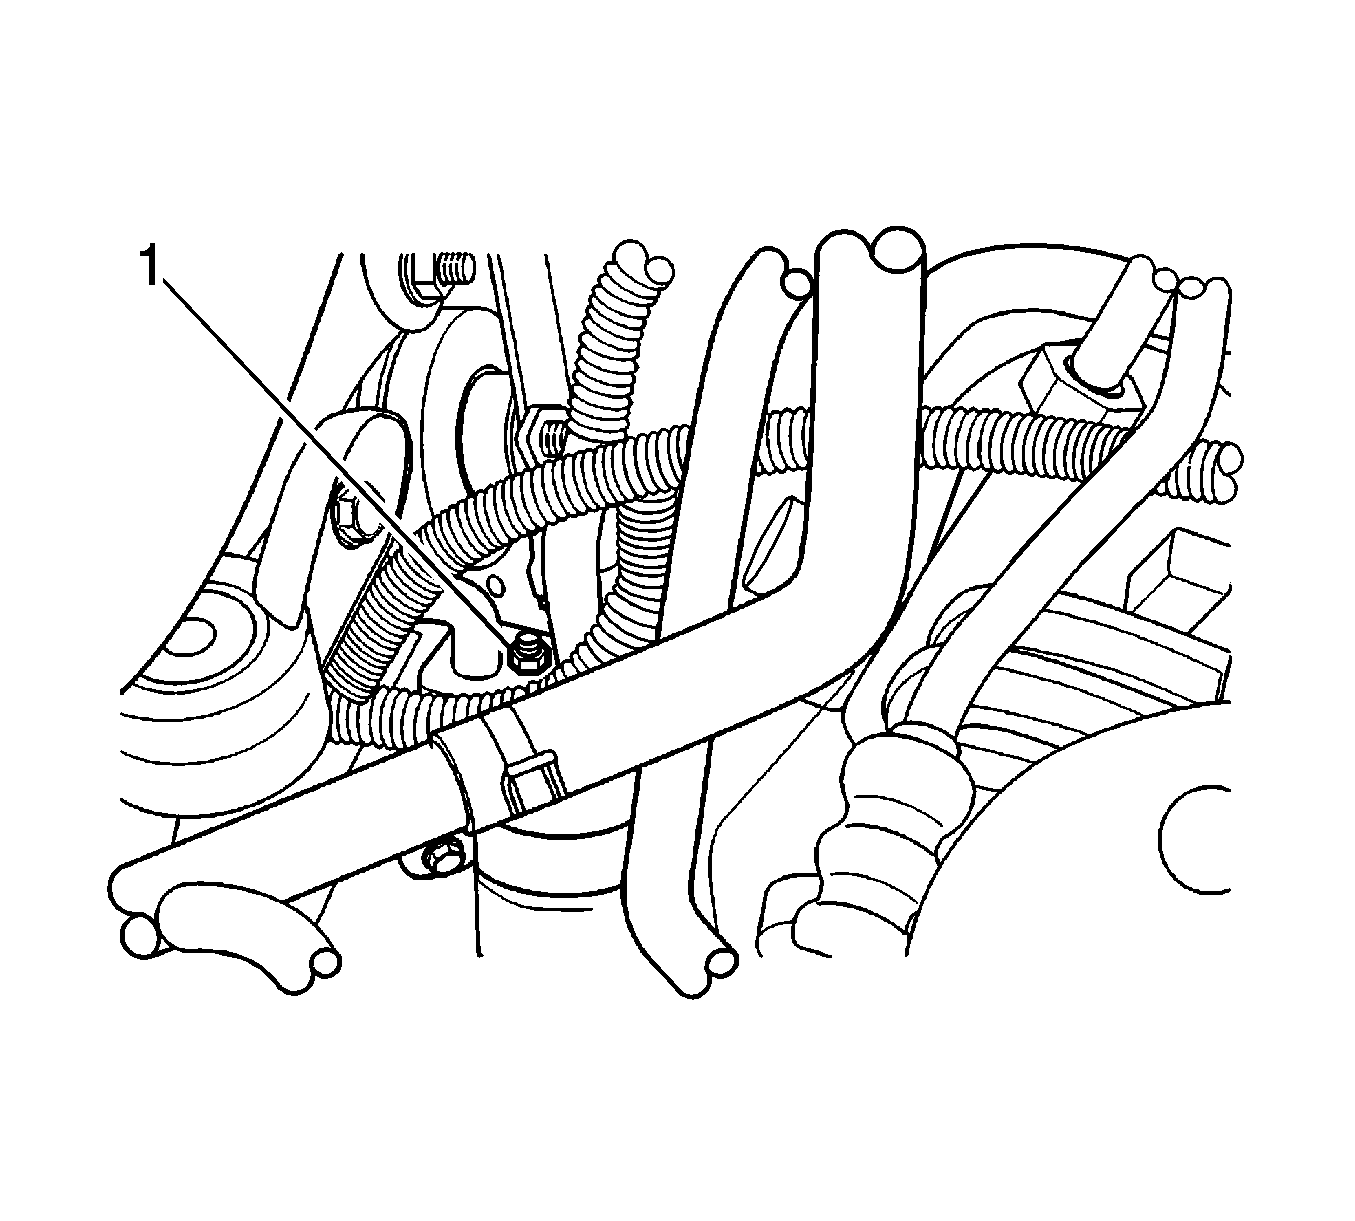
- Remove the receiver dryer flange nuts (1).
- Remove the A/C high pressure pipe line between the condenser and the receiver dryer.
- Remove the purge control valve. Refer to Evaporative Emission Canister Purge Solenoid Valve Replacement in Engine Controls-0.8L or Evaporative Emission Canister Purge Solenoid Valve Replacement in Engine Controls-1.0L.
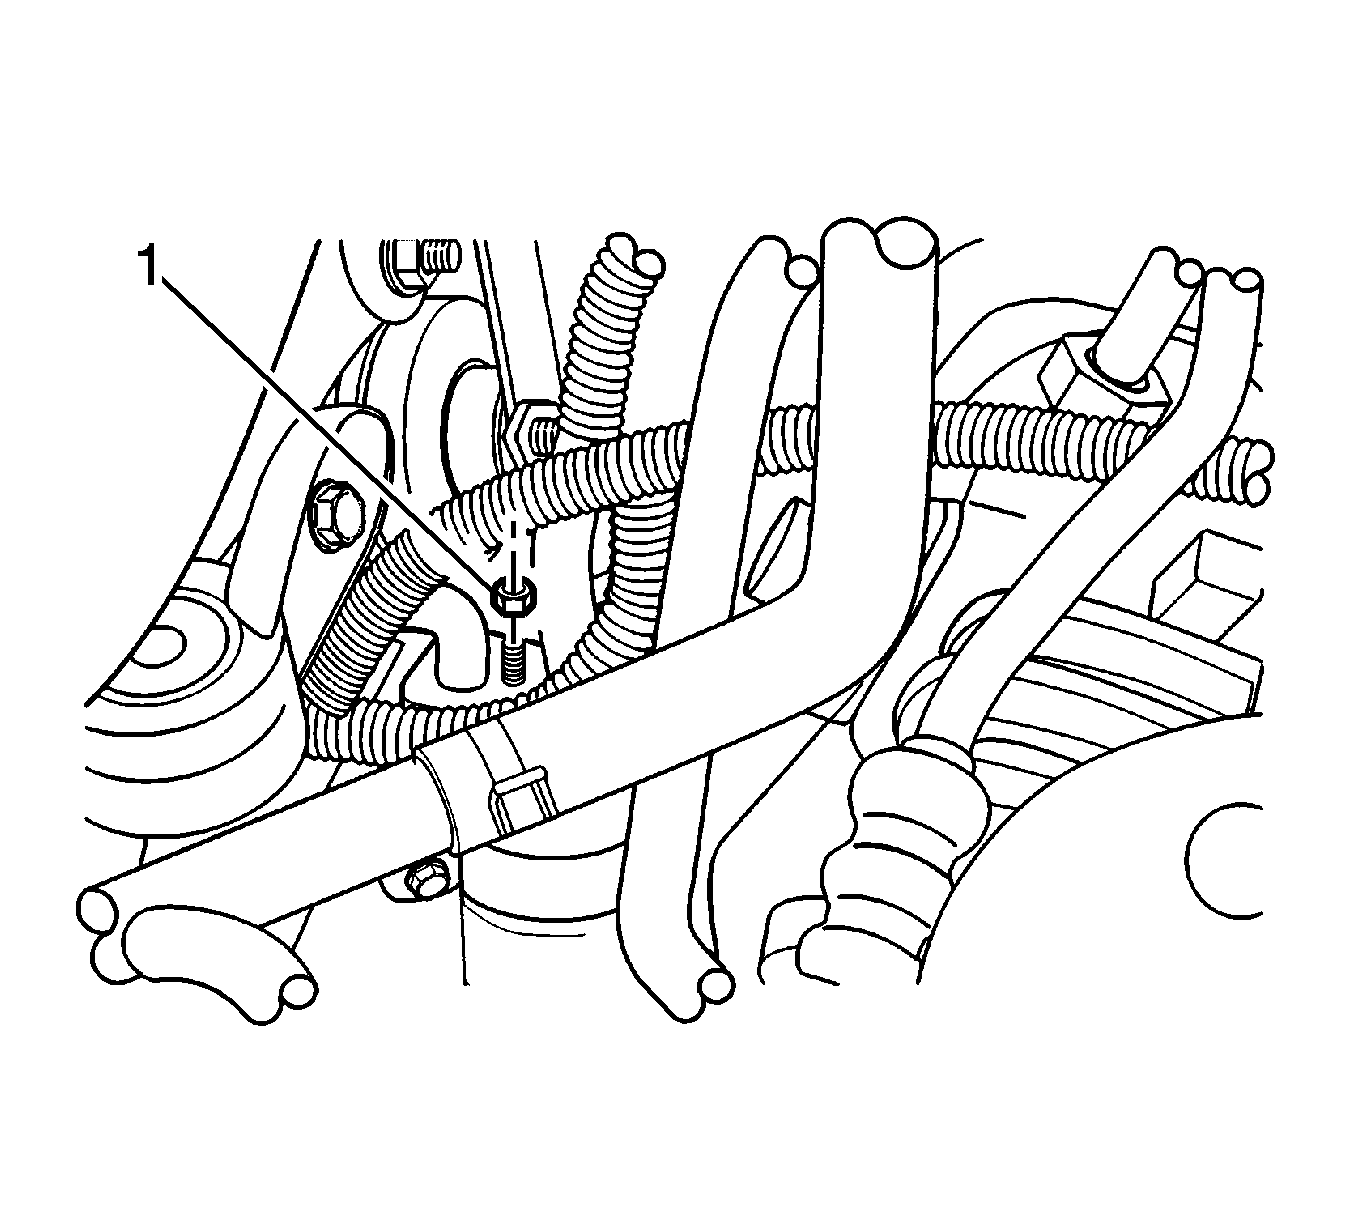
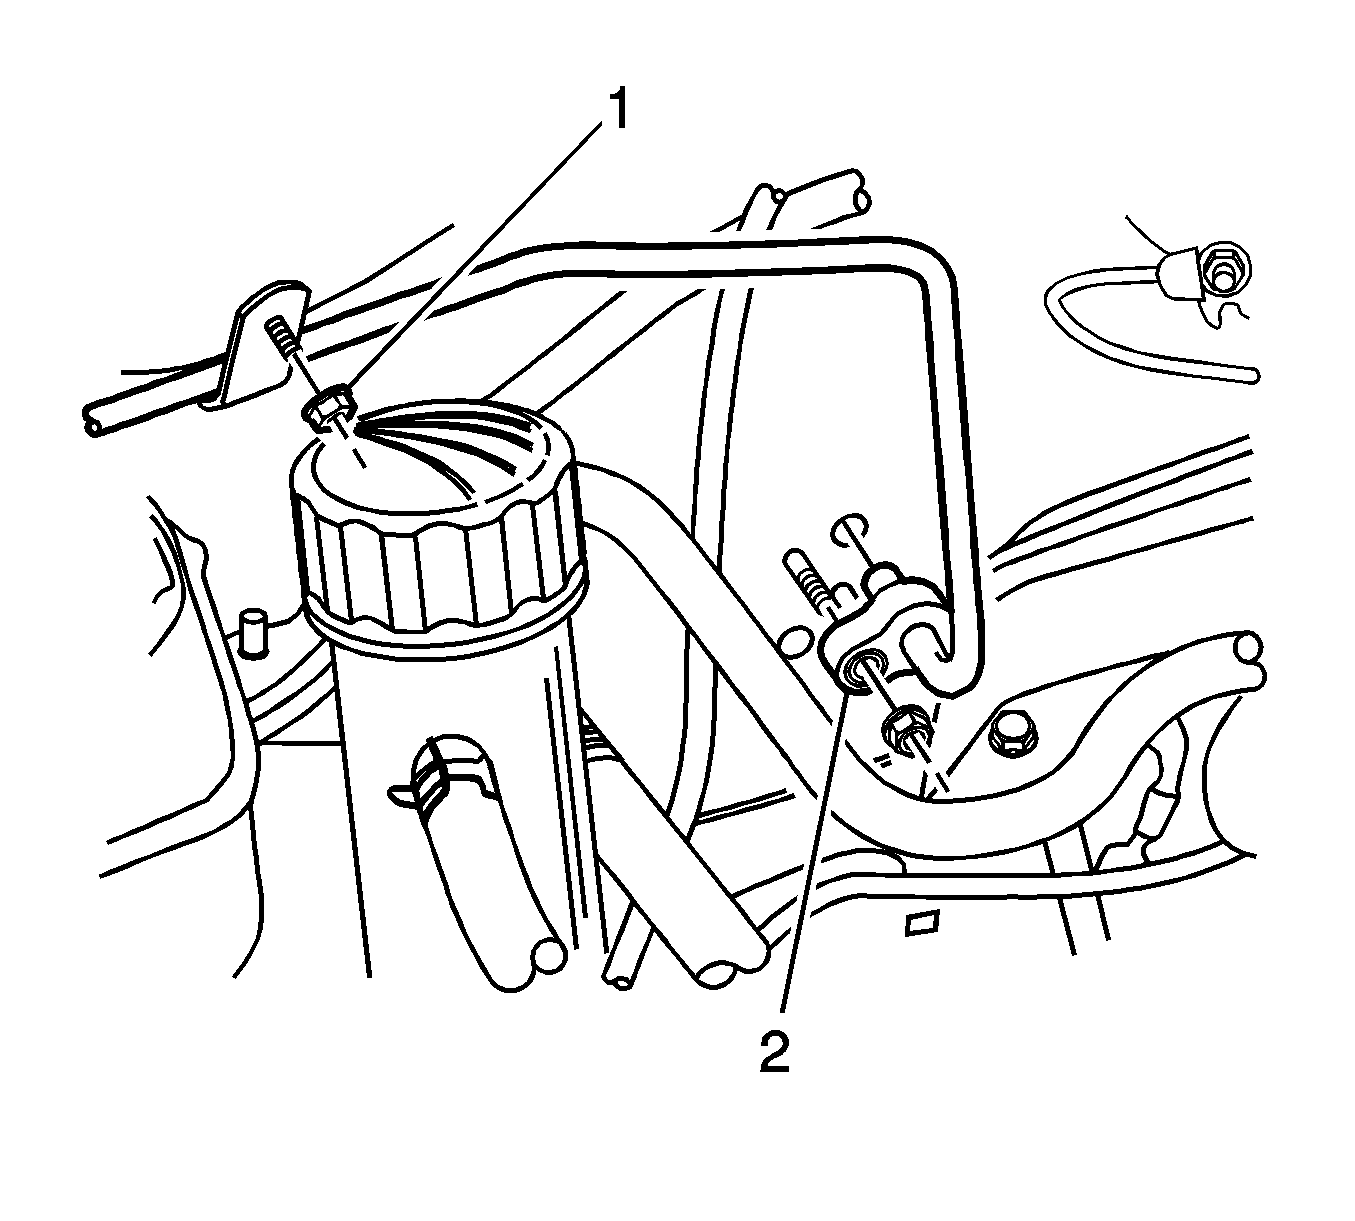
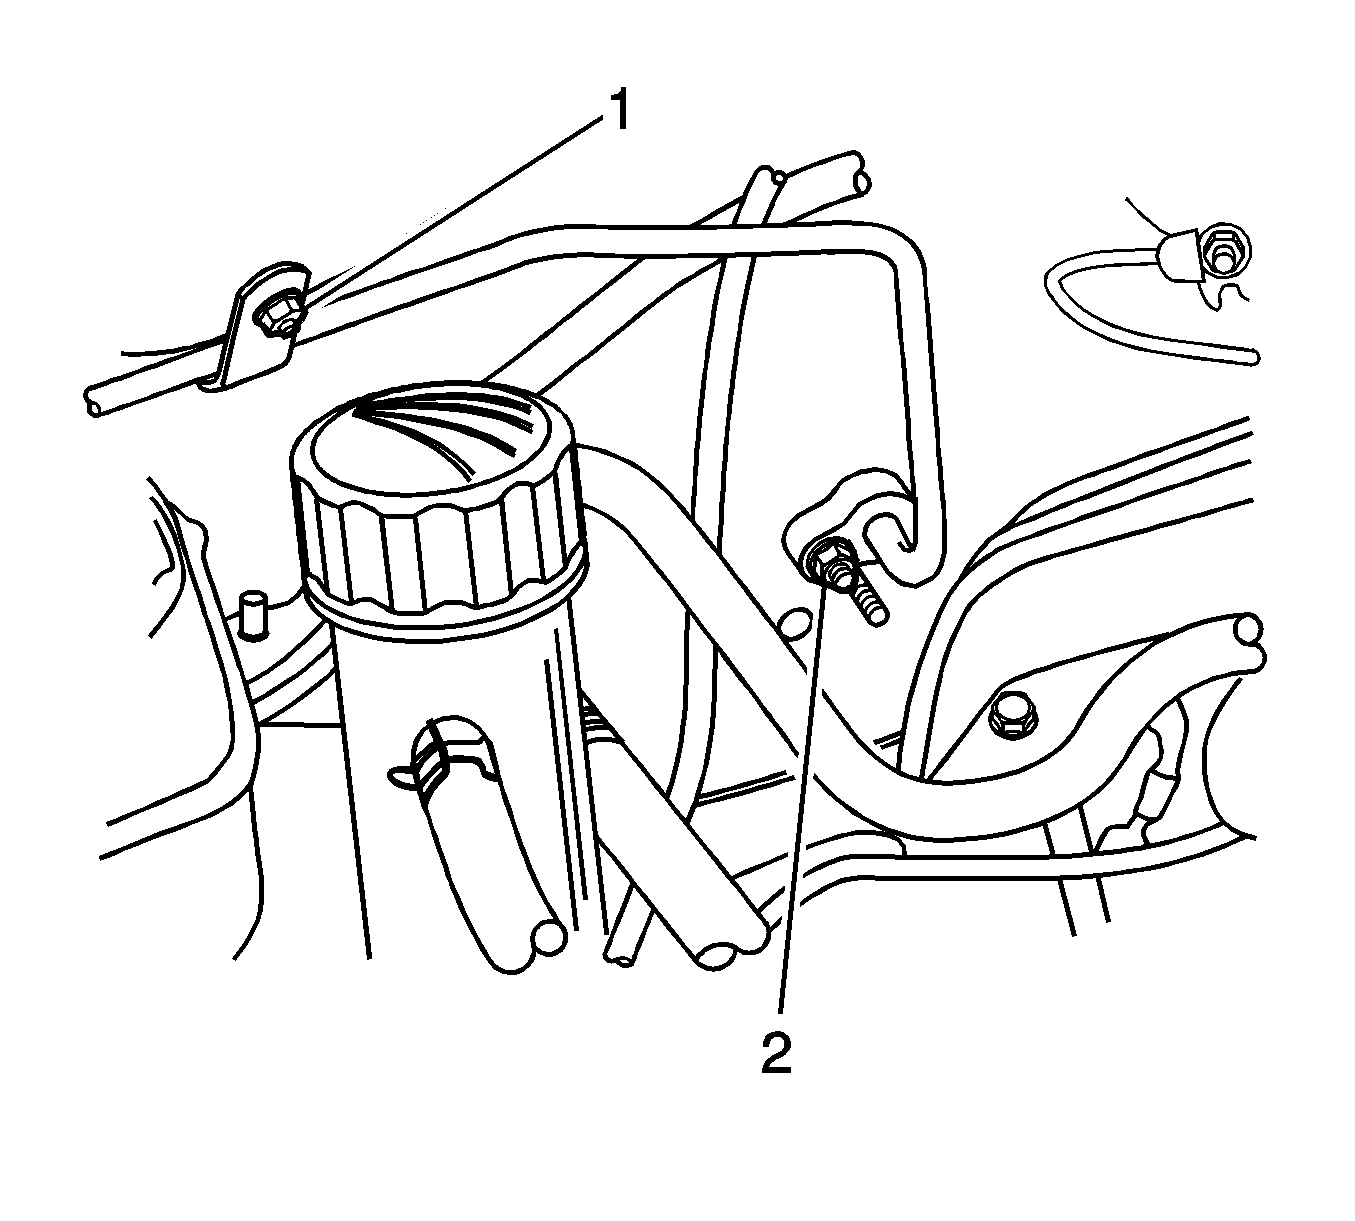
- Remove the bracket nut (1).
- Loosen the fitting (2).
- Remove the A/C high pressure pipe line between the receiver dryer and the evaporator.
Caution: Refer to Battery Disconnect Caution in the Preface section.
Installation Procedure
- Install the high pressure pipe line (1) to the compressor.
- Install the fitting (1) securing the high pressure pipe line to the receiver dryer.
- Install the fitting (3) securing the high pressure pipe line to the receiver dryer.
- Install the high pressure pipe line bracket and tighten the nut (2).
- Install the receiver dryer flange and tighten the nuts (1).
- Install the high pressure pipe line to the evaporator and tighten the nuts (2).
- Install the high pressure pipe line bracket and tighten the nut (1).
- Install the purge control valve. Refer to Evaporative Emission Canister Purge Solenoid Valve Replacement in Engine Controls-0.8L and Evaporative Emission Canister Vent Solenoid Valve Replacement in Engine Controls-1.0L.
- Evacuate and recharge the system. Refer to Refrigerant Recovery and Recharging .
- Install the front bumper fascia. Refer to Front Bumper Fascia Replacement in Bumpers.
- Connect the negative battery cable.
Notice: Refer to Fastener Notice in the Preface section.
Important: Discard the removed O-rings.
Tighten
Tighten the bolt securing the high pressure pipe
line to the compressor to 23 N·m (17 lb ft).
Tighten
Tighten the fitting securing the high pressure pipe
line to the condenser pipe line to 23 N·m (17 lb ft).
Tighten
Tighten the fitting securing the high pressure pipe
line to the receiver dryer to 14 N·m (10.5 lb ft).
Tighten
Tighten the bracket nut to 5 N·m (44 lb in).
Tighten
Tighten the receiver dryer flange nuts to 14 N·m
(10.5 lb ft).
Tighten
Tighten the nut securing the high pressure pipe
line to the evaporator to 14 N·m (10.5 lb ft).
Tighten
Tighten the bracket nut to 5 N·m (44 lb in).
