HIGH LIFTGATE LATCHING EFFORT (DIAG./INSTALL SERVICE KIT)

Subject: HIGH LIFT GATE LATCHING EFFORT (DIAGNOSE/INSTALL SERVICE KIT)
Models Affected: 1990-91 TRANS SPORT MODELS
Condition: High Lift Gate Latching Effort in 1990-91 Trans Sports.
Cause: 1. Interference with over slam bumpers.
2. Misaligned strikers.
3. Misaligned strikers in opening.
Correction: 1. Insure rubber bumpers at lower corners are not causing interference. They should lightly contact the body when the lift gate is closed.
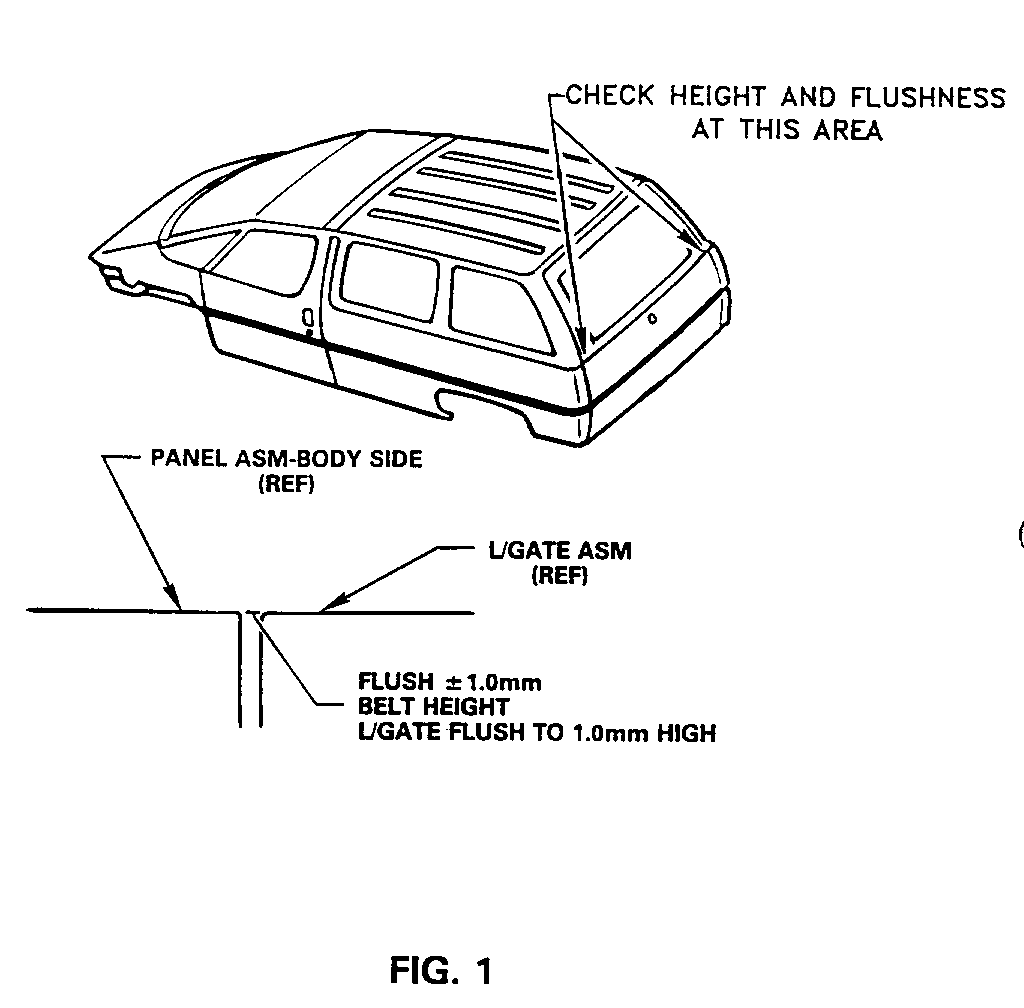
2. If efforts are still unacceptable remove strikers (leave struts attached). Close the lift gate and check the height at the belt line as shown in Figure 1. Lift gate should be flush for height with the quarter panel (+/- 1.0 MM). If not flush, loosen lift gate side hinge bolts and (using hinge bolt attachment witness marks as a guide) adjust in desired direction to obtain a flush condition. Be sure to equalize opposite hinge by loosening bolts and retorque.
3. Reinstall strikers to set lift gate flush (+/- 1.0 MM) fore/aft at the quarter panels. The strikers should not be dragging on the top or bottom of the latch.
4. If efforts are still unacceptable, install service kit and follow procedure listed below.
Kit Part Numbers: 10219106
Note: Installing this kit will reduce latching effort and initial pull down effort from the full open position. However, a slight increase in opening effort will be experienced.
Retrofit kit consists of the following parts:
Struts (Two) Bracket Assembly (Two) Rivet (Two) Bolt (Two) Lock Cylinder Instruction Sheet Template
Procedure: 1. Remove speaker covers to access trim panel retaining screws and remove.
2. Remove the rest of retaining screws and remove trim panel.
3. Remove rear pillar shoulder belt anchor bolts.
4. Remove rear pillar trim.
5. Support lift gate in full open position with a padded jack stand to prevent damage.
6. Remove struts from the door and body and discard.
7. Remove the stud from the lift gate. With the stud removed, place it upside down in a one inch deep well socket and drive the washer off the stud. Discard washer and save stud for later use.
8. Using bolts supplied in kit, attach brackets to the door, finger tight or snug.
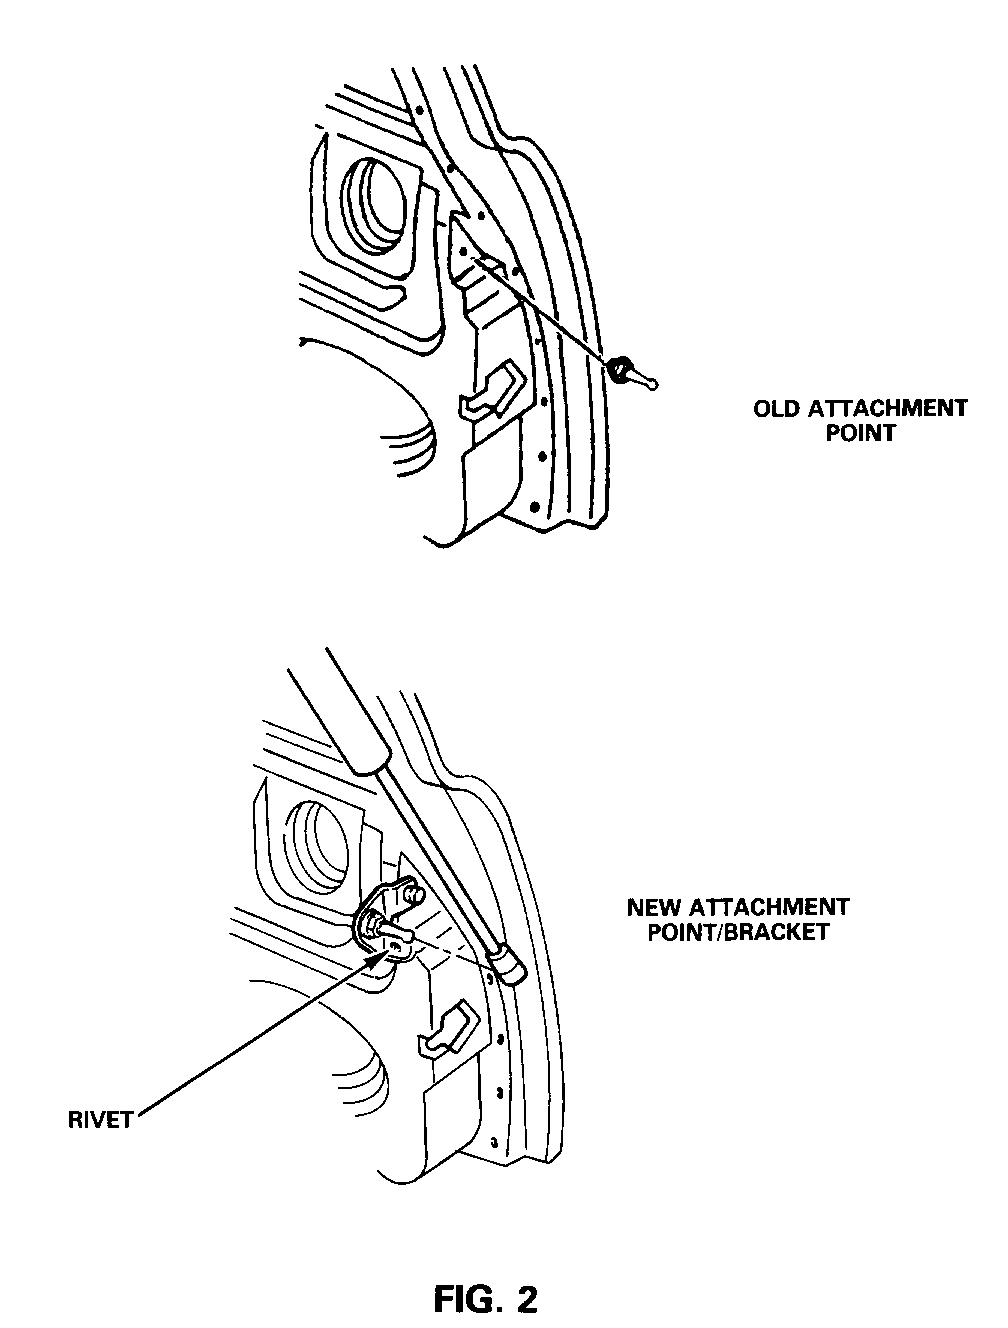
9. Drill a 13/64" rivet hole in the door as shown in Figure 2. Install rivets supplied from kit.
10. Install the modified studs from Step 7 to the brackets.
11. Torque the bolts and the studs to 40-45 N.m (29-33 lbs. ft.).
12. Install new struts, (Piston end attached to the lift gate.) Remove jack stand.
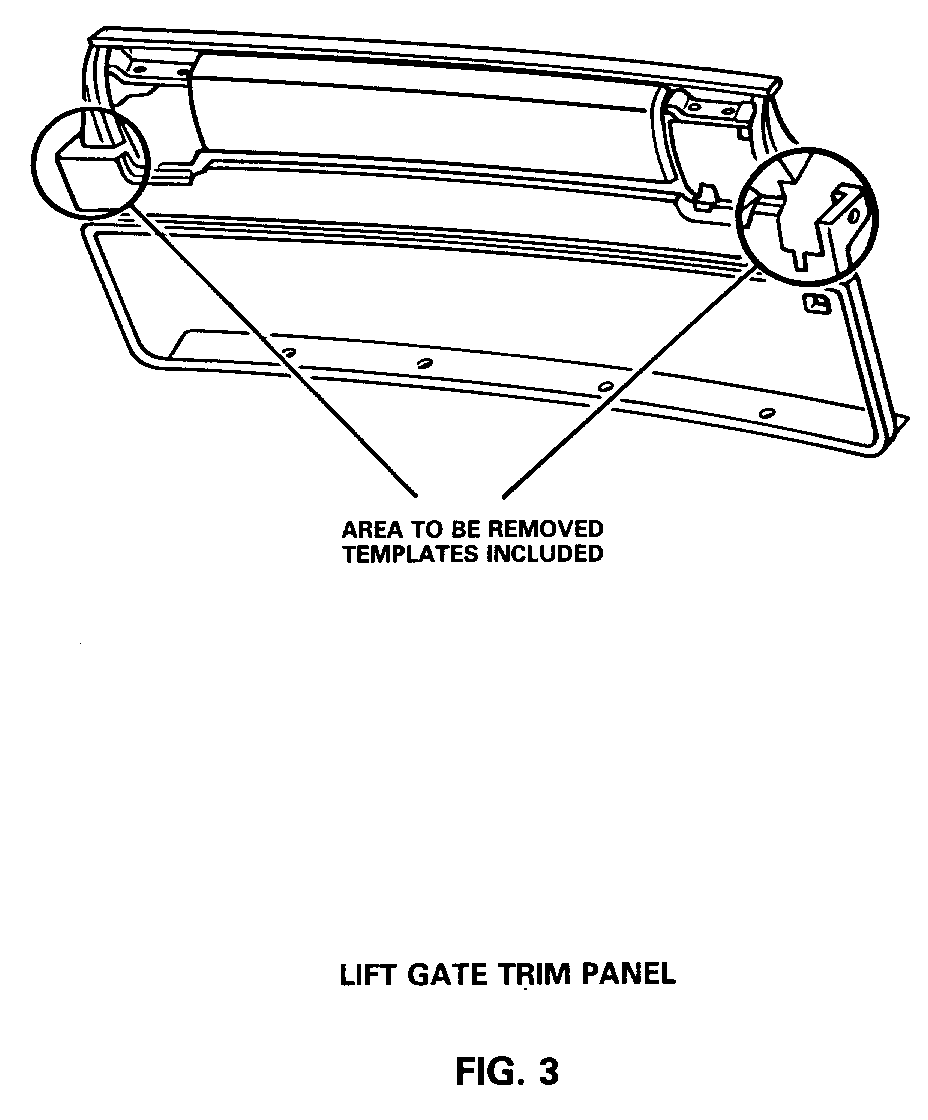
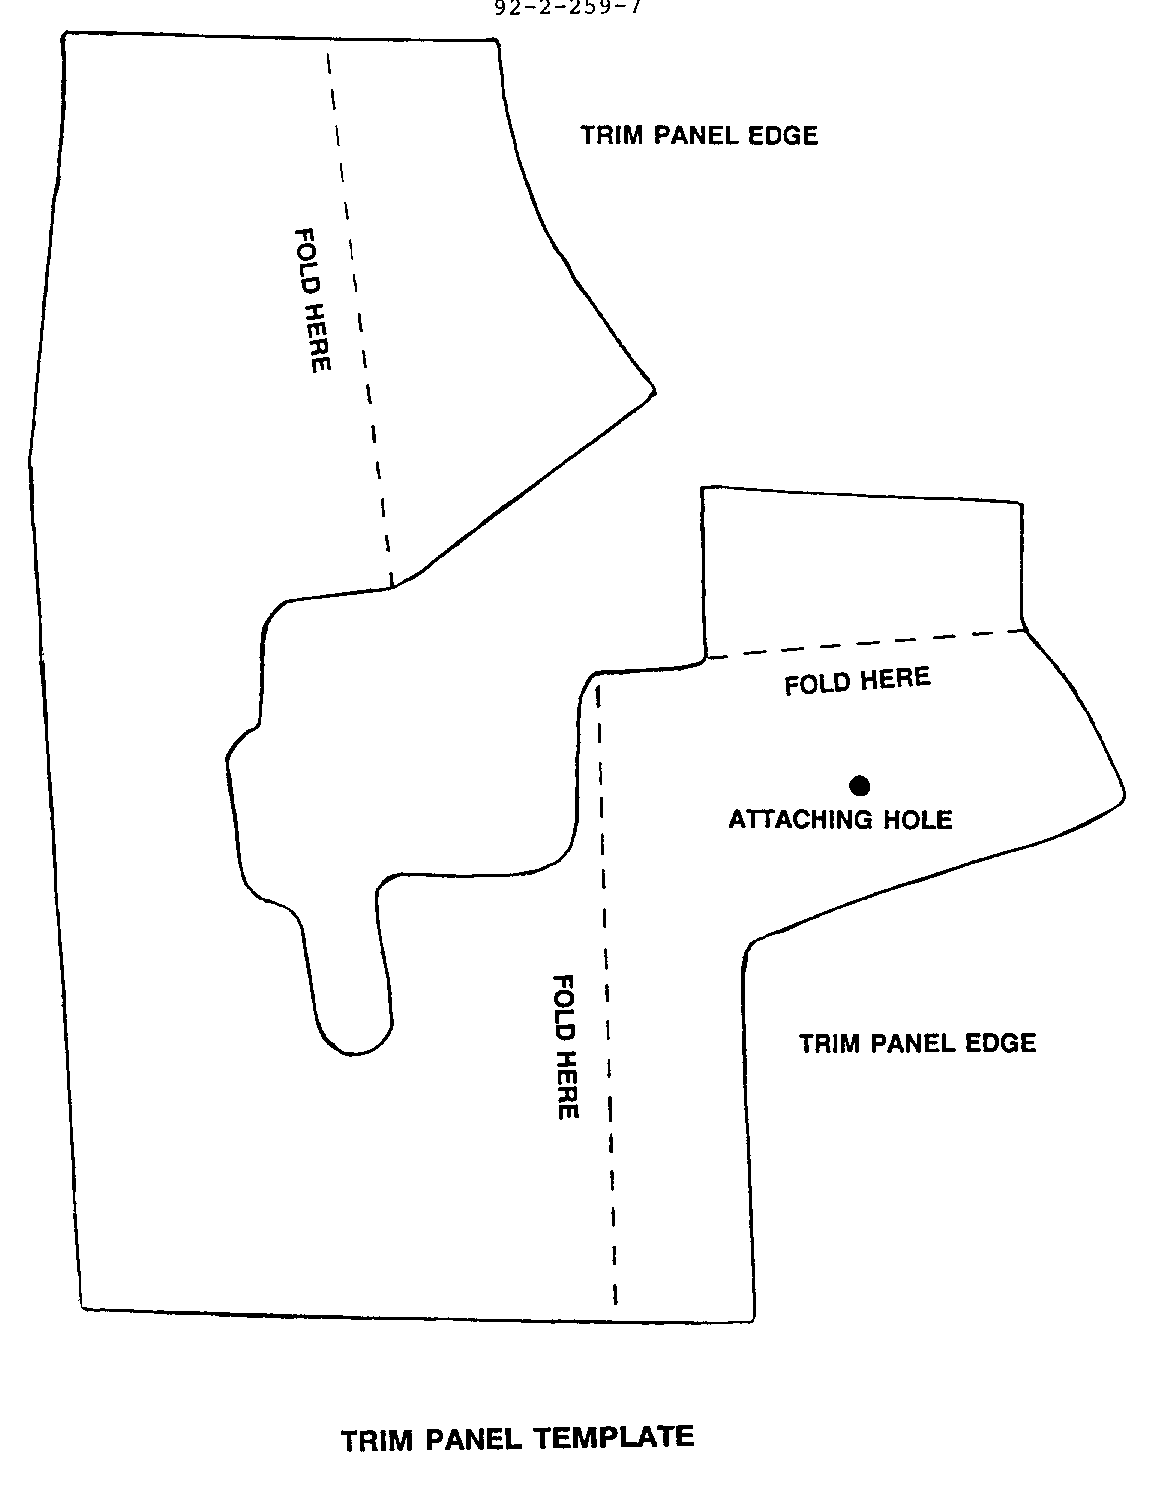
13. Install template from the kit to the right hand side of the trim panel, as shown in Figure 3.
Important: Template will have to be folded in opposite direction for left hand side.
14. Mark area around template with grease pencil.
15. Remove outlined section of trim panel with suitable tool such as a coping saw, die grinder, etc. After cutting, use a flat file to smooth out flat lines and rat tail file to smooth out radius lines.
16. Install new lock cylinder which has a larger gripping area for opening the lift gate as follows:
17. Remove lock rods and lock rod cover plate.
18. Remove the rivet from the lock cylinder retainer, on vehicles with power lock. Remove retainer and cylinder (discard cylinder).
19. Recode the lock cylinder supplied in kit and reinstall.
20. Reinstall lock cylinder retainer plate. Using a long nose rivet gun, install a 1/8" X 1/4" aluminum rivet to the lock cylinder bracket. (On Vehicles Equipped With Power Locks.)
21. Reinstall cover plate and lock rods.
22. Check for proper operation of the lock and lift gate before the next step.
23. Reinstall trim panel.
24. Reinstall D-pillar trim.
25. Reinstall shoulder belt anchor bolts and torque to 35-48 N.m (26-35 lbs. ft.).
26. Reinstall speaker cover.
Part Availability:
Parts are currently available from GMSPO.
Labor Operation Number: T1838
Labor Time Allowance 2.5 Hrs.


General Motors bulletins are intended for use by professional technicians, not a "do-it-yourselfer". They are written to inform those technicians of conditions that may occur on some vehicles, or to provide information that could assist in the proper service of a vehicle. Properly trained technicians have the equipment, tools, safety instructions and know-how to do a job properly and safely. If a condition is described, do not assume that the bulletin applies to your vehicle, or that your vehicle will have that condition. See a General Motors dealer servicing your brand of General Motors vehicle for information on whether your vehicle may benefit from the information.
