For 1990-2009 cars only
- Heat the piston to 80-90°C (176-194°F).
- Coat the piston pin with engine oil.
- Push the piston pin into the piston pin bore by hand.
- Assemble the connecting rod and the piston.
- Install new snap rings using a small screwdriver.
- Install the following components of the oil control ring assembly (bottom ring):
- Install the lower compression ring (second ring). Place the manufacturer's mark facing up.
- Install the upper compression ring (top ring).
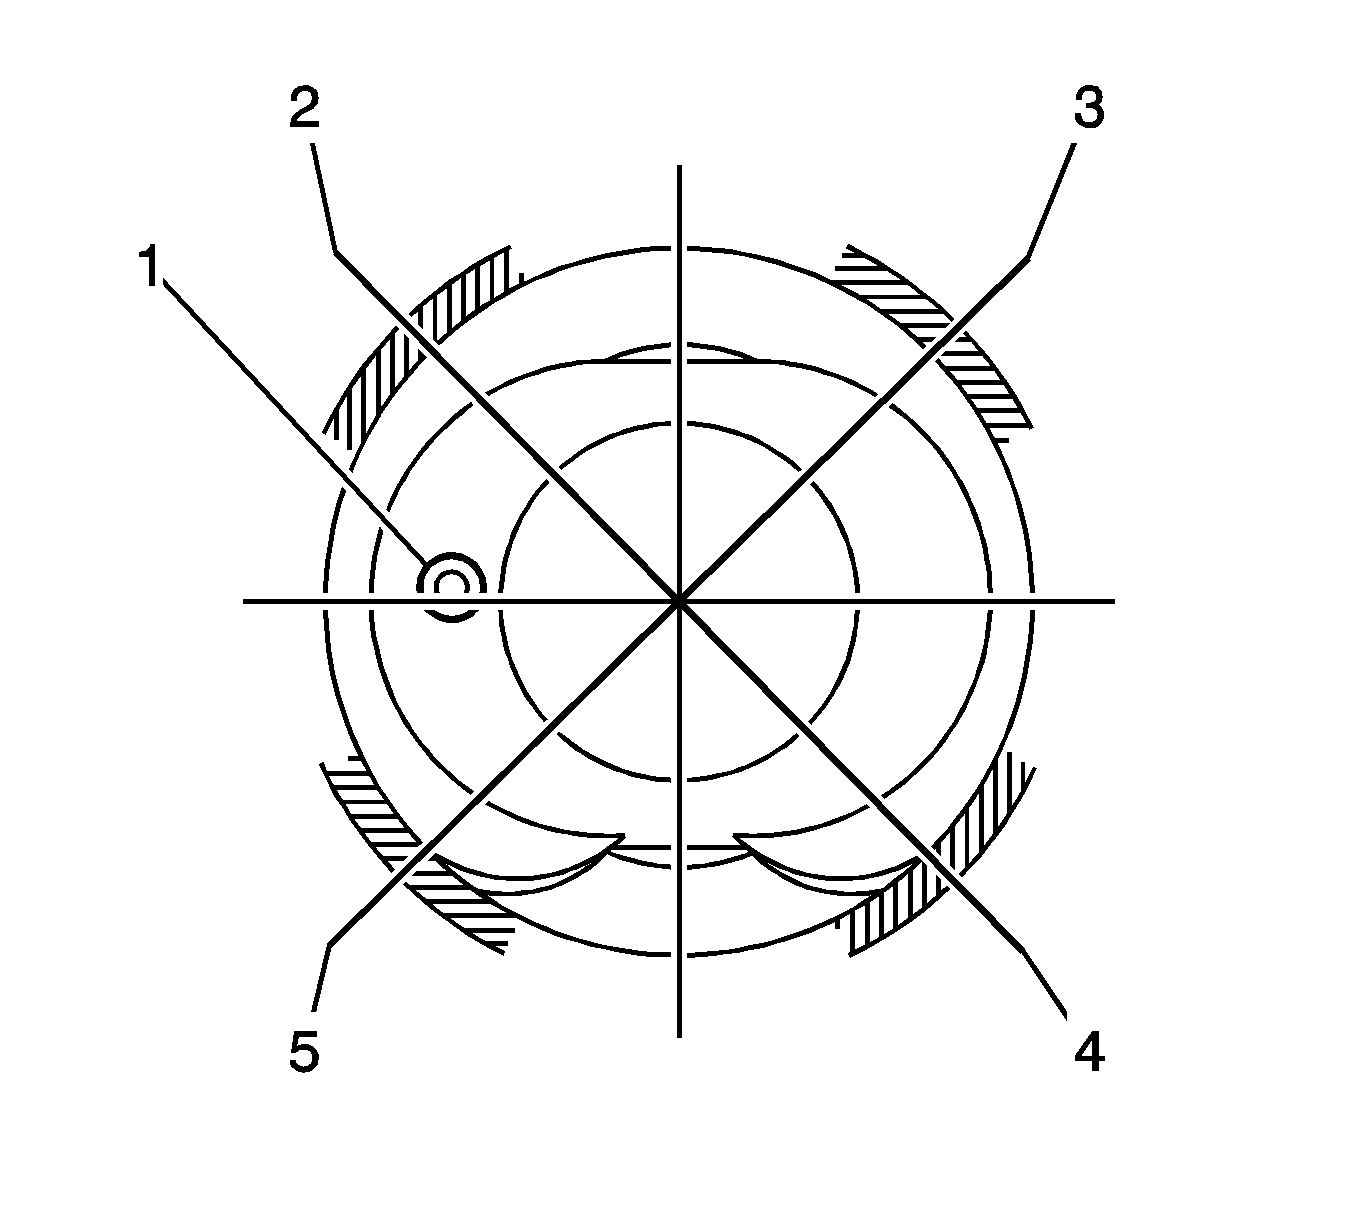
- Position the piston rings in relation to the front mark (1), as follows:


Important: Install the piston onto the connecting rod with the marks (1) oriented toward the front of the engine.


Important: Be sure that the end gap of the piston pin snap ring is aligned with the pin hole cutout portion of the piston.
Notice: Use a piston ring expander to install the piston rings. The rings may be damaged if expanded more than necessary.

| 6.1. | The expander |
| 6.2. | The lower oil control ring |
| 6.3. | The upper control ring |

| 9.1. | Upper side rail (2). |
| 9.2. | Compression No. 2 (3). |
| 9.3. | Lower side rail (4). |
| 9.4. | Compression No. 1 or expander (5). |
