Special Tools
| • | J-35405 Differential Preload Wrench |
| • | J-46002 Drive Pinion Lock Nut Wrench |
| • | J-46004 Rear Axle Drive Pinion Holding Tool |
- Install the proper rear No. 1 differential side gear thrust washers on the differential side gears.
- Install the differential side gears, differential pinion gears, rear differential pinion thrust washers and rear differential pinion shaft in the differential case.
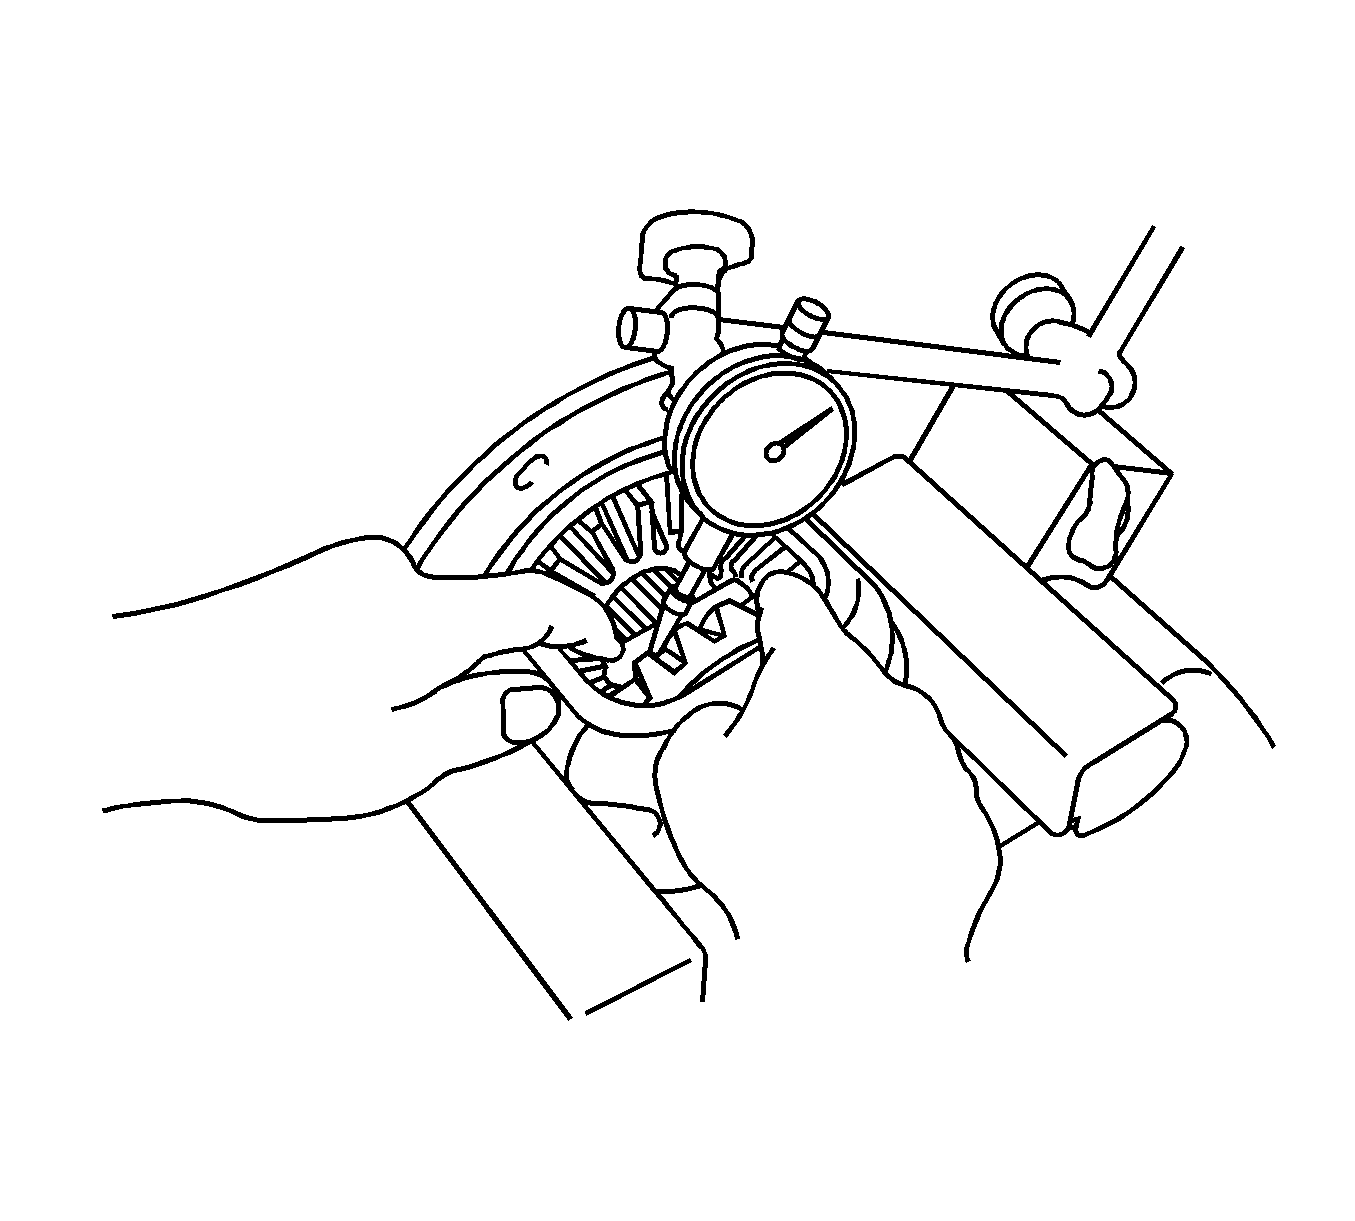
- Measure the differential side gear backlash while holding a differential pinion gear toward the differential case.
- If the backlash is not within the specification, install the rear No. 1 differential side gear thrust washers with different thicknesses. Refer to Spacer and Shim Specifications for the No. 1 Side Gear Thrust Washer Chart.
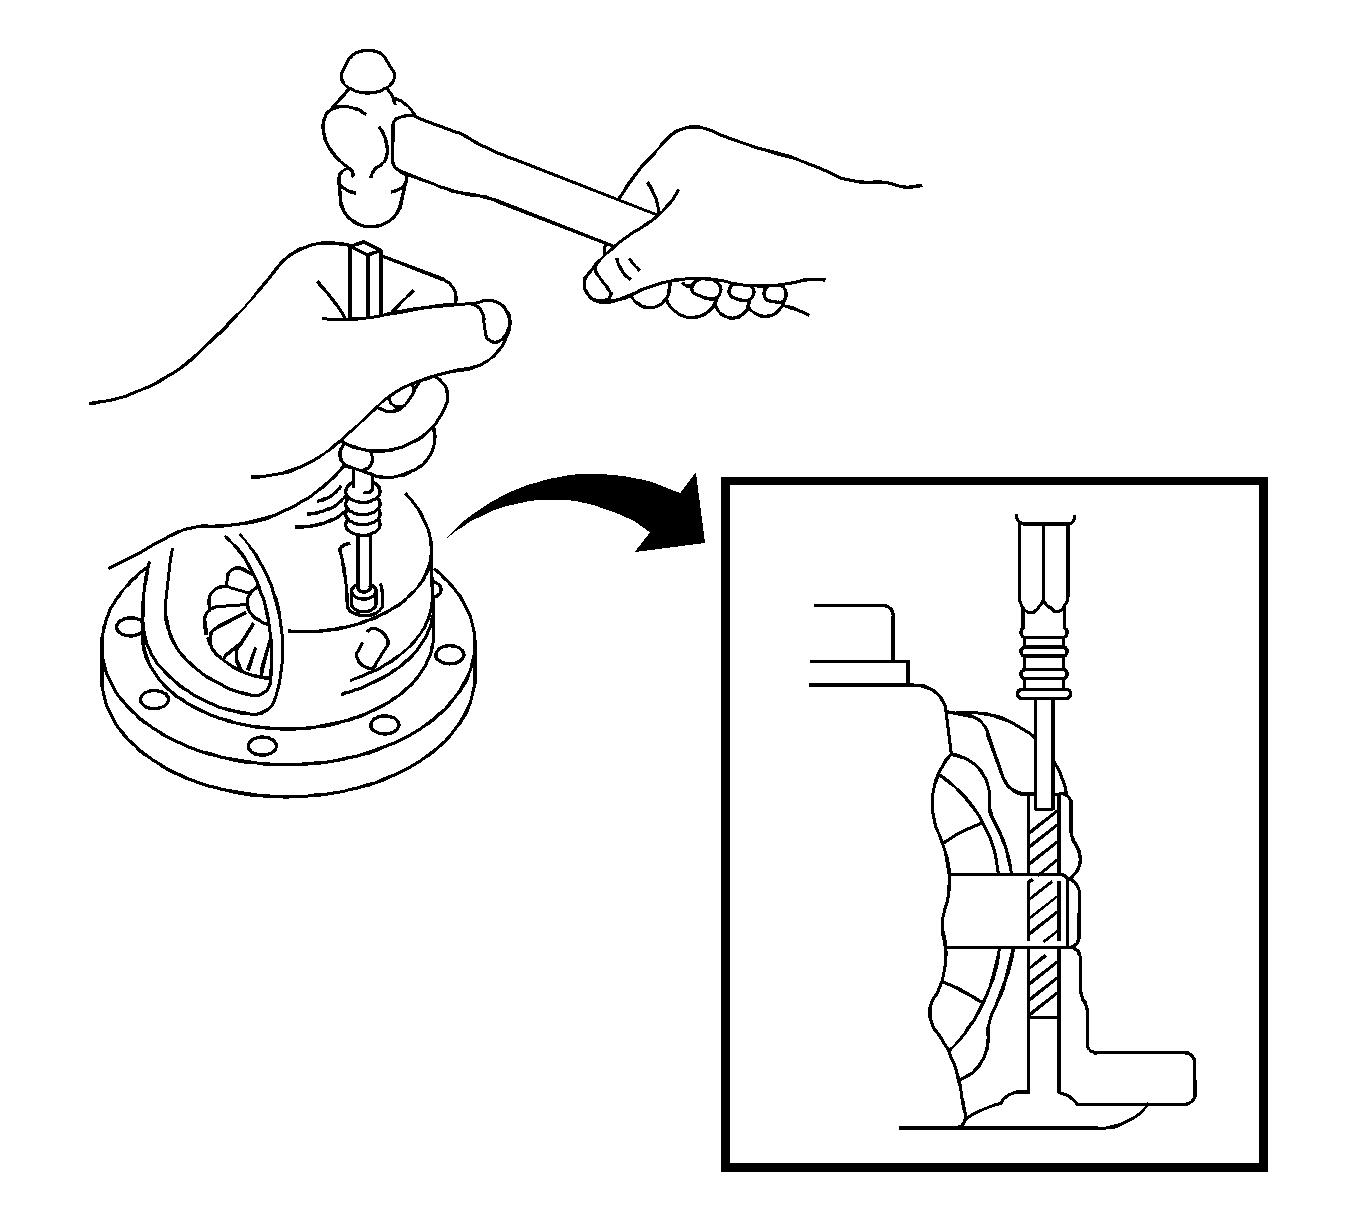
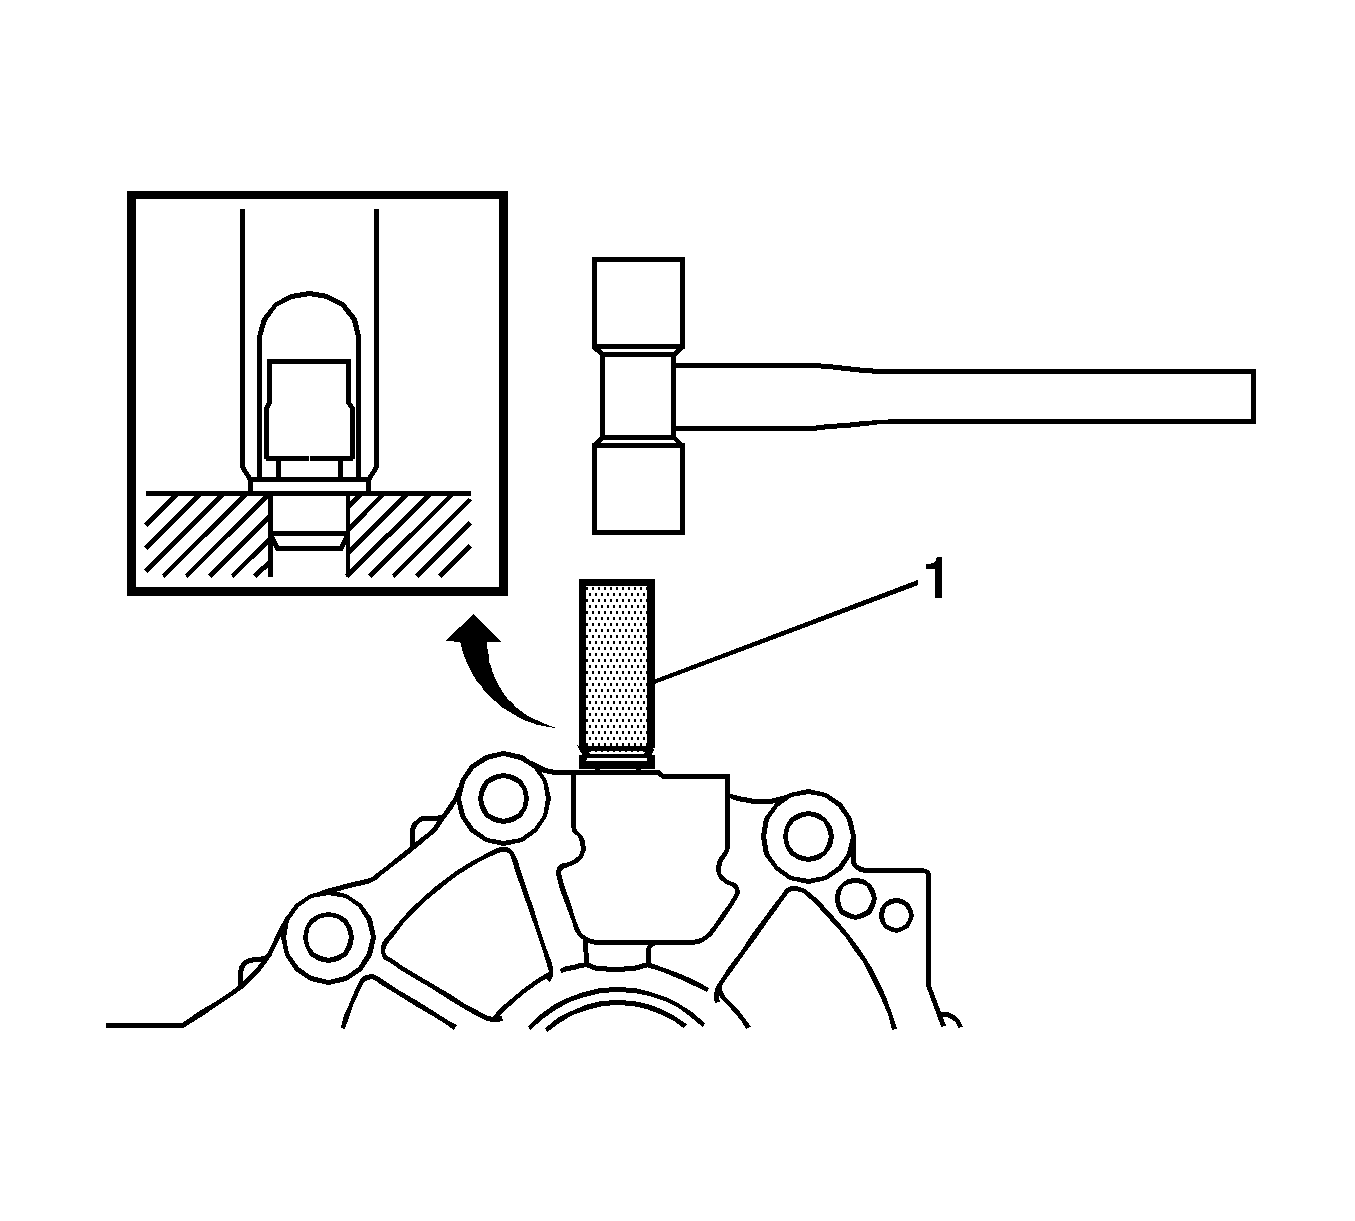
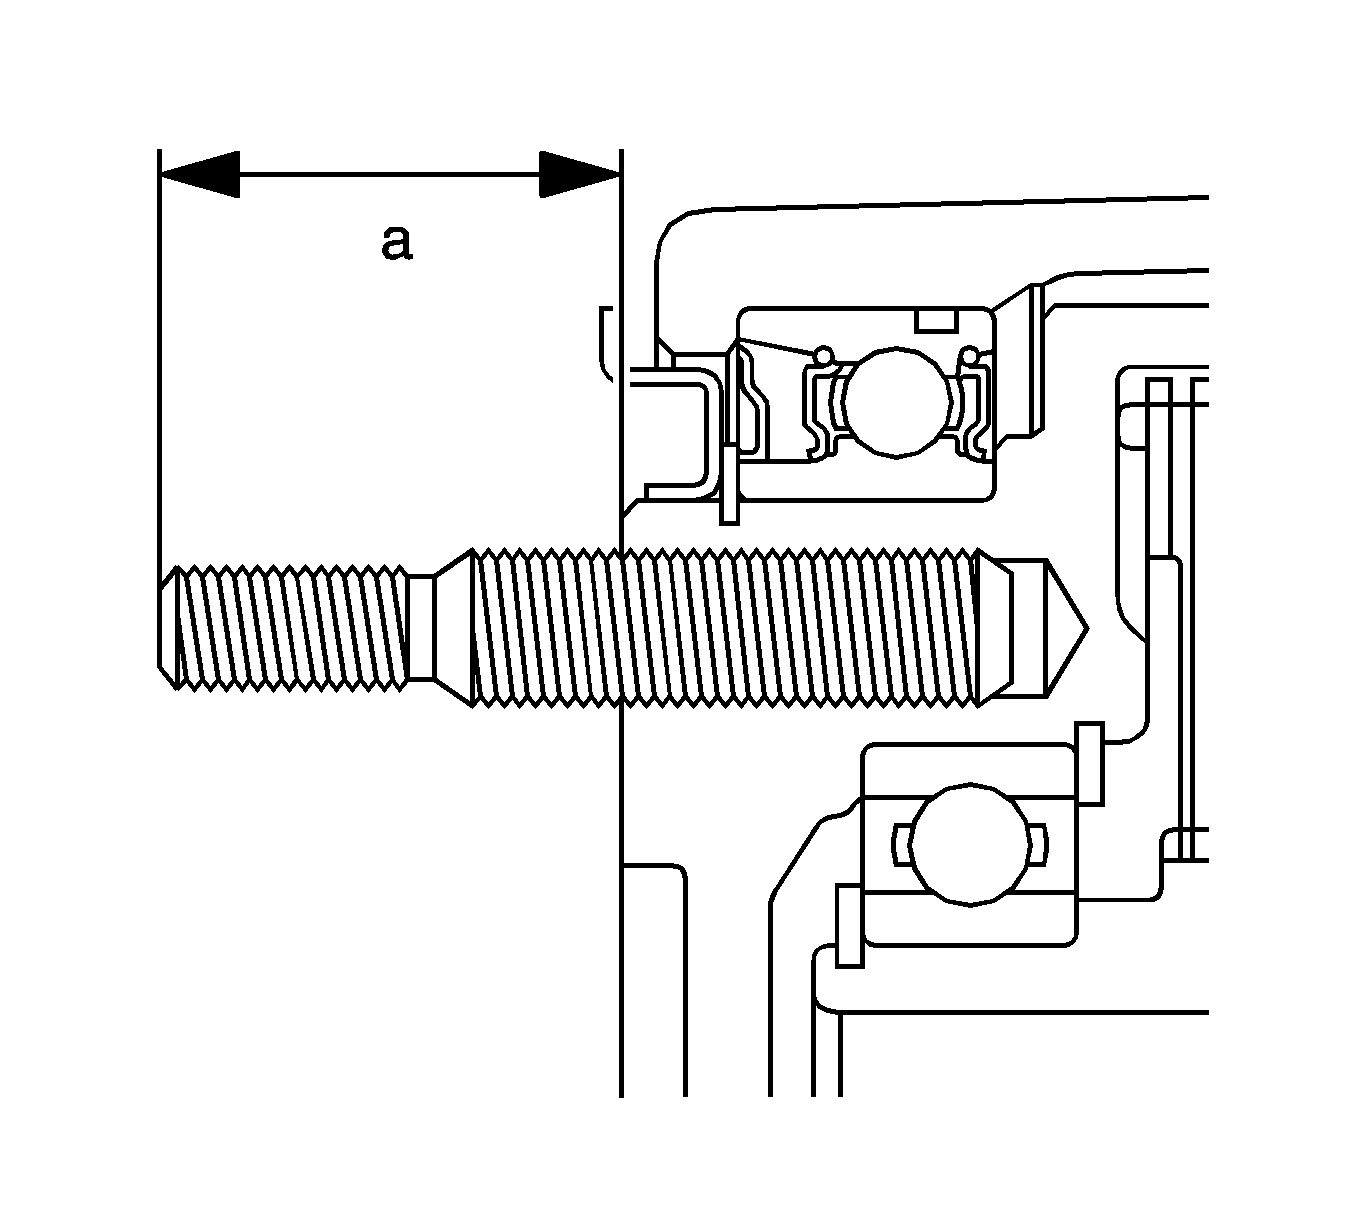
- Using a pin punch and a hammer, install the rear differential pinion shaft pin through the differential case and hole of the pinion shaft.
- Using a chisel and a hammer, stake the outside of the differential case pin hole.
- Clean the contact surfaces of the differential case and ring gear.
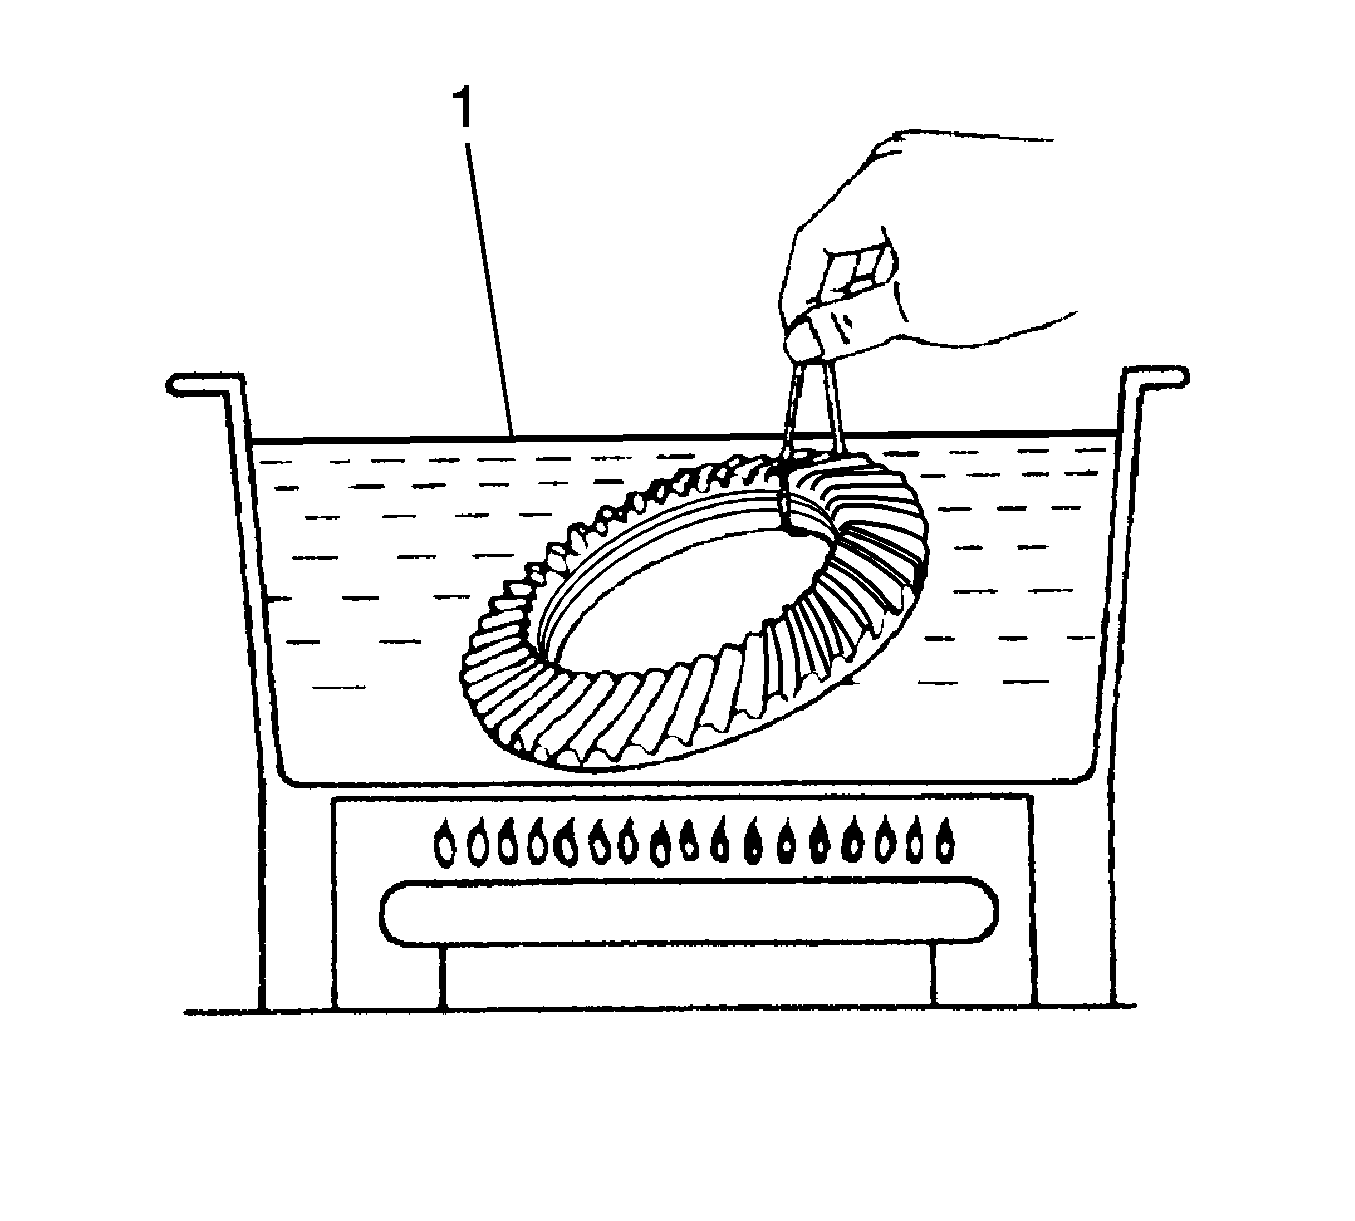
- Heat the ring gear in boiling water (1).
- Carefully remove the ring gear from the boiling water.
- After the moisture on the ring gear has completely evaporated, quickly install the ring gear to the differential case.
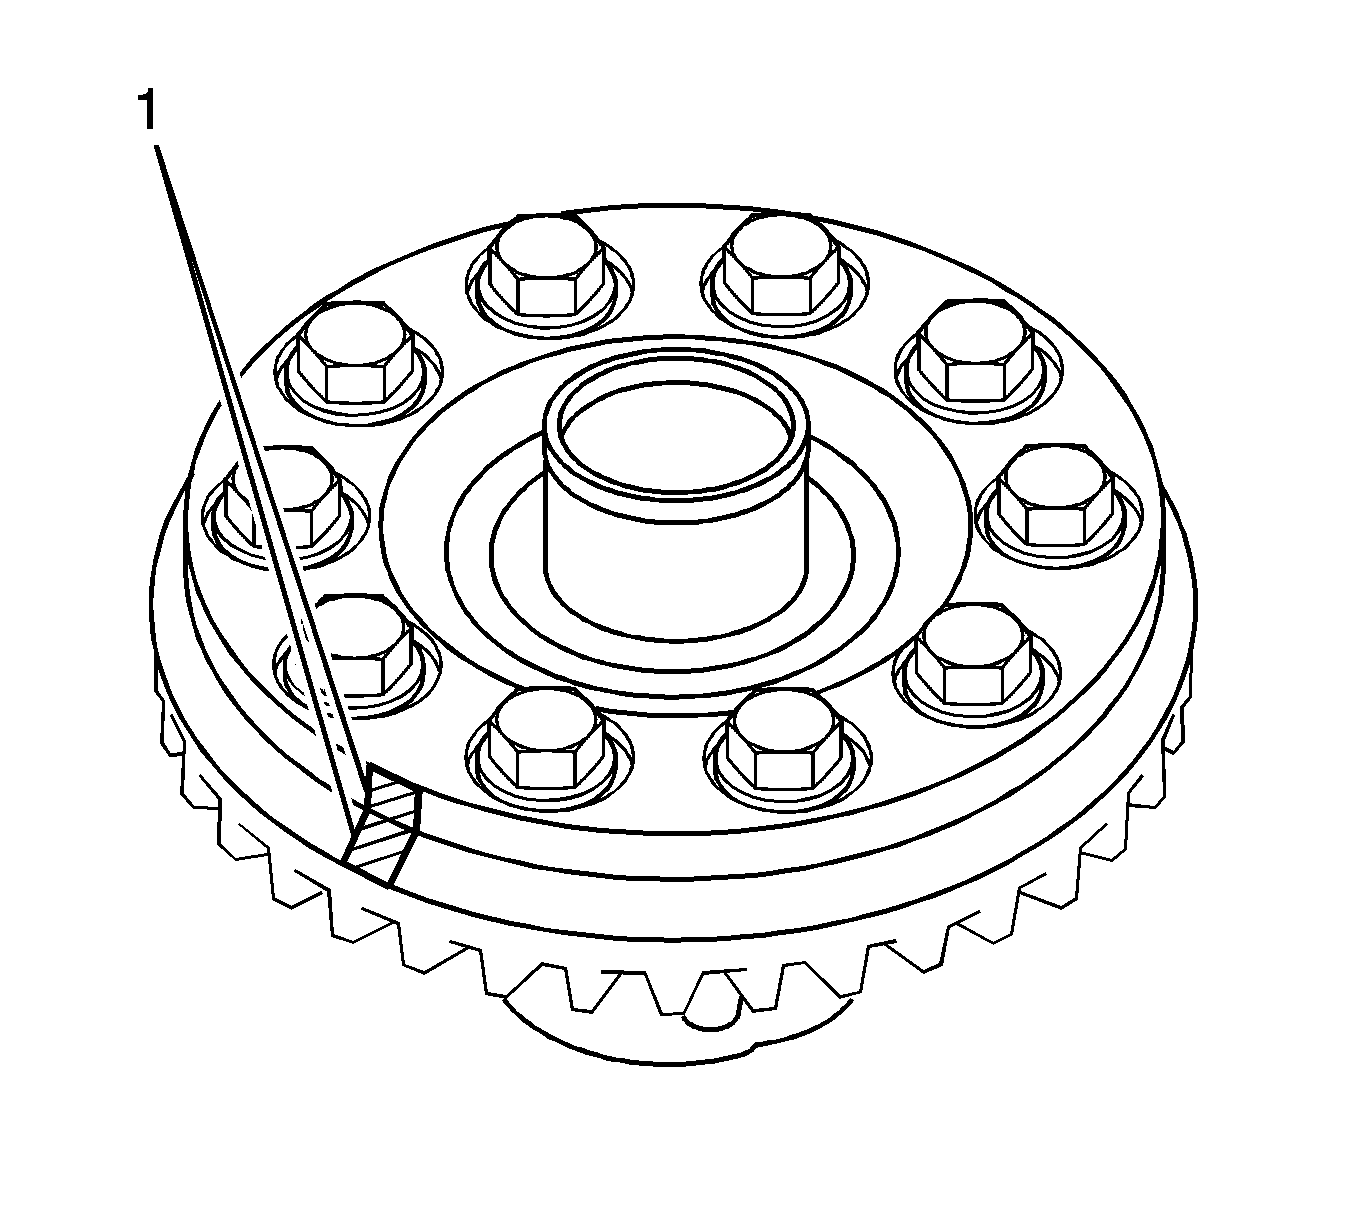
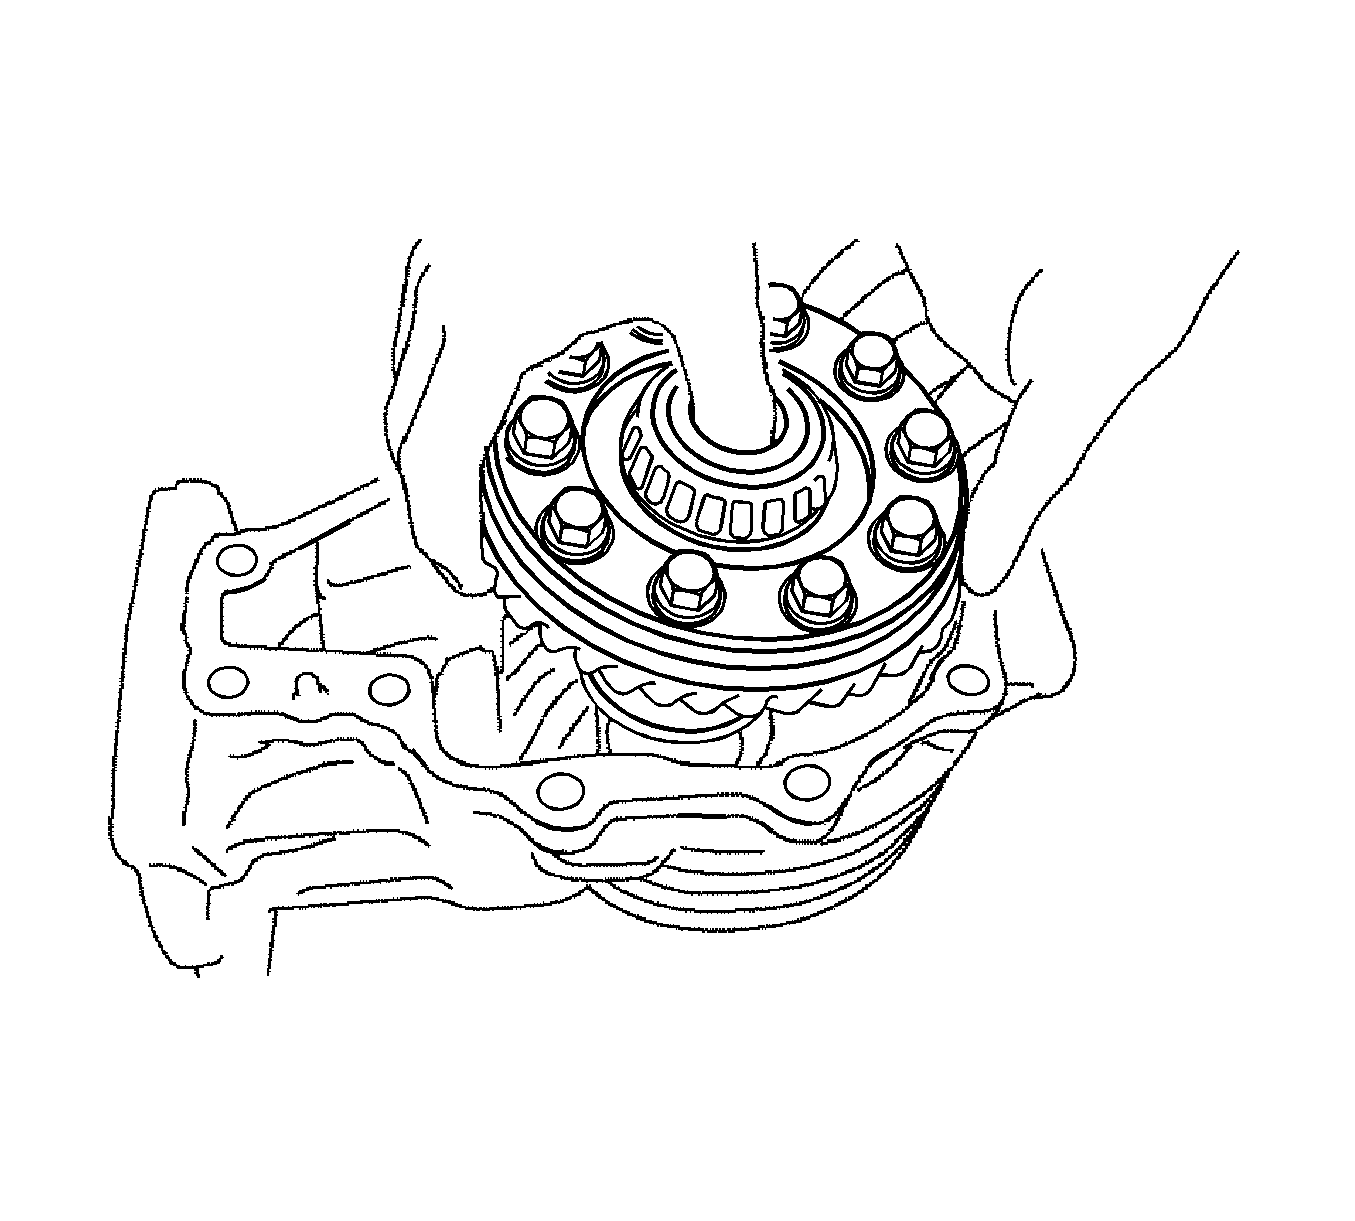
- Align the matchmarks (1) on the rear differential case and differential ring gear, and install the differential ring gear.
- Hand tighten the new bolts.
- After the ring gear cools down sufficiently, tighten the bolts uniformly to 78 N·m (58 lb ft).
- Using a press (1), press-fit the rear differential case bearing right side (inner race) to the rear differential case.
- Using a press (1), press-fit the rear differential case bearing left side (inner race) to the rear differential case.
- Using a plastic hammer, install the straight pins to the differential carrier.
- Thoroughly remove oil and water from the surface of the rear differential case that will face the differential ring gear.
- Using a suitable installer (1), install the rear drive pinion rear tapered roller bearing (outer race) to the rear differential carrier.
- Using a suitable installer (1), install the rear drive pinion front tapered roller bearing (outer race) to the rear differential carrier.
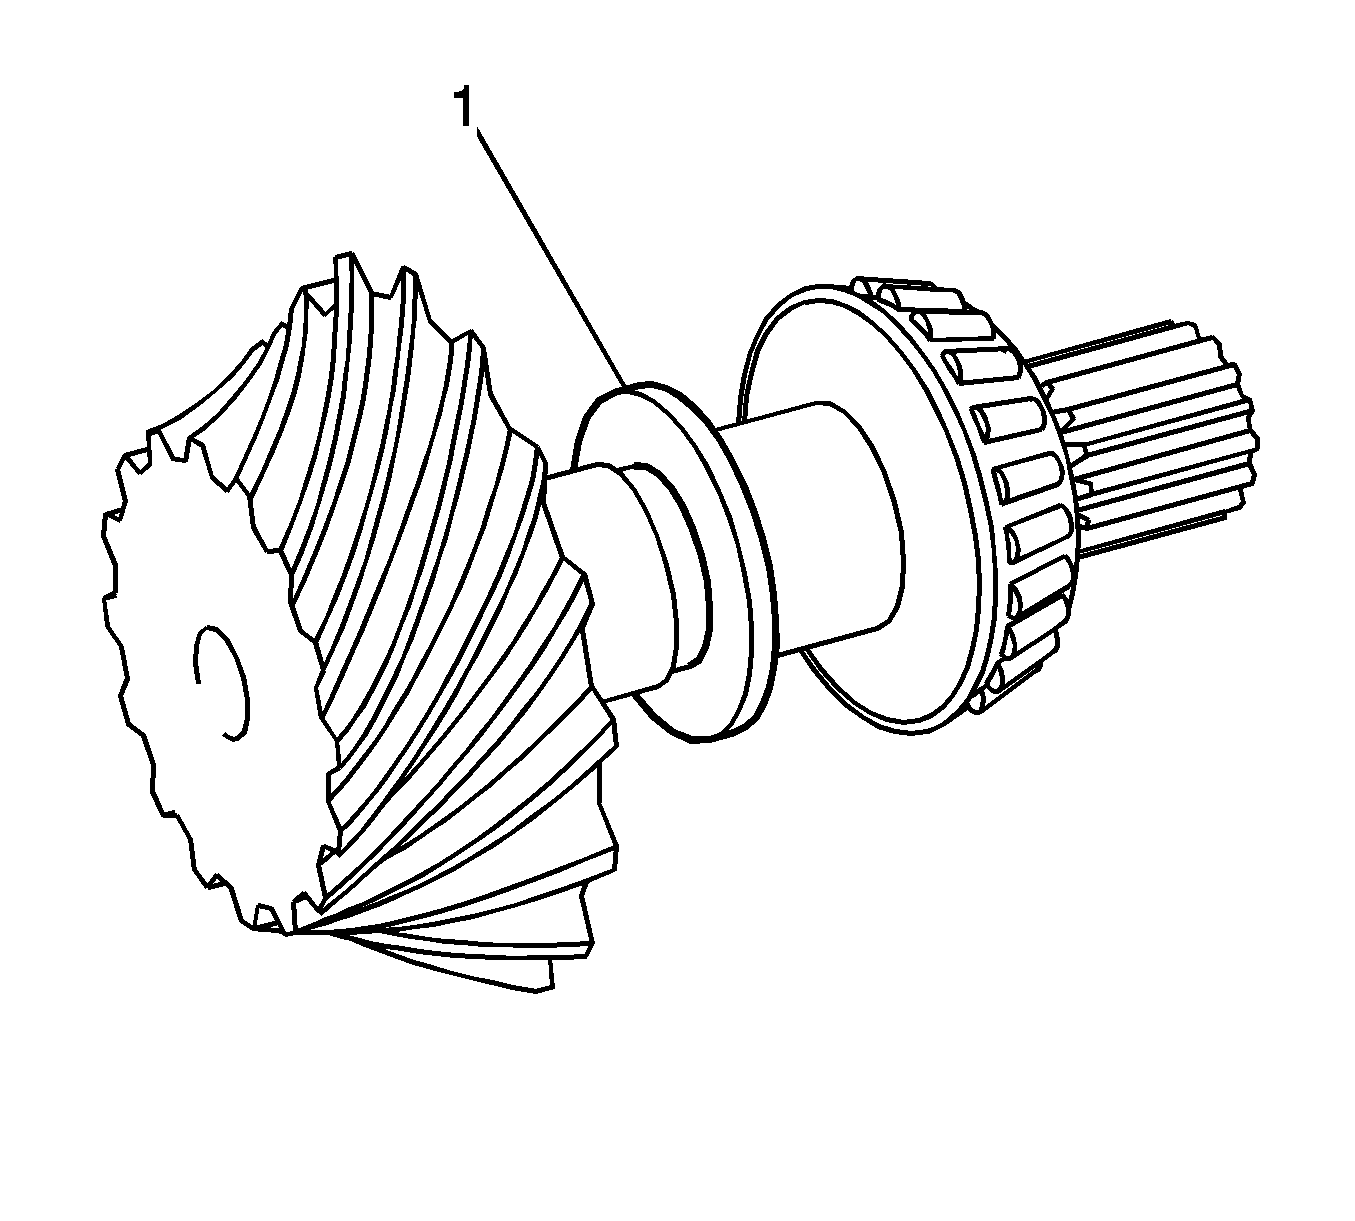
- Install the rear differential drive pinion plate washer to the differential drive pinion.
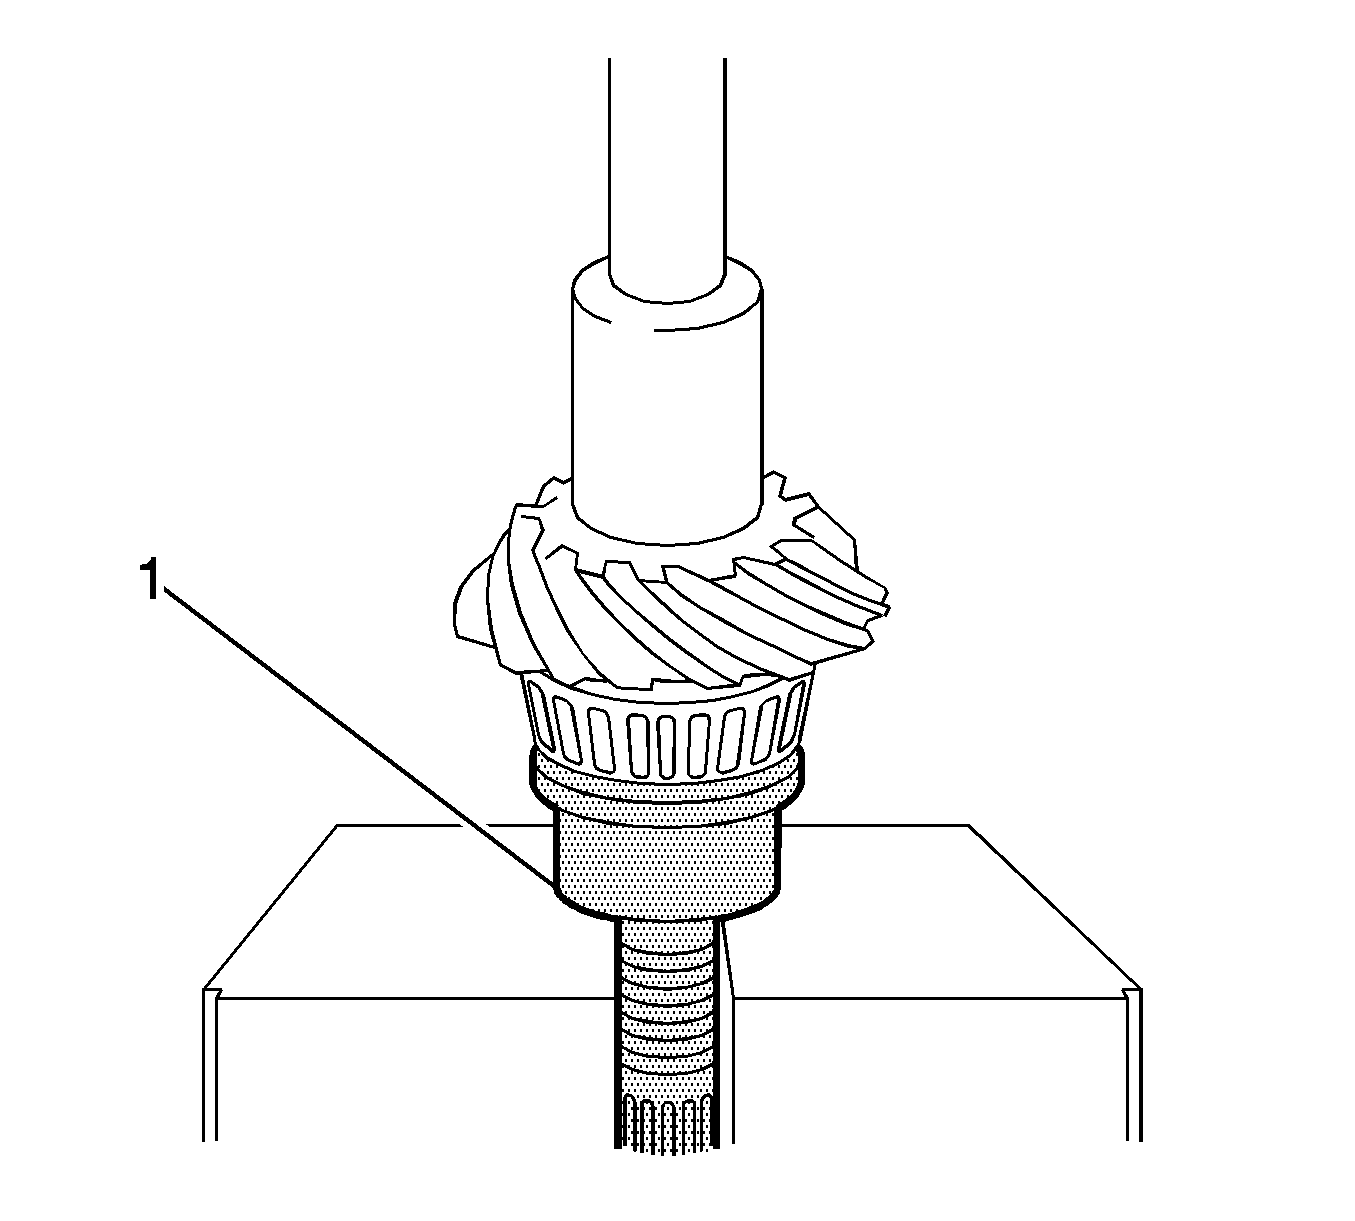
- Using a press, press-fit the rear drive pinion rear tapered roller bearing (inner race) to the differential drive pinion (1).
- Using a press (2), press-fit the rear differential side gear shaft washer plate and rear differential case bearing right side (outer race) to the rear differential carrier.
- Using a press (2), press-fit the rear differential side gear shaft washer plate and rear differential case bearing left side (outer race) to the differential side bearing retainer.
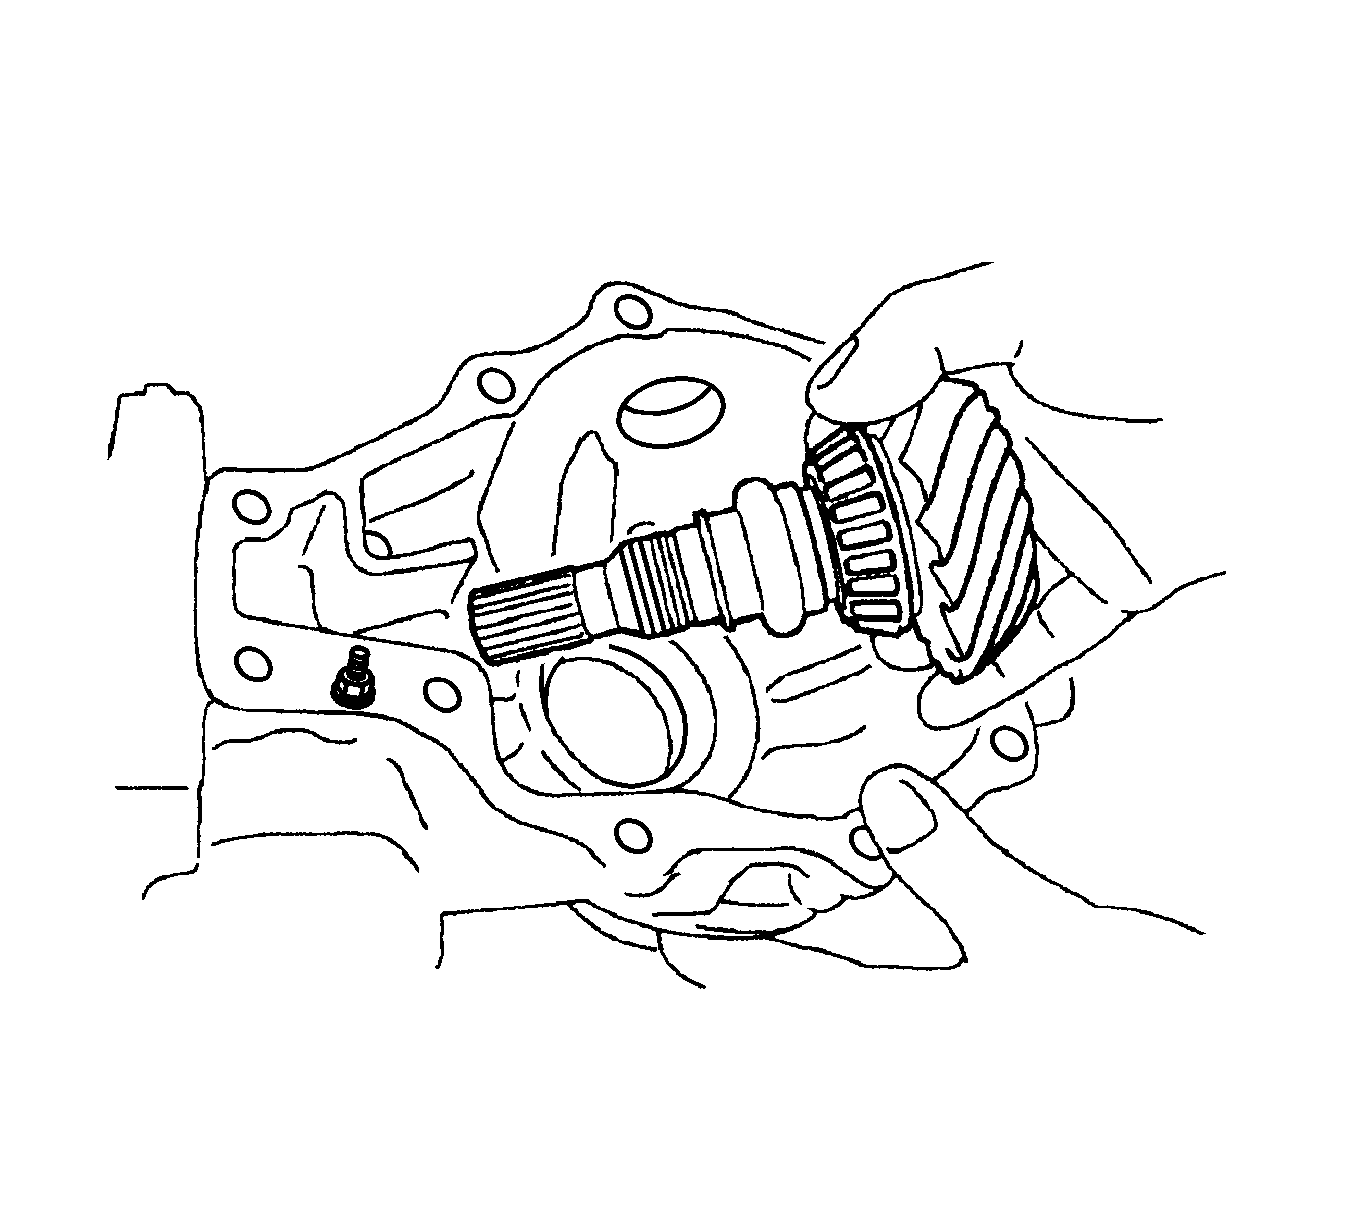
- Install the differential drive pinion (with rear drive pinion rear tapered roller bearing (inner race) to the rear differential carrier.
- Install the rear drive pinion front tapered roller bearing (inner race) and a new rear drive pinion nut to the differential drive pinion.
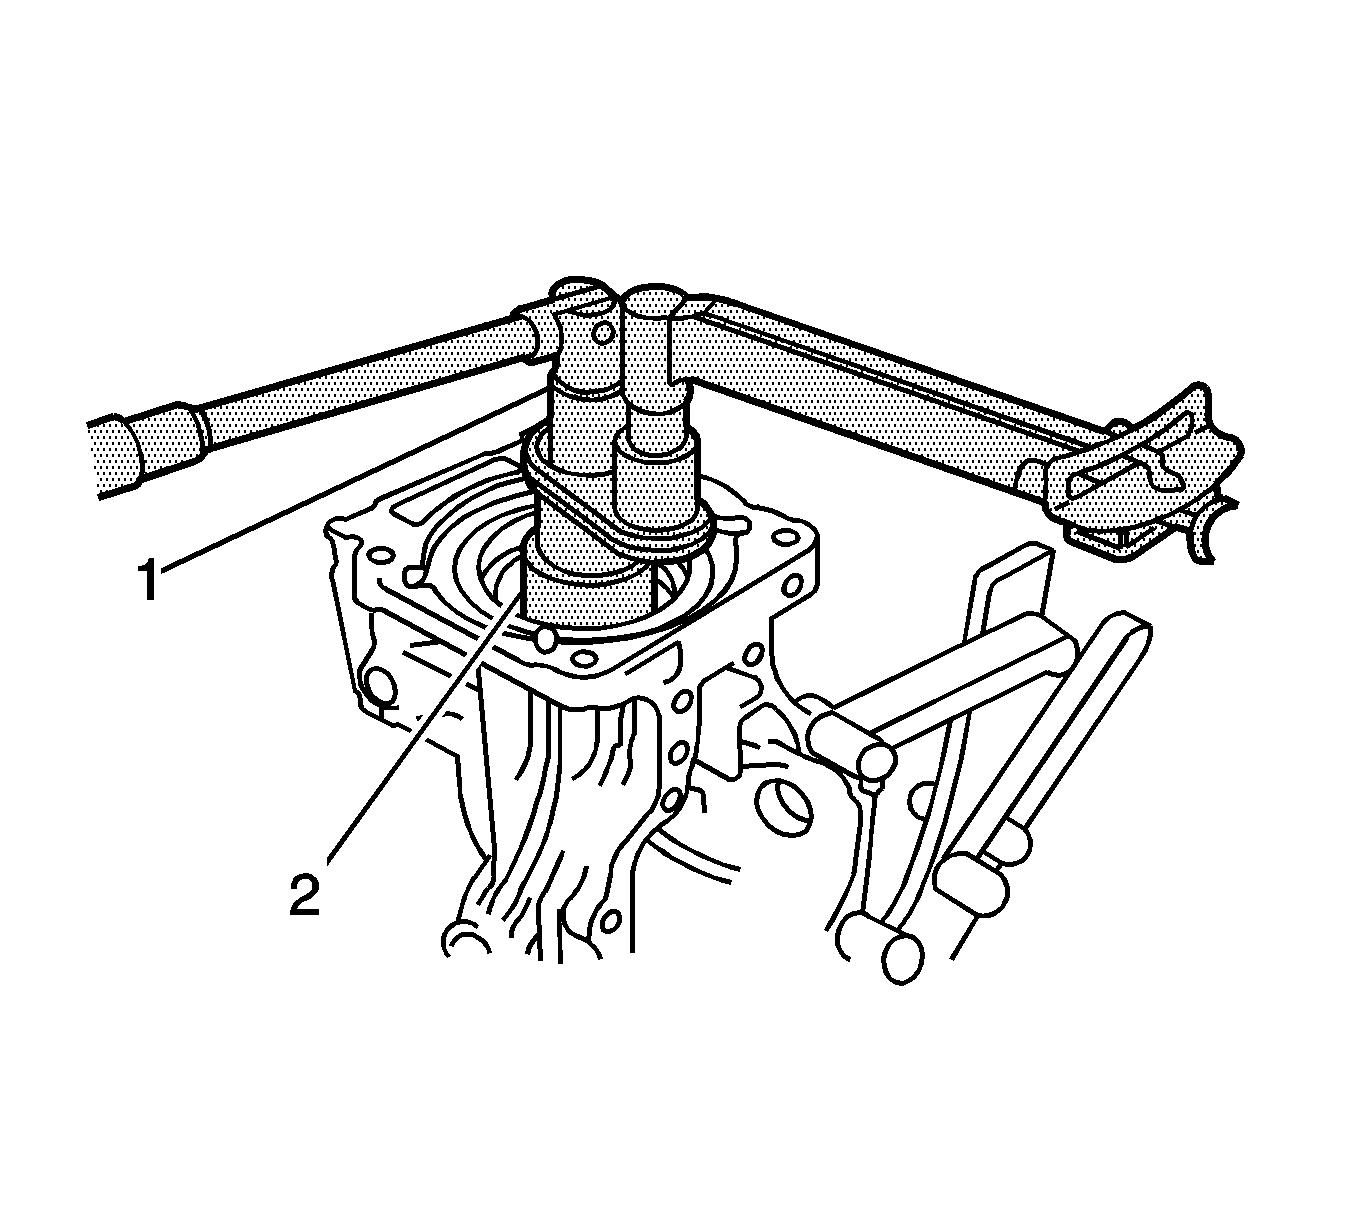
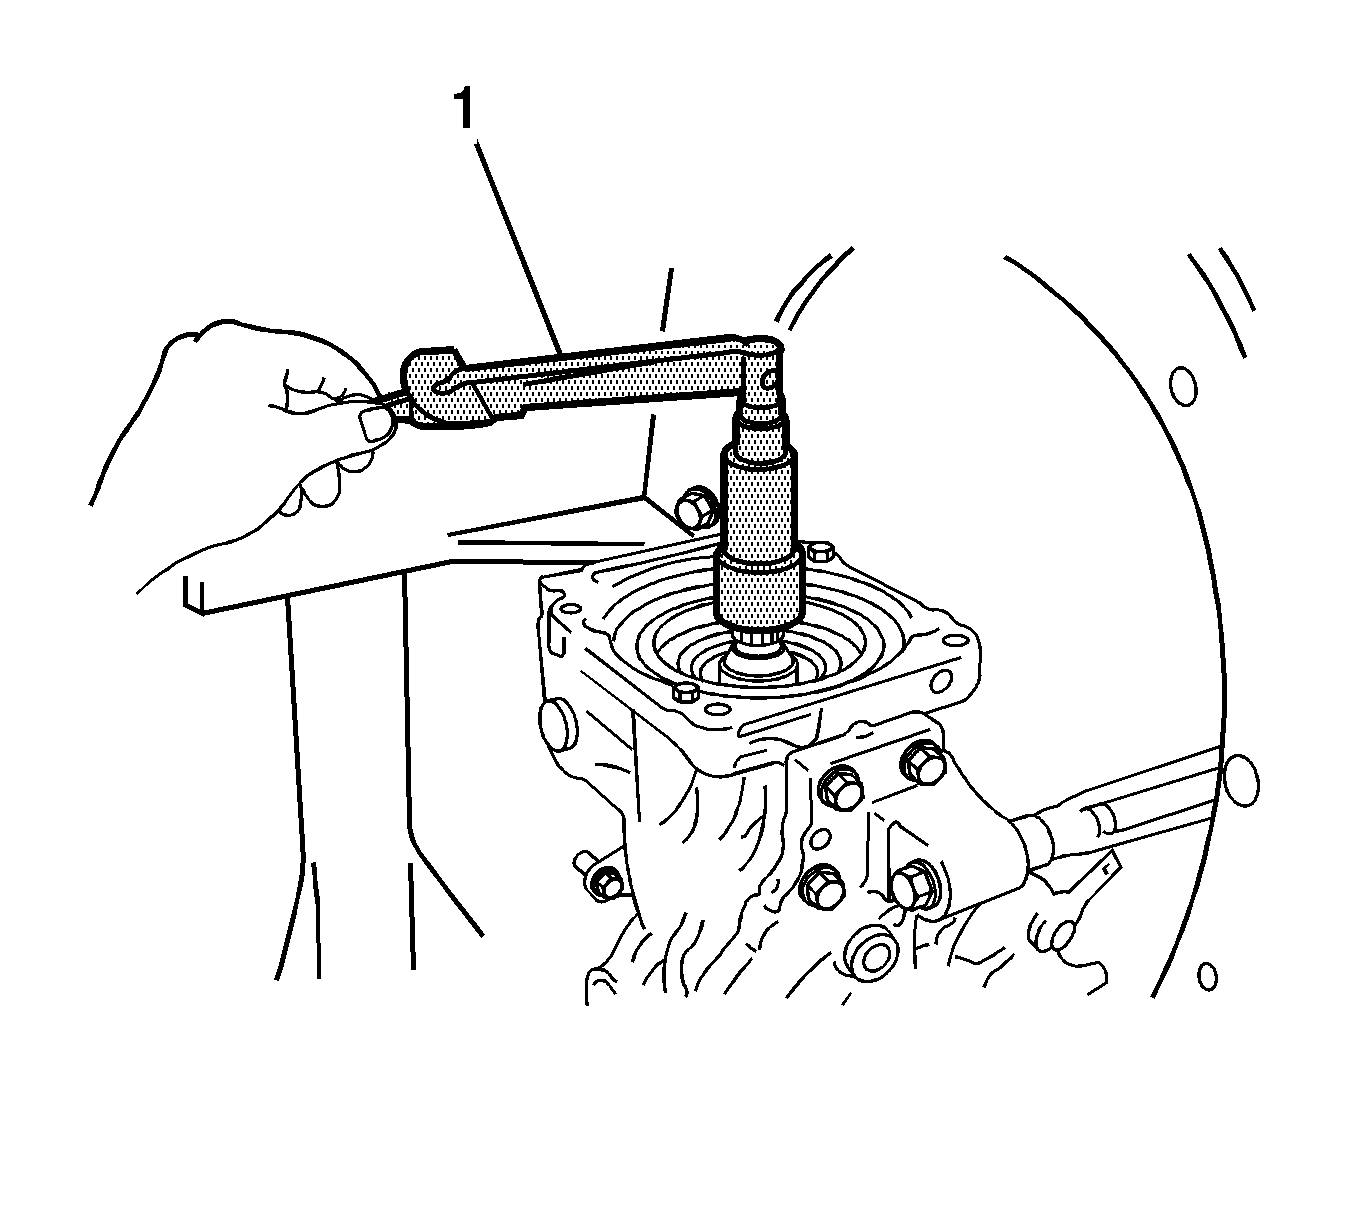
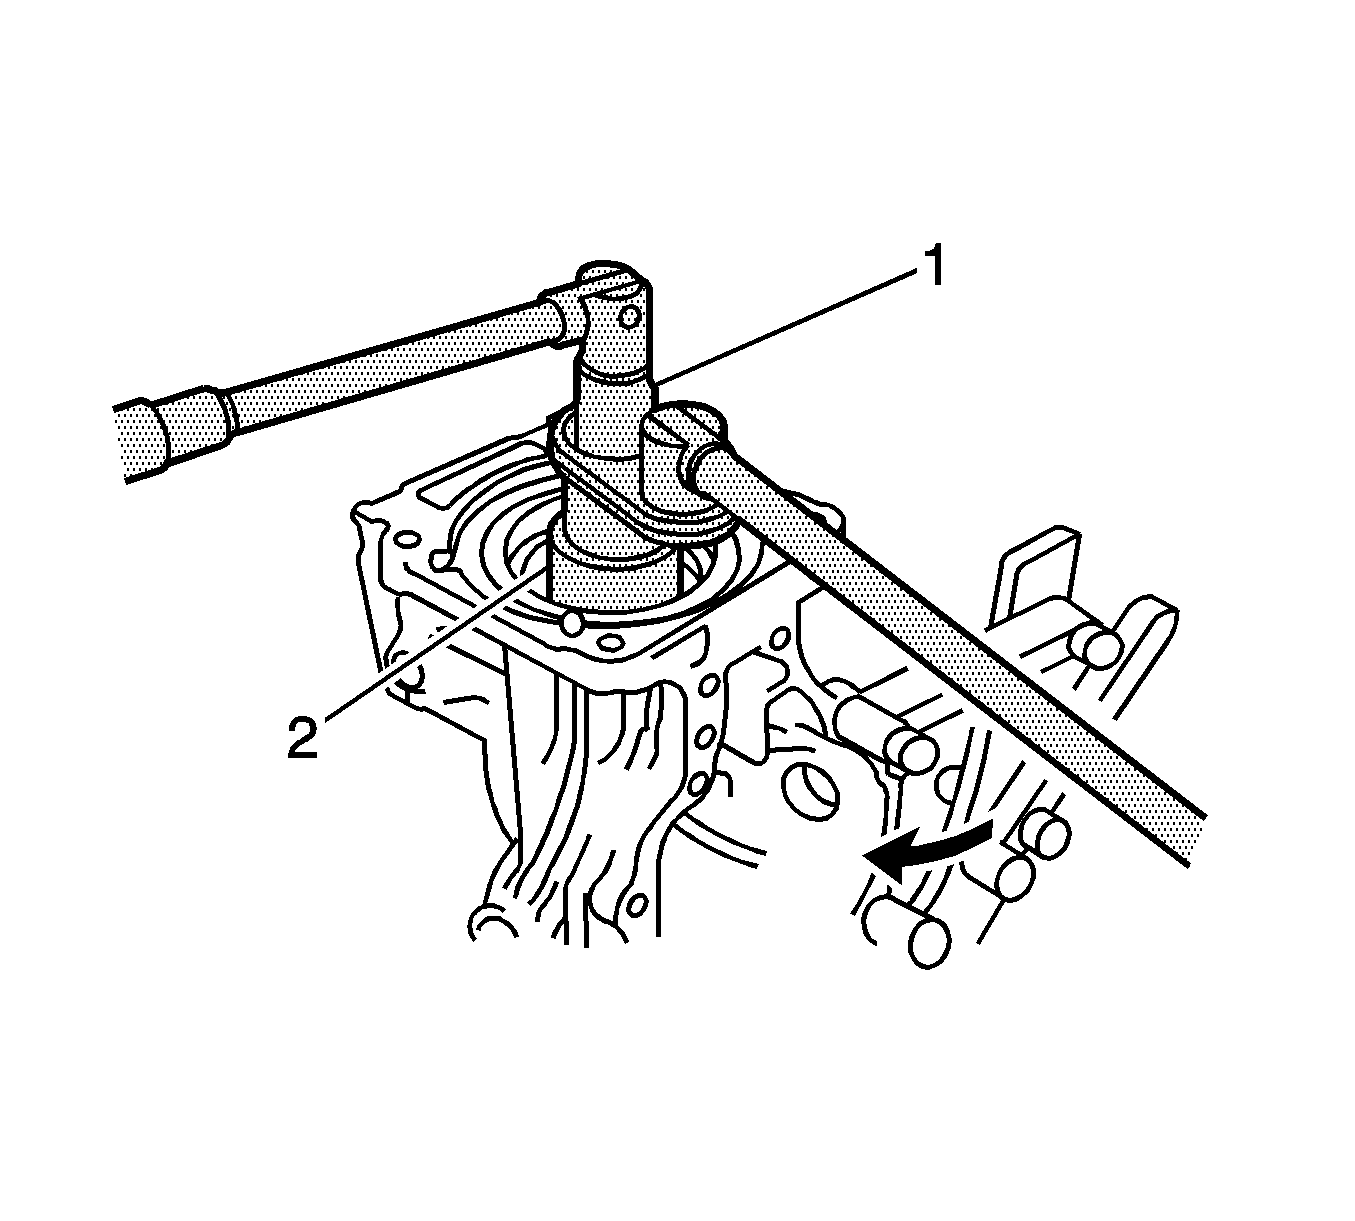
- Using J-46004 Rear Axle Drive Pinion Holding Tool (1) and J-46002 Drive Pinion Lock Nut Wrench (2), tighten a new rear drive pinion nut a little at a time until the specified preload is reached. Do not exceed the torque limit. Tighten the drive pinion nut to 223 N·m (164 lb ft).
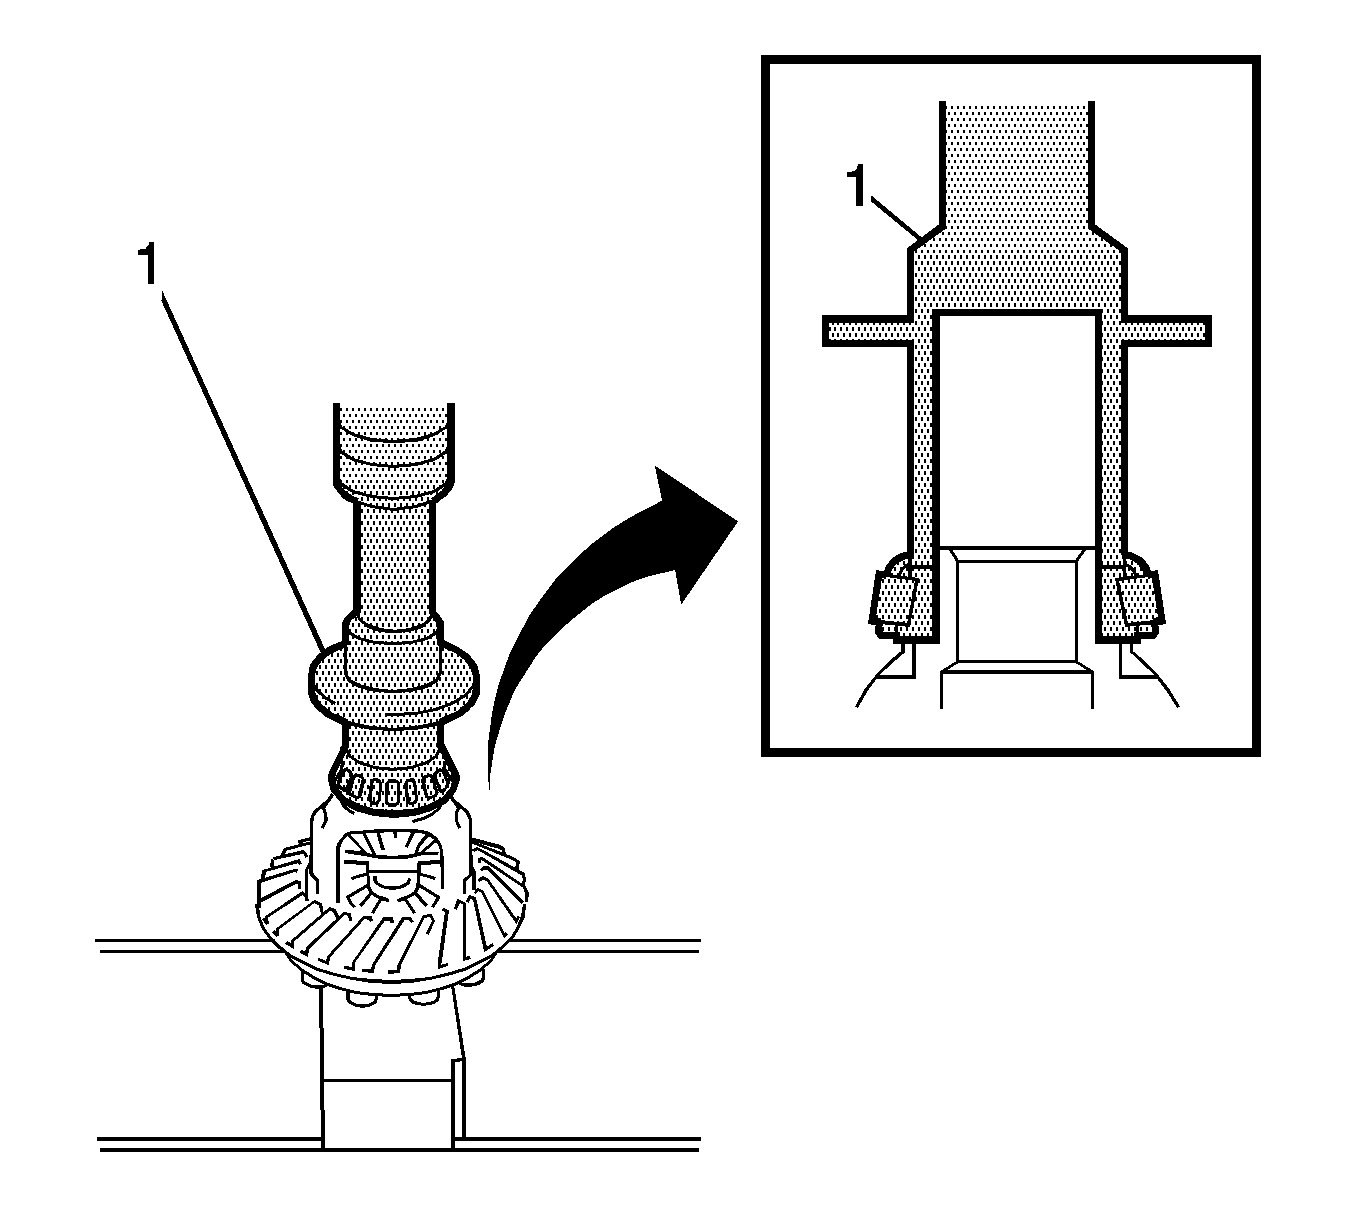
- Using J-46004 Holding Tool (1) and a torque wrench, measure the preload (starting torque) of the differential drive pinion.
- Install the rear differential case to the rear differential carrier.
- Using a scraper and wire brush, clean the sealant from the rear differential carrier and differential side bearing retainer.
- Install the differential side bearing retainer to the rear differential carrier with the bolts and tighten to 42 N·m (31 lb ft).
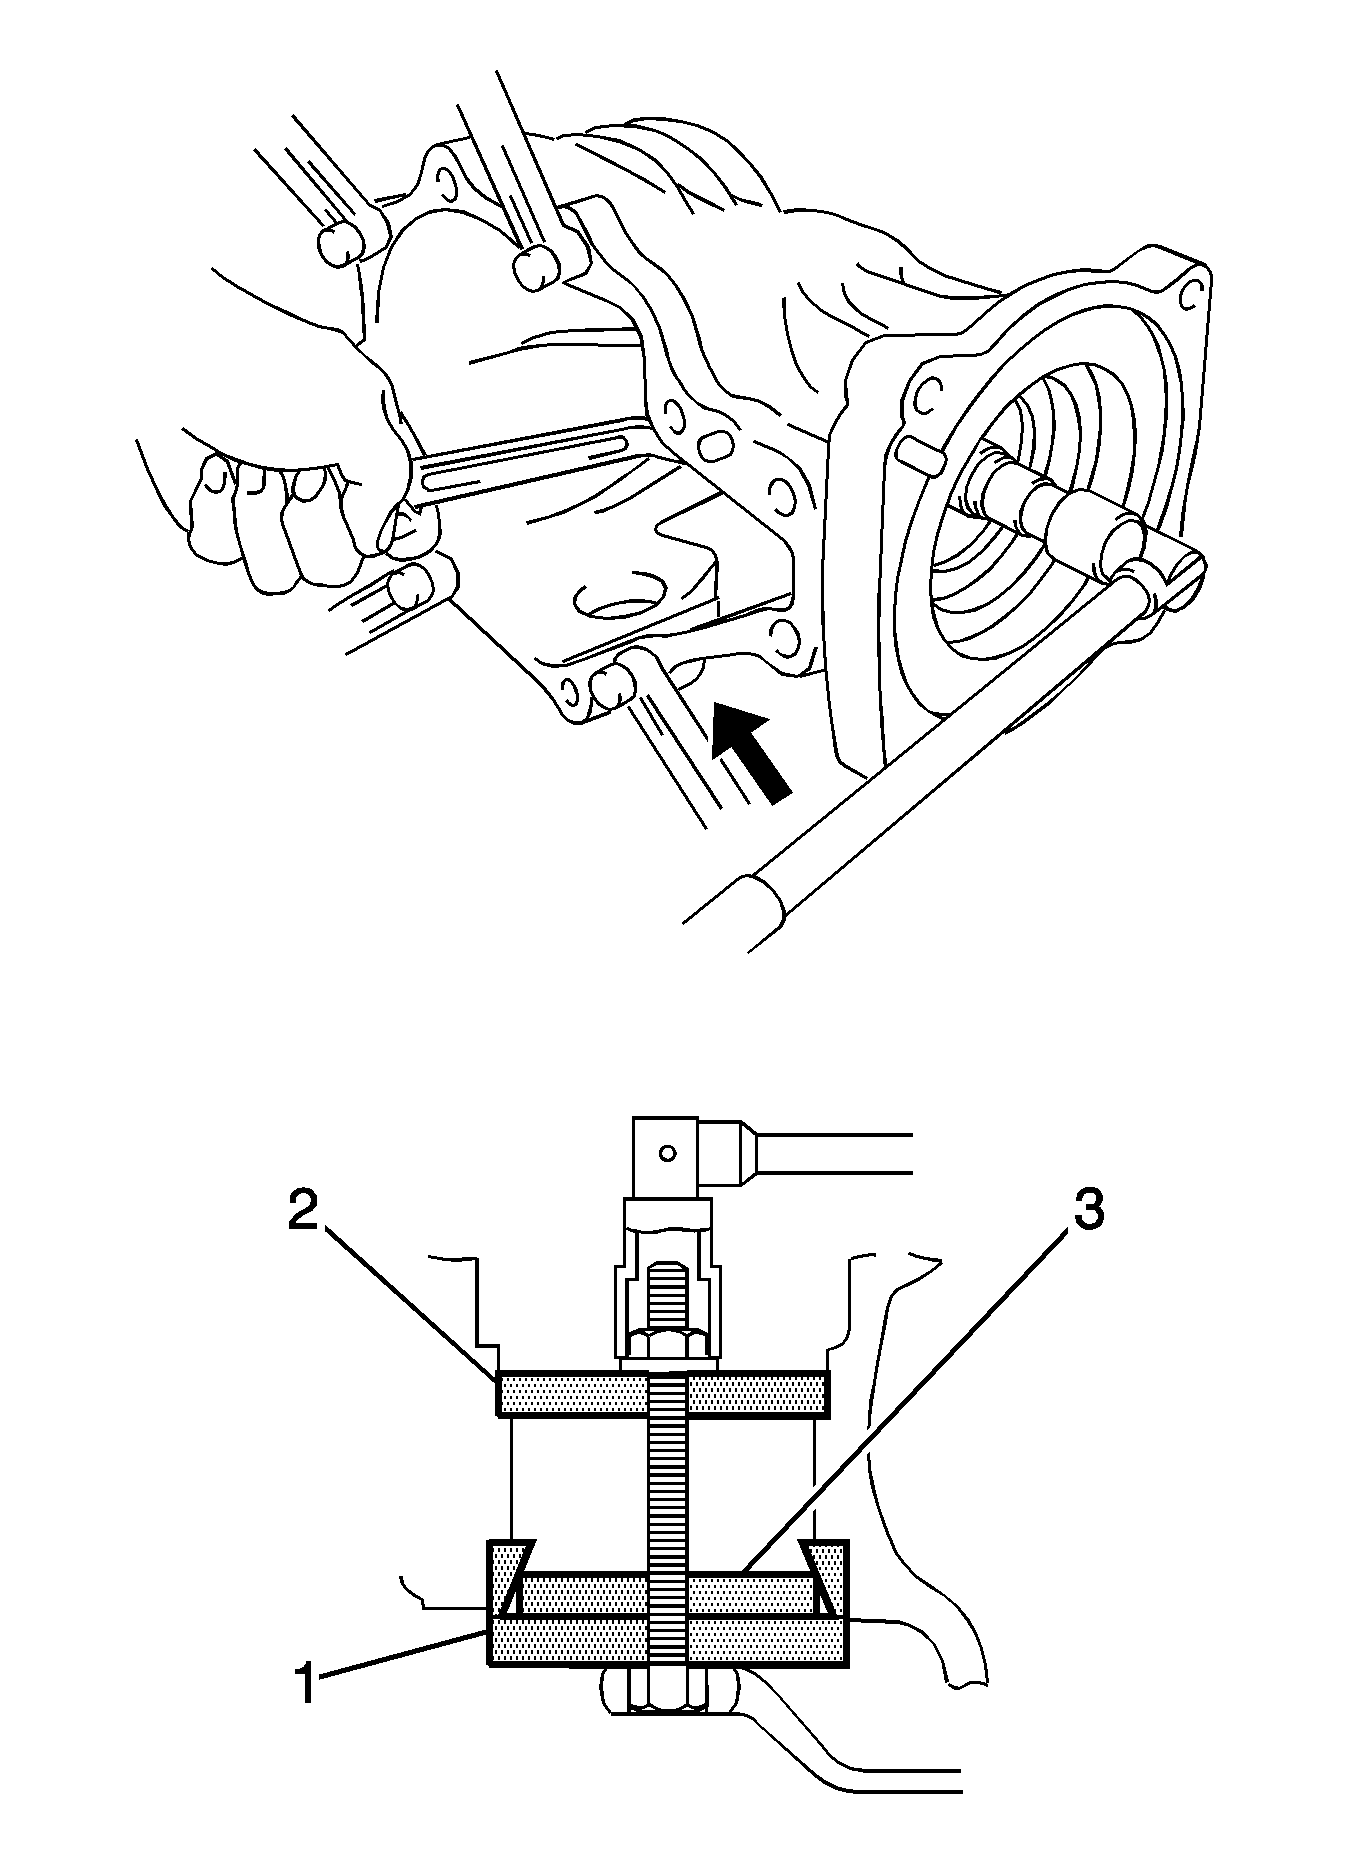
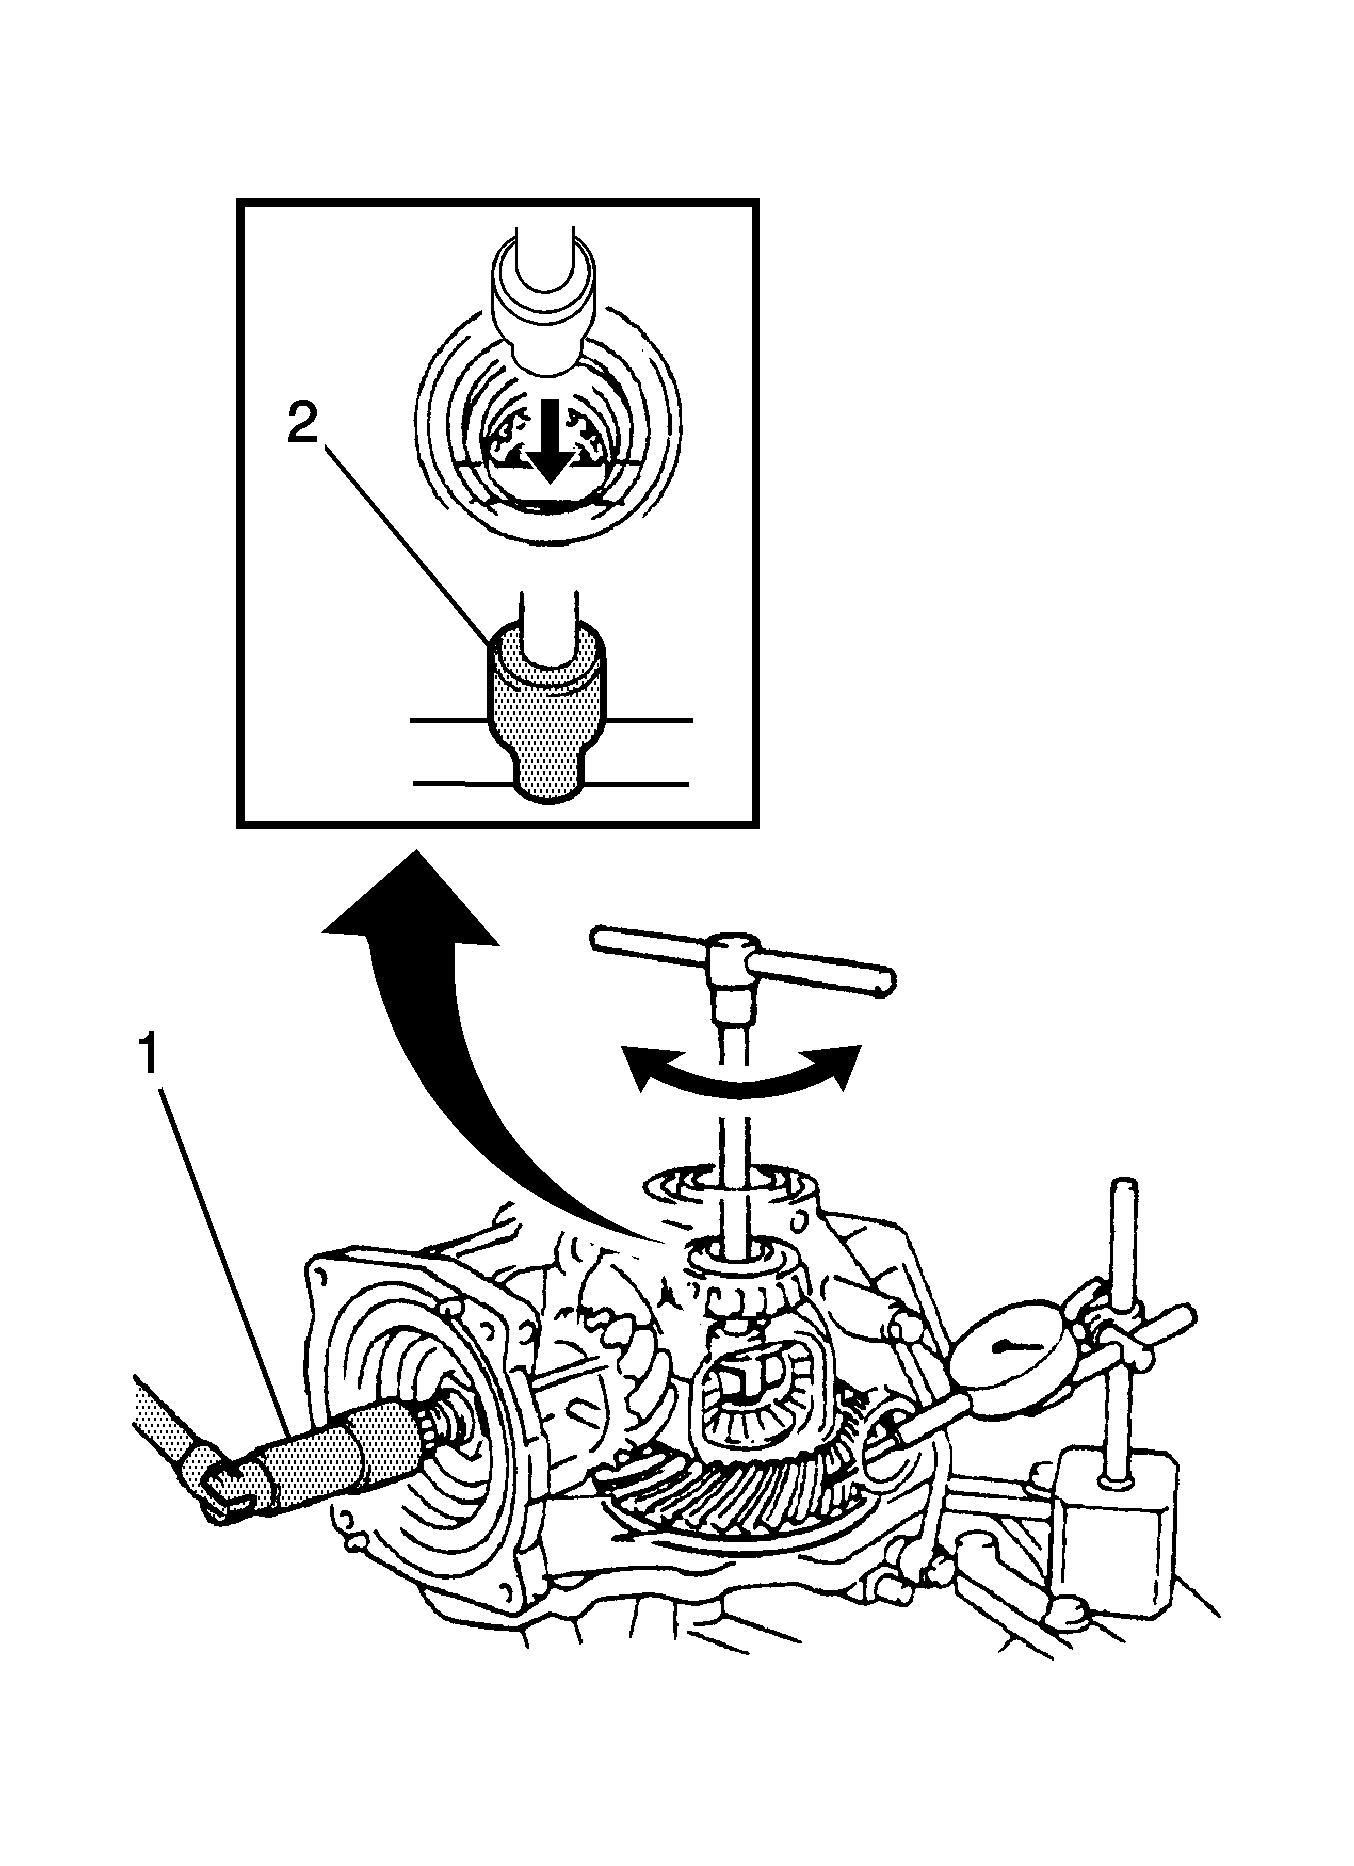
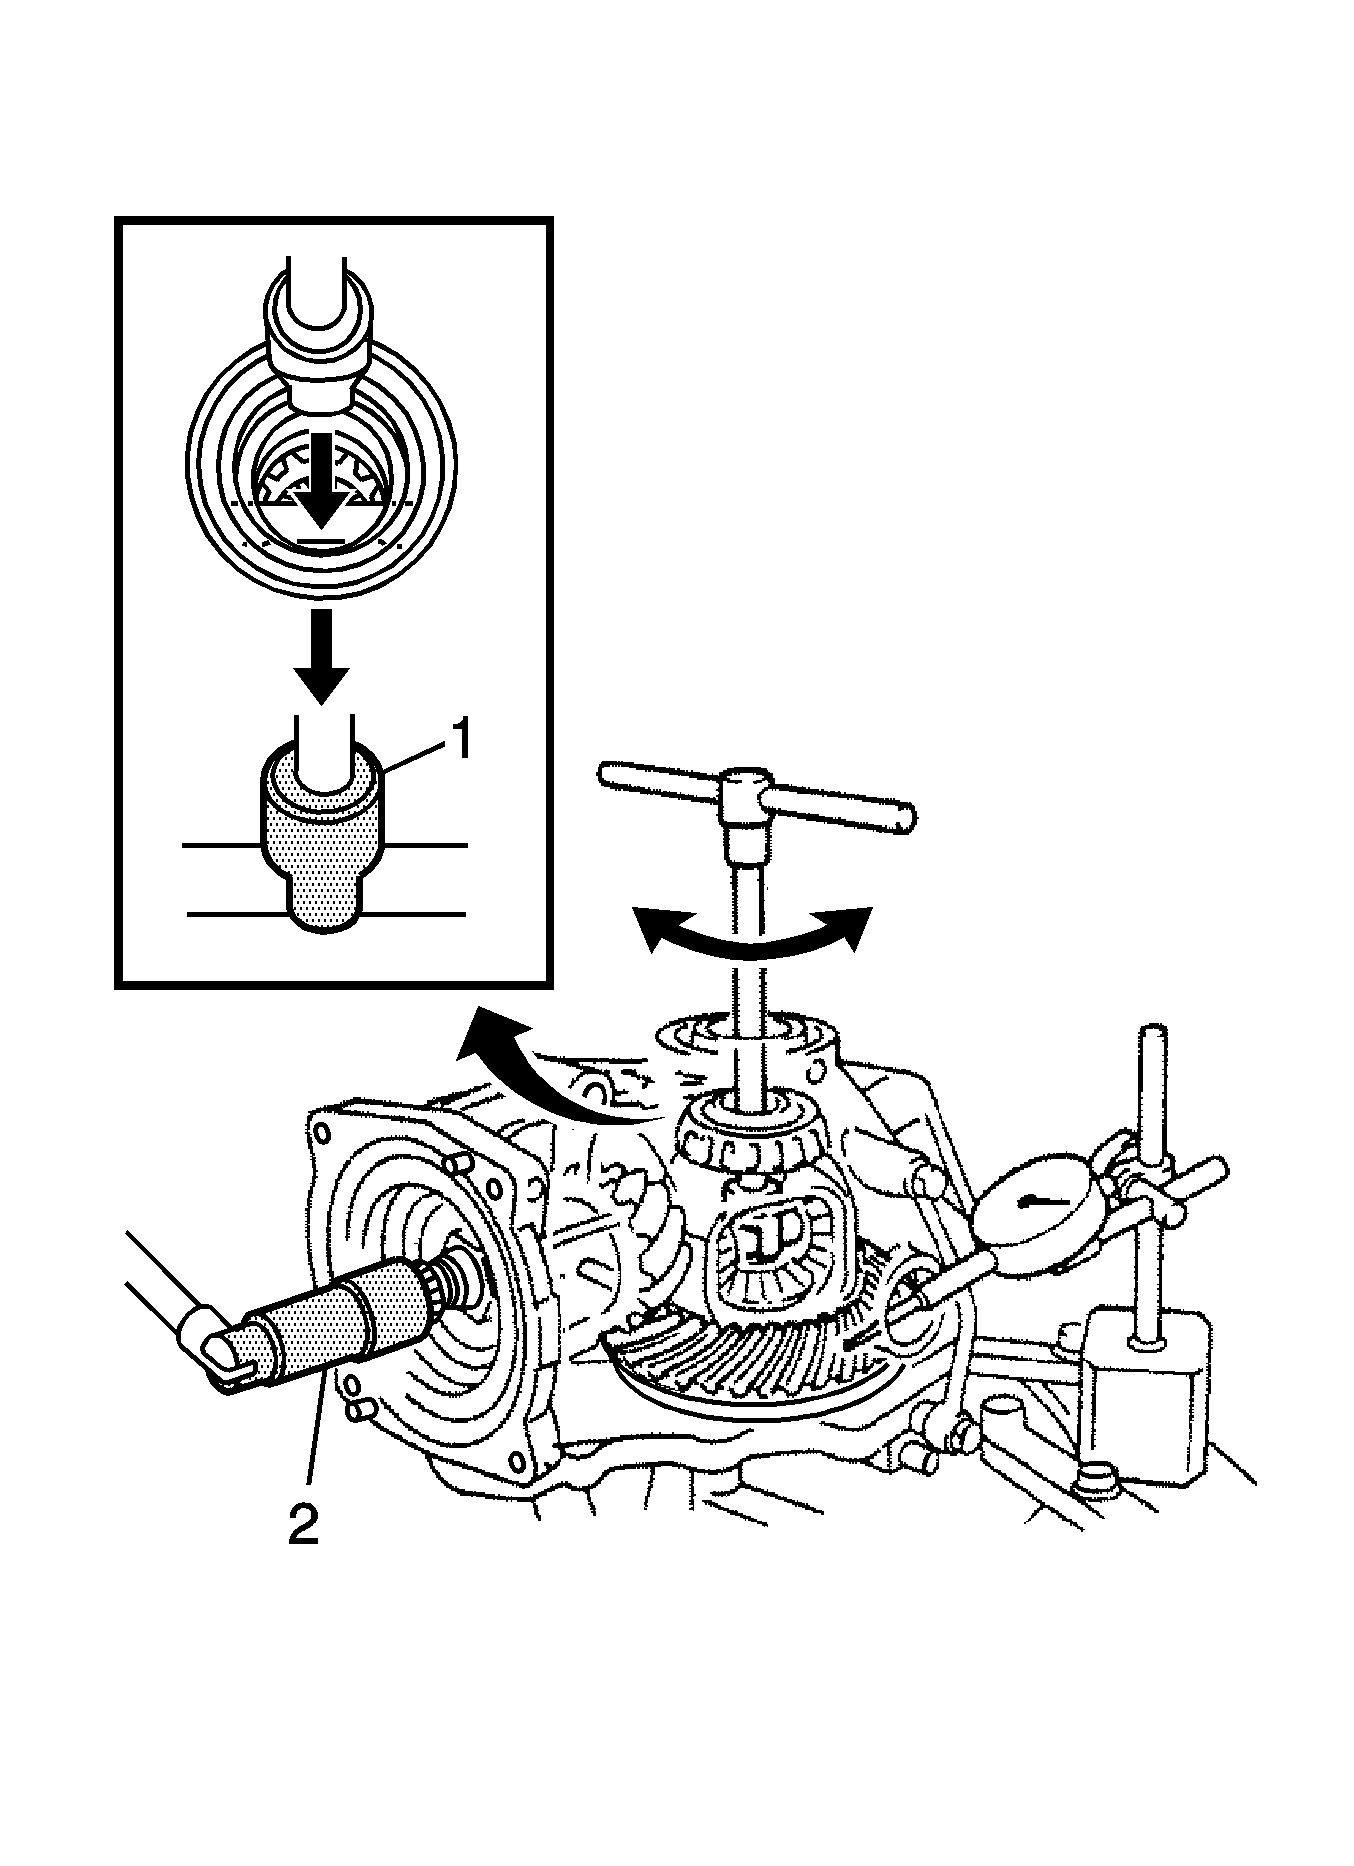
- Insert a dial indicator through the rear differential carrier cover plug hole, and set it perpendicular to a ring gear tooth surface's tip.
- Using J-46004 Holding Tool (1), hold the drive pinion in place.
- Using J-35405 Wrench (2), rotate the rear differential case forward and backward, and measure the backlash.
- If the result is not within the specified range, select washers that are thicker or thinner as necessary, where the thickness for the left and right side is the same. Then perform the rear differential case bearing outer race installation.
- Remove the bolts and the differential side bearing retainer.
- Remove the differential case from the differential carrier.
- Coat 3 or 4 teeth at 4 different positions on the ring gear with Prussian blue.
- Install the differential case to the differential carrier.
- Install the differential side bearing retainer with the bolts and tighten to 42 N·m (31 lb ft).
- Turn the differential drive pinion several times.
- Remove the bolts and the differential side bearing retainer.
- Inspect the tooth pattern.
- Perform the following procedure for face or flank contact.
- Perform the following procedure for heel or toe contact.
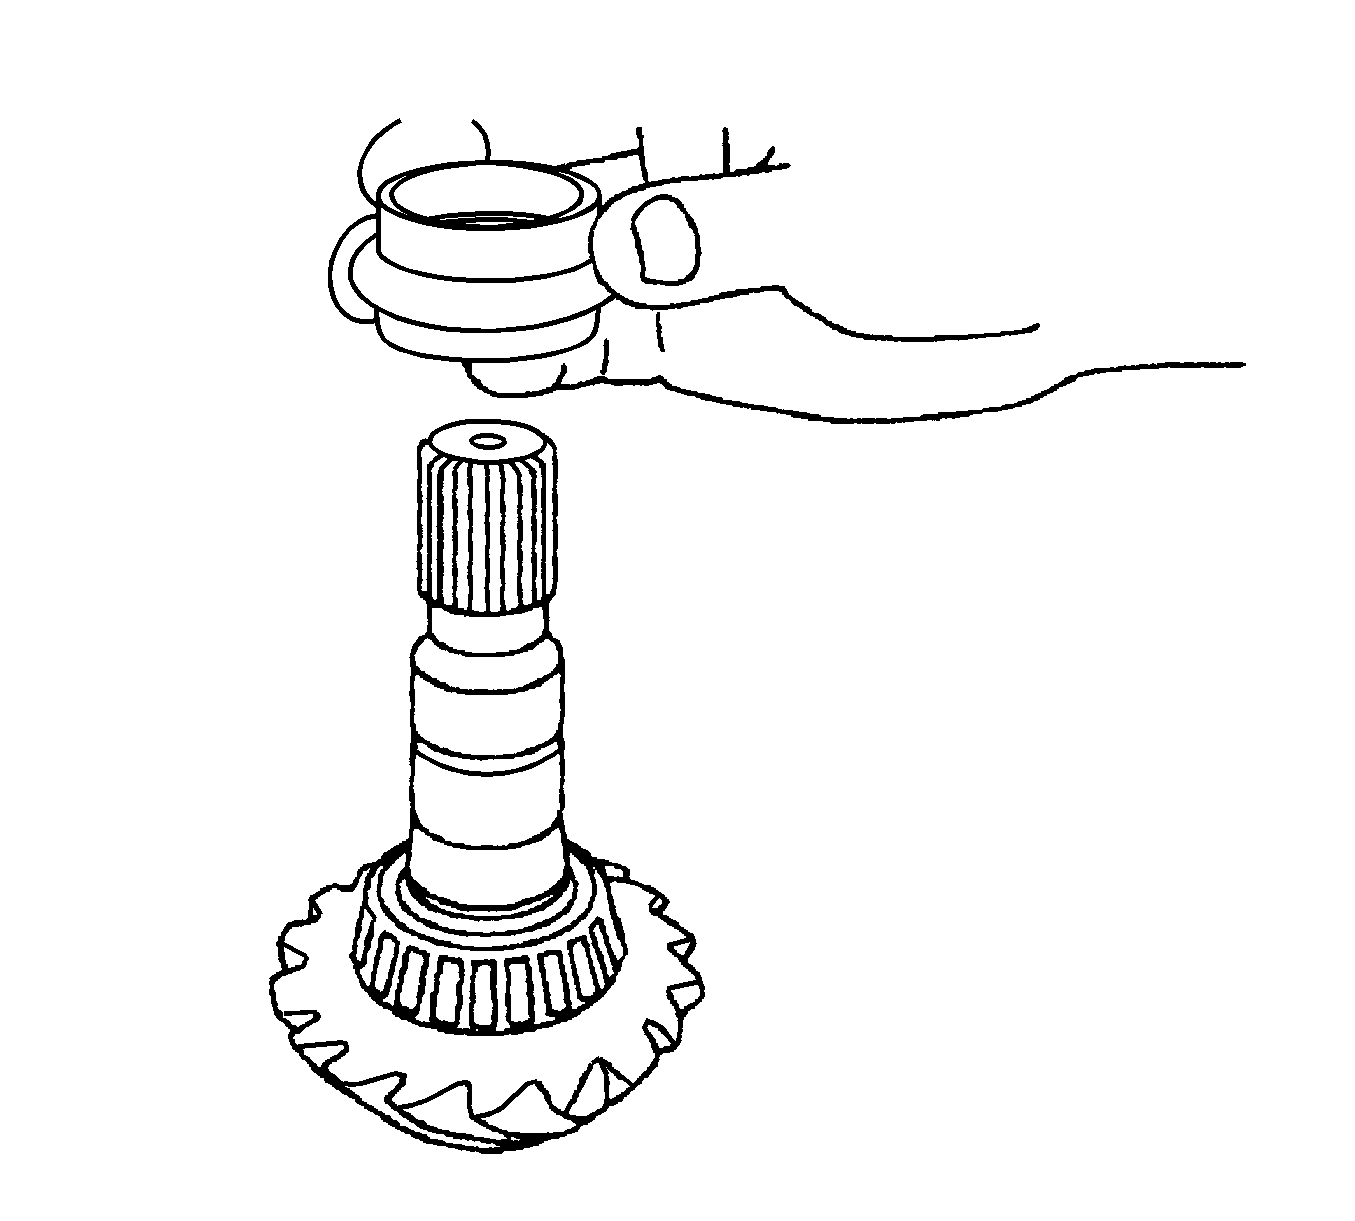
- Select a drive pinion washer (1) again and perform the rear drive pinion rear tapered roller bearing installation. Refer to Spacer and Shim Specifications for Rear Differential Drive Pinion Plate Washer Thickness Chart.
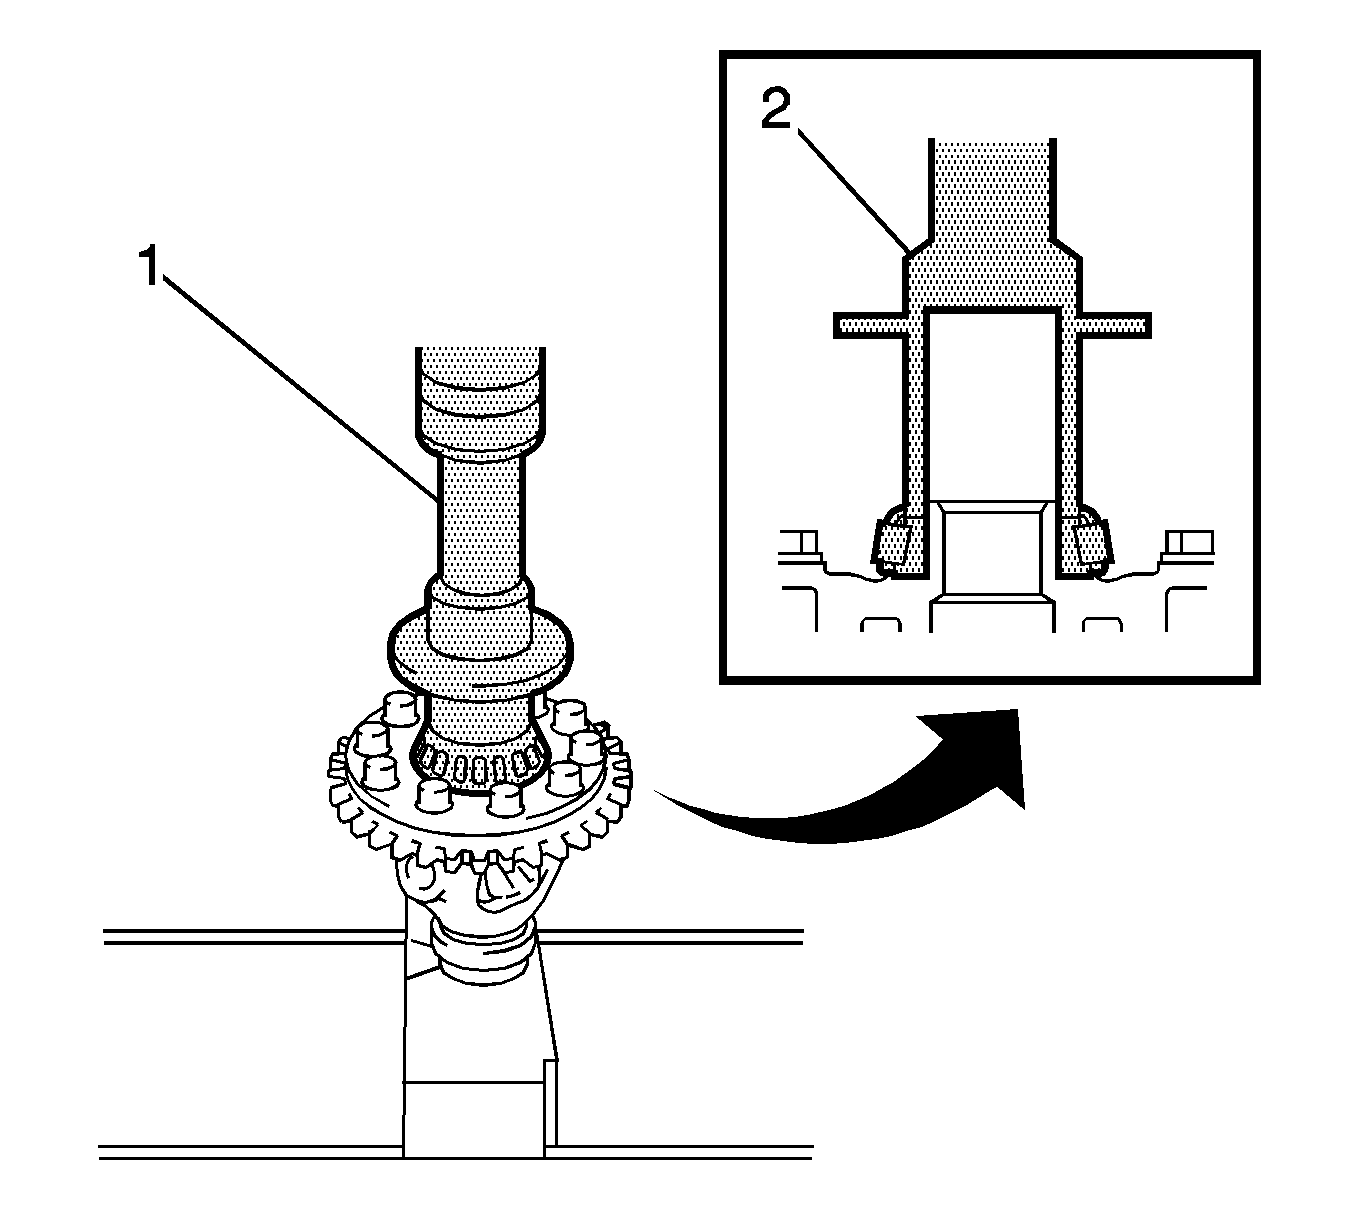
- Using J-46004 Holding Tool and a torque wrench (1), measure the preload (starting torque) with the teeth of the differential drive pinion and differential ring gear in contact.
- If the results are not within the specification, perform the procedure below.
- Remove the rear differential case from the rear differential carrier.
- Remove the rear differential drive pinion from the rear differential carrier.
- Install a new rear differential drive pinion bearing spacer to the differential drive pinion.
- Install the rear differential drive pinion oil slinger to the differential drive pinion.
- Install the drive pinion and rear drive pinion front tapered roller bearing (inner race) to the differential carrier.
- Apply hypoid gear oil to the threads of the rear drive pinion nut.
- Install a new rear drive pinion nut to the differential drive pinion. Using J-46002 Wrench (2), tighten the nut while confirming the preload. Tighten the nut to 223 N·m (164 lb ft).
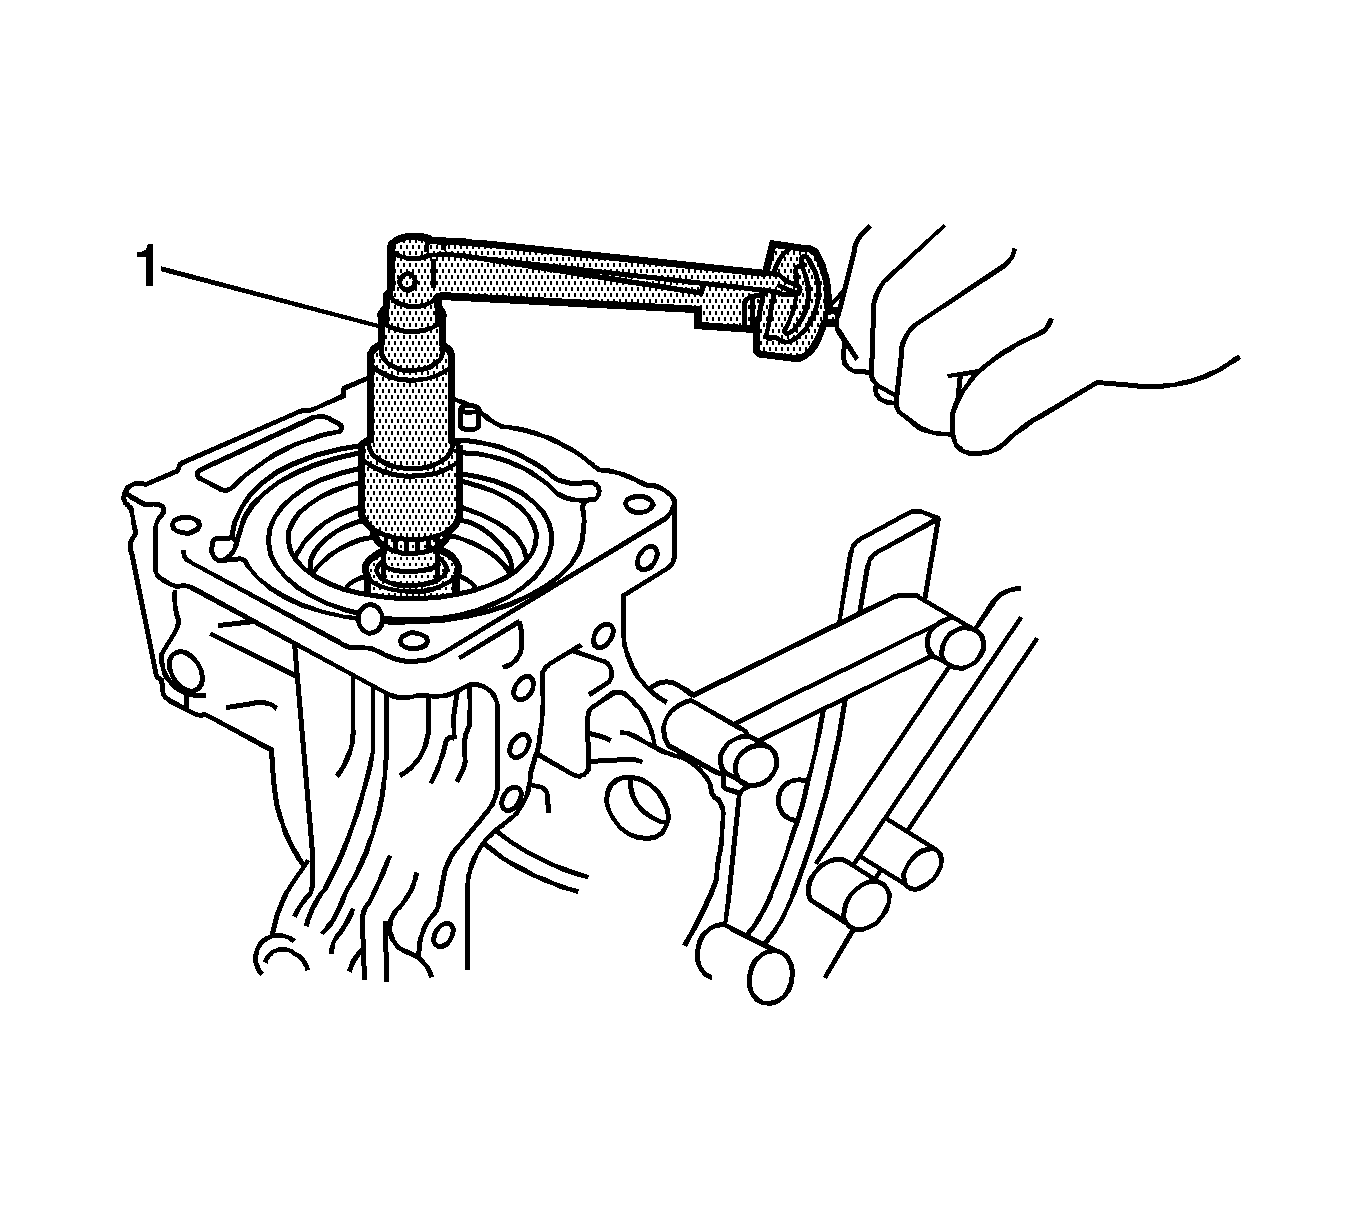
- Using J-46004 Holding Tool and a torque wrench (1), inspect the preload (starting torque).
- If the preload is insufficient, use J-46004 Holding Tool (1) to tighten the drive pinion nut 5 to 10 degrees at a time. Measure the preload and repeat the adjustment as necessary until the preload matches the specified torque.
- If the tightening torque of the rear drive pinion nut exceeds 245 N·m (181 lb ft) but the preload is still insufficient, loosen the rear drive pinion nut. Then check if the rear drive pinion nut and differential drive pinion threads are damaged.
- If there is no defect, replace the rear drive differential drive pinion bearing spacer, apply hypoid gear oil to its threads and repeat the procedure above.
- Install the rear differential case to the rear differential carrier.
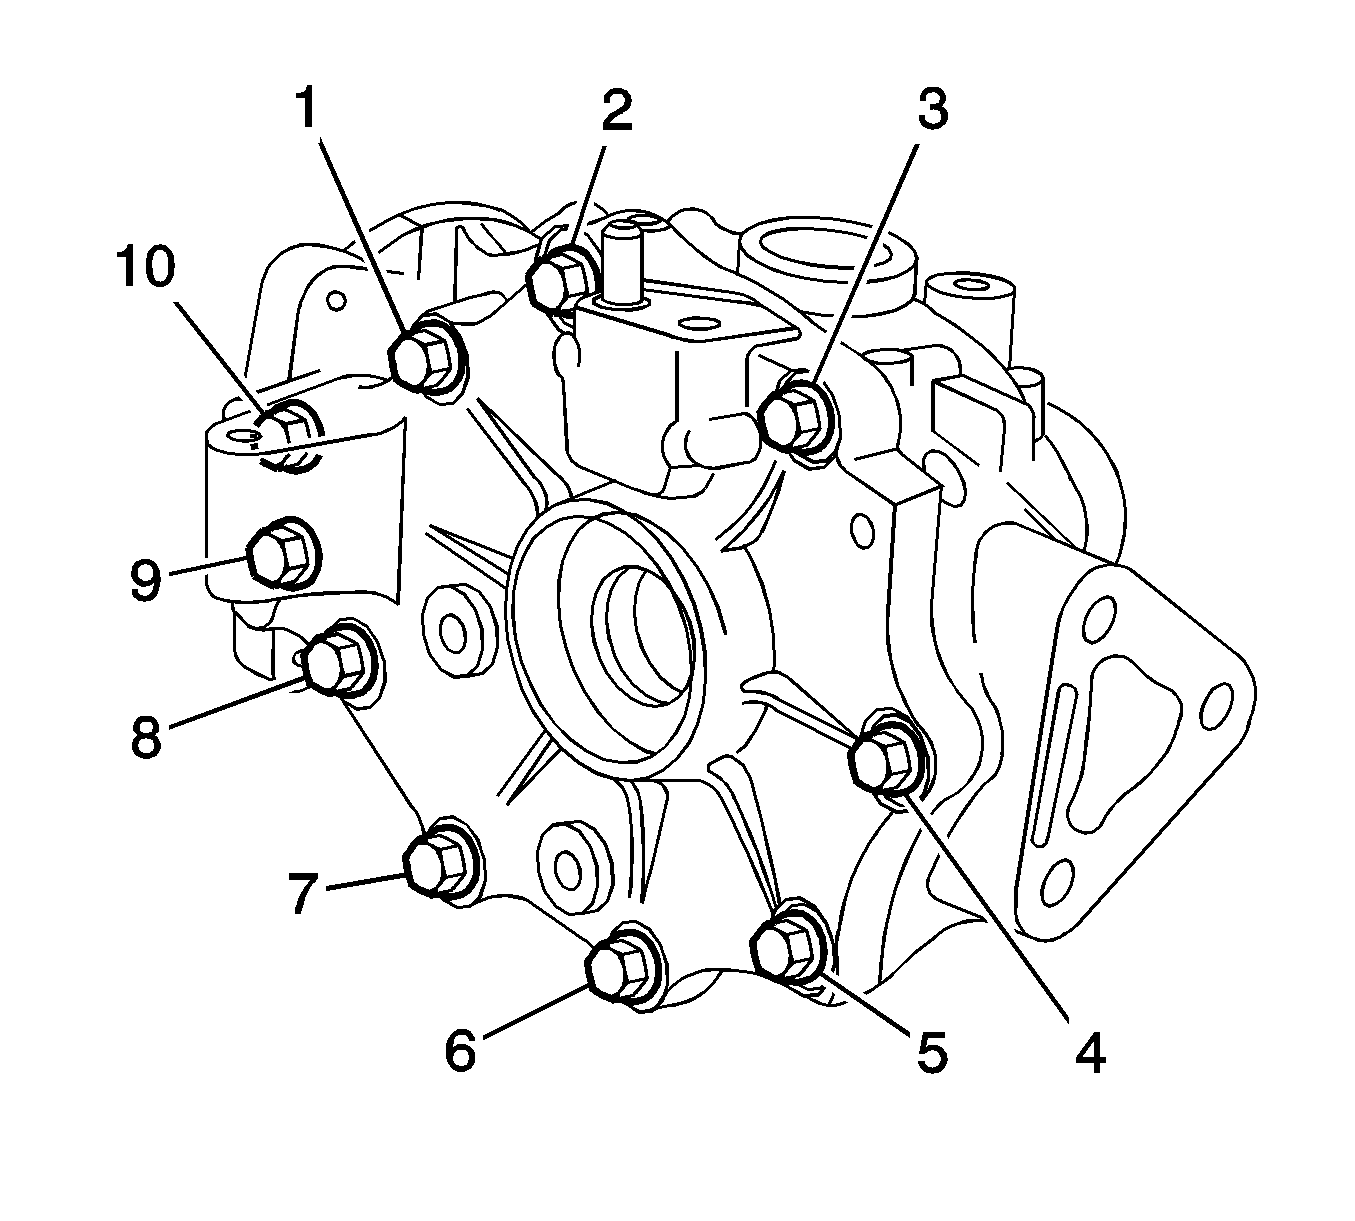
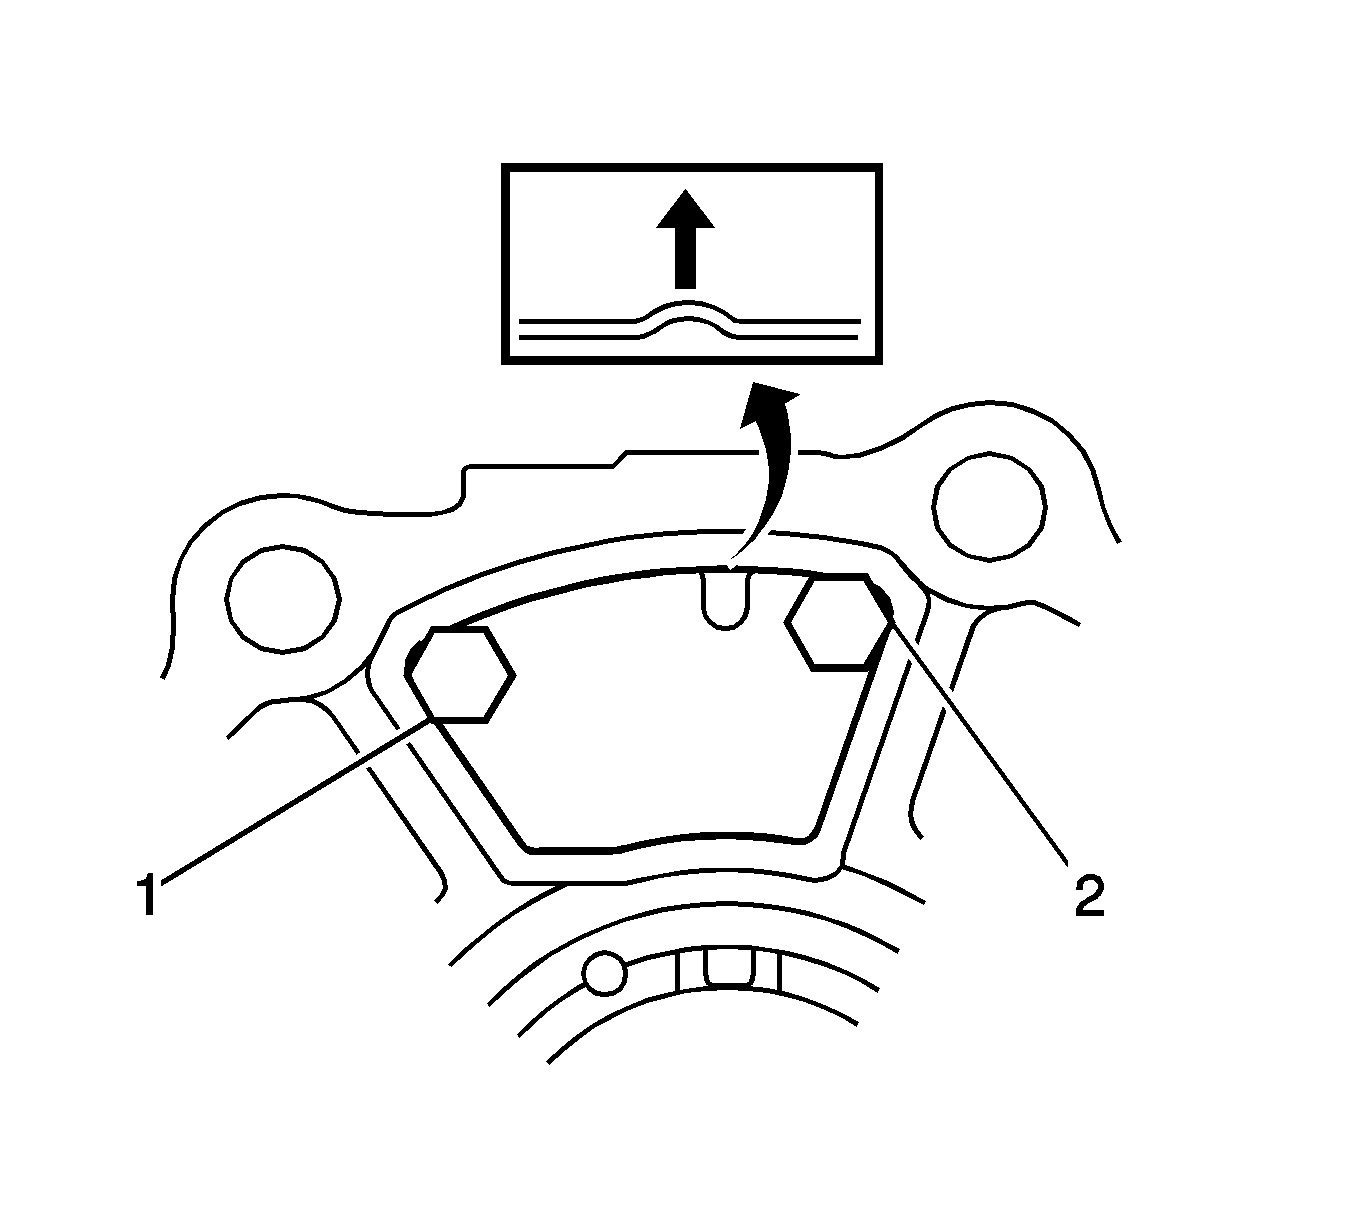
- Install the differential side bearing retainer to the rear differential carrier with the bolts (1-10) and tighten to 42 N·m (31 lb ft).
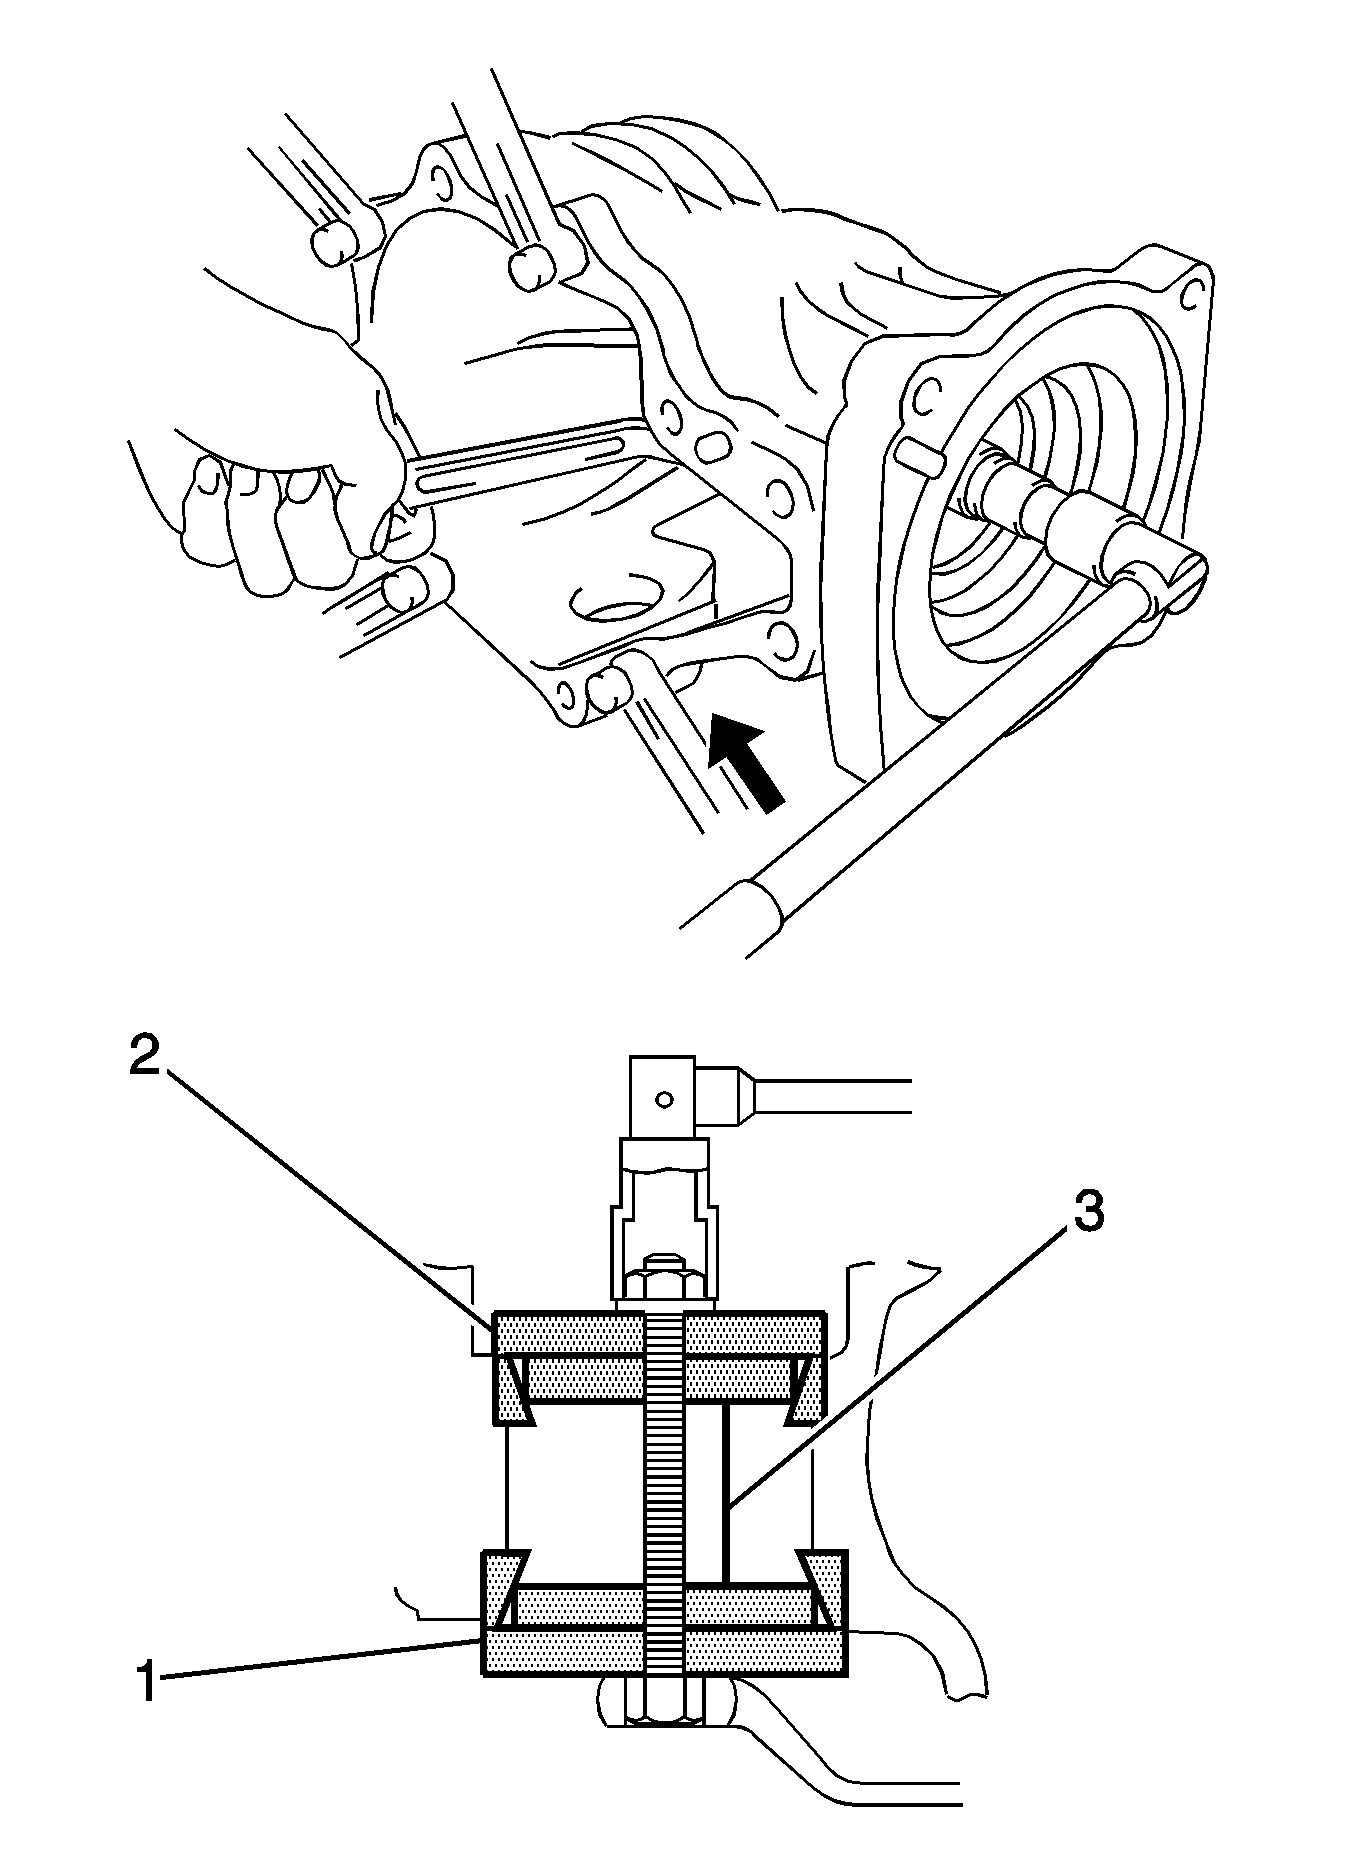
- Insert a dial indicator (1) through the rear differential carrier cover plug hole, and set it perpendicular to a ring gear tooth tip.
- Using J-46004 Holding Tool , hold the drive pinion in place.
- Using J-35405 Differential Preload Wrench (2), rotate the rear differential case forward and backward, and measure the backlash.
- If the backlash is not within the specification, adjust the side bearing preload or repair as necessary.
- Using J-46004 Holding Tool (1) and a torque wrench, measure the preload (starting torque) with the teeth of the differential drive pinion and differential ring gear in contact.
- If the results are not within the specification, perform the following procedure.
- Remove the bolts and the differential side bearing retainer.
- Install the bolts (1, 2) and rear differential breather plug oil deflector to the side bearing retainer, and tighten the bolts to 5 N·m (44 lb in).
- Using a suitable installer (1), tap in the rear differential carrier cover breather plug to the side bearing retainer.
- Using a non-residue solvent, remove grease and oil from the alignment surfaces of the rear differential carrier and differential side bearing retainer.
- Apply sealant Three Bond 1281 or equivalent, to the areas indicated in the illustration of the differential side bearing retainer.
- Install the differential side bearing retainer to the rear differential carrier with the bolts (1-10) and tighten to 42 N·m (31 lb ft).
- Using J-46004 Holding Tool (1) and a torque wrench, inspect the preload (starting torque) with the teeth of the differential drive pinion and differential ring gear in contact.
- Insert a dial indicator through the rear differential carrier cover plug hole, and set it perpendicular to a ring gear tooth tip.
- Using J-46004 Holding Tool , hold the drive pinion in place.
- Using J-35405 Wrench (1, 2), rotate the rear differential case forward and backward, and measure the backlash.
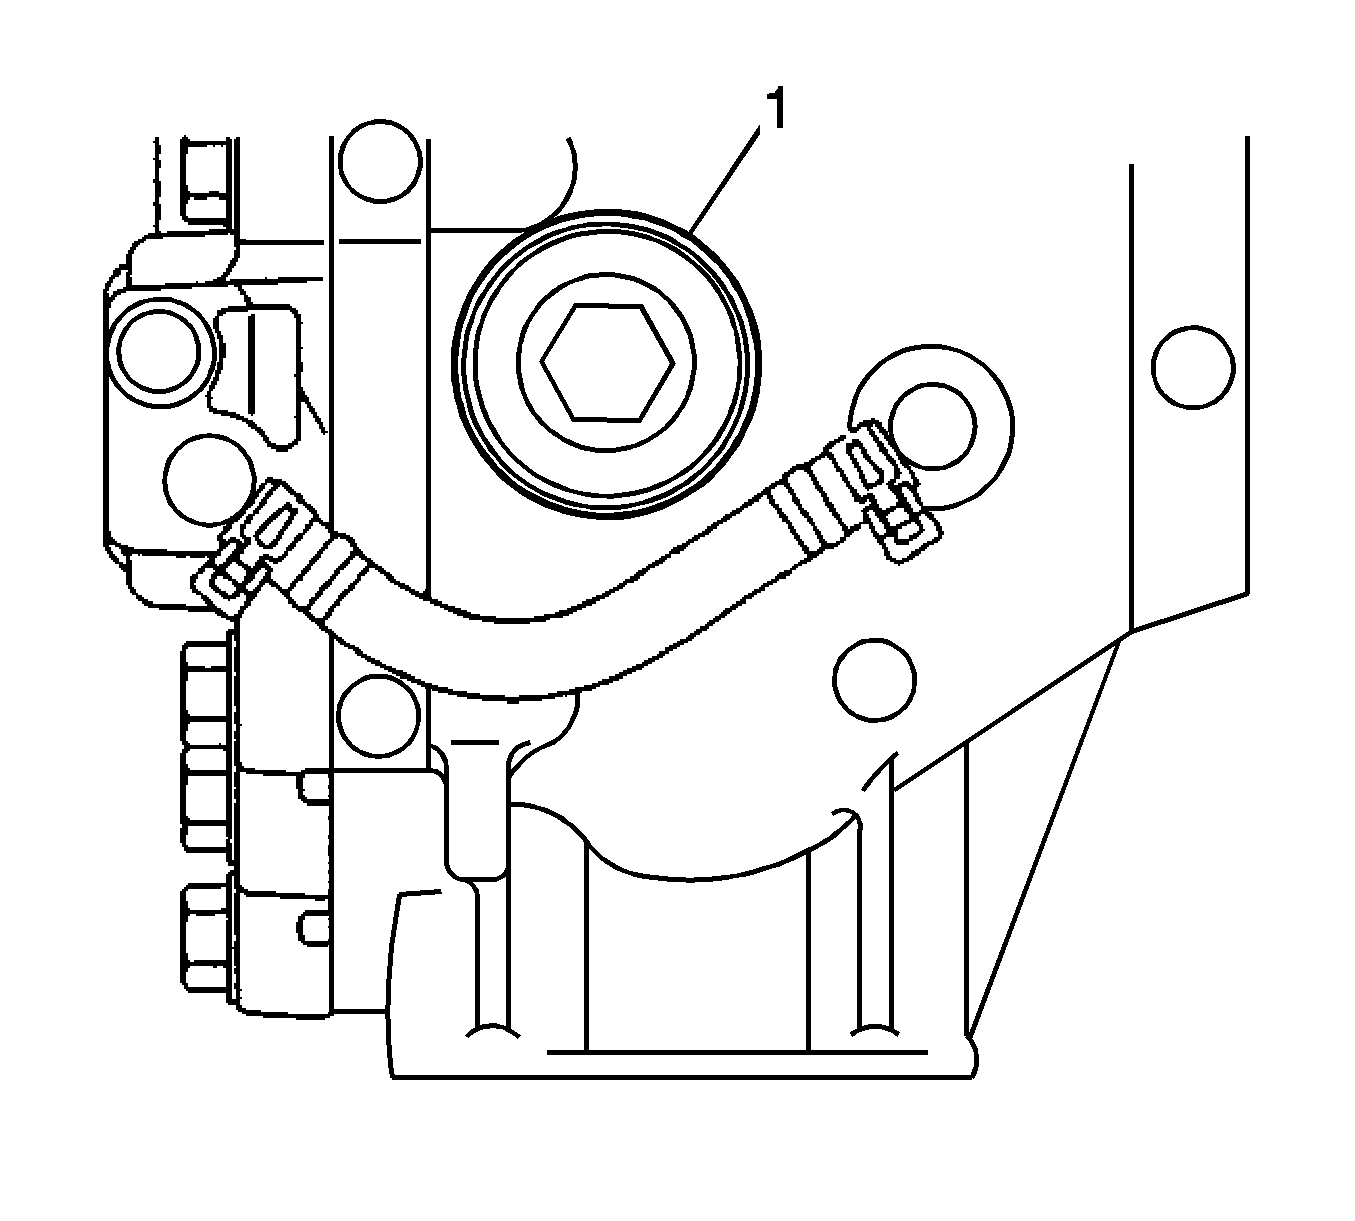
- Using a chisel and a hammer, stake the rear drive pinion nut.
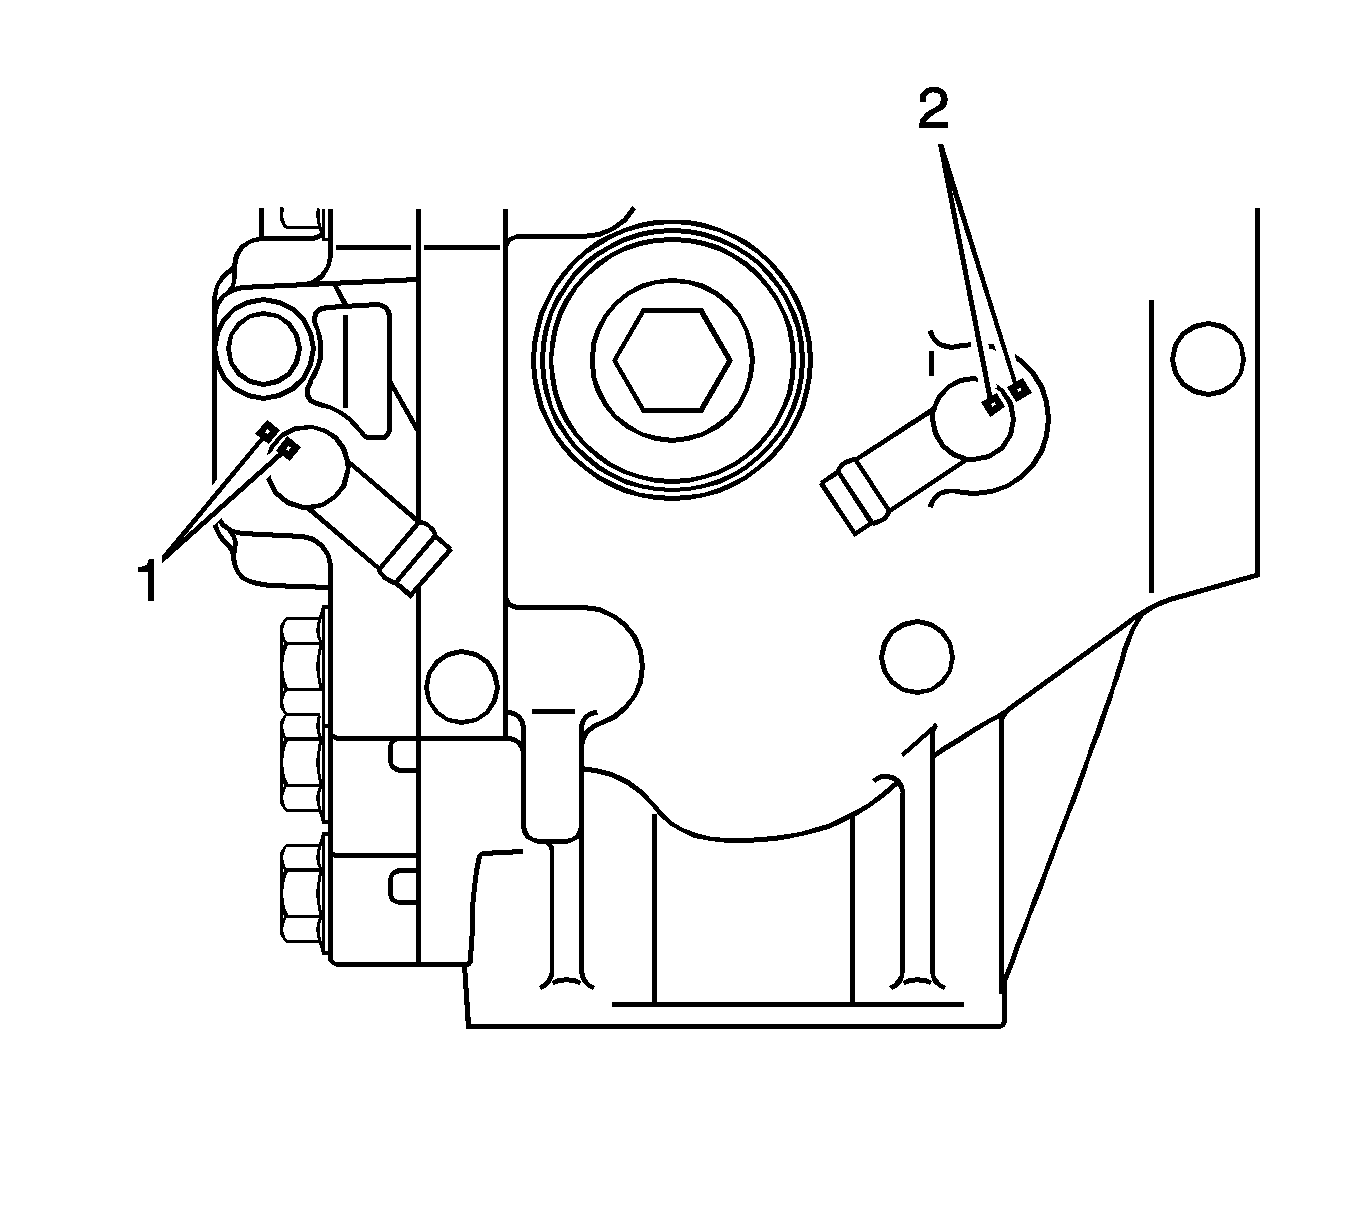
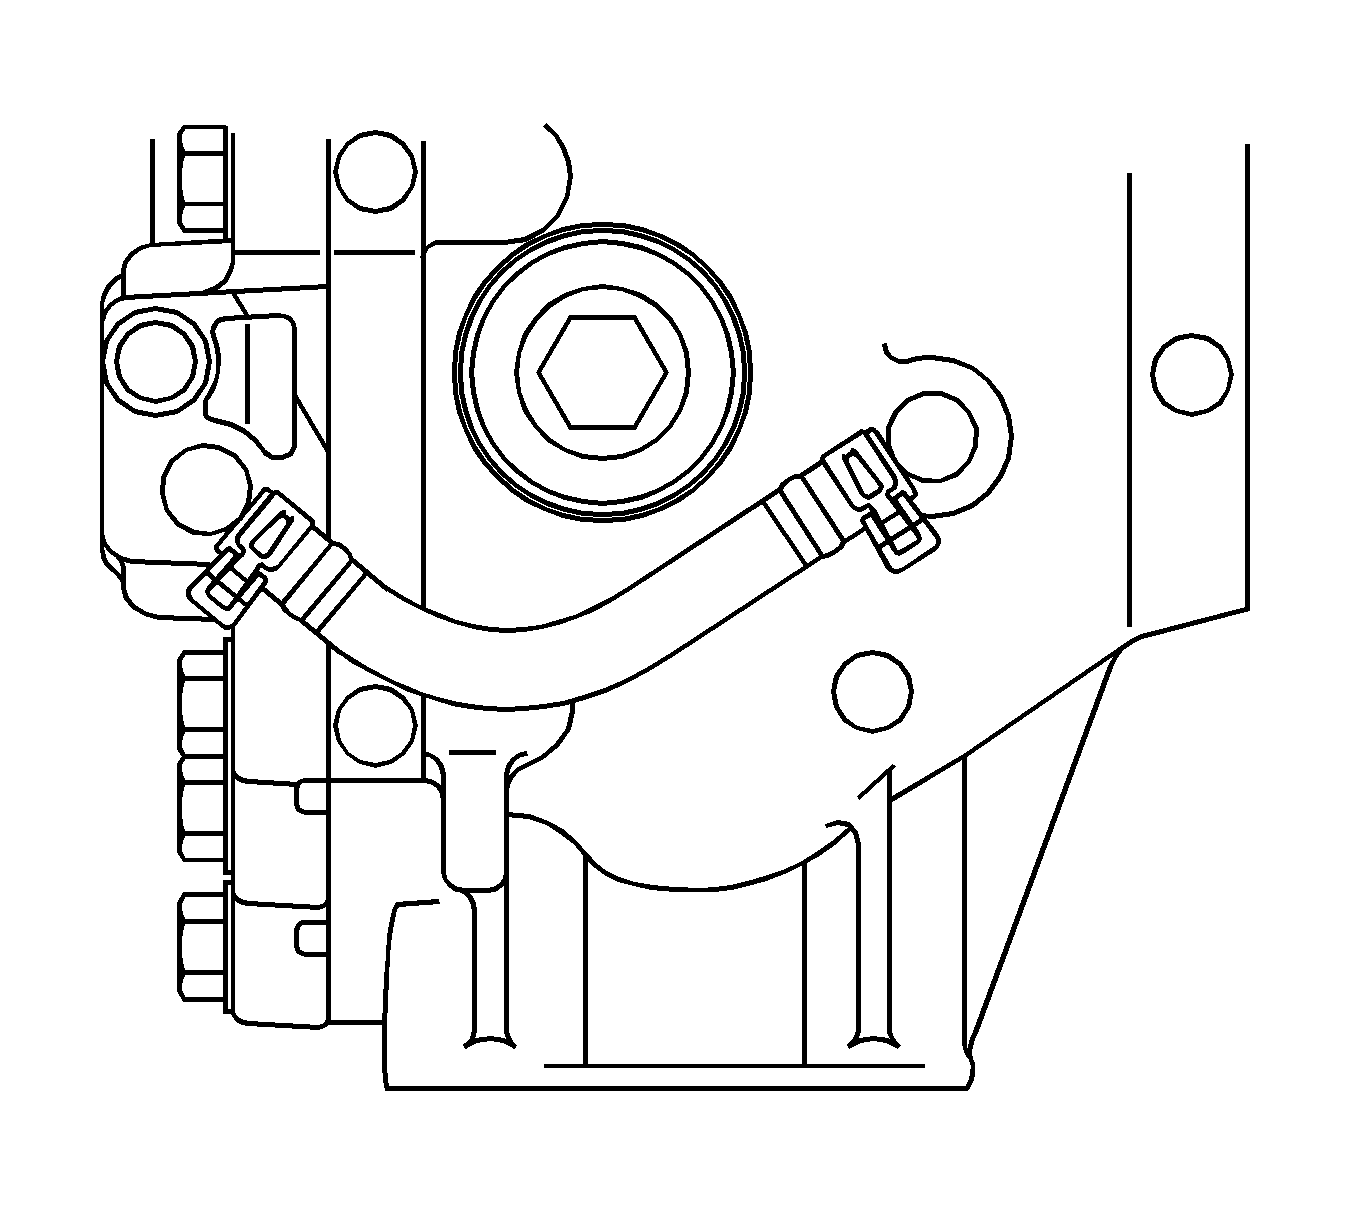
- Align the matchmarks (1, 2) on the differential pressure control hose elbows and differential carrier.
- Using the differential pressure control hose clips, install the rear differential pressure control hose to the differential pressure control hose elbows.
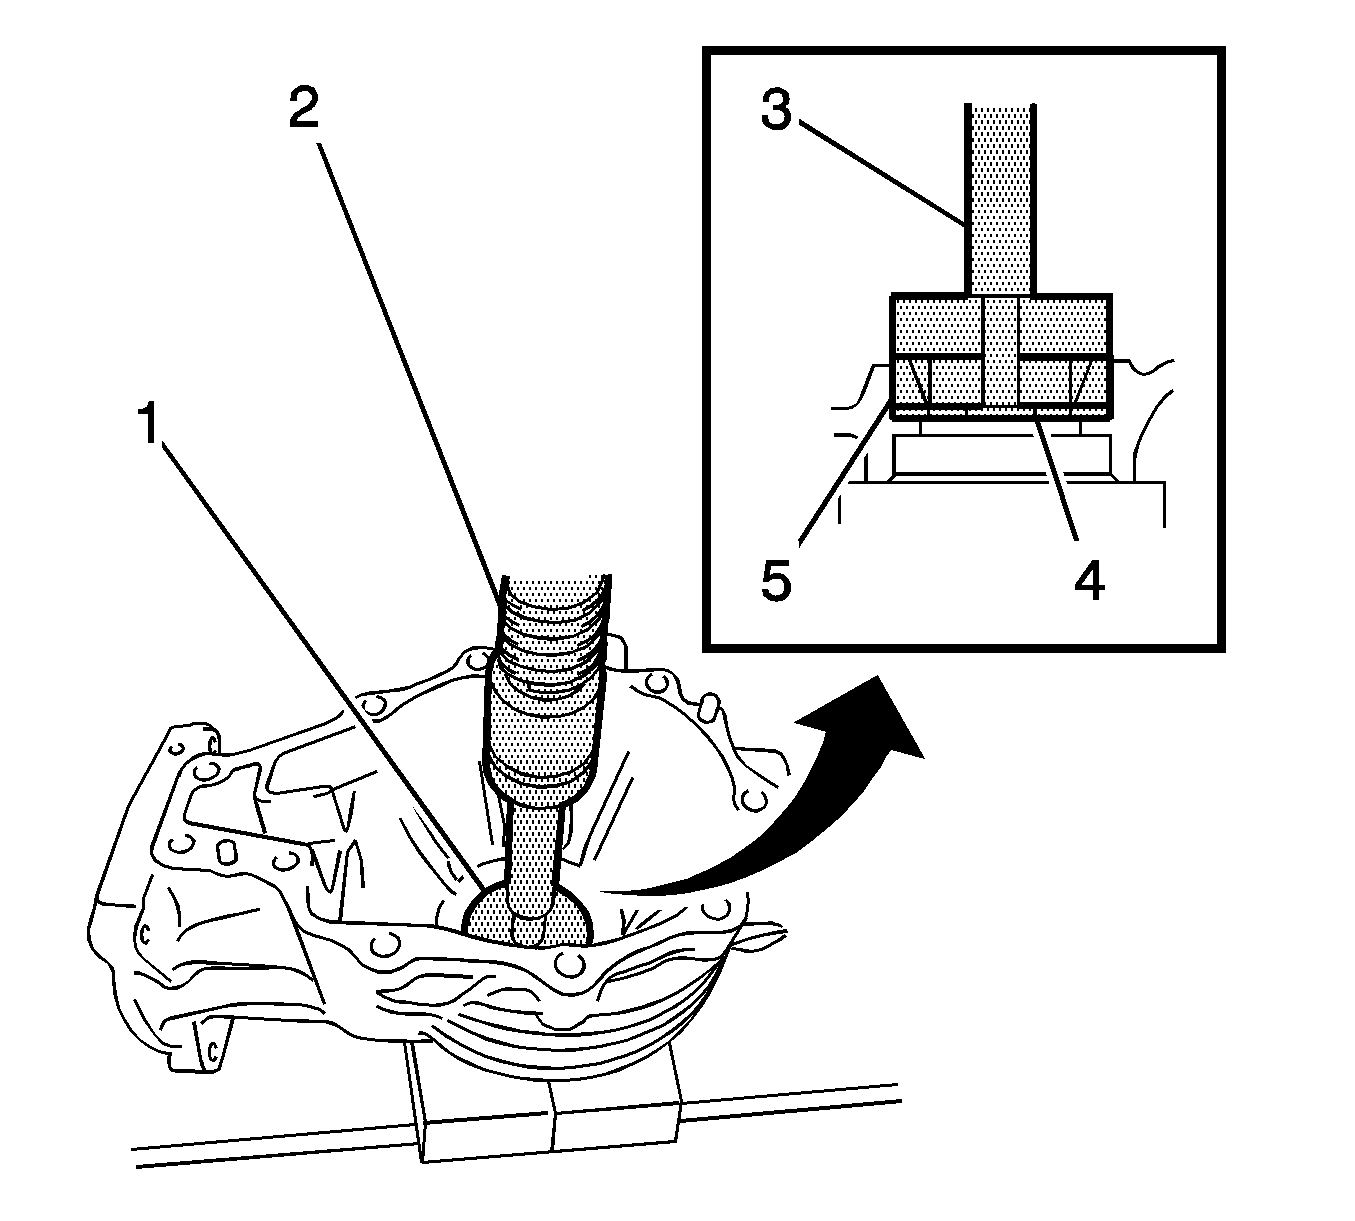
- Apply a light coat of MP grease No. 2 to the lip of a new oil diaphragm seal.
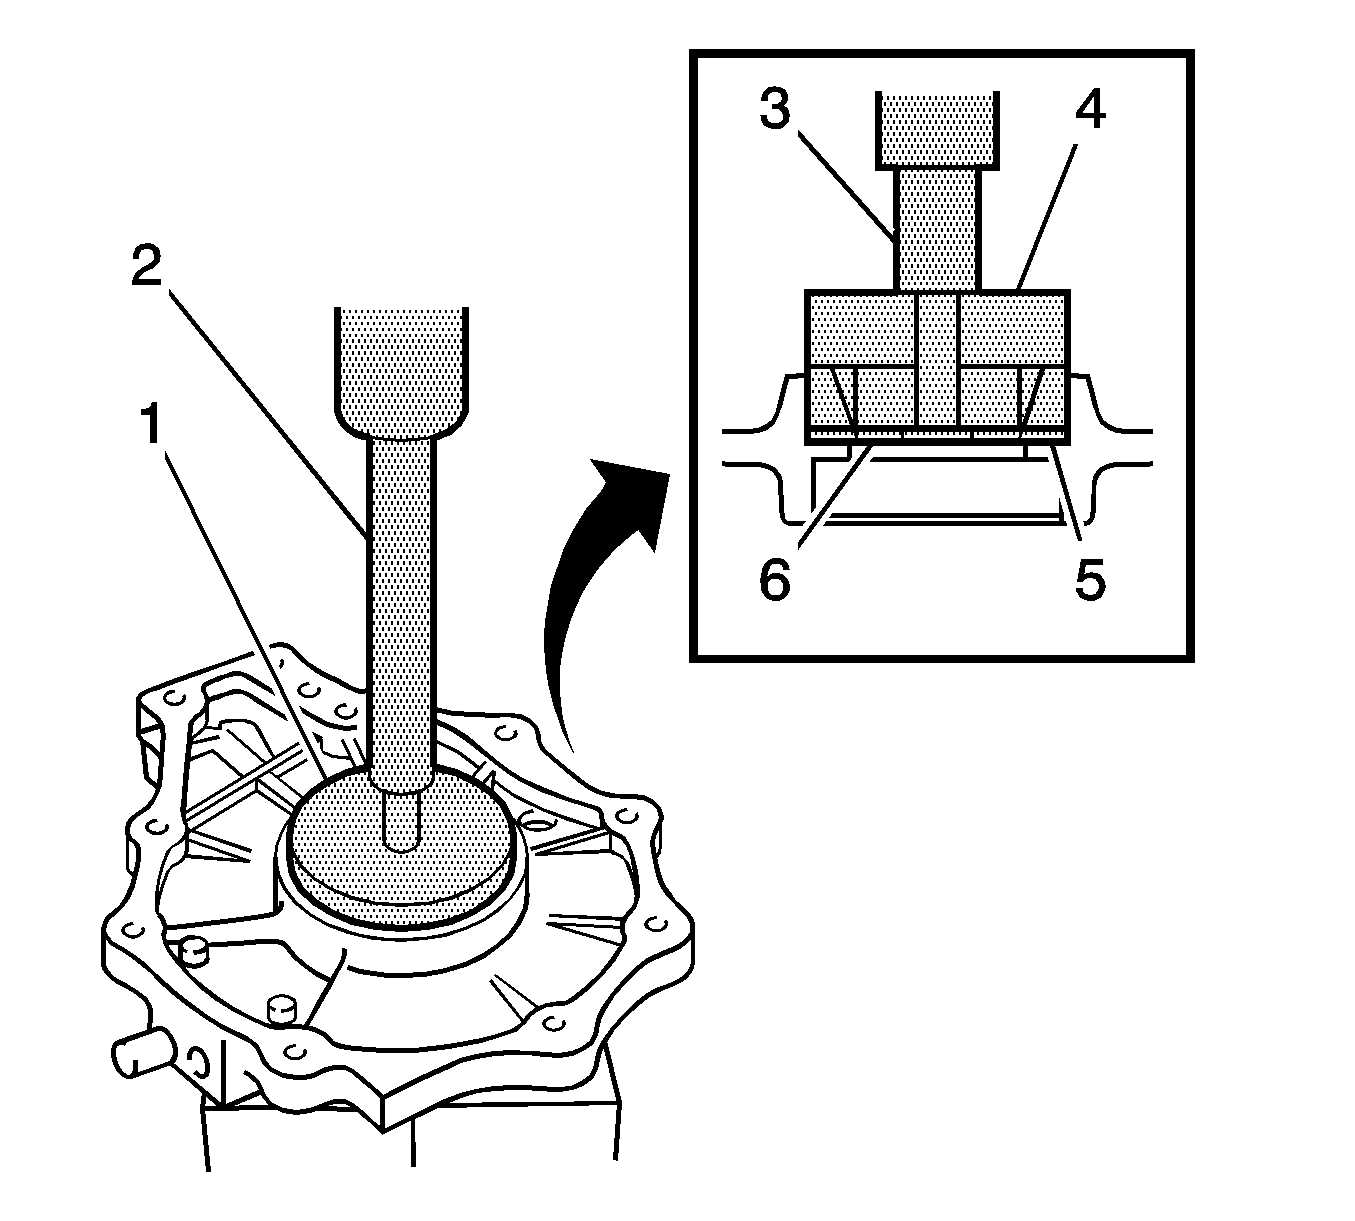
- Tap the oil diaphragm seal into the rear differential carrier using a suitable tool (1).
- Apply a light coat of MP grease No. 2 to the lip of a new rear differential side gear shaft oil seal.
- Tap the rear differential side gear shaft oil seals into the rear differential carrier and differential side bearing retainer using a suitable tool (1).
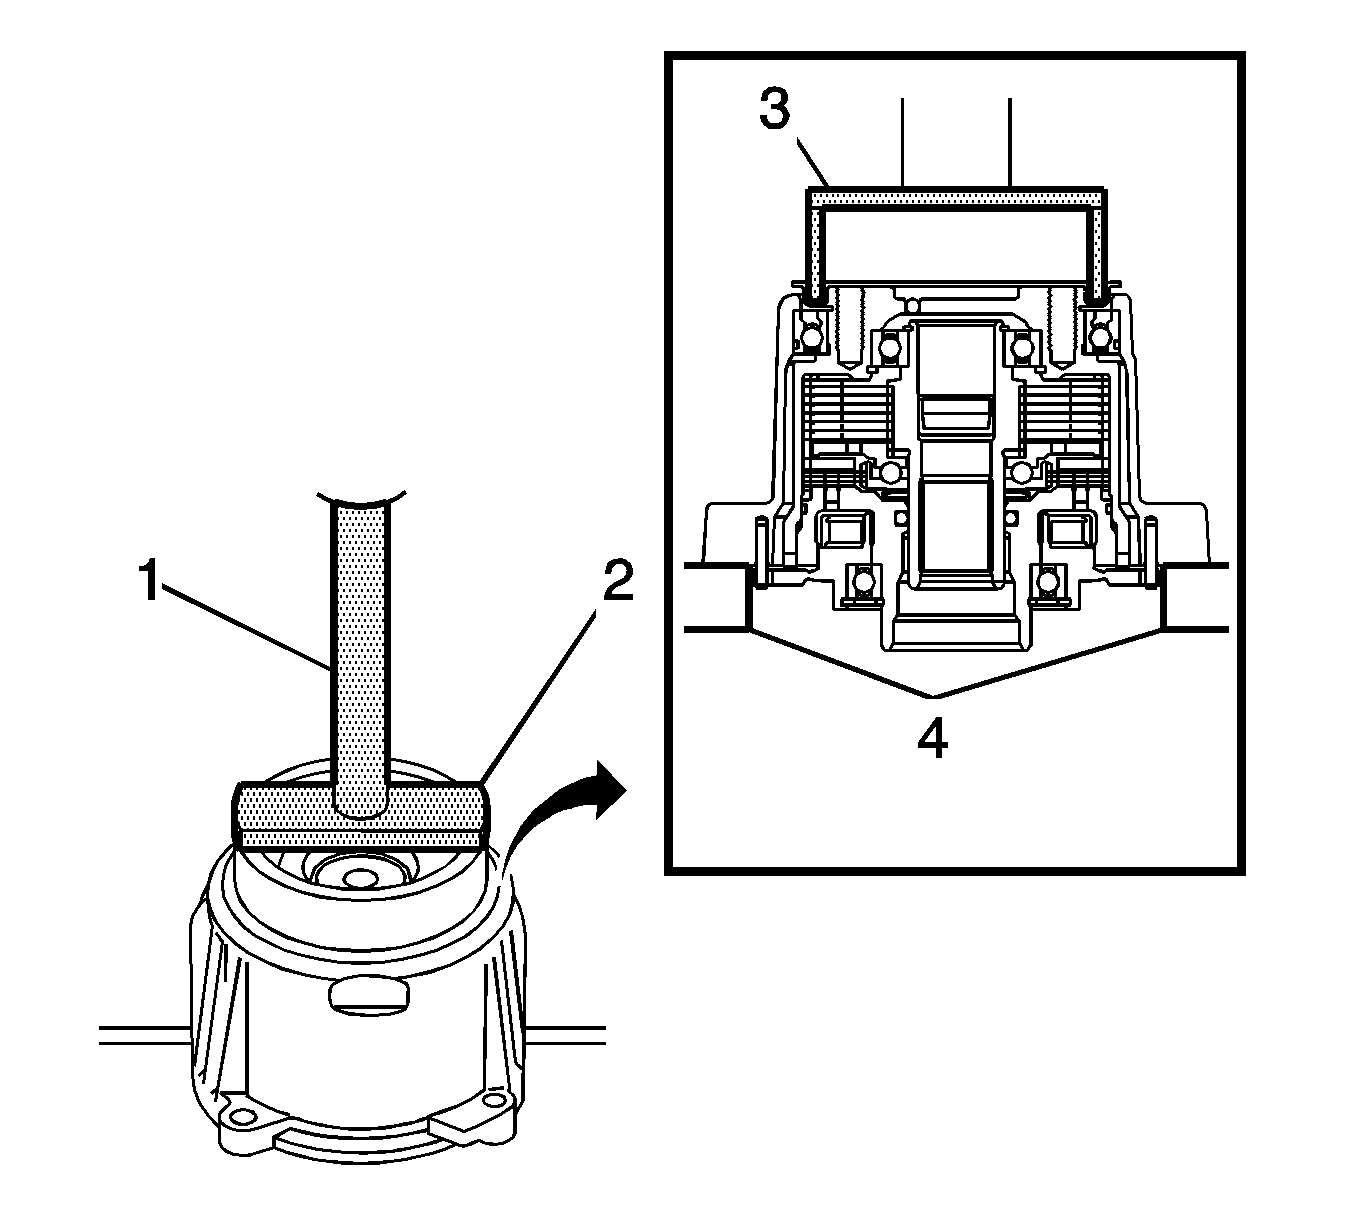
- Using a press (1), install the new rear differential dust deflector.
- Install the transmission coupling spacer (1) to the rear differential carrier.
- Install the transmission coupling conical spring washer (1) to the rear differential carrier.
- Remove the sealant from the rear differential carrier and differential side bearing retainer.
- Remove grease and oil from the alignment surfaces of the rear differential carrier and the electromagnetic control coupling sub-assembly.
- Apply sealant Three Bond 1281 or equivalent, to the areas indicated in the illustration of the electromagnetic control coupling sub-assembly.
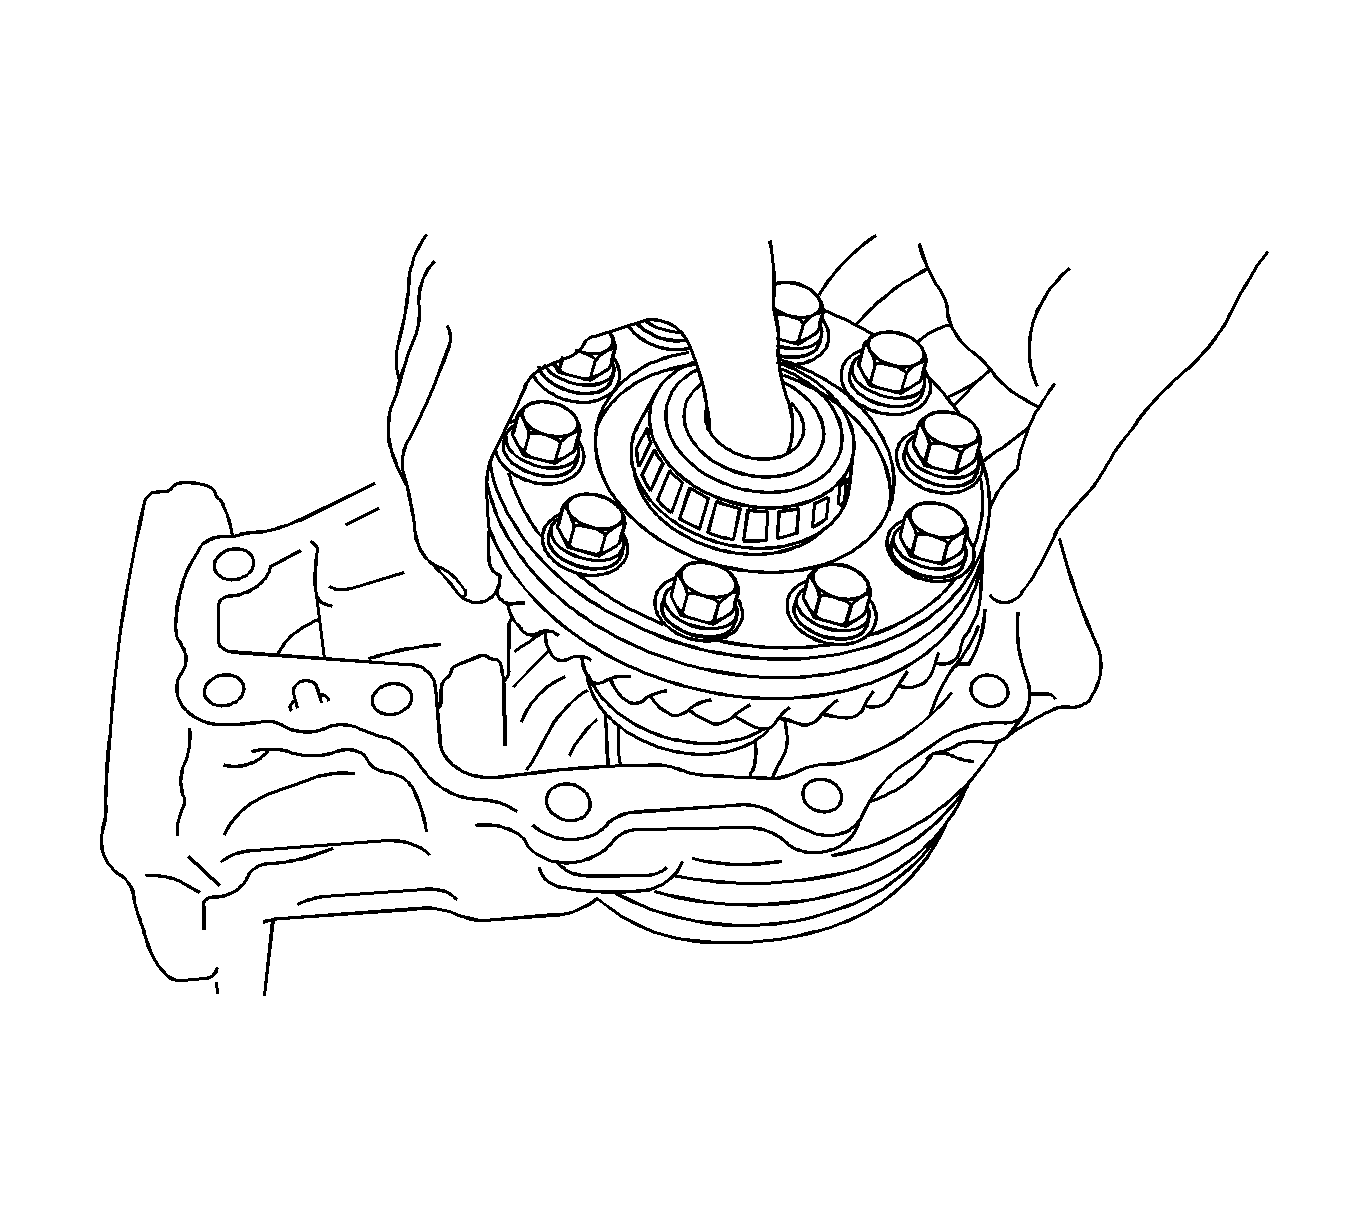
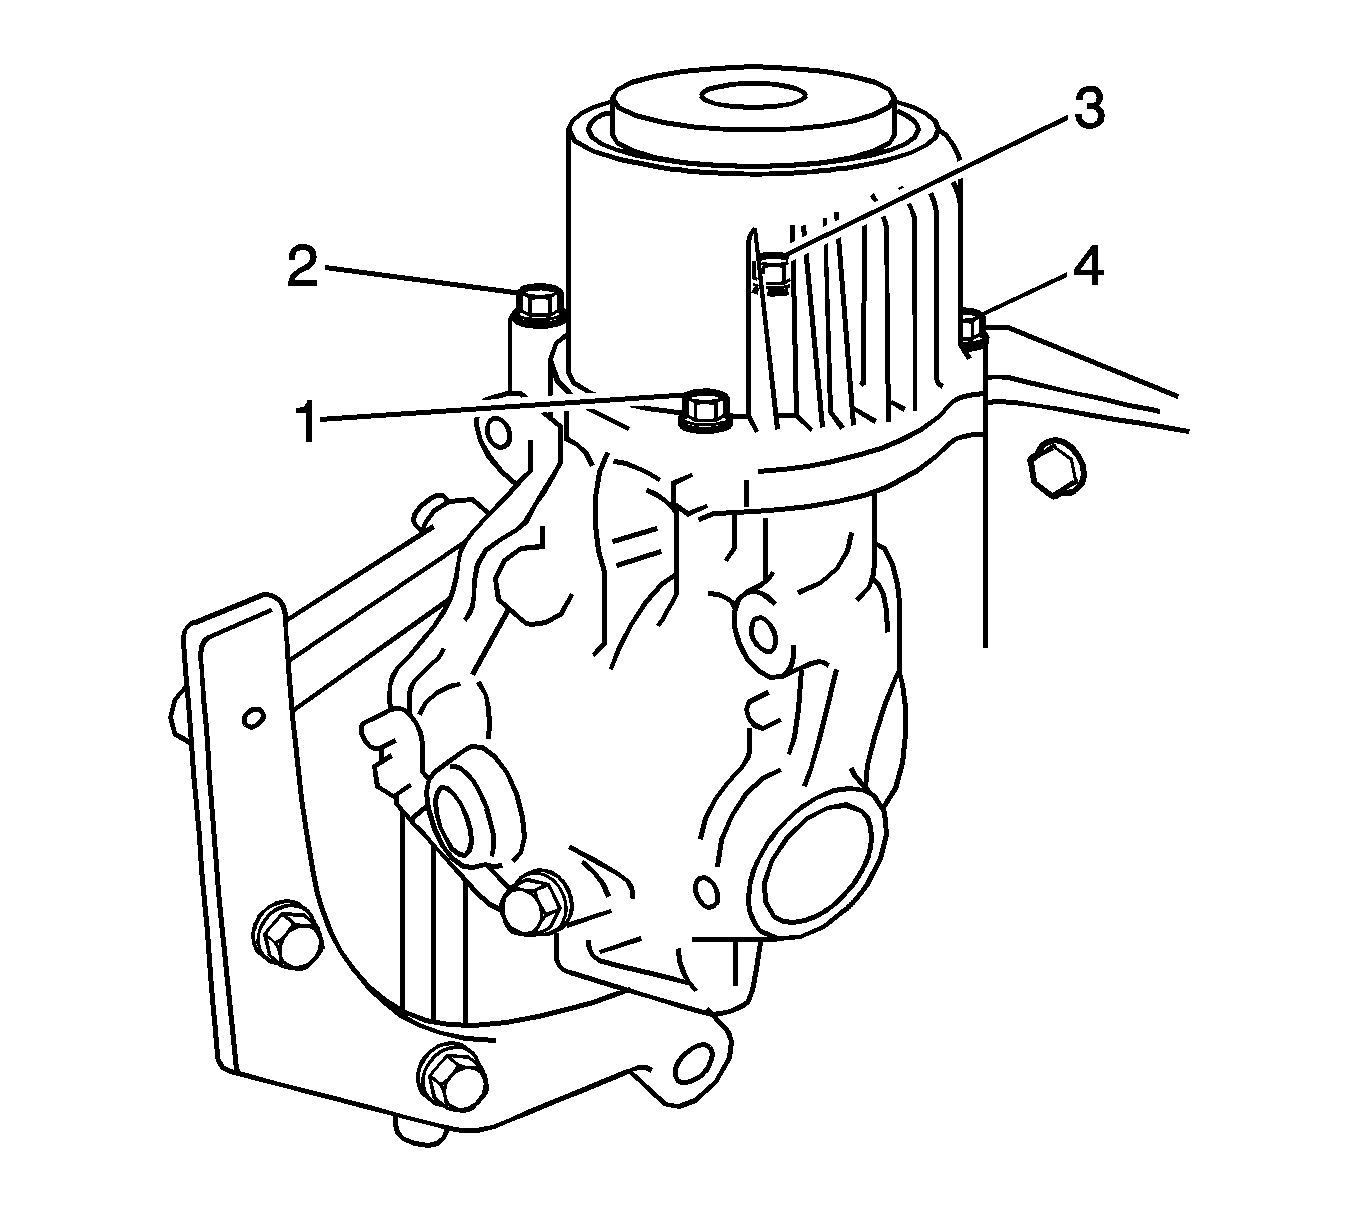
- Install the electromagnetic control coupling subassembly with the bolts (1-4) and tighten to 20 N·m (15 lb ft).
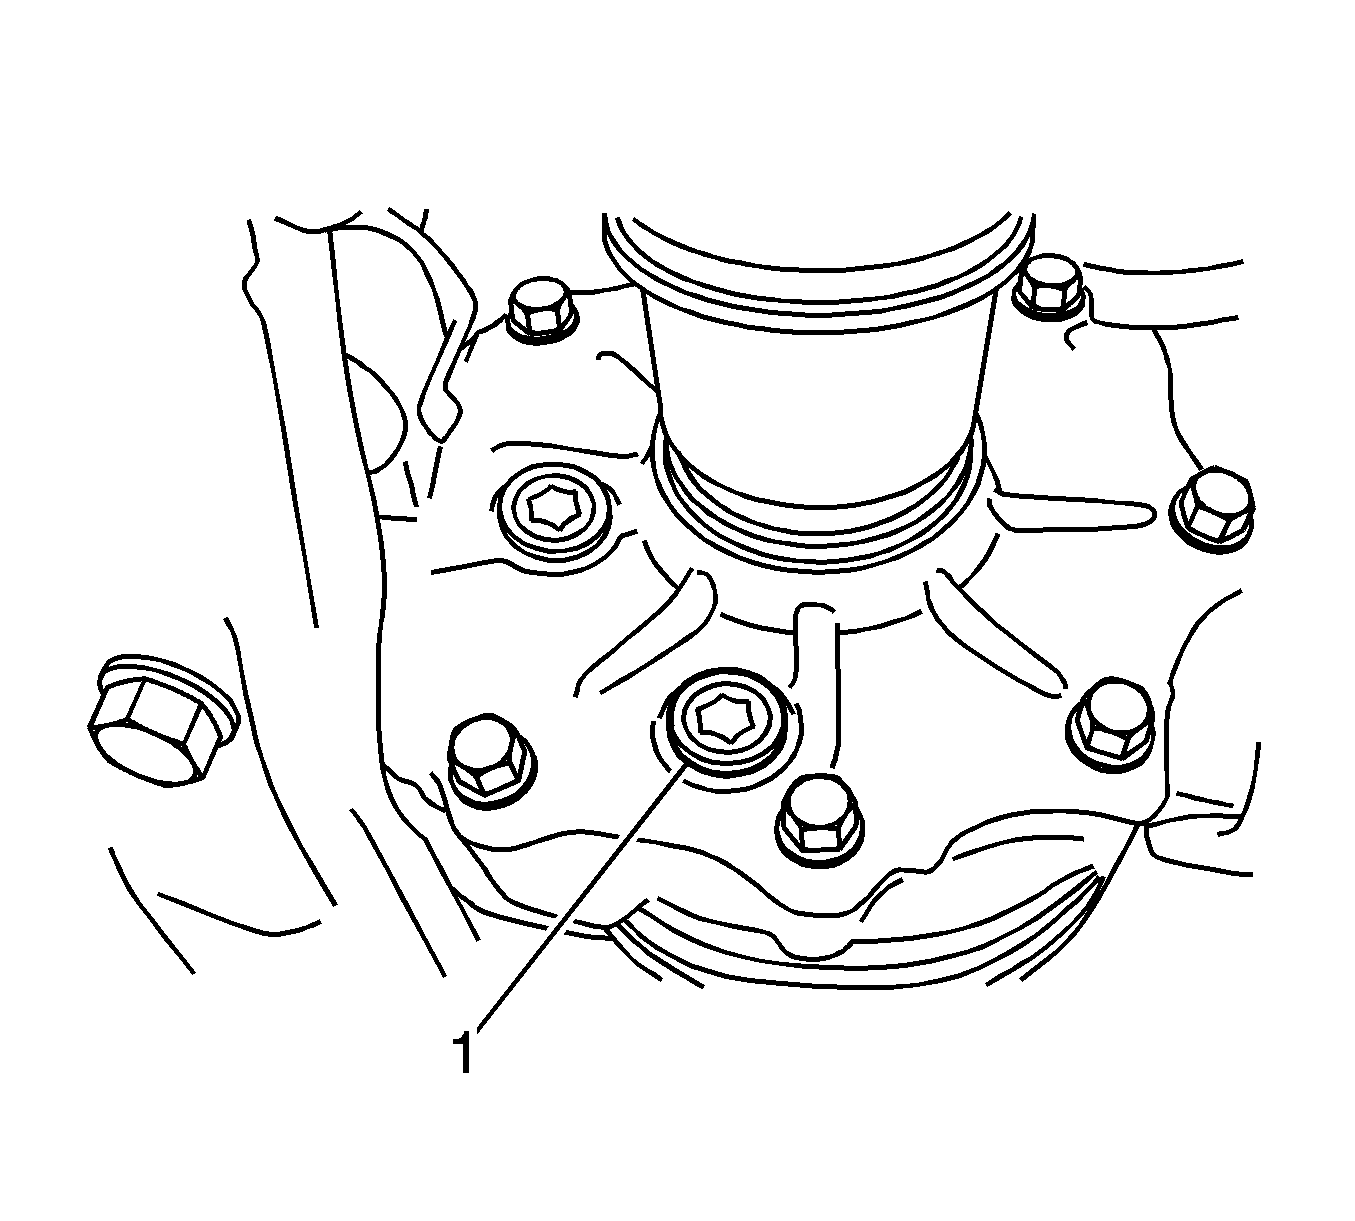
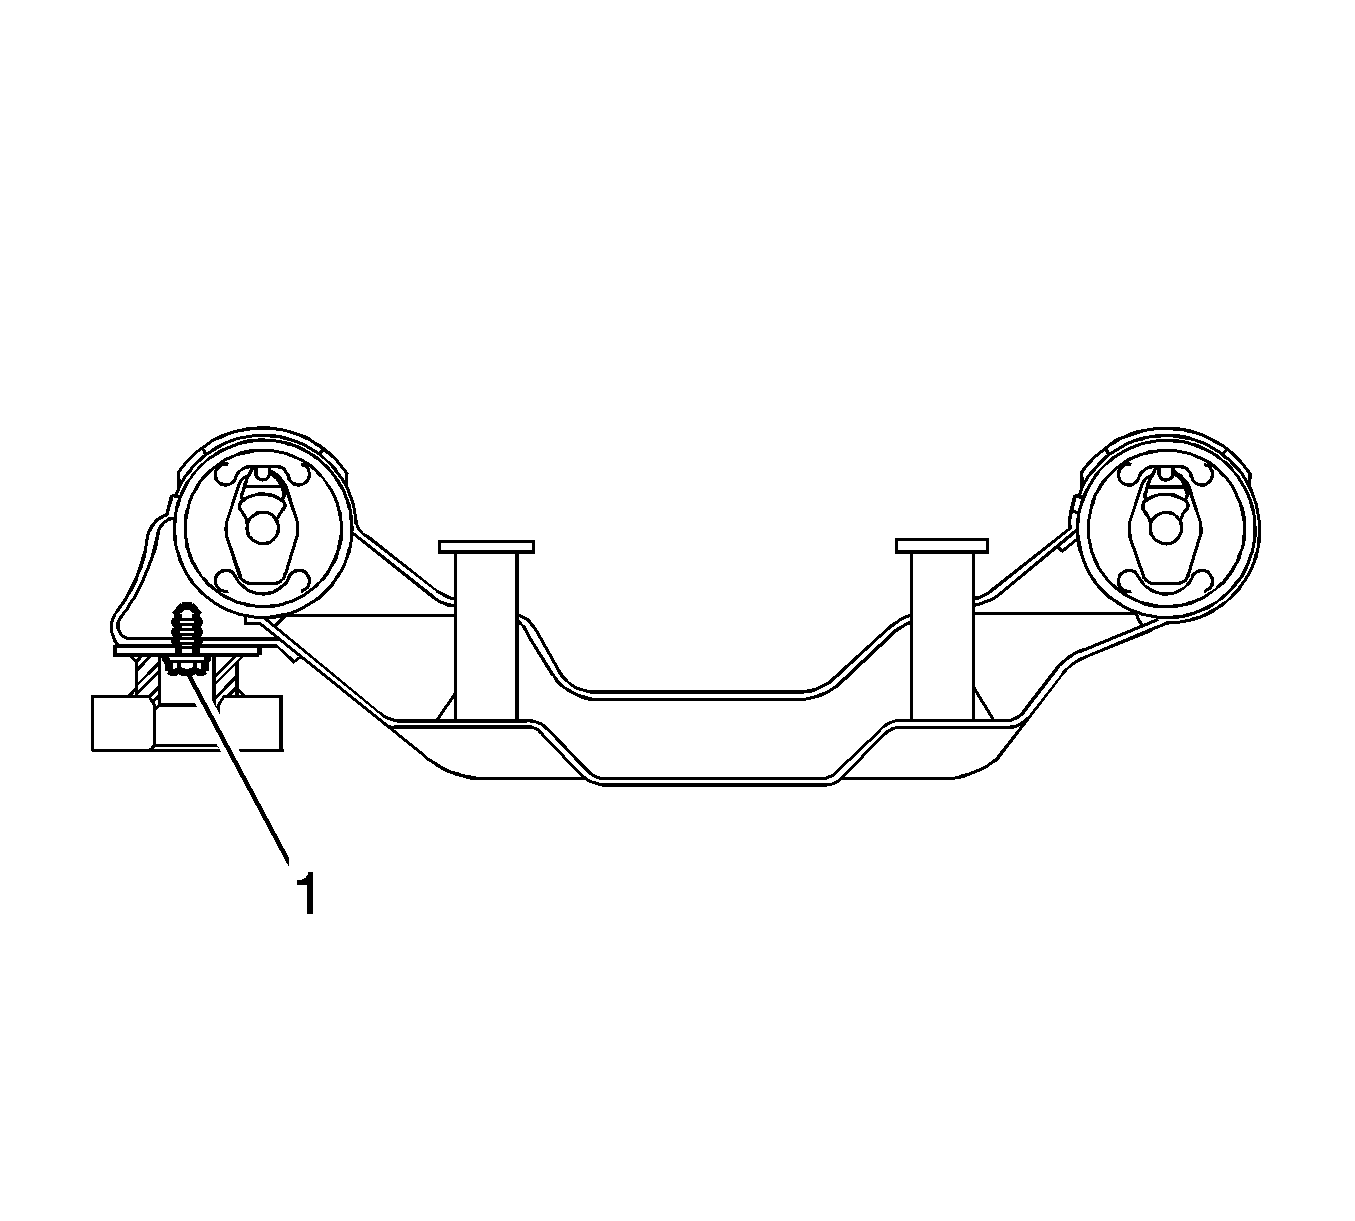
- Install a new gasket with the rear differential drain plug (1) and tighten to 39 N·m (29 lb ft).
- Install a new gasket with the rear differential filler plug (inspection plug) (1) and tighten the plug to 98 N·m (72 lb ft).
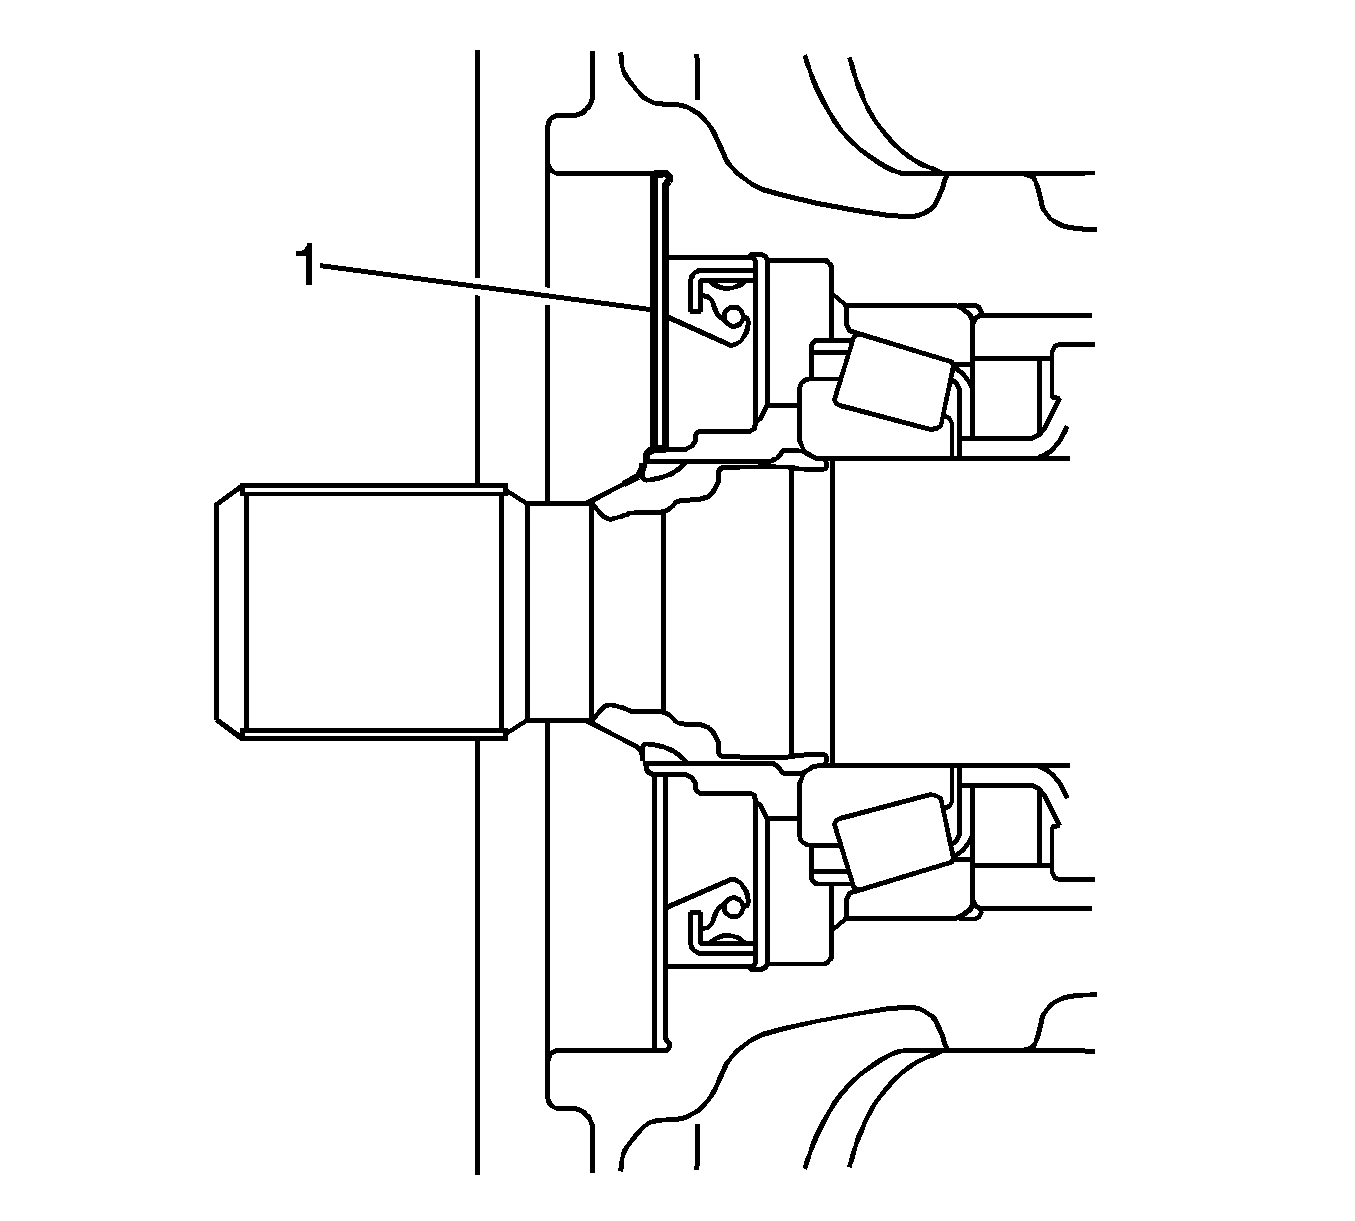
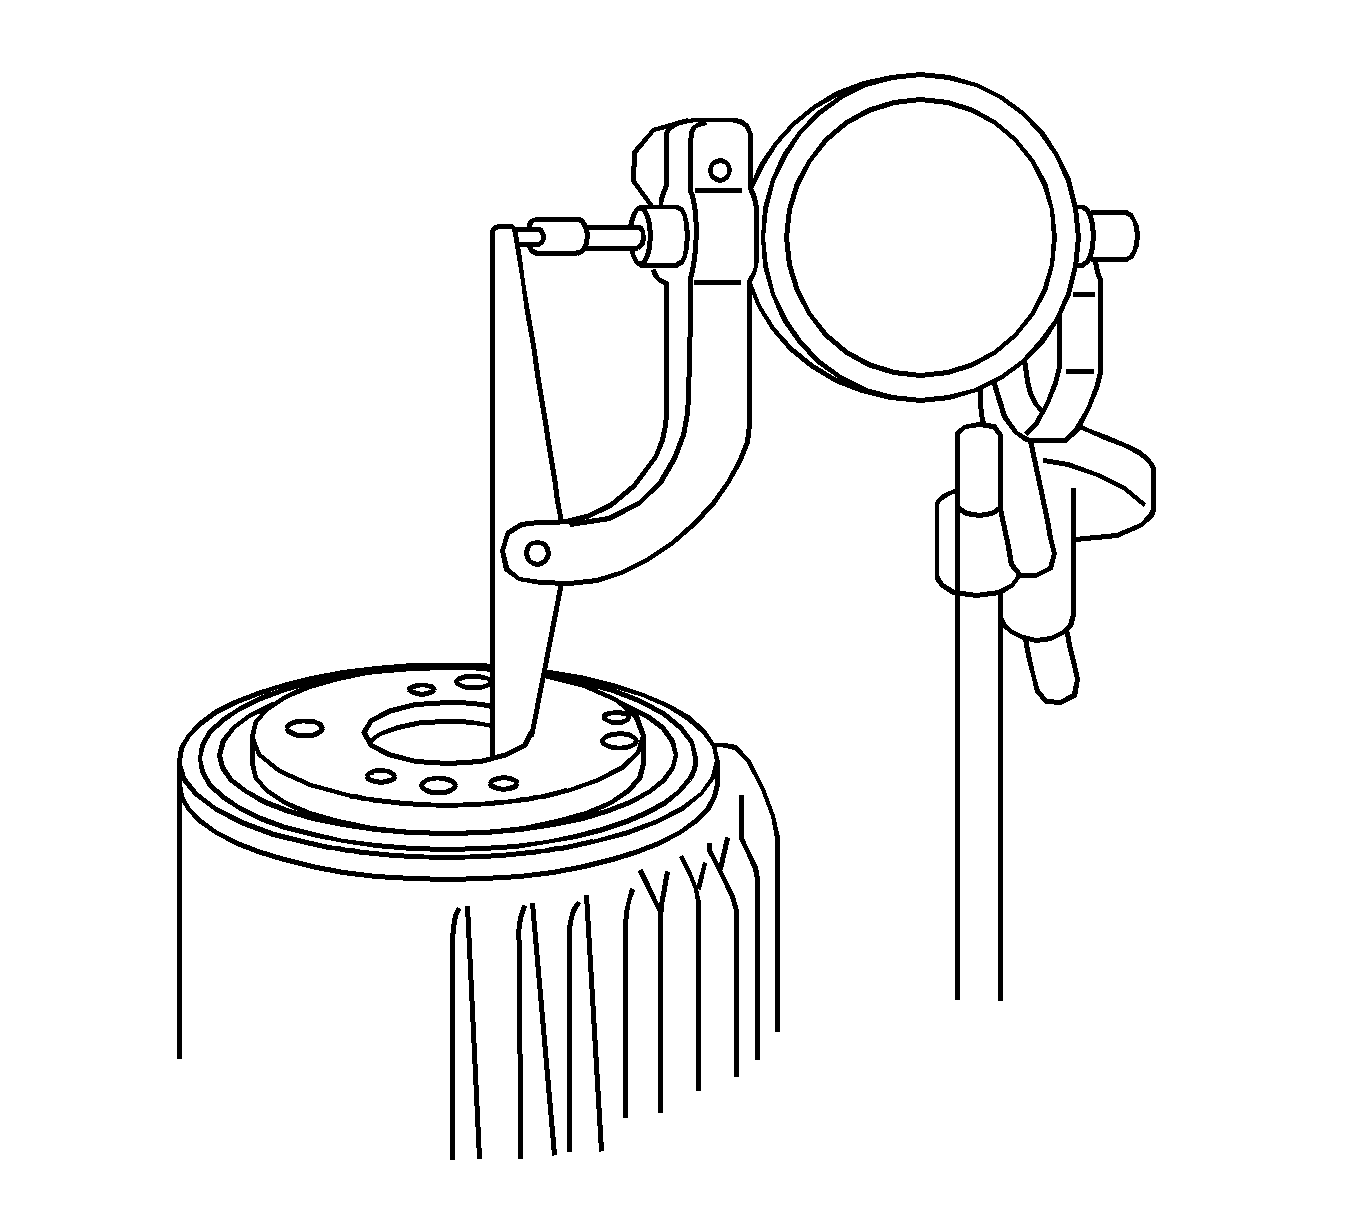
- Install a dial indicator so that it is perpendicular to the inner side of the electromagnetic control coupling sub-assembly.
- Using a suitable tool (1), rotate the electromagnetic control coupling sub-assembly forward and backward and measure the vertical runout.
- If the runout is greater than the maximum value, replace the electromagnetic control coupling sub-assembly.
- Install a dial indicator perpendicular to the electromagnetic control coupling sub-assembly.
- Using a suitable tool (1), rotate the electromagnetic control coupling sub-assembly forward and backward and measure the lateral runout.
- If the runout is greater than the maximum value, replace the electromagnetic control coupling sub-assembly.
- Hand tighten the new stud bolts to the electromagnetic control coupling sub-assembly.
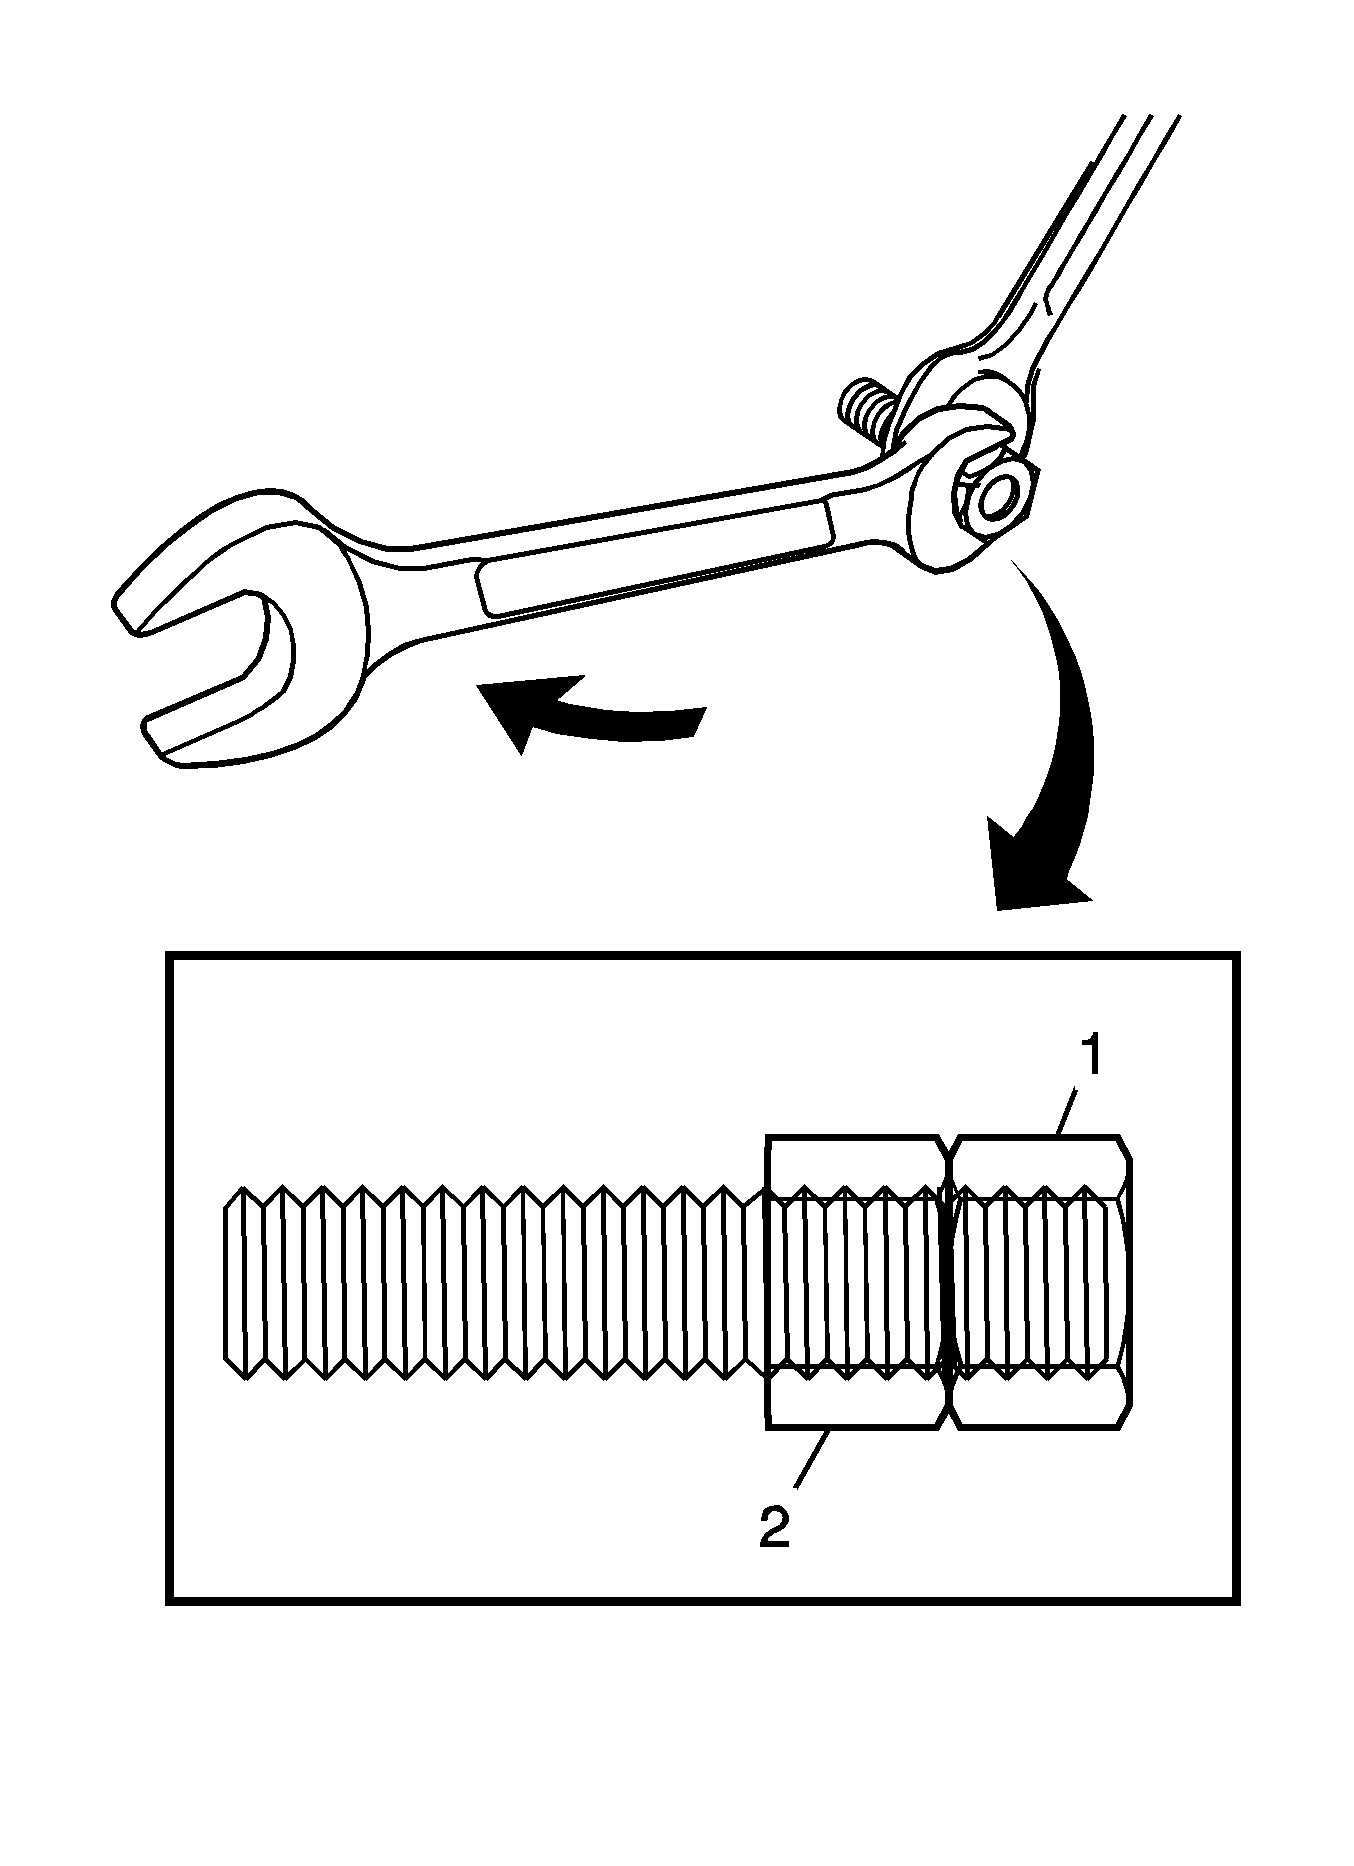
- Install the nuts to the stud bolt.
- Lock the upper nut (1) using the lower nut (2).
- Turn the upper nut and tighten the stud bolts (a) to the electromagnetic control coupling sub-assembly. Tighten the bolts to 10 N·m (88 lb in).
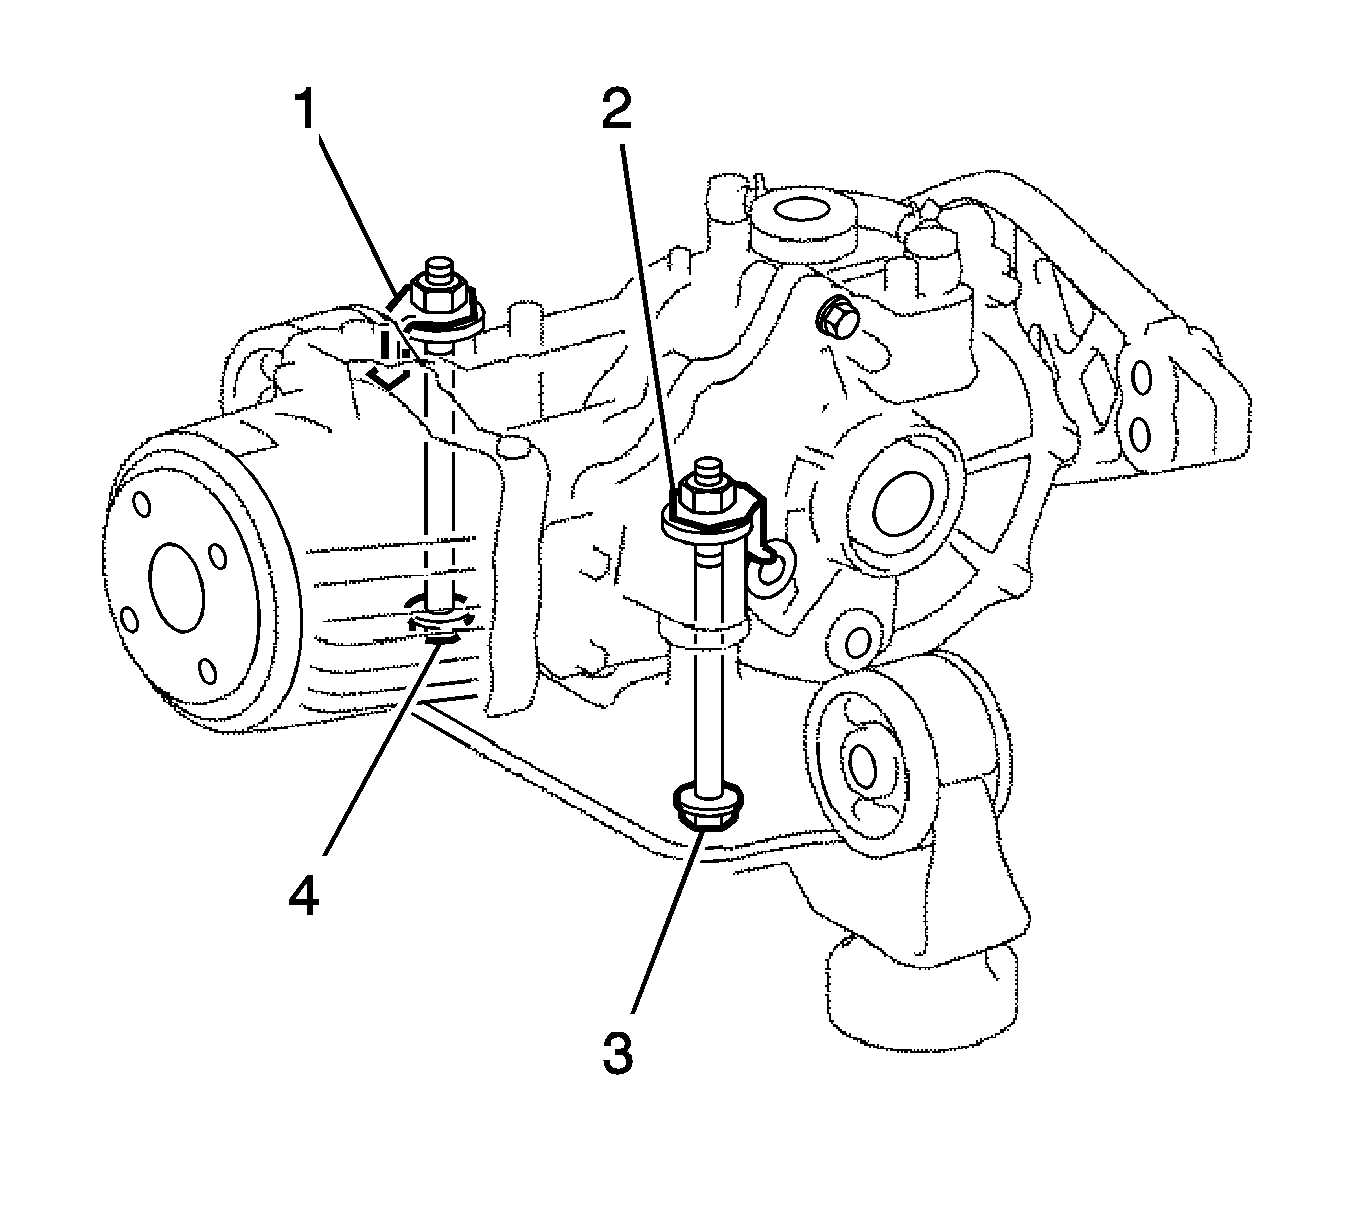
- Install the rear differential dynamic damper with the bolt (1) and tighten to 27 N·m (20 lb ft).
- Install the differential support to the differential carrier assembly with the bolts (1, ,2 3) and tighten to 167 N·m (123 lb ft).
- Install the rear No. 1 differential support assembly to the differential carrier assembly with the bolts (3, 4) and nuts (1, 2). Tighten the bolts to 103 N·m (76 lb ft).
Note:
• When installing a thrust washer, side gear and pinion, check for dust or chip. • When replacing a side gear or a pinion, replace both of them together. • Apply hypoid gear oil to the sliding parts and rotating parts.
Note: Align the holes of the differential case and rear differential pinion shaft.
Specification
Backlash - 0.05-0.20 mm (0.0019- 0.0078 in)
Caution: Refer to Fastener Caution in the Preface section.
Note:
• The new bolts are coated with heat resistant oil. Do not wash it off. • Install the rear differential case bolts by tightening diametrically opposite bolts uniformly in several passes. • Tighten the rear differential case bolts after the differential ring gear has cooled down sufficiently.
Note: Use the removed rear differential drive pinion washer for installation.
Specification
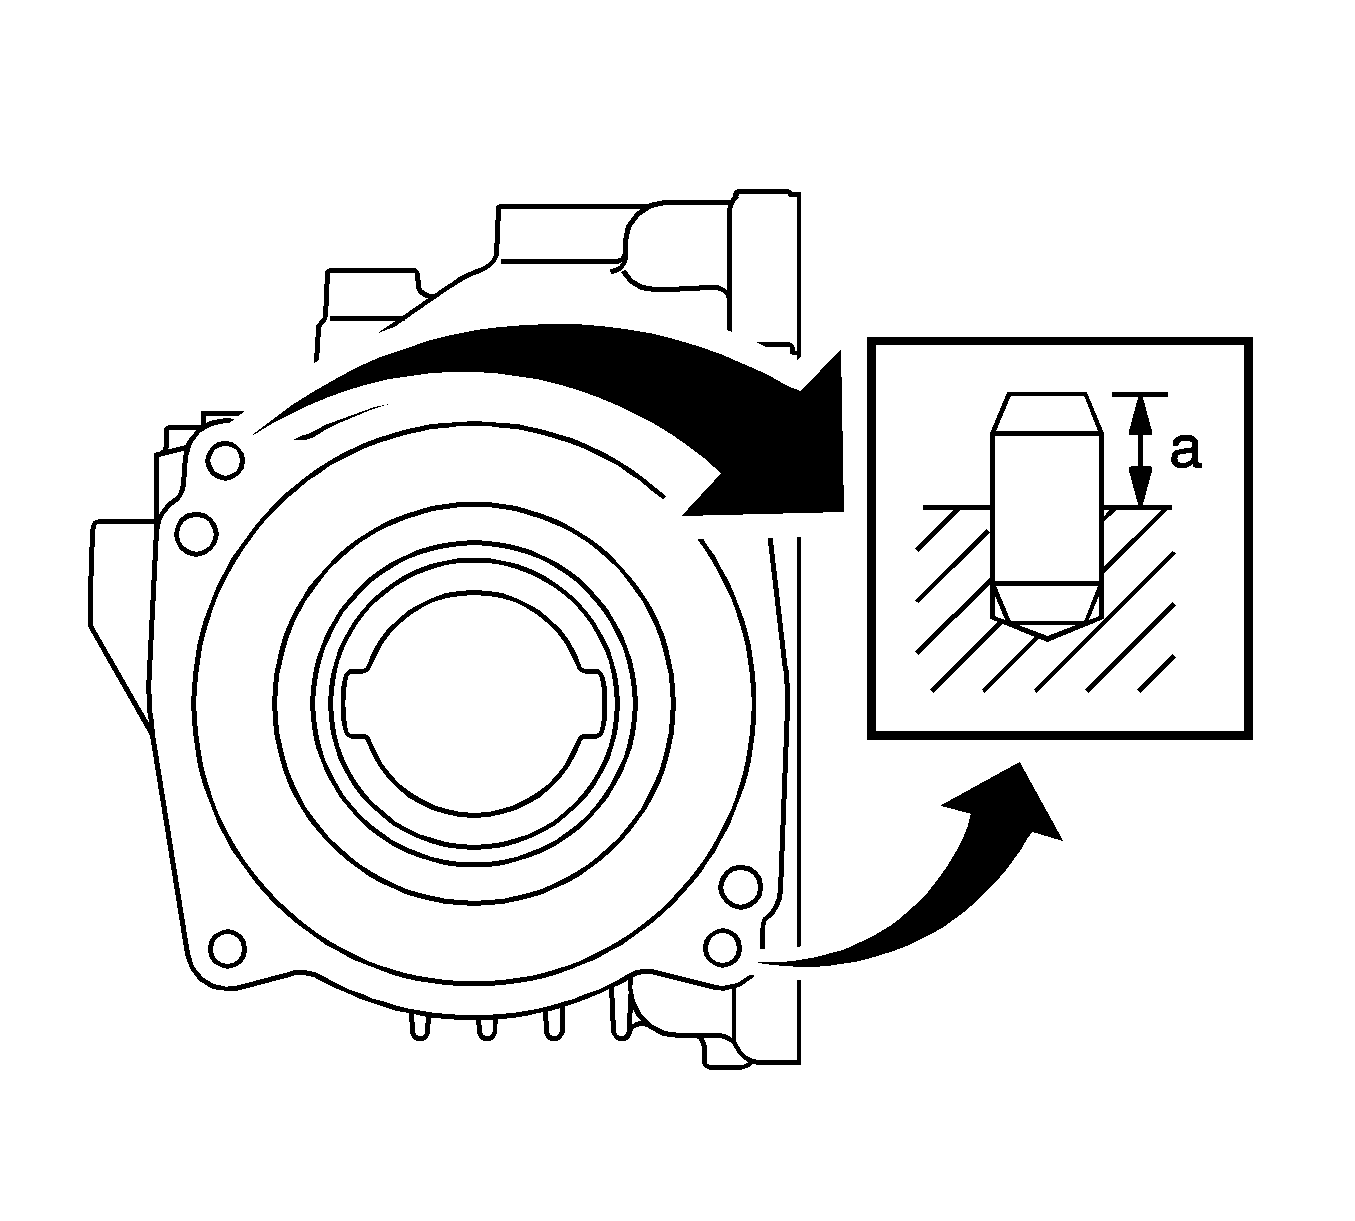
Straight Pin depth - 8-9 mm (0.315-0.354 in) (a)

Note: Install each rear differential drive pinion washer to the place it was removed from.
Note:
• New bearings are coated with anti-rust oil. If using new bearings, do not wash it off. • If reusing a bearing, coat it with hypoid gear oil.
Note: Tighten the rear drive pinion nut gradually. Never tighten excessively.
Note:
• For a more accurate measurement, rotate the bearing forward and backward before inspecting. • Record the preload measurement for use with the total preload inspection.
Specification
| • | Drive pinion preload, new bearing - 0.7-1.3 N·m (6-11 lb in) |
| • | Drive pinion preload, reused bearing - 0.4-0.7 N·m (3-6 lb in) |
Specification
Backlash - 0.10-0.15 mm (0.0039-0.0059 in)
When the backlash is smaller than the specified value, select a thick washer for the right side and thin washer for the left side.
When the backlash is larger than the specified value, select a thin washer for the right side and thick washer for the left side.
Refer to Spacer and Shim Specifications for Rear Differential Side Gear Shaft Washer Plate Thickness Chart.
Note: Check the tooth contact pattern at 2 or more positions around circumference of the differential ring gear.
| 42.1. | Select washers that are thicker or thinner as necessary, where the thickness for the left and right side is the same. Then install the rear differential case bearing outer race. |
| 42.2. | Repeat the differential ring gear and differential drive pinion tooth contact pattern inspection. |
| 42.3. | Repeat the differential ring gear and differential drive pinion backlash inspection. |
If the differential ring gear and differential drive pinion backlash is not as specified, replace the differential ring gear and differential drive pinion.
Specification
| • | Standard total preload, new bearing - Standard drive pinion preload plus 0.7-1.3 N·m (6-11 lb in) |
| • | Standard total preload, reused bearing - Standard drive pinion preload plus 0.29-0.49 N·m (2.6-4.3 lb in) |
| 46.1. | Select a side gear shaft washer for the right side again, and then perform the rear differential case bearing outer race installation (right side only). |
| 46.2. | Repeat the total preload inspection. |
| 46.3. | Repeat the ring gear backlash inspection. |
| 46.4. | Repeat the differential ring gear and drive pinion tooth contact pattern inspection. |
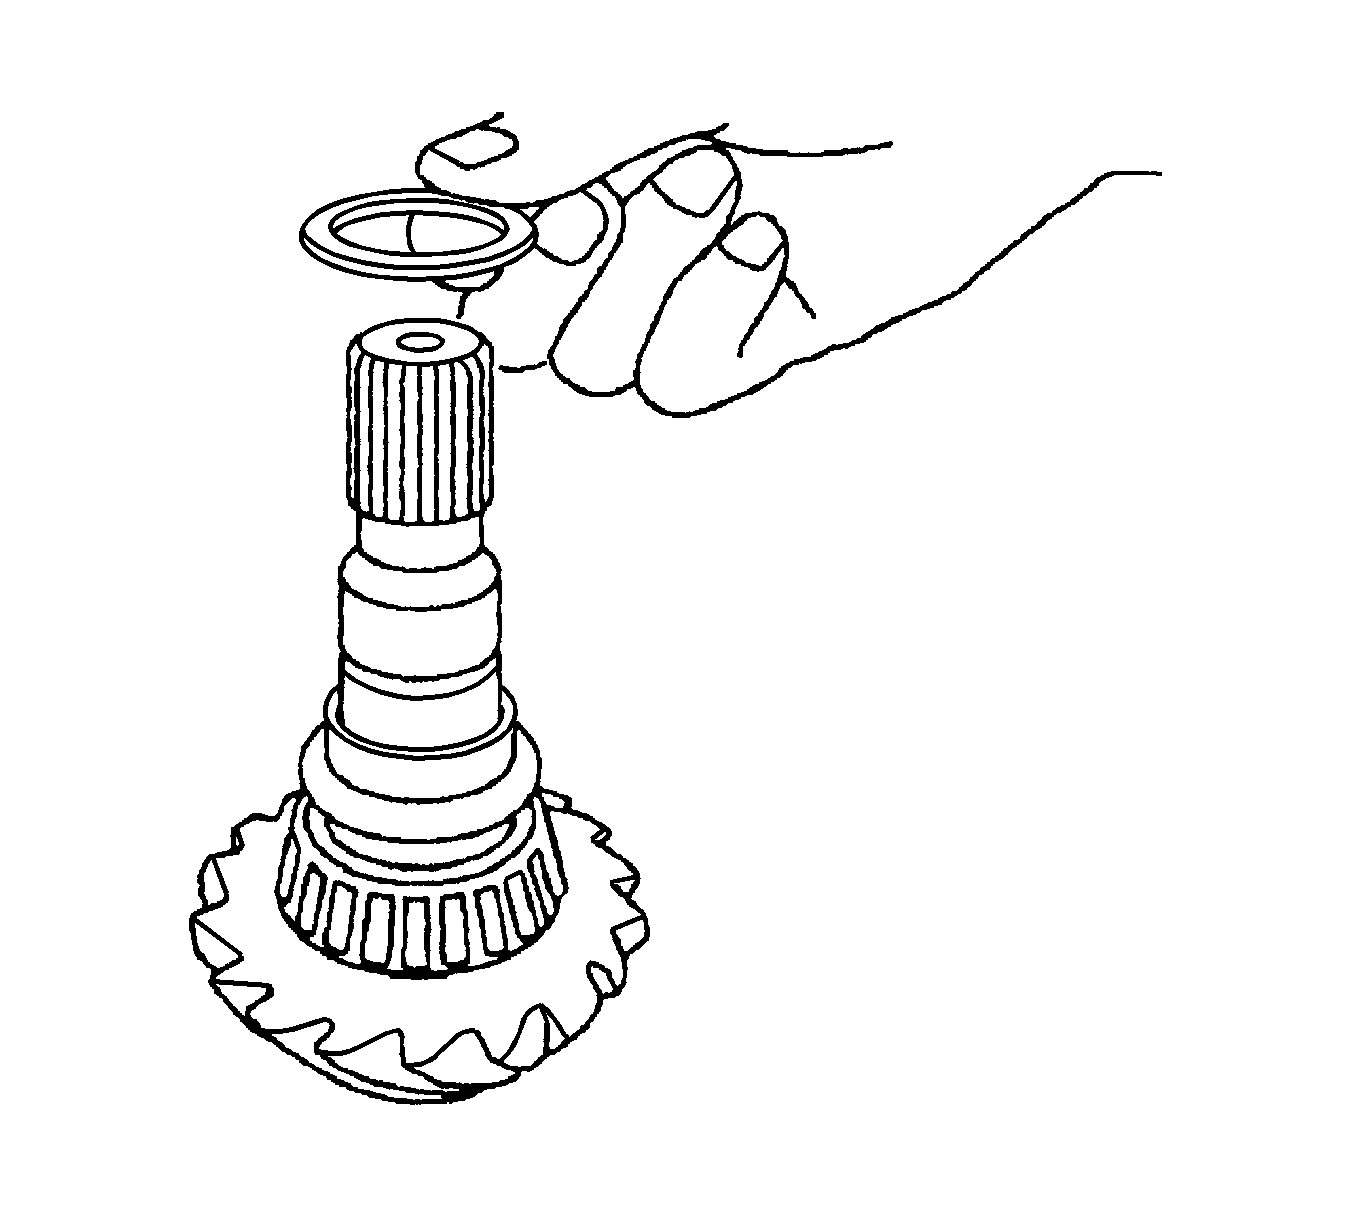
Note: Face the smaller inside diameter to the front.
Specification
| • | Drive pinion preload, new bearing - 0.7-1.3 N·m (6-11 lb in) |
| • | Drive pinion preload, reused bearing - 0.4-0.7 N·m (3-6 lb in) |
Specification
Backlash - 0.10-0.15 mm (0.0039-0.0059 in)

Specification
| • | Standard total preload, new bearing - Standard drive pinion preload plus 0.7-1.3 N·m (6-11 lb in) |
| • | Standard total preload, reused bearing - Standard drive pinion preload plus 0.29-0.49 N·m (2.6-4.3 lb in) |
| 64.1. | Select a side gear shaft washer for the right side again, and then perform the rear differential case bearing outer race installation (right side only). |
| 64.2. | Repeat the total preload inspection. |
| 64.3. | Repeat the ring gear backlash inspection. |
| 64.4. | Repeat the differential ring gear and drive pinion tooth contact pattern inspection. |
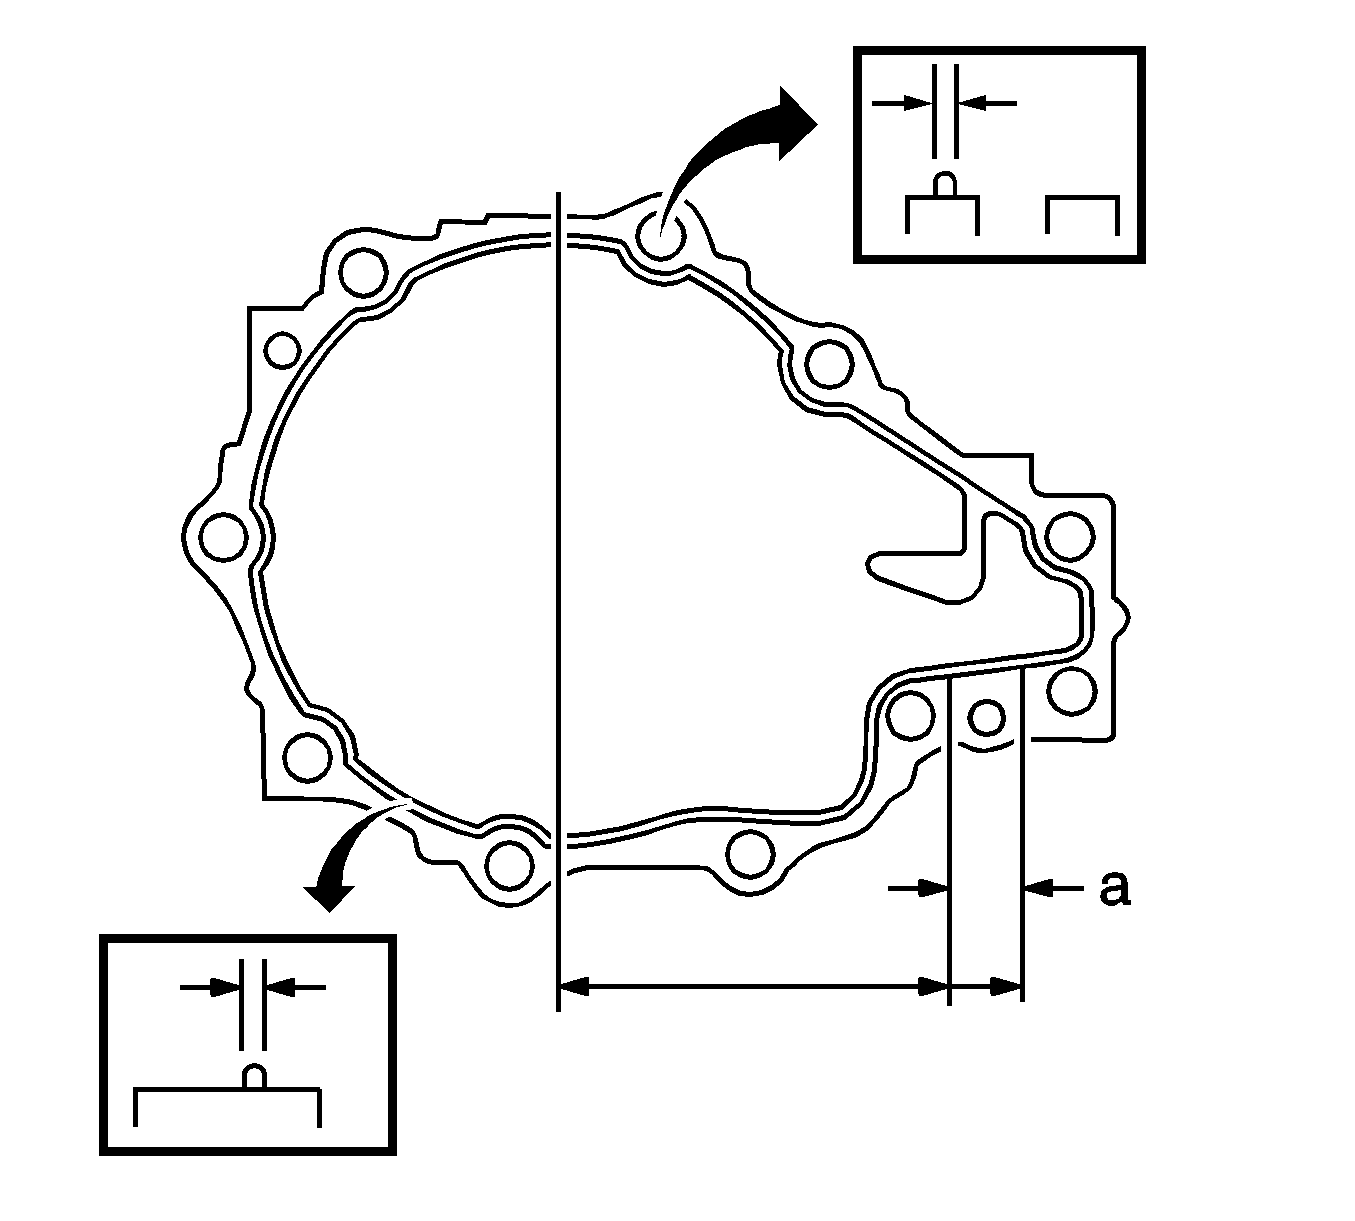
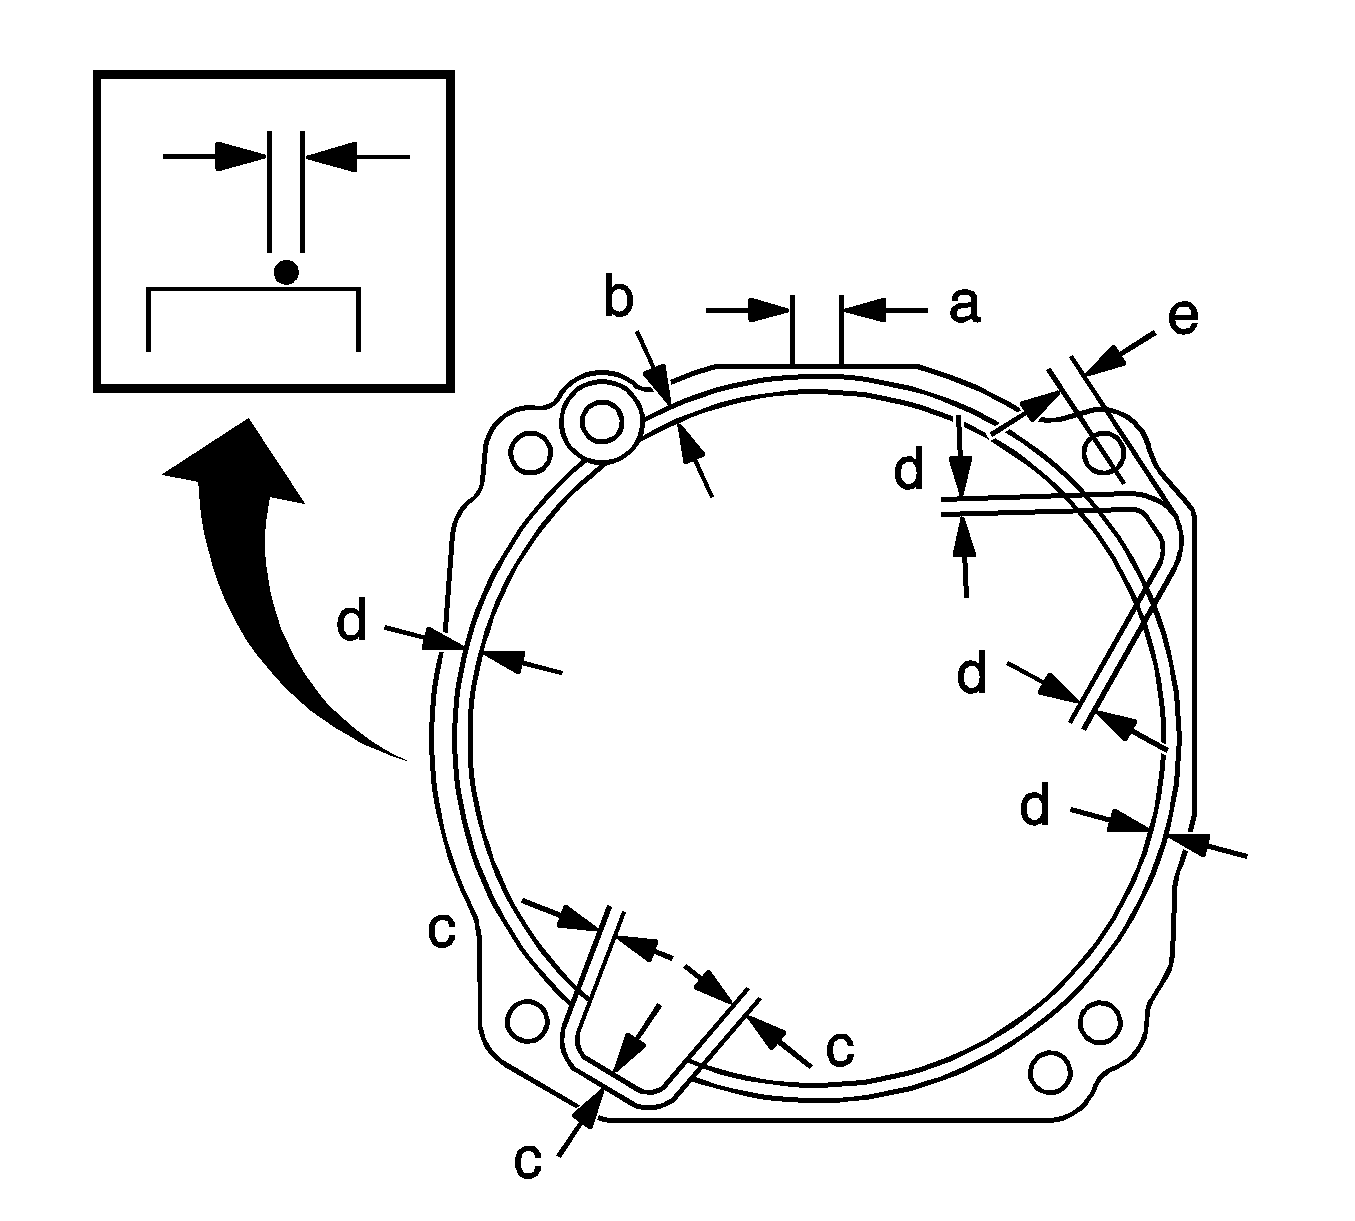
Note:
• Apply sealant in a continuous bead 2-3 mm (0.0787-0.118 in) in diameter. • Stop applying sealant after allowing it to overlap with the beginning of the bead by at least 10 mm (0.394 in) within range A. • Perform the installation within 3 minutes after applying sealant. • Begin the application in the range of "A".
Note: After installing the cover, do not add oil or drive the vehicle, and leave it alone for 1 hour or more. Also, avoid sudden acceleration and deceleration for 12 hours or more.
Specification
| • | Standard total preload, new bearing - Standard drive pinion preload plus 0.7-1.3 N·m (6-11 lb in) |
| • | Standard total preload, reused bearing - Standard drive pinion preload plus 0.29-0.49 N·m (2.6-4.3 lb in) |
Specification
Backlash - 0.10-0.15 mm (0.0039-0.0059 in)
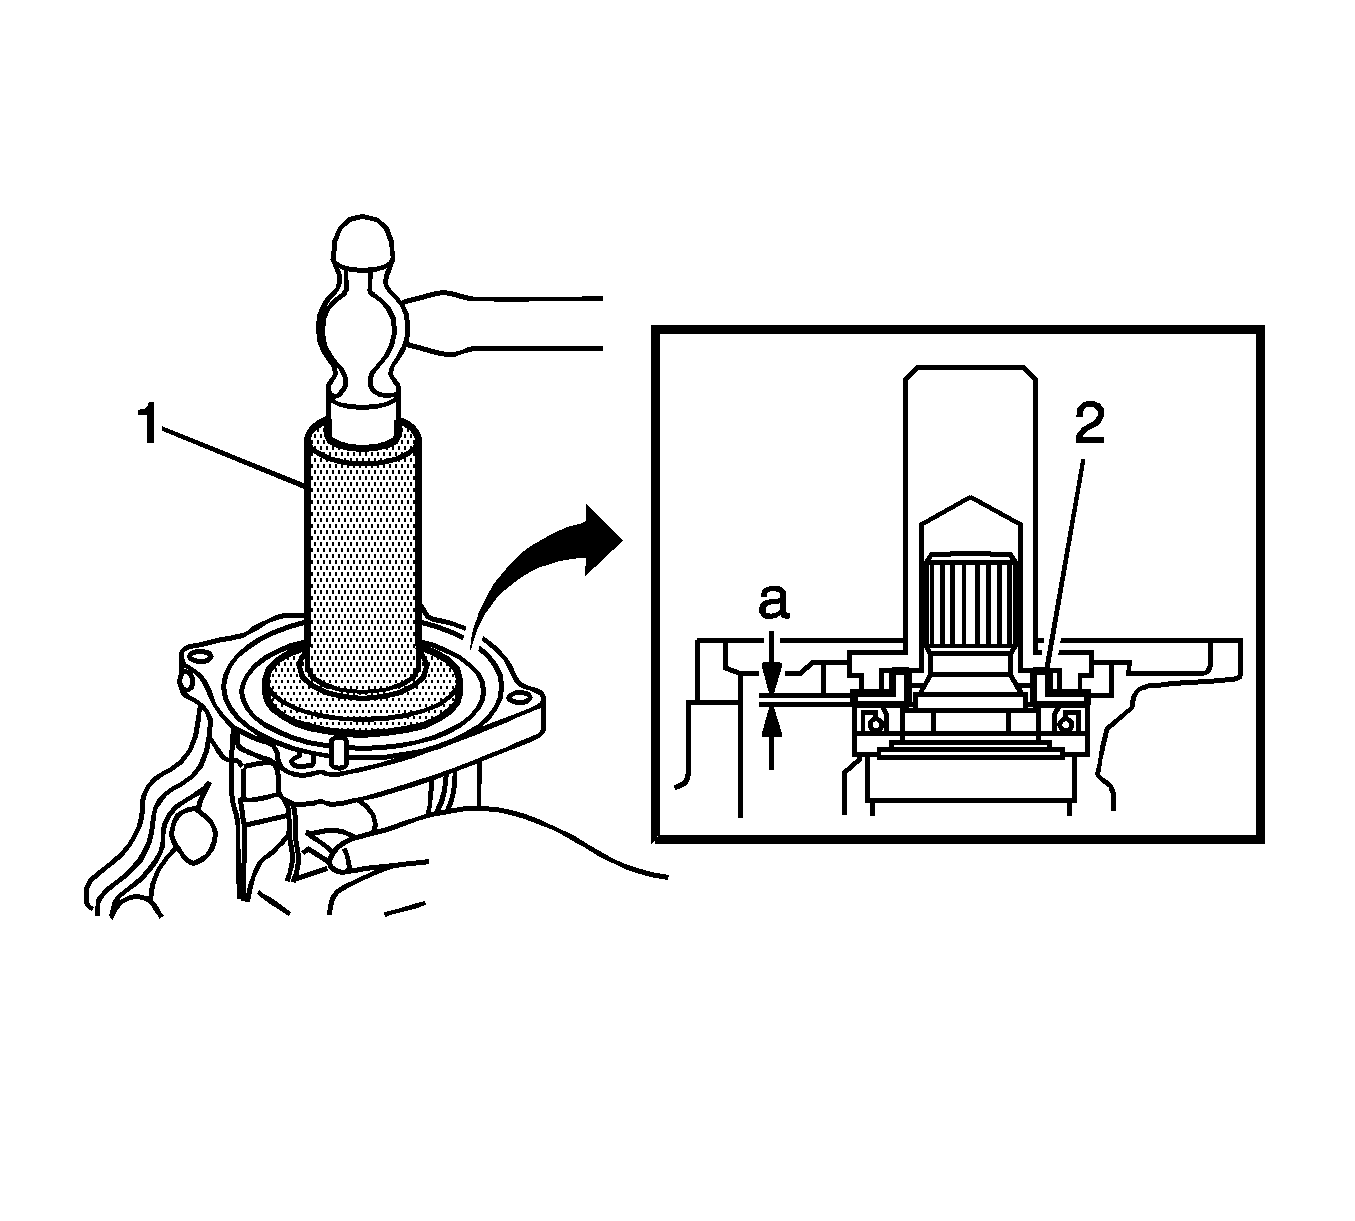
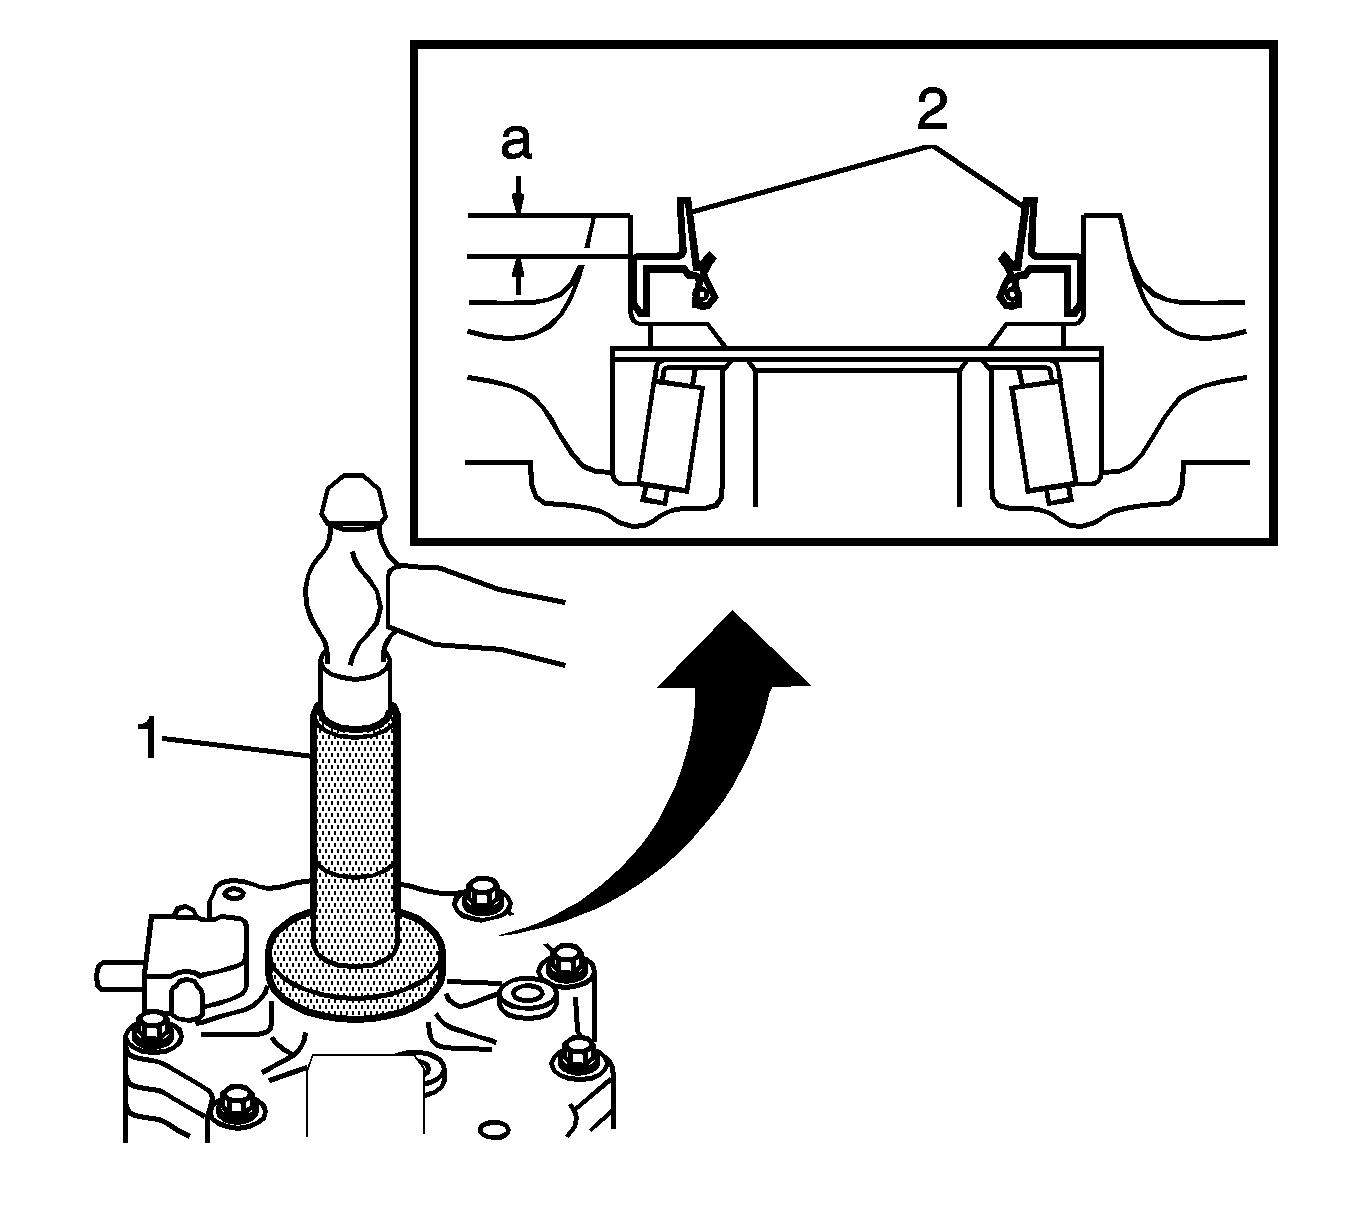
Note:
• Tap the oil seal uniformly so that it is driven in straight. • Do not excessively tap the oil seal (2).
Specification
Oil seal driven in depth - 0.7-1.3 mm (0.0276-0.0512 in)
Note:
• Tap the oil seal uniformly so that it is driven in straight. • Do not excessively tap the oil seal (2).
Specification
Oil seal driven in depth - 4.2-4.8 mm (0.0165-0.0189 in)

Note: Install the transmission coupling conical spring washer so that the orange-marked surface faces the front of the vehicle (coupling side).
Note:
• Begin the application in the range of "A". • Apply sealant in a continuous bead 2-3 mm (0.0787-0.118 in) in diameter. • Perform the installation within 3 minutes after applying the sealant. • Stop applying sealant after allowing it to overlap with the beginning of the bead by at least 10 mm (0.394 in) within range A.
| • | Area (B) : Apply sealant to 1.0 mm (0.0394 in) |
| • | Area (C) : Apply sealant to 2.0 mm (0.0787 in) |
| • | Area (D) : Apply sealant to 3.0 mm (0.0118 in) |
| • | Area (E) : Apply sealant to 5.0 mm (0.1969 in) |

Specification
Maximum runout - 0.04 mm (0.0015 in)

Specification
Maximum runout - 0.06 mm (0.0023 in)
Note: This step should be performed only when the rear differential dynamic damper is being replaced.