For 1990-2009 cars only
Removal Procedure
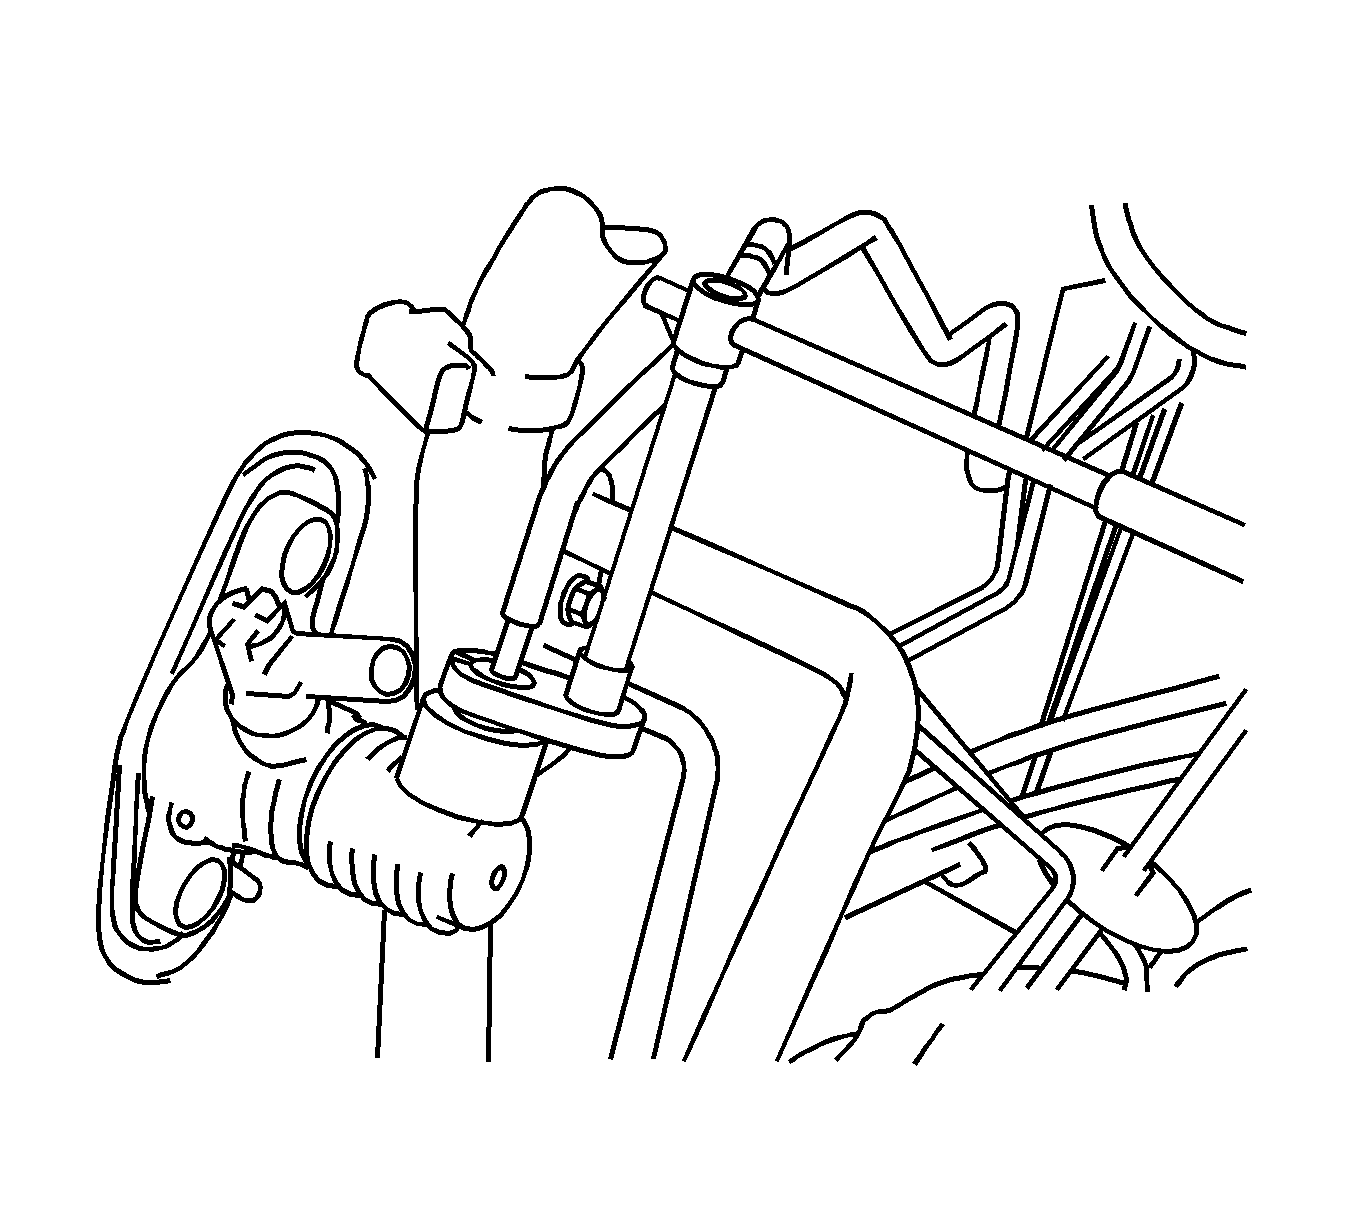
- Loosen the clip and disconnect the clutch reservoir tube from the clutch master cylinder assembly.
- Using a 10 mm union nut wrench, disconnect the clutch line.
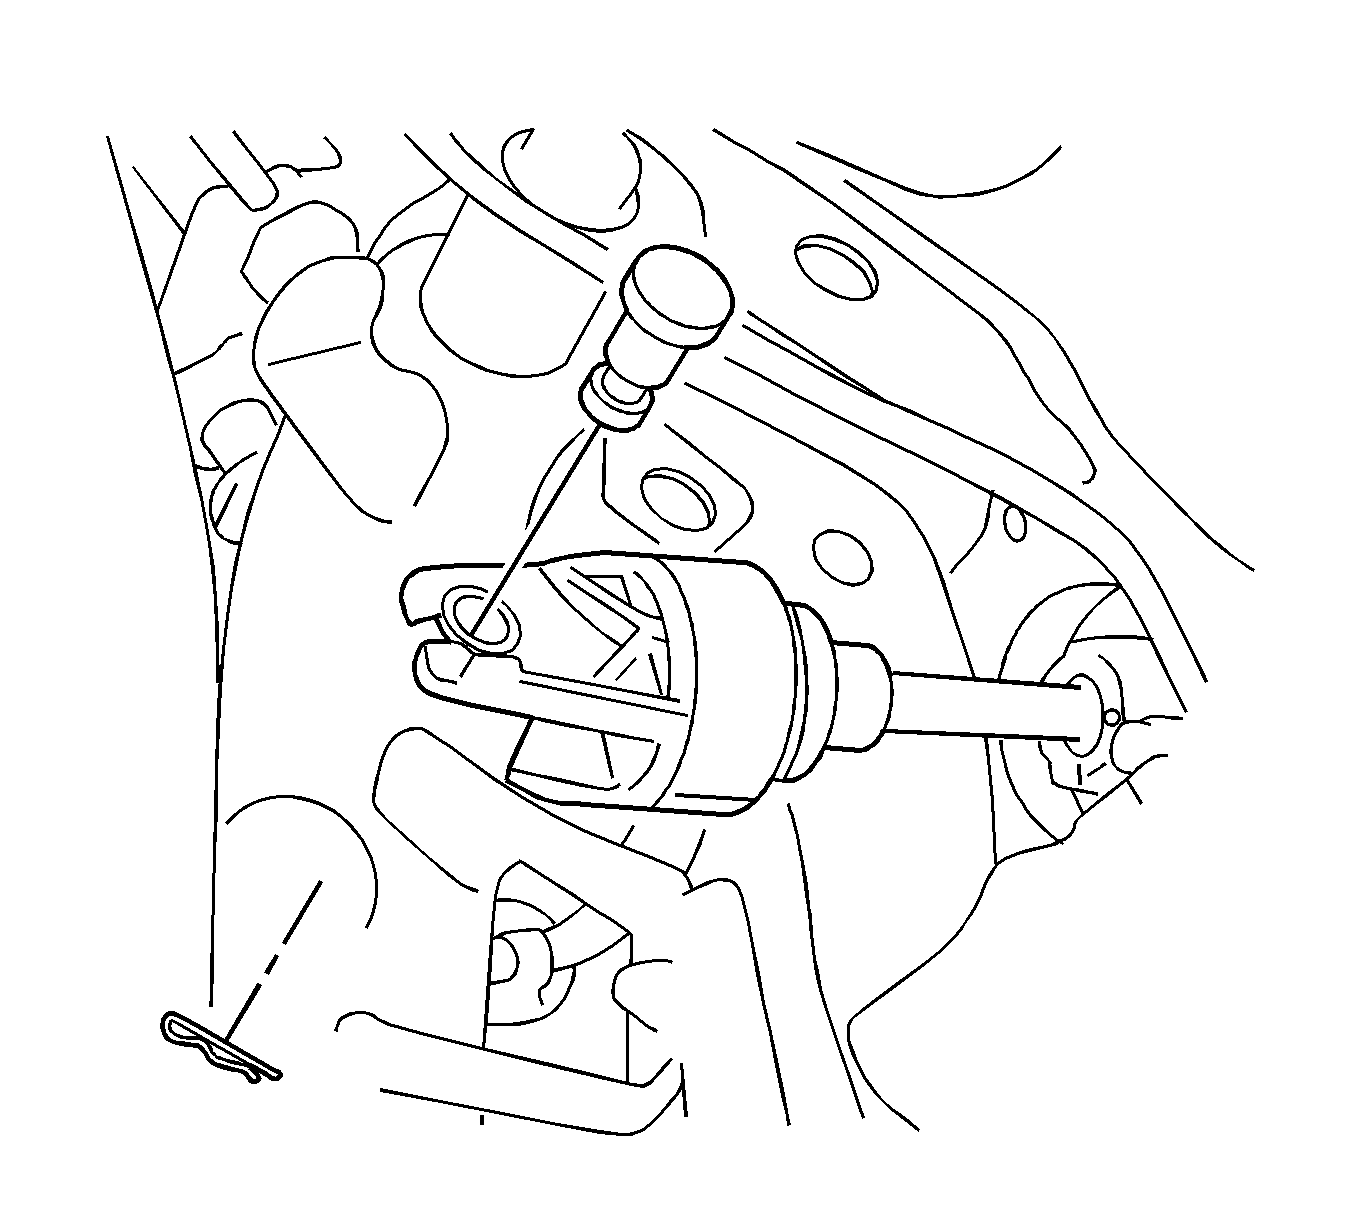
- Remove the clip and hole pin.
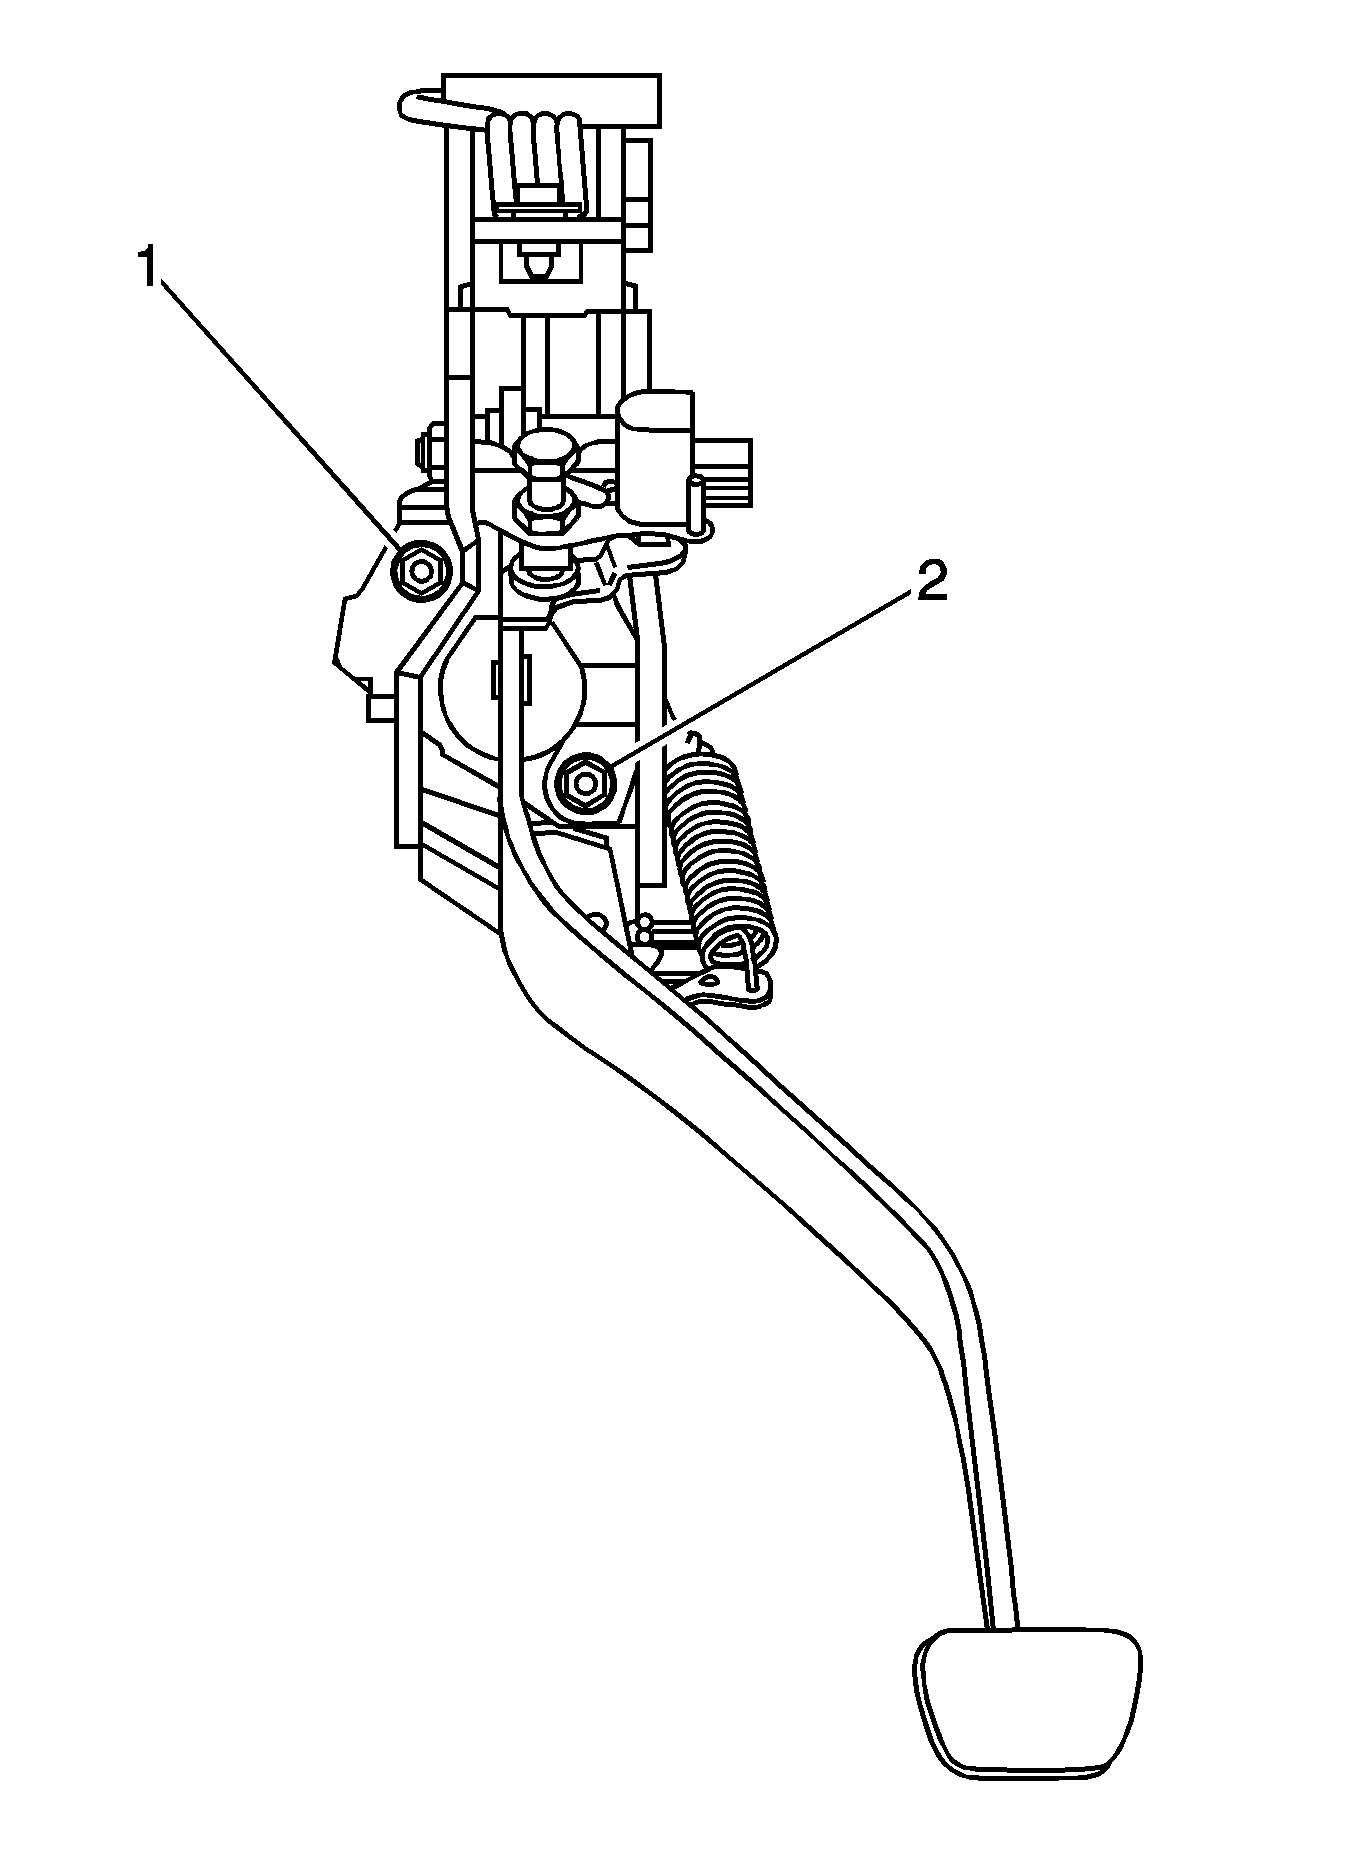
- Remove the nuts (1, 2) and clutch master cylinder.
- Remove the clutch master cylinder bracket.


Installation Procedure
- Install the clutch master cylinder bracket.
- Install the clutch master cylinder with the nuts (1, 2) and tighten to 13 N·m (115 lb in).
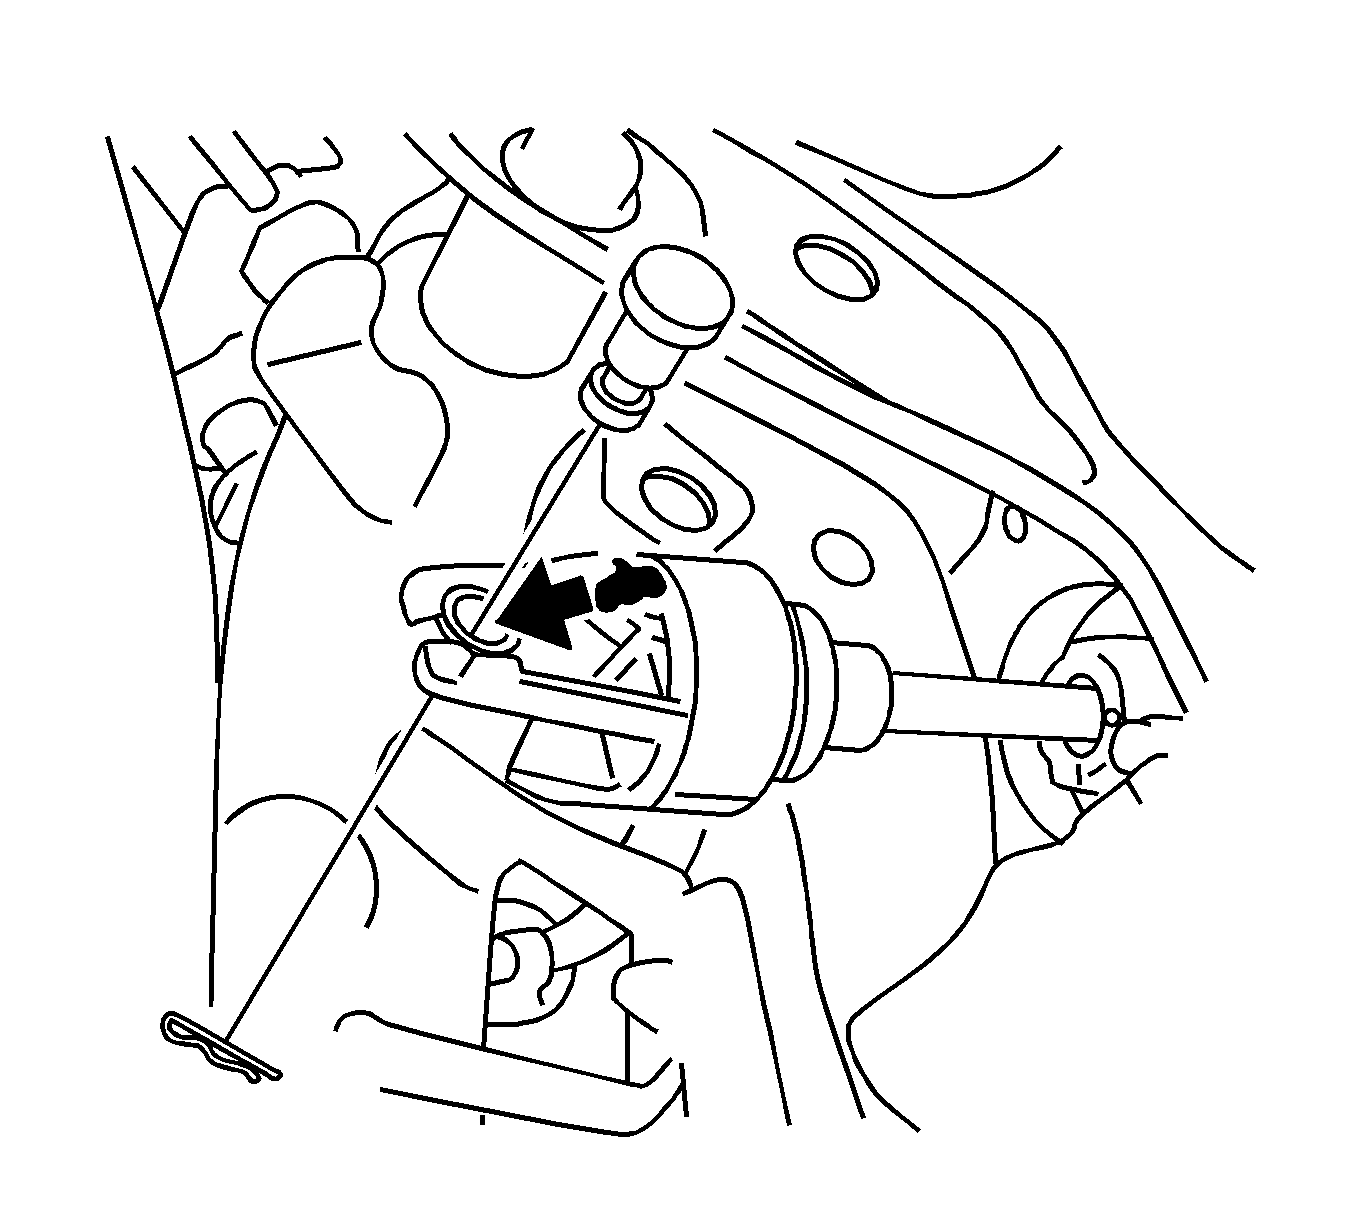
- Apply MP grease to the contact surface of the clevis bushing.
- Connect the clevis to the clutch pedal sub-assembly with the hole pin.
- Install the clip to the hole pin.
- Using a 10 mm union nut wrench, connect the clutch line and tighten.
- Connect the clutch reservoir tube to the clutch master cylinder assembly with the clip.

Caution: Refer to Fastener Caution in the Preface section.

Note: Install the hole pin from the right side of the vehicle.

| • | Without a union nut wrench 15 N·m (11 lb ft). |
| • | With a union nut wrench 14 N·m (10 lb ft). |
