Removal Procedure
- Disconnect the cable from negative battery terminal. Refer to Battery Negative Cable Disconnection and Connection.
- Remove the battery. Refer to Battery Replacement.
- Remove the battery tray. Refer to Battery Tray Replacement.
- Remove the engine cover. Refer to Engine Cover Replacement.
- Remove the air cleaner assembly.
- Remove the oxygen sensor. Refer to Heated Oxygen Sensor Replacement - Sensor 2.
- Remove the front exhaust pipe assembly. Refer to Front Pipe Replacement.
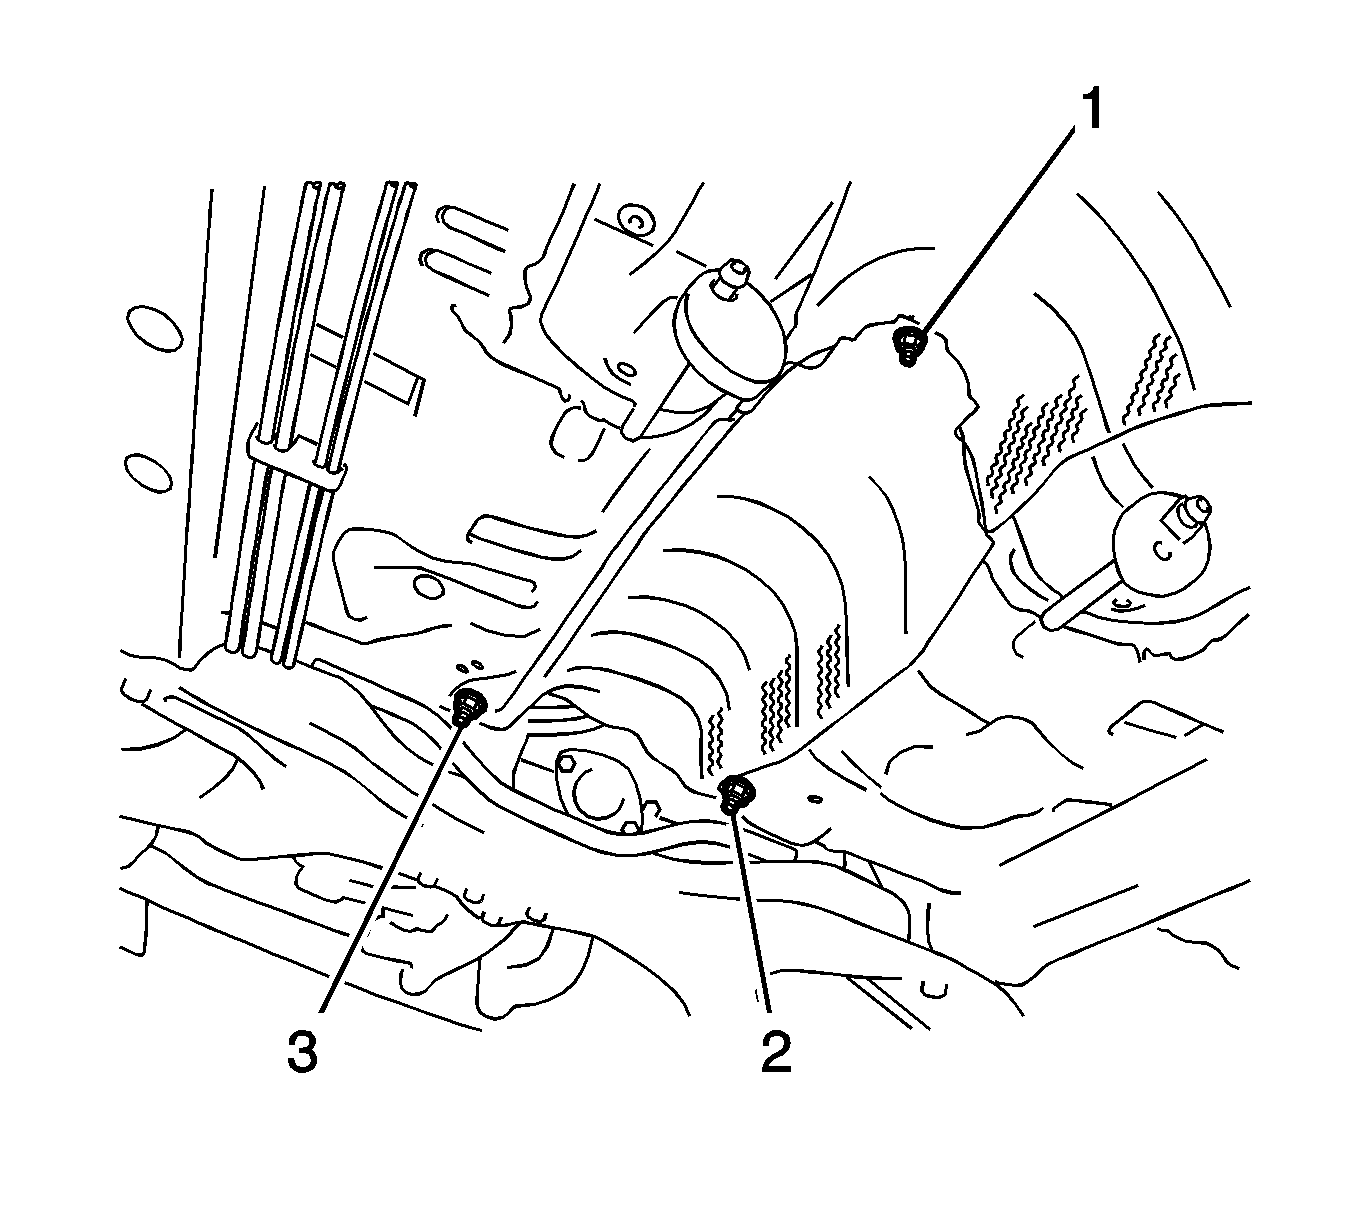
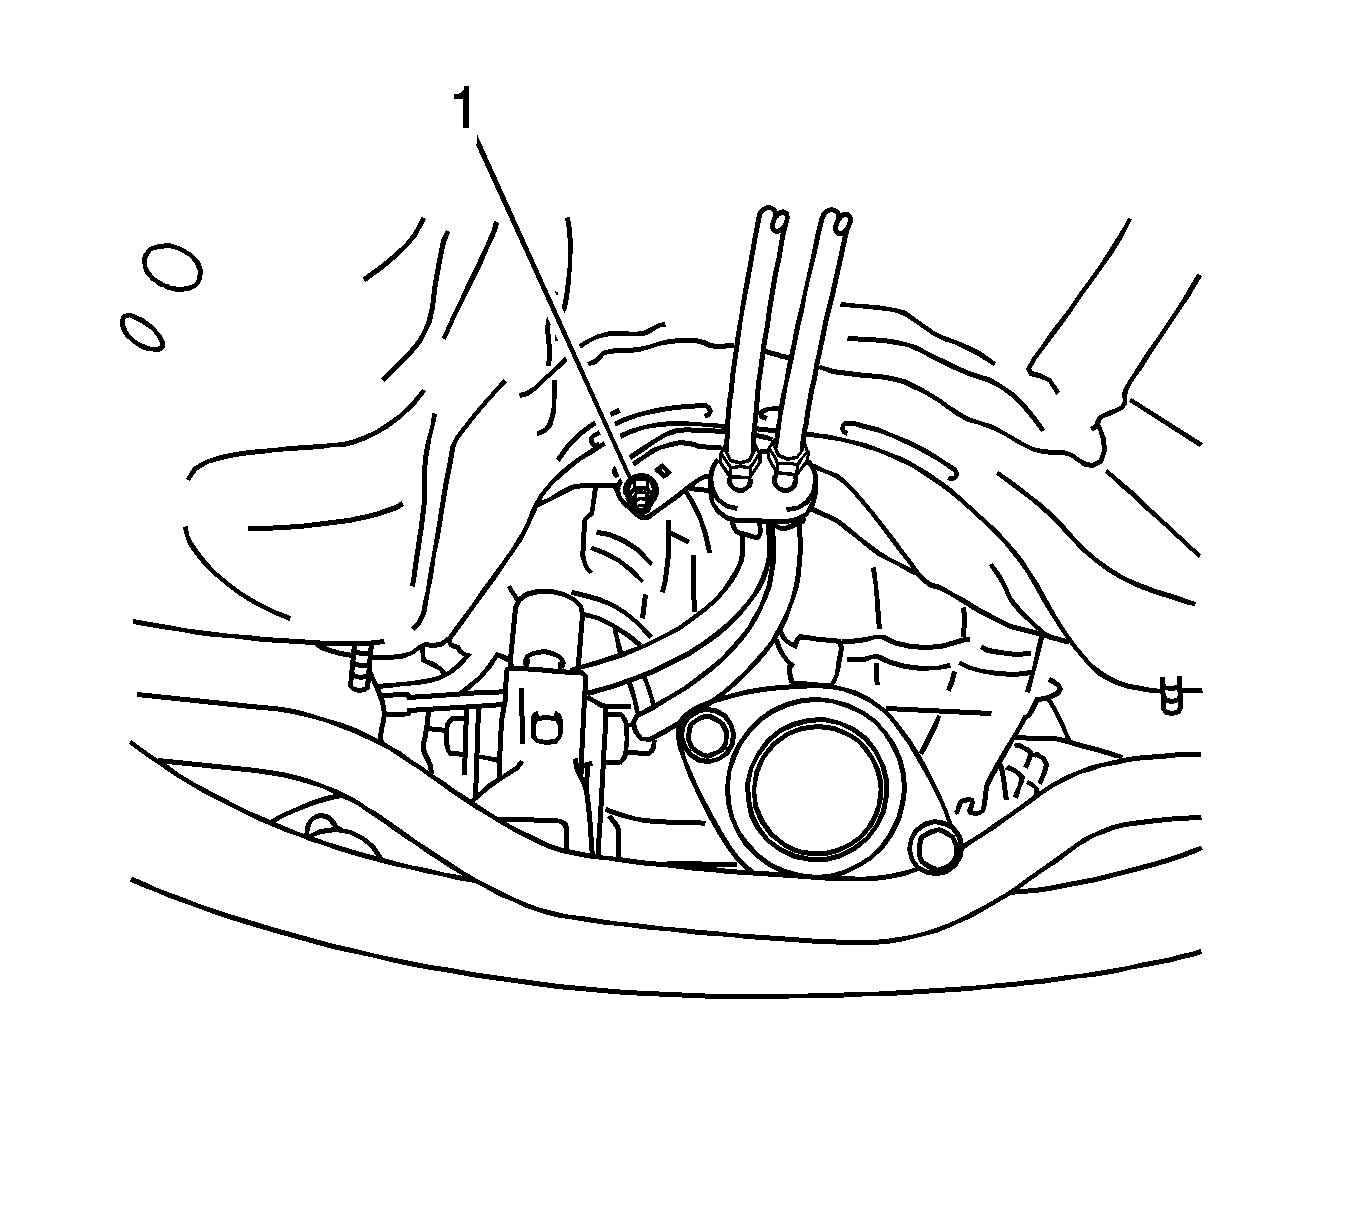
- Remove the nuts (1-3) and remove the No. 1 front floor heat shield.
- Remove the front floor assembly. Refer to Front Floor Console Replacement
- Disconnect the shift lever cables (1, 2) from the shift lever assembly.
- Using a screwdriver, pull out the stopper (2) of the transmission shift lever.
- Rotate the nut counterclockwise approximately 180 degrees and, while holding the nut in that position, disconnect the transmission cable from the shift lever retainer.
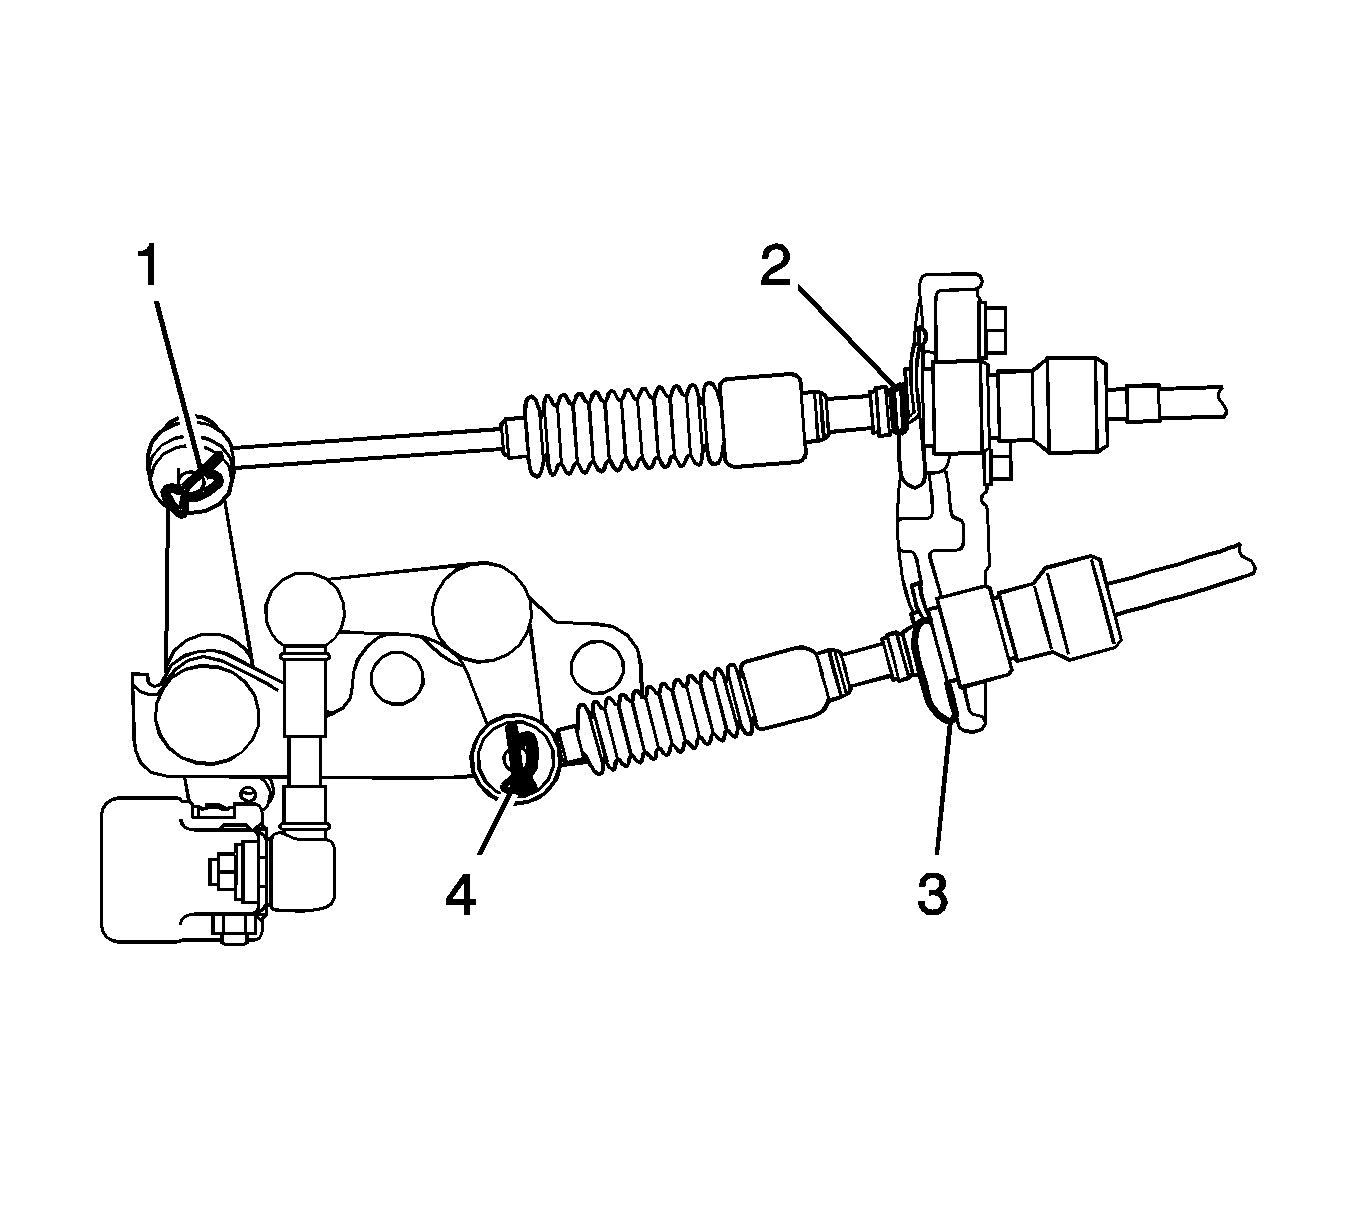
- Remove the clips (2, 3) and disconnect the transmission cables from the cable bracket.
- Remove the clips (1, 4) and disconnect the transmission cables from the transaxle.
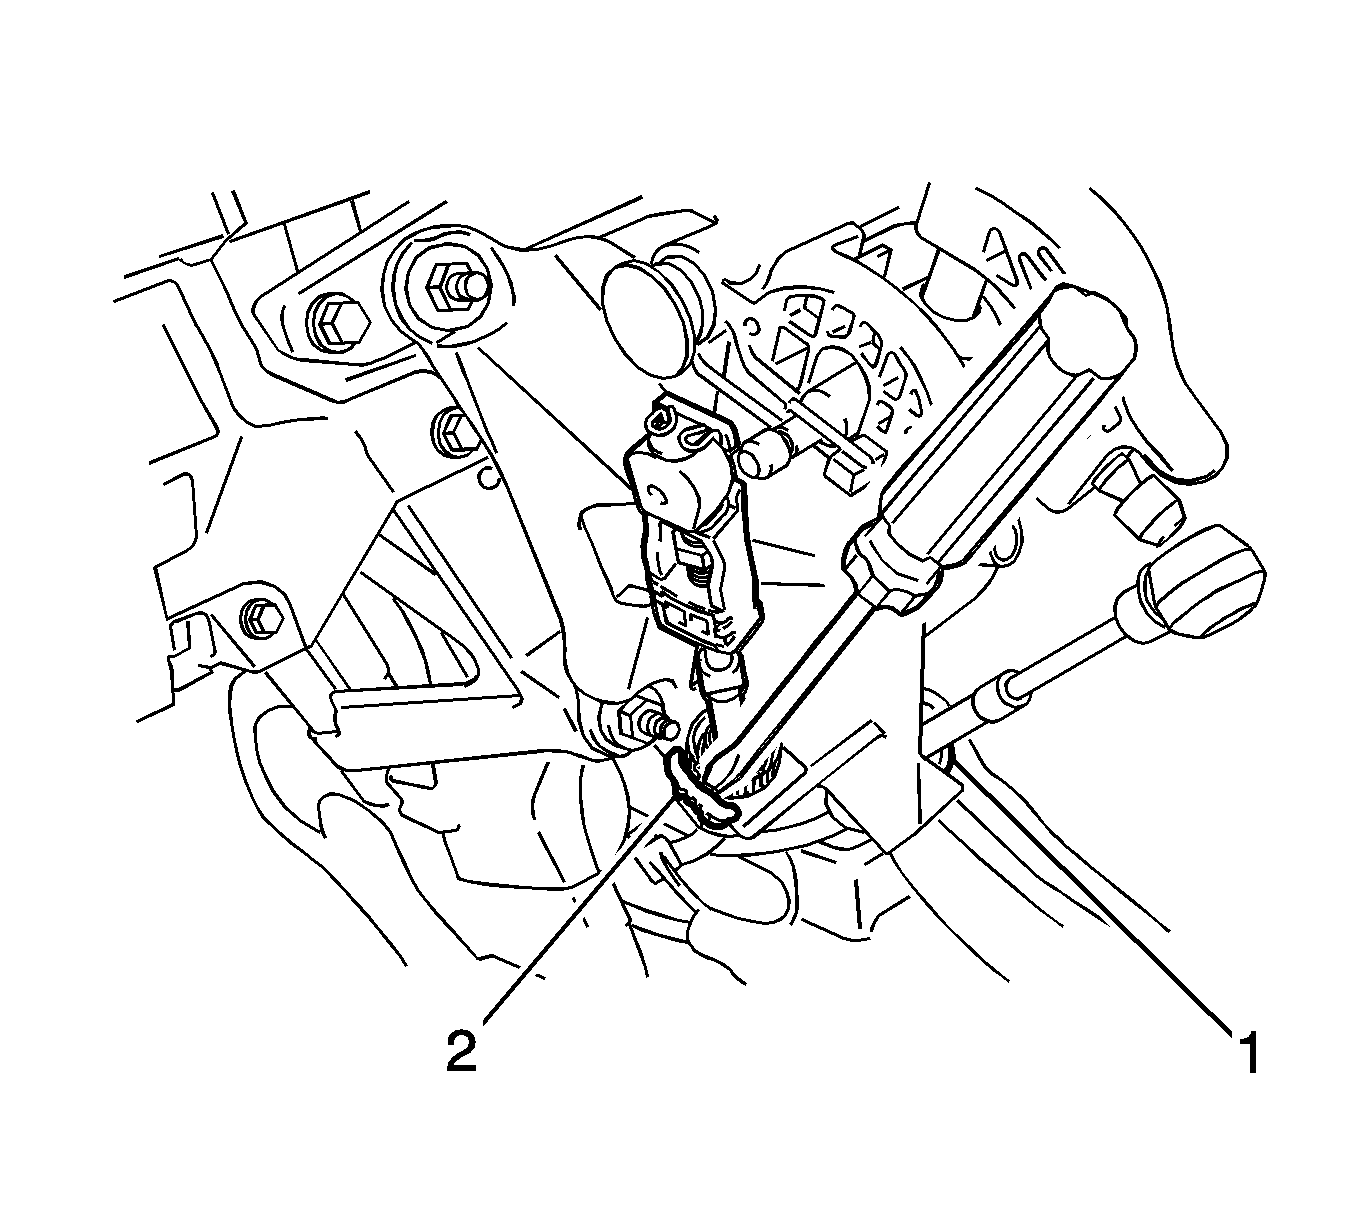
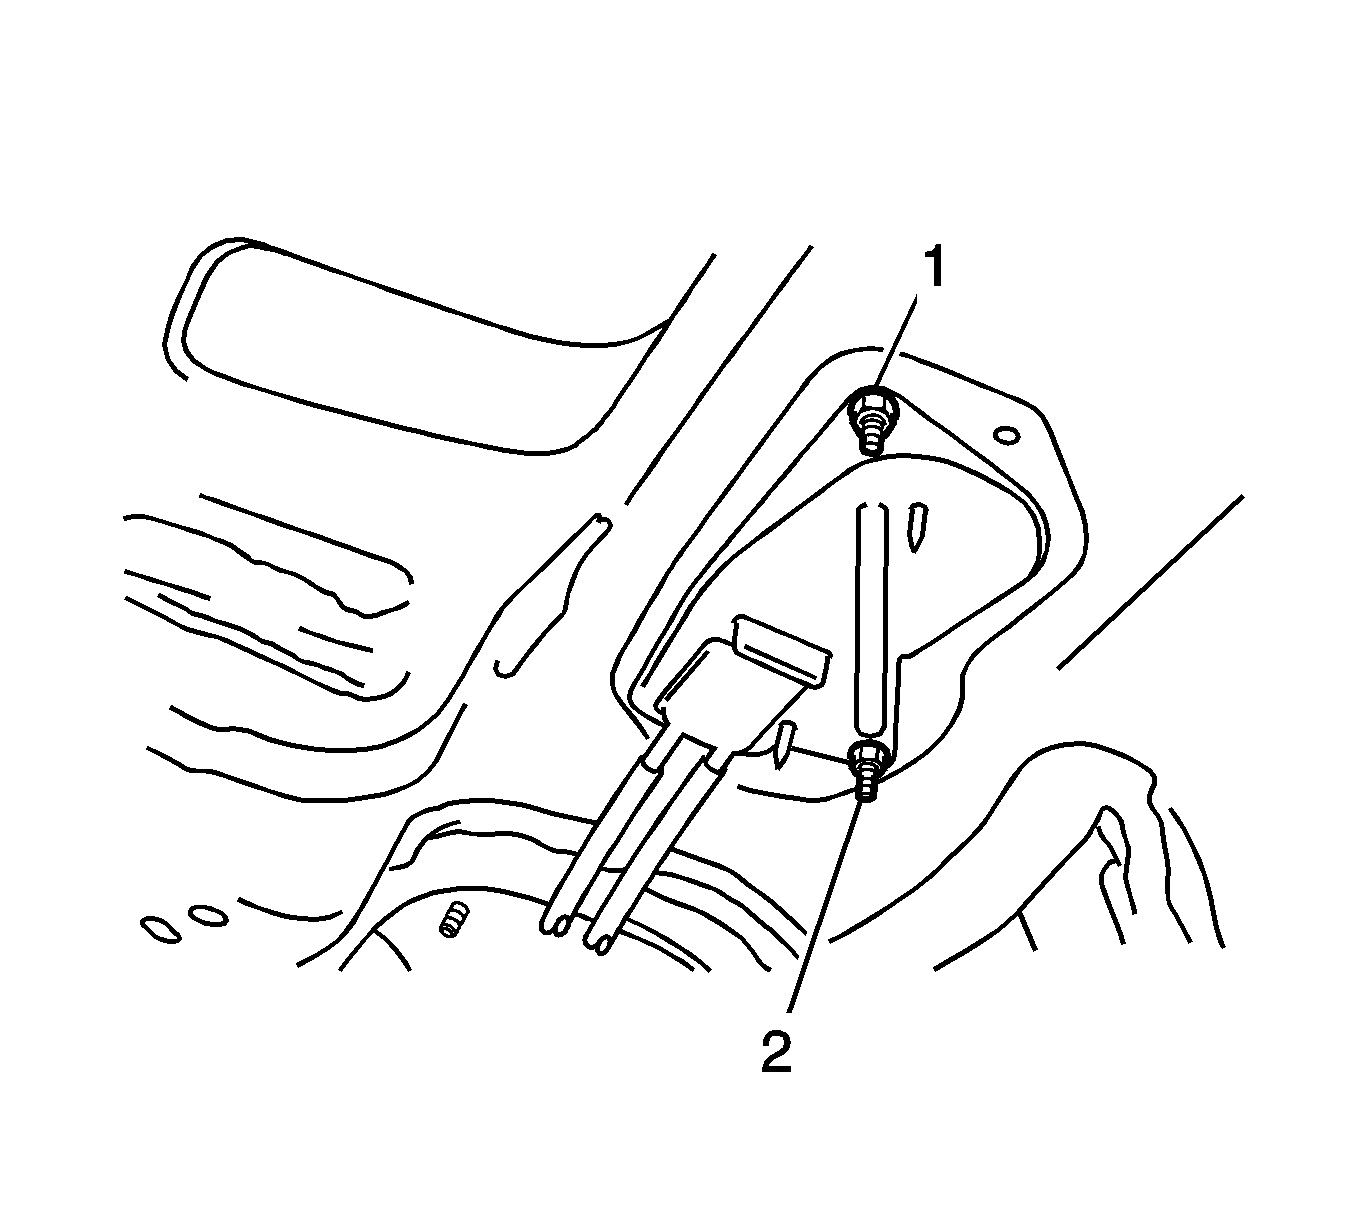
- Remove the nut (1), and disconnect the transmission shift lever cable assembly.
- Remove the nuts (1, 2) and the transmission cable assembly.
Note: When disconnecting the cable, some systems need to be initialized after the cable is reconnected.
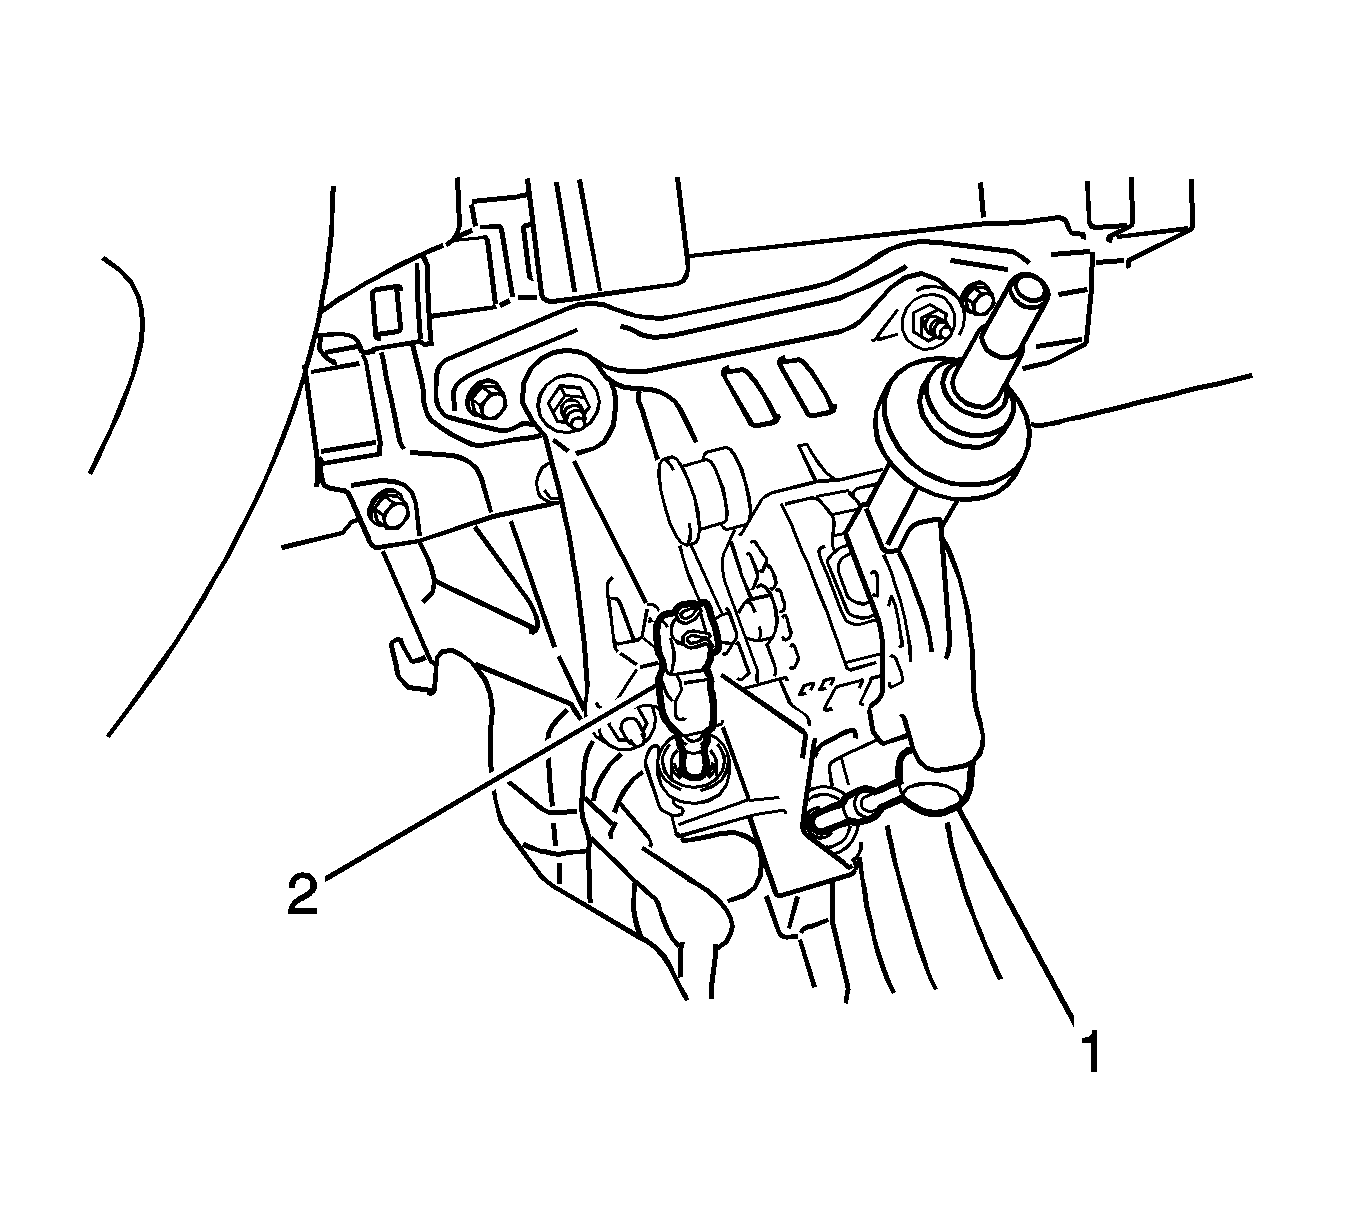
Note: Do not remove the stopper. If it is removed, reinstall it to its original position.
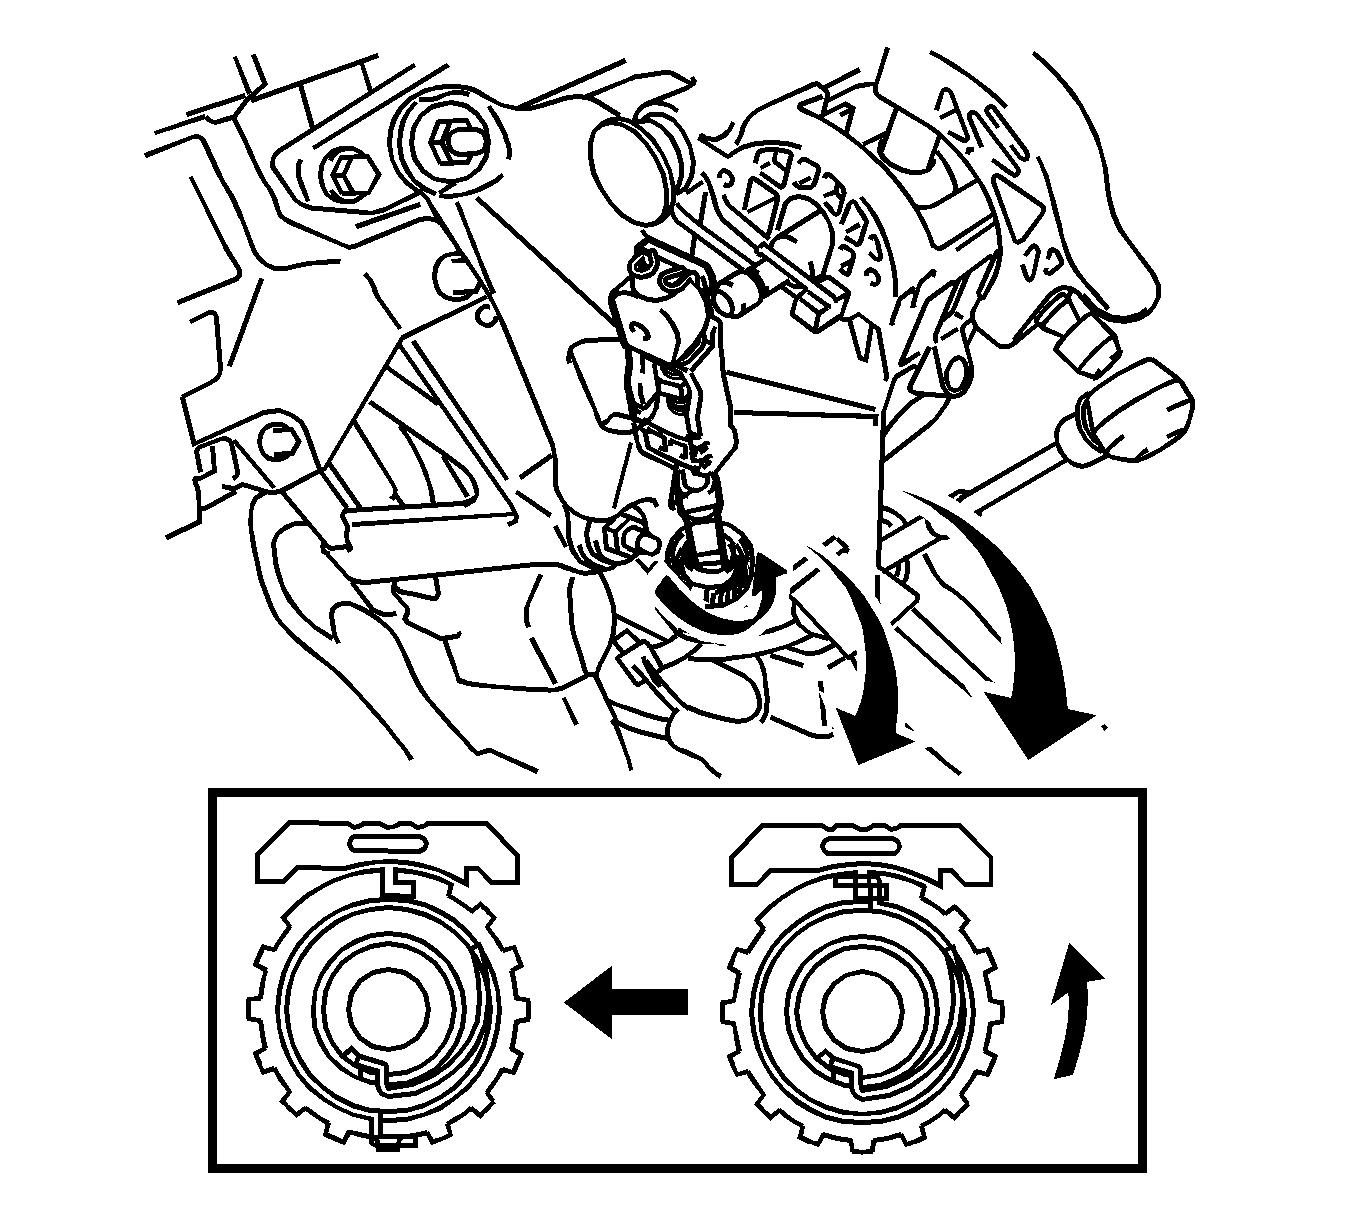
Note: Do not rotate the nut excessively as it will come off the internal spring and the transmission shift lever cable will not be reusable.
Installation Procedure
- Install the transmission shift lever cable assembly with the nuts (1, 2) and tighten to 5 N·m (44 lb in).
- Install the transmission cable assembly with the nut (1) and tighten to 5 N·m (44 lb in).
- Install the transmission cables to the cable bracket with new clips (2, 3).
- Install the transmission cables to the transaxle with the clips (1, 4).
- Rotate the transmission cable nut (1) counterclockwise approximately 180 degrees and, while holding the nut in that position, press in the stopper (2) until it makes 2 click sounds.
- Install the outer part of the transmission cable to the shift lever retainer. Check that the position of the spring is in the proper location, and push in the stopper.
- Using a screwdriver, pull the lock piece out from the adjuster case.
- Install the shift cable to the shift lever assembly.
- Press in and lock the lock piece to the adjuster case.
- Adjust the transmission shift cable. Refer to Manual Transmission Shift Lever Cable Adjustment.
- Install the front floor console assembly. Refer to Front Floor Console Replacement.
- Install the No. 1 front floor heat shield with the nuts (1-3) and tighten to 6 N·m (53 lb in).
- Install the front exhaust pipe assembly. Refer to Front Pipe Replacement.
- Install the oxygen sensor. Refer to Heated Oxygen Sensor Replacement - Sensor 2.
- Install the air cleaner assembly.
- Install the engine cover. Refer to Engine Cover Replacement.
- Install the battery tray. Refer to Battery Tray Replacement.
- Install the battery. Refer to Battery Replacement.
- Connect the cable to the negative battery terminal. Refer to Battery Negative Cable Disconnection and Connection.
- Inspect for an exhaust gas leak.
Caution: Refer to Fastener Caution in the Preface section.
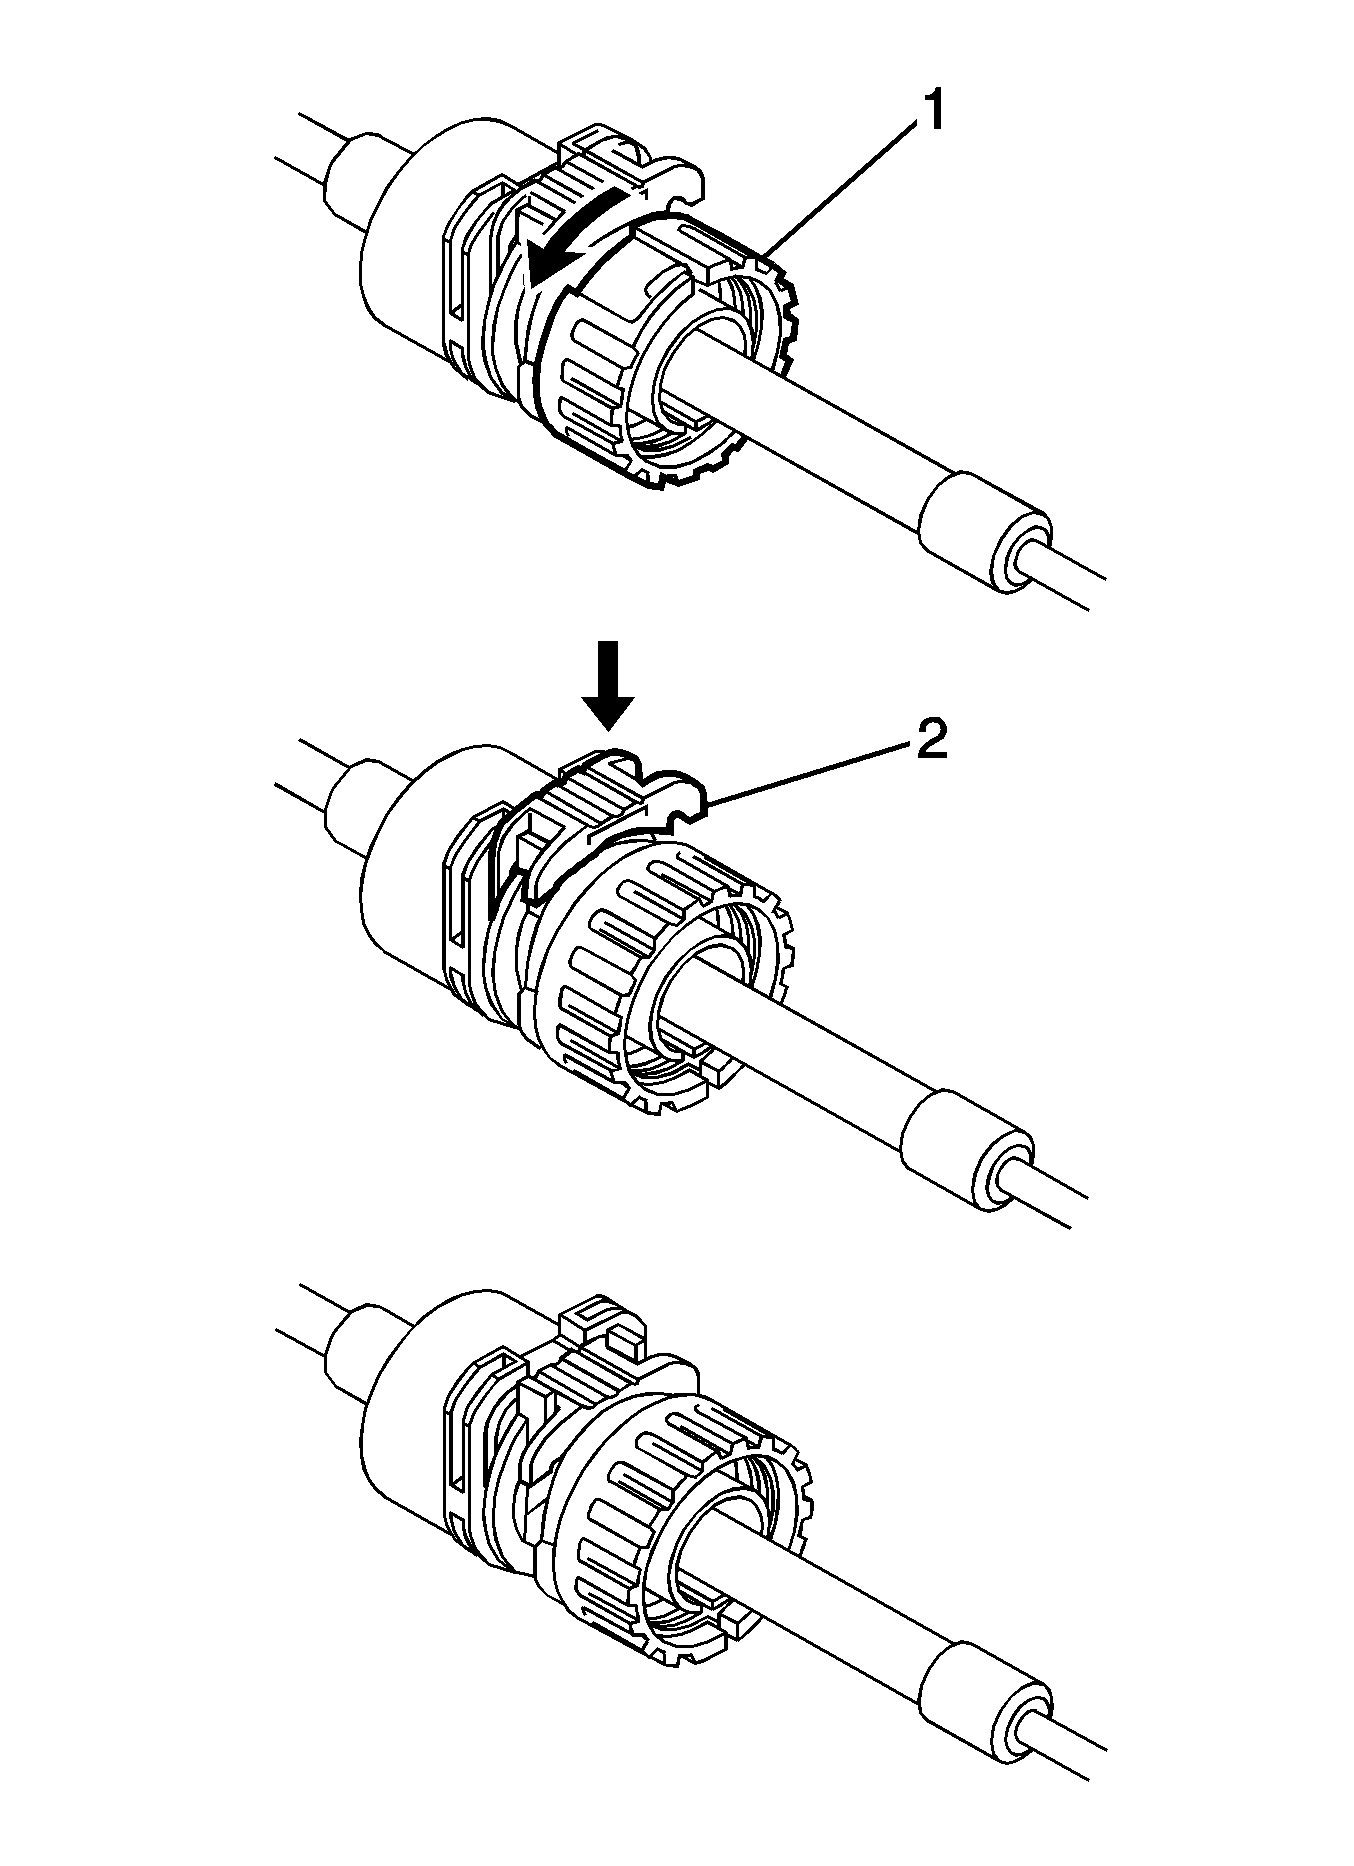
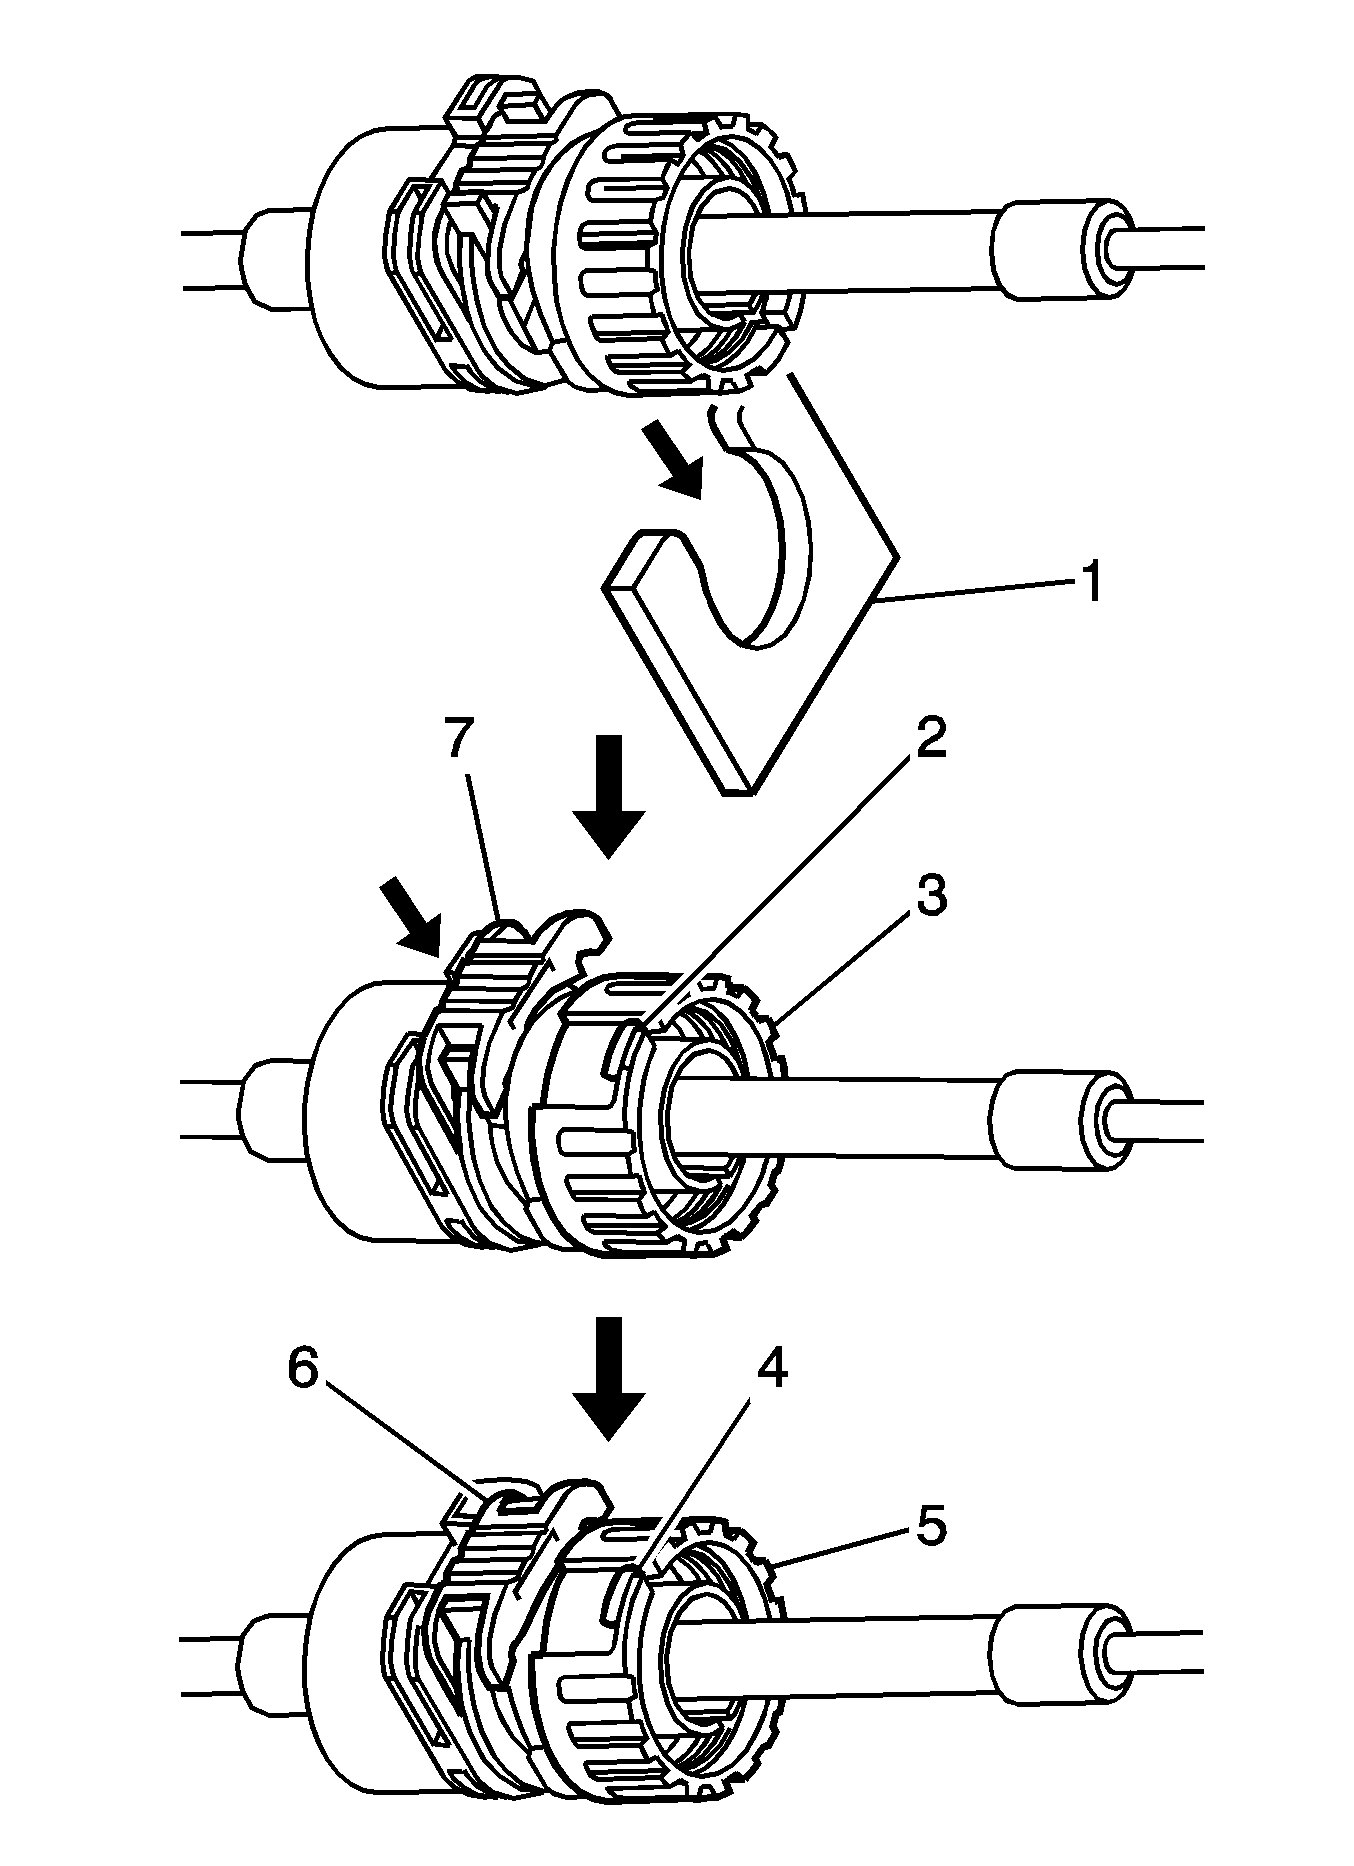
If the stopper cannot be pushed in, slightly rotate the nut (3) clockwise and then push in the stopper.
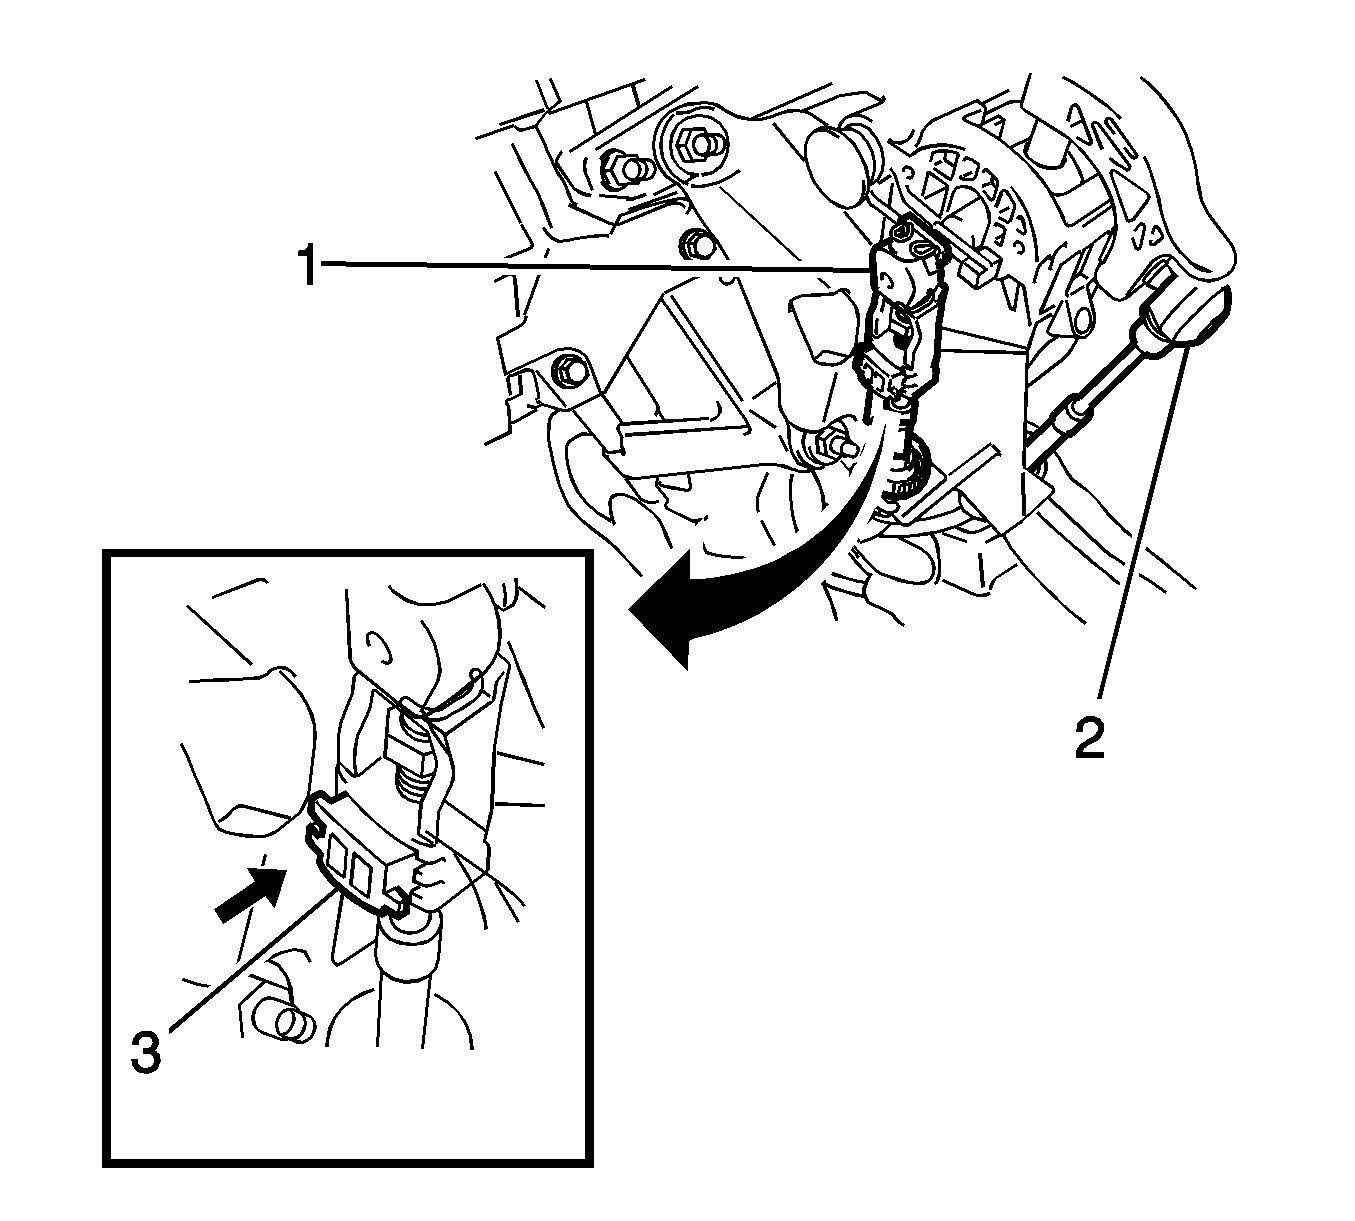
Note: With the shift lever in N, make sure that the lock piece is protruding from the adjuster case.
Note: Securely press in the lock piece (3) until the lock engages.
Note: When disconnecting the cable, some systems need to be initialized after the cable is reconnected.
