For 1990-2009 cars only
Special Tools
| • | J-46001 Differential Drive Pinion Holding Tool |
| • | J-46003 Output Shaft Bearing Locknut Wrench |
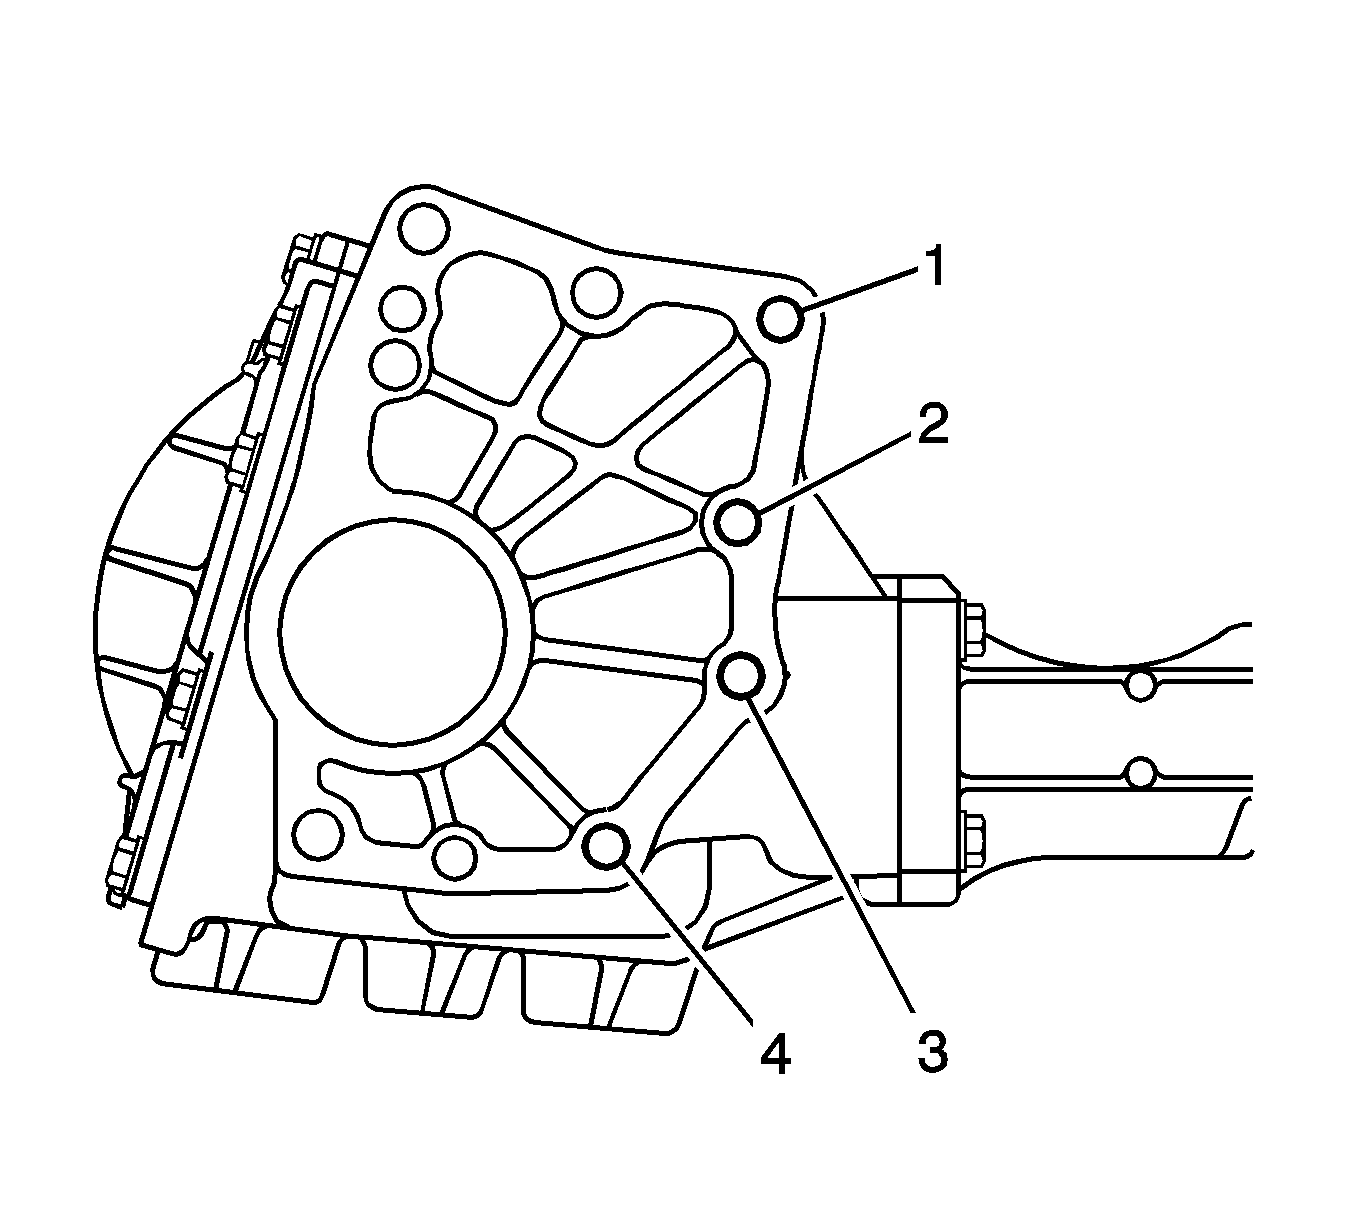
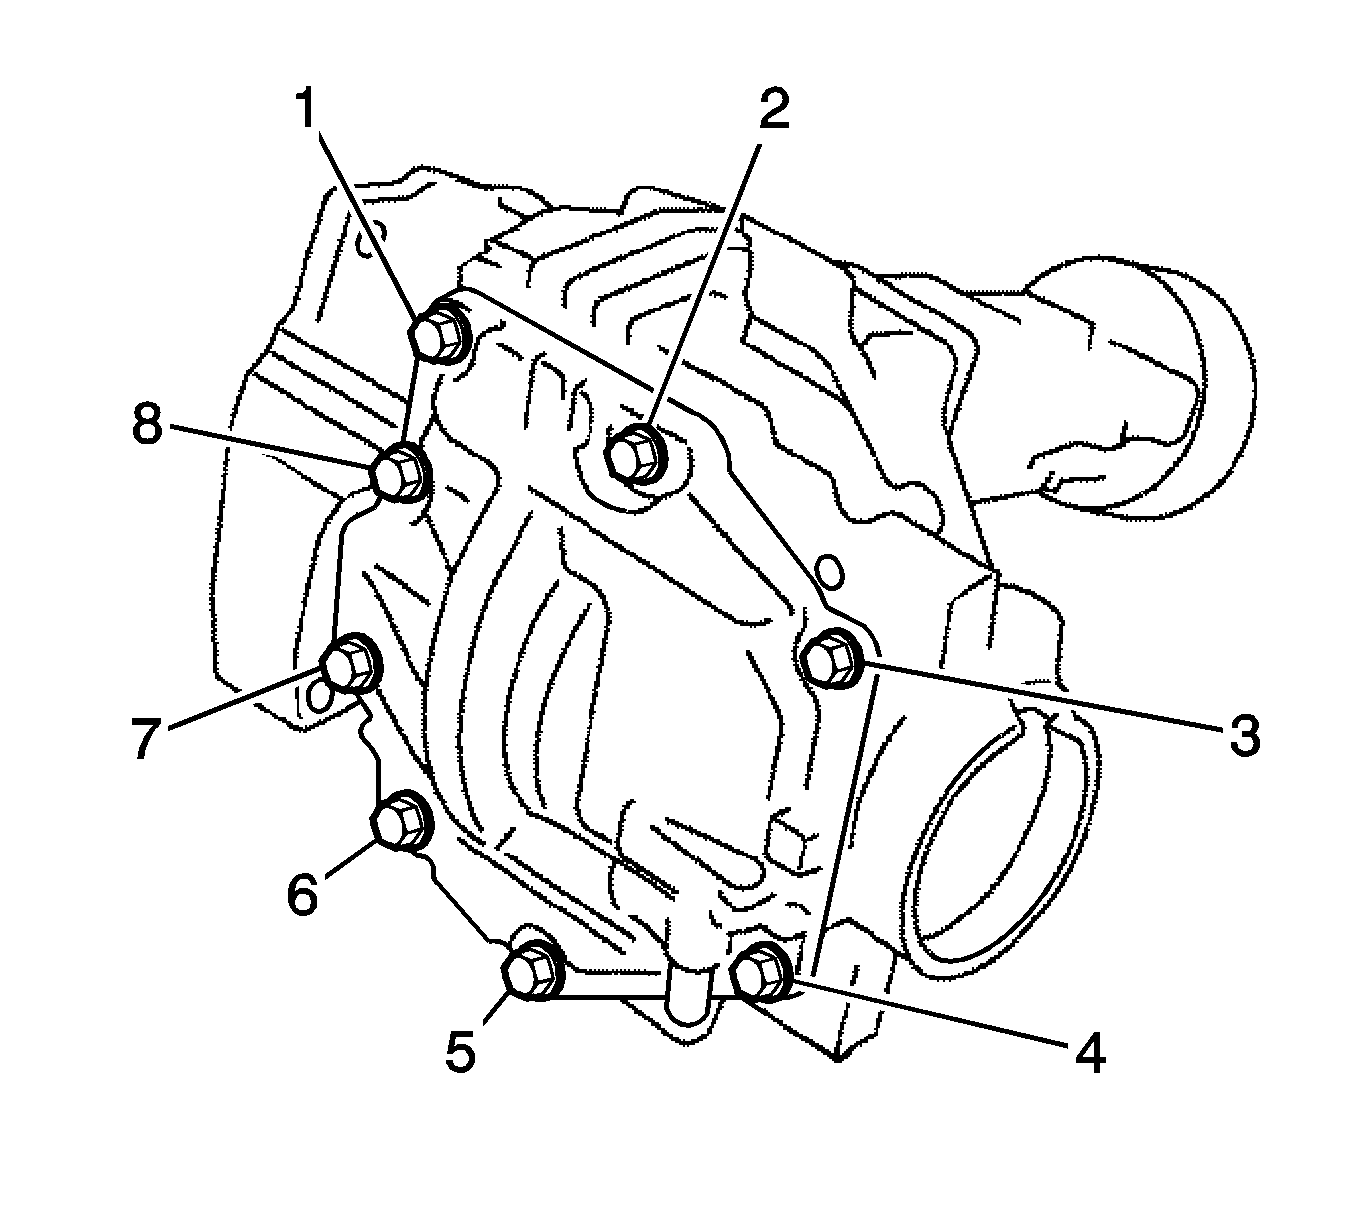
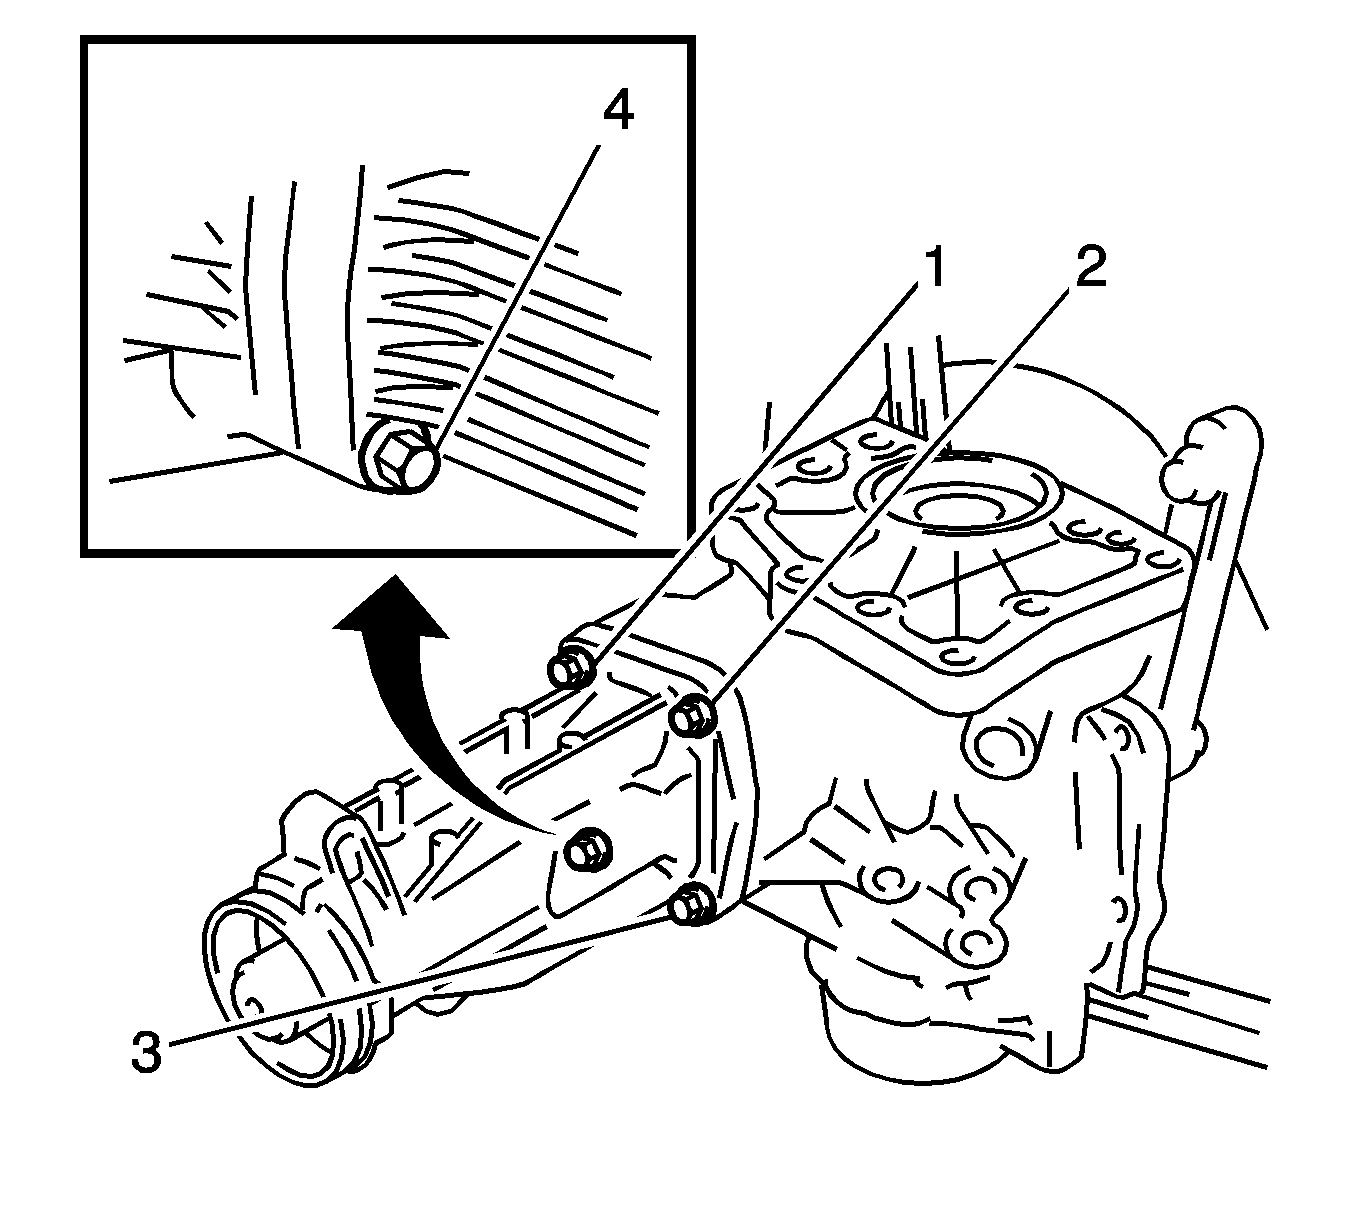
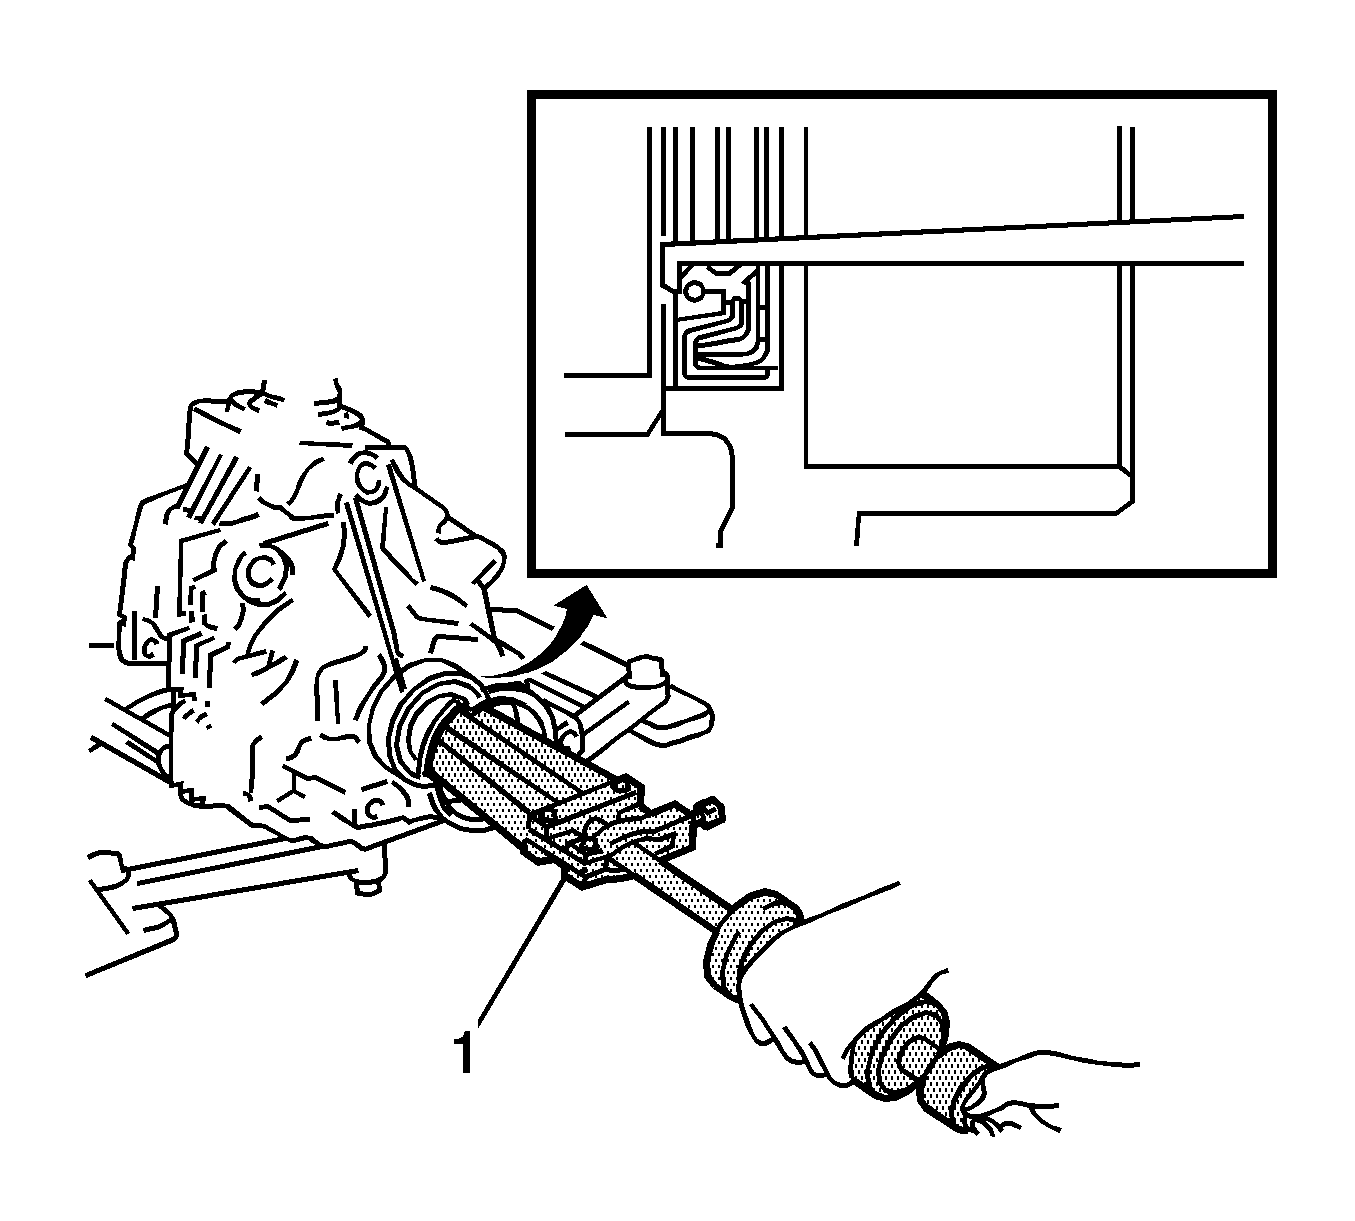
- Remove the transfer and transaxle setting stud bolts (1-4).
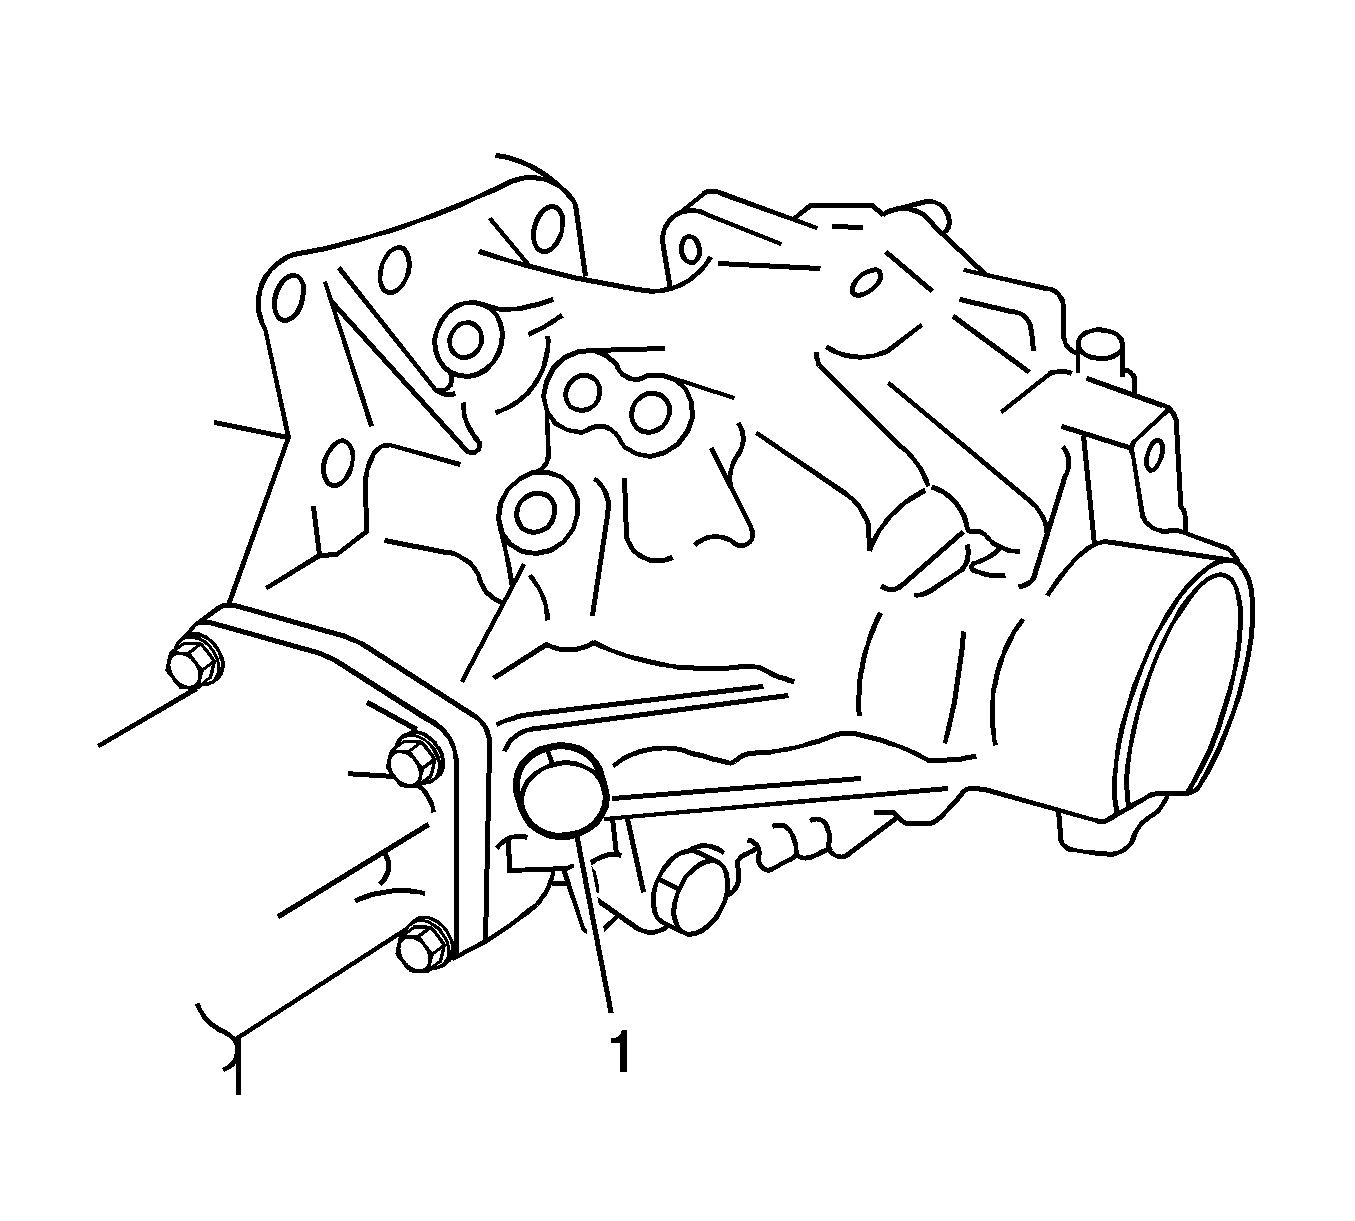
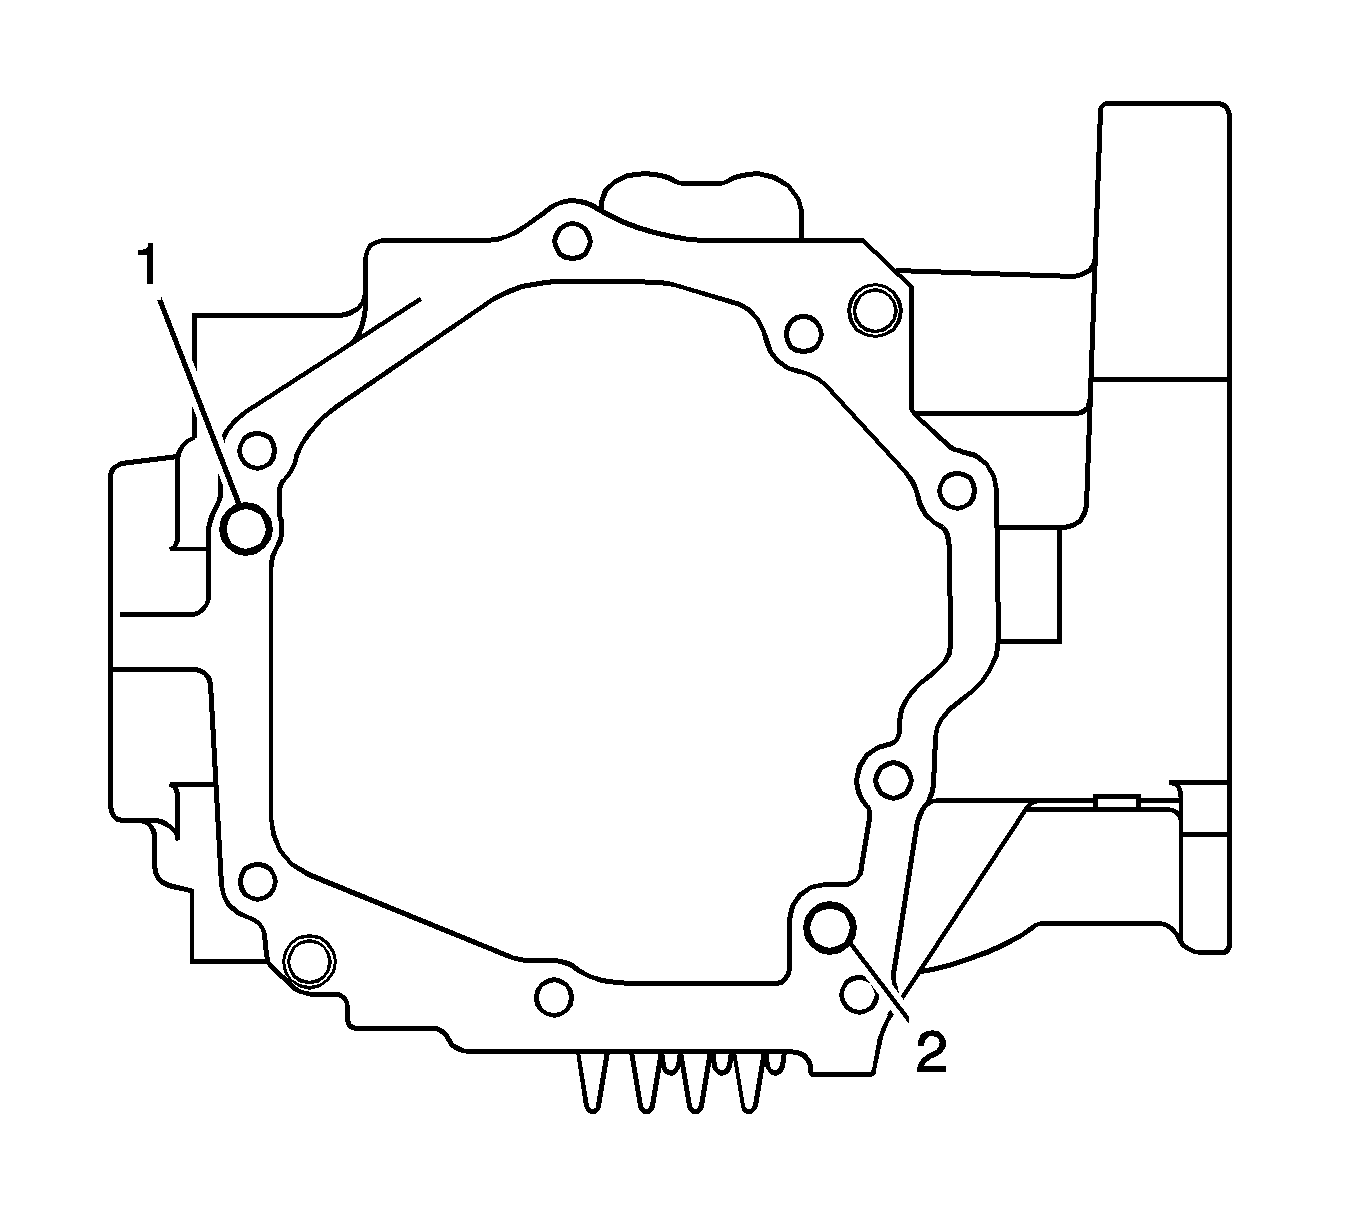
- Remove the number 2 transfer case plug (1).
- Remove the gasket from the number 2 transfer case plug.
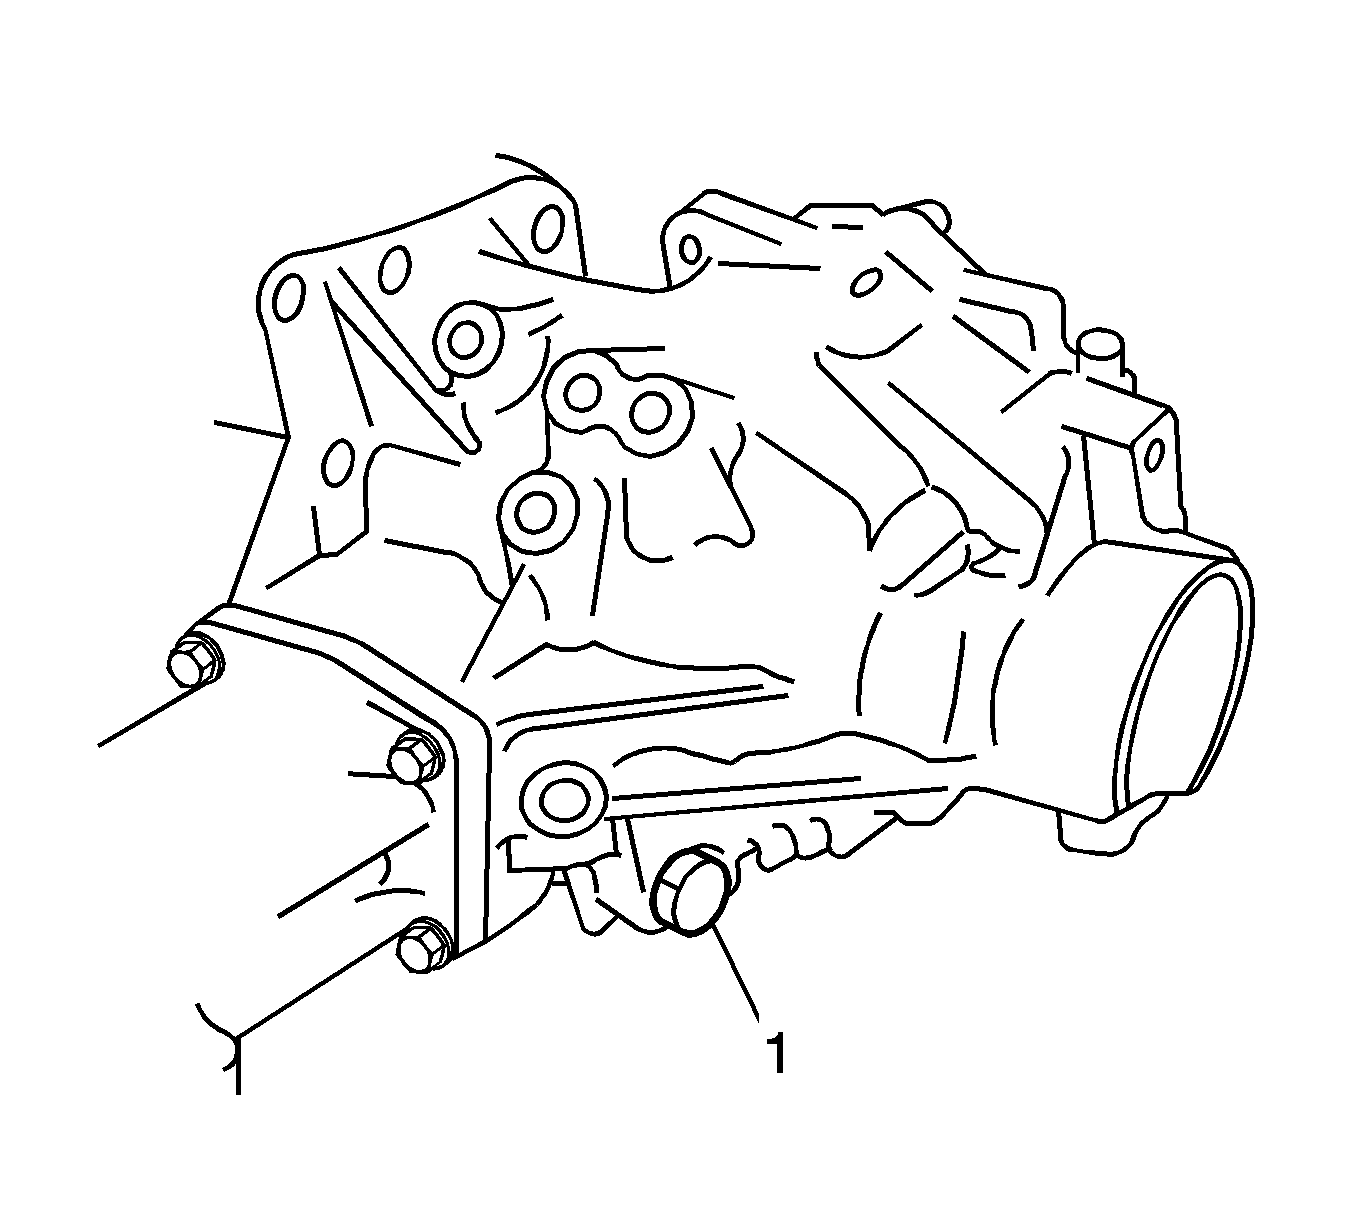
- Remove the number 1 transfer case plug (1).
- Remove the gasket from the number 1 transfer case plug.
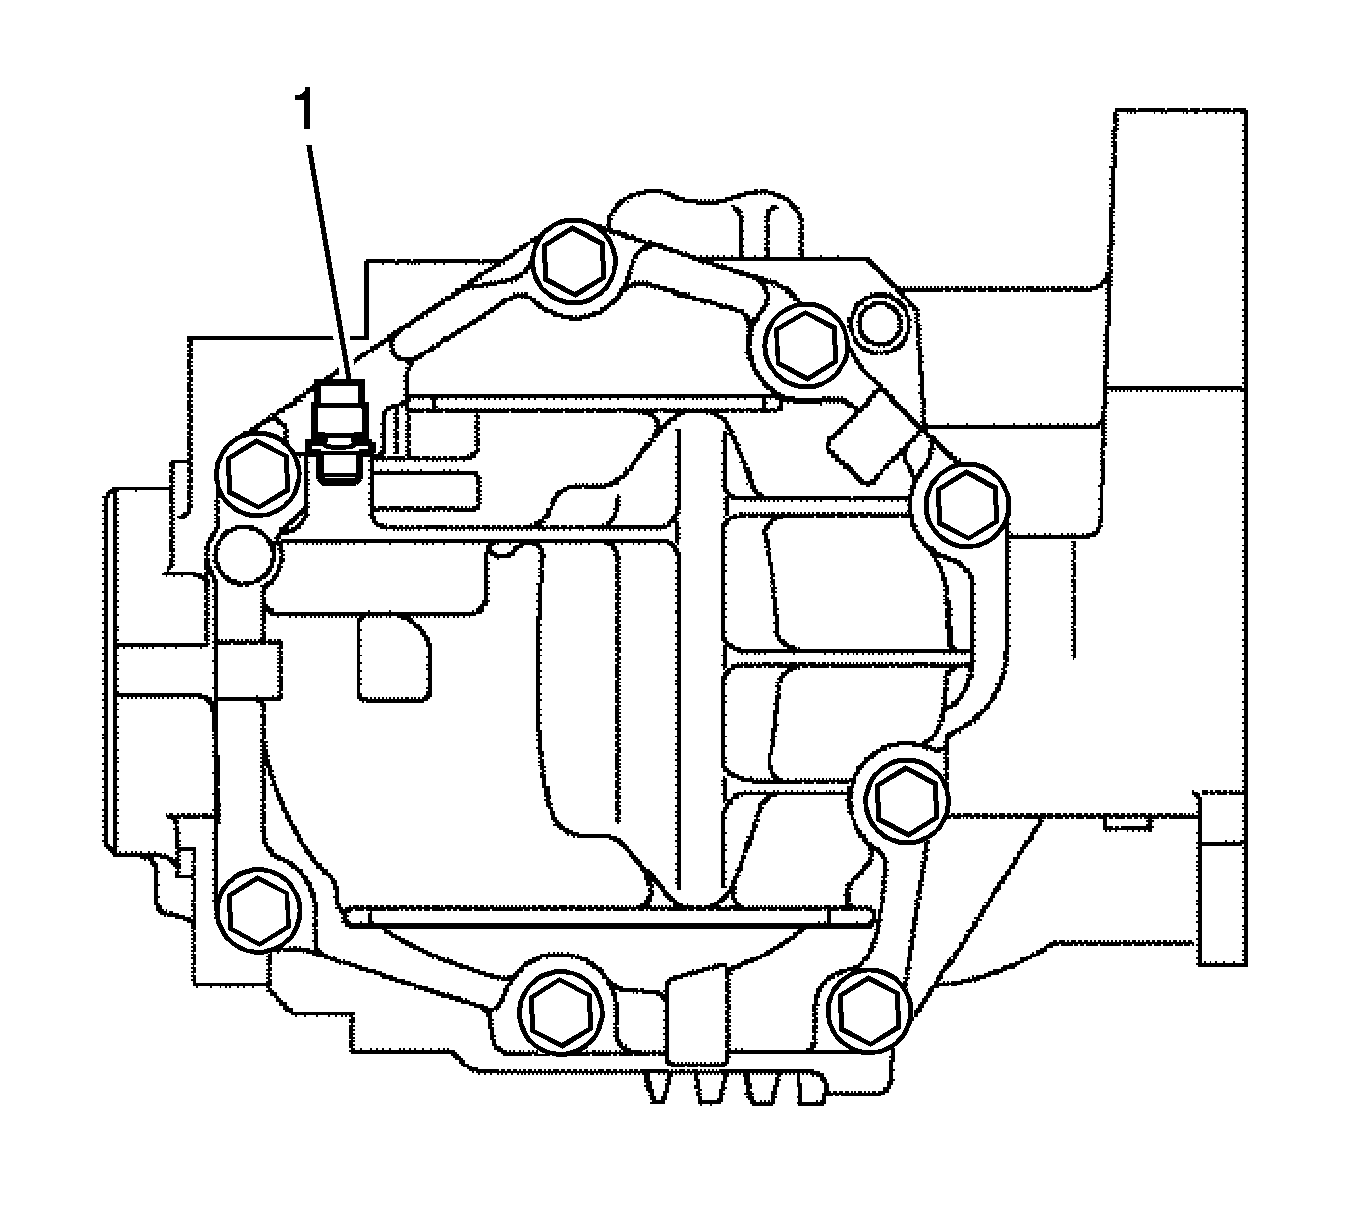
- Remove the transfer drain plug (1).
- Remove the gasket from the transfer drain plug.
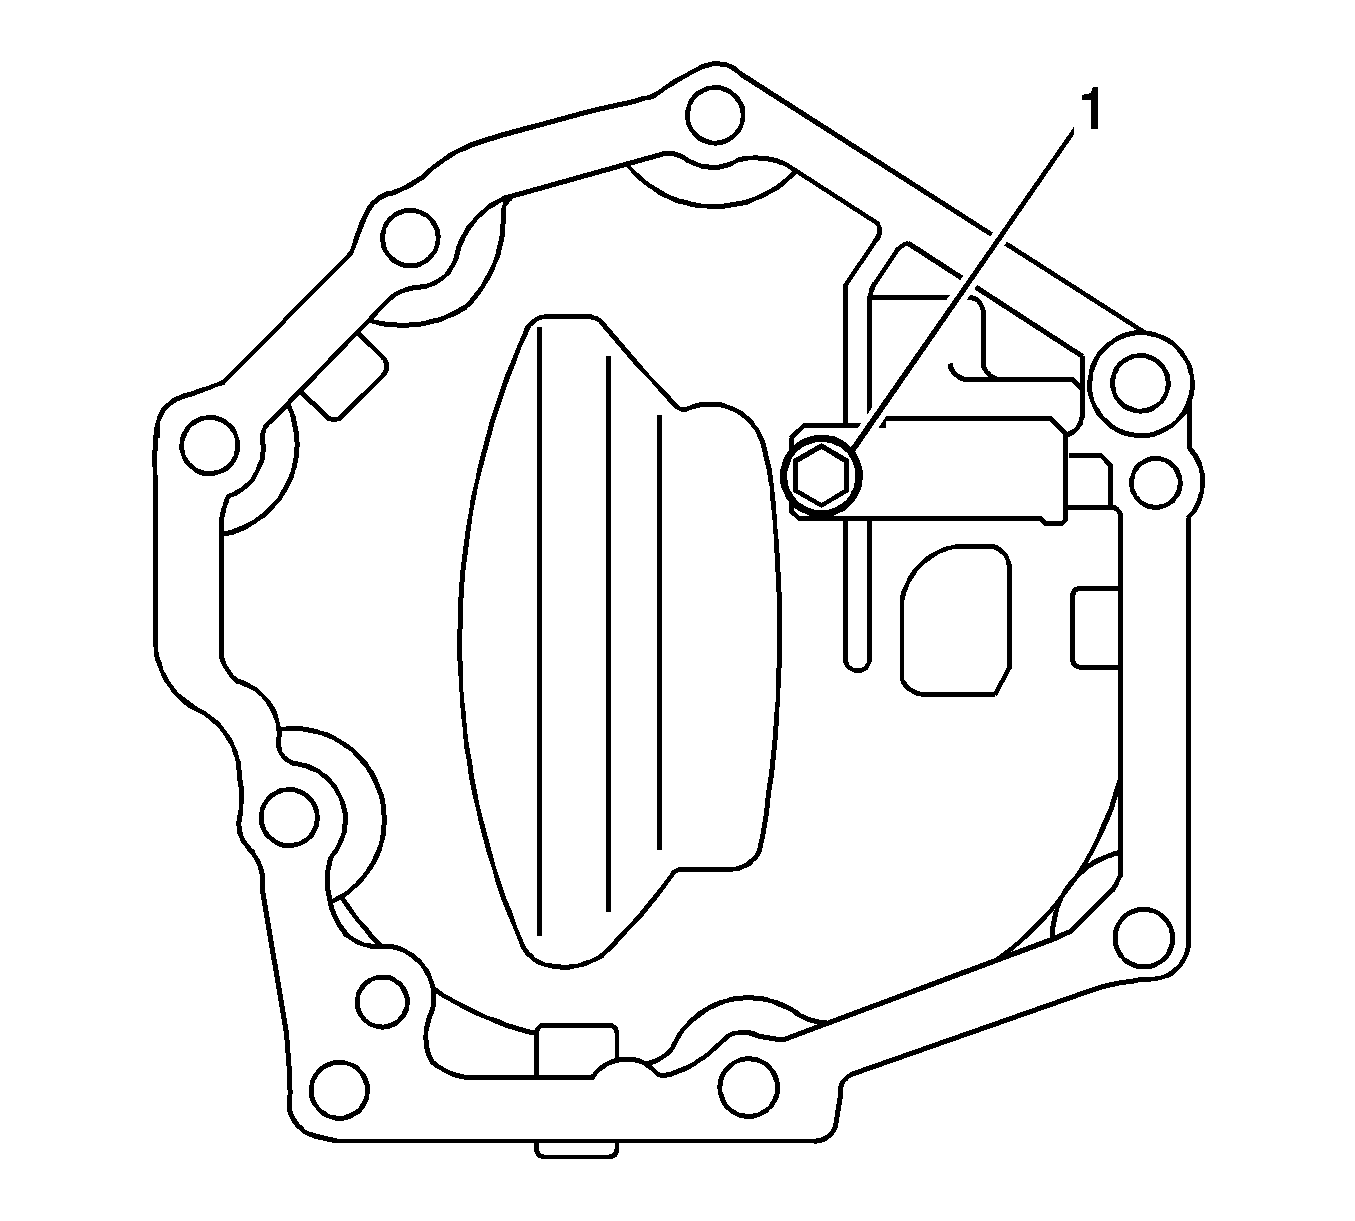
- Using a screwdriver, remove the transfer case breather plug (1).
- Remove the bolts (1-8).
- Using a brass bar and a hammer, remove the number 1 transfer case cover from the transfer case.
- Remove the bolt (1) and breather oil deflector.
- Remove the bolts (1-3) and transfer dynamic damper from the transfer extension housing sub-assembly.
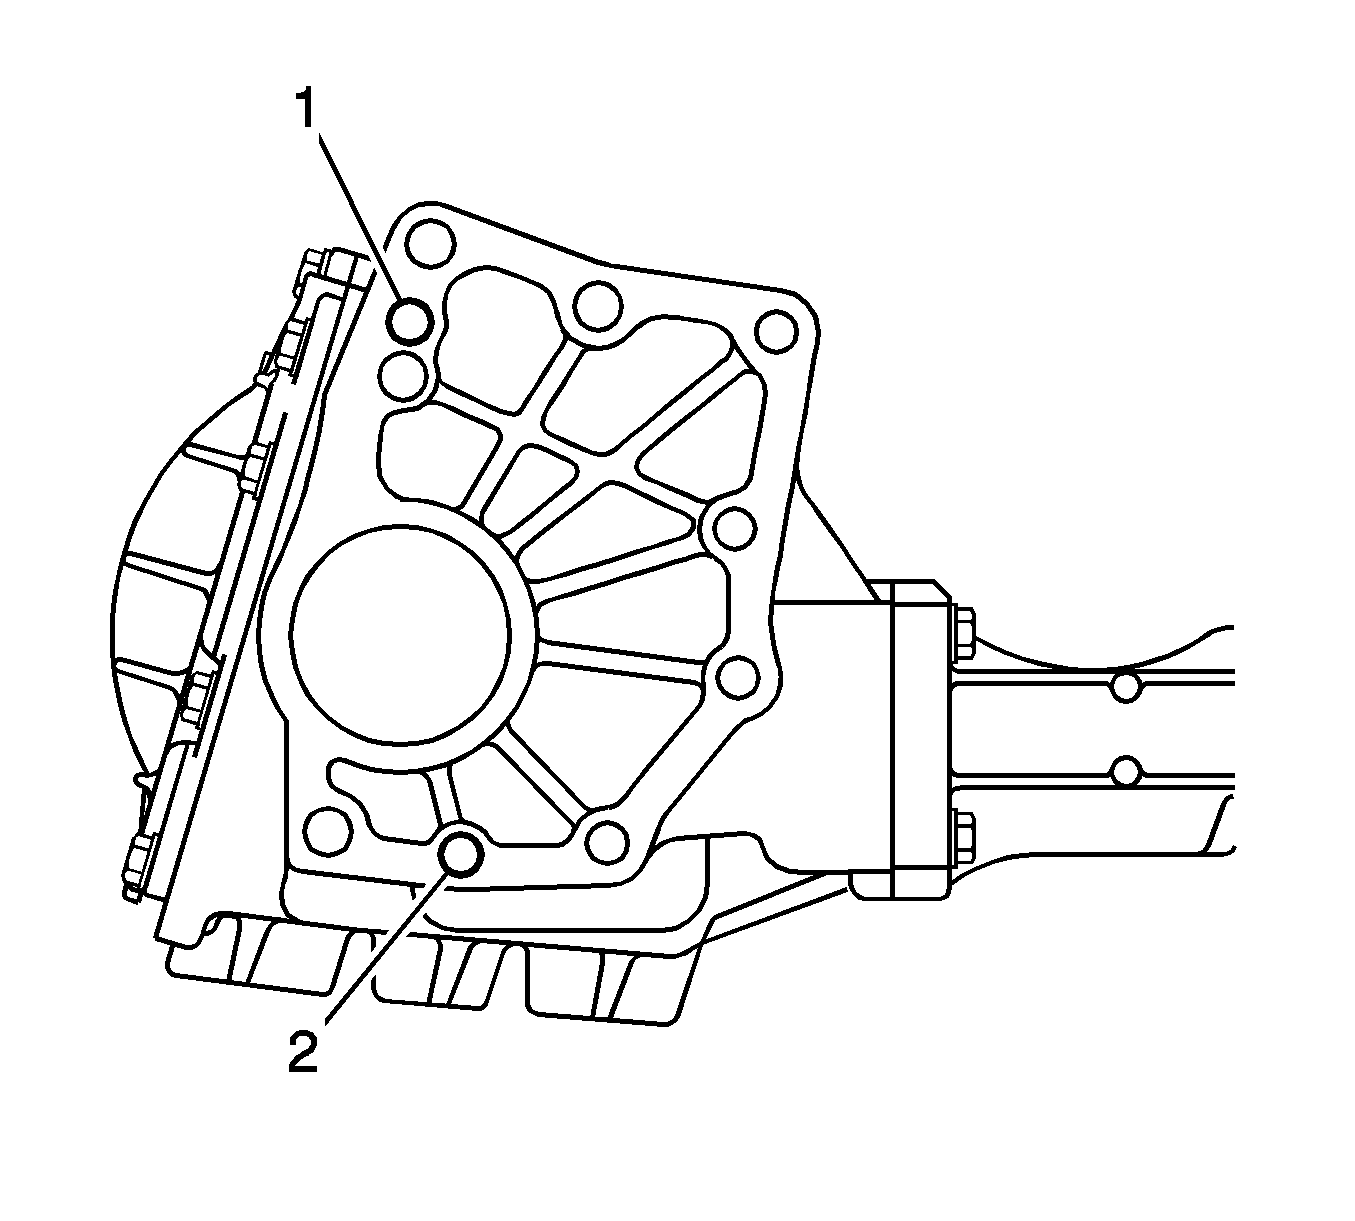
- Remove the transfer case straight pins (1, 2) from the transfer case.
- Install the transfer case onto the holding fixture through the straight pin locations (1, 2).
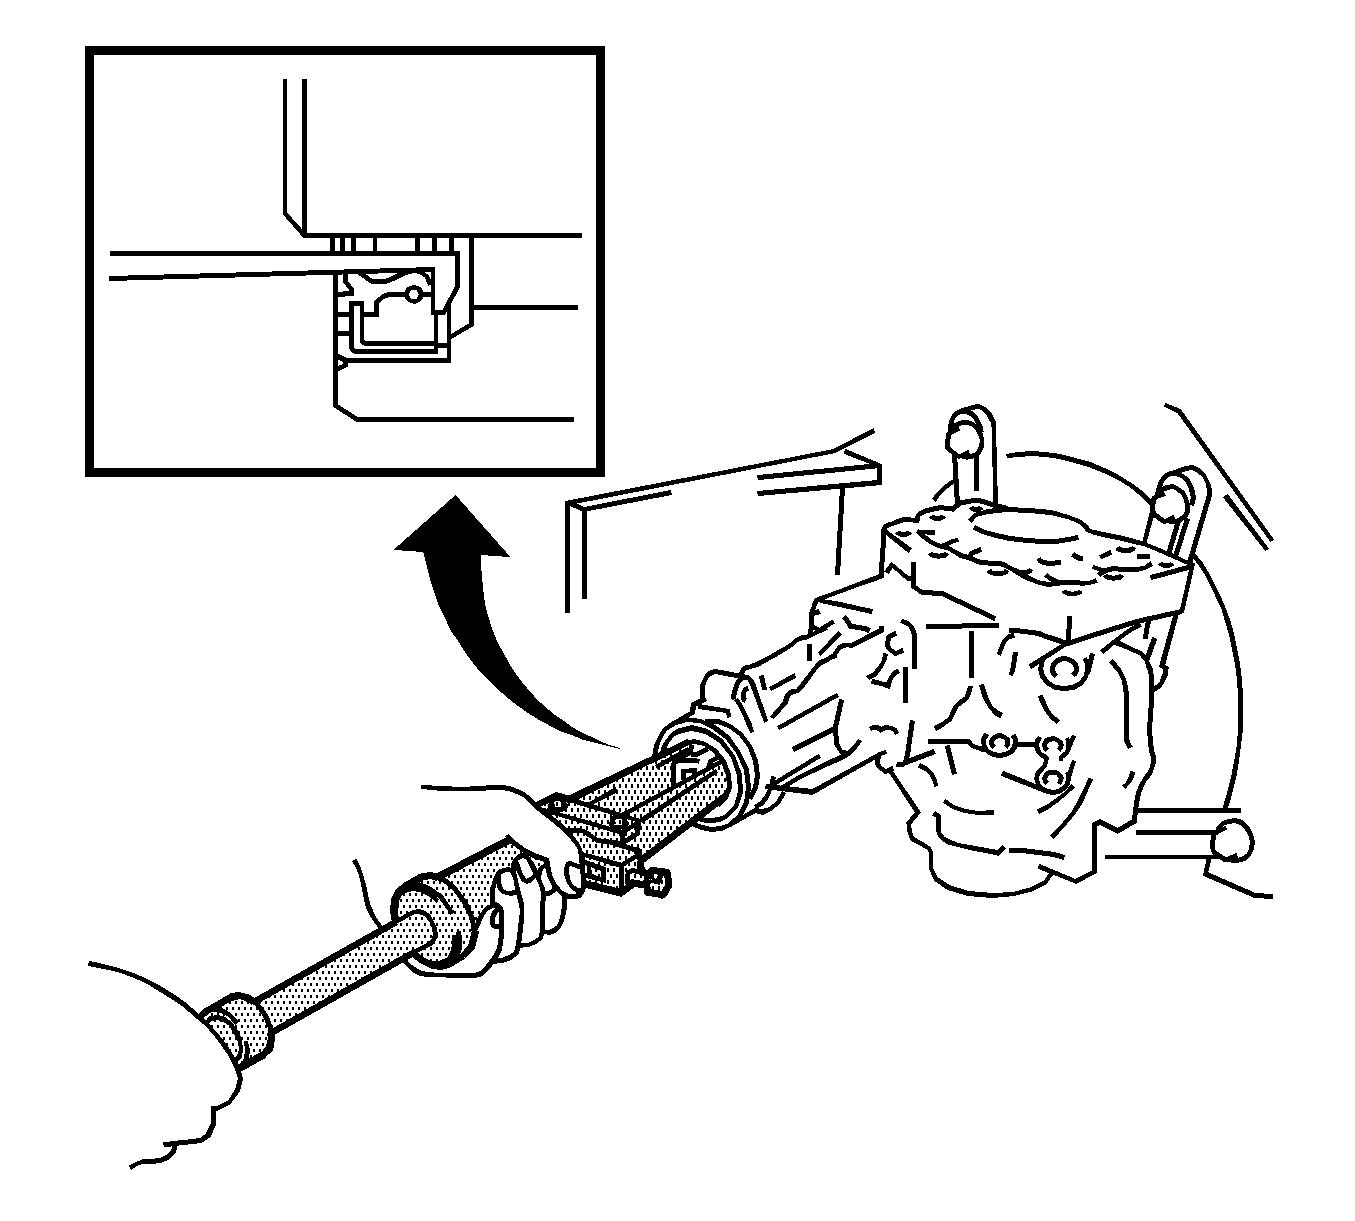
- Using a plastic hammer, remove the transfer extension housing dust deflector from the transfer extension housing sub-assembly.
- Using a suitable puller, remove the transfer case rear oil seal from the transfer extension housing sub-assembly.
- Remove the bolts (1-4).
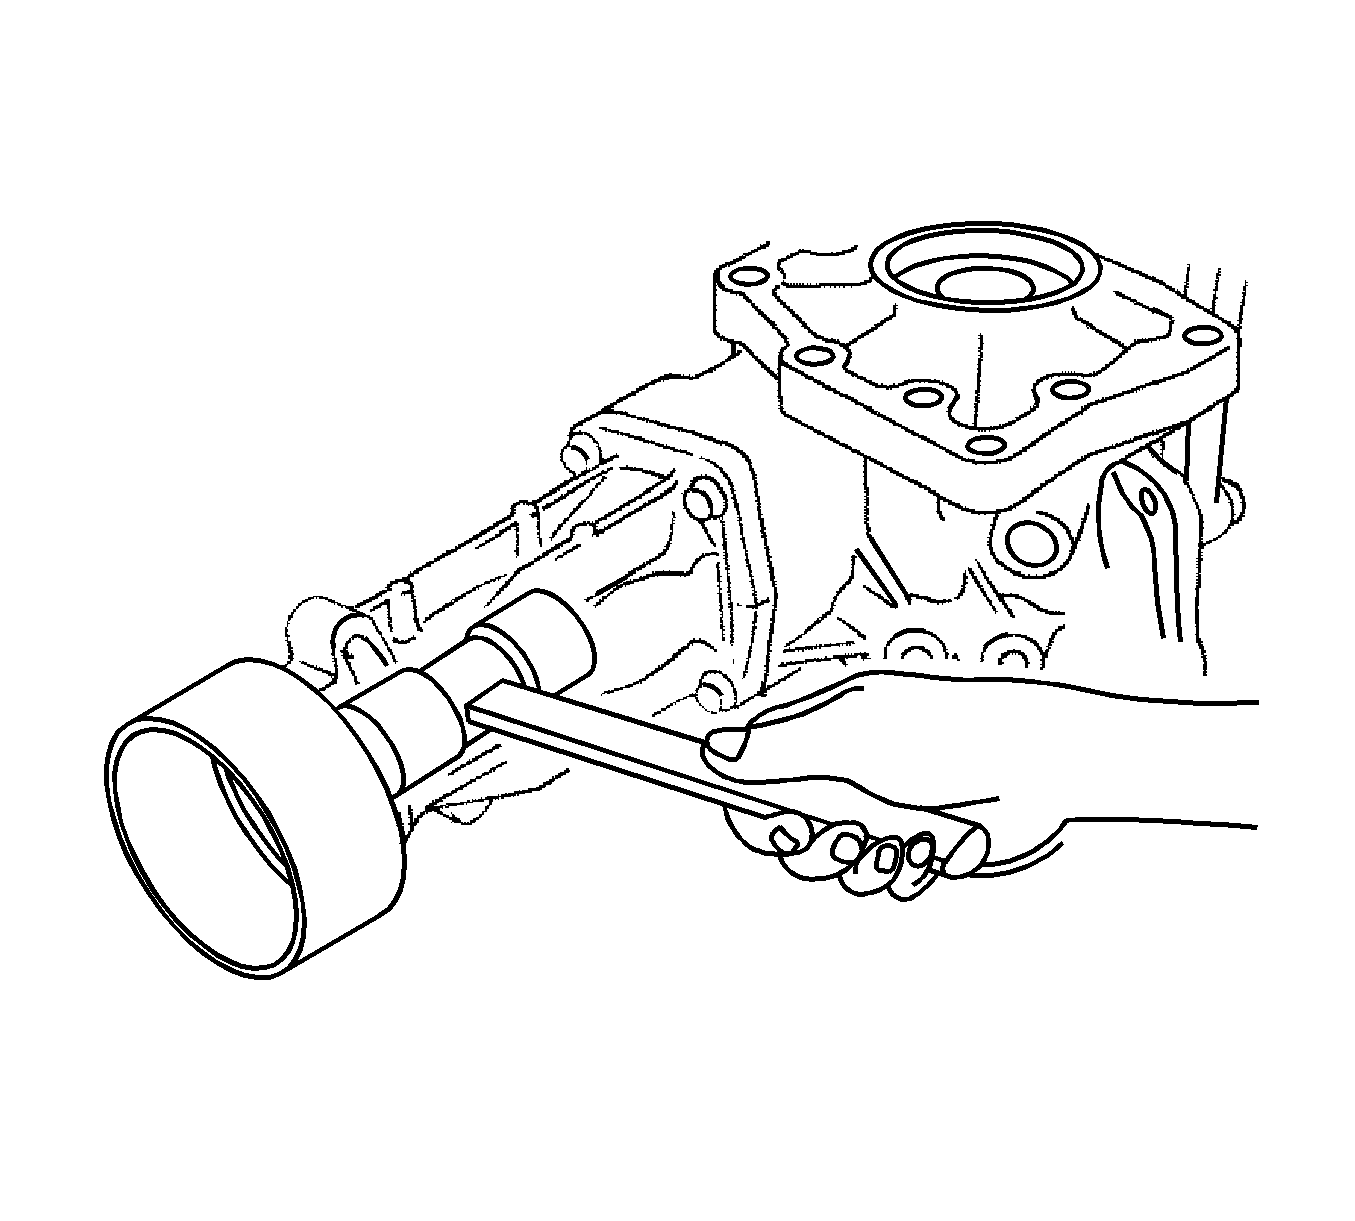
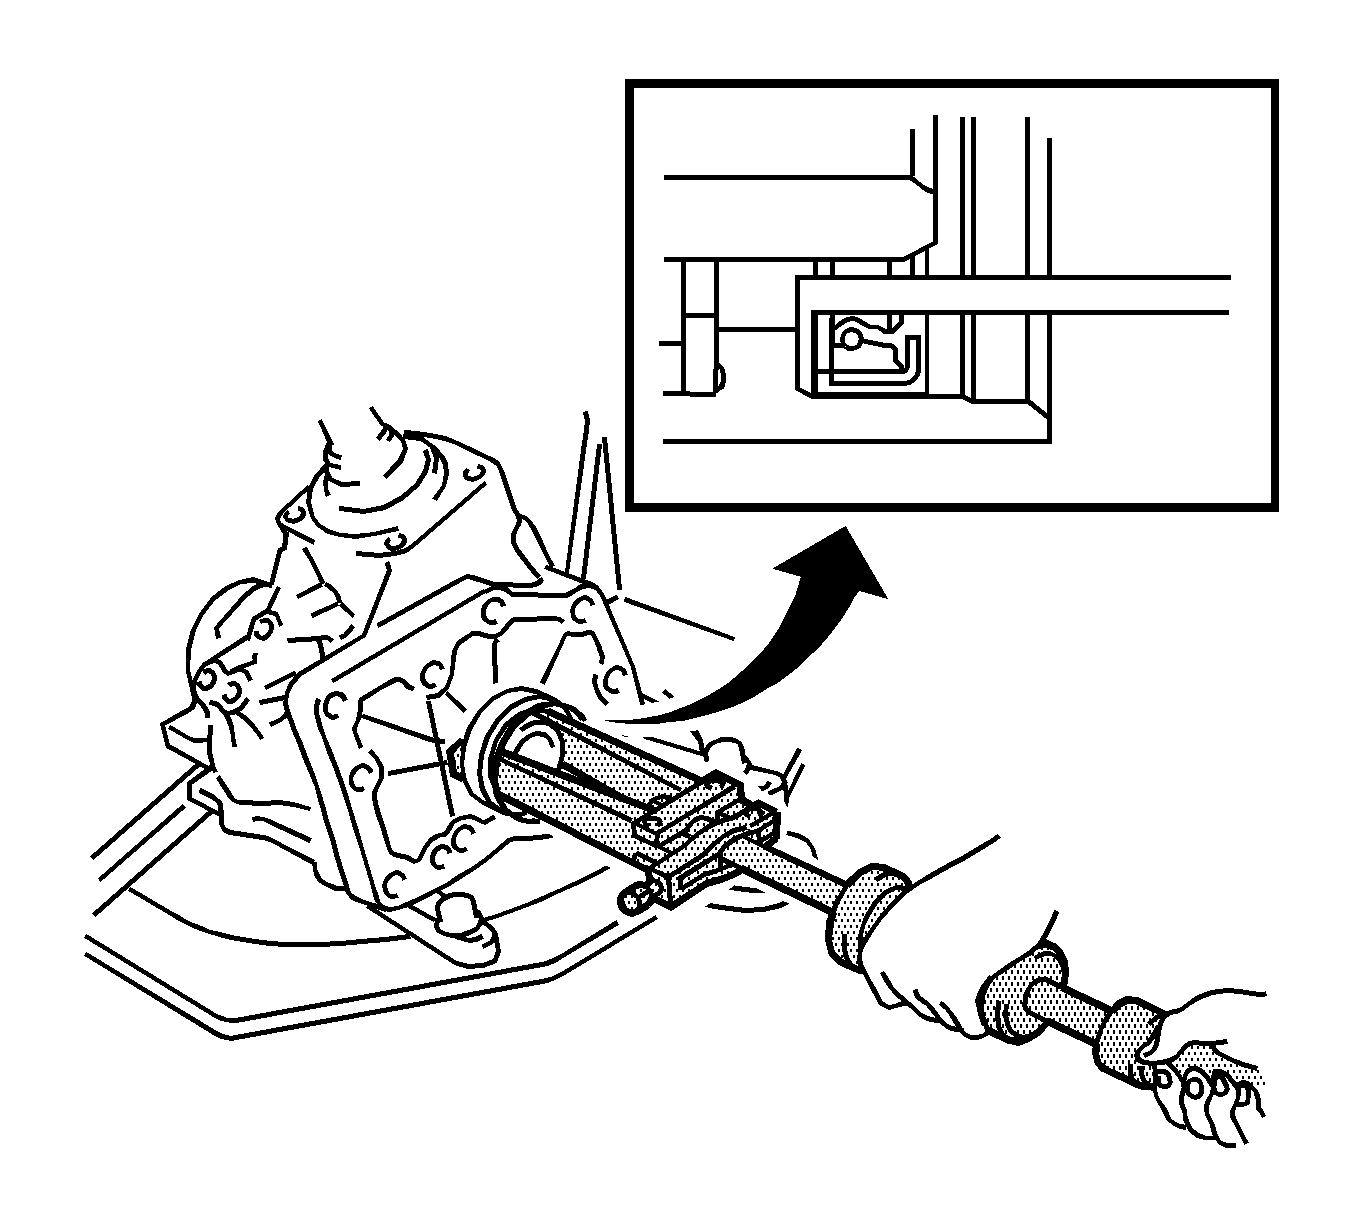
- Using a plastic hammer, remove the transfer extension housing sub-assembly from the transfer case.
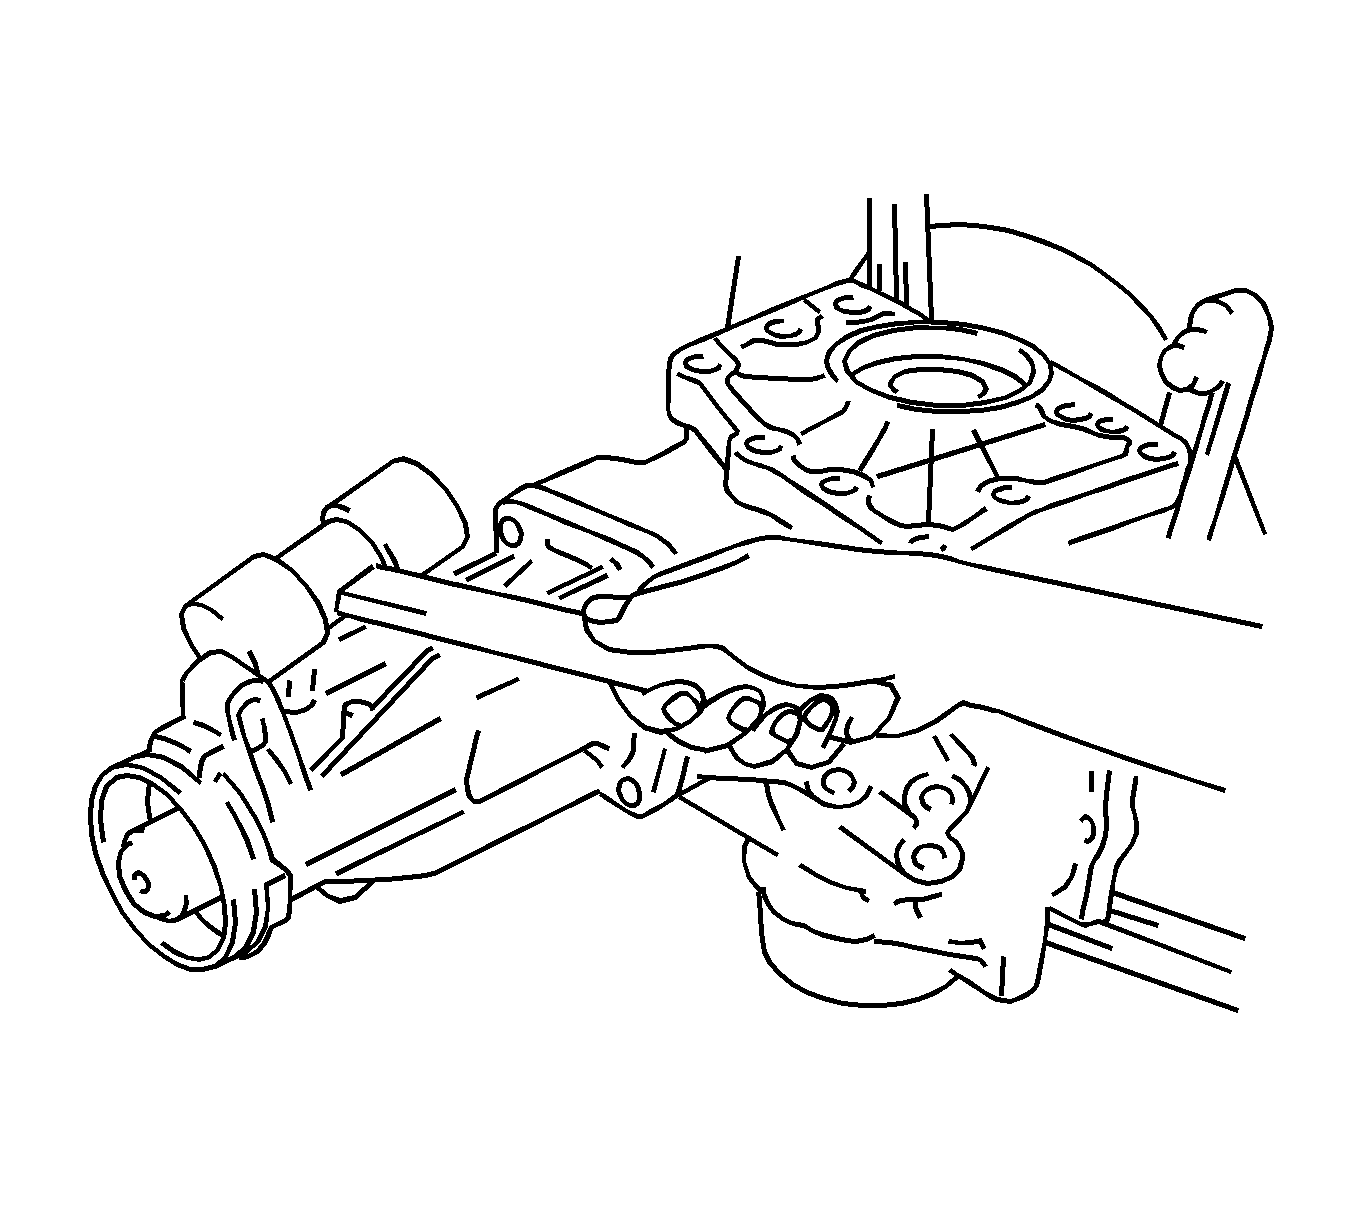
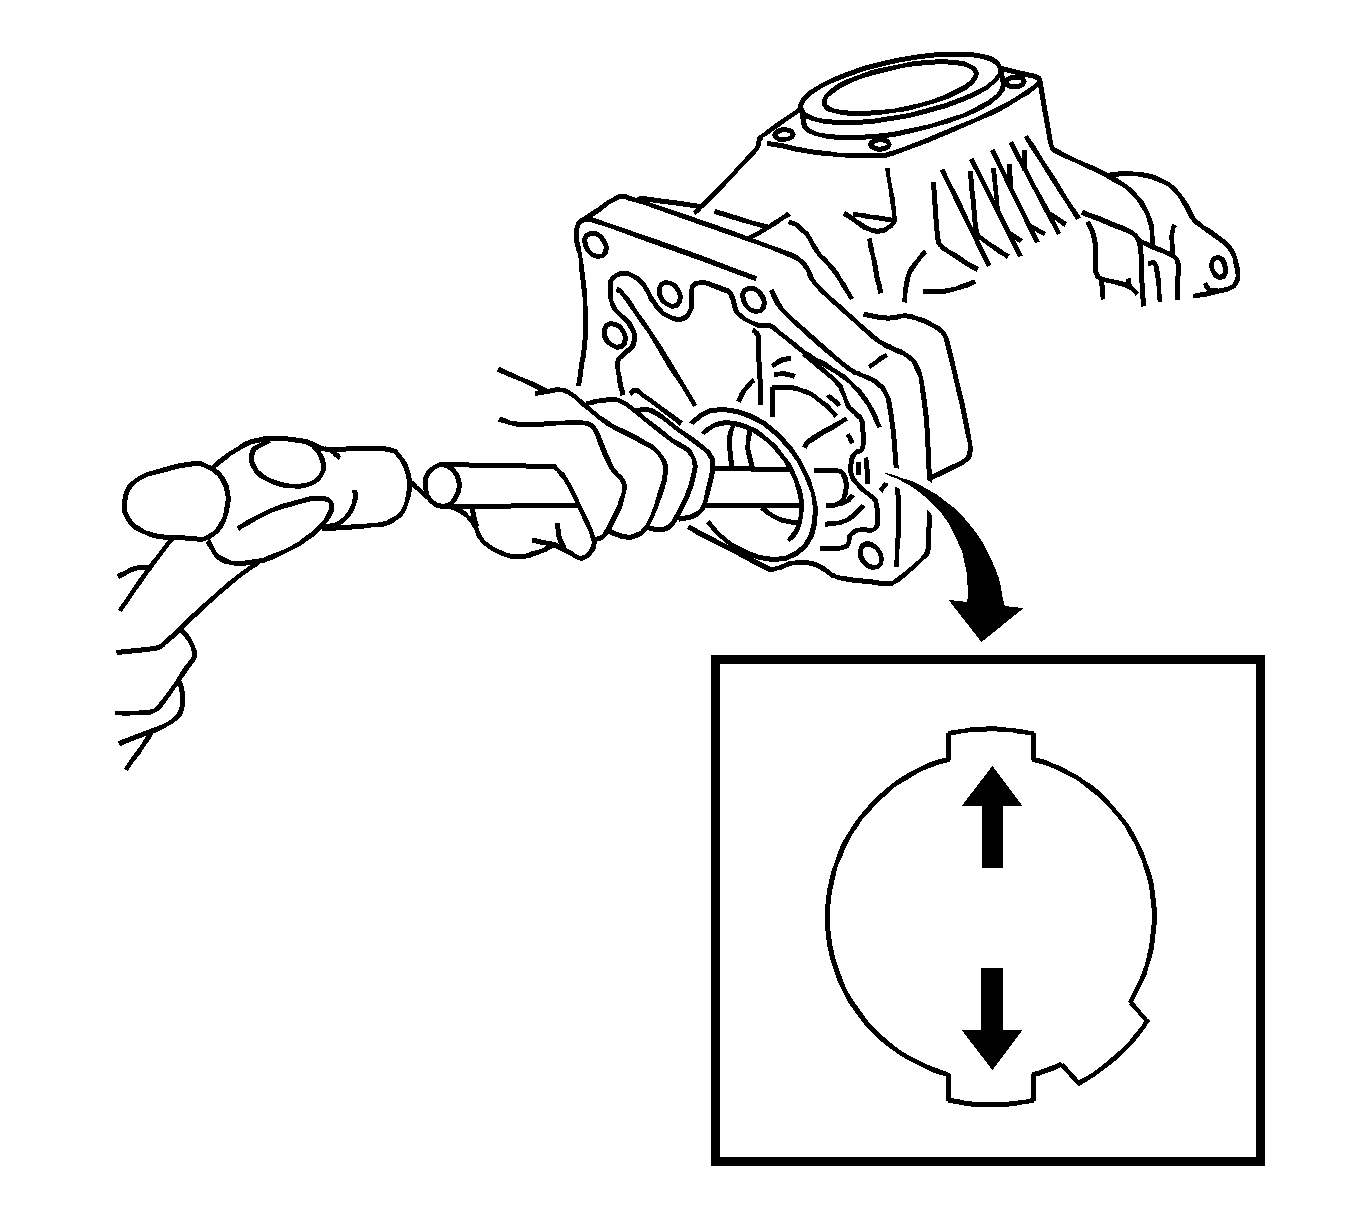
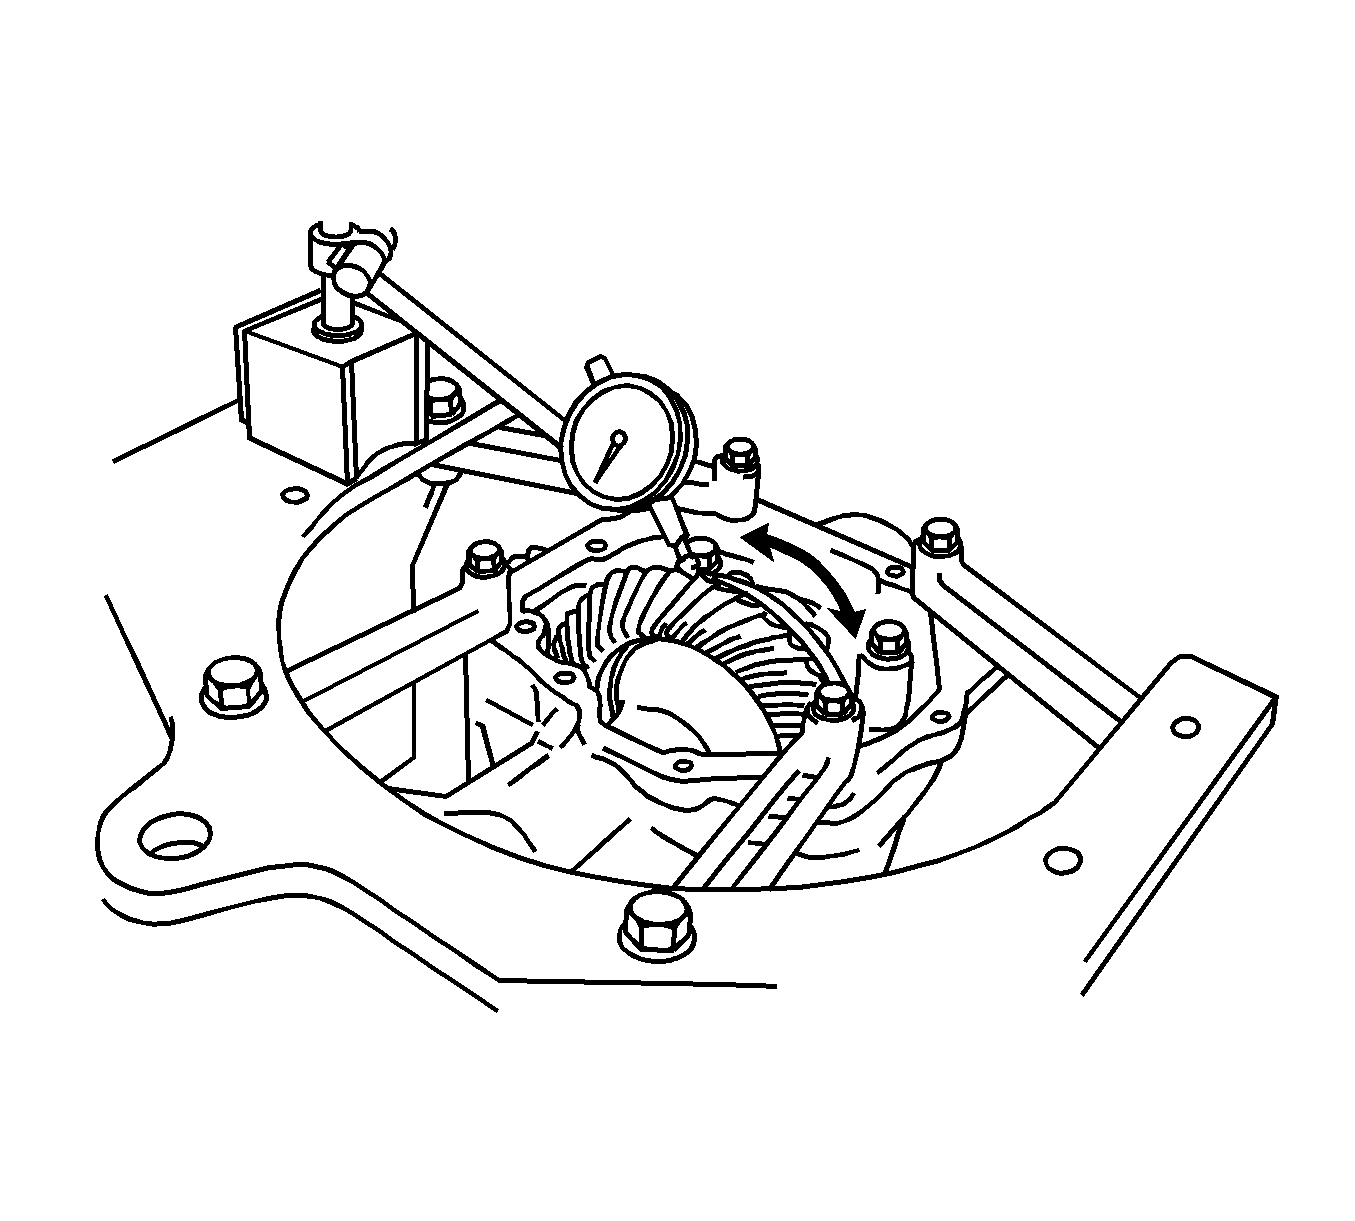
- Using J-46003 output shaft bearing locknut wrench and a torque wrench, measure the preload of the backlash between the driven pinion and ring gear.
- Inspect the ring gear backlash.
- Inspect the tooth contact between ring gear and drive pinion.
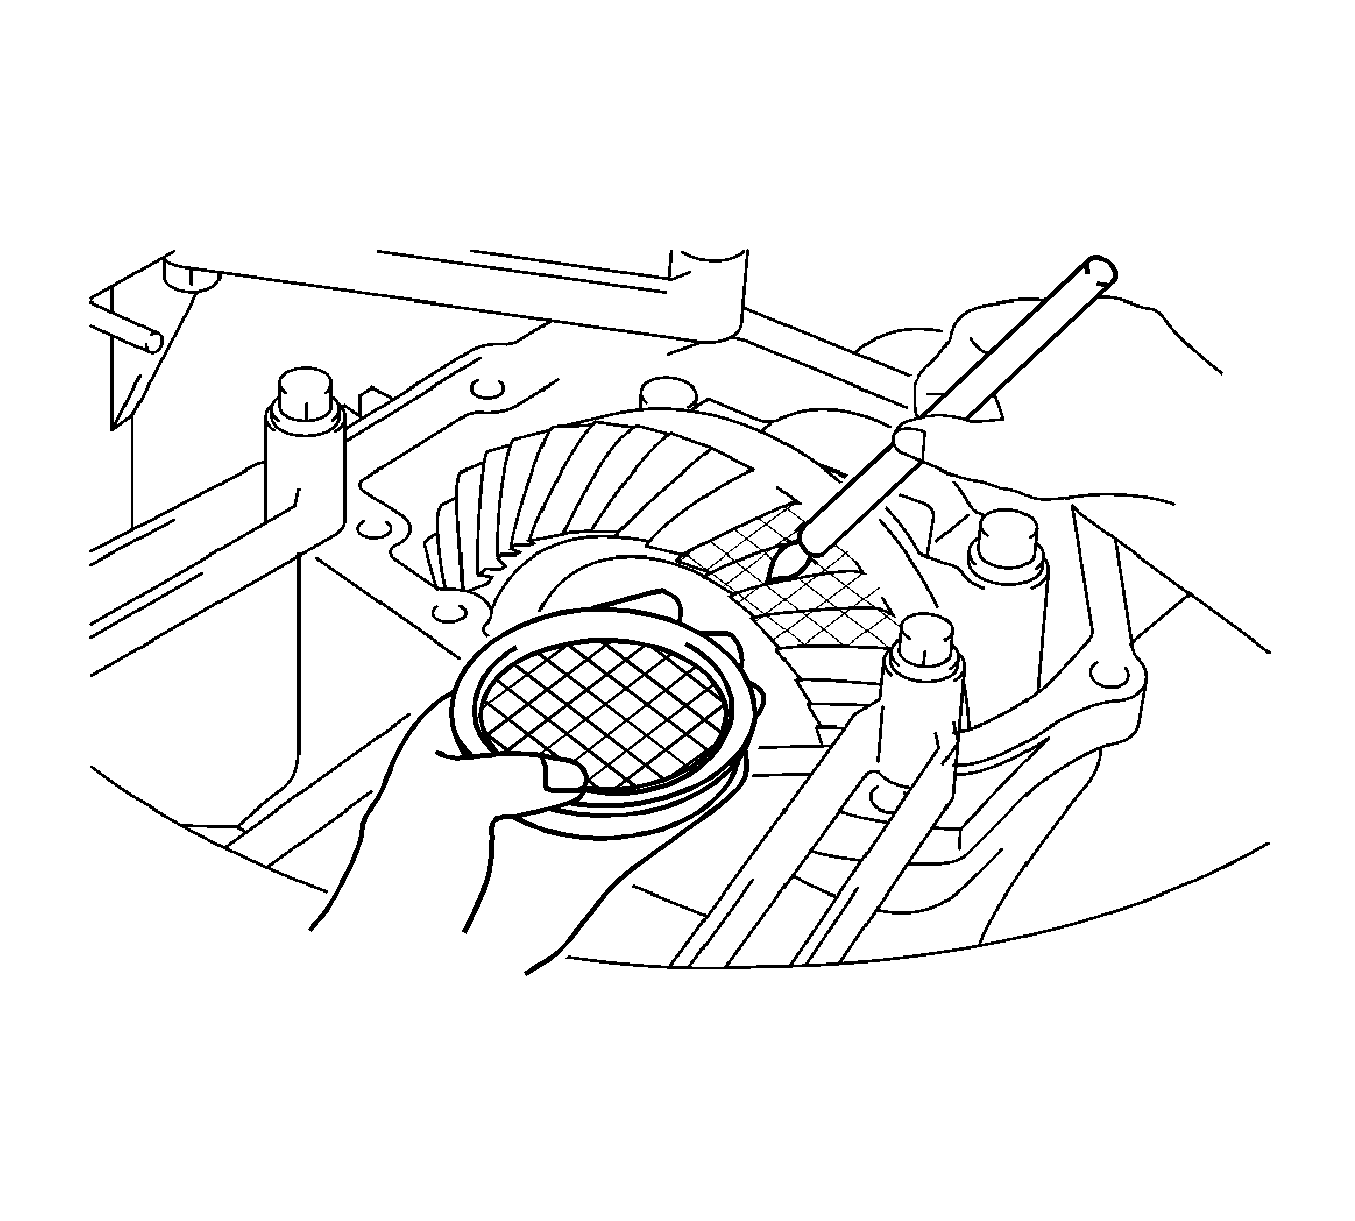
- Coat 3 or 4 teeth at 4 different positions on the ring gear with red lead.
- Rotate the ring gear to inspect the tooth pattern.
- Using a suitable puller, remove the transfer case front oil seal from the transfer case.
- Using a suitable puller (1), remove the transfer case front oil seal from the transfer case.
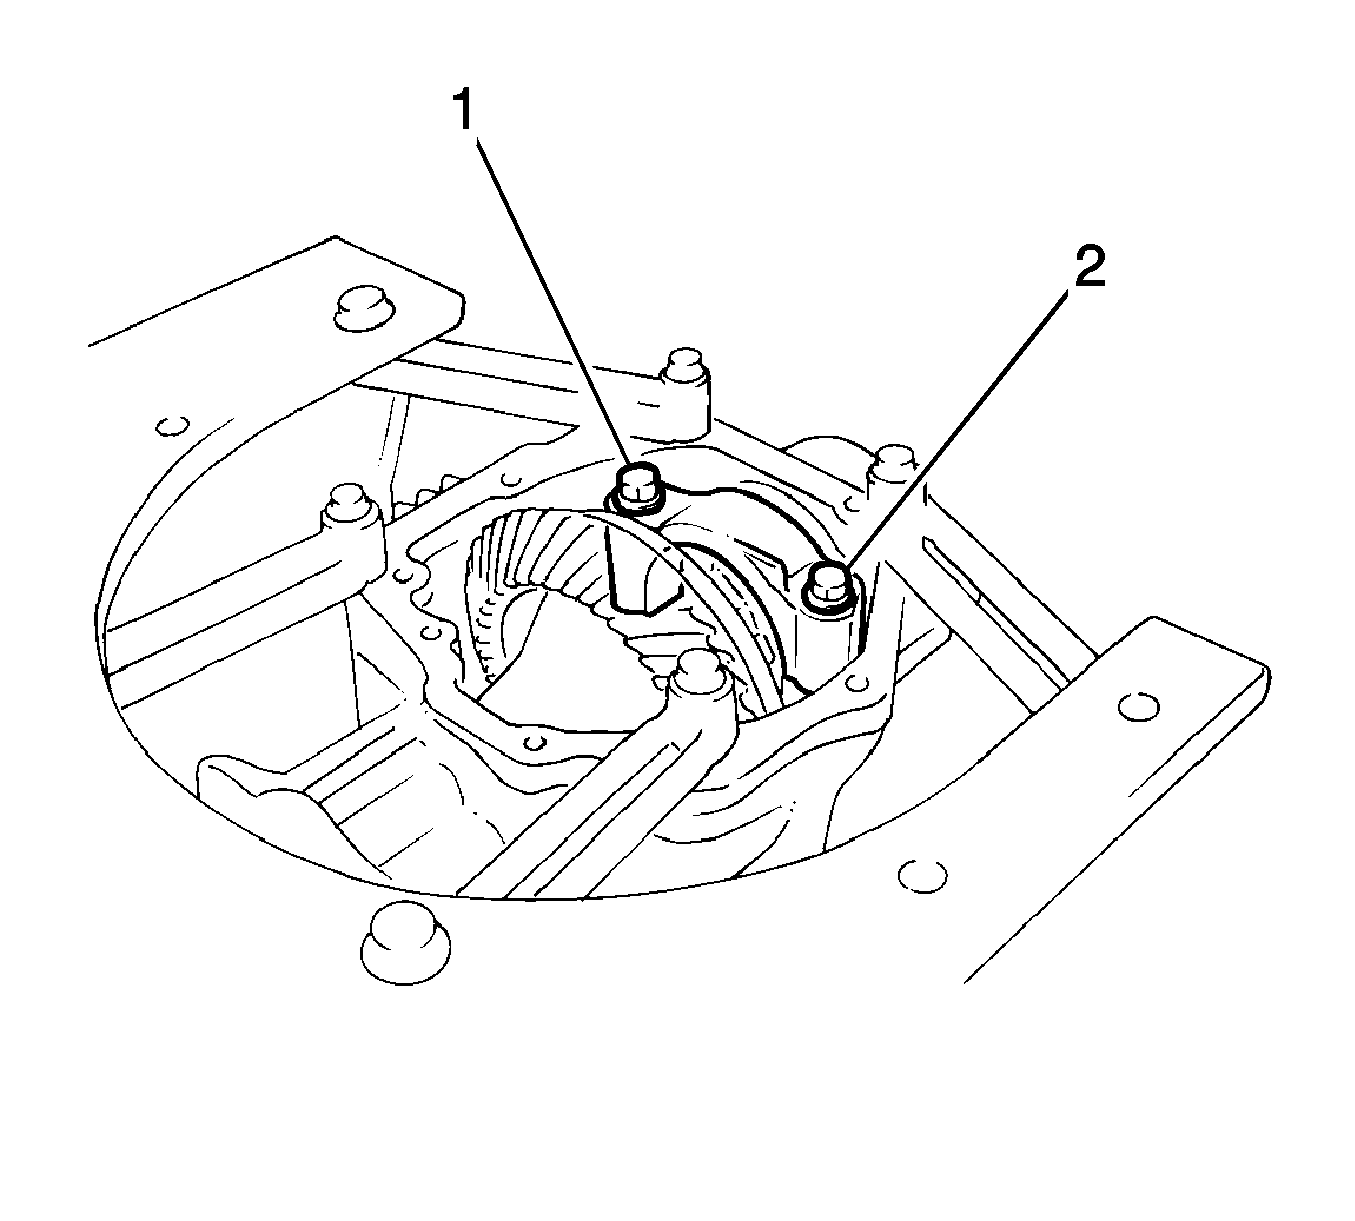
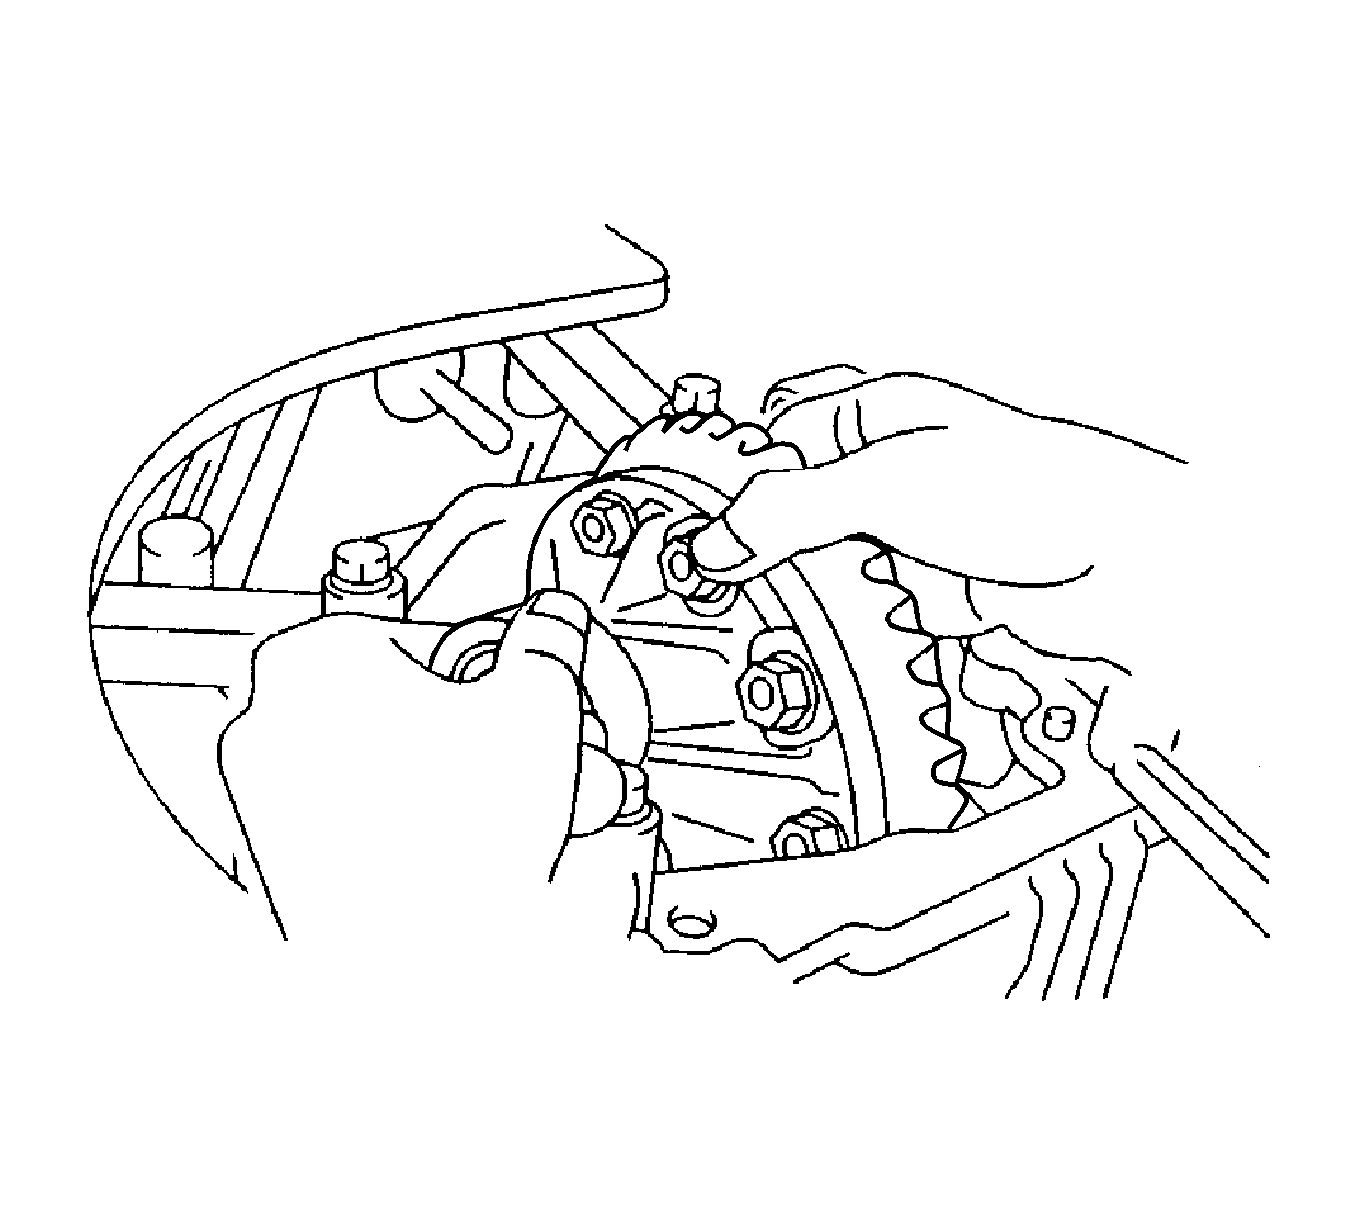
- Remove the bolts (1, 2) and the bearing cap.
- Remove the number 1 transfer output shaft spacer.
- Remove the number 2 transfer ring gear mounting case washer.
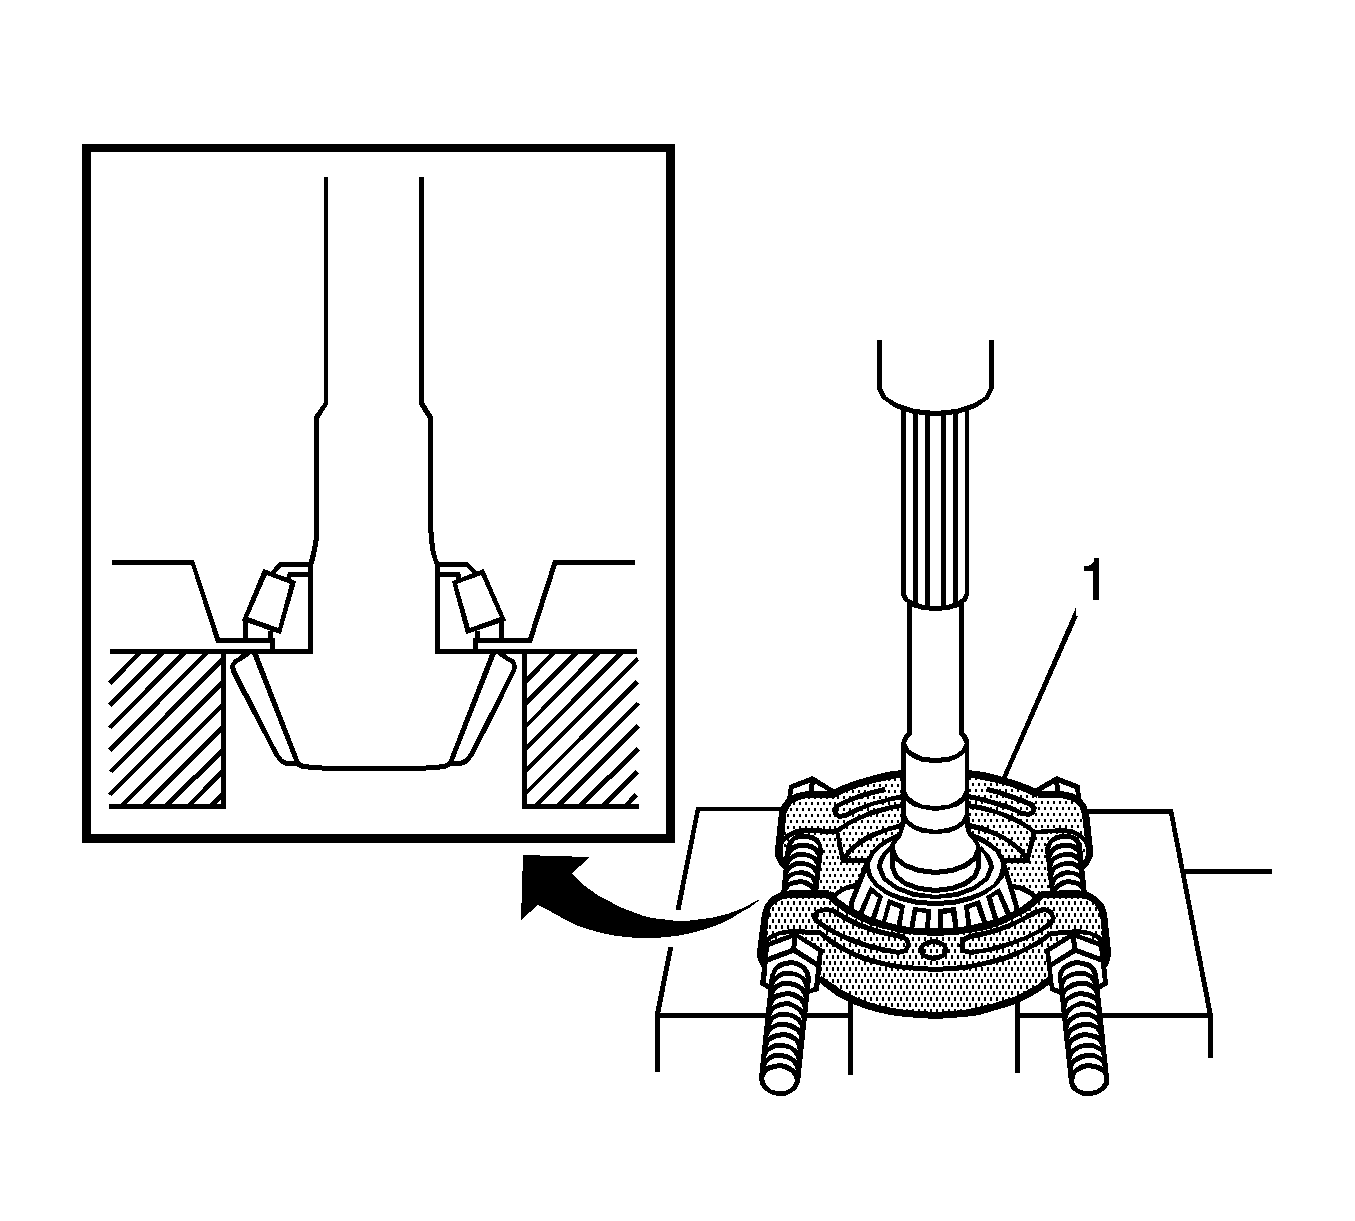
- Remove the transfer ring gear mounting case from the transfer case.
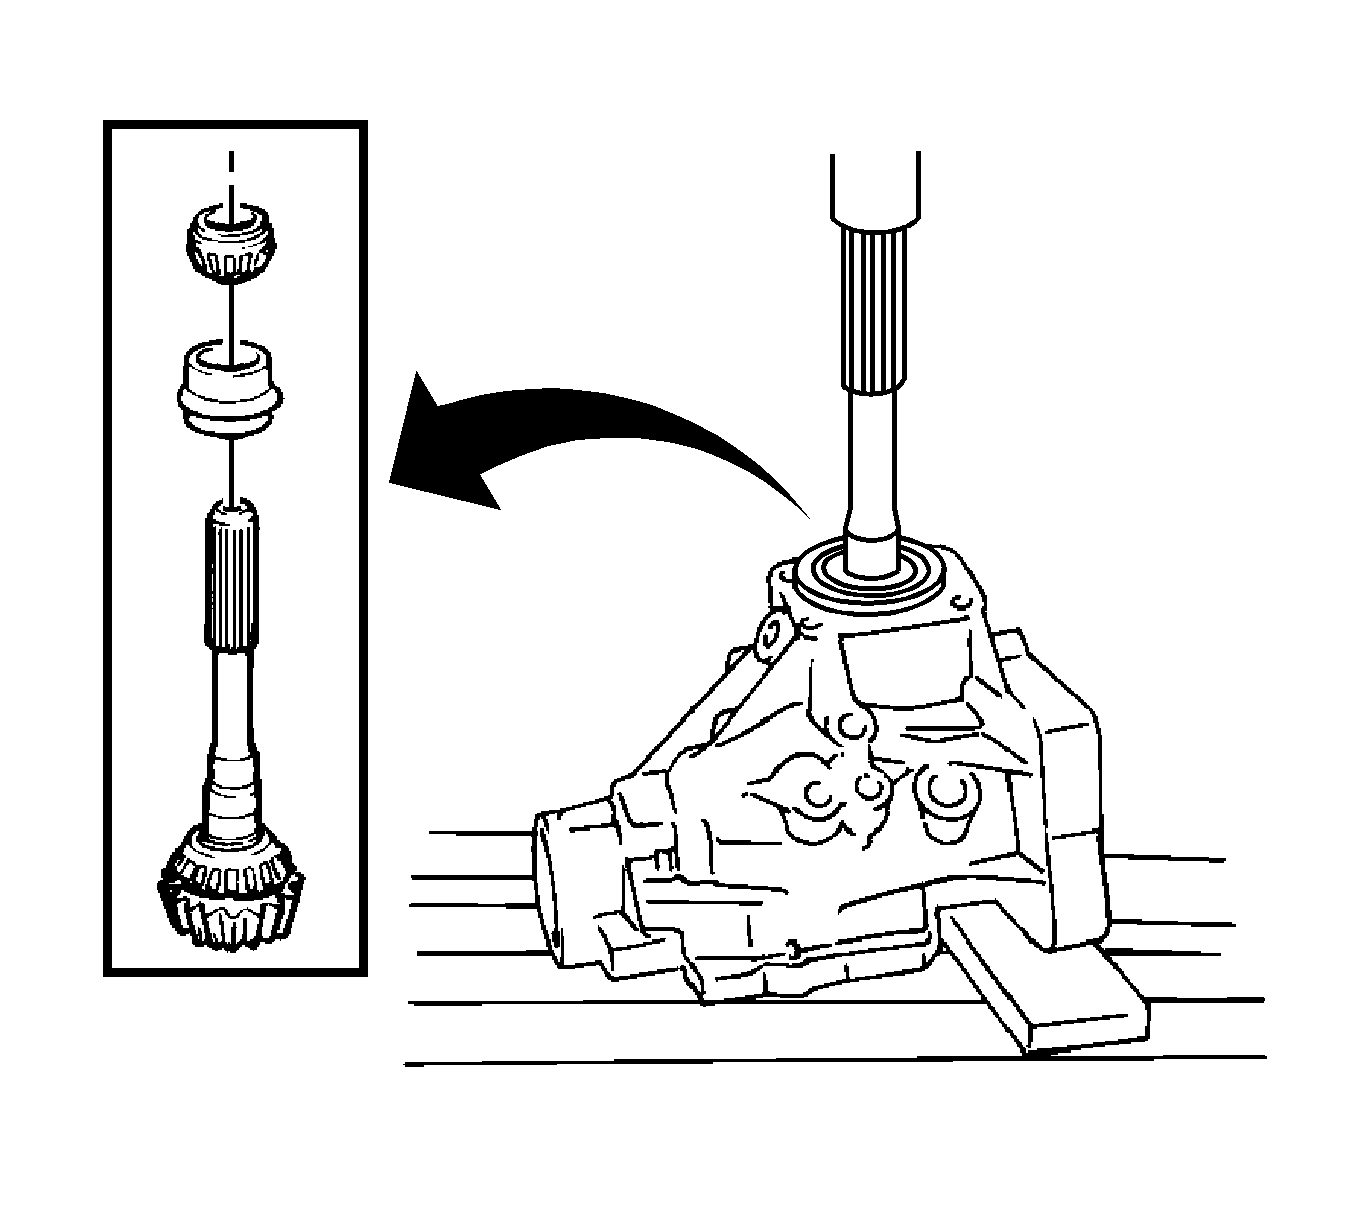
- Remove driven pinion.
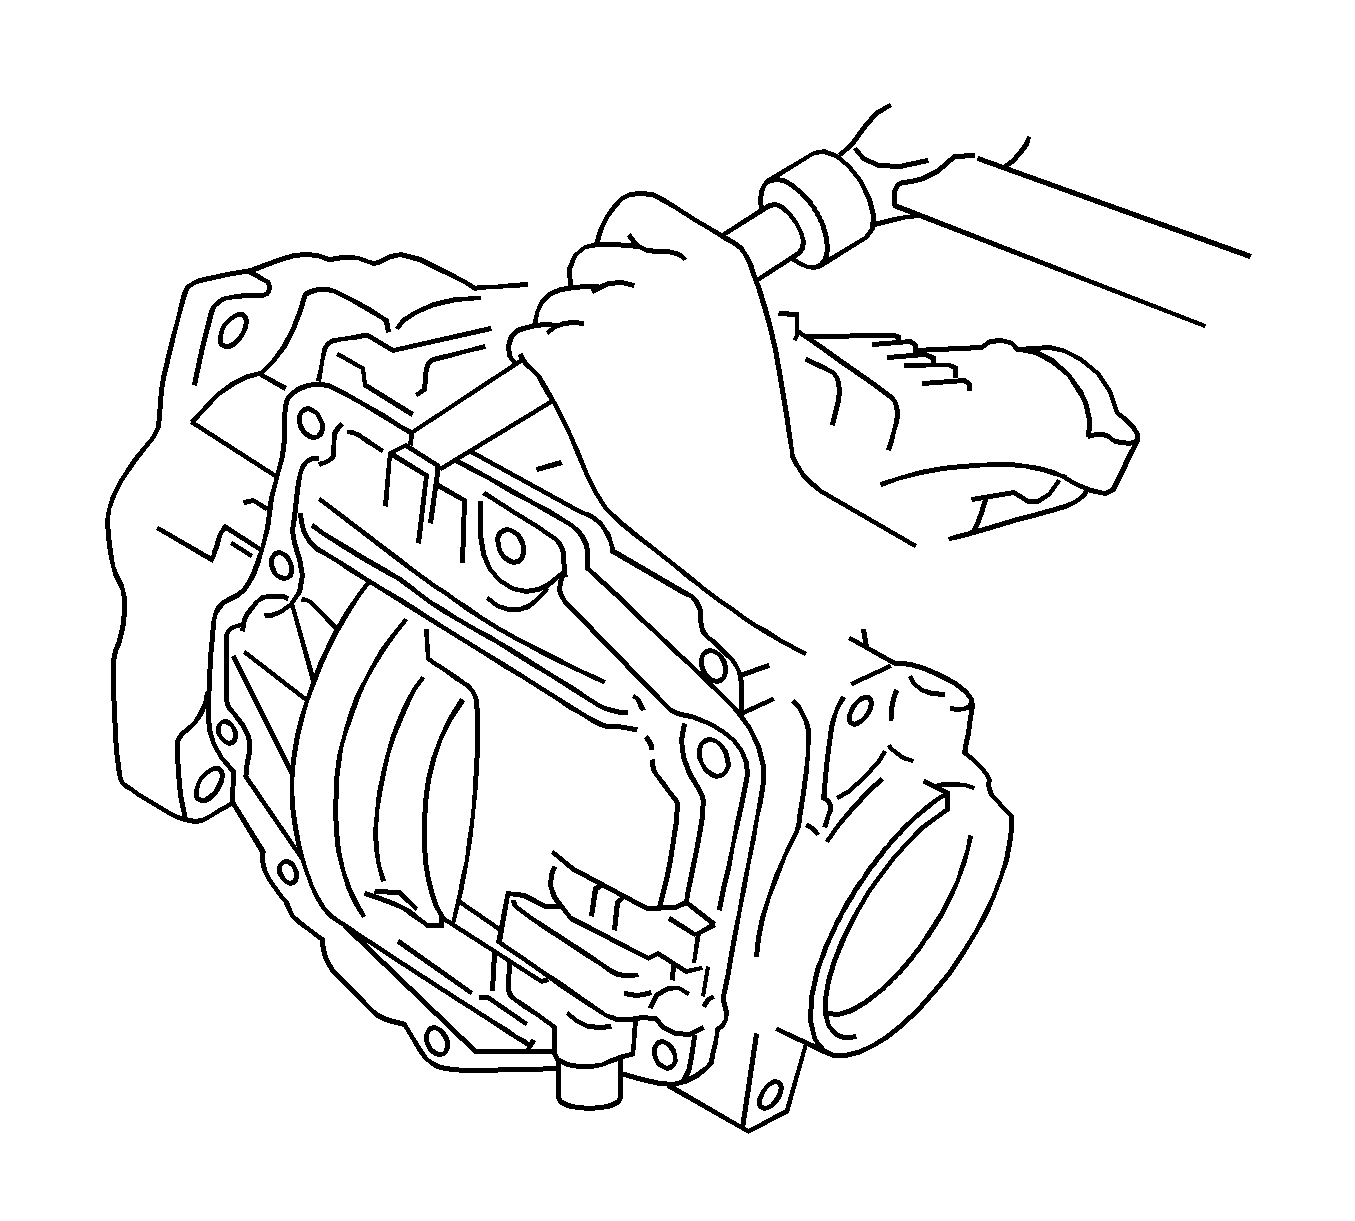
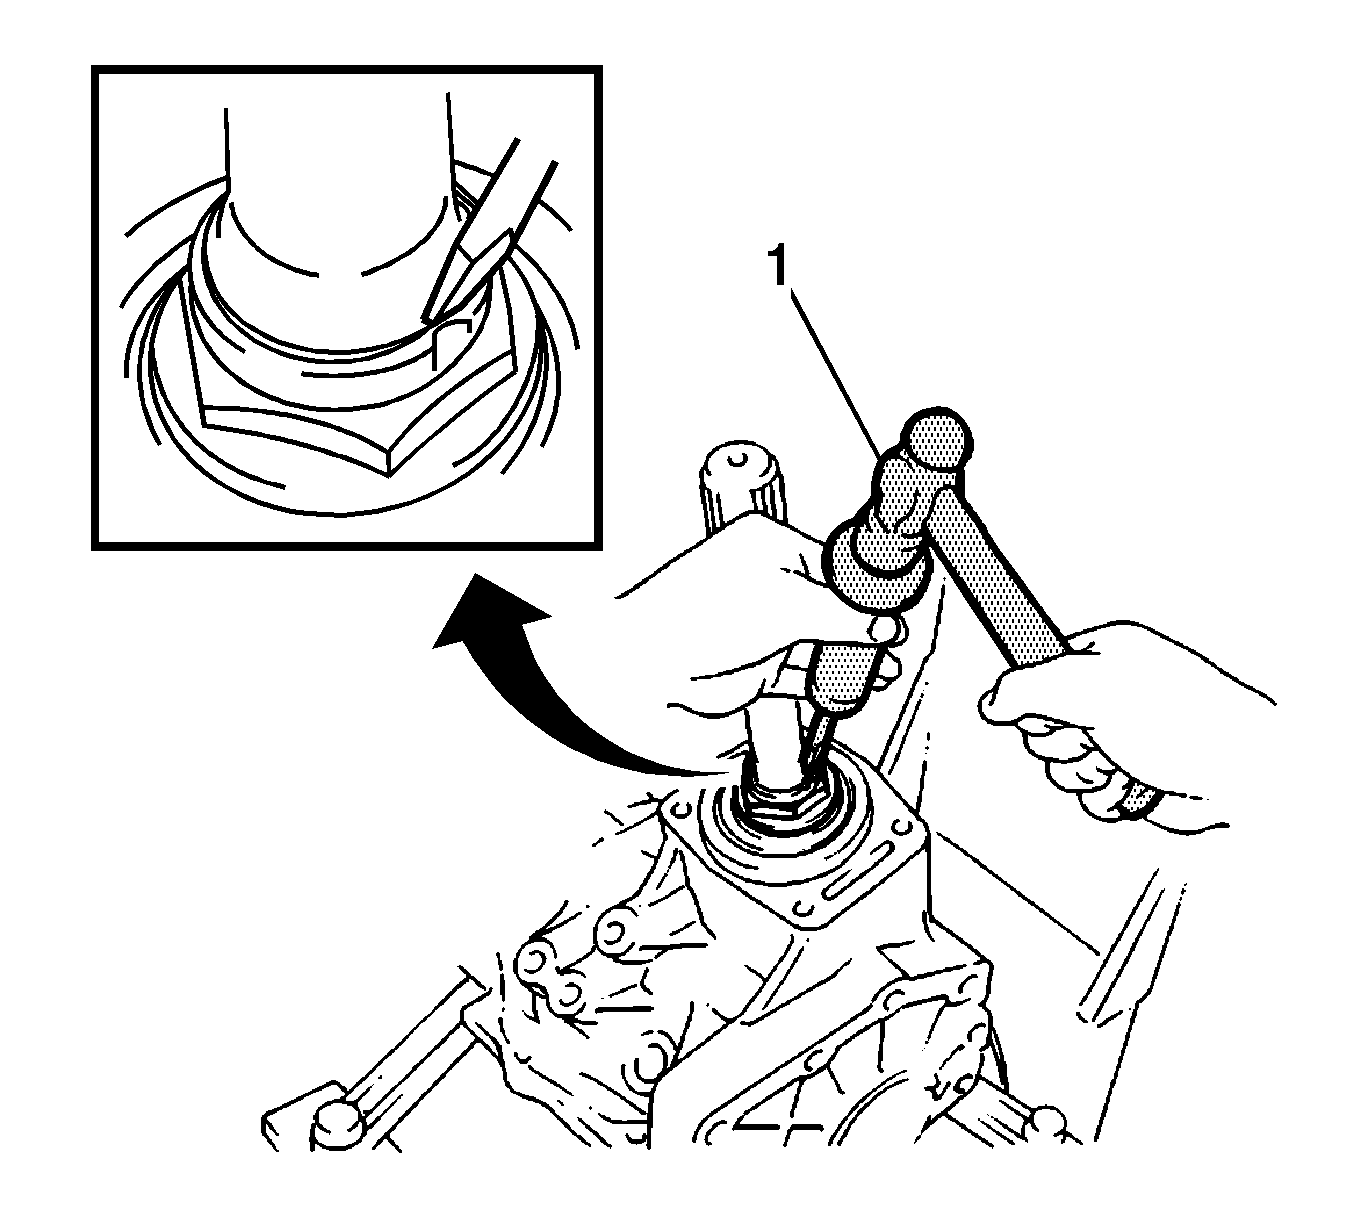
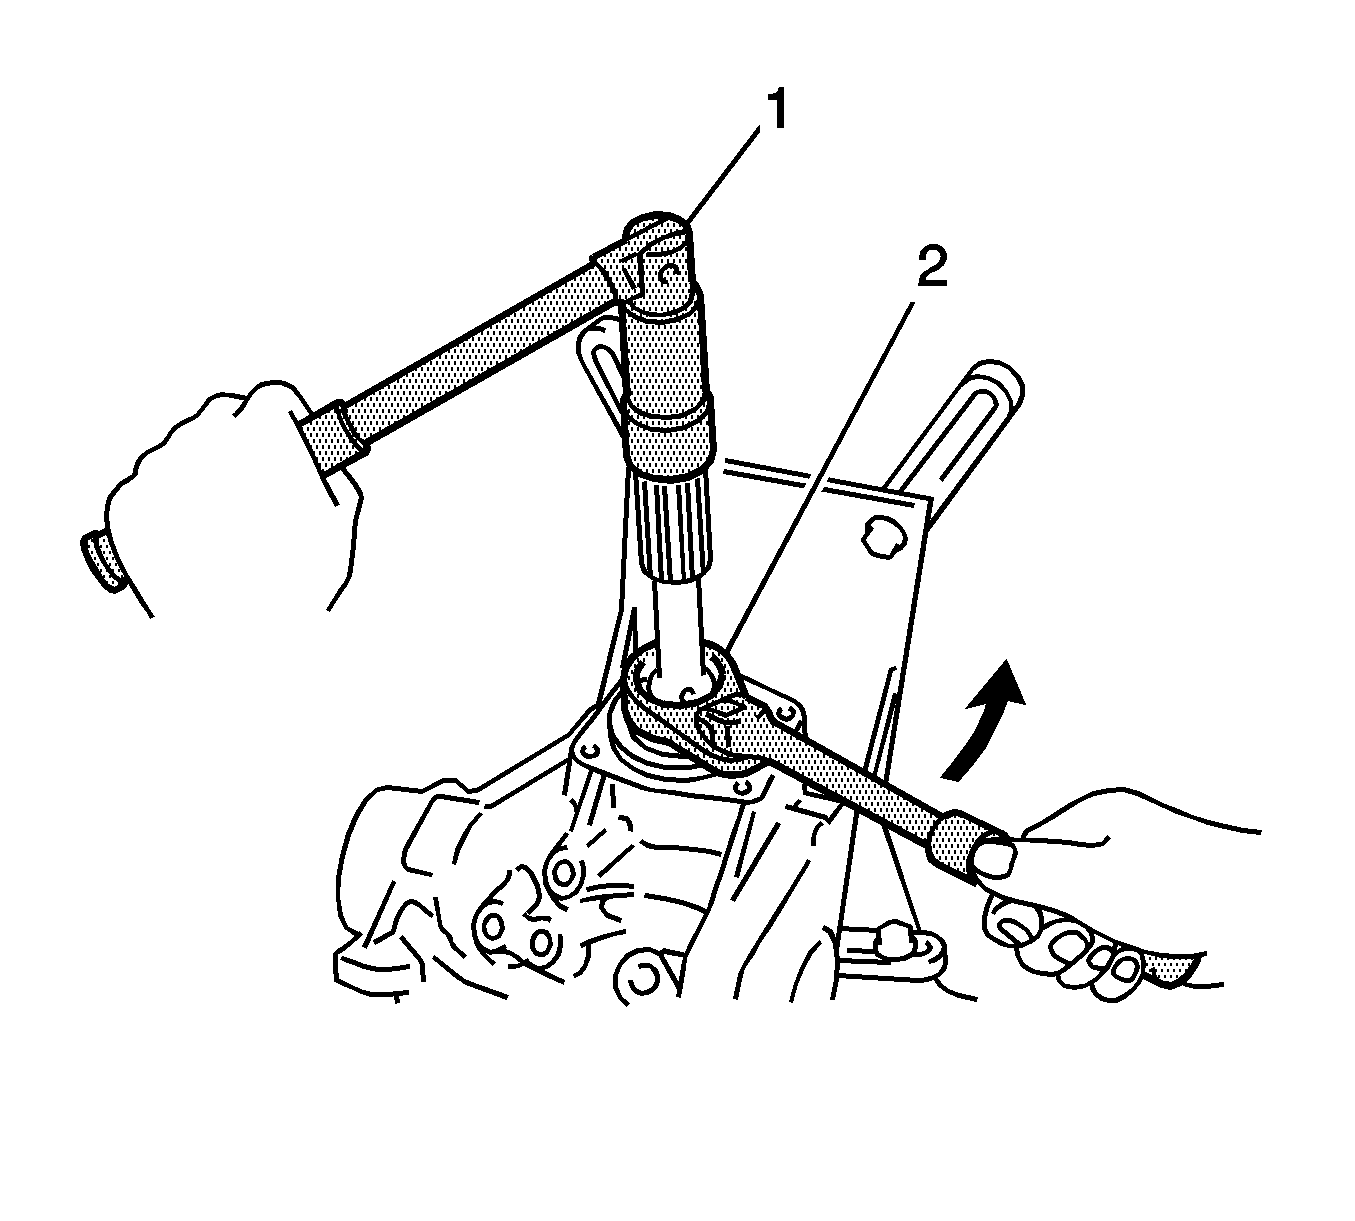
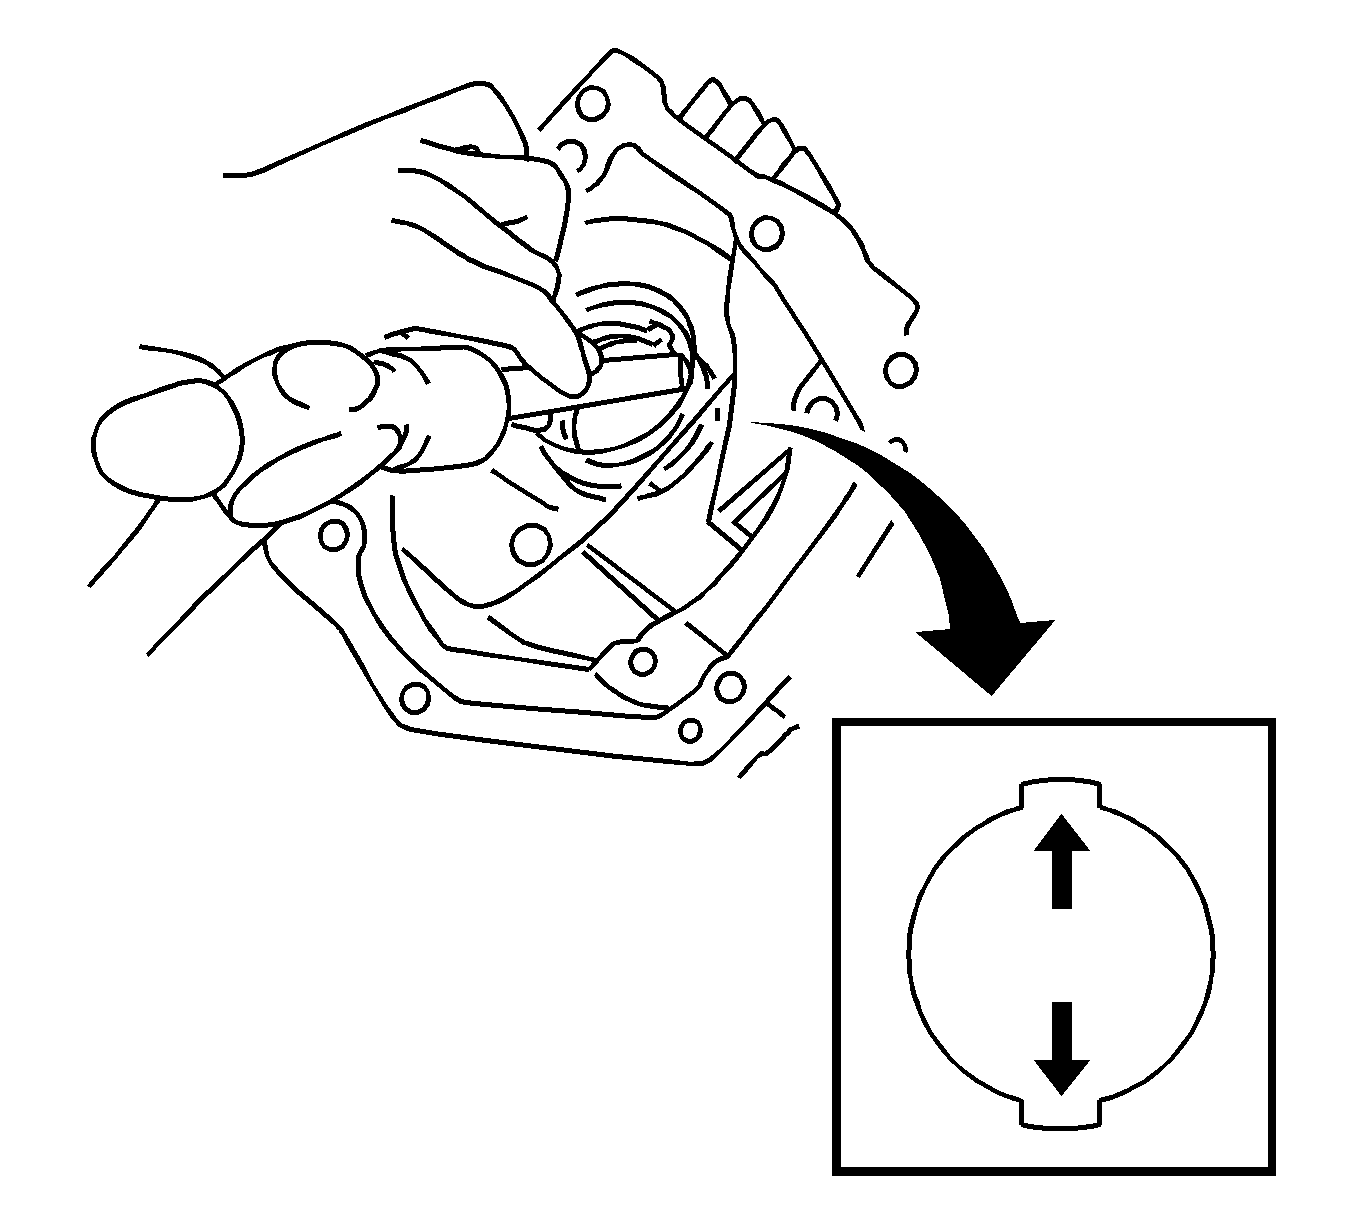
- Unstake the gear nut using a hammer (1) and chisel.
- Using J-46003 wrench (2) and J-46001 differential drive pinion holding tool (1), remove the gear nut.
- Using a press, press out the driven pinion, transfer driven pinion rear bearing (inner race) and transfer pinion bearing spacer.
- Using a press (1), press out the transfer driven pinion front bearing (inner race).
- Using a brass bar and a hammer, tap the driven pinion front bearing (outer race) to remove from the case.
- Remove the transfer output shaft washer.
- Remove the ring gear mounting case bearing right side (outer race) from the transfer ring gear mounting case.
- Using a suitable puller, remove the ring gear mounting case bearing right side (inner race) from the transfer ring gear mounting case.
- Using a suitable puller, remove the ring gear mounting right side (inner race) RH from the transfer ring gear mounting case.
- Using a brass bar and a hammer, tap the 2 positions of the ring gear mounting case bearing left side (outer race) to remove from the transfer case.
- Remove the ring gear mounting case plate washer.
- Inspect the runout of the ring gear.
- Remove the ring gear.
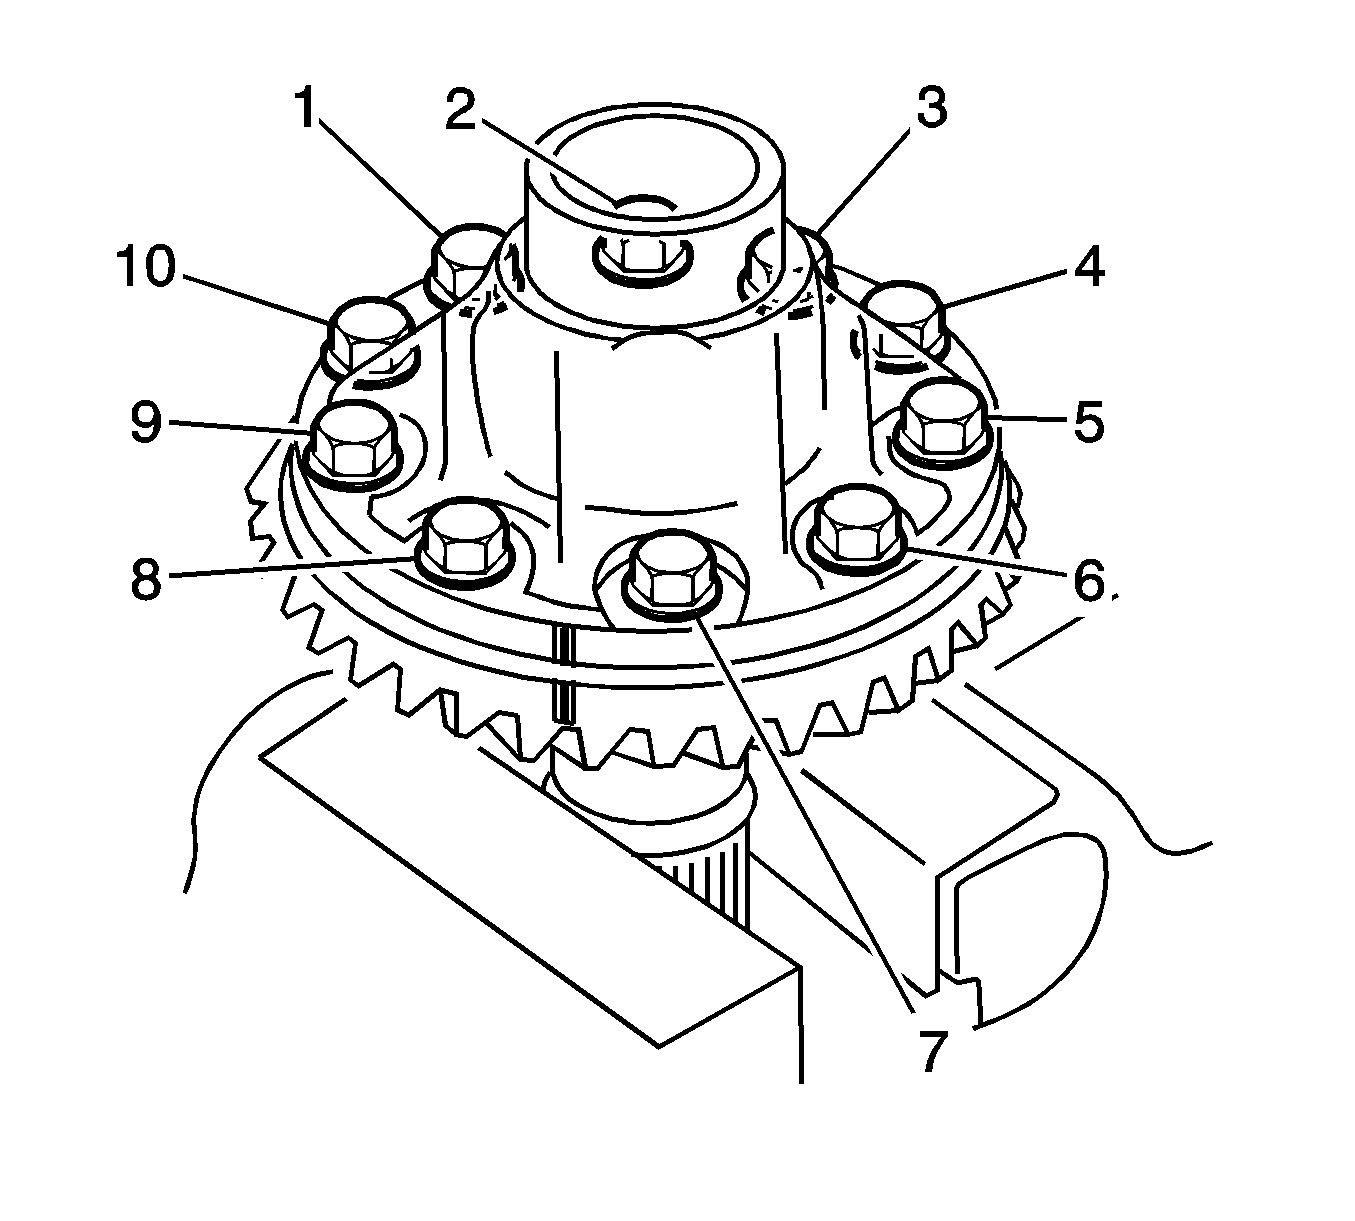
- Put matchmarks on the transfer ring gear mounting case and ring gear.
- Remove the bolts (1-10).
- Using a plastic hammer, tap on the ring gear to separate it from the transfer ring gear mounting case.
- Inspect the transfer ring gear mounting case.
- Using a brass bar and a hammer, tap the 2 positions on the driven pinion rear bearing (outer race) before removing it from the transfer case.
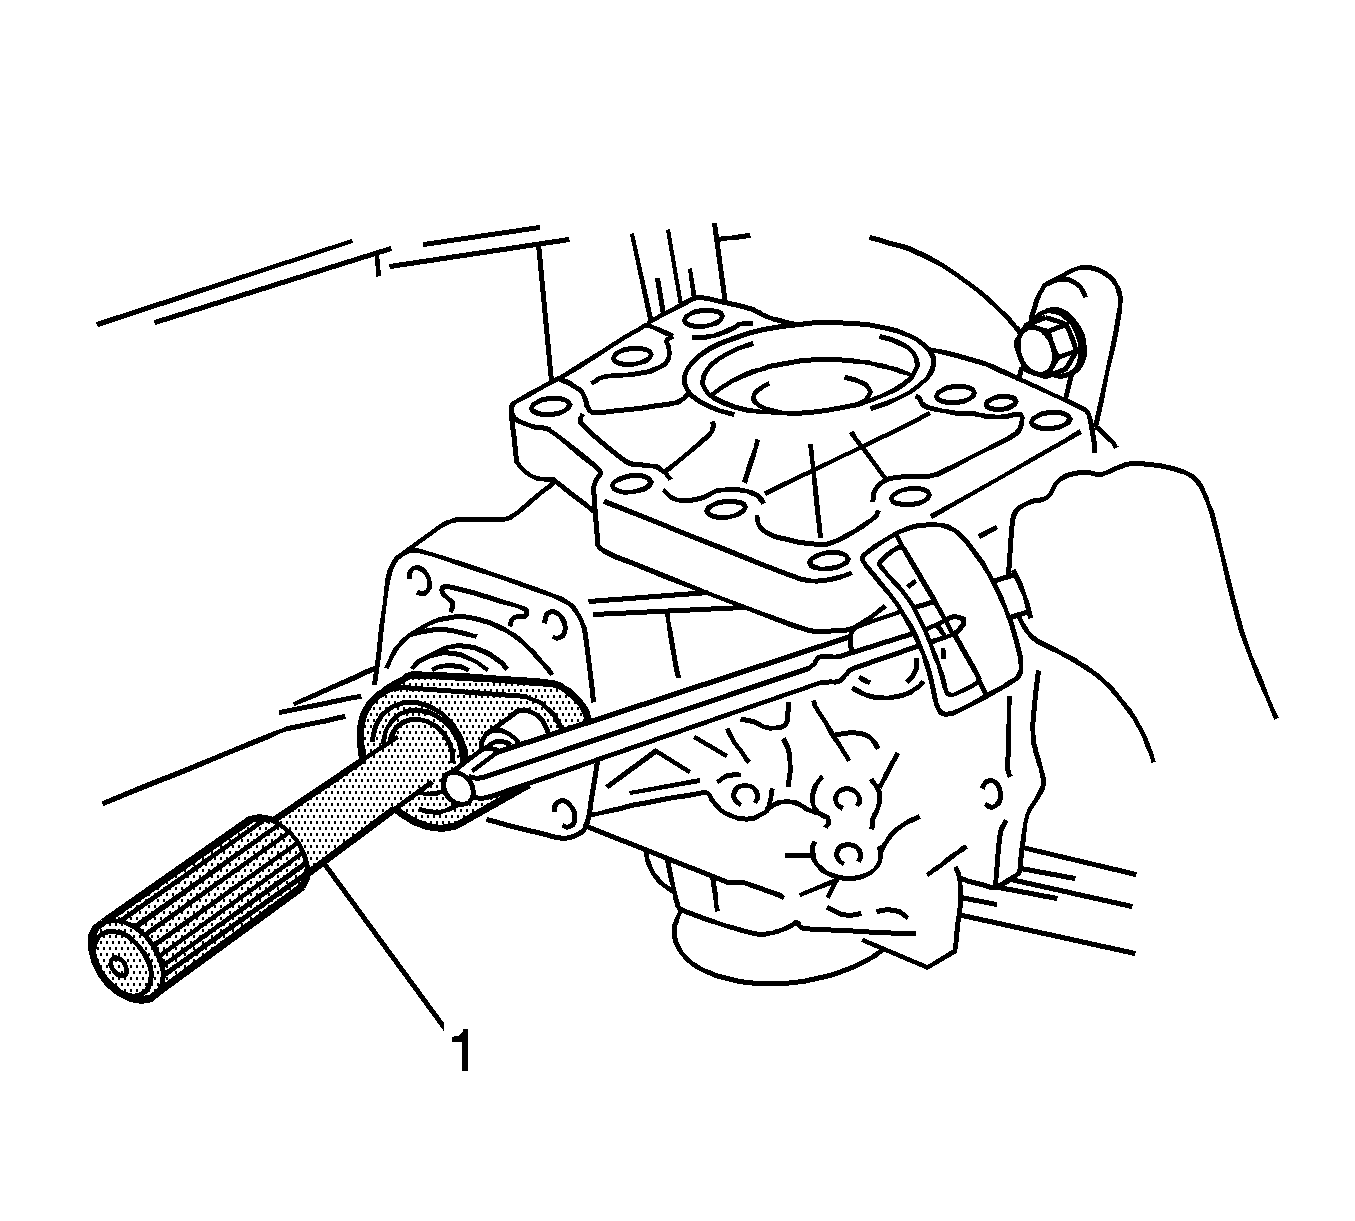
- Using J-46003 wrench and a torque wrench, measure the preload of the backlash between the driven pinion (1) and ring gear.
- Use a torque wrench with a fulcrum length of 130 mm (5.12 in)
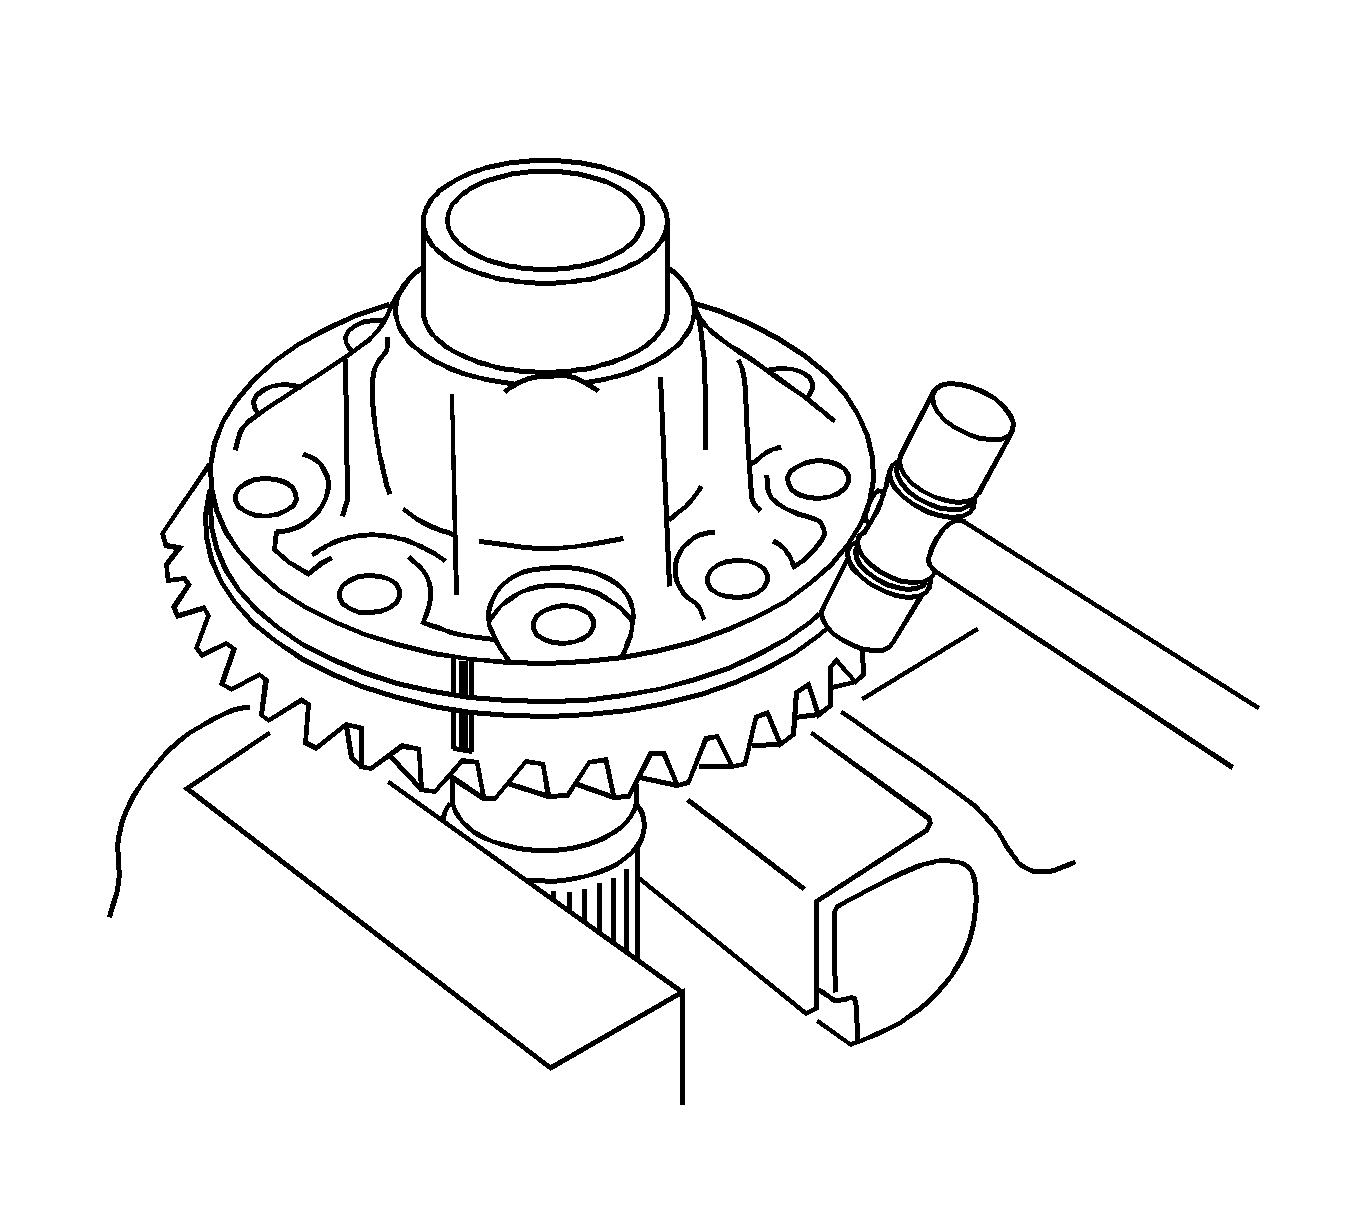
- Using J-46003 wrench and a torque wrench, measure the total preload.
- Use a torque wrench with a fulcrum length of 130 mm (5.12 in)
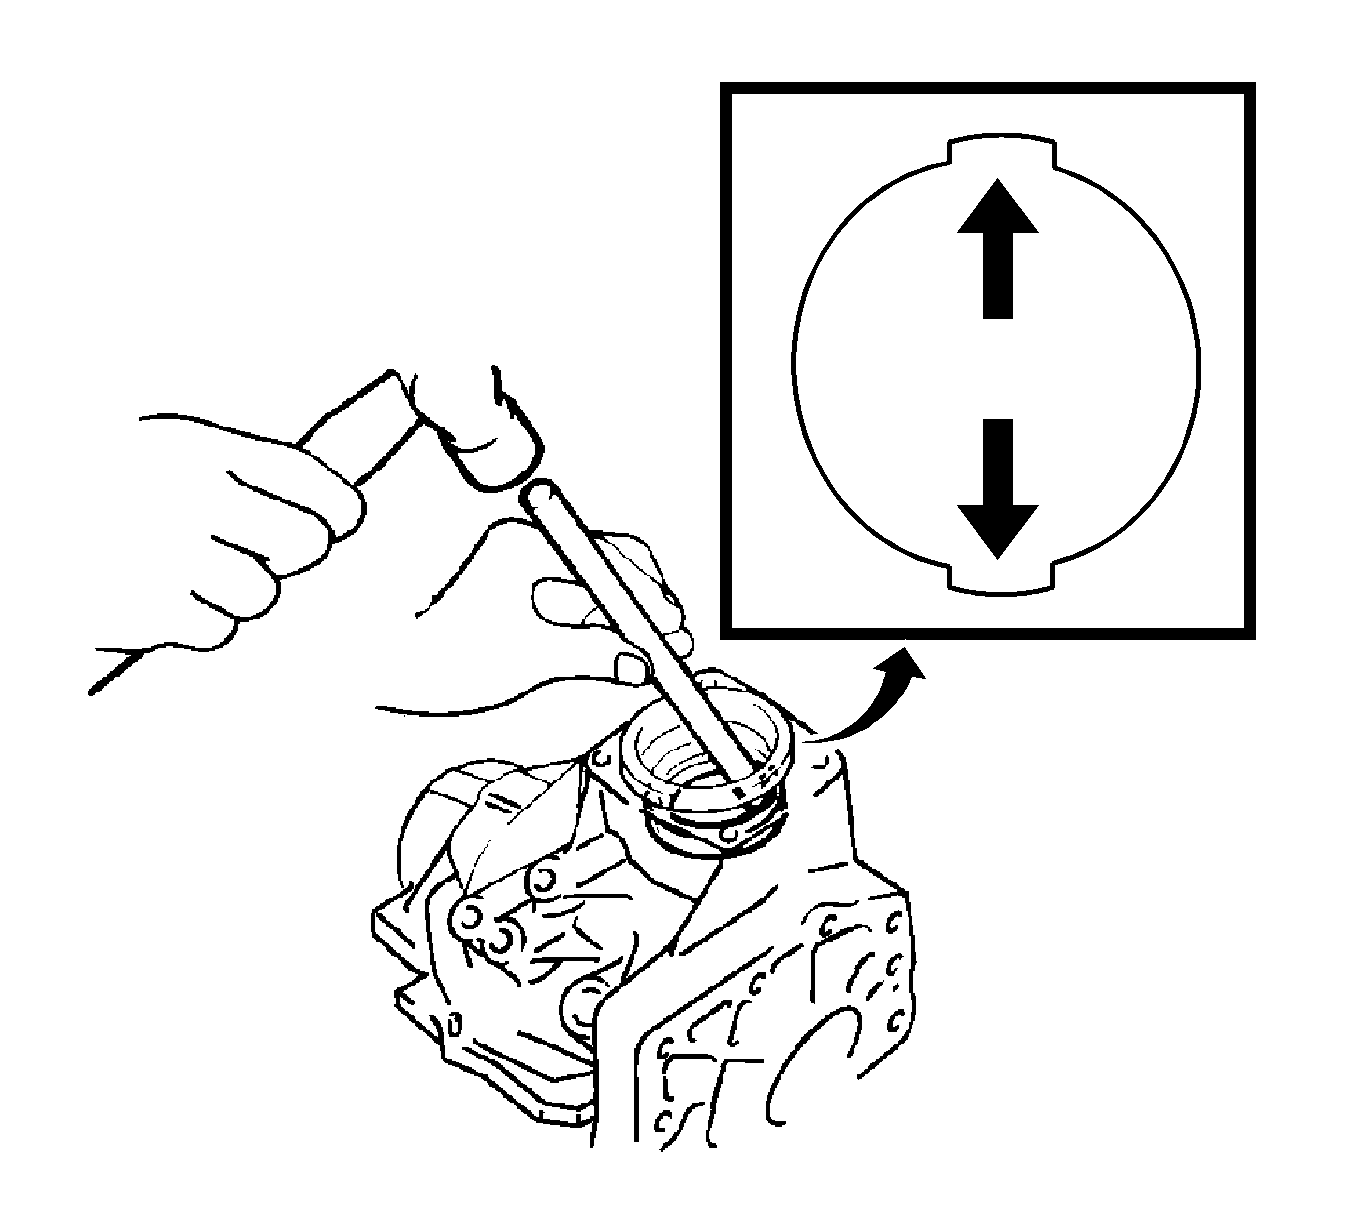
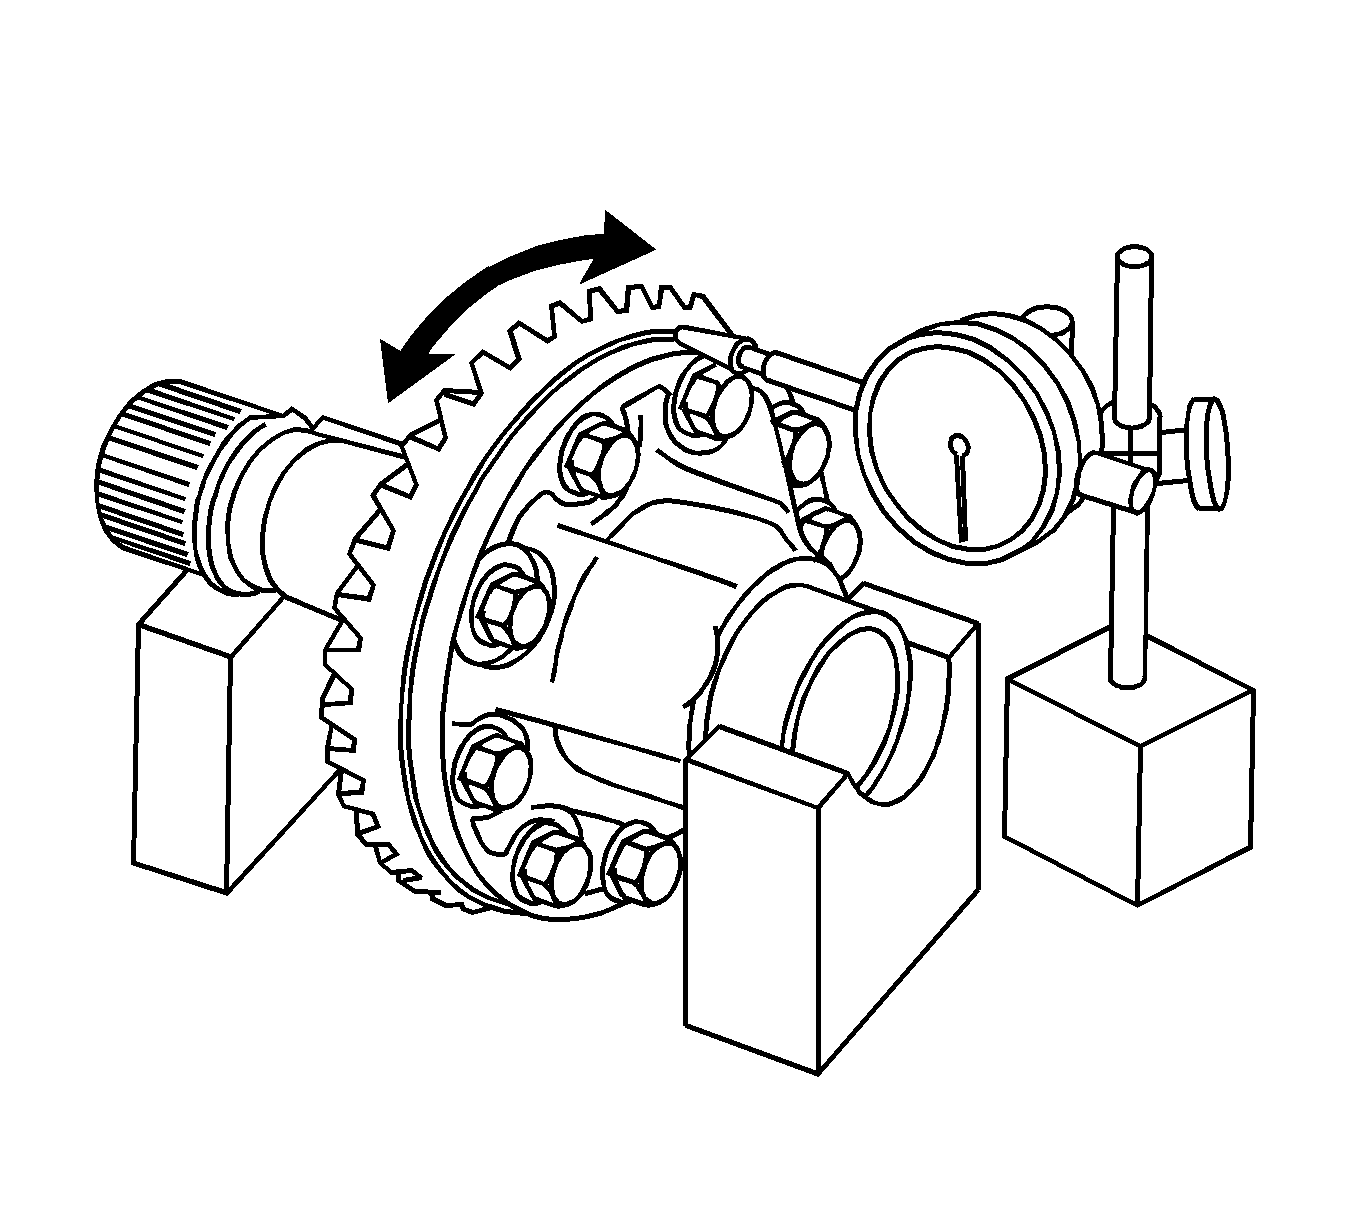
- Using a dial gauge, check the backlash of the ring gear.
- If the backlash is not within the specification, adjust the side bearing preload or repair as necessary.
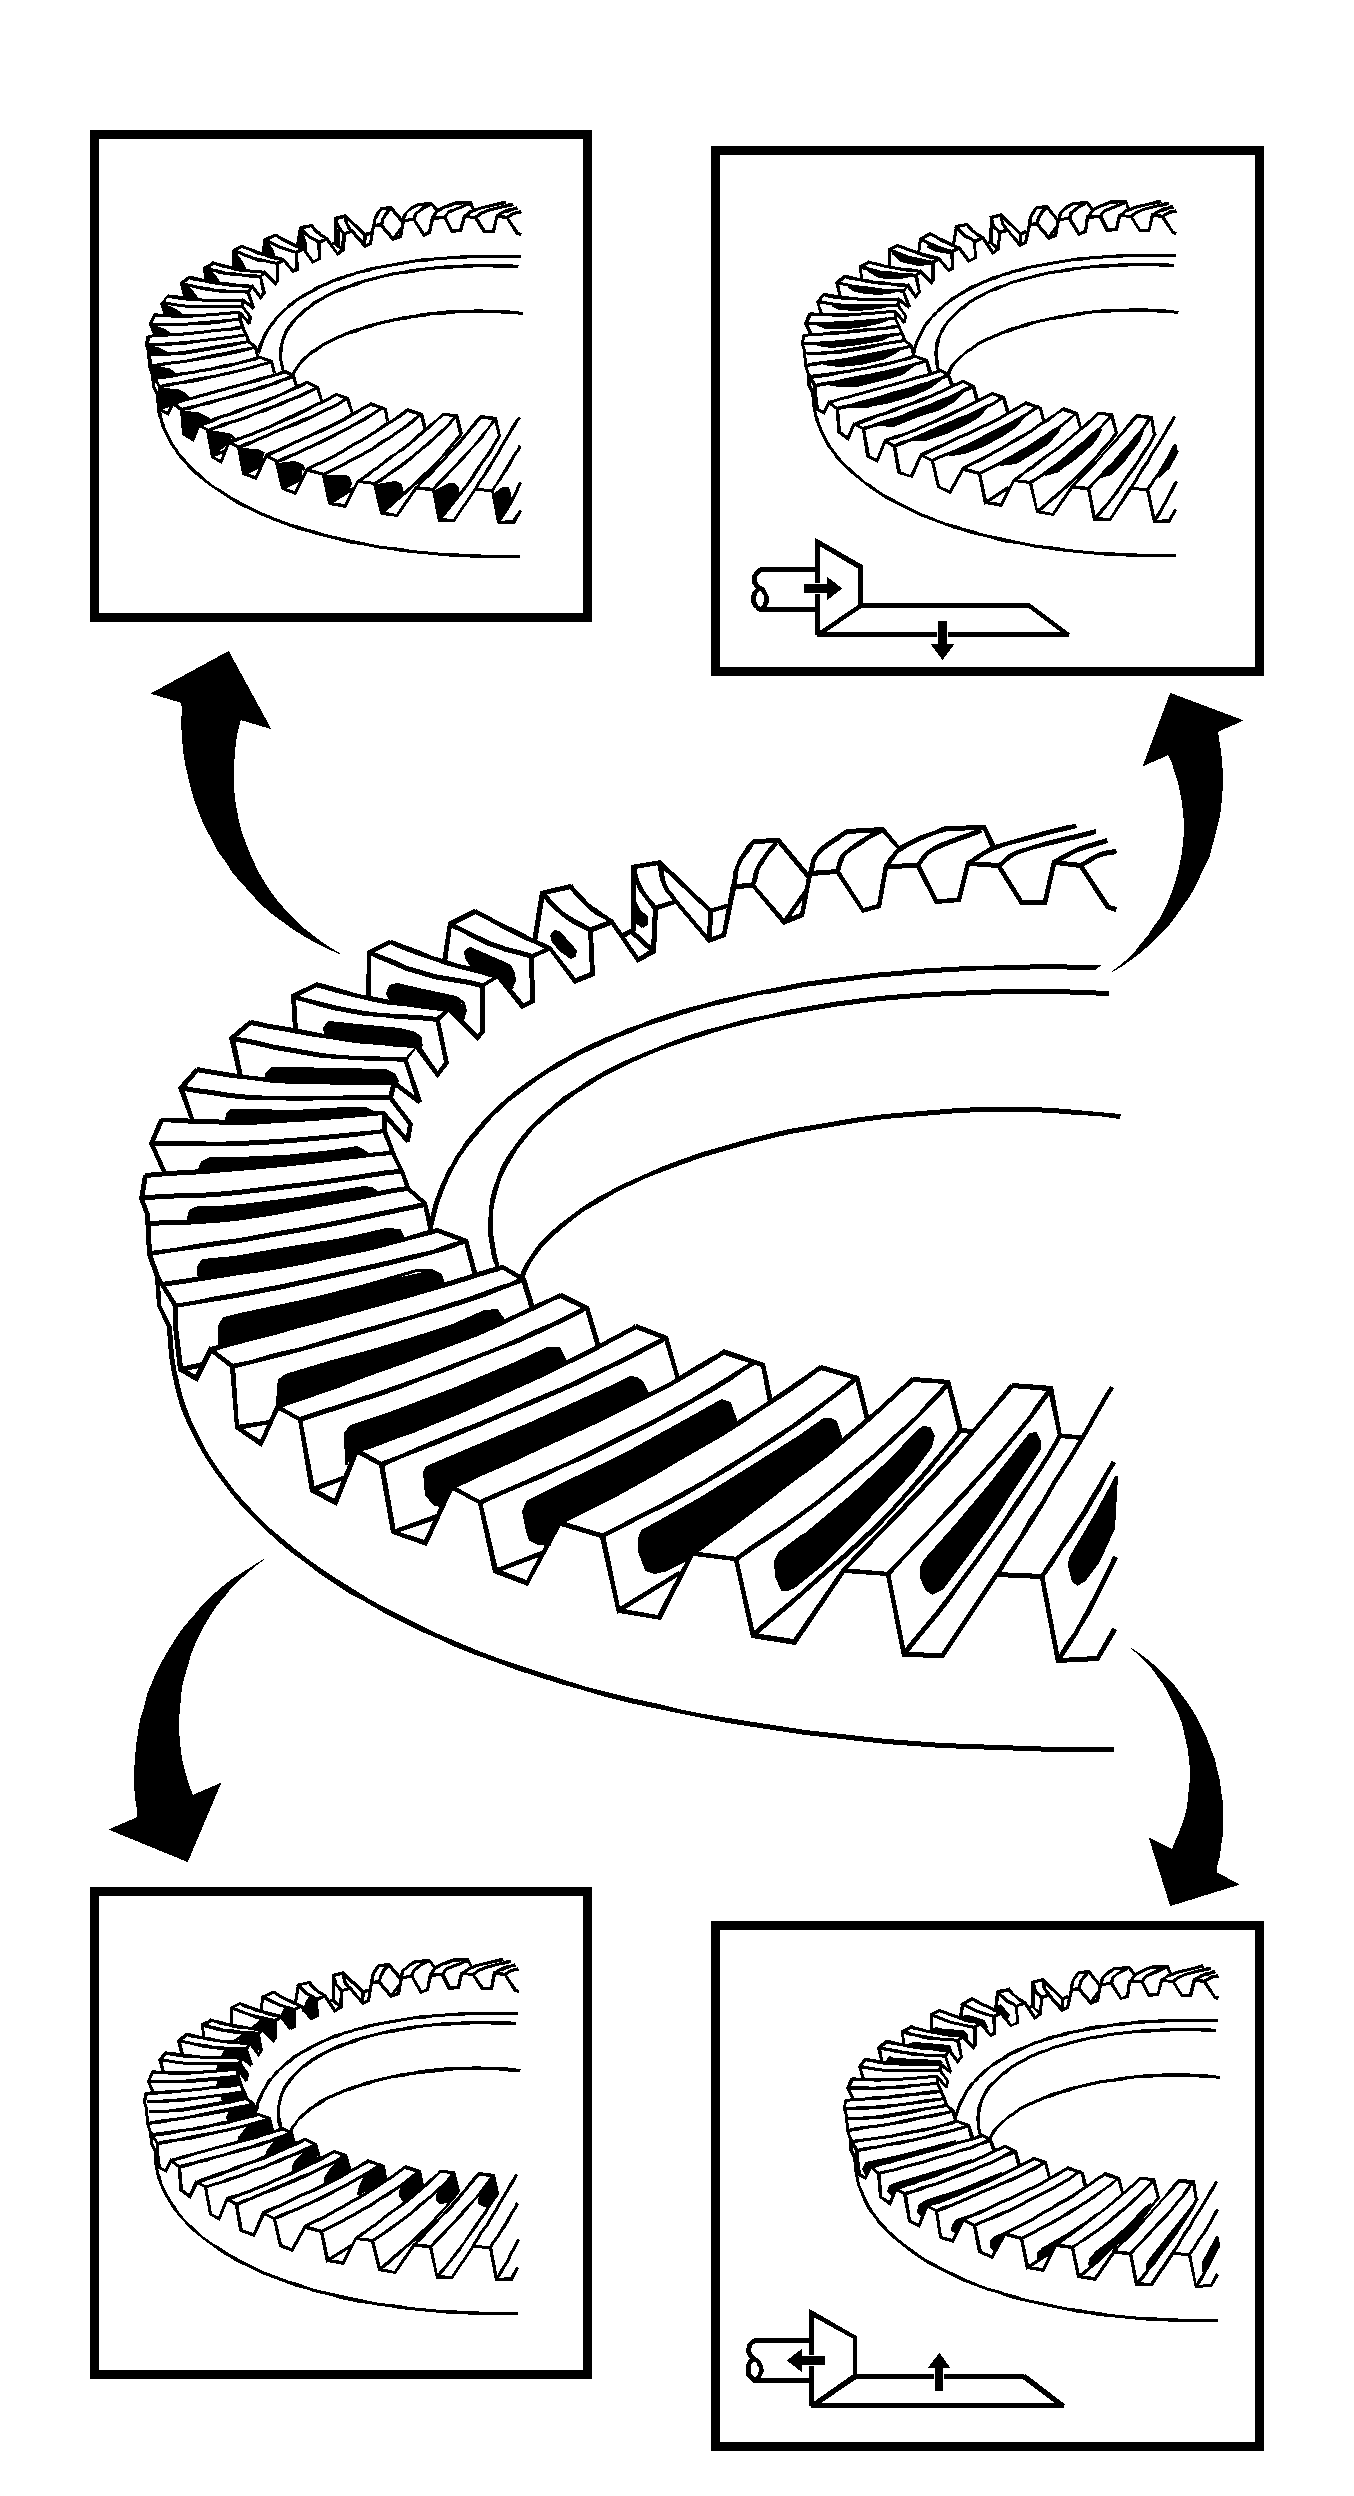
- Inspect the tooth contact between the ring gear and drive pinion.
- Coat 3 or 4 teeth at the 4 different positions on the ring gear with red lead.
- Rotate the ring gear to inspect the tooth pattern.
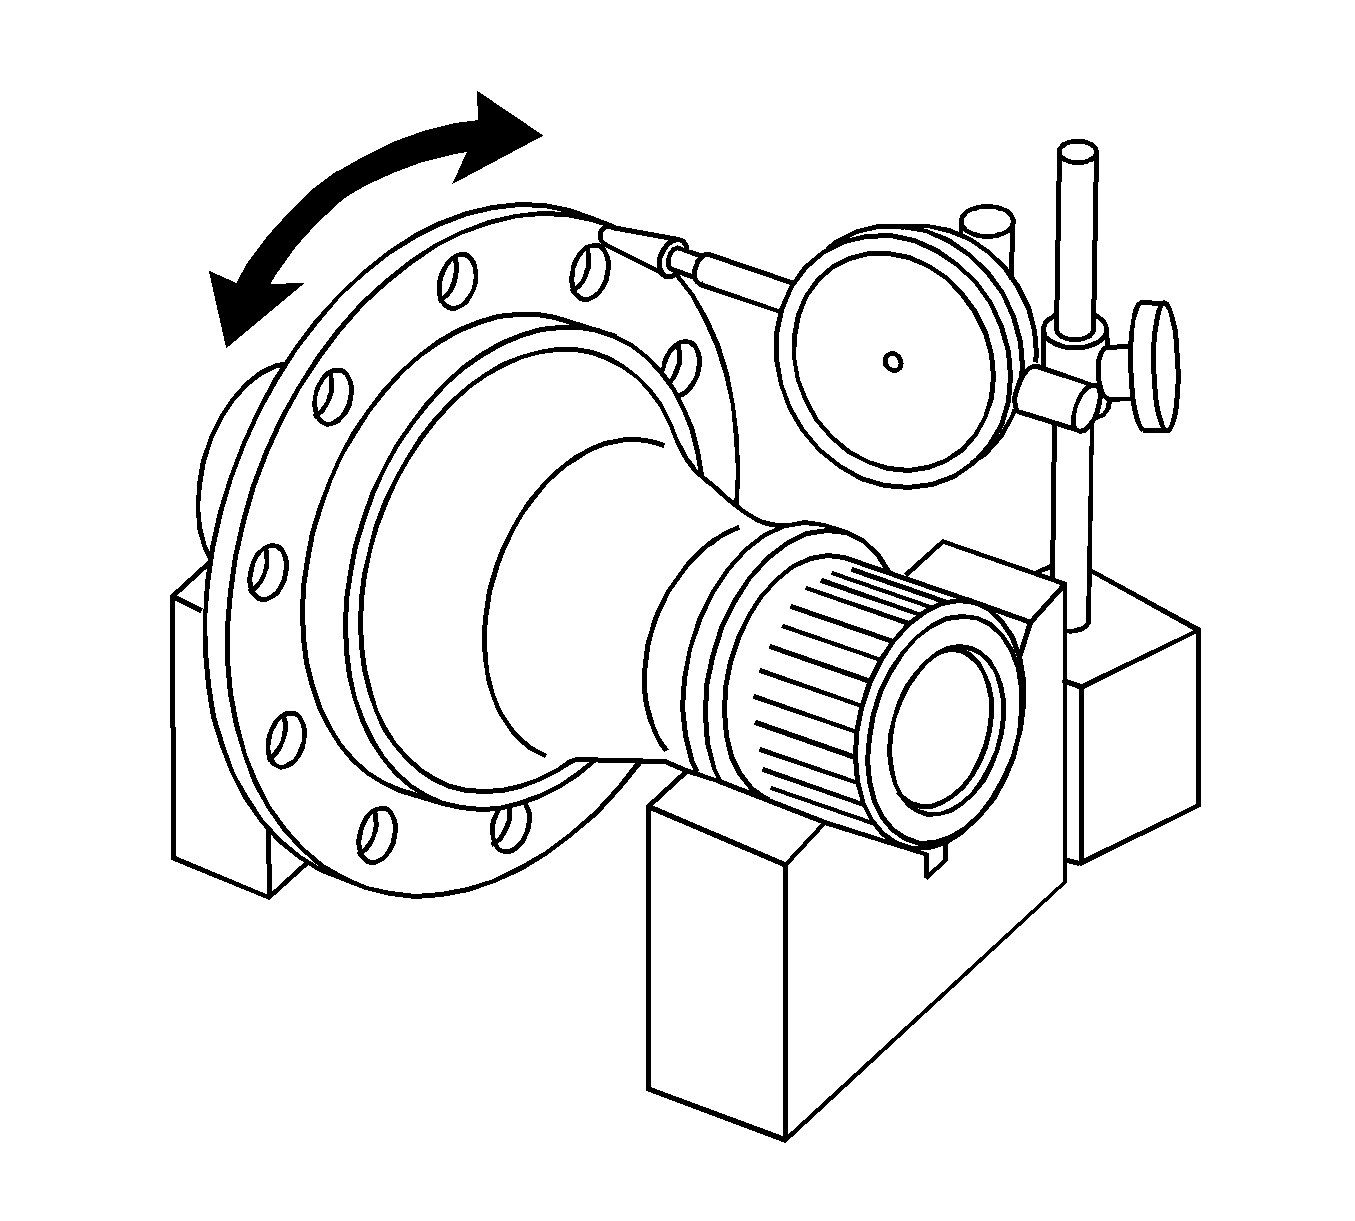
- Inspect the runout of the ring gear.
- Inspect the transfer ring gear mounting case.

Note: Place the brass bar on the rib part of the case.

Preload (at Starting)
| • | 0.39-0.69 N·m (3.5-6.1 lb in) |
| • | 0.28-0.50 N·m (2.5-4.4 lb in) |
Note: Place the brass bar at the 2 positions of the cutouts on the case.
Note: Place the brass bar at the 2 positions of the cutouts on the case.
Note: Do not damage the tooth surface of the ring gear.
Note: Place the brass bar at the 2 positions of the cutouts on the case.
Preload (at Starting)
| • | 0.39-0.69 N·m (3.5-6.1 lb in) |
| • | 0.28-0.50 N·m (2.5-4.4 lb in) |
Preload (at Starting)
| • | 0.25-0.44 N·m (2.2-3.9 lb in) |
| • | 0.18-0.32 N·m (1.6-2.8 lb in) |
Note: Check at least 3 positions on the circumference of the ring gear.
Specification
Backlash: 0.10-0.18 mm (0.0039-0.007 in)
| • | Place the transfer ring gear mounting case on the V-block. |
| • | Using a dial gauge, check the runout of the ring gear. |
Specification
Maximum runout: 0.06 mm (0.0024 in)
| • | Place the transfer ring gear mounting case on the V-block. |
| • | Using a dial gauge, check the runout of the ring gear. |
Specification
Maximum runout: 0.04 mm (0.0016 in)
