
Note:
| • | Install the input gear seal after the transfer case is assembled. |
| • | Do not cock the bearing when installing. Ensure to squarely install the bearing in the bore. |
- Using a suitable bearing installer, install the rear output shaft bearing. Ensure the bearing installer is used against the outer race of the bearing.

- Using the driver of the
J 36371 Installer
, install the front output shaft rear bearing into the rear case half.

- Using the
J 8092 Handle
(1) and the
J 45239 Installer
(2), install the control actuator lever shaft bearing until it bottoms in the bore. The
seal side of the bearing faces the encoder motor.
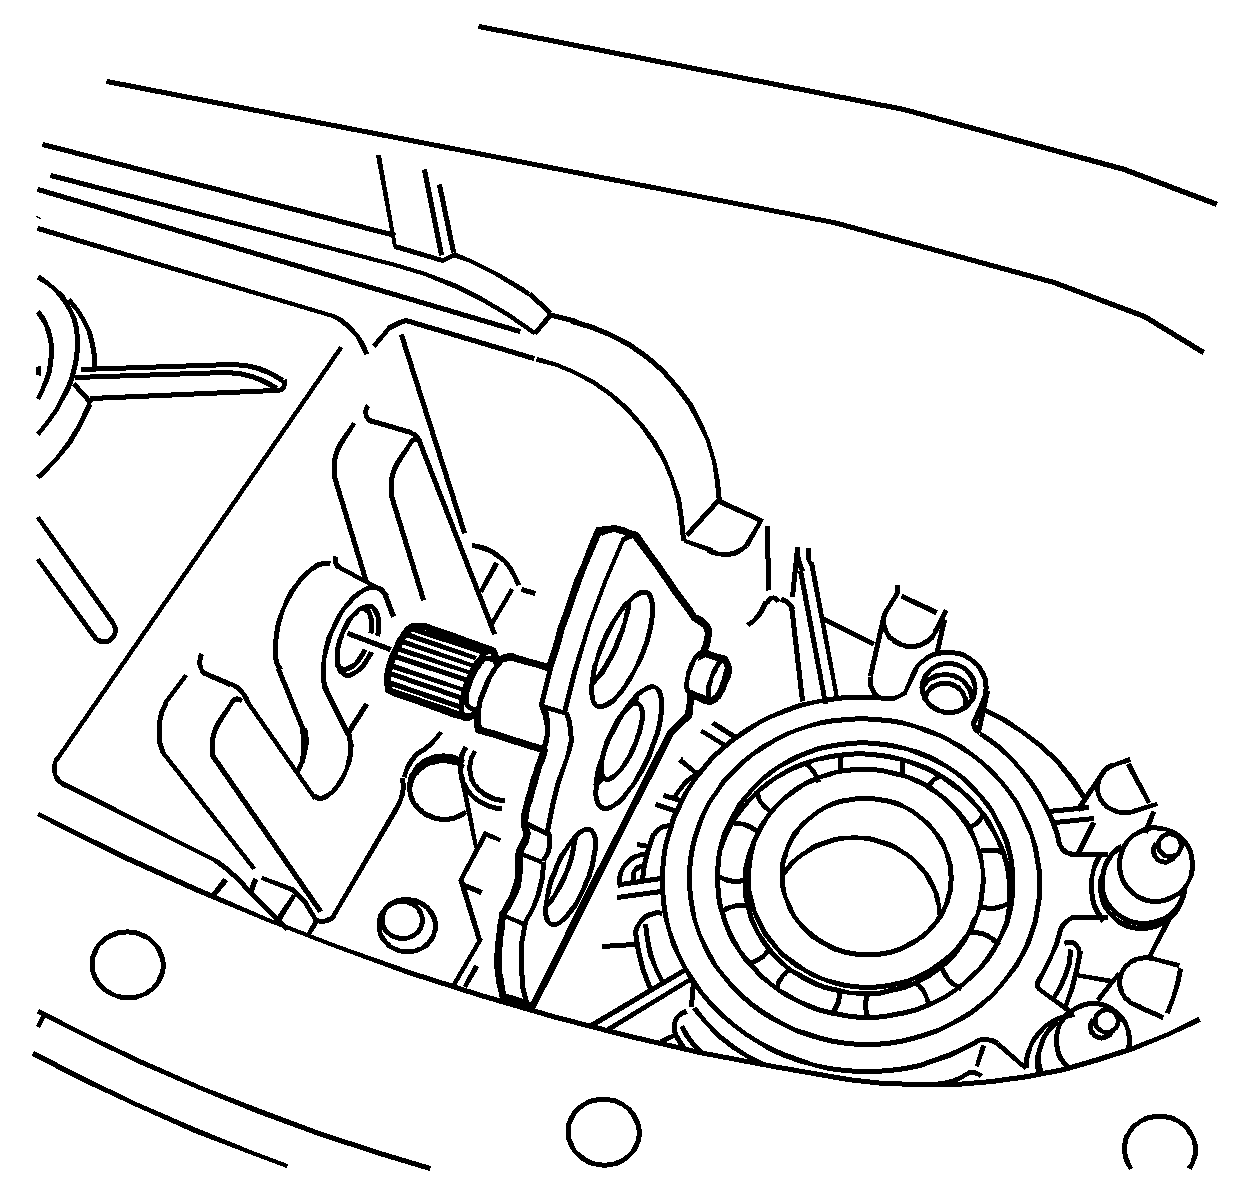
- Install the control actuator lever shaft in the rear
case half.
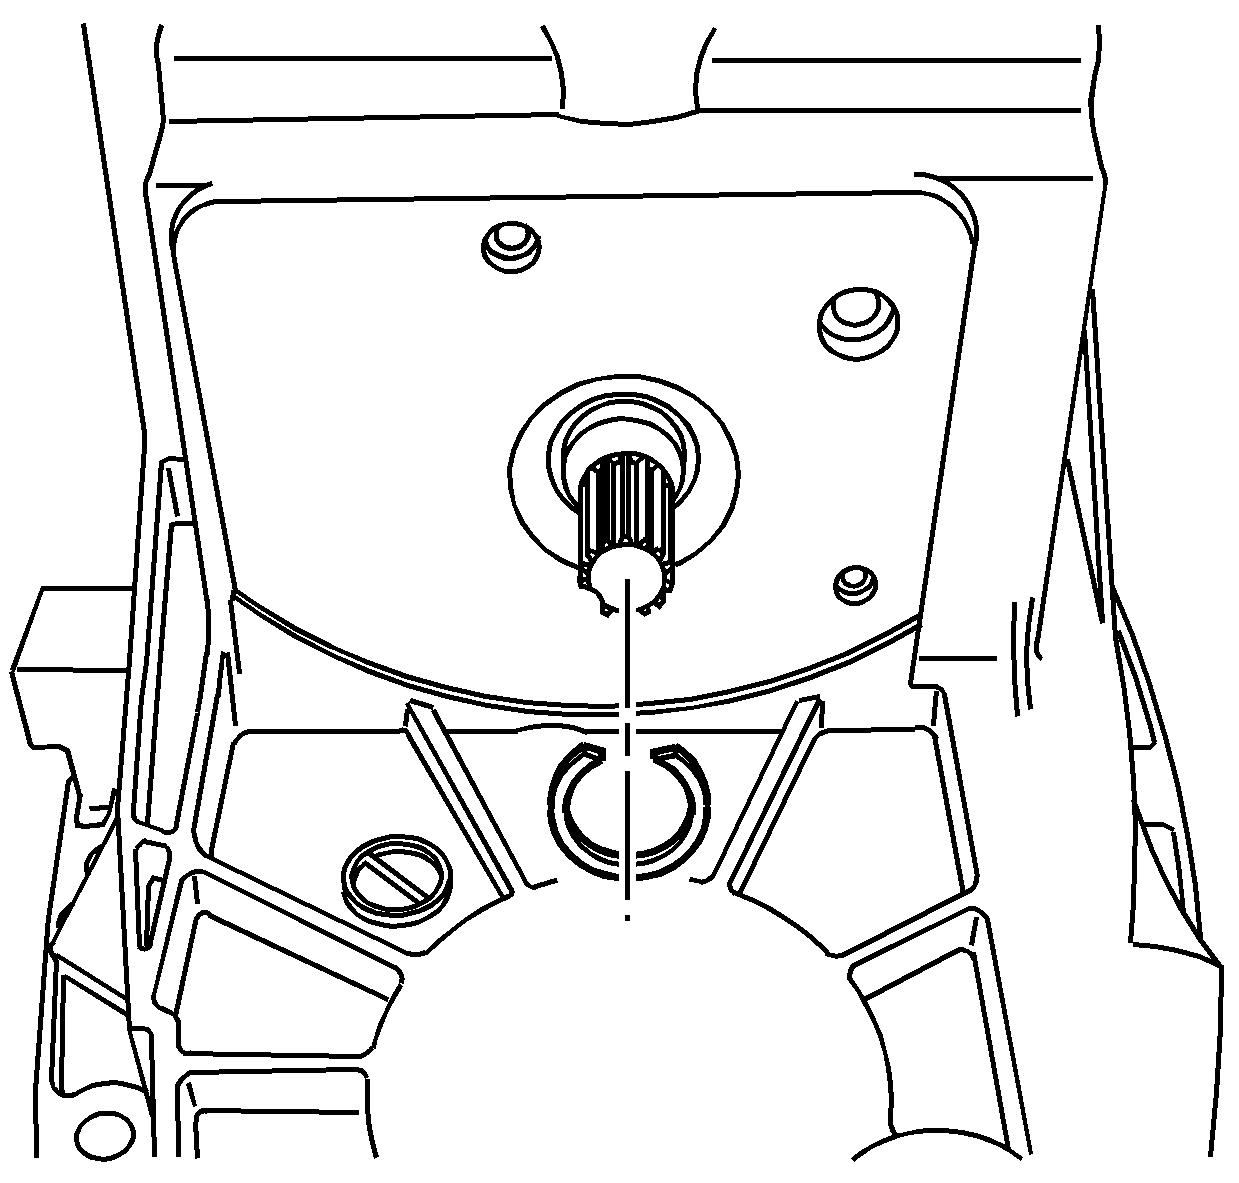
- Install a new control actuator lever
shaft retaining ring.

- Install the oil pump screen and oil pump hose to the oil pump suction pipe.
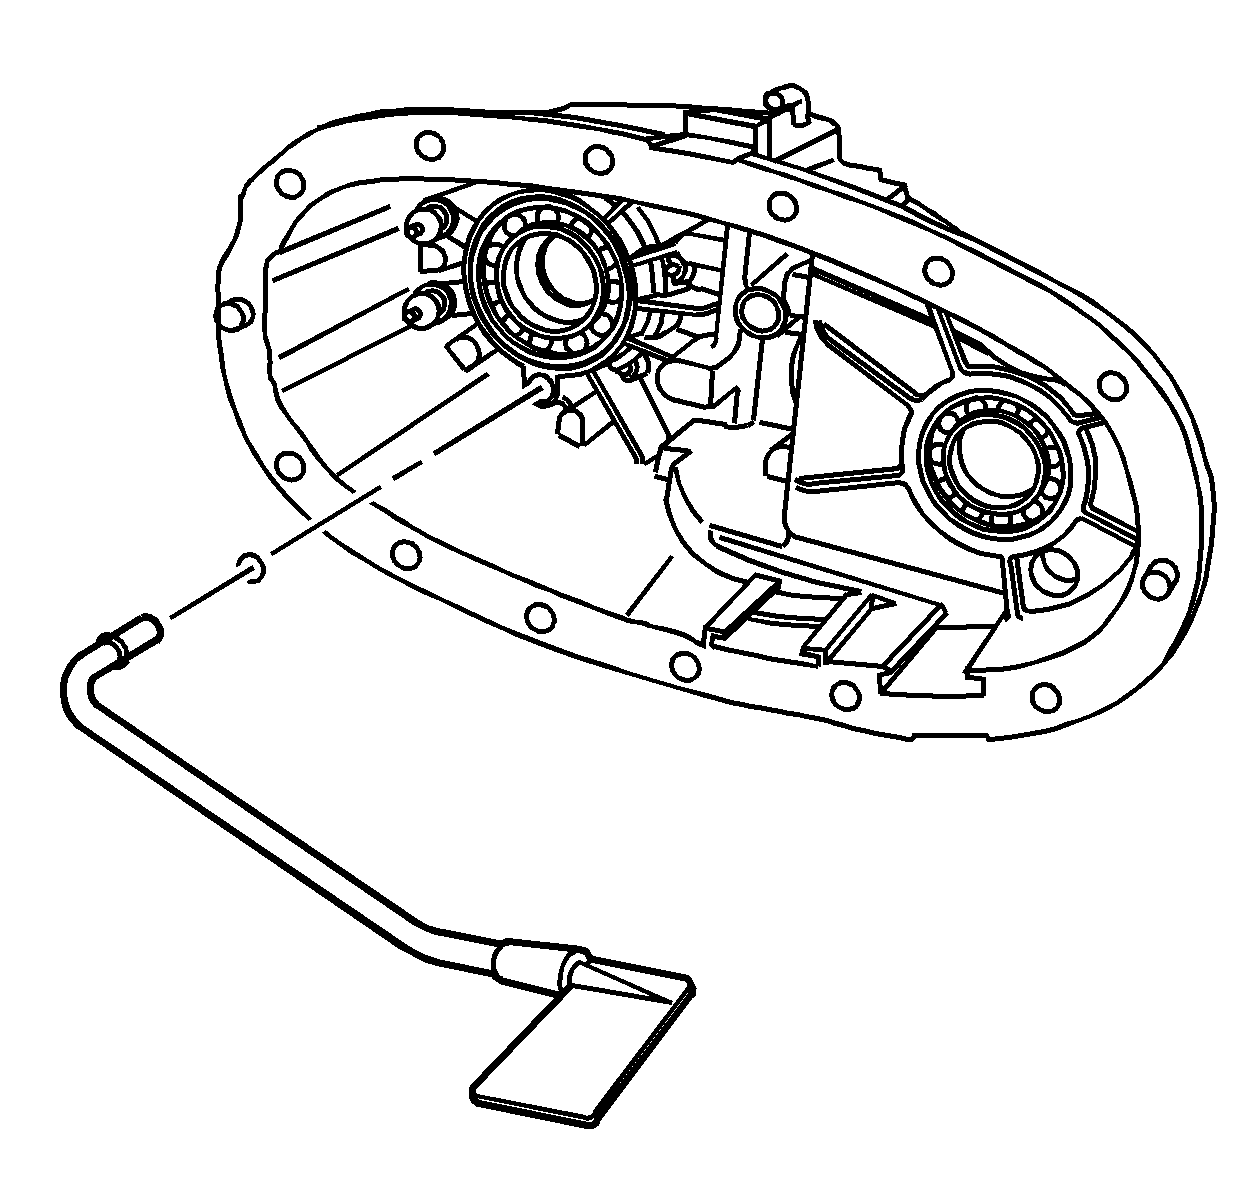
- Install a new O-ring seal onto the oil pump suction pipe.
- Lightly lubricate the O-ring seal with transfer case oil.
- Install the oil pump suction pipe assembly in the rear case half. Ensure the oil pump suction pipe is fully seated.
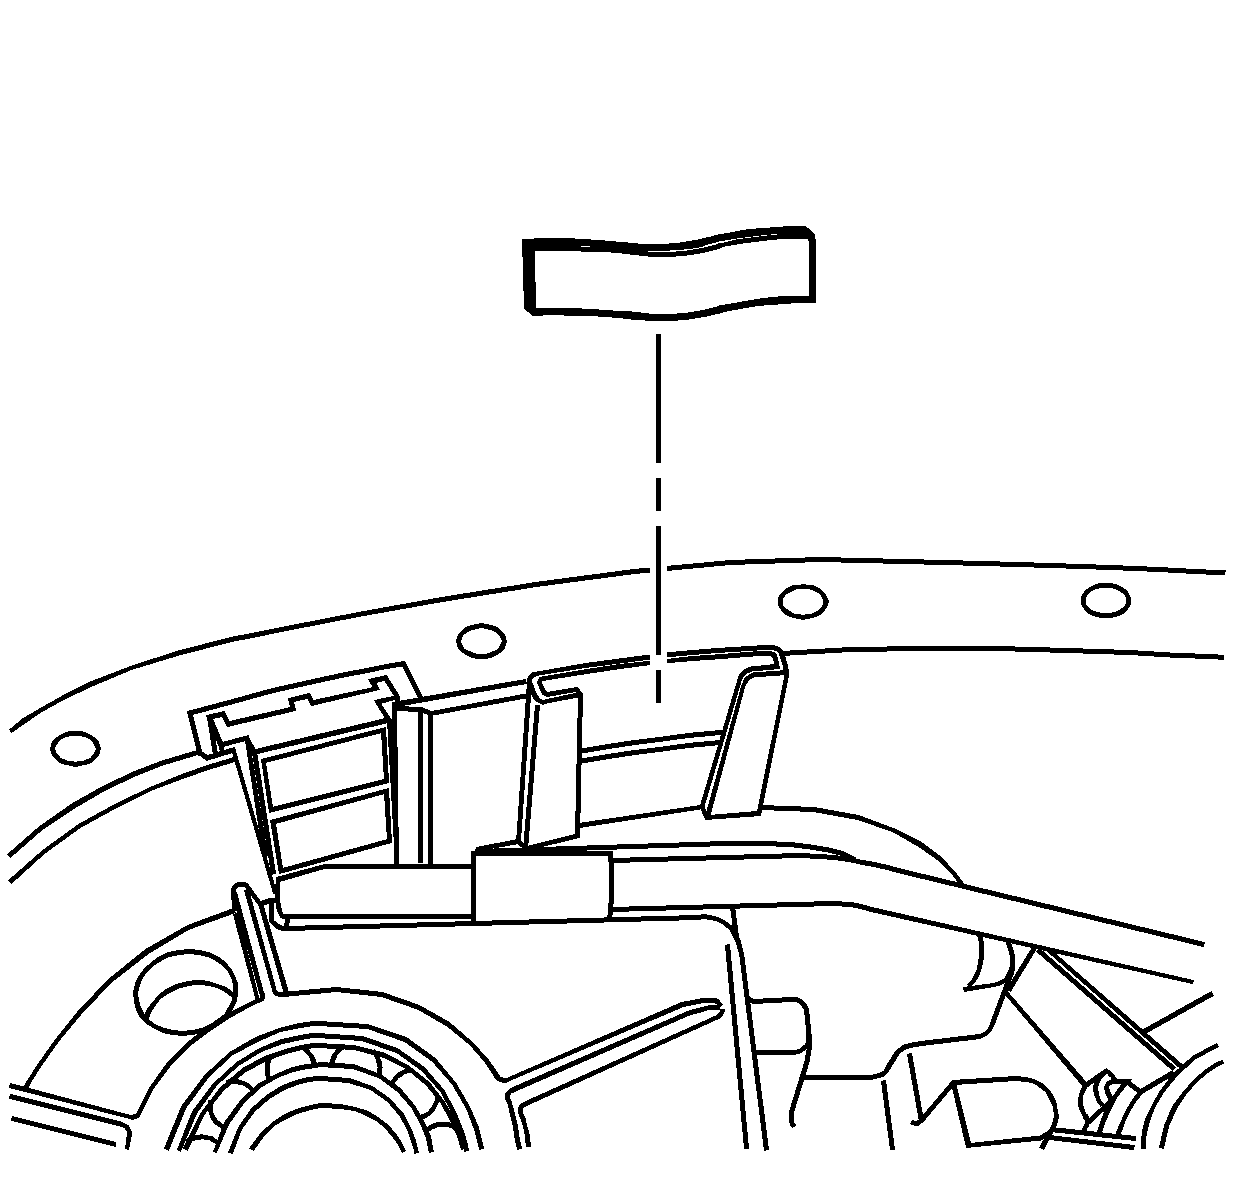
- Install the chip collector magnet in the rear case half.
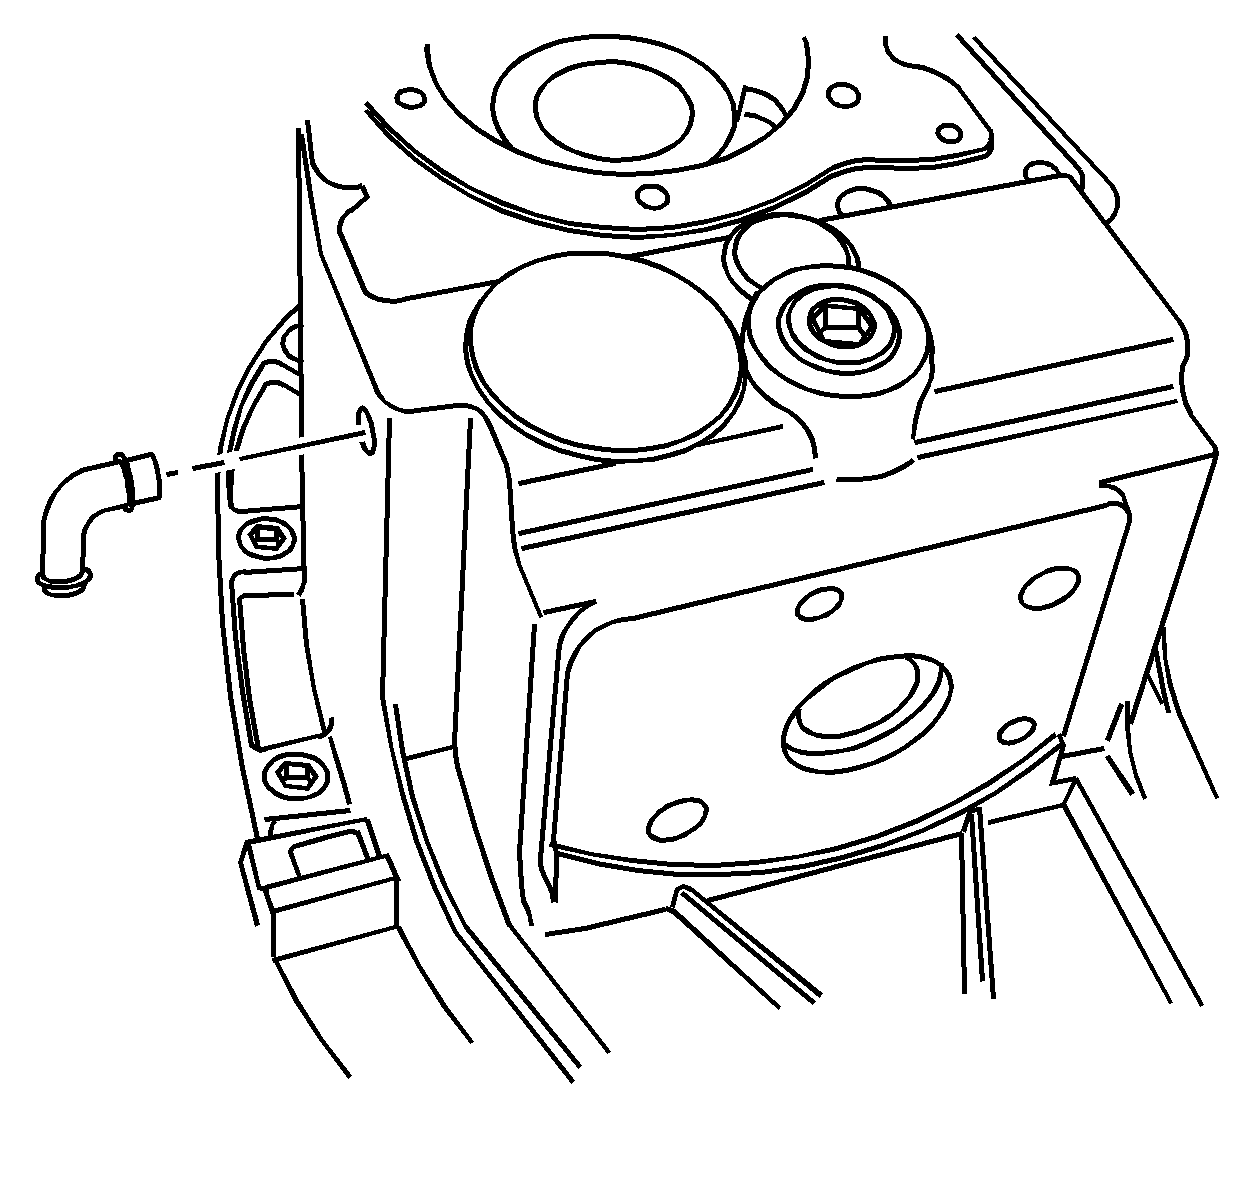
- Apply a thin layer of retaining compound GM P/N 12377901 (Canadian P/N 10953504)
or equivalent to the vent, if removed.
- Tap the vent into the case. Ensure the vent is aligned in the direction shown.

Note: Install the front output shaft seal after the transfer case is assembled.
- Using the
J 36371 Installer
, install the front output shaft front bearing into the front case.

- Using a press, install the input gear
bearing into the front case.
| • | Ensure the press plates fit properly on the case. |
| • | Use a suitable press tool that fits to the bearing outer race. |

- If removed, install the input gear
thrust bearing into the input gear using the
J 8092 Handle
(1) and the
J 45237 Installer
(2).

- Using a press, press the input gear
assembly into the input gear bearing.
| 16.1. | Support the front case half on press plates to allow the input gear to protrude. |
| 16.2. | Support the inner race of the input gear bearing. |
| 16.3. | Use a suitable press plate on the end of the input gear. |
| 16.4. | Press on the input gear until fully seated against the input gear bearing. |
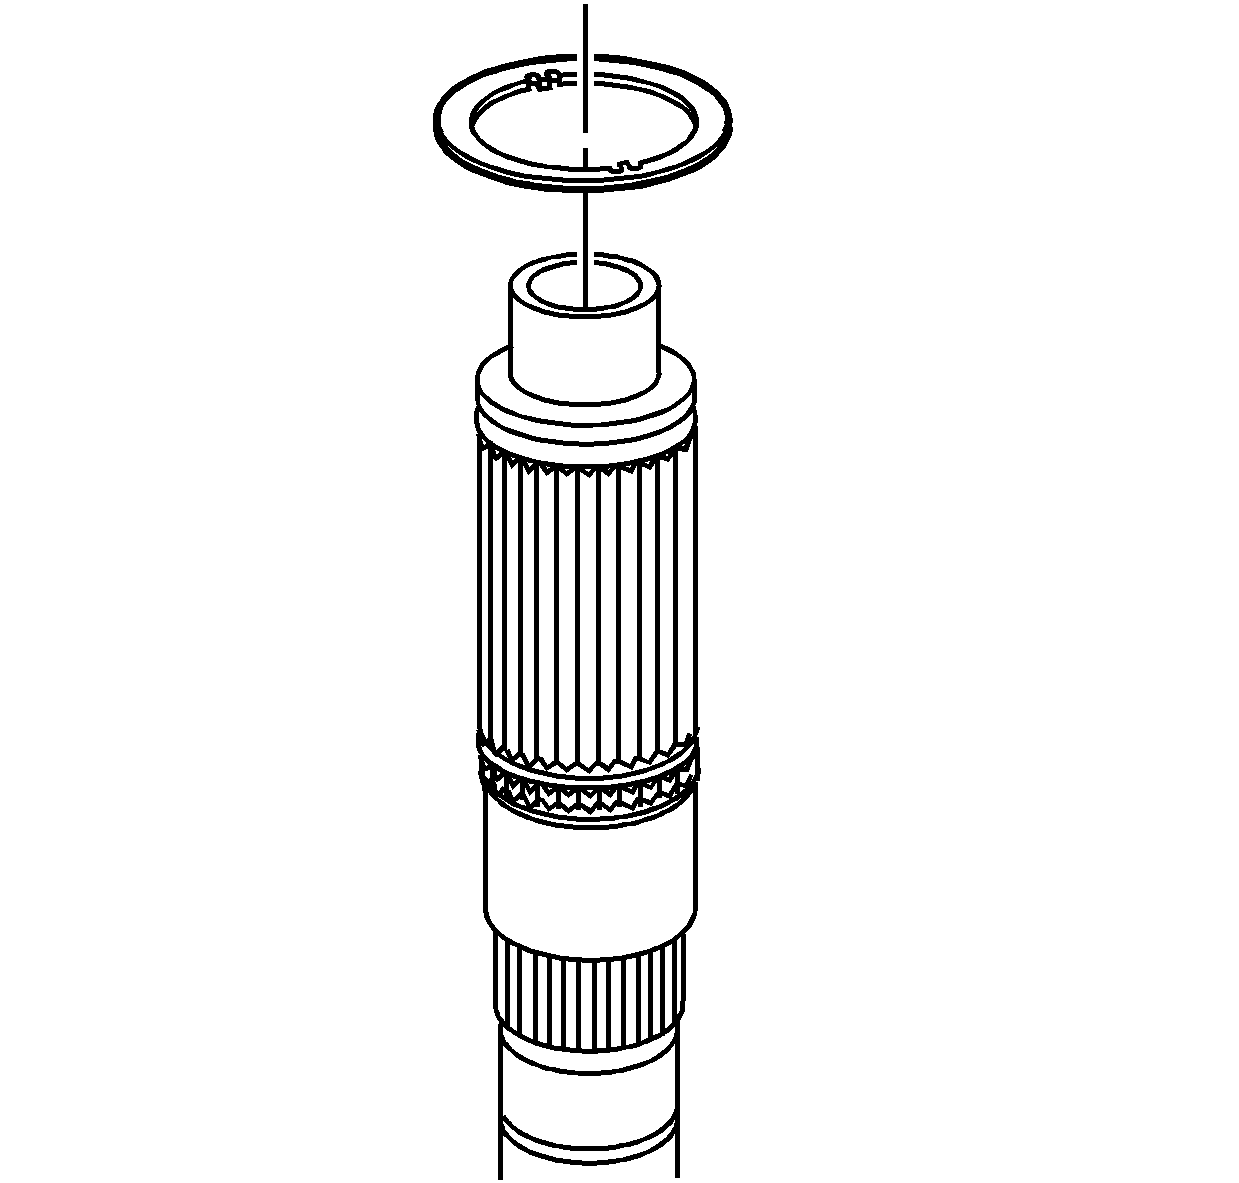
- Install the rear output shaft thrust washer. Align the tabs with the shaft splines.
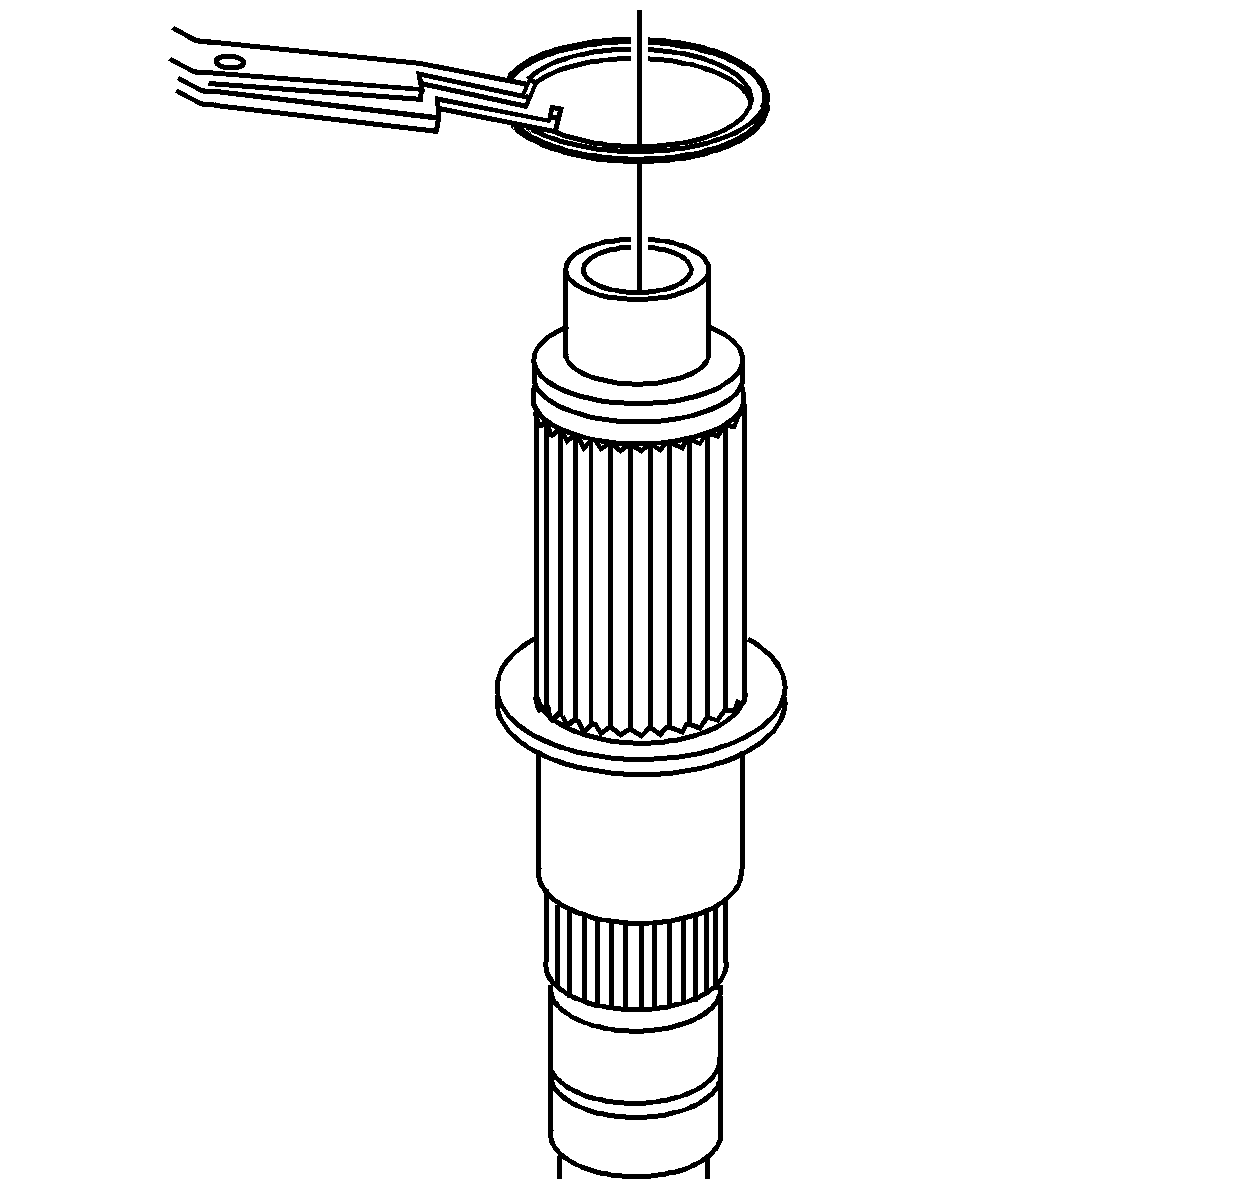
- Install a new retaining ring, for the clutch housing, on the rear output shaft. Ensure the retaining ring is properly installed in
the groove.
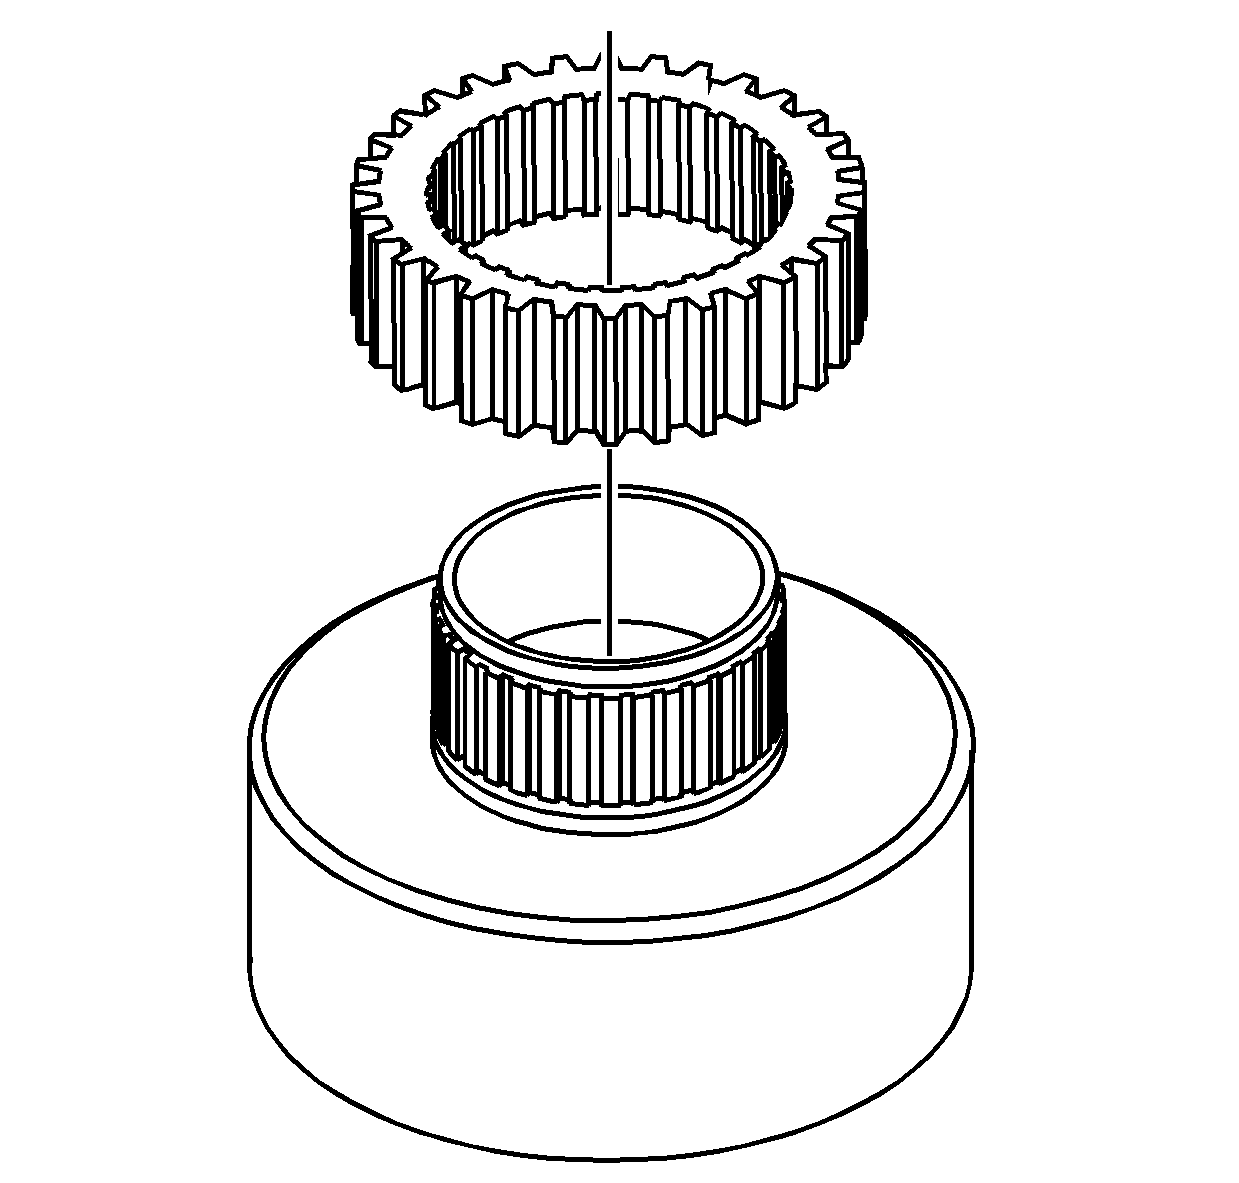
- Install the drive sprocket onto the clutch housing.
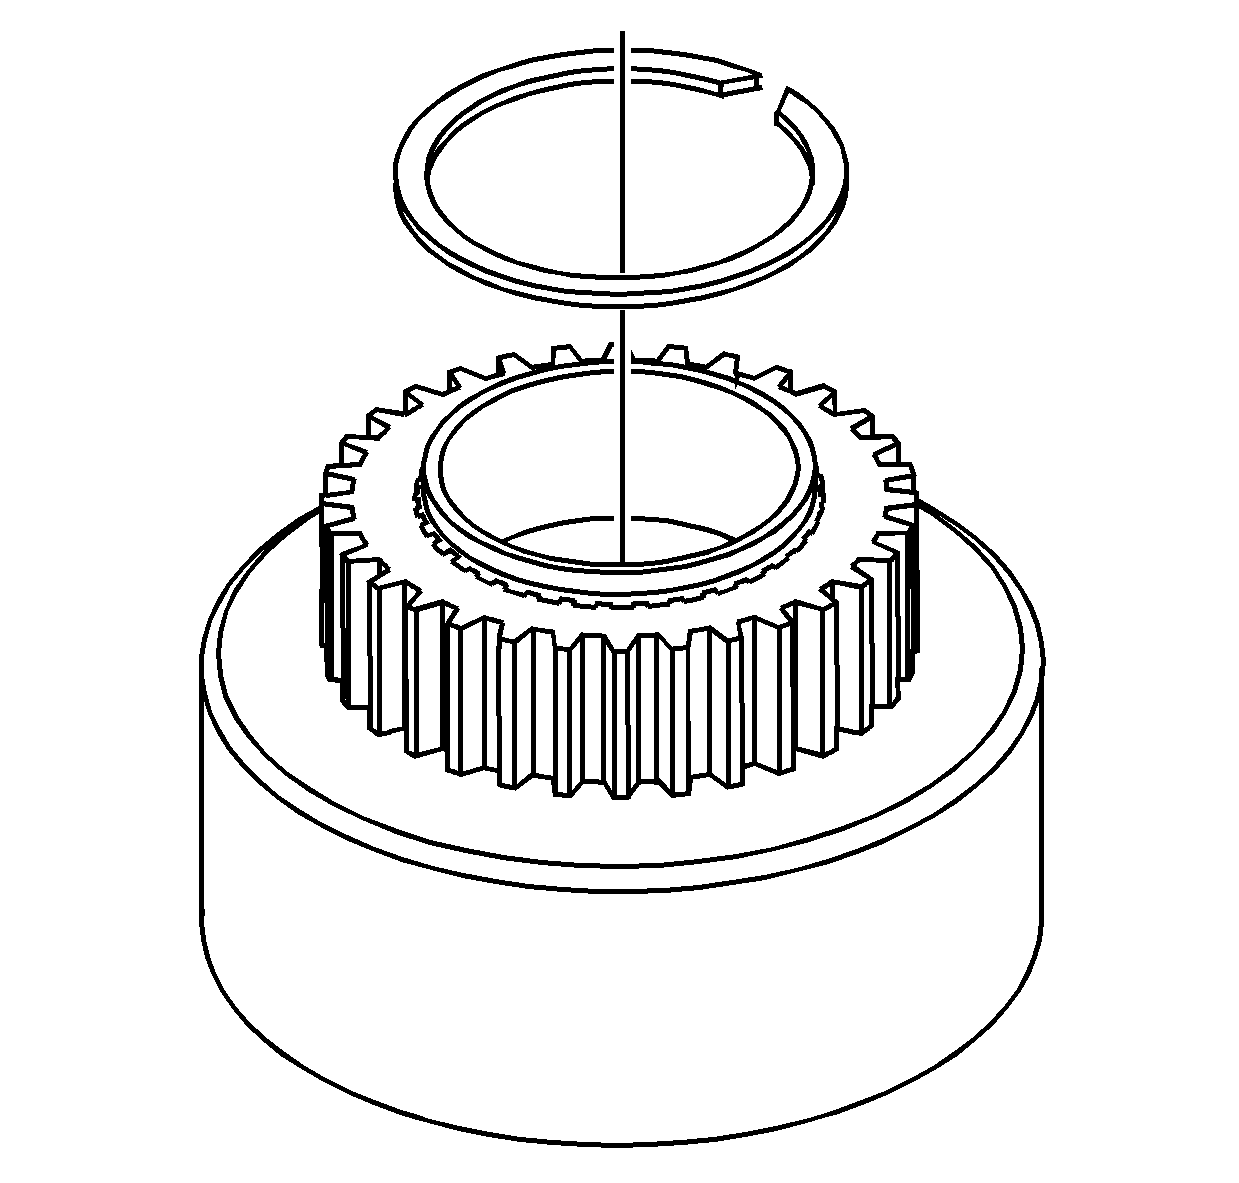
- Install a new retaining ring for the drive sprocket
on the clutch housing.
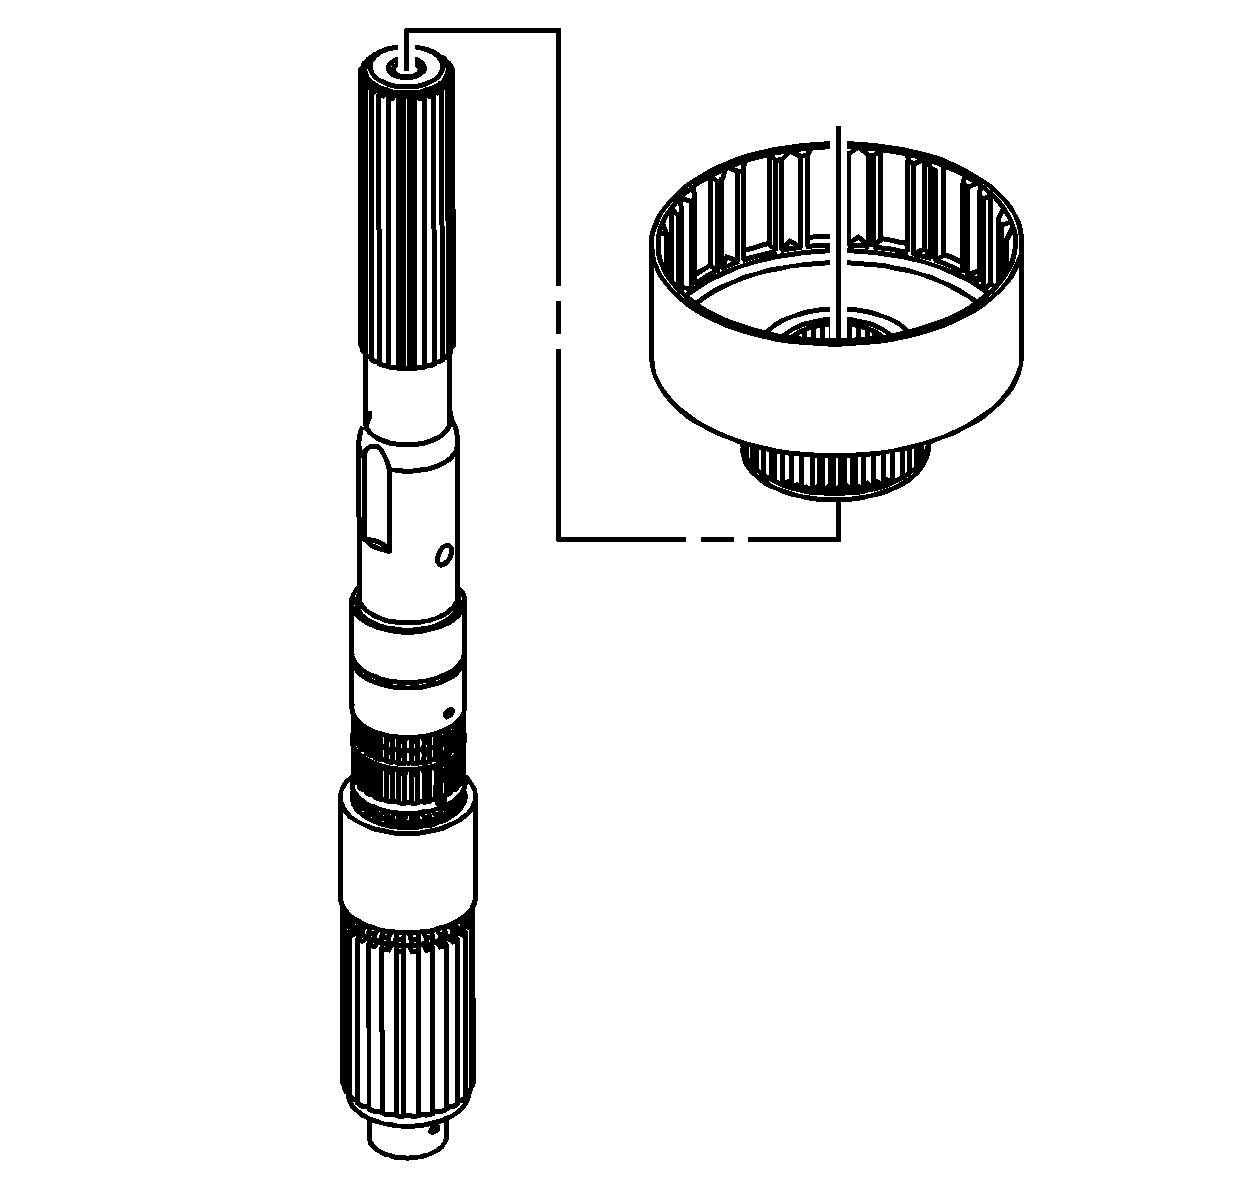
- Lightly lubricate the clutch housing inner bearing with transfer case fluid.
- Install the clutch housing onto the rear output shaft.

- Install the clutch hub into the clutch housing.

- With the friction material facing down, install an outer clutch disc into the
clutch housing.

- With the friction material facing down, install an inner clutch disc into the
clutch housing.
- Continue to install the outer clutch disc and inner clutch disc, alternating until 9 of each are installed.
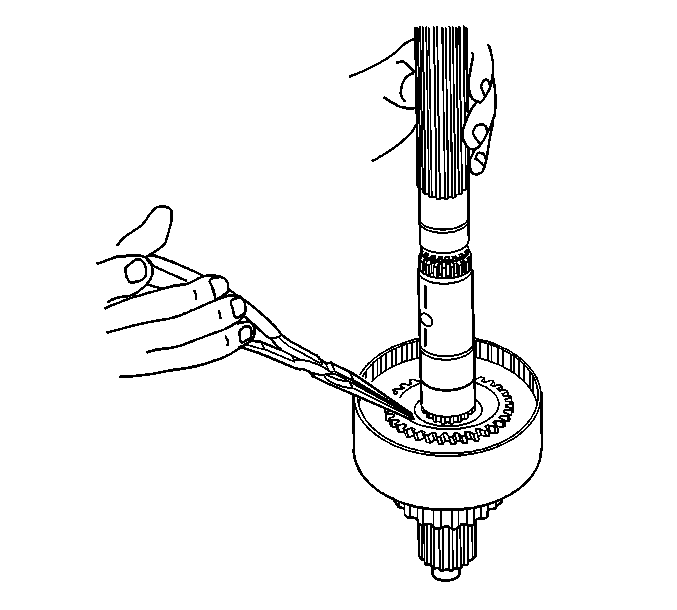
- Install a new clutch hub retaining ring onto the rear output shaft.
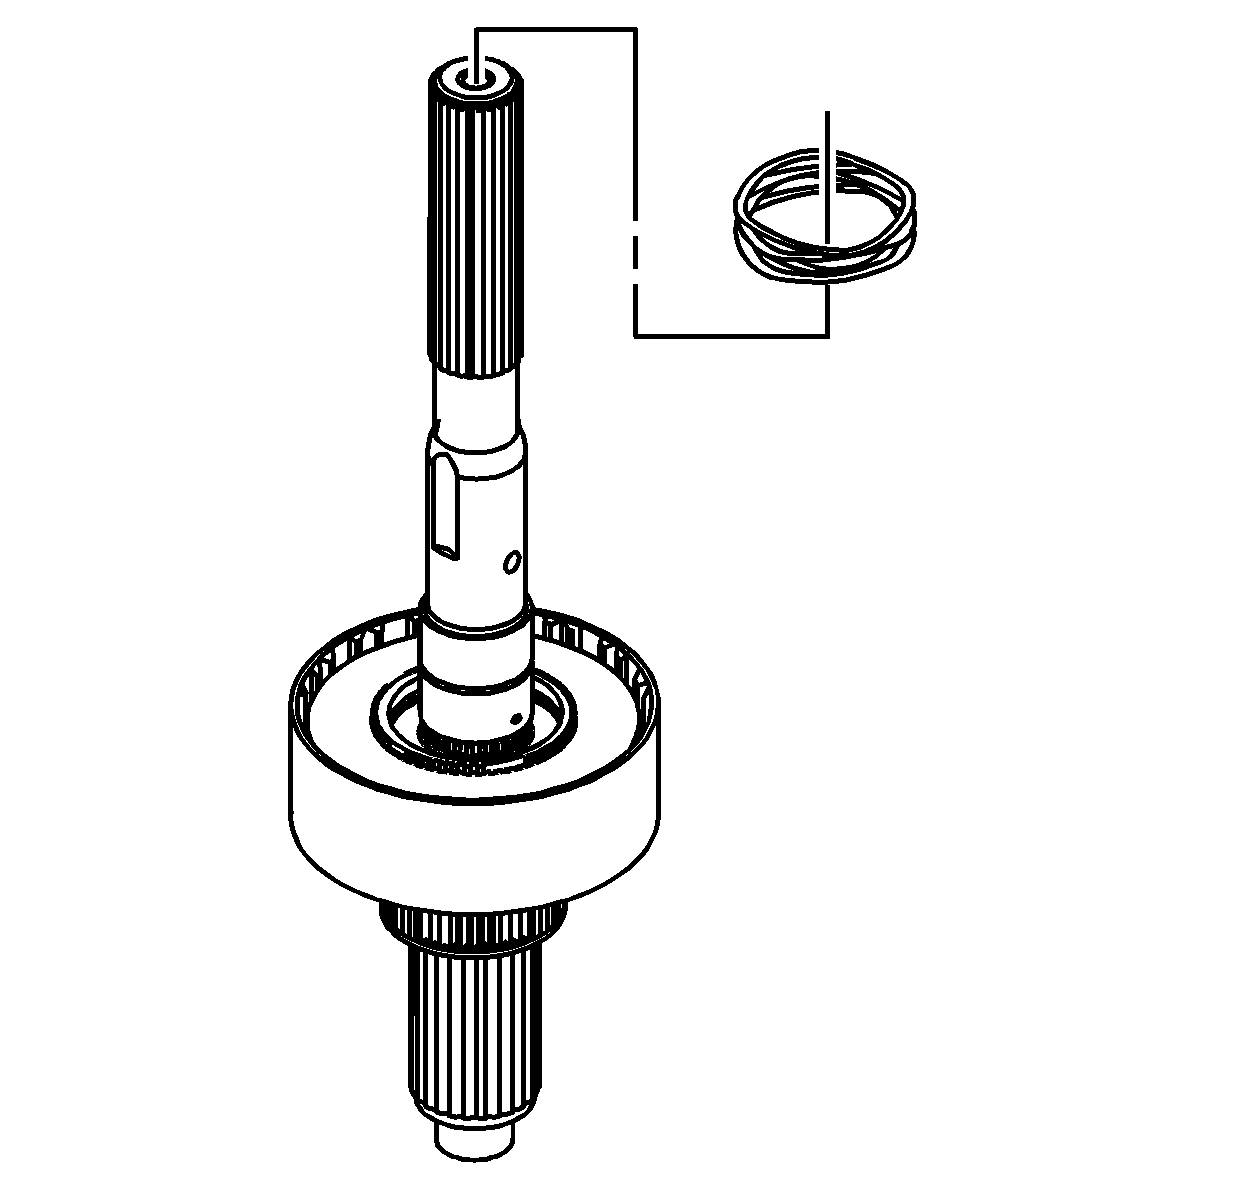
- Install the clutch spring.
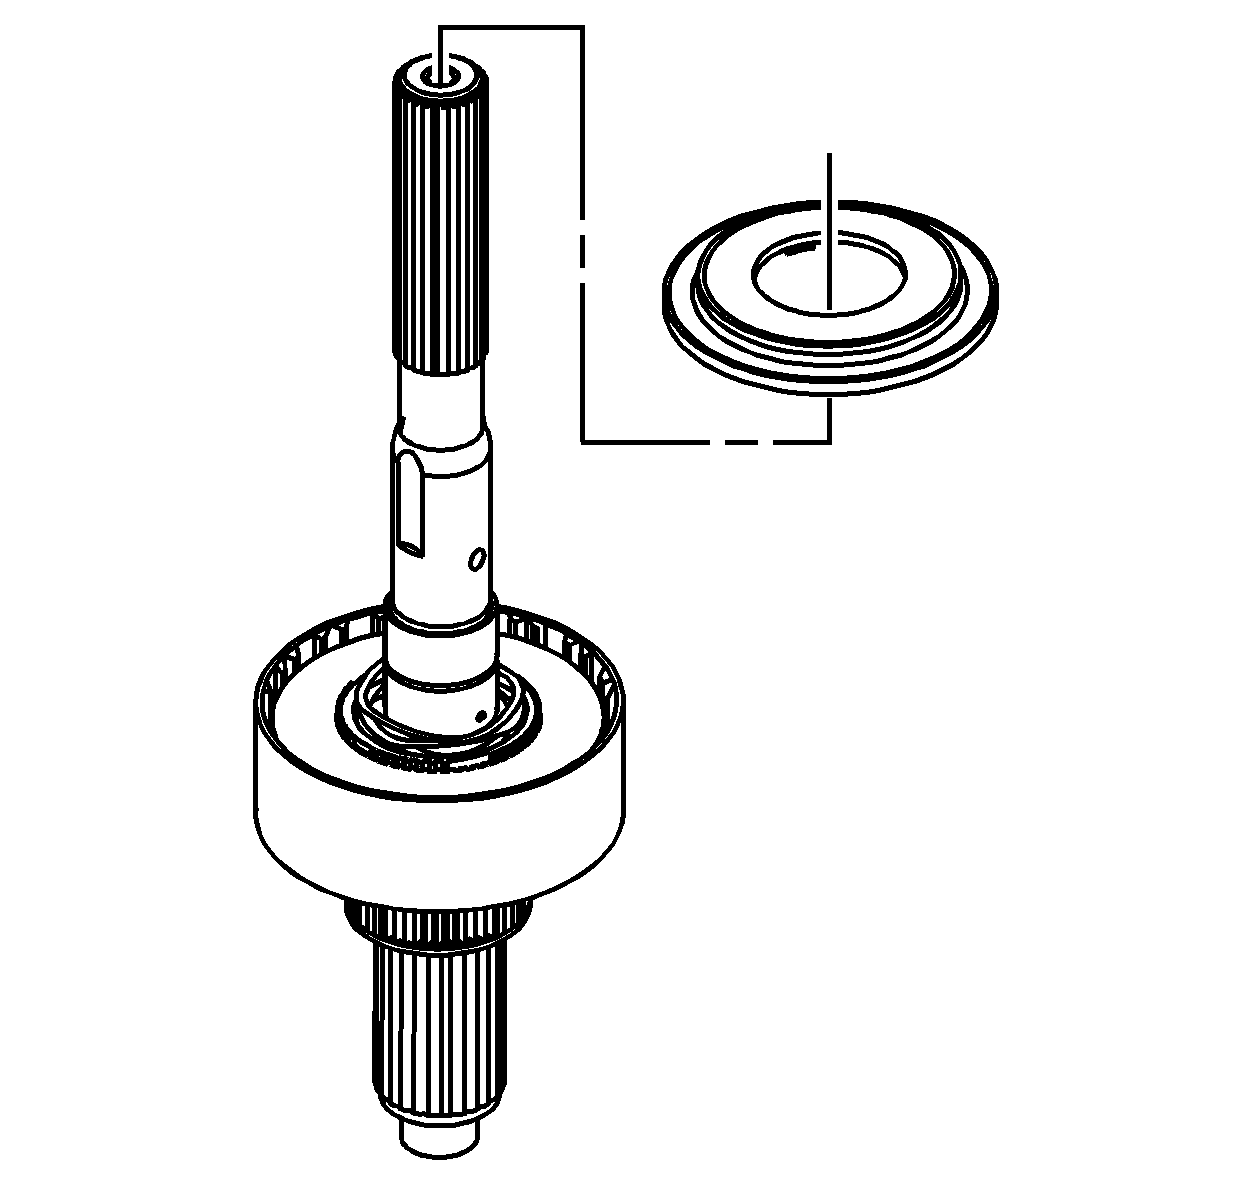
- Install the clutch apply plate.
| • | Ensure the clutch apply plate tabs are aligned with the clutch hub. |
| • | Ensure the clutch spring is seated properly in the underside groove of the clutch apply plate. |
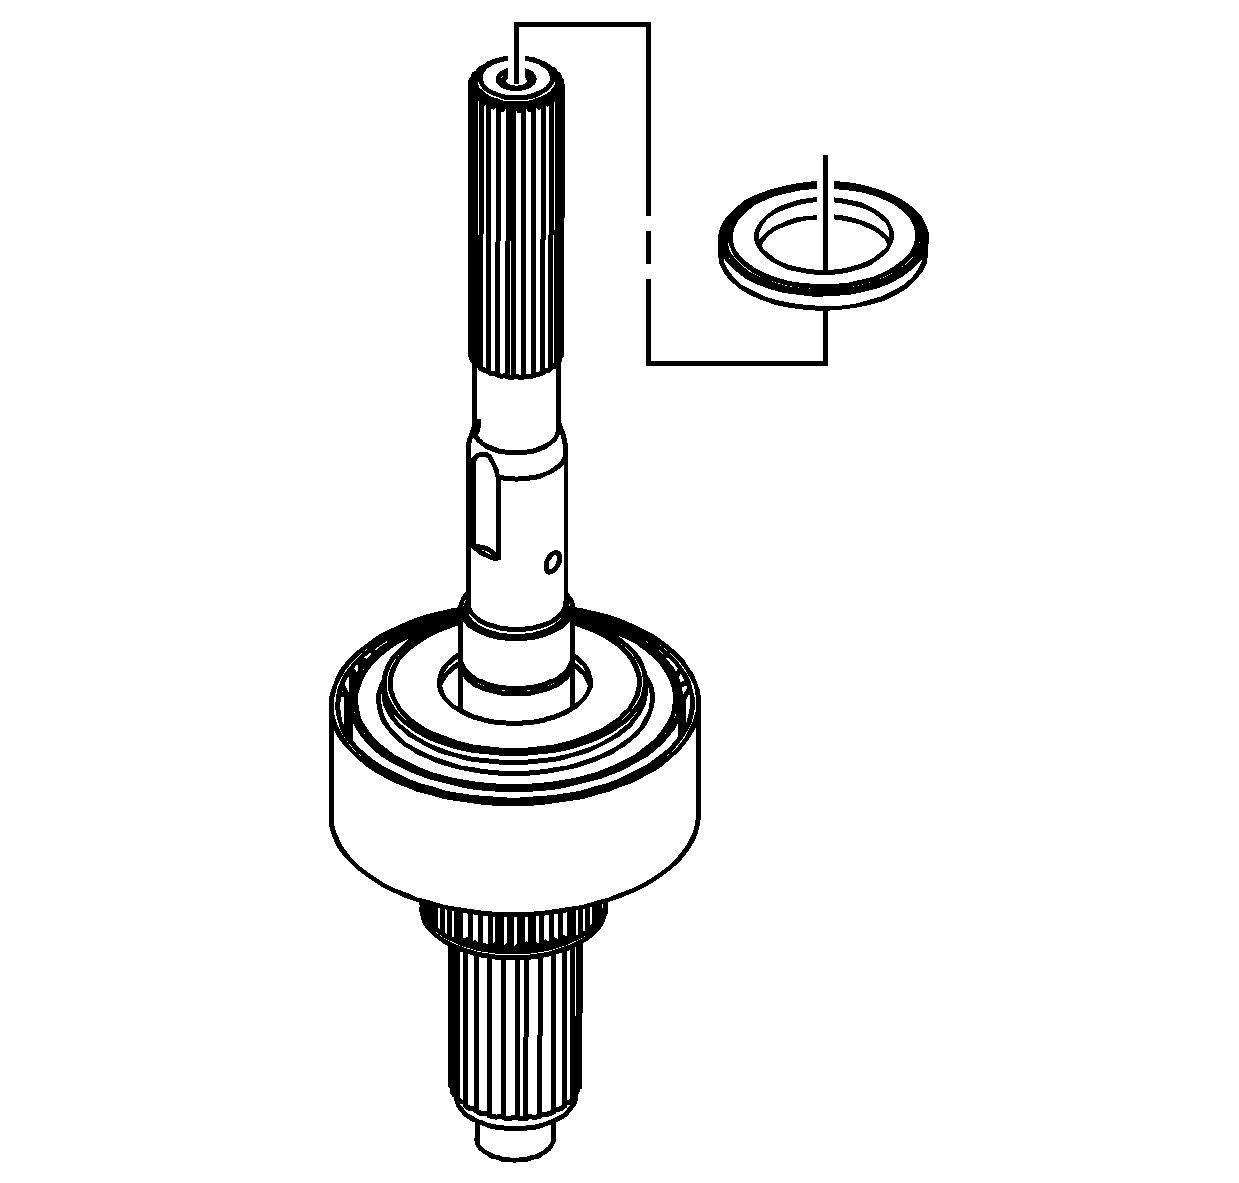
- Install the clutch pressure plate bearing. The bearing will only install in 1 direction. The bearing
will fit flush to the inner plate when properly installed.
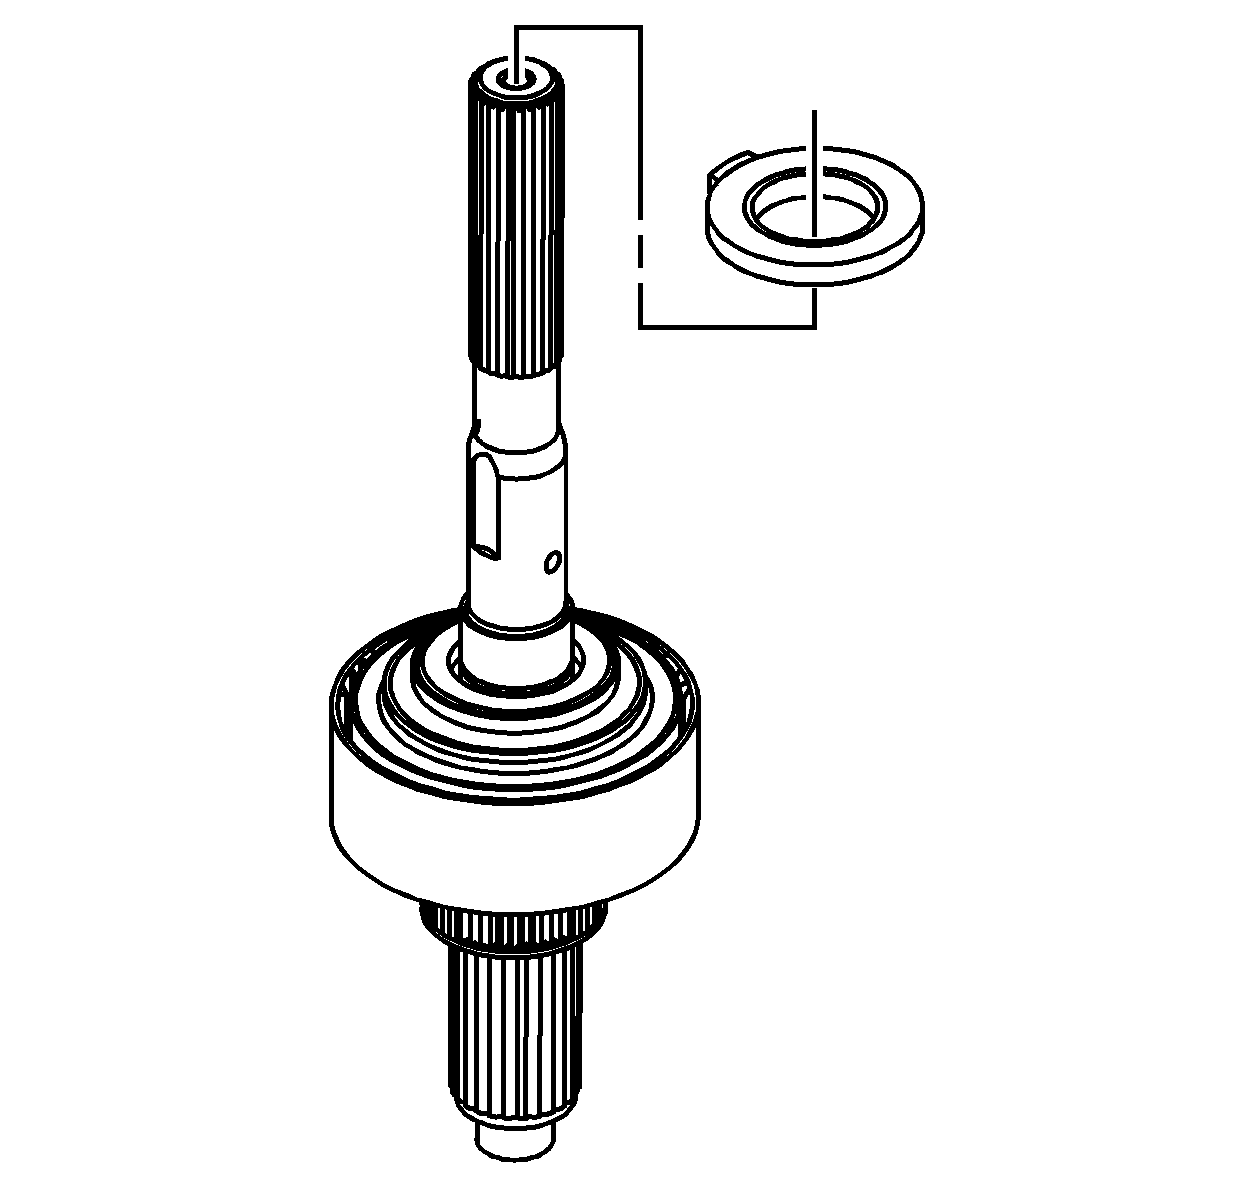
- Install the clutch inner plate.

Note: The marks on the clutch pressure plate bearing must be aligned before installing the clutch apply plate retaining ring.
- Align the markings on the clutch pressure plate bearing.
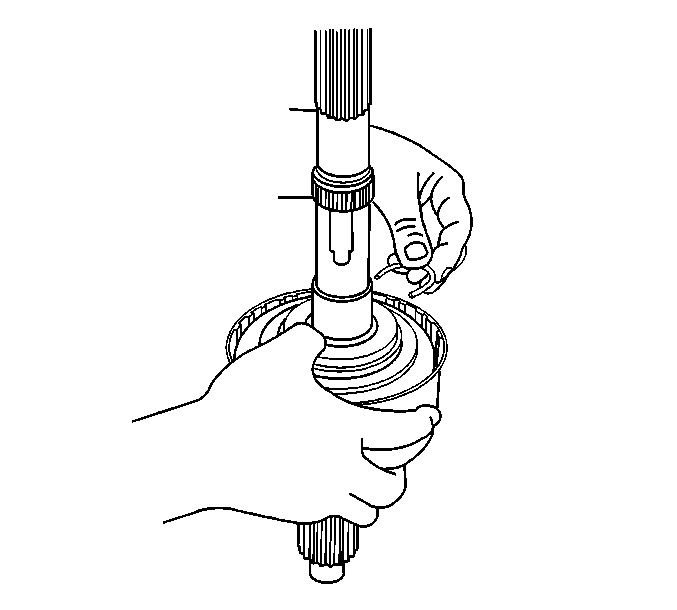
- While pushing down on the clutch apply plate, install the clutch apply plate retaining ring.
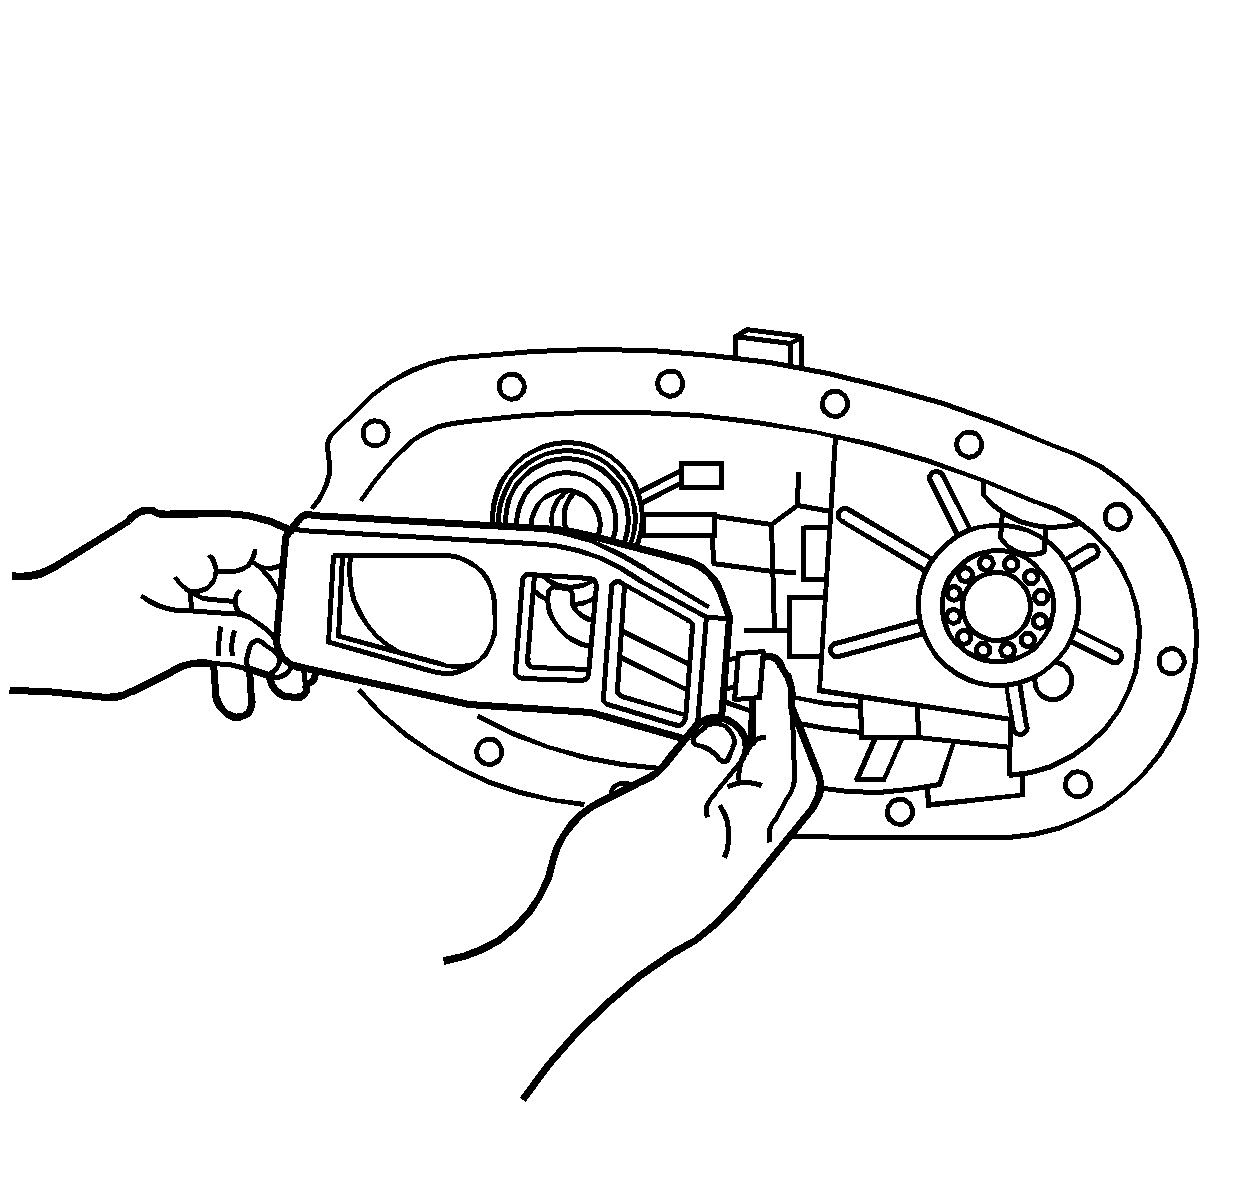
- Install the clutch lever to the rear case half.
| • | Position the clutch lever onto the 2 pivot pins. |
| • | Shift the control actuator lever shaft to the NEUTRAL position. |
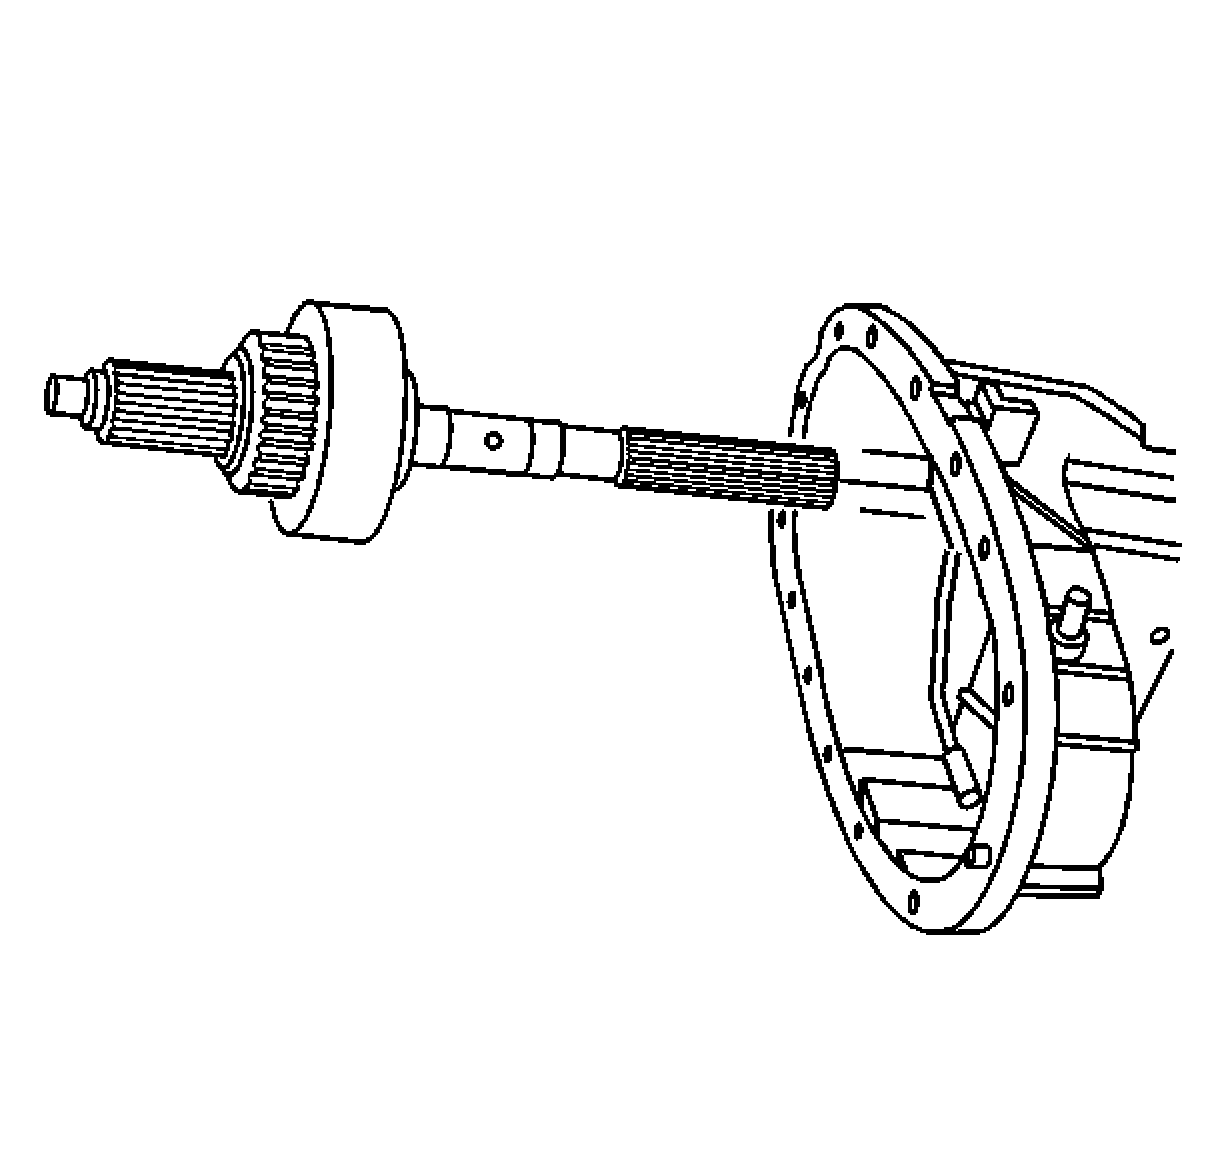
- Install the rear output shaft assembly.

- Using a hydraulic press and the
J 36373 Installer
, install a new front speed sensor reluctor wheel onto the front output shaft.
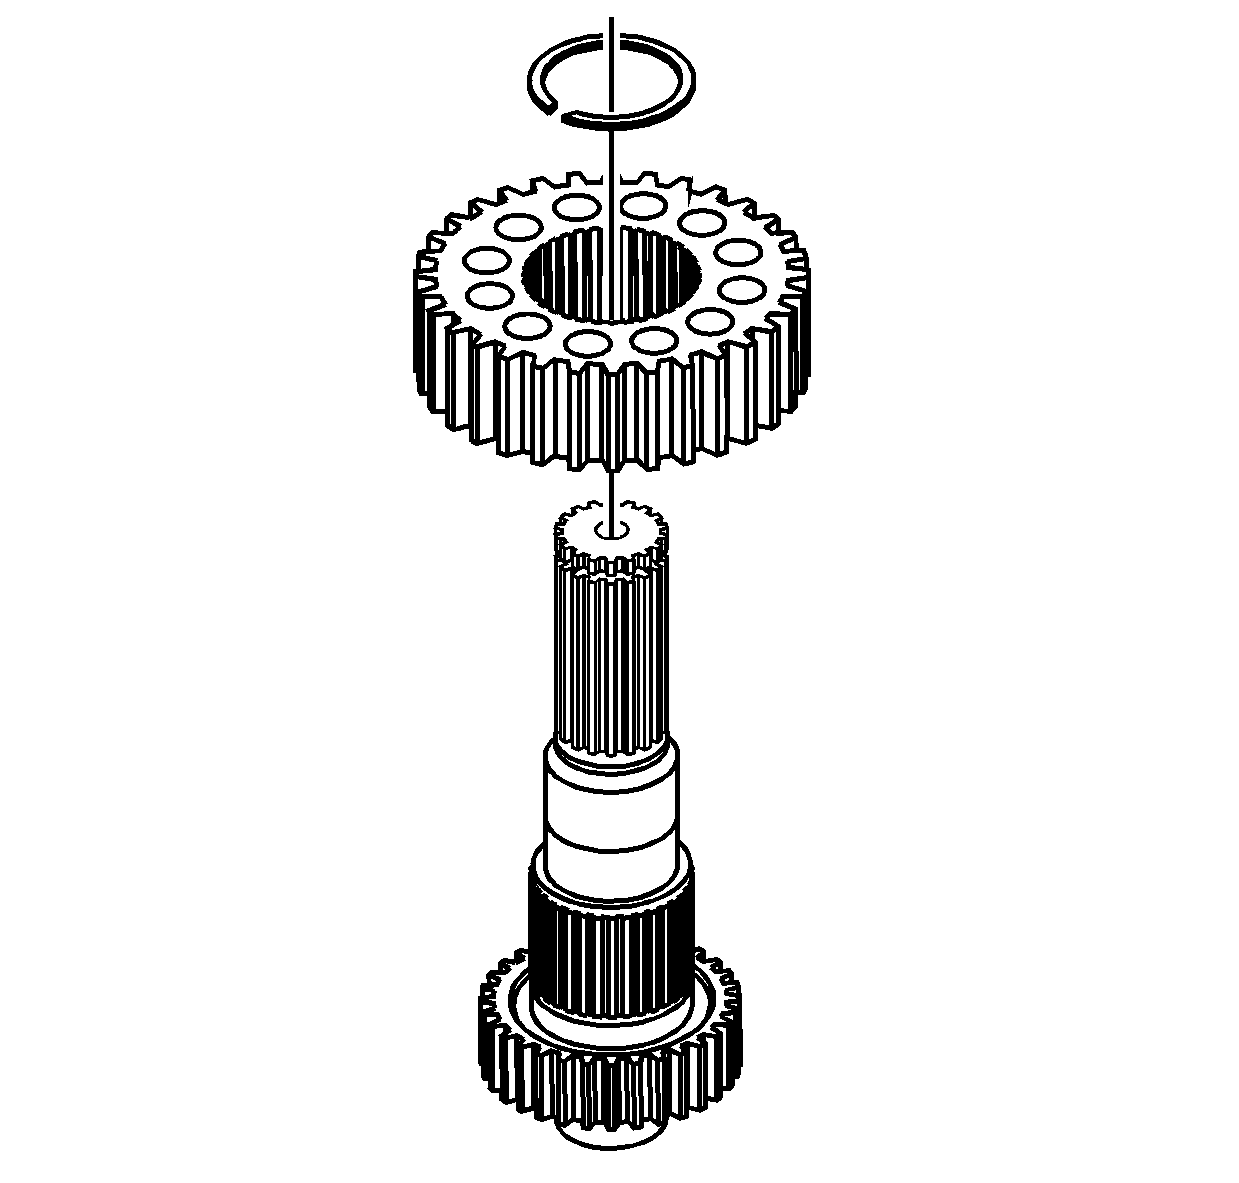
- Install the driven sprocket onto the front output shaft.
- Install a new driven sprocket retaining ring onto the front output shaft.
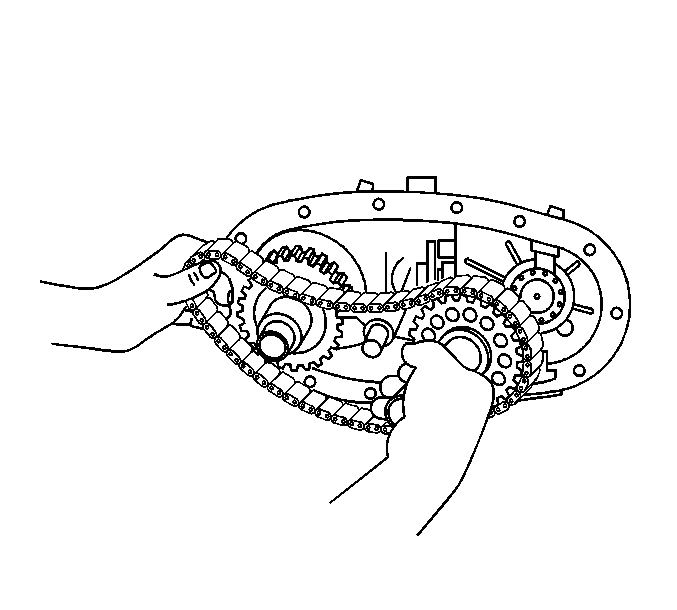
Note: If using the drive chain again, align the marks made during disassembly for proper wear pattern alignment.
- Install the drive chain assembly.
| 39.1. | Position the drive chain on the driven sprocket on the front output shaft. |
| 39.2. | Position the drive chain on the drive sprocket on the rear output shaft. |
| 39.3. | Install the front output shaft into the front output shaft rear bearing. |

- Attach the
J 45759 Fixture
(2) to the transfer case front half.
- Install the
J 45759 Fixture
(2) into the
J 3289-20 Holding Fixture
(1) and secure with
the pivot pin.

Caution: Apply the proper amount of sealant to the flange when assembling the transfer case. Excessive amounts of sealant can plug the oil pump screen, resulting in internal component failure.
Note: Ensure both sealing surfaces of the front and rear case halves are free of dirt, oil, and cleaning solvent.
- Apply a 3 mm (1/8 in) bead of sealant GM P/N 12345739 (Canadian P/N 10953541) or equivalent onto the rear case half.
- Inspect to ensure the location pins are installed in the front case half.
- Install any missing location pins in the front case half.

- Install the front case half to the
rear case half.
| • | Rotating the output shaft will align the splines with the input gear. |
| • | The case halves should come together without any resistance. |
| • | The rear case half should align on the front case half location pins. |
Caution: Refer to Fastener Caution in the Preface section.
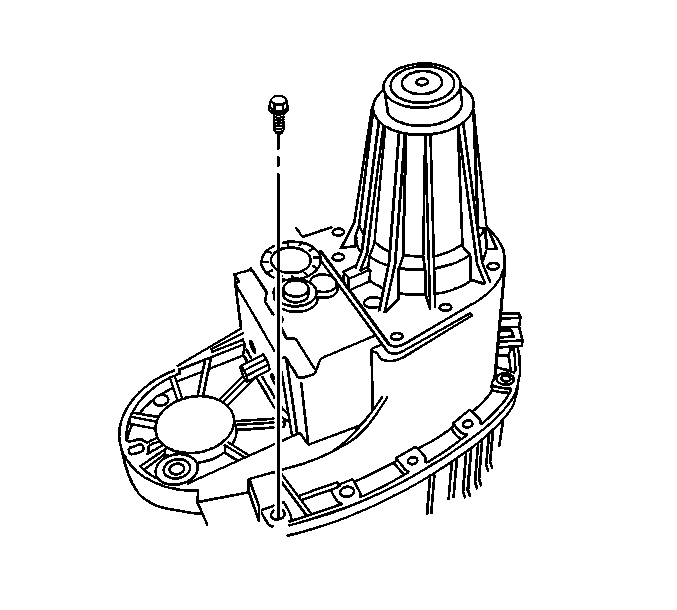
- Install the front case half to rear case half bolts and tighten to
22 N·m (16 lb ft)..

- Install the oil pump driven gear, the outer rotor.
- Install the oil pump drive gear, the inner rotor. The flat on the inner rotor aligns to the flat area on the rear output shaft.

Note: DO NOT use sealer on the oil pump cover.
- Install the oil pump cover.
- Install the oil pump cover mounting bolts and tighten to
11 N·m (9 lb ft).

- Position the NEW speed sensor reluctor wheel onto the rear output shaft.

Note: Use the
J 45235 Installer
to install the rear speed sensor reluctor wheel to the proper specifications.
- Using the
J 45235 Installer
on the rear output shaft, install the rear speed sensor reluctor wheel.
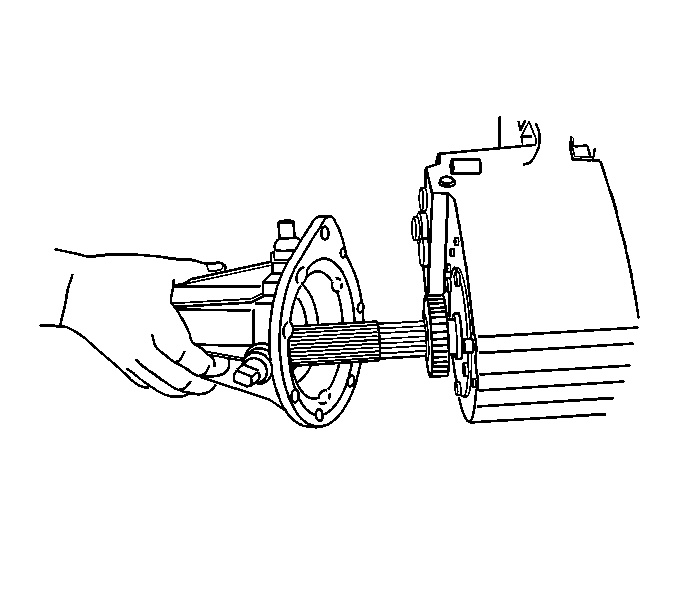
- Inspect to ensure the rear extension location pins are installed in the rear case half.
- Install any missing location pins in the rear case half.
Caution: Apply the proper amount of sealant to the flange when assembling the transfer case. Excessive amounts of sealant can plug the oil pump screen, resulting in internal component failure.
Note: Ensure both sealing surfaces of the rear extension and rear case half are free of dirt, oil, and cleaning solvent.
- Apply a 3 mm (1/8 in) bead of sealant GM P/N 12345739 (Canadian P/N 10953541) or equivalent onto the rear extension.
- Install the rear extension to the rear case half. Align on the location pins.
- Install the rear extension bolts and tighten to
22 N·m (16 lb ft).
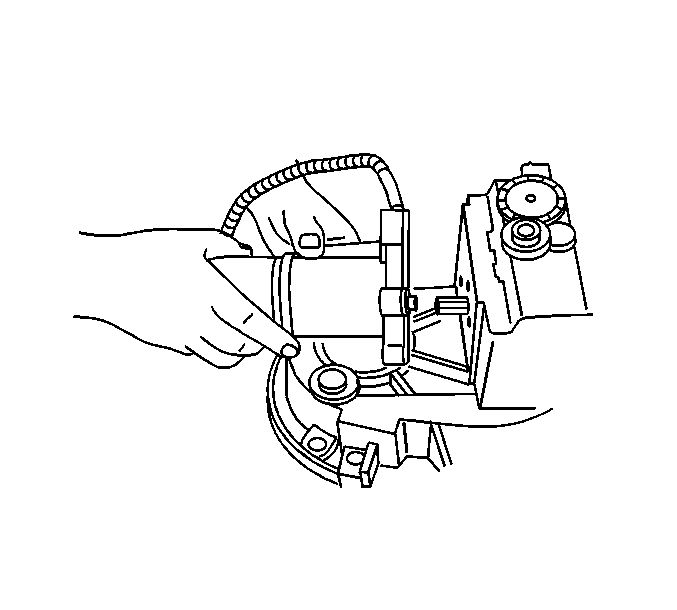
Note: The shift control detent must be in the NEUTRAL position when installing the motor/encoder.
- Shift the shift control detent into the NEUTRAL position.
Note: A new motor/encoder will not have location pins.
- Inspect to ensure the location pins are installed in the motor/encoder.
- Install any missing location pins in the motor/encoder.
- Install the motor/encoder assembly.
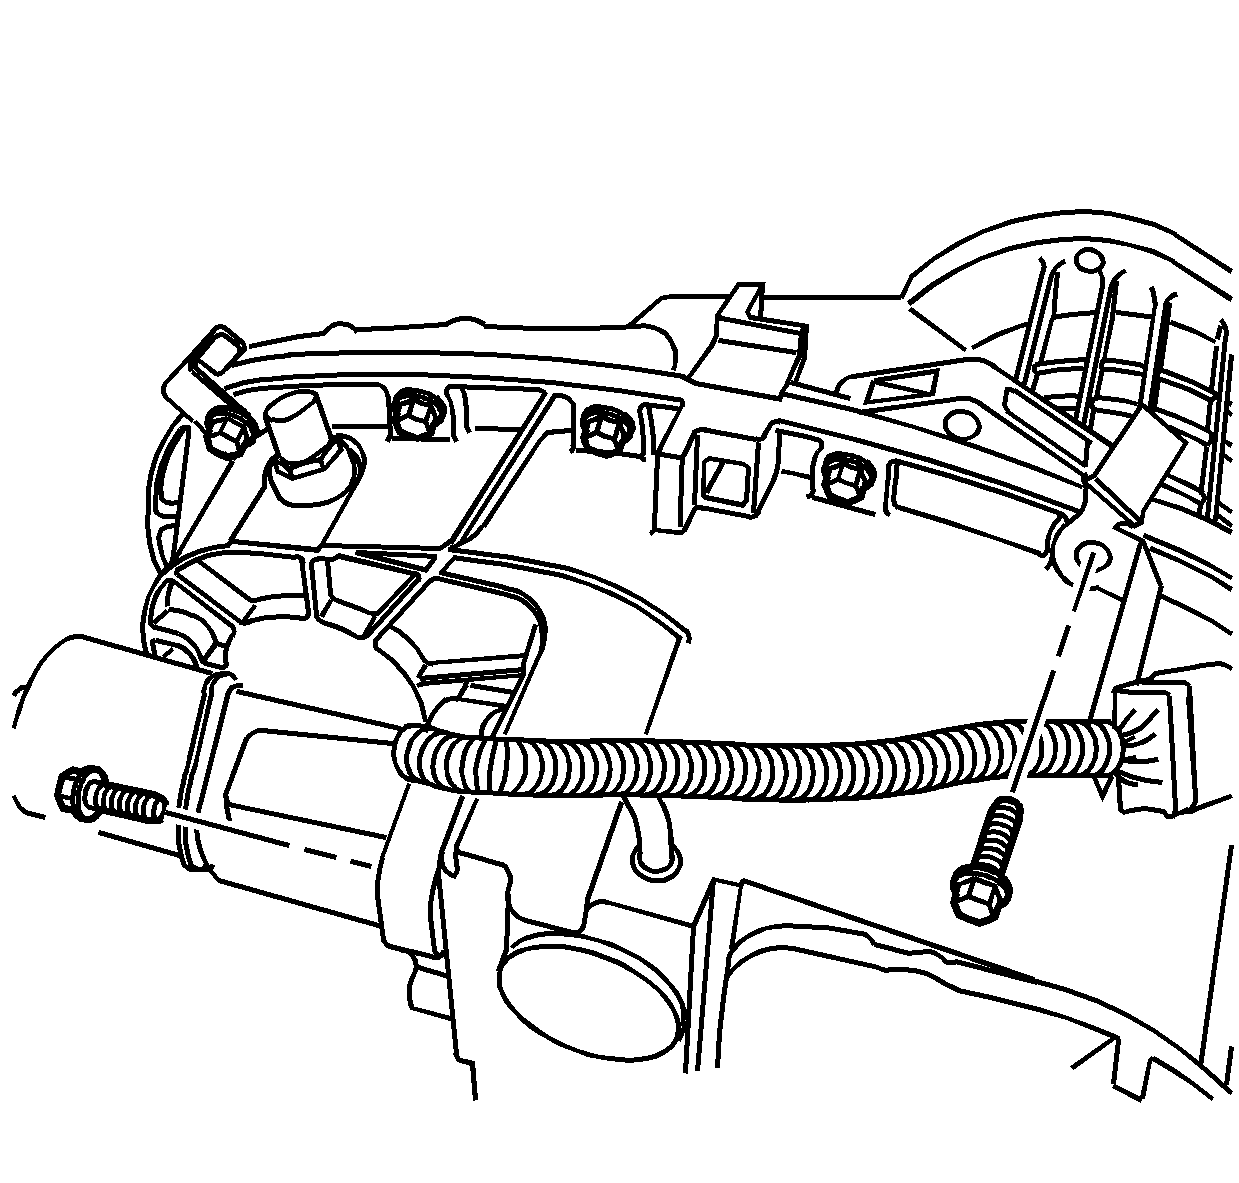
- Install the motor/encoder mounting bolts and tighten to
16 N·m (12 lb ft).
- Install the motor/encoder wiring harness bracket and case half bolt and tighten to
22 N·m (16 lb ft).
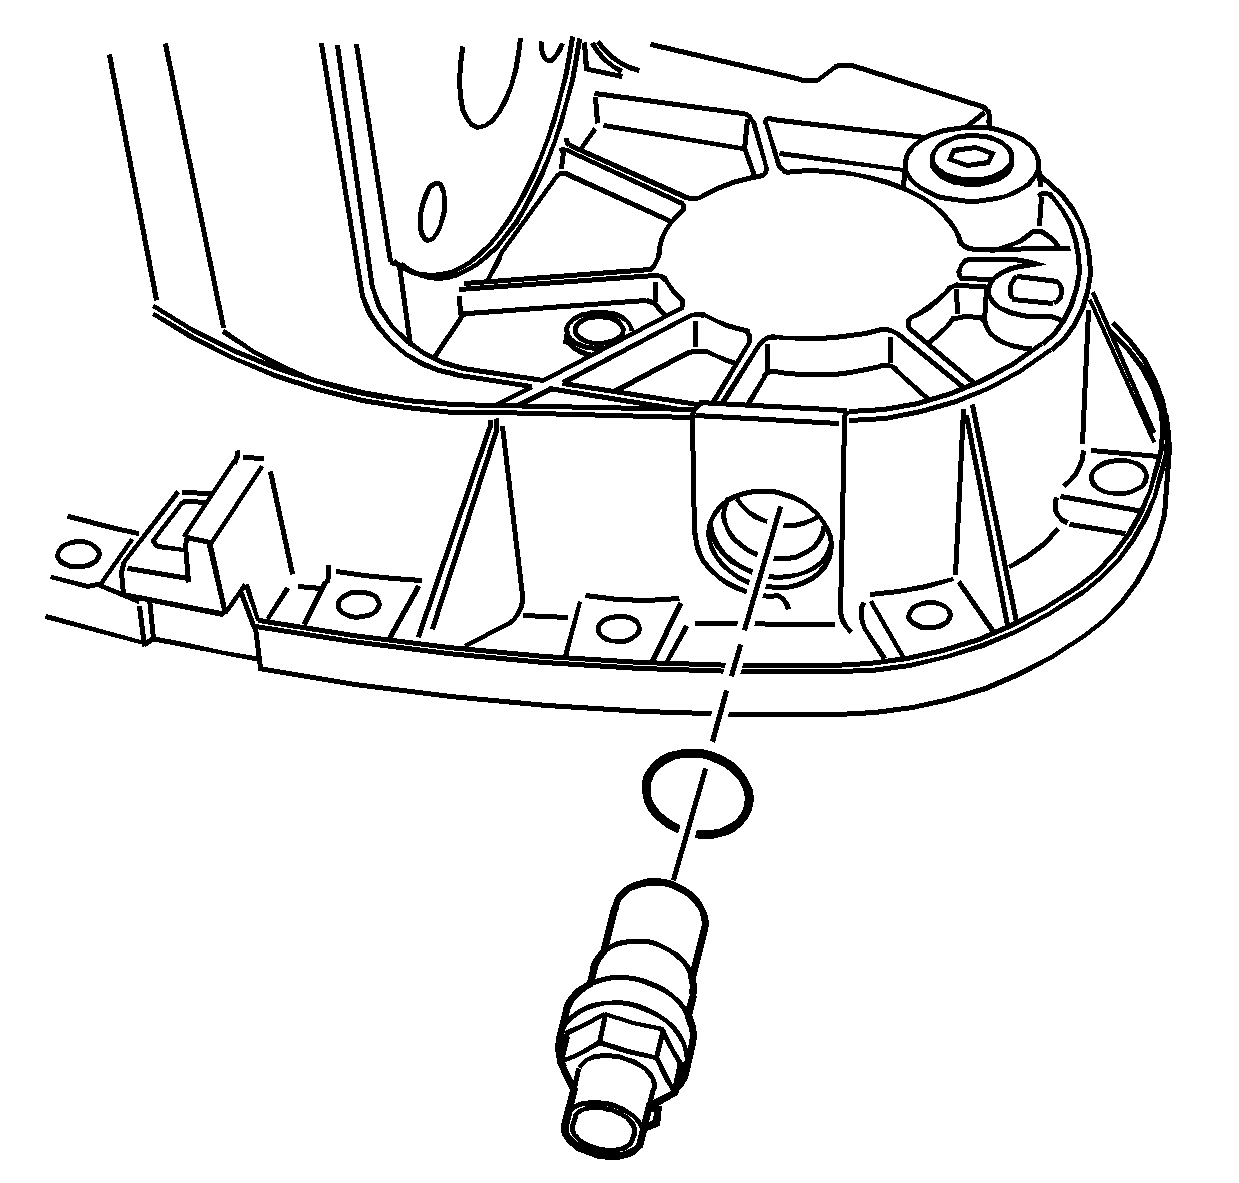
- Install the front vehicle speed sensor (VSS)
and tighten to
17 N·m (13 lb ft).
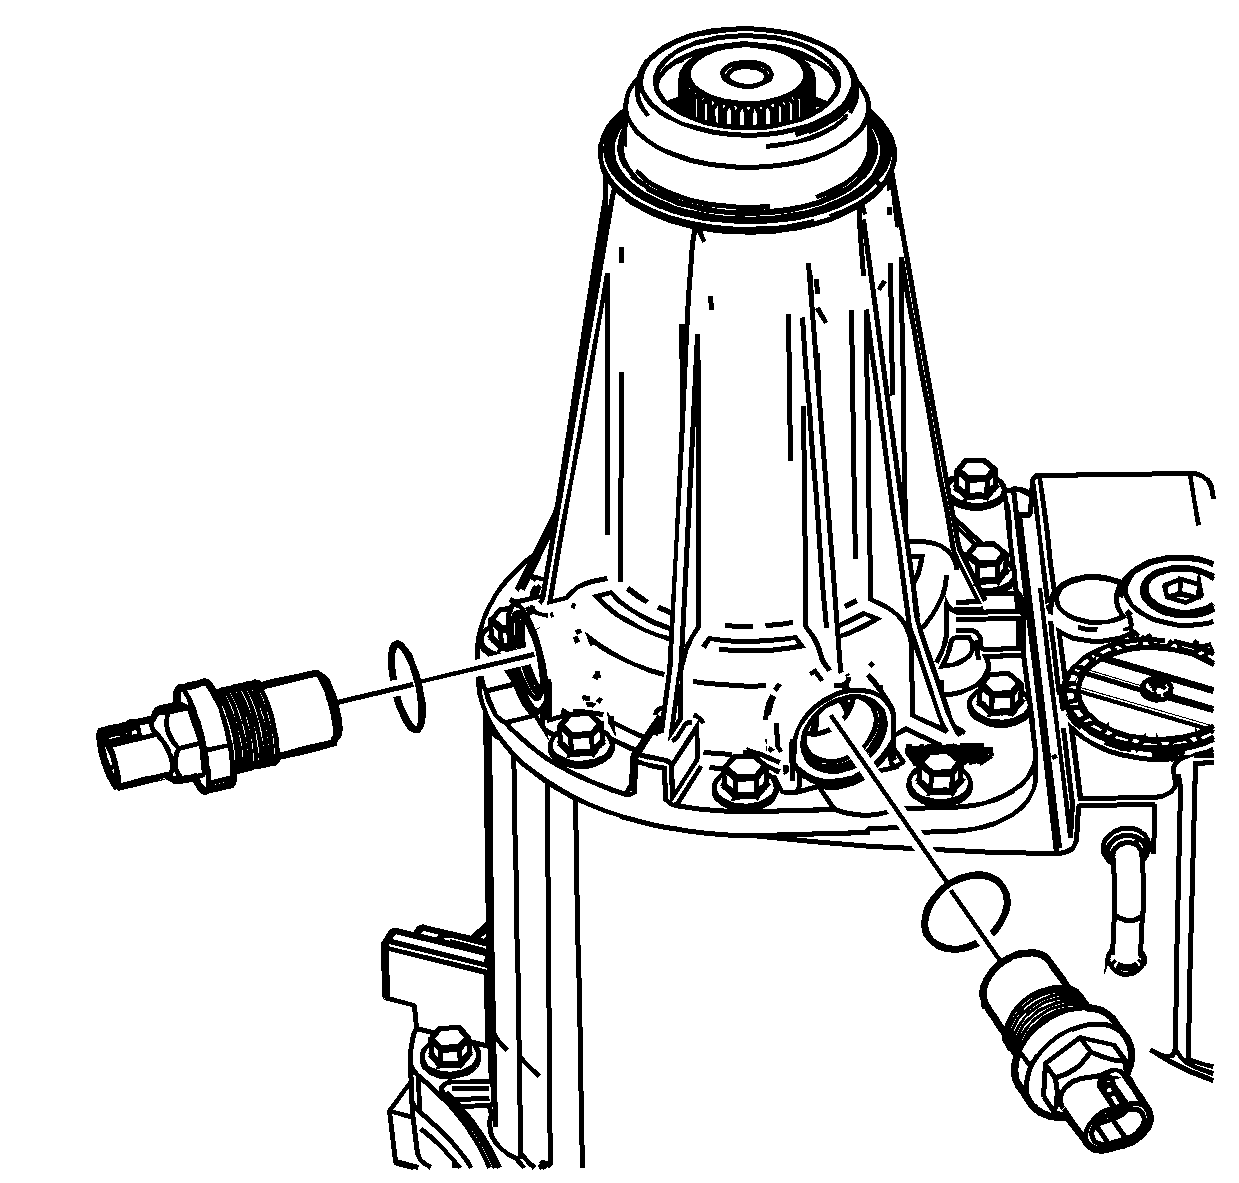
- Install the right rear VSS and tighten to
17 N·m (13 lb ft).
- Install the left rear VSS and tighten to
17 N·m (13 lb ft).
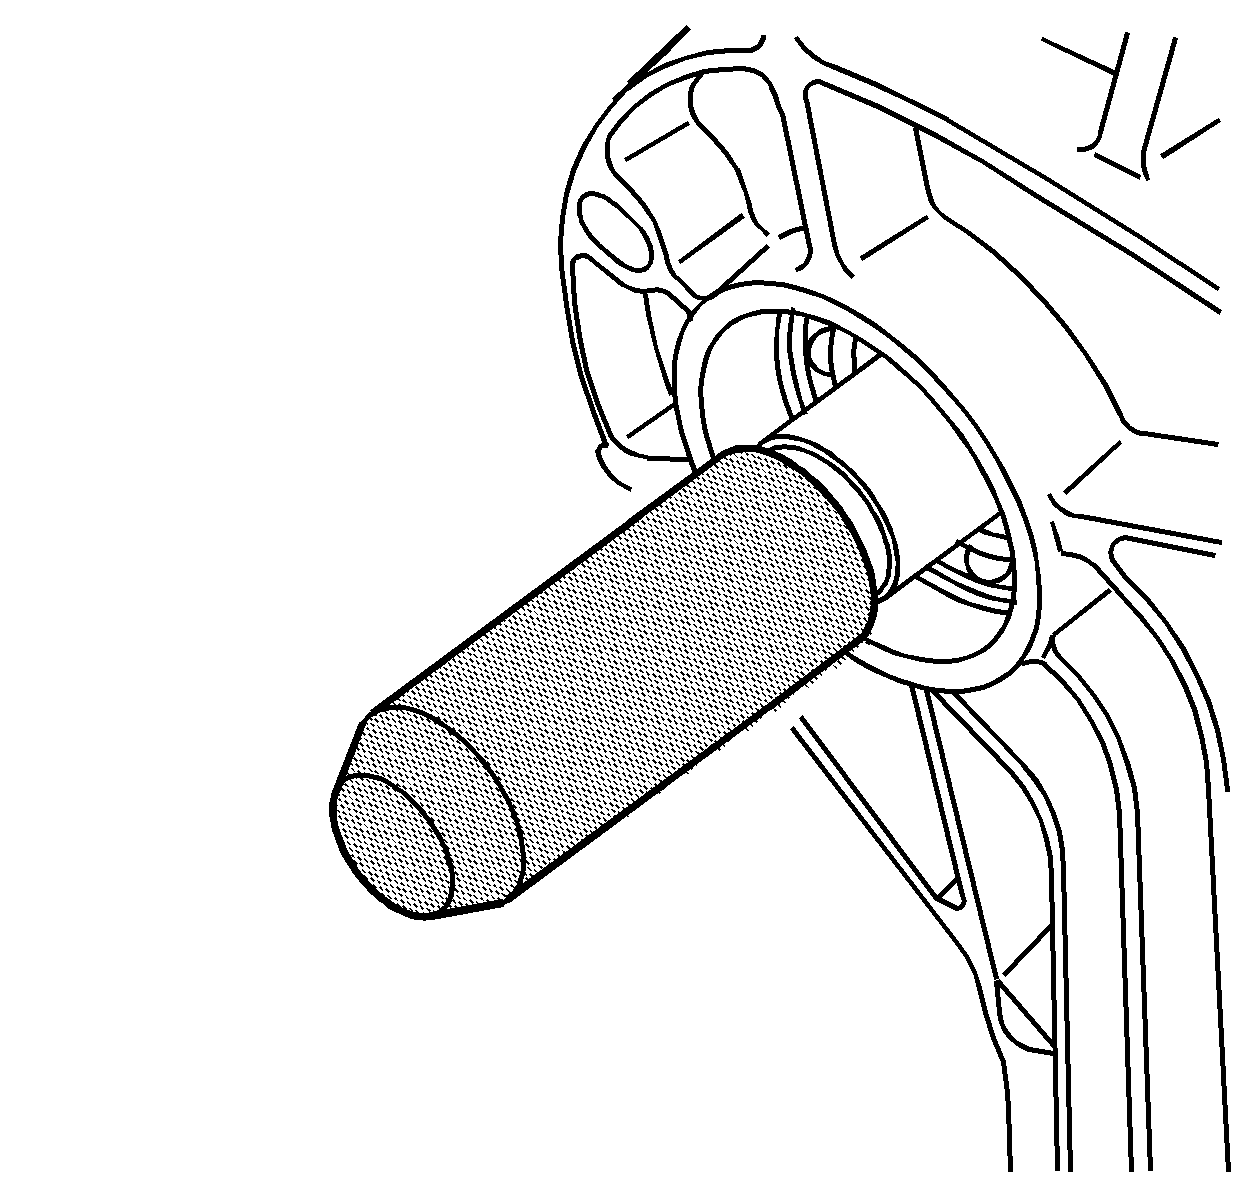
- Install the J 45236-2 onto the front output shaft.
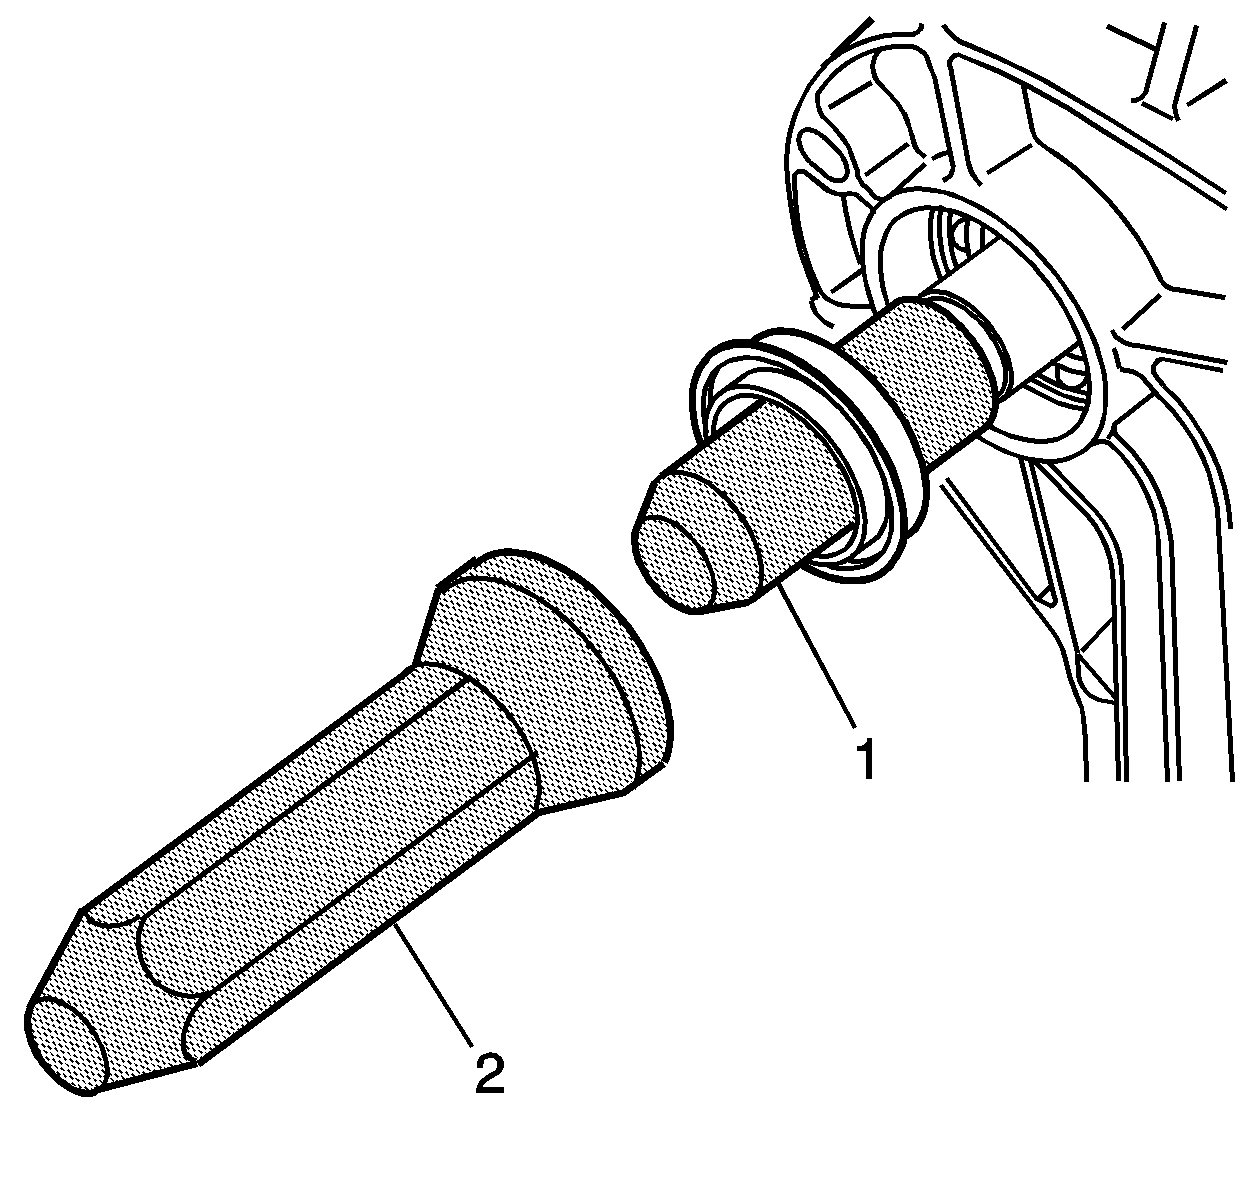
- Install the seal onto the J 45236-2 (1).
- Using the J 45236-1 (2), install the front output shaft seal.

- Using the
J 42738 Installer
, install the front input shaft seal.
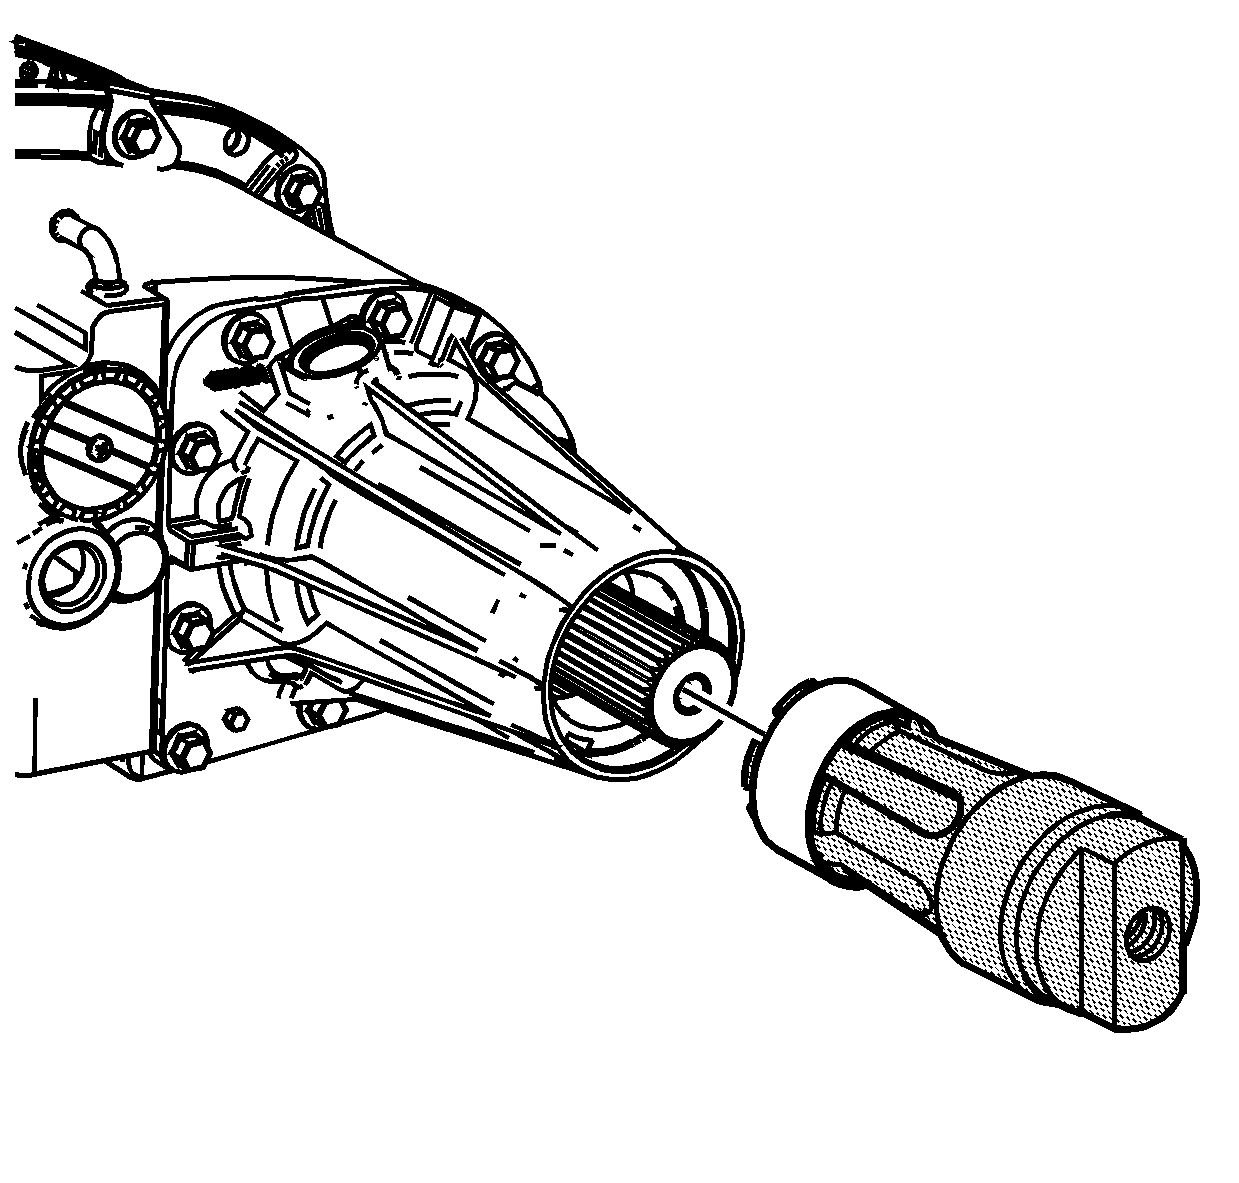
- Using the
J 45380 Installer
, install a new rear output shaft
bushing.
| 71.1. | Install the bushing on the finger section of the
J 45380 Installer
. |
| 71.2. | Install the finger section to the main body of the
J 45380 Installer
. |
| 71.3. | Position the bushing and tool to the case. |
| 71.4. | Using a hammer and the
J 45380 Installer
, install the bushing. |
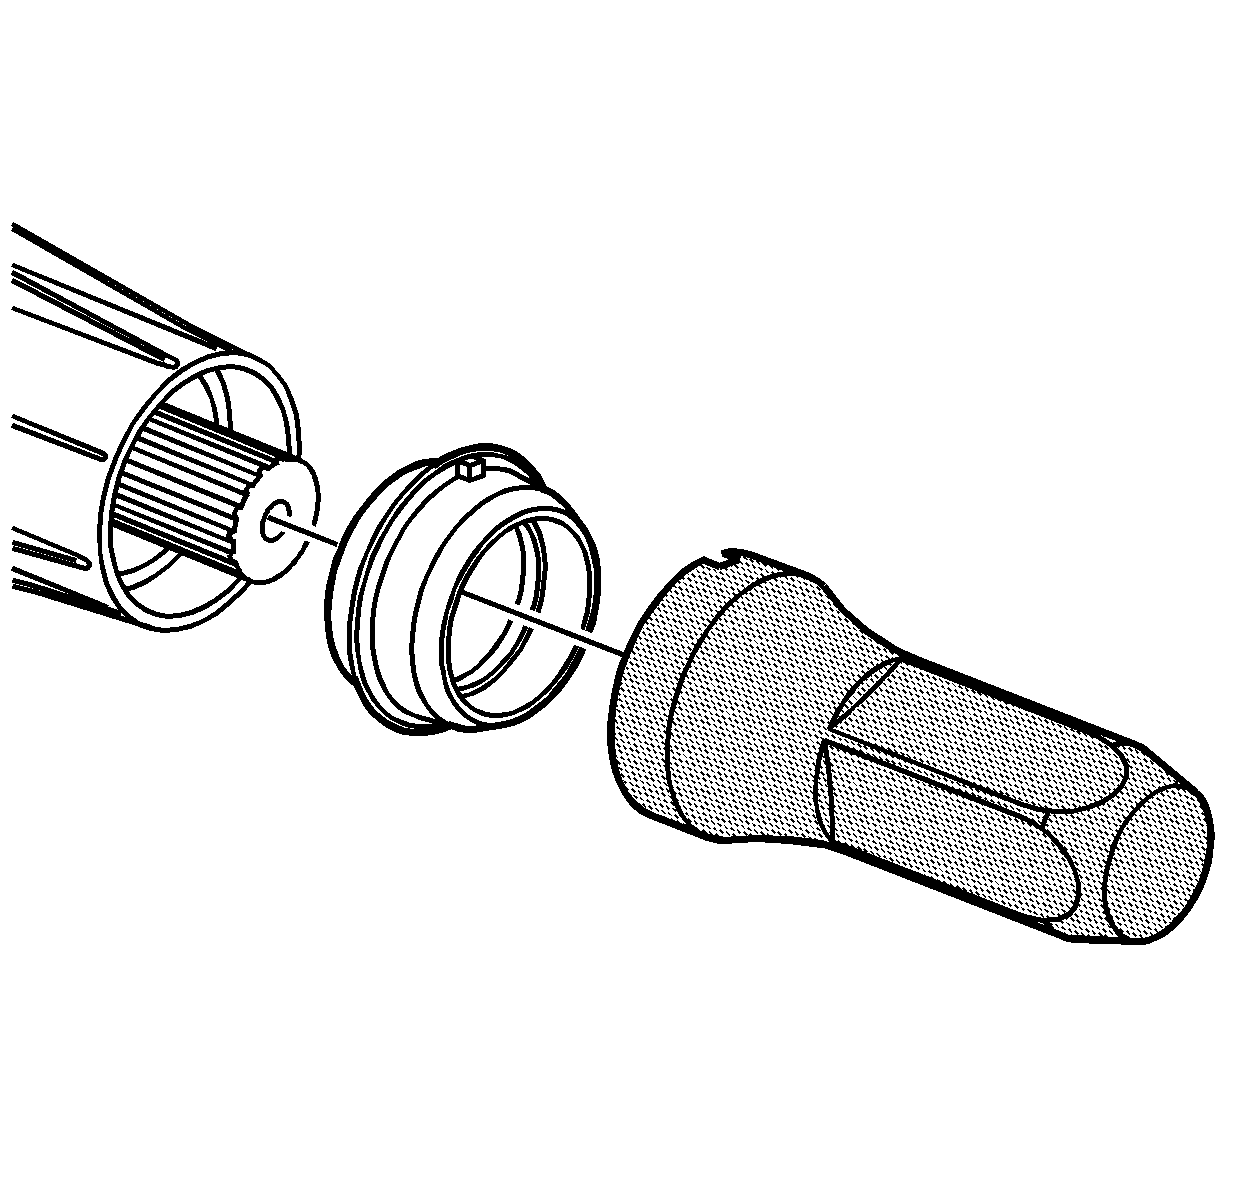
- Using the
J 37668-A Installer
, install the rear output shaft seal.
| 72.1. | Align the notch on the
J 37668-A Installer
with the tab on the seal. |
| 72.2. | Install the seal with the tab at the top and the weep hole at the bottom. |

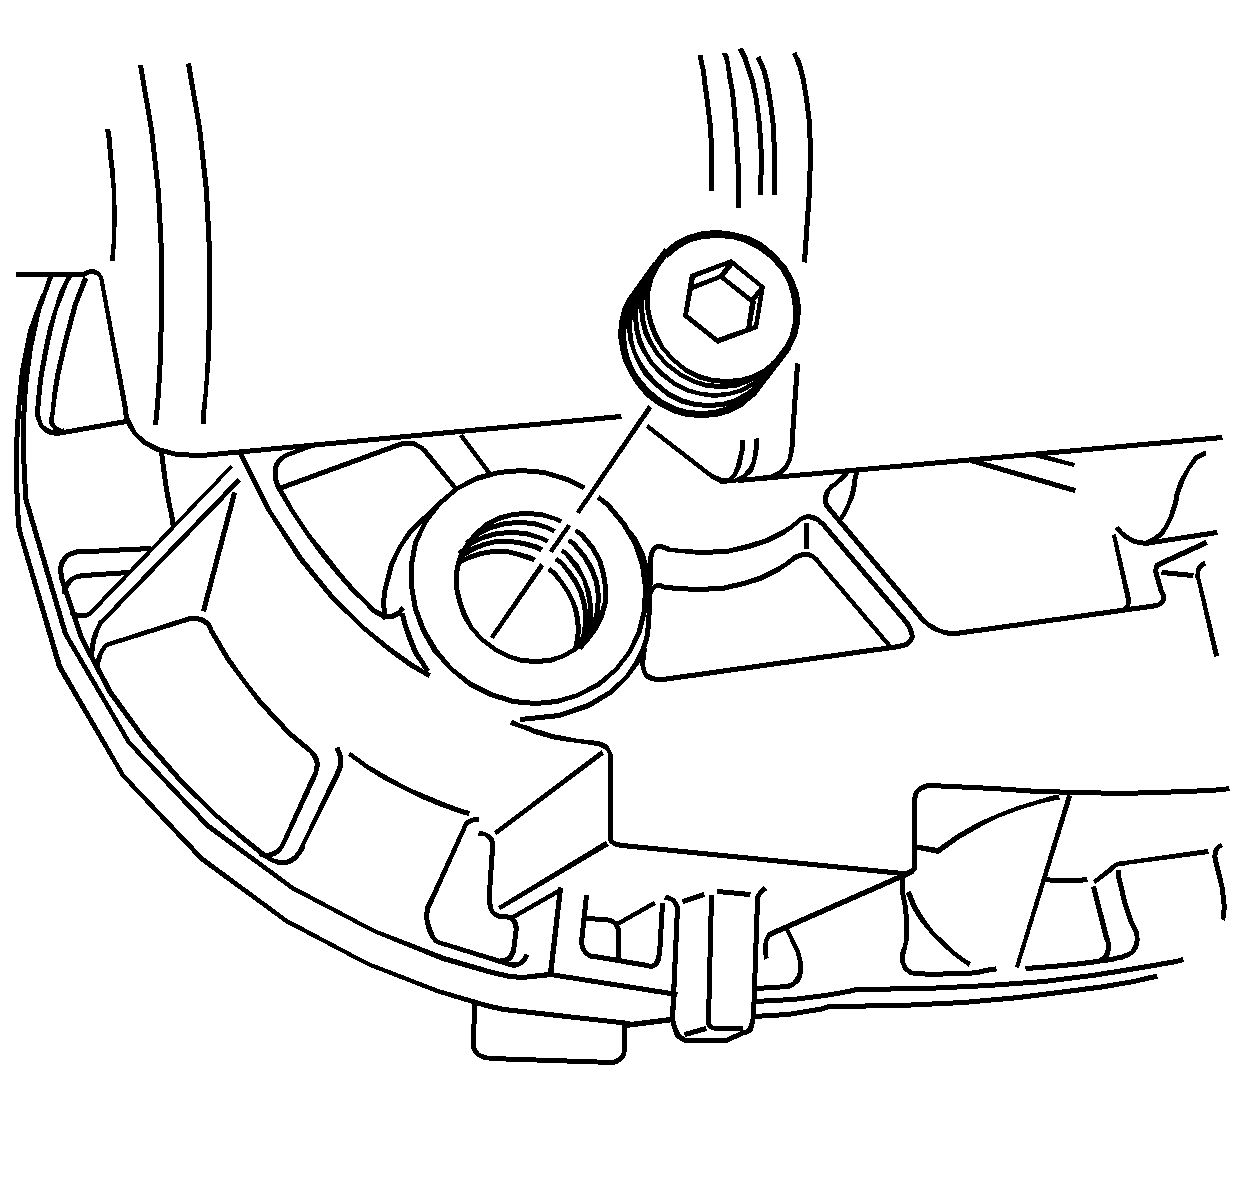
- Apply pipe sealant GM P/N 12346004 (Canadian P/N 10953480) or equivalent to the
fill plug threads.
- Install the fill plug and tighten to
27 N·m (20 lb ft).
- Apply pipe sealant GM P/N 12346004 (Canadian P/N 10953480) or equivalent to the
drain plug threads.
- Install the drain plug and tighten to
27 N·m (20 lb ft).


