For 1990-2009 cars only
Battery Positive Cable Replacement Underhood Junction Block to Starter
Removal Procedure
Important:
• Always use replacement cables that are of the same type, diameter and
length of the cables that you are replacing. • Always route the replacement cable the same way as the original cable.
- Disconnect the negative battery cable from the battery. Refer to Battery Negative Cable Disconnection and Connection .
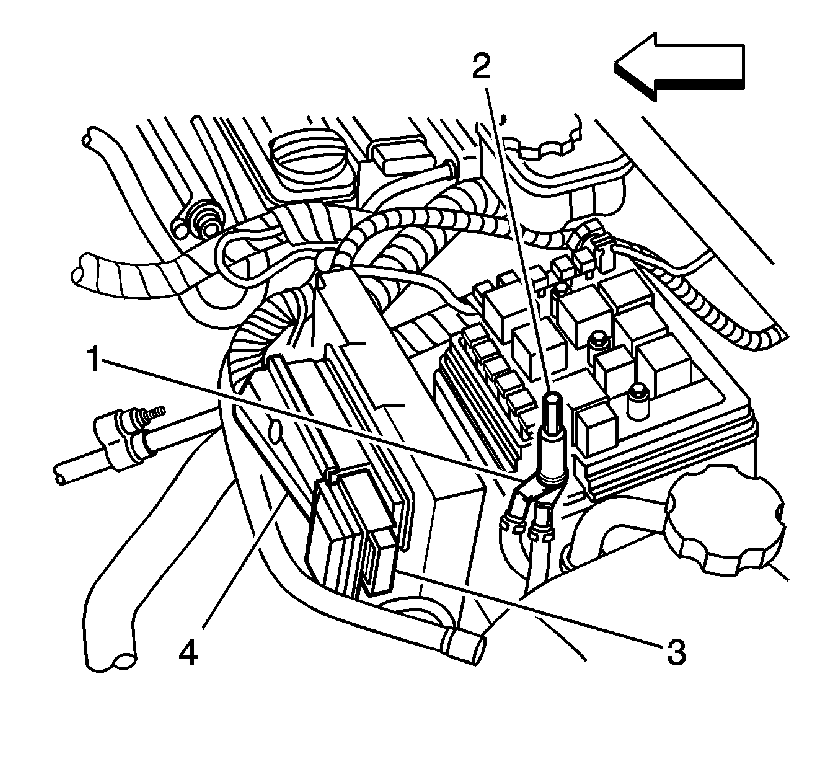
- Disconnect the positive battery cable (1) from the under hood junction block terminal.
- Raise and support the vehicle. Refer to Lifting and Jacking the Vehicle in General Information.
- Disconnect the positive cable from the negative cable near the transmission.
- Disconnect the positive battery cable (4) from the starter.
- Remove the battery cable from the vehicle.


Installation Procedure
- Place the battery cable in the vehicle using the original routing.
- Connect the positive battery cable (4) to the starter.
- Tape the positive battery cable to the negative battery cable near the transmission.
- Lower the vehicle.
- Connect the positive battery cable (1) to the under hood junction block positive bolt (2).
- Connect the negative battery cable to the battery. Refer to Battery Negative Cable Disconnection and Connection .

Notice: Refer to Fastener Notice in the Preface section.
Tighten
Tighten the starter terminal nut to 17 N·m (13 lb ft).

Tighten
Tighten the bolt (2) to 17 N·m (13 lb ft).
Battery Positive Cable Replacement Battery to Underhood Junction Block
Removal Procedure
Important:
• Always use replacement cables that are of the same type, diameter and
length of the cables that you are replacing. • Always route the replacement cable the same way as the original cable.
- Disconnect the negative battery cable from the battery. Refer to Battery Negative Cable Disconnection and Connection .
- Disconnect the positive battery cable (1) from the battery.
- Remove the under hood junction block. Refer to Underhood Electrical Center or Junction Block Bracket Replacement in Wiring Systems.
- Unseat the cable retainer from the under hood area near the LT shock tower.
- Remove the rear seat cushion. Refer to Rear Seat Cushion Replacement in Seats.
- Remove the drivers seat assembly. Refer to Front Seat Replacement - Bucket in Seats.
- Pull back the carpet and sound insulation padding in order to expose the battery positive cable. Refer to Floor Panel Carpet Replacement in Interior Trim.
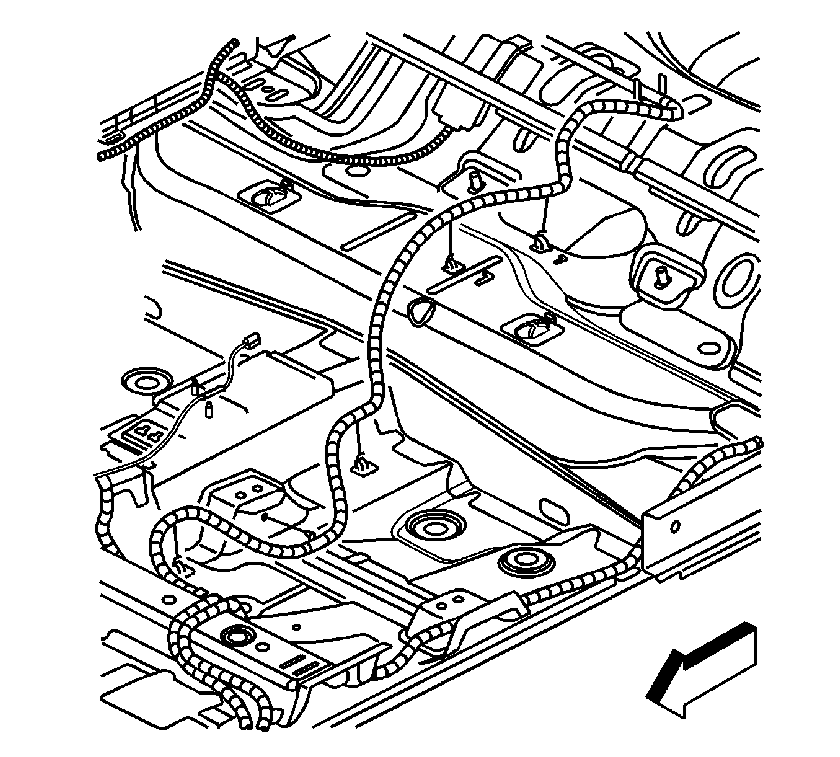
- Release the cable hold down clips in the interior and trunk area to the vehicle.
- Pull the interior to engine compartment grommet from the interior in order to release the cable.
- Remove the positive cable from the vehicle.


Installation Procedure
- Route the battery cable through the engine compartment pass through and up to the underhood junction block.
- Seat the grommet from the vehicle interior area.
- Route the battery positive cable along the floor pan of the interior and trunk area.
- Secure the positive battery cable to the interior area and trunk compartment clips.
- Position the sound insulation and carpet to the interior. Refer to Floor Panel Carpet Replacement in Interior Trim.
- Install the drivers seat assembly. Refer to Front Seat Replacement - Bucket in Seats.
- Install the rear seat cushion. Refer to Rear Seat Cushion Replacement in Seats.
- Secure the cable retainer to the under hood area near the LT shock tower.
- Install the under hood junction block. Refer to Underhood Electrical Center or Junction Block Bracket Replacement in Wiring Systems.
- Connect the positive battery cable to the battery.
- Connect the negative battery cable (2) to the battery. Refer to Battery Negative Cable Disconnection and Connection .

Notice: Refer to Fastener Notice in the Preface section.

Tighten
Tighten the positive battery terminal bolt (1) to 17 N·m
(13 lb ft).
