Information on Tri Coat Paint Repair

| Subject: | Information on Tri-Coat Paint Repair |
| Models: | 1998 Saturns with pearl white paint |
Purpose:
The purpose of this bulletin is to familiarize the technicians with tri-coat paint repair. This information is required since pearl white tri-coat paint, finished with a pearl shell tri-coat system is available on 1998 vehicles.
Pearl White Paint Codes | ||
|---|---|---|
Sales Code | 16 | 16 |
WA Number | 287A | 287A |
Color Name | Pearl White Ground Coat | Pearl White Pearl Coat |
Refinish Manufacturer | ||
Akzo-Sikkens | SAT 287A | SAT 287A |
B.A.S.F. Diamont | 24489 | 24489 |
B.A.S.F. Glasurit | SAT 287A | SAT 287A |
Dupont | B9554 | B9555 |
I.C.I. | 7GV7G | 7GV6B |
P.P.G. | 5028 | 5029 |
Sherwin Williams-Acme-Martin Senour | 50599 | 50600 |
Hoechst Group -- Spies Hecker | 11853 | 16057 |
Hoechst Group -- Standox | 16/287A | 16/287A |
Comparing Basecoat/Clearcoat and Tri-Coat Finishes
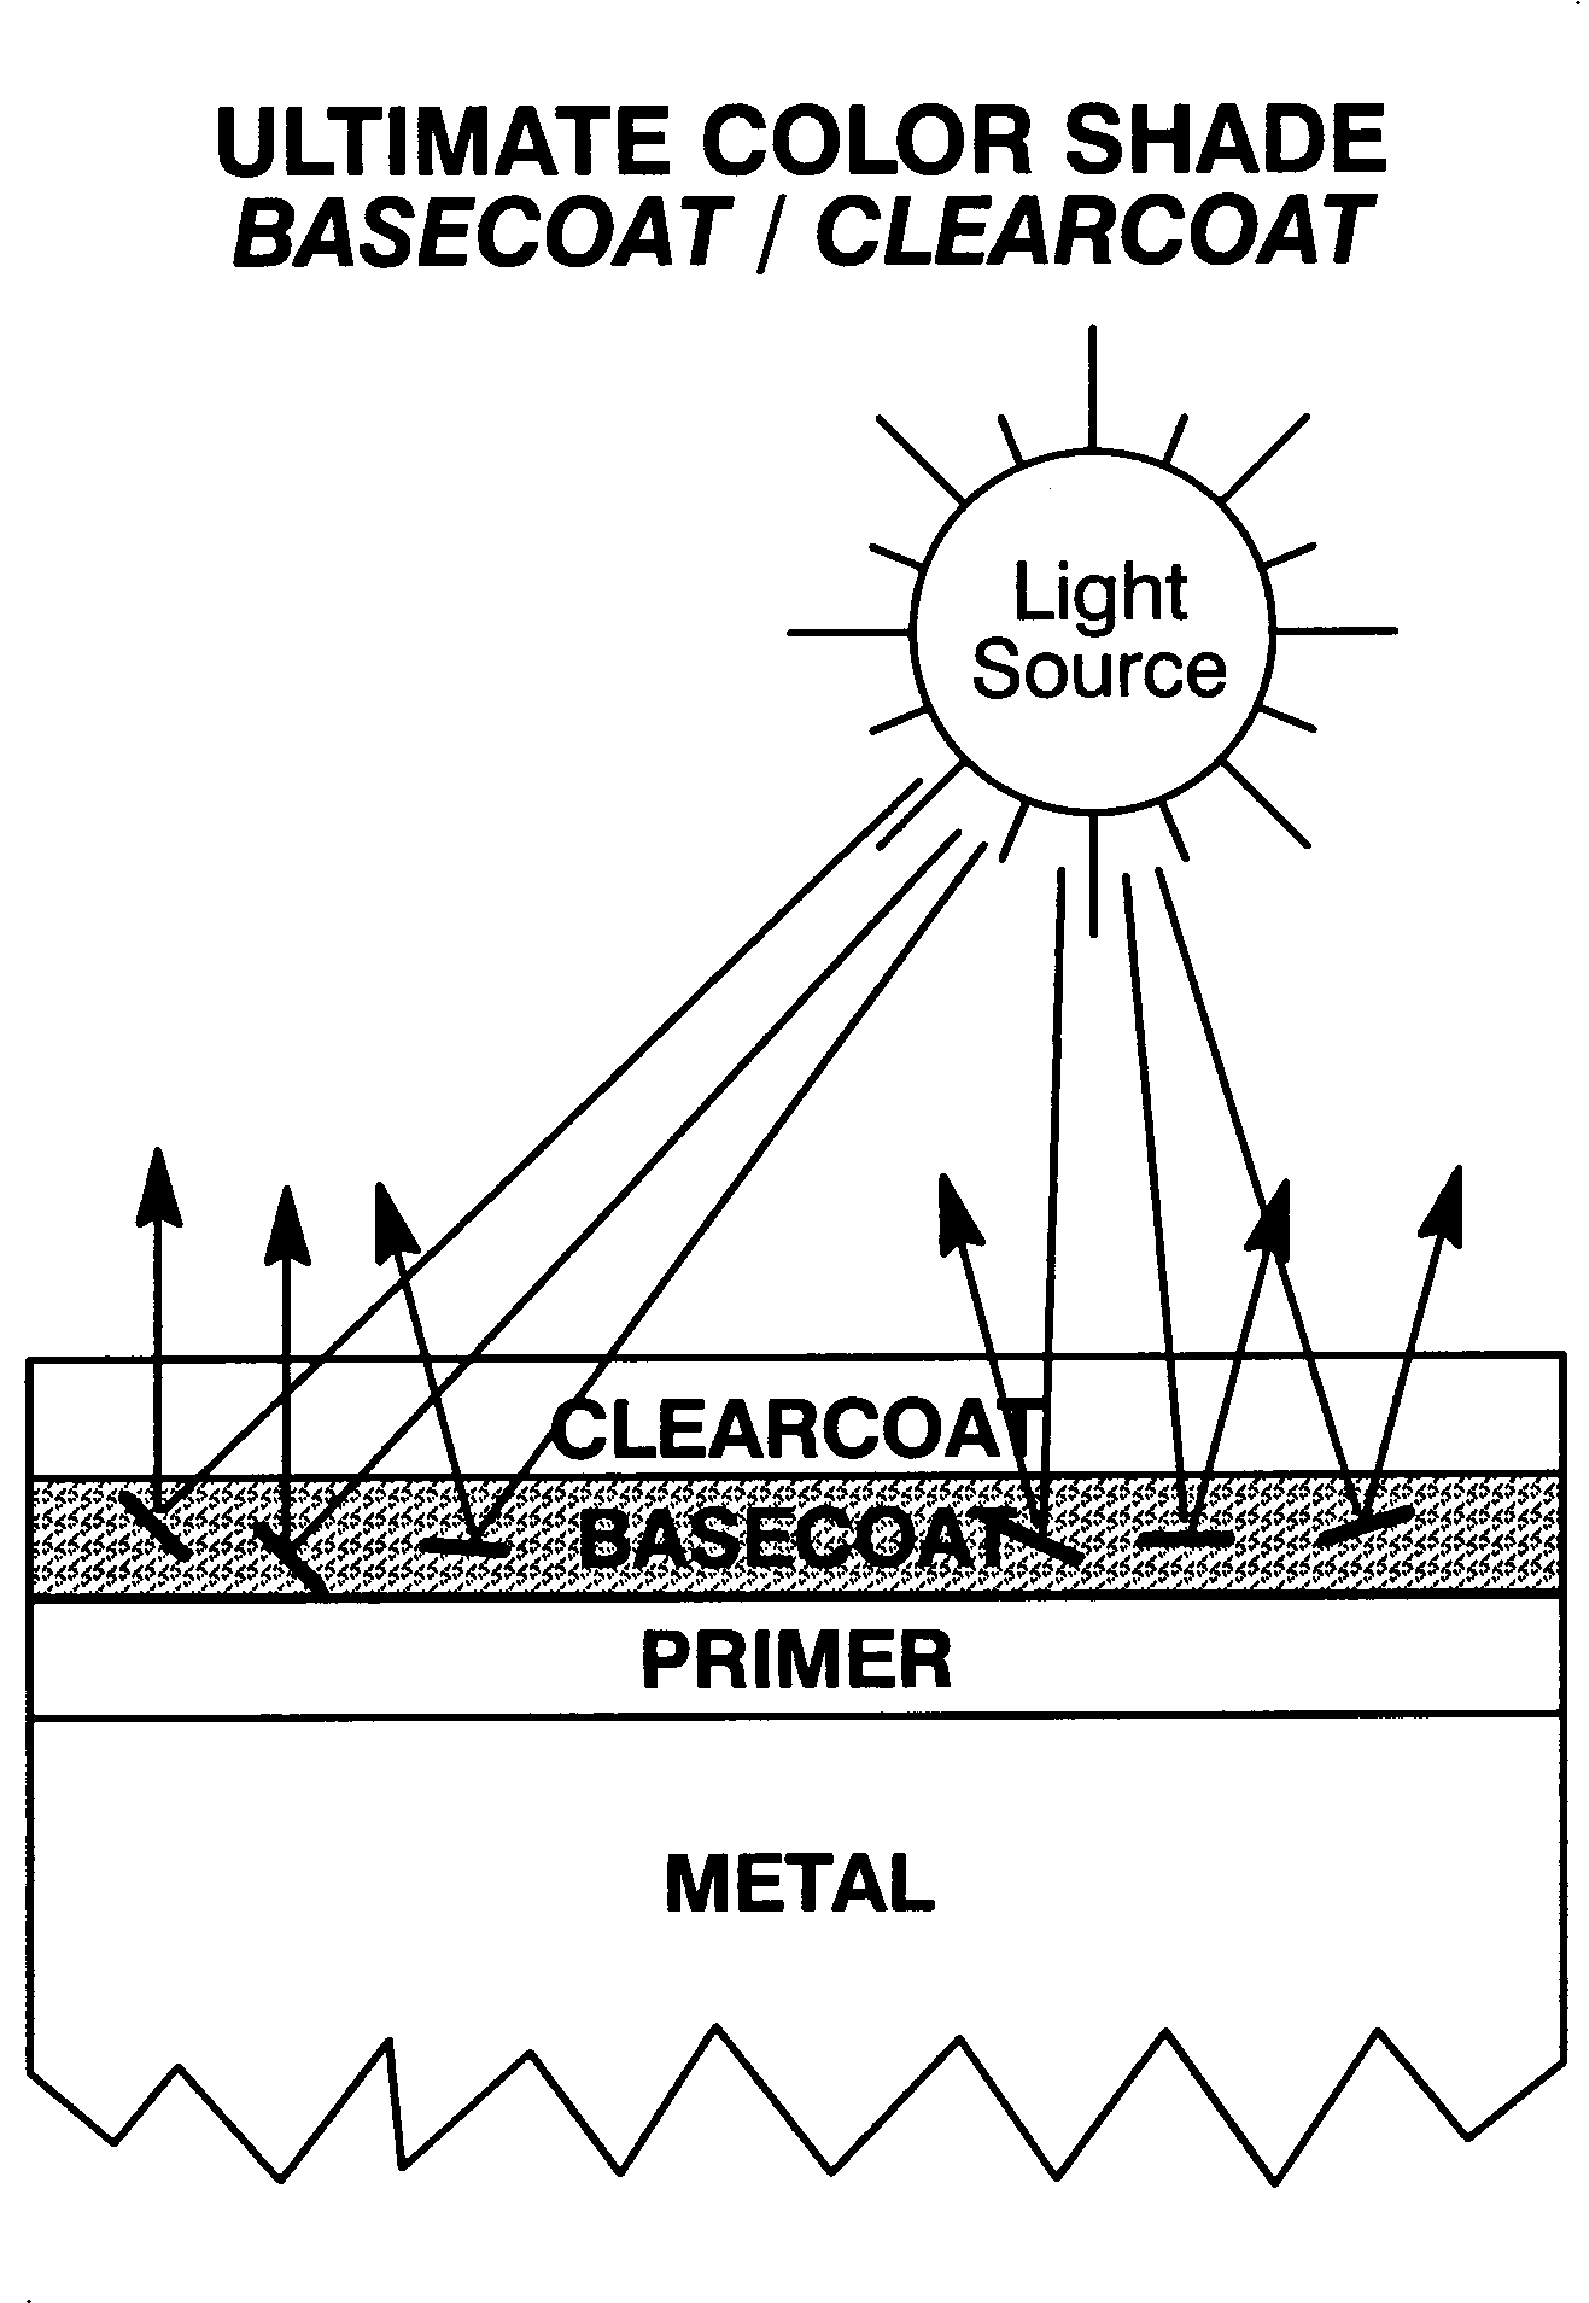
The Ultimate Basecoat/Clearcoat Color Shade
Light that penetrates the surface of the cured paint film, reflects off the aluminum flakes, then passes around the pigment of varying densities which produce the ultimate shade.
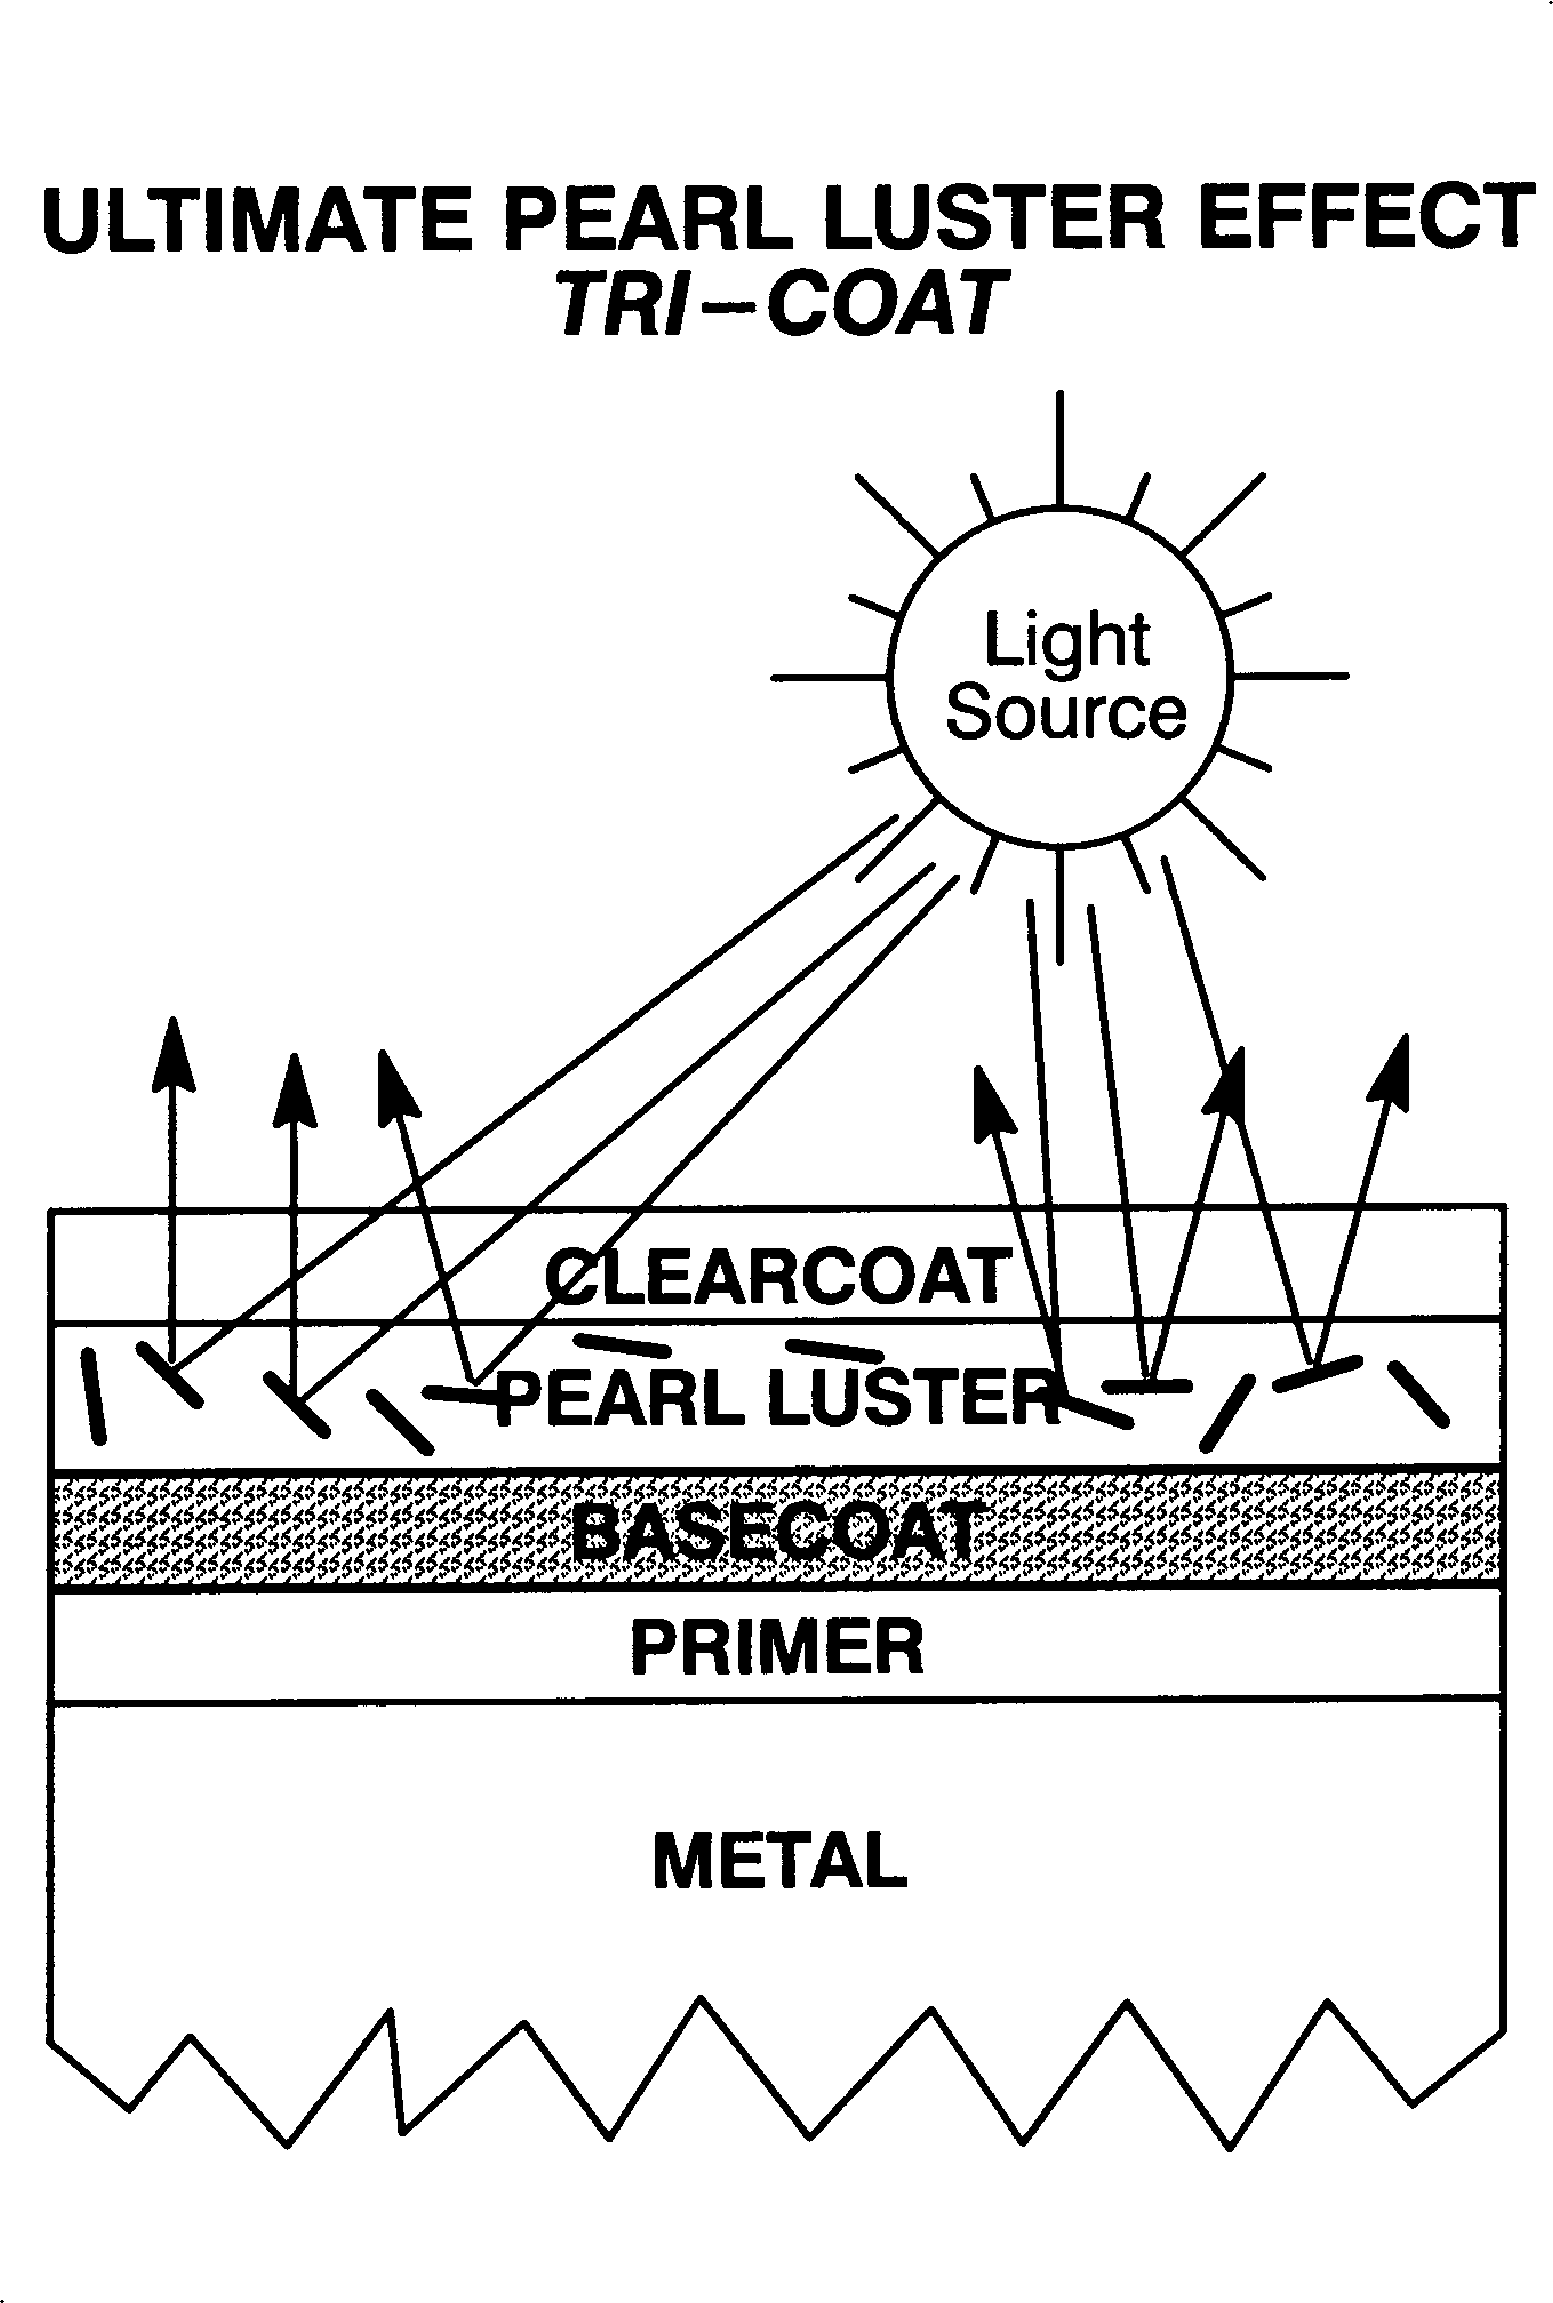
The Ultimate Pearl Luster Effect
Light striking the applied film of titanium dioxide on the flakes of mica creates the pearl luster effect by allowing the light to deflect at different angles. The light deflection determines the ultimate pearl luster effect you see.
The repair of these whit pearl colors requires different techniques and a different application process. Many of the conventional application techniques used on basecoat/clearcoat metallic colors do not apply when repairing a tri-coat finish.
Basecoat/clearcoat metallic colors can be adjusted by the following variables:
- Reduction
- Air pressure
- Gun distance
- Fluid adjustment
- Fluid tip size
The color is affected as follows:
| • | Higher air pressure/increased reduction causes a metallic color to shift to the light side on the face and dark on the flop. |
| • | Lower air pressure/decreased reduction causes a metallic color to shift to the dark side on the face and go light on the flop. |
Theoretically, when a metallic paint film is applied wet as it would be at lower air pressure and lower reduction, the aluminum flake settles deeper in the paint film and is surrounded by the color pigment causing a darker appearance. The color reacts in the opposite when the variables are reversed.
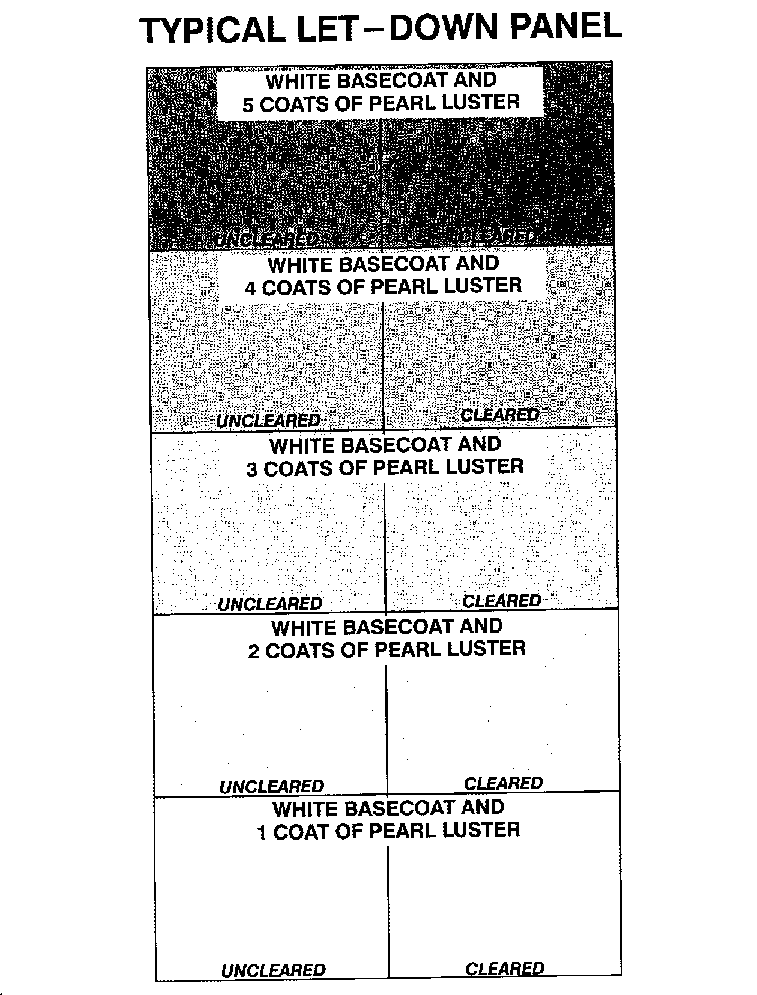
The theory does not apply to the white pearl tri-color system. The white basecoat is a solid material, therefore, will not be sensitive to the same variables that affect metallic colors. On the other hand, the pearl coat (or mid-coat) is very sensitive to film build. For this reason, a let-down panel should be used to determine the number of pearl coats required to match the OEM finish. This tool should be made prior to starting a repair. The let-down panel is used to match paint on the repair vehicle.
The Let-Down Panel
The let-down panel should be used as an aid to determine the appropriate number of pearl coats (mid-coats) that will be necessary to achieve a proper color match. This is done by comparing the various pearl coat film build areas on the let-down panel adjacent to the repair area, prior to starting the repair. It can be made in the following manner, refer to the illustration on the facing page.
- Apply the white base to hiding (paint code 40, WA9563).
- Mask the panel in five sections leaving the first section exposed.
- Apply a single medium wet coat of pearl material.
- Remove the masking paper from the second section.
- Apply a medium wet coat over the entire uncovered area of the panel.
- Repeat the above steps until the five sections are completed, leaving only one coat on the last section.
- Once the panel is dry, mask off one half of the panel dividing it lengthwise. Apply 2 coats of clear on the unmasked half of the panel. Remove the masking paper and let the panel dry.
Important: The let-down panel should illustrate five different film builds of pearl coat.
Paint Repair Technique Options
The successful repair of tri-coat finishes will depend upon the painter's repair technique and their experience with these colors. Remember, all tri-coat colors are designed to be repairable.
When selecting and using materials:
| • | Use only top quality materials. |
| • | Follow the manufacturer's labeled instructions. |
| • | Do not mix different brands of materials. |
The success of a paint repair depends upon:
| • | An acceptable color match. |
| • | A good blend with the original color. |
| • | A proper build-up of the pearl luster coat. |
| • | A similar gloss and smoothness of the finish. |
Important: The pearl luster is very sensitive to film build. As the film build of the pearl luster coat increases, the color becomes darker. If the pearl luster becomes too dark to blend into the adjacent areas, reapplication of the white base coat followed by pearl luster coats will be required.
Paint repair techniques for the tri-coat finishes consist of the following options:
- Spot/partial repair.
- Full panel repair (picture frame, without blending).
- Full panel repair (with blending of the pearl luster coat).
Caution: If product containing isocyanates are used, it is mandatory that adequate respirator protection be worn. Examples of such protection are: air line respirators with full hood or half mask. If not available, use a vapor/particulate type respirator, that the respirator manufacturer recommends as effective for isocyanate vapor and mist (unless local regulations prevail). Such protection should be worn during the entire painting process. Persons with respiratory problems or those allergic to isocyanates must not be exposed to isocyanate vapors or spray mist.
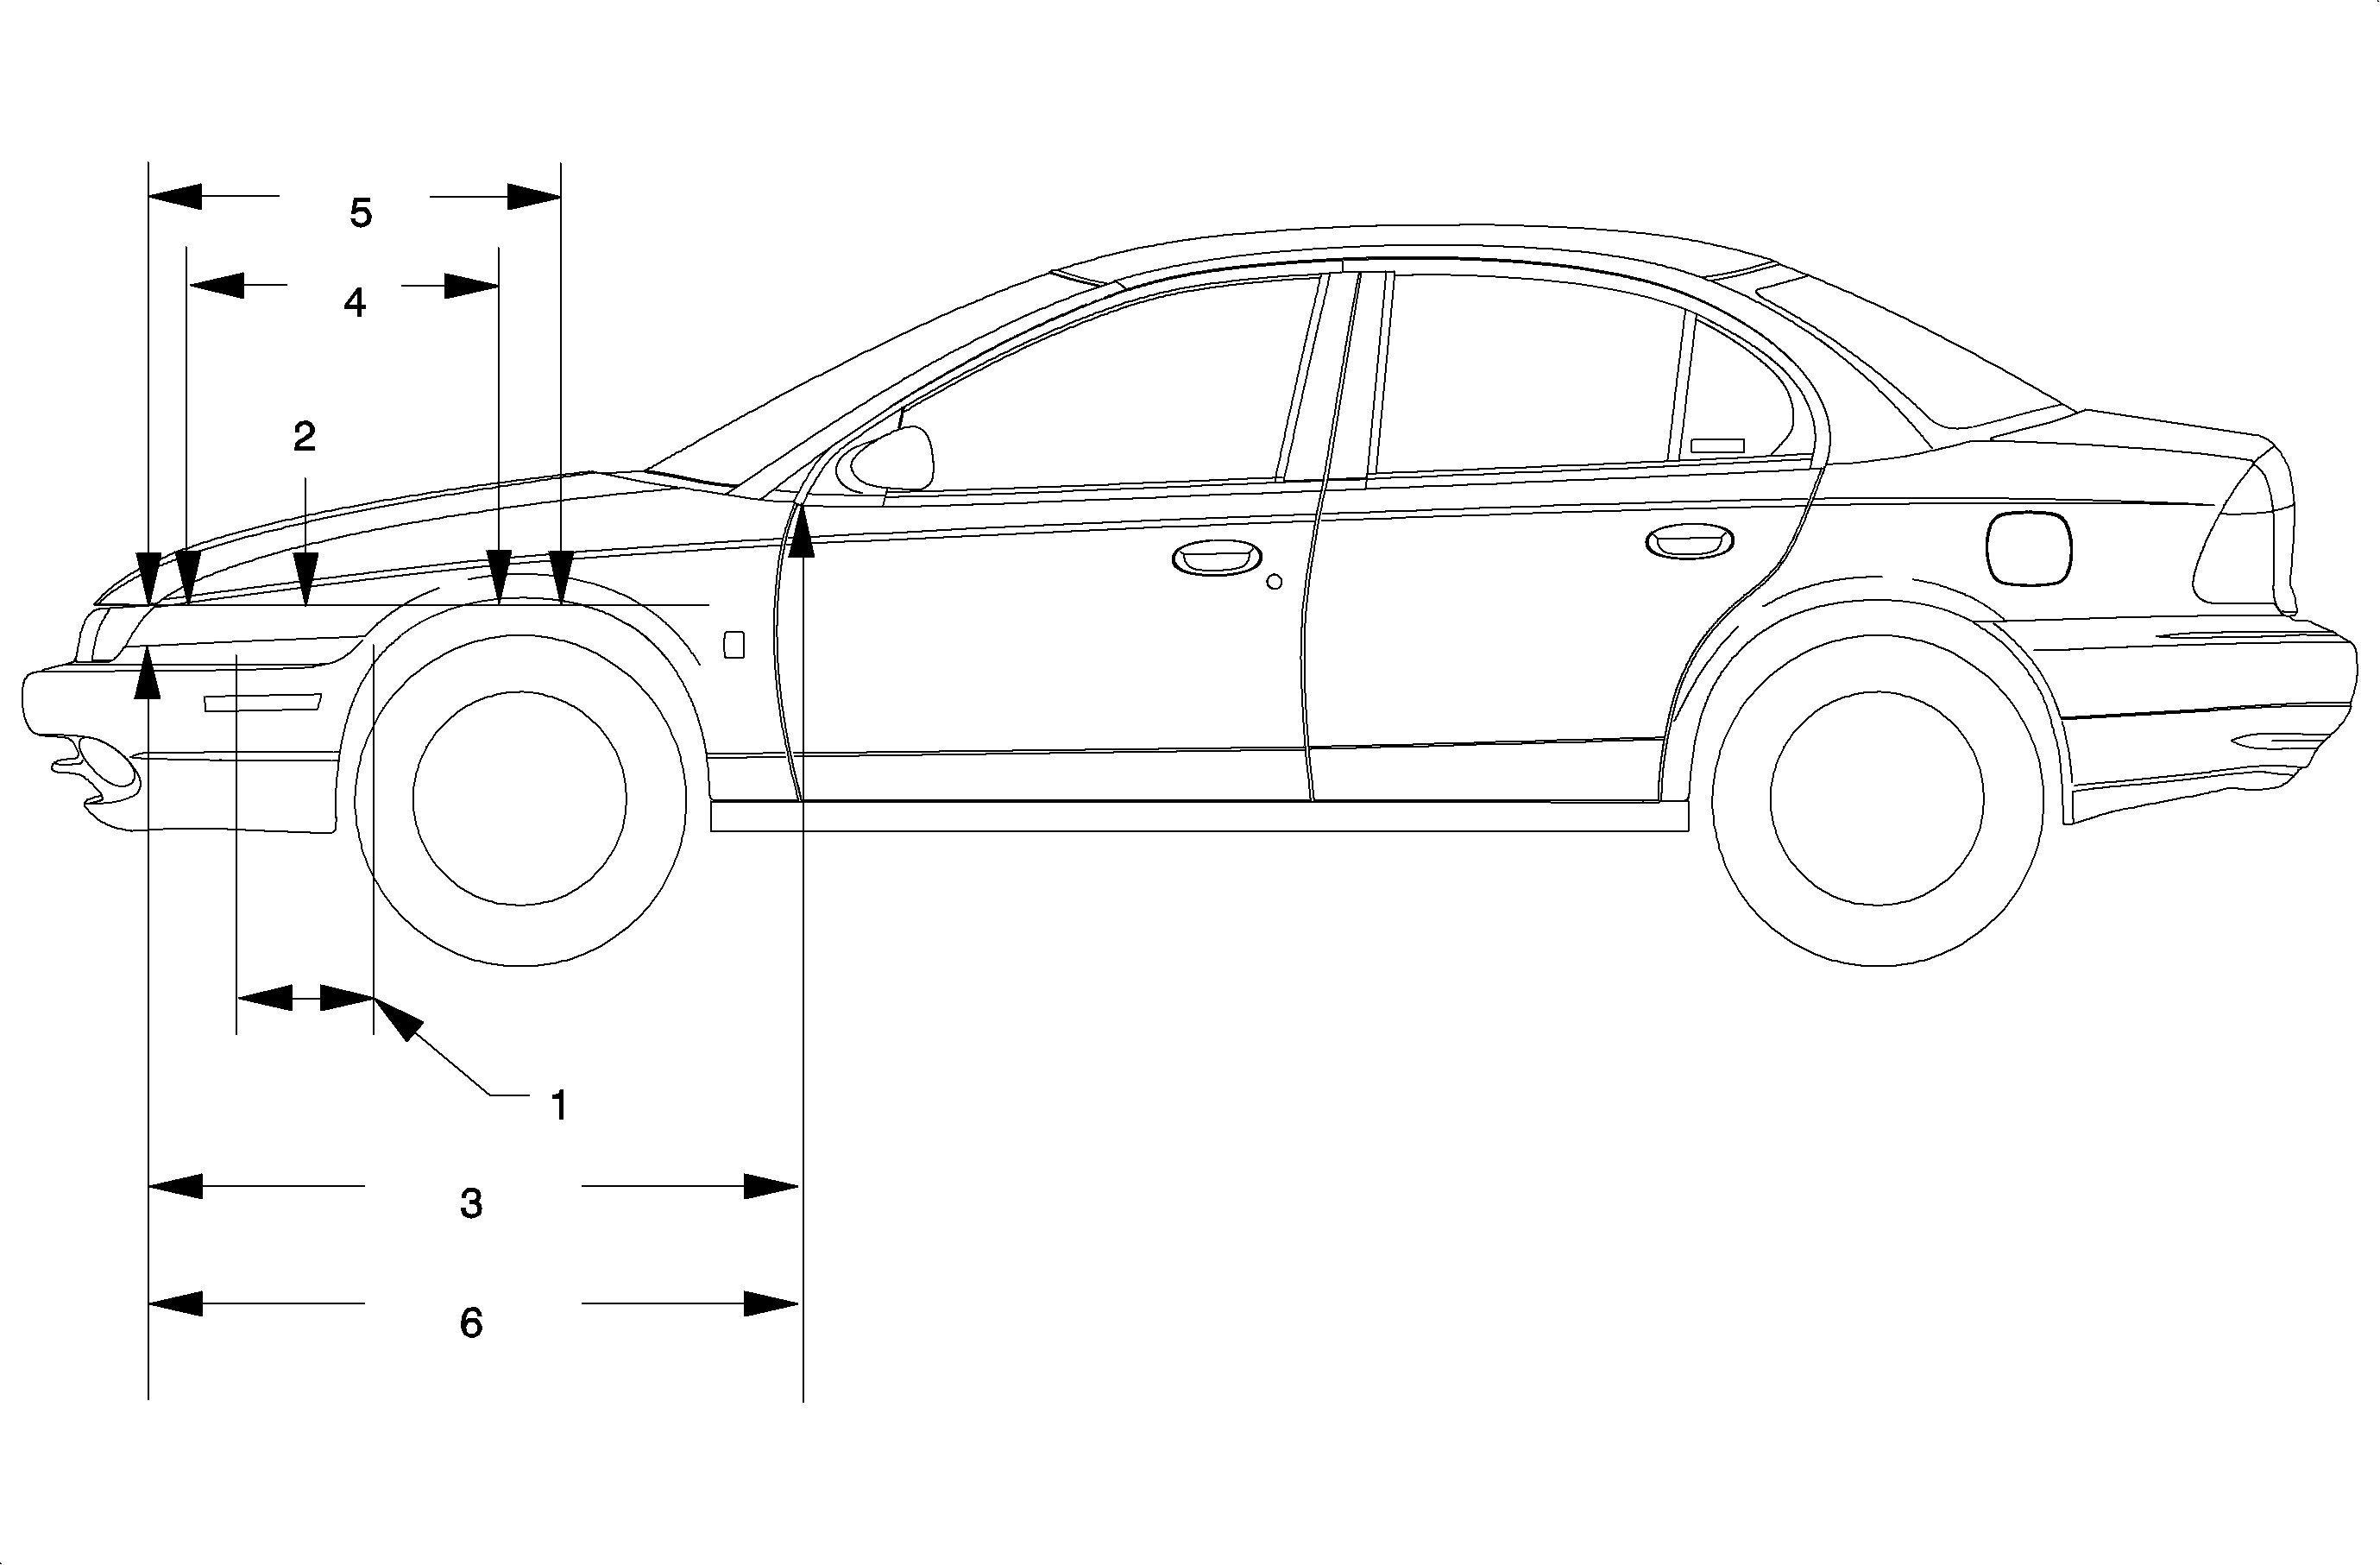
Repair Method -- Spot/Partial Repair
Use standard repair procedures for component panel repair. Sand, prime and compound the same as for any paint operation.
- Wet sand the primed areas where the base color will be applied with #400 grit sandpaper.
- Apply primer-surfacer as required. Follow labeled instructions.
- Compound or wet sand the areas to be painted with ultra-fine or finer sandpaper and wash the entire area with a cleaning solvent.
- Apply base color to hide. Feather out the base white in the blend areas. Use let-down panel to determine the number of pearl luster coats required to match the adjacent panels.
- Apply the pearl luster coat over the white base area then blend beyond as required. Allow sufficient flash time between coats.
- Apply clearcoat over the complete panel.
Important: For best results, light color primers or sealers should be used under the base white coat.
Full Panel Repair-Picture Frame Without Blending
- Wet sand the primed areas where the base color will be applied with #400 grit sandpaper.
- Apply primer-surfacer as required. Follow labeled instructions.
- Compound or wet sand the areas to be painted with ultra-fine or finer sandpaper and wash the entire area with a cleaning solvent.
- Apply base color to hide. Use let-down panel to determine the number of pearl luster coats required to match the adjacent panels.
- Apply the pearl luster coat over the entire panel until color match is acquired. Allow sufficient flash time between coats.
- Apply clearcoat over the complete panel.
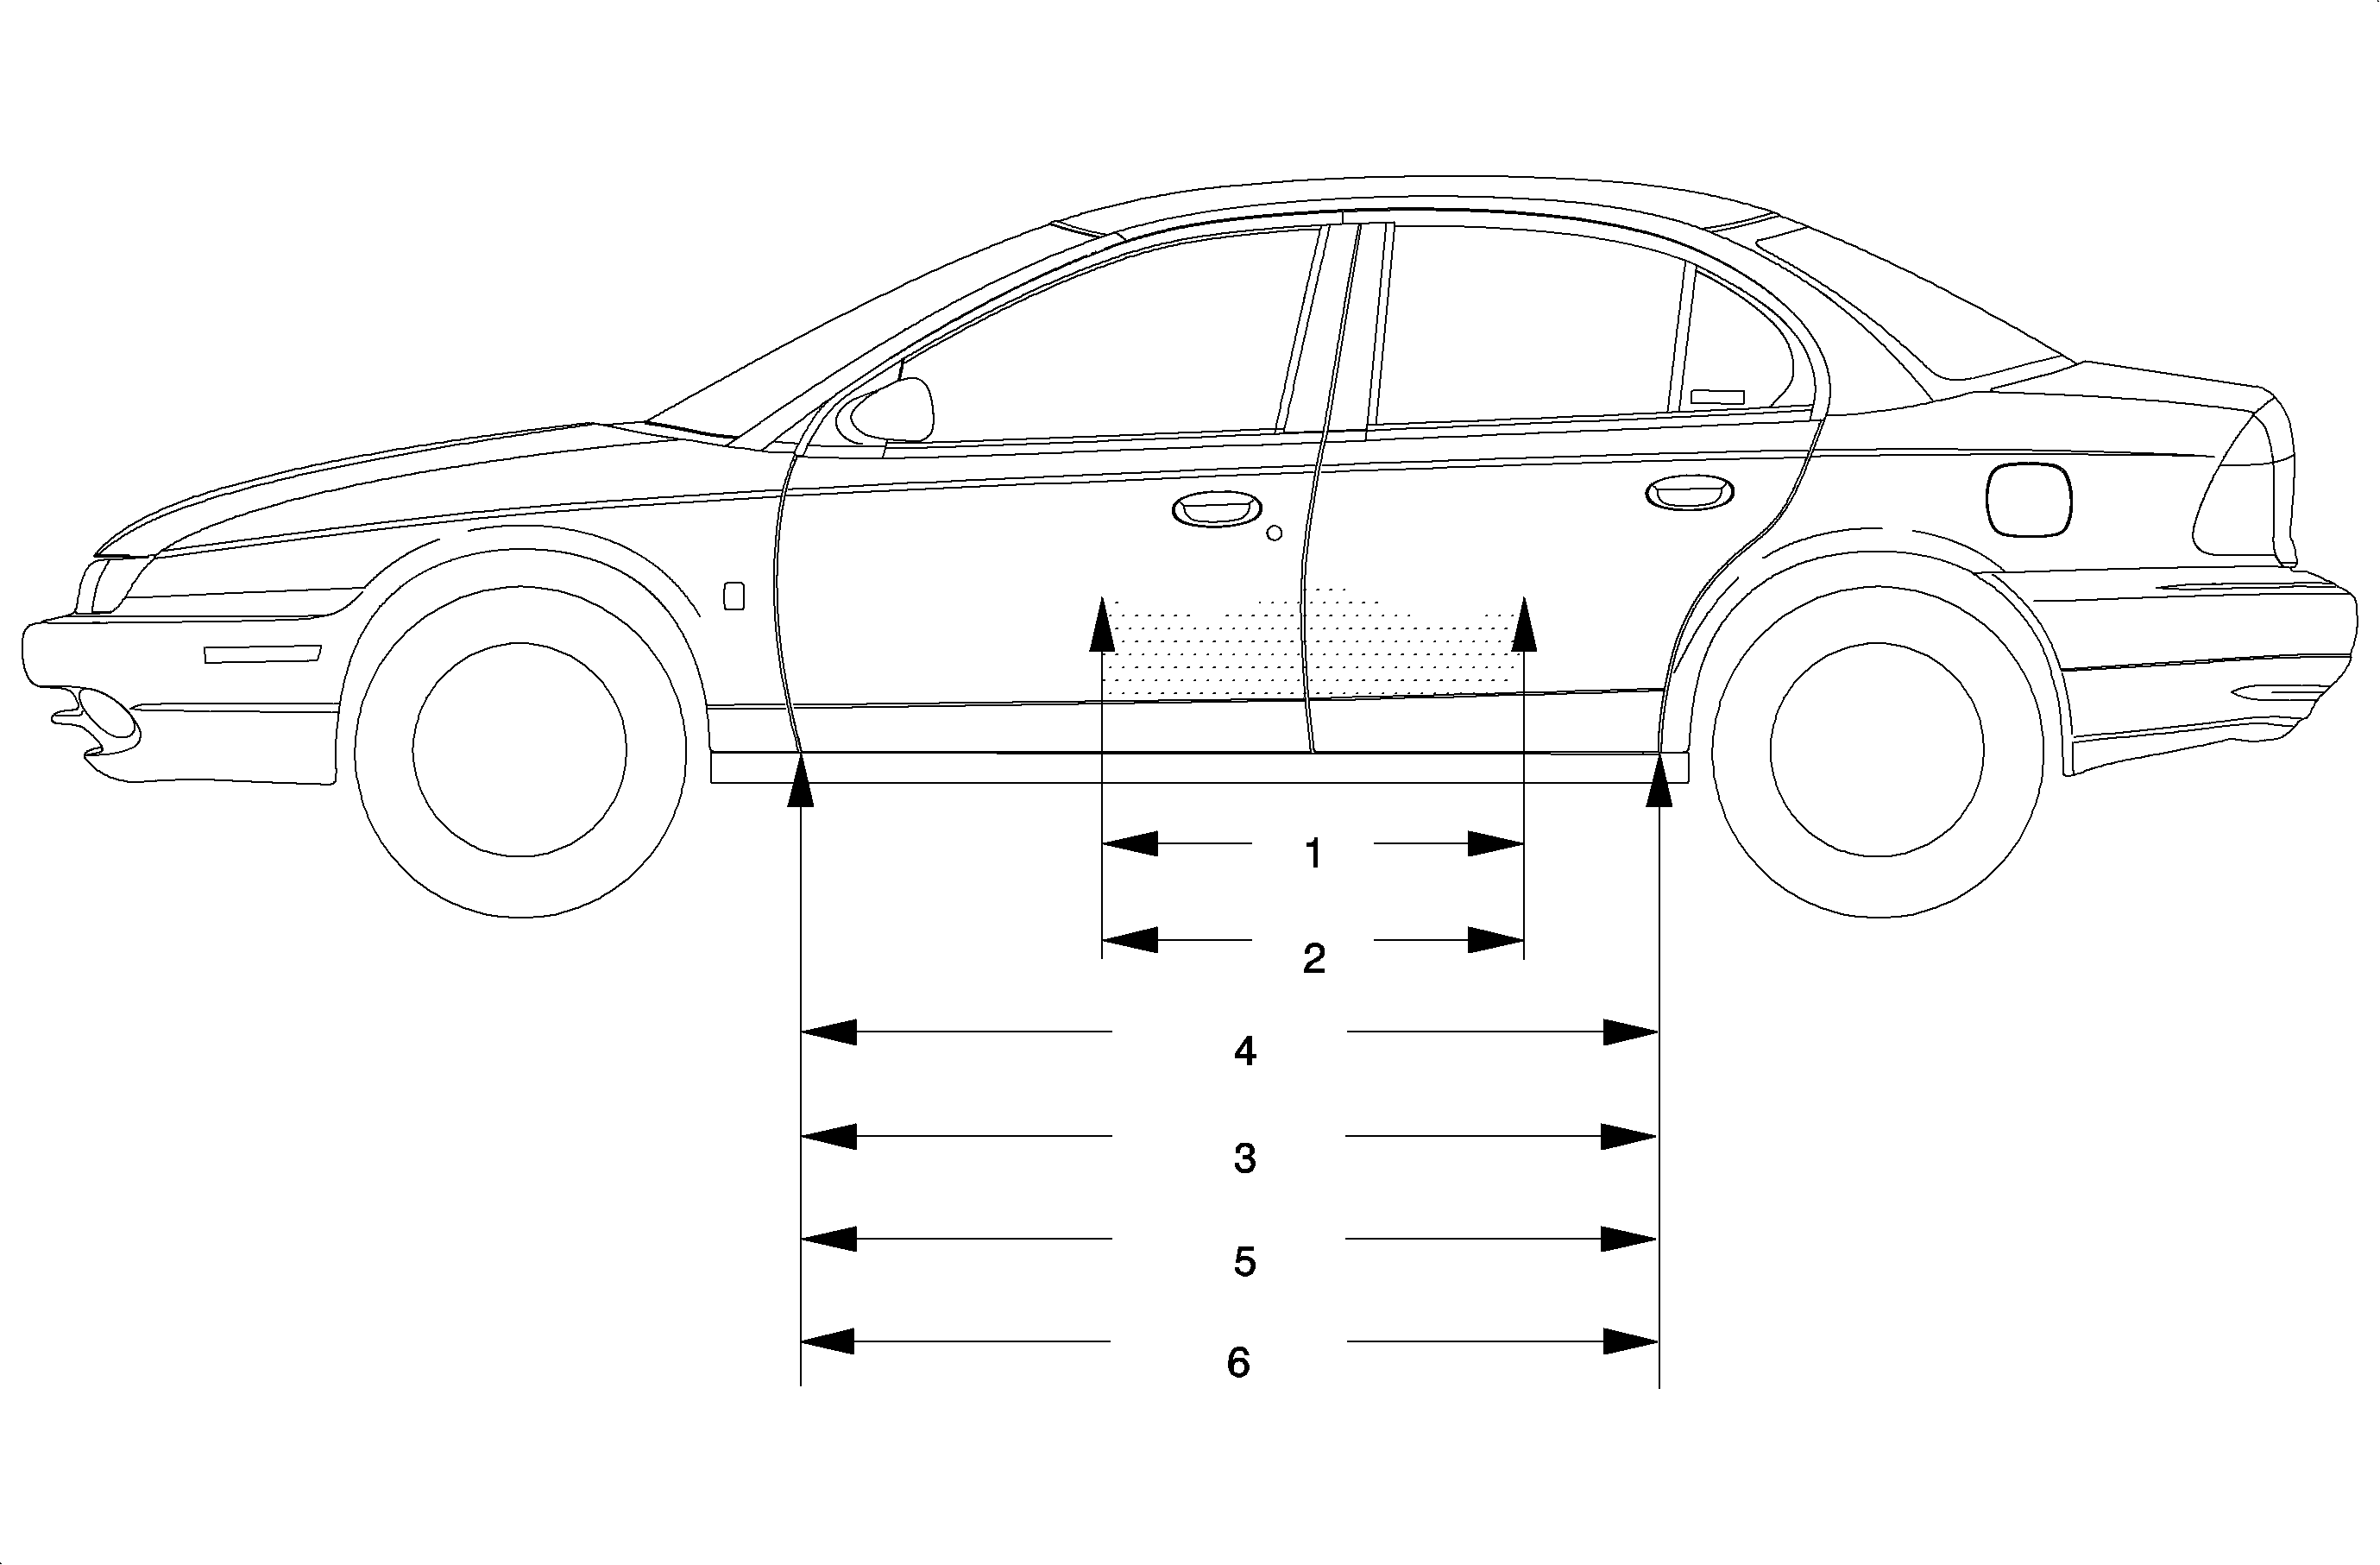
Important: For best results, light color primers or sealers should be used under the base white coat.
Full Panel Repair-Blending Into Adjacent Panels
- Wet sand the primed areas where the base color will be applied with #400 grit sandpaper.
- Apply primer-surfacer as required. Follow labeled instructions.
- Compound or wet sand the areas to be painted with ultra-fine or finer sandpaper and wash the entire area with a cleaning solvent.
- Mask off the blend panels and apply the basecoat to hide on the repair panel. Use the let-down panel to determine the number of pearl luster coats required to match the adjacent panels.
- Apply the required number of pearl luster coats to the repair panel, allowing sufficient flash time, between coats and let dry. Pull back the masking paper from the adjacent panels to check for color match. If the repair panel is lighter than the adjacent panels, replace the masking paper and apply additional pearl luster to the panel. Allow sufficient flash time between coats.
- Clearcoat the complete repair and adjacent blend panels.
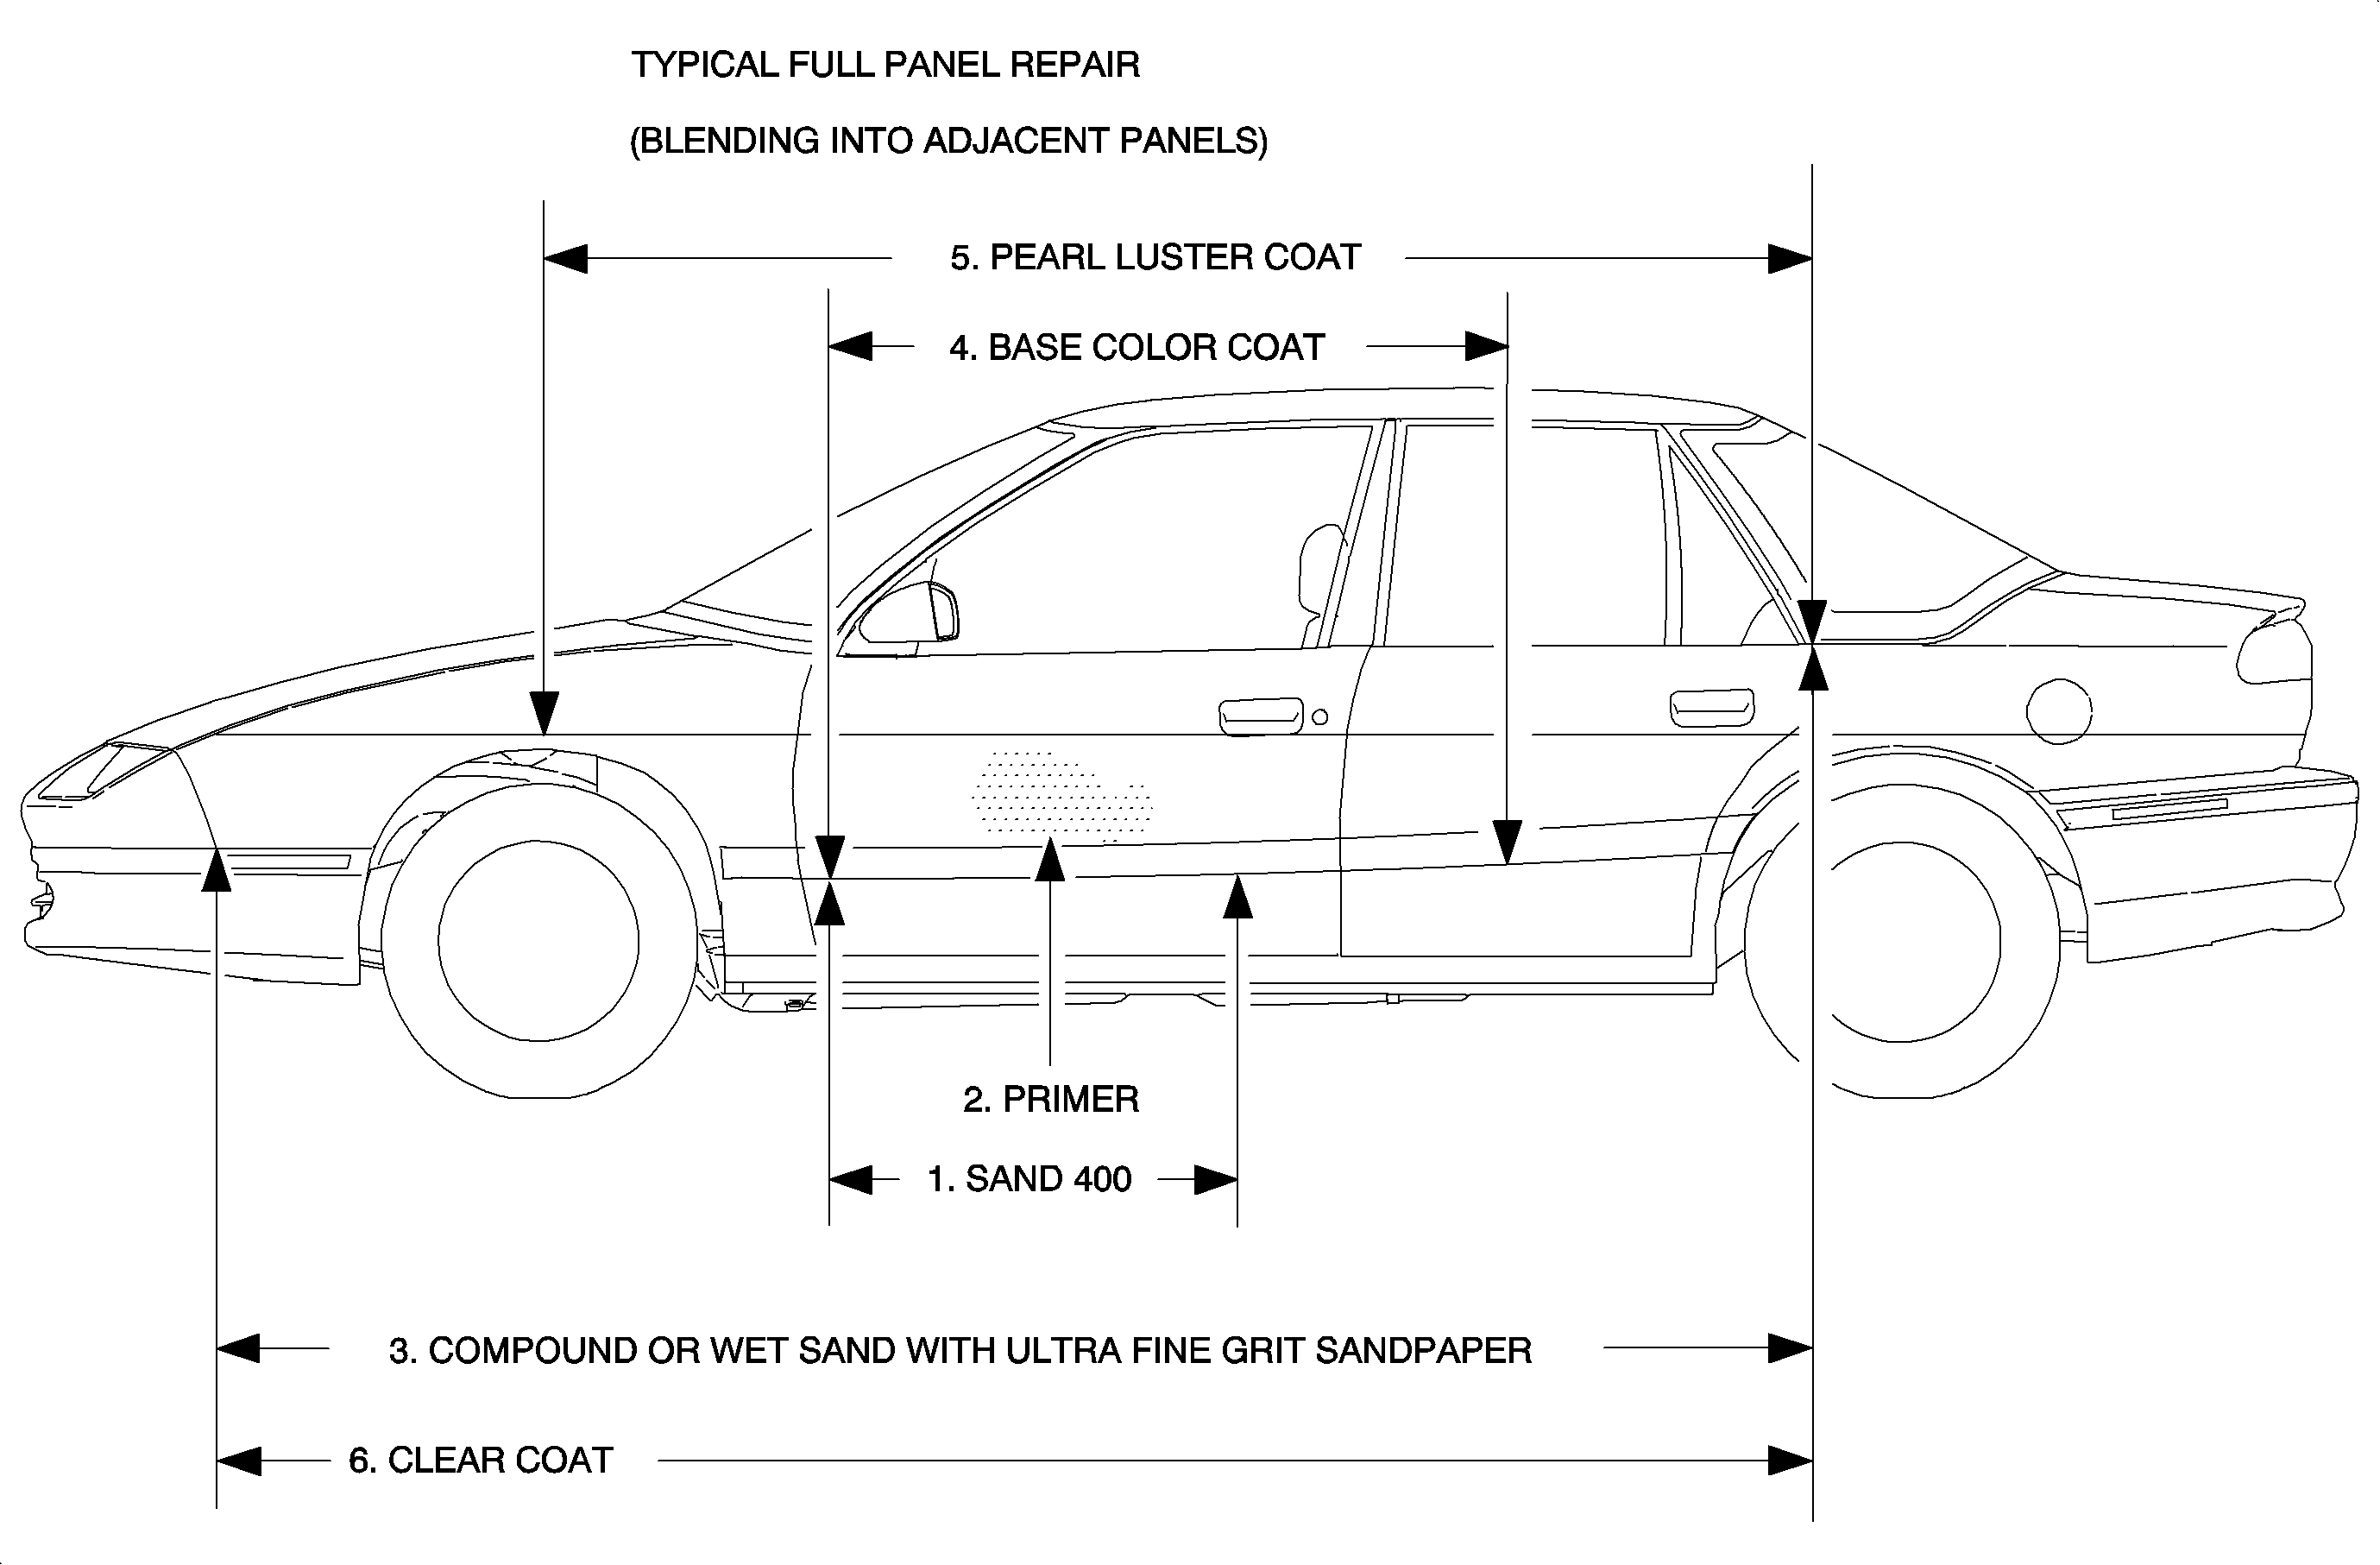
Important: For best results, light color primers or sealers should be used under the base white coat.
| • | Remove the masking paper from the blend panels and apply one more additional coat of pearl luster over the repair panel and onto the adjacent blend panel using an arching motion. |
| • | If additional coats are necessary, extend each coat beyond the last on the blend panel. |
