Important: If the transaxle has a failure of the coast
clutch sprag assembly or any of the below listed parts, a service kit is available.
Replace all of the parts of the kit to prevent loss of adequate lubrication. The kit
includes the following parts:
| • | Torque converter housing |
| • | Coast clutch sprag assembly |
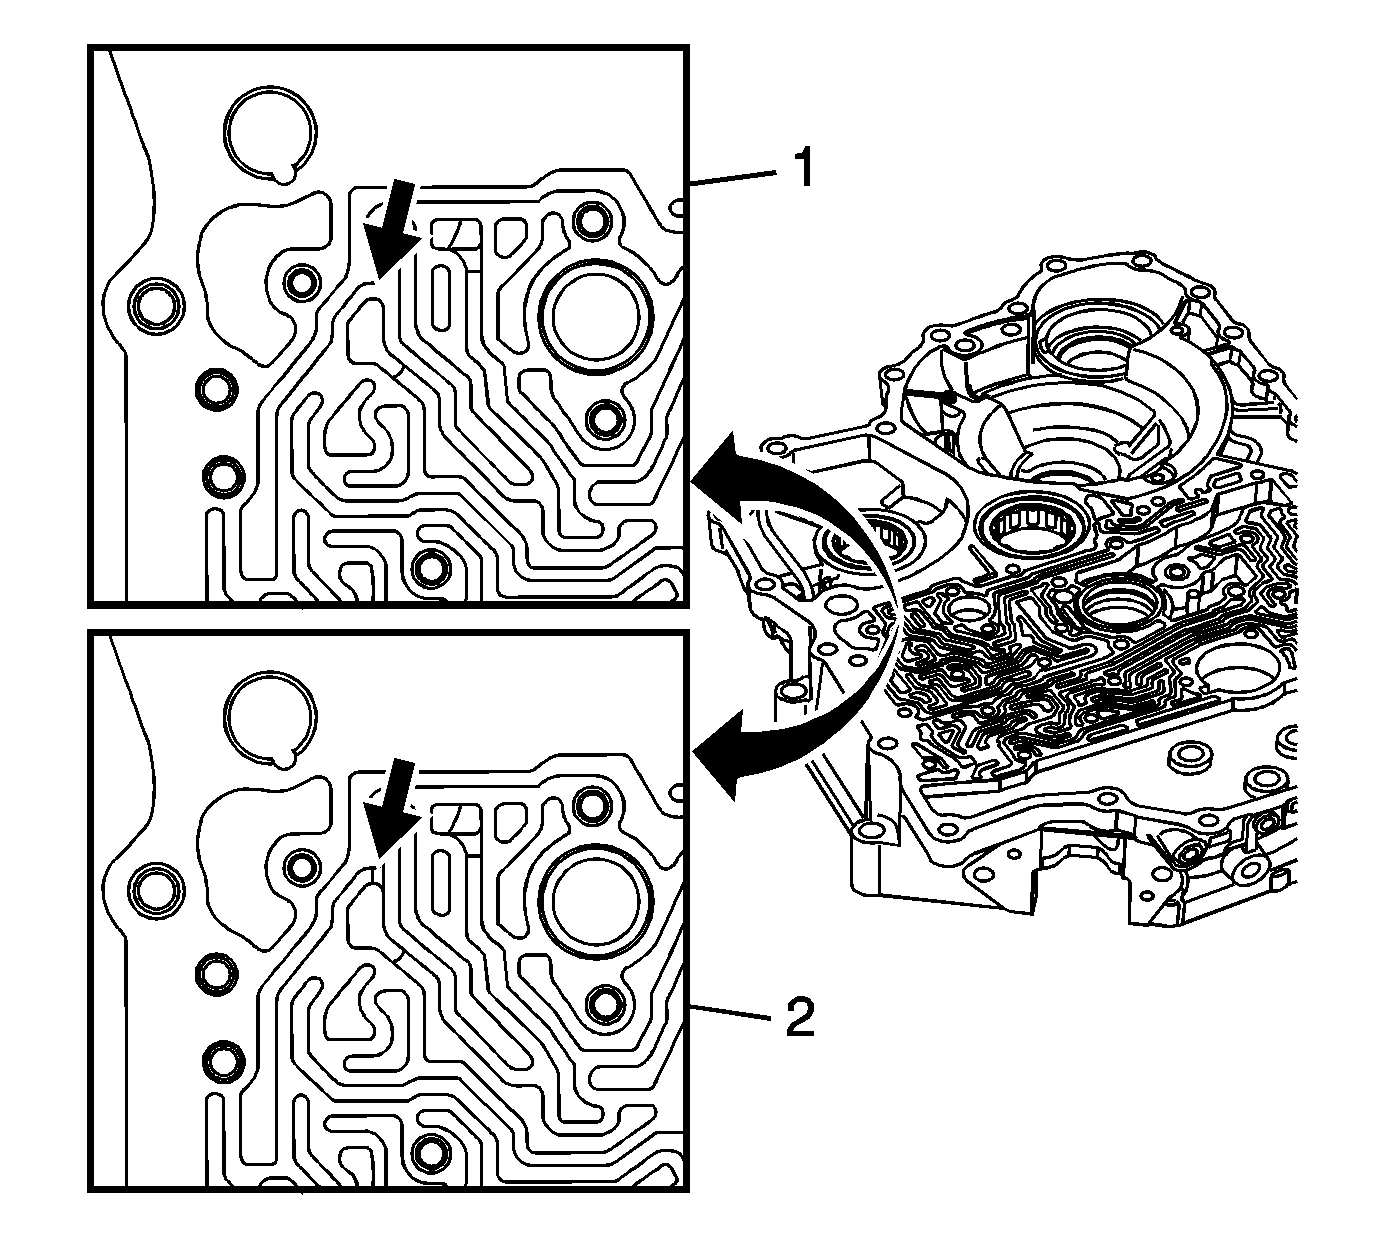
- Inspect the torque converter housing for the correct lubrication passage. The
1st design (1) will not have the small lubrication passage and the 2nd design (2)
will have the passage.
Notice: Refer to Fastener Notice in the Preface section.

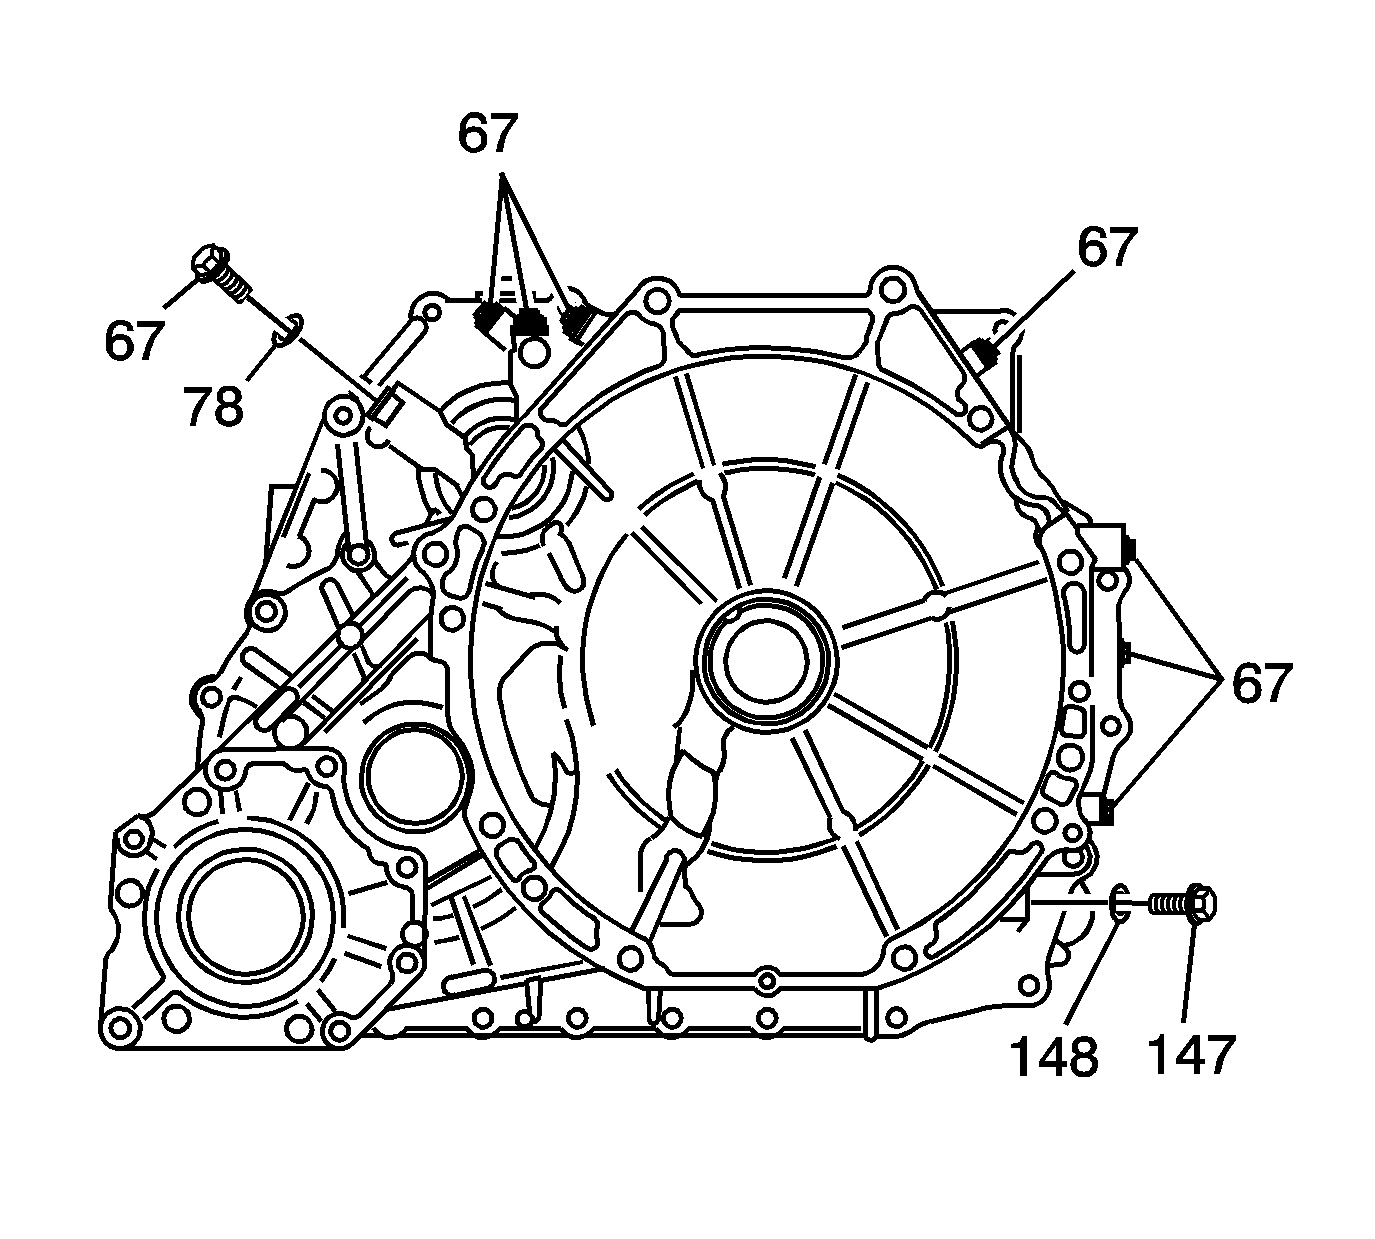
- Install the 8 8 mm fluid pressure test hole plugs (67) with new
sealing washers (78).
Tighten
Tighten the test hole plugs to 18 N·m
(13 lb ft).
- Install the 10 mm case plug (147) with the sealing washer (148).
Tighten
Tighten the plug to 26 N·m (20 lb ft).

- Using the 25 mm side of the DT 46516
(1) and EN 46342
(2), install the 12 mm x 24 mm
x 6 mm park pawl actuator shaft front bearing (134) until flush in the
transmission torque converter housing (150).

- Install the 3rd clutch shaft lube feed plate (139)
into the torque converter housing (150).
- Install the 28 mm x 52 mm x 12.8 mm 3rd clutch shaft
front bearing (138) into the torque converter housing (150).

- Using the 52 mm side of DT 46412
(2) and EN 46342
(1), install the 3rd clutch shaft front bearing (138)
until it bottoms in the torque converter housing (150).

- Install the output shaft lube feed plate (135)
into the torque converter housing (150).
- Install the 40.5 mm x 74 mm x 21 mm output shaft
front bearing (136) in the direction as shown in the insert.

- Using the 72 mm side of DT 46415
(2) and EN 46342
(1), install the output shaft front bearing (136) until
it bottoms out in the torque converter housing.
When the bearing is fully
seated the bearing will be slightly above the housing surface due to the design of
the bearing.

- Using the 37 mm side of the DT 46413
(2) and EN 46342
(1), install the 29 mm x 39 mm
x 9.5 mm 1st/2nd clutch shaft front bearing (127) until it bottoms out
into the torque converter housing (150).

- Install both 1st/2nd clutch shaft lube feed
collar O-ring seals (128) on the 1st/2nd clutch shaft lube feed collar (129).
Lubricate the O-ring seals with transmission fluid.

Important: Ensure the lube feed collar is fully seated
into the torque converter housing. Ensure there is no damage to the O-ring
seals during installation.
- Install the lube feed collar (129) into the torque converter housing
bore with the aid of the 40 mm side of DT 46413
(2) and EN 46342
(1) as shown.

- Using the 62 mm side of DT 46414
(2) and EN 46342
(1), install the 32 mm x 63 mm x 19 mm
1st/2nd clutch shaft intermediate bearing (130) with the groove for the lock
tab facing up.
The 1st/2nd clutch shaft intermediate bearing is properly
installed into the torque converter housing when the following conditions are met:
| • | Install the bearing until the lock tab groove is aligned to the lock tab
surface. |
| • | When the lock tab is flush to the mounting surface, the lock tab will
slide into the bearing groove . |

- Install the 1st/2nd clutch shaft intermediate bearing retainer lock tab retainer (132).
- Install the 1st/2nd clutch shaft intermediate bearing retainer M6 x 1.0 mm
x 20 mm bolt (133).
Tighten
Tighten the bolt to 12 N·m (106 lb in)
- Secure the bolt by bending the lock tab against the bolt head.

Important:
| • | Lubricate all parts with automatic transmission fluid during installation. |
| • | Replace the tapered roller bearing with a NEW one whenever the race is
replaced. |
| • | Do not use the selective shim or shims on the torque converter housing
side. |
| • | Adjust the preload after replacing the tapered roller bearing and race. |
- Install the front differential front bearing race spacer (900) into the
torque converter housing (150).
- Install the front differential tapered front roller bearing 80 mm
race (901) into the torque converter housing (150).

- Using the 78 mm side of DT 46428
(2) and EN 46342
(1), install the 80 mm front differential tapered front
roller bearing race (901) until fully seated.

- Using the DT 46414
(2) and EN 46342
(1), install the torque converter bearing (115) until it bottoms
out flush in the torque converter housing (150) using the 68 mm side
of the driver.

Notice: Do not install the torque converter fluid seal (116) below the
flanged section of the torque converter housing or premature failure
of the mainshaft front bearing could occur.
- Using the DT 46417
and EN 46342
, install the torque converter
fluid seal (116) until it is flush with the flanged section of the torque converter
housing (150) using the 45 mm side of the driver.

- Using EN 46342
(1) and DT 46429
(2), install the 35 mm x 54 mm x 8 mm front wheel
drive shaft fluid seal (117) into the torque converter housing (150)
until the seal is flush with the housing surface.

- Using the 65 mm side of DT 46417
(2) and EN 46342
(1) install a NEW 48 mm x 65 mm x 7.5 mm
transfer case input shaft seal (118) into the torque converter housing (150)
until the seal is flush with the housing surface.

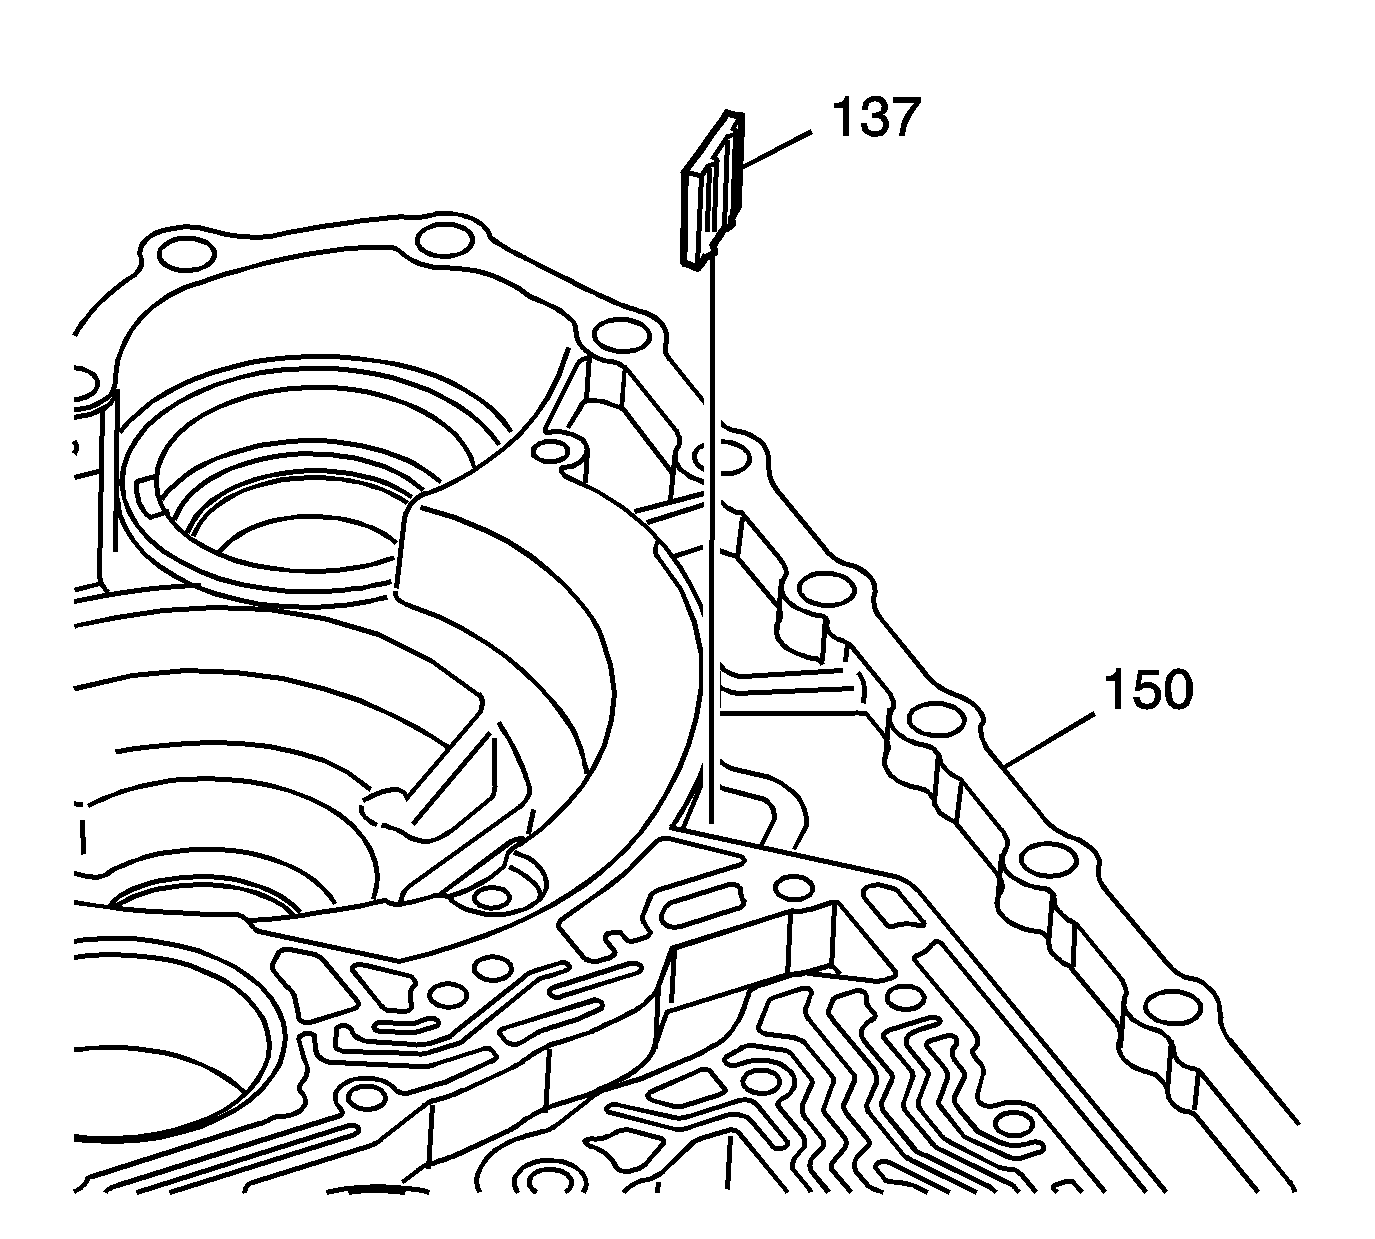
- Install the magnetic chip collector (137)
back into the torque converter housing assembly (150).


