Exhaust Manifold Replacement - Right Side RPOs L26/L32
Removal Procedure
- Remove the fuel injector sight shield. Refer to Fuel Injector Sight Shield Replacement in Engine Mechanical - 3.8L.
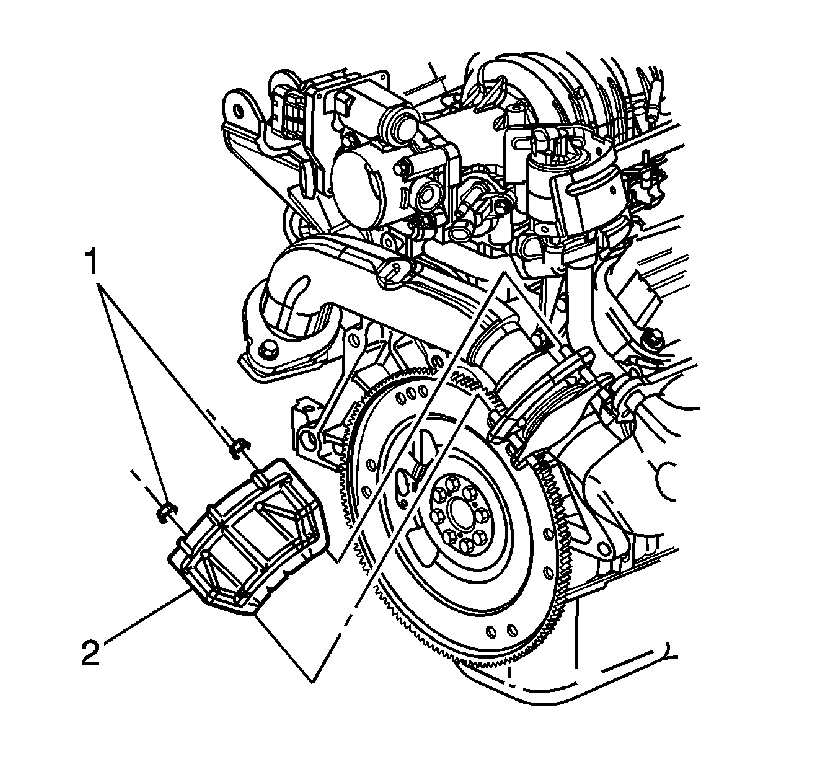
- Remove the exhaust crossover heat shield nuts (1).
- Remove the exhaust crossover heat shield (2).
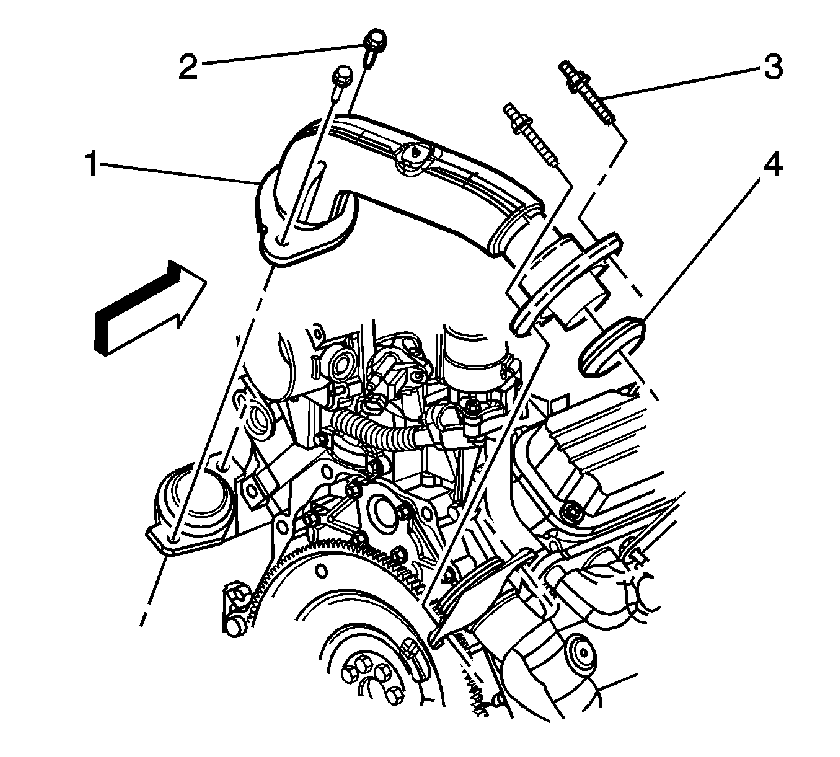
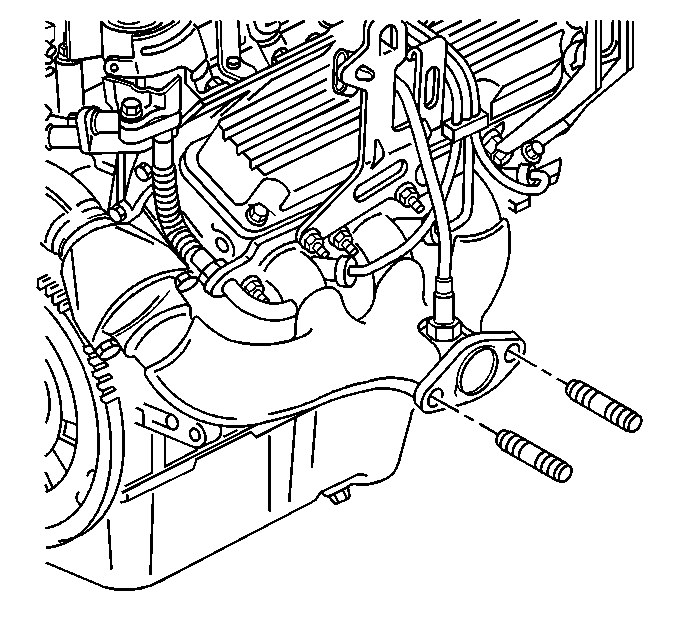
- Remove the exhaust crossover pipe studs (3) from the right exhaust manifold.
- Raise and support the vehicle. Refer to Lifting and Jacking the Vehicle in General Information.
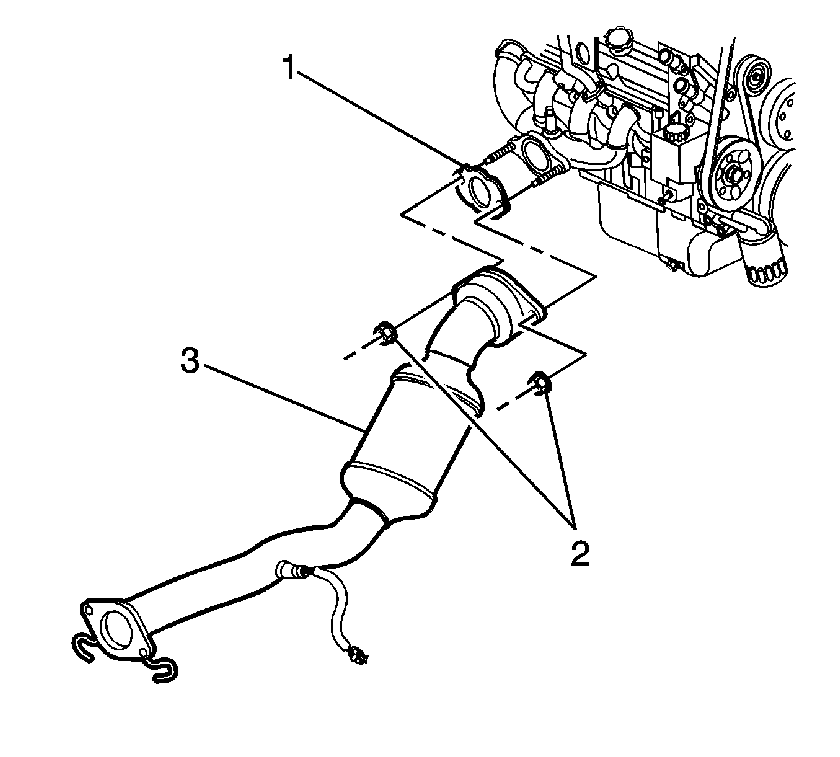
- Remove the exhaust manifold pipe stud nuts (2) and the catalytic converter pipe (3) from the right exhaust manifold.
- Lower the vehicle.
- Rotate the engine to access the right side of the engine. Refer to Rotating the Engine for Service Access in Engine Mechanical - 3.8L.
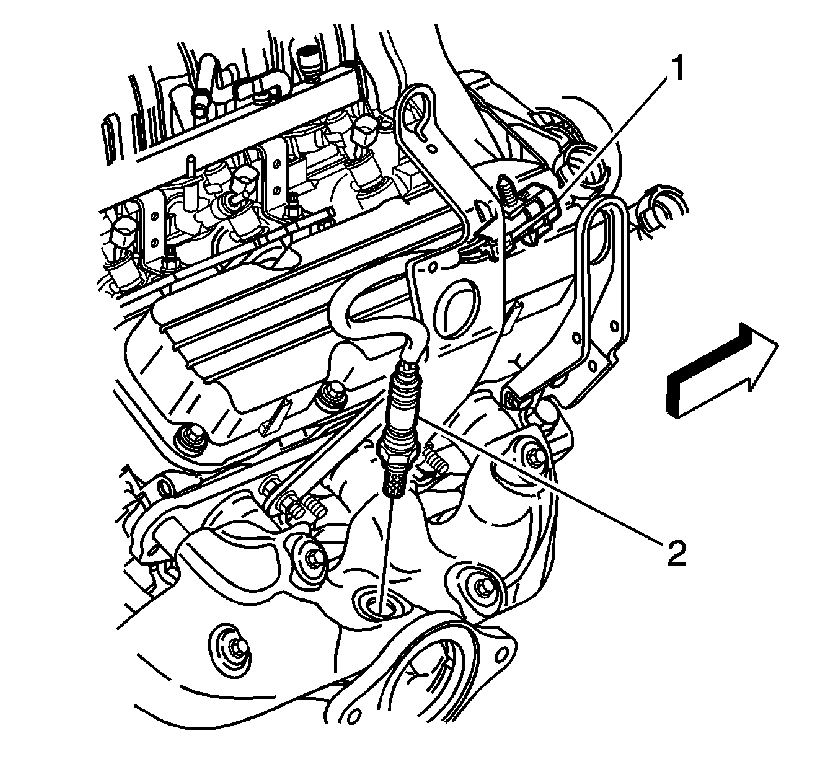
- Disconnect the heated oxygen sensor (HO2S) electrical connector (1).
- Remove the HO2S electrical connector (1) from the engine sight shield bracket.
- Remove the HO2S (2) from the right exhaust manifold. Refer to Heated Oxygen Sensor 1 Replacement
- Remove the right side spark plugs from cylinders 2, 4 and 6. Refer to Spark Plug Replacement in Engine Controls - 3.8L.
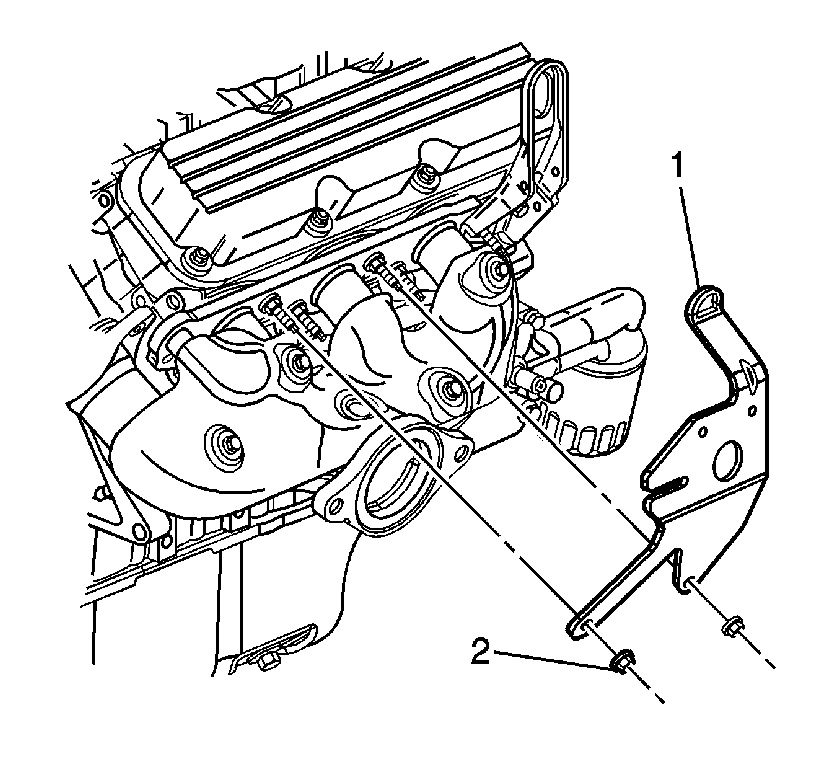
- Remove the fuel injector sight shield bracket nuts (2).
- Remove the fuel injector sight shield bracket (1).
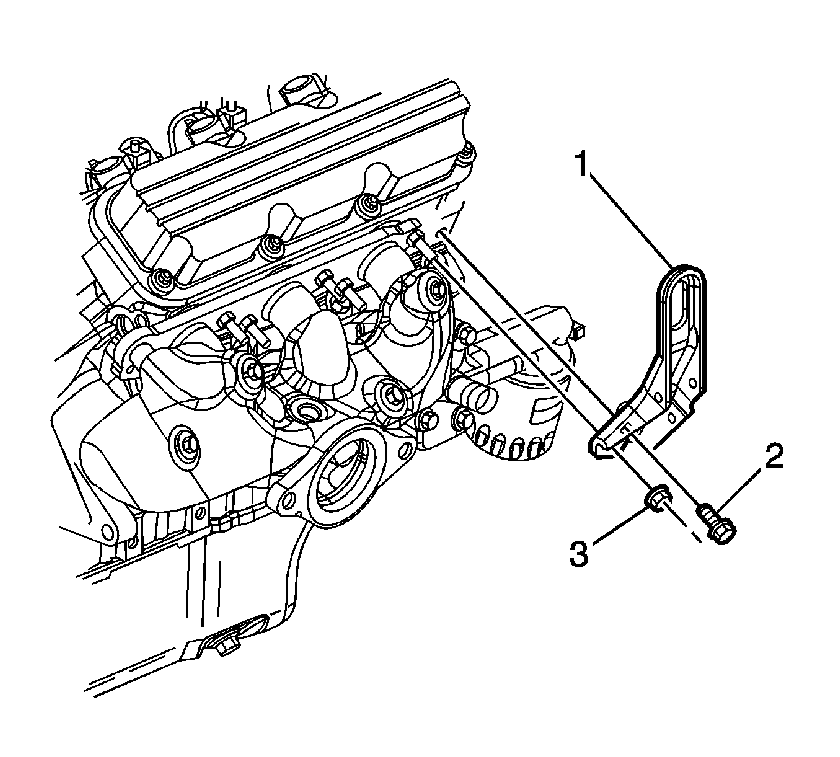
- Remove the right engine lift bracket bolt (2) and the nut (3).
- Remove the right engine lift bracket (1).
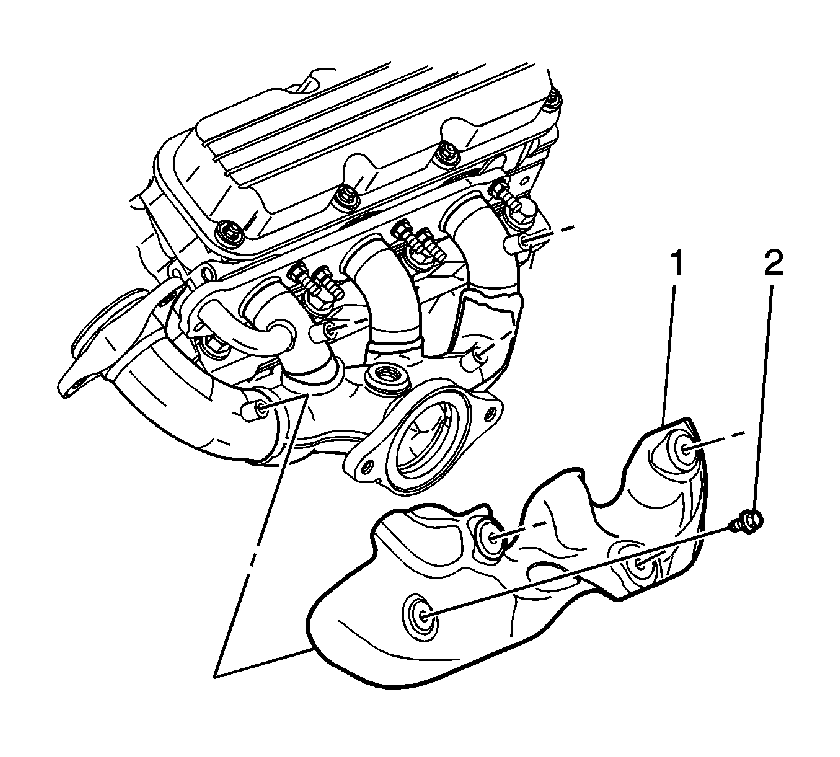
- Remove the right exhaust manifold heat shield bolts (2).
- Remove the right exhaust manifold heat shield (1).
- Raise the vehicle.
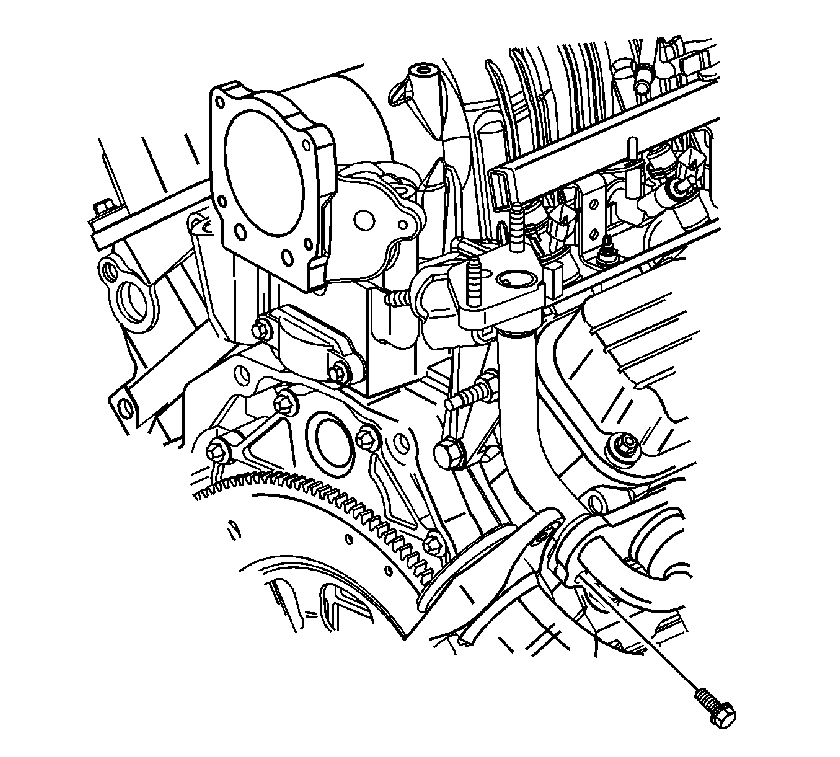
- Remove the exhaust gas recirculation (EGR) valve inlet adapter pipe bolt (1) from the right exhaust manifold.
- Lower the vehicle.
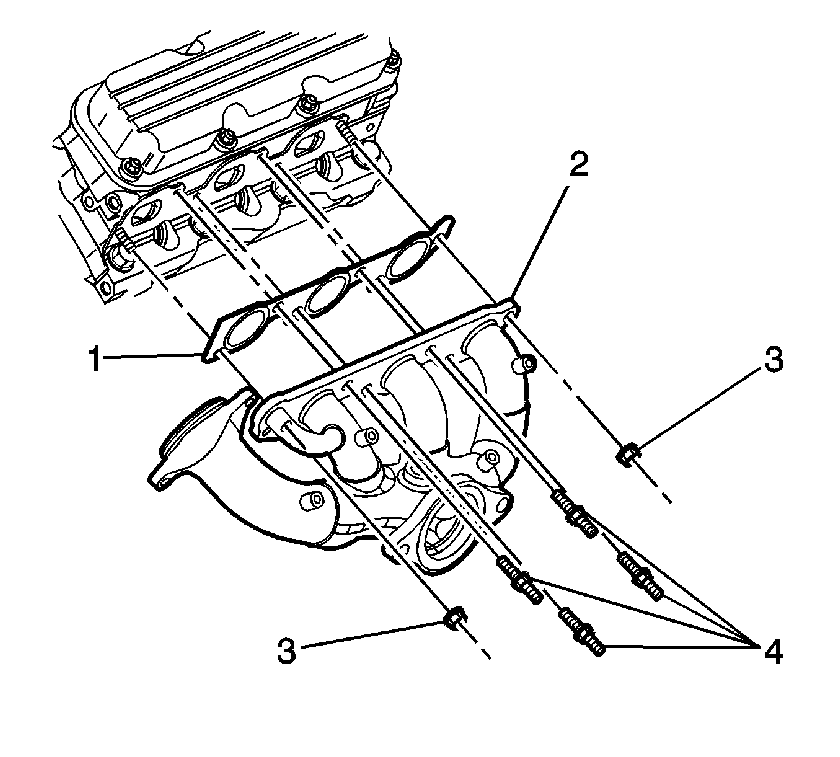
- Remove the right exhaust manifold studs (4) and the nuts (3).
- Remove the right exhaust manifold (2).
- Remove the right exhaust manifold gasket (1).
- Remove the exhaust manifold studs if damaged.
- Clean and Inspect the right exhaust manifold. Refer to Exhaust Manifold Cleaning and Inspection in Engine Mechanical - 3.8L.
Installation Procedure
- Install the exhaust manifold studs if removed.
- Install the right exhaust manifold gasket (1).
- Install the right exhaust manifold (2).
- Install the right exhaust manifold studs (4) and the nuts (3).
- Raise the vehicle.
- Install the exhaust gas recirculation (EGR) valve inlet adapter pipe bolt (1) to the right exhaust manifold.
- Lower the vehicle.
- Install the right exhaust manifold heat shield (1).
- Install the right exhaust manifold heat shield bolts (2).
- Install the right engine lift bracket (1).
- Install the right engine lift bracket bolt (2) and the nut (3).
- Install the fuel injector sight shield bracket (1).
- Install the fuel injector sight shield bracket nuts (2).
- Install the right side spark plugs to cylinders 2, 4 and 6. Refer to Spark Plug Replacement in Engine Controls - 3.8L.
- Install the HO2S (2) to the right exhaust manifold. Refer to Heated Oxygen Sensor 1 Replacement
- Install the HO2S electrical connector (1) to the engine sight shield bracket.
- Connect the HO2S electrical connector (1).
- Return the engine to the original position.
- Raise the vehicle.
- Install the catalytic converter pipe (3) to the right exhaust manifold.
- Install the catalytic converter pipe stud nuts (2) to the right exhaust manifold.
- Lower the vehicle.
- Install the exhaust crossover pipe studs (3) to the right exhaust manifold.
- Install the exhaust crossover heat shield (2).
- Install the exhaust crossover heat shield nuts (1).
- Install the engine mount struts. Refer to Engine Mount Strut Replacement - Right Side and Engine Mount Strut Replacement - Left Side in Engine Mechanical - 3.8L.
- Install the fuel injector sight shield. Refer to Fuel Injector Sight Shield Replacement in Engine Mechanical - 3.8L.


Notice: Refer to Fastener Notice in the Preface section.
Tighten
Tighten the studs and the nuts to 30 N·m
(22 lb ft).

Tighten
Tighten the bolt to 29 N·m (21 lb ft).

Tighten
Tighten the bolts to 10 N·m (89 lb in).

Tighten
Tighten the bolt and the nut to 30 N·m
(22 lb ft).

Tighten
Tighten the nuts to 30 N·m (22 lb ft).


Tighten
Tighten the stud nuts to 35 N·m (26 lb ft).

Tighten
Tighten the studs to 20 N·m (15 lb ft).

Tighten
Tighten the nuts to 20 N·m (15 lb ft).
Exhaust Manifold Replacement - Right Side LY7
Callout | Component Name |
|---|---|
|
Notice: Refer to Fastener Notice in the Preface section. Fastener Tightening Specifications: Refer to Fastener Tightening Specifications. Preliminary ProcedureRemove the exhaust crossover pipe. Refer to Exhaust Crossover Pipe Replacement. | |
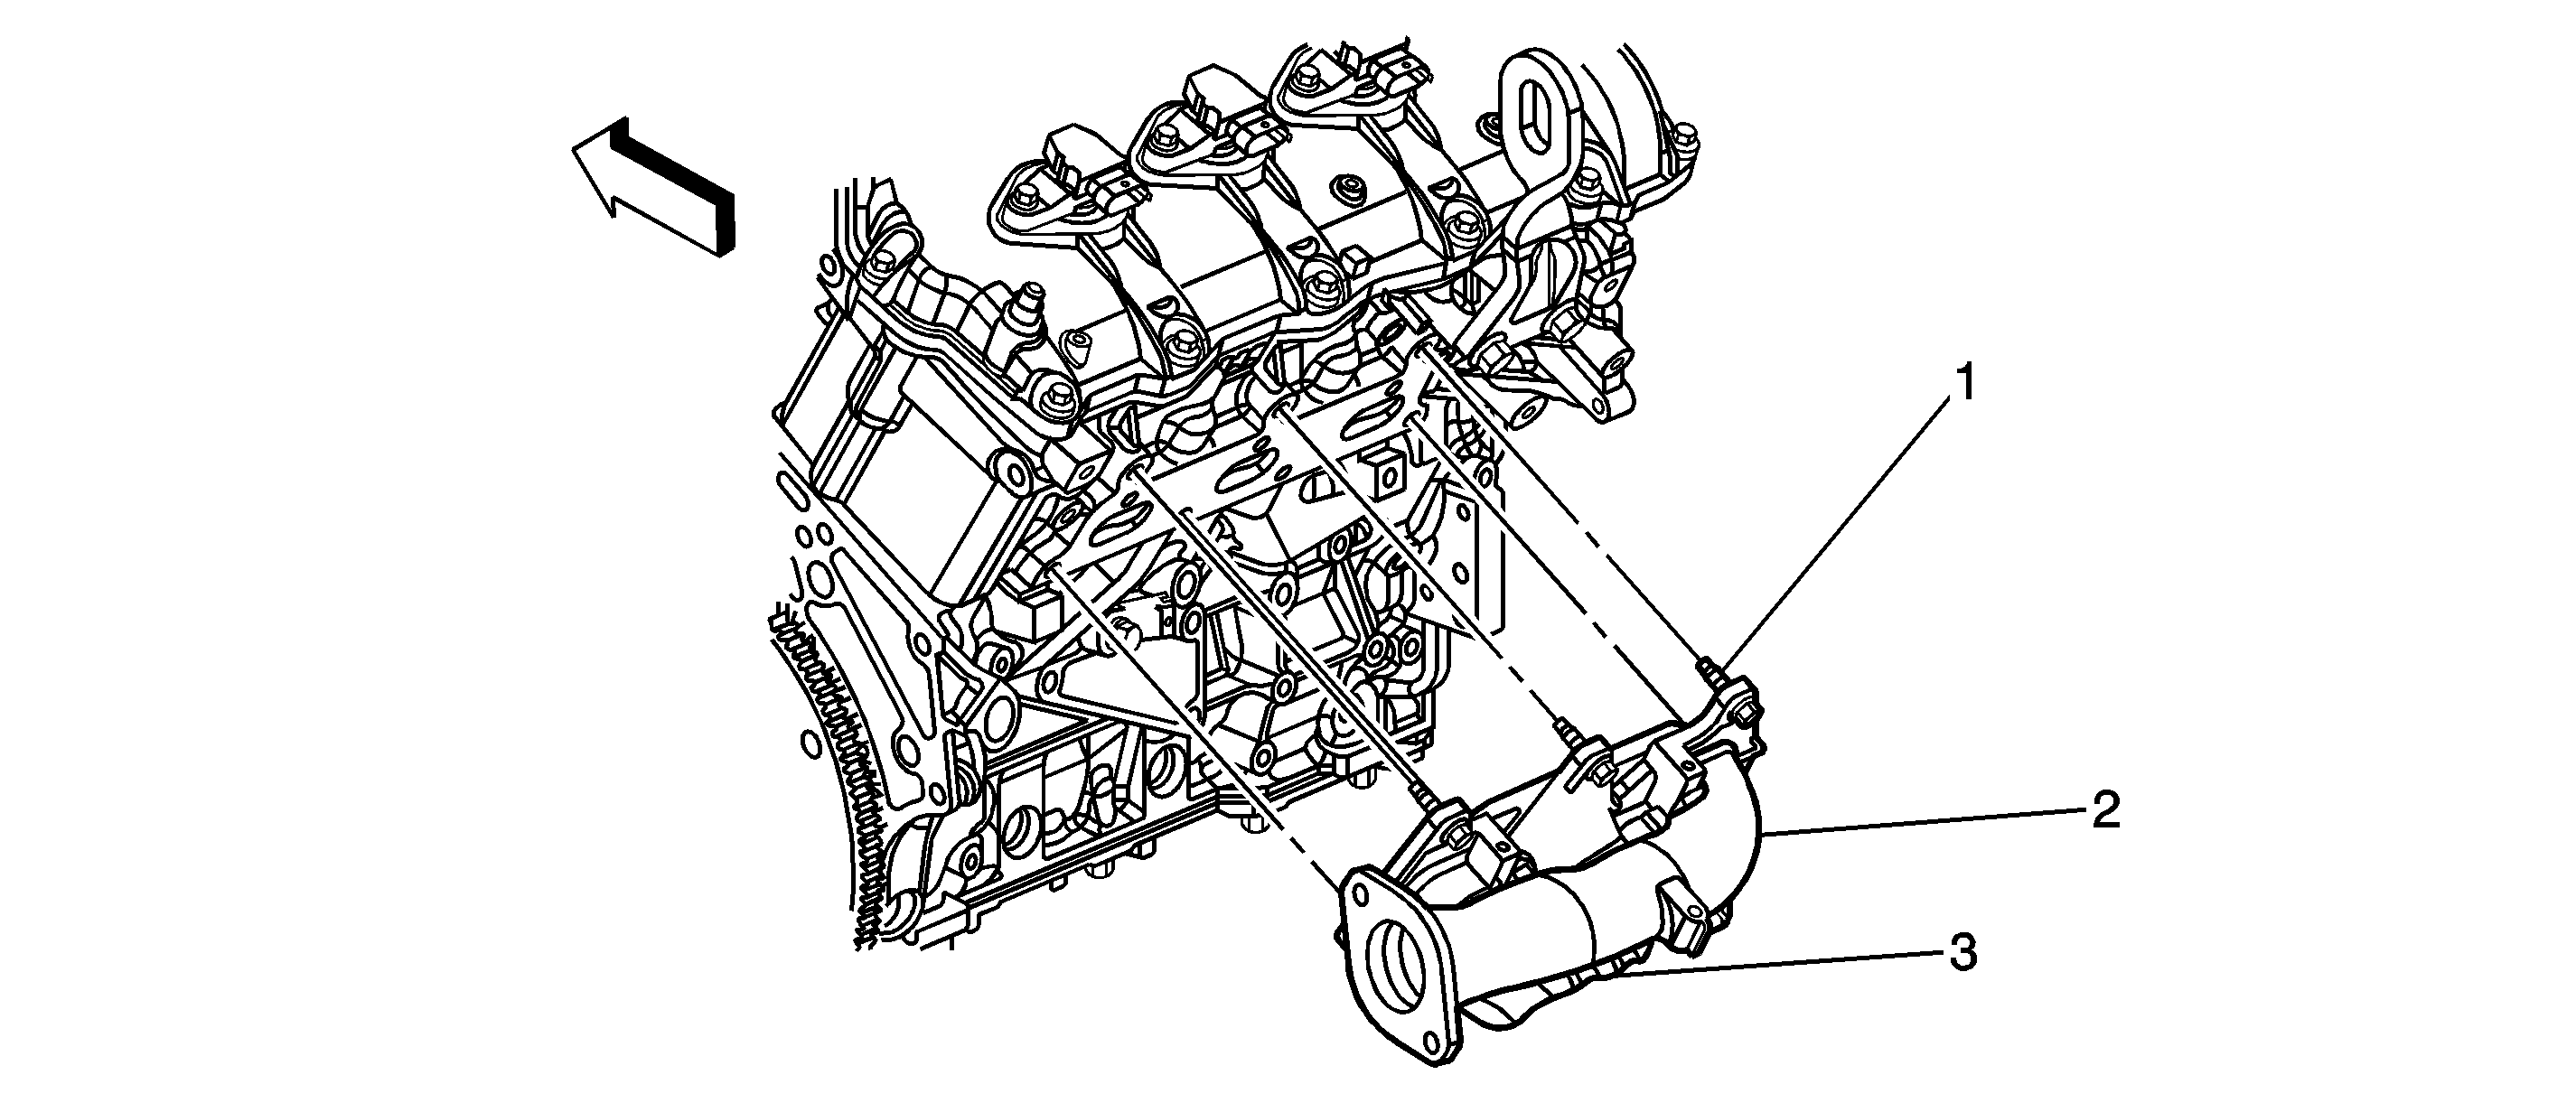
1 | Bolts, Exhaust Manifold (Qty: 7) Tighten |
2 | Manifold, Right Rear Exhaust |
3 | Gasket, Right Rear Exhaust Manifold |
