Power Steering Pressure Pipe/Hose Replacement L26
Removal Procedure
- Place a drain pan under the vehicle.
- Remove the accessory drive belt. Refer to Drive Belt Replacement.
- Raise and support the vehicle. Refer to Lifting and Jacking the Vehicle.
- Remove the tire and wheel assembly. Refer to Tire and Wheel Removal and Installation.
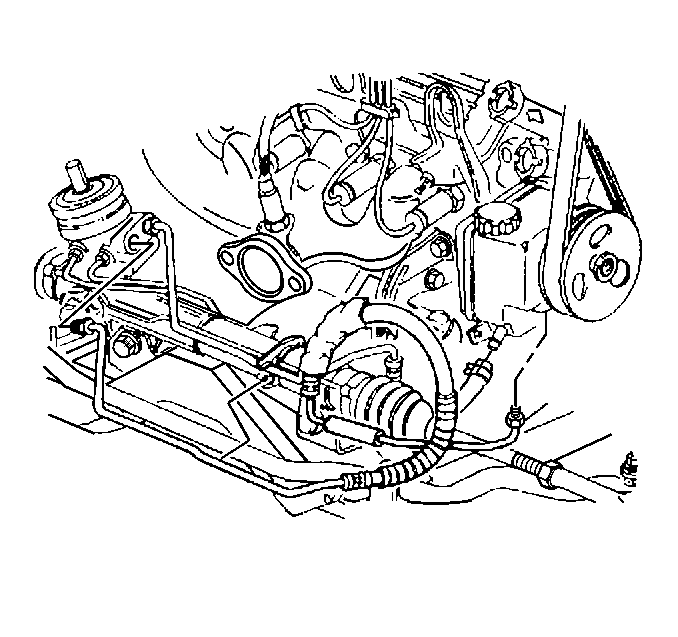
- The power steering pressure hose is the lower hose at the power steering gear.
- Remove the power steering pressure hose from the power steering pump.
- Remove the power steering pressure hose from the clamps on the power steering gear.
- Remove the power steering pressure hose from the vehicle.

Remove the power steering pressure hose from the power steering gear.
Installation Procedure
- Install the power steering pressure hose to the vehicle.
- Install the power steering pressure hose to the clamps on the power steering gear.
- Install the power steering pressure hose to the power steering pump.
- Install the power steering pressure hose to the power steering gear.
- Install the tire and wheel assembly. Refer to Tire and Wheel Removal and Installation.
- Remove the drain pan from under the vehicle.
- Lower the vehicle.
- Install the accessory drive belt. Refer to Drive Belt Replacement.
- Fill the power steering system with power steering fluid. Refer to Checking and Adding Power Steering Fluid.
- Bleed the power steering system. Refer to Power Steering System Bleeding.
- Inspect the power steering system for leaks. Refer to Power Steering Fluid Leaks.

Notice: Use the correct fastener in the correct location. Replacement fasteners must be the correct part number for that application. Fasteners requiring replacement or fasteners requiring the use of thread locking compound or sealant are identified in the service procedure. Do not use paints, lubricants, or corrosion inhibitors on fasteners or fastener joint surfaces unless specified. These coatings affect fastener torque and joint clamping force and may damage the fastener. Use the correct tightening sequence and specifications when installing fasteners in order to avoid damage to parts and systems.
Tighten
Tighten the fitting to 27 N·m (20 lb ft).
Tighten
Tighten the pressure hose fitting to 27 N·m (20 lb ft).
Power Steering Pressure Pipe/Hose Replacement LY7
Removal Procedure
- Remove the fuel injector sight shield. Refer to Fuel Injector Sight Shield Replacement .
- Remove the engine mount struts. Refer to Engine Mount Strut Replacement - Left Side and Engine Mount Strut Replacement - Right Side .
- Remove the coolant recovery reservoir. Refer to Coolant Recovery Reservoir Replacement .
- Disconnect the electrical harness clip at the underhood junction block (UHJB) and the coolant housing.
- Disconnect the electrical connector at the engine control module (ECM).
- Remove as much power steering fluid from the remote power steering fluid reservoir as possible.
- Place drain pans under the vehicle as needed.
- Remove the remote power steering fluid reservoir and separate it from the bracket. Refer to Remote Power Steering Fluid Reservoir Replacement .
- Install the engine support fixture hook to the remote power steering fluid reservoir bracket and reinstall it to the cylinder head. Tighten the remote power steering fluid reservoir bracket bolts.
- Install the engine support fixture. Refer to Engine Support Fixture .
- Remove the right front tire/wheel assembly. Refer to Tire and Wheel Removal and Installation .
- Remove the right front engine splash shield. Refer to Engine Splash Shield Replacement .
- Remove the steering gear heat shield.
- Remove the right side engine mount lower nuts. Refer to Engine Mount Replacement - Right Side .
- Remove the left side transmission mount lower nuts. Refer to Transmission Mount Replacement - Left Side .
- Lift the engine upward using the engine support fixture to allow the right side engine mount studs to separate from the cradle. This will allow the power steering pressure hose to pass under the left side engine mount location during removal and installation.
- Remove the right side engine mount/bracket assembly. Refer to Engine Mount Replacement - Right Side .
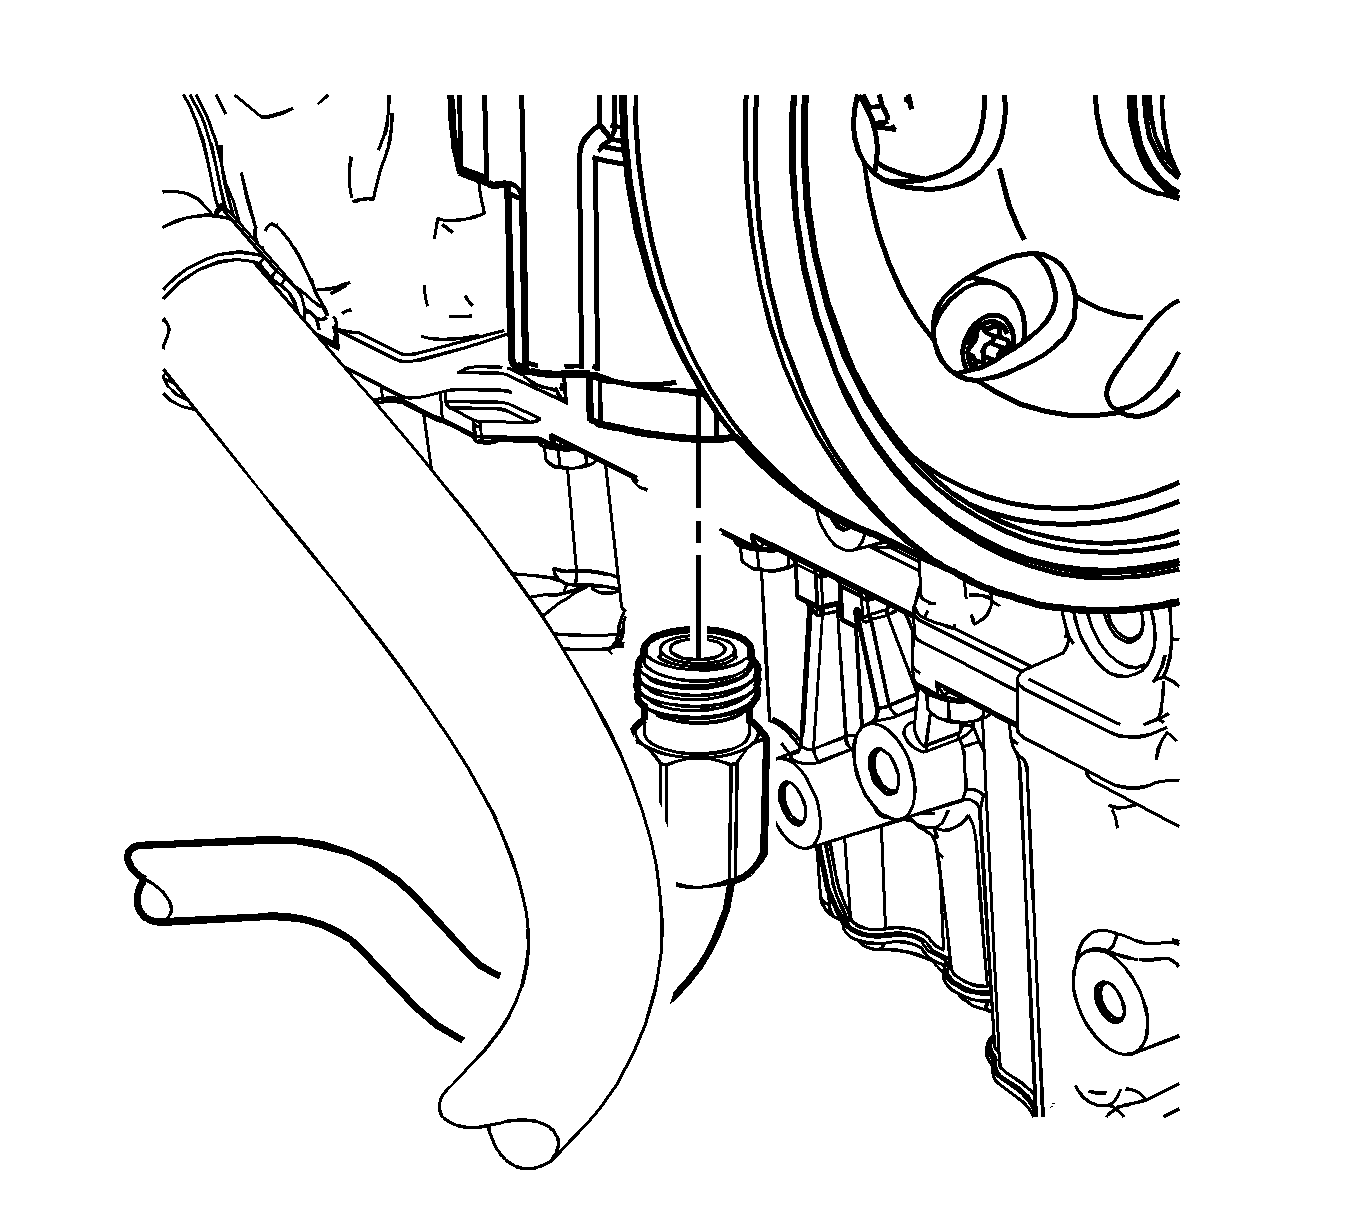
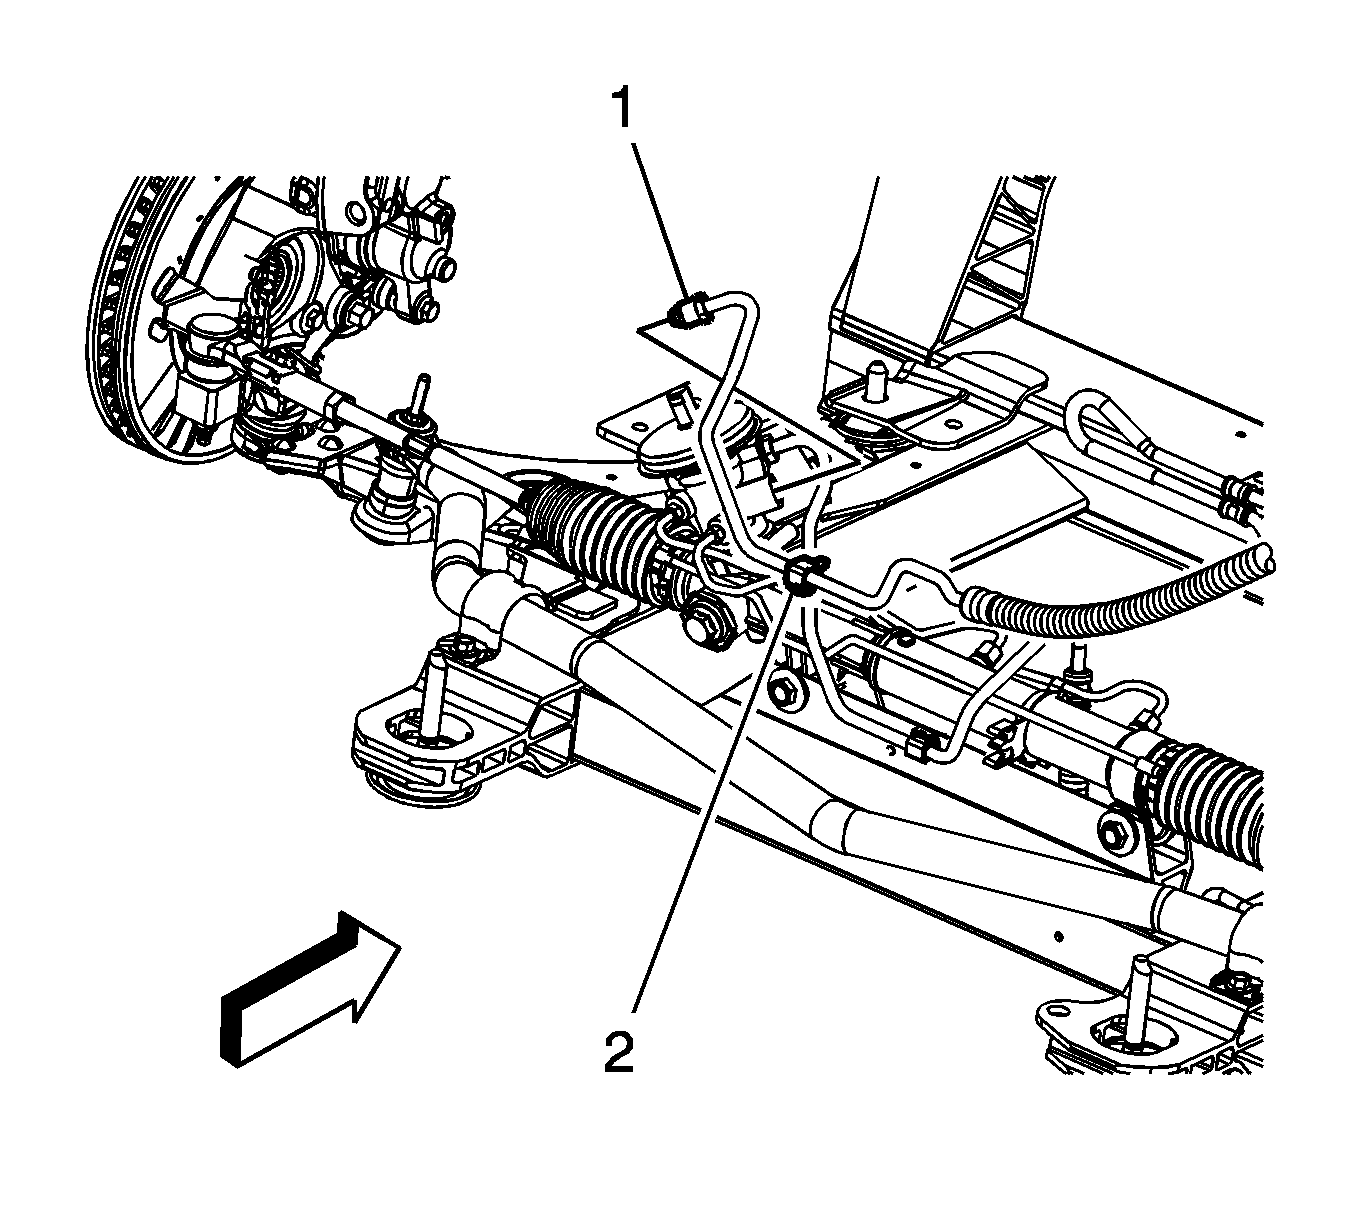
- Disconnect the power steering pressure hose (1) from the power steering pump.
- Remove the power steering pressure hose fitting (1) from the steering gear.
- Unclip the power steering pressure hose retaining clips (2).
- Remove the power steering pressure hose from the vehicle.
One engine mount strut bolt and nut can be reinstalled to the engine mount strut bracket on the engine to be used as an attachment point for the front engine attachment.
Notice: Refer to Fastener Notice in the Preface section.
Tighten
| • | Tighten the M6 bolt to 9 N·m (80 lb in). |
| • | Tighten the M8 bolt to 25 N·m (18 lb ft). |
Notice: Do NOT allow the wheel drive shaft constant velocity joint to contact the inner wheel structure. Use care when raising the engine in order to prevent wheel drive shaft constant velocity joint damage.

Important: DO NOT try to remove the power steering pump nut from the power steering pressure hose. The power steering pump nut is a quick-connect fitting and once the power steering pressure hose is installed, the quick-connect fitting cannot be removed. If a new power steering pressure hose is required for further repairs, then a new power steering pump nut will be required.

Replace any retaining clips as needed.
Installation Procedure
- Install a NEW quick connect fitting at the power steering pump.
- Install the power steering pressure hose to the vehicle.
- Install the power steering pressure hose fitting (1) to the steering gear.
- Connect the power steering pressure hose (1) to the power steering pump.
- Install the right side engine mount/bracket assembly. Refer to Engine Mount Replacement - Right Side .
- Lower the powertrain into position while aligning the right side engine mount and left side transmission mount into position.
- Clip the power steering pressure hose retaining clips (2) into place.
- Install the right side engine mount lower nuts. Refer to Engine Mount Replacement - Right Side .
- Install the left side transmission mount lower nuts. Refer to Transmission Mount Replacement - Left Side .
- Install the steering gear heat shield.
- Install the right front engine splash shield. Refer to Engine Splash Shield Replacement .
- Install the right front tire/wheel assembly. Refer to Tire and Wheel Removal and Installation .
- Remove the engine support fixture. Refer to Engine Support Fixture .
- Remove the remote power steering fluid reservoir bracket and engine support fixture hook.
- Connect the remote power steering fluid reservoir and bracket.
- Install the remote power steering fluid reservoir. Refer to Remote Power Steering Fluid Reservoir Replacement .
- Clean any excess fluid from the vehicle and remove any drain pans.
- Connect the electrical connector at the engine control module ECM.
- Connect the electrical harness clip at the UHJB and the coolant housing.
- Install the coolant recovery reservoir. Refer to Coolant Recovery Reservoir Replacement .
- Install the engine mount struts. Refer to Engine Mount Strut Replacement - Left Side and Engine Mount Strut Replacement - Right Side .
- Fill and bleed the power steering system. Refer to Power Steering System Bleeding .
- Install the fuel injector sight shield. Refer to Fuel Injector Sight Shield Replacement .
Important: Replace the O-ring seal.
Tighten
Tighten the fitting to 40 N·m (30 lb ft).

Important: Hand tighten all fittings and retaining clips before finalizing any torques.
Tighten
Tighten the fitting to 27 N·m (20 lb ft).

Tighten
Tighten the fitting to 27 N·m (20 lb ft).
Tighten
Tighten the screws to 6 N·m (53 lb in).
