Exhaust Manifold Installation - Right Side Without Secondary Air Injection-SAI
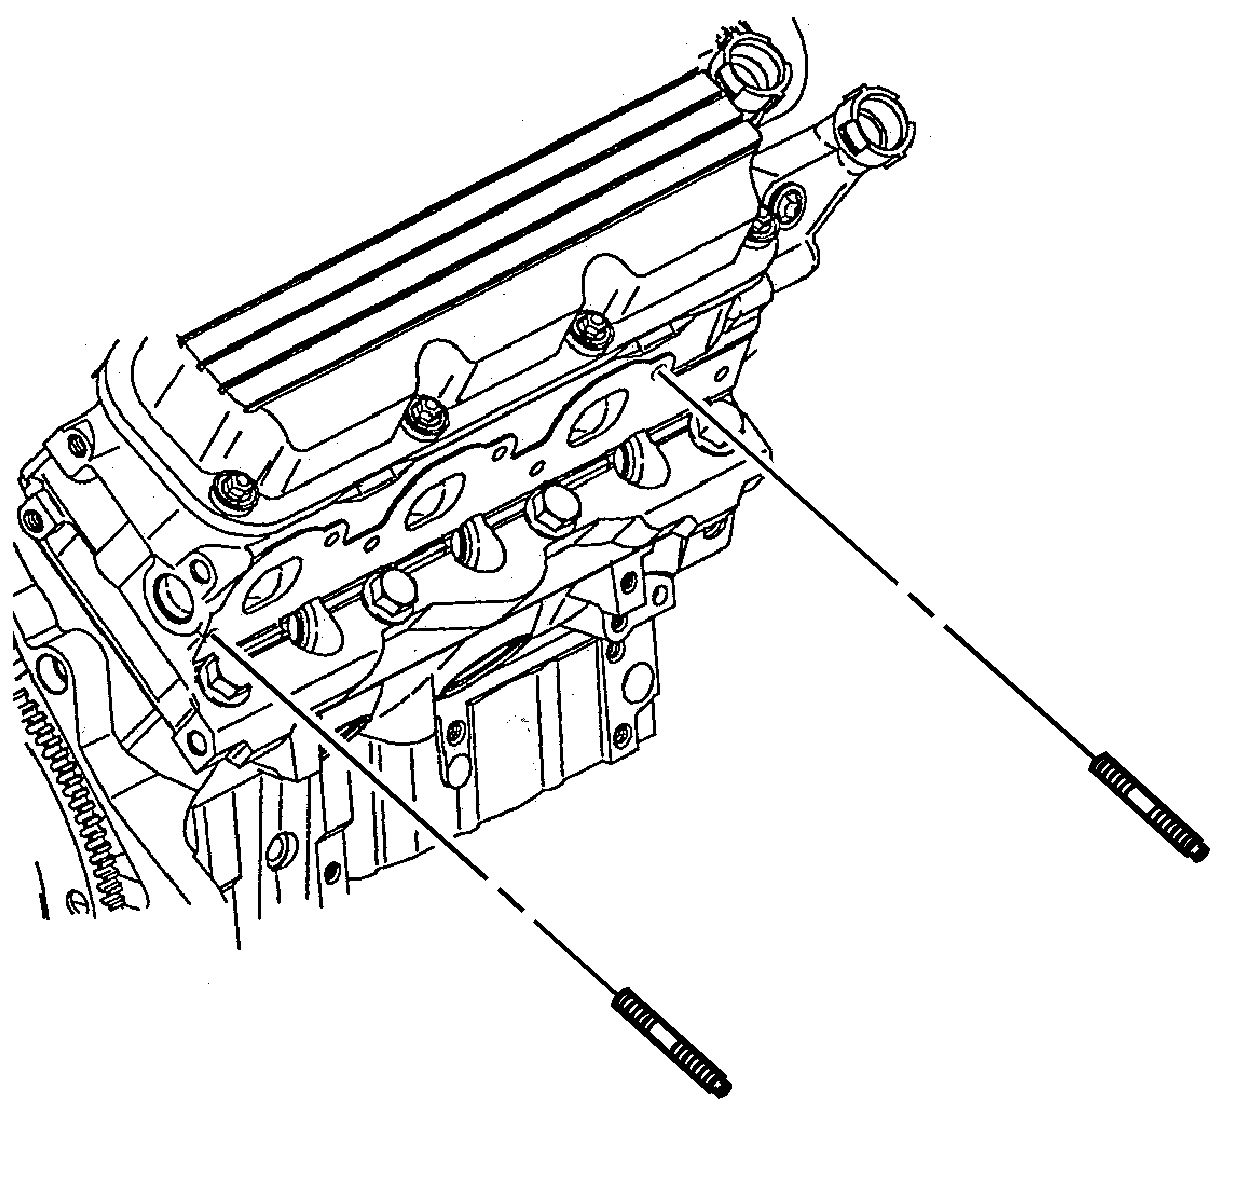
- Install the exhaust manifold studs.
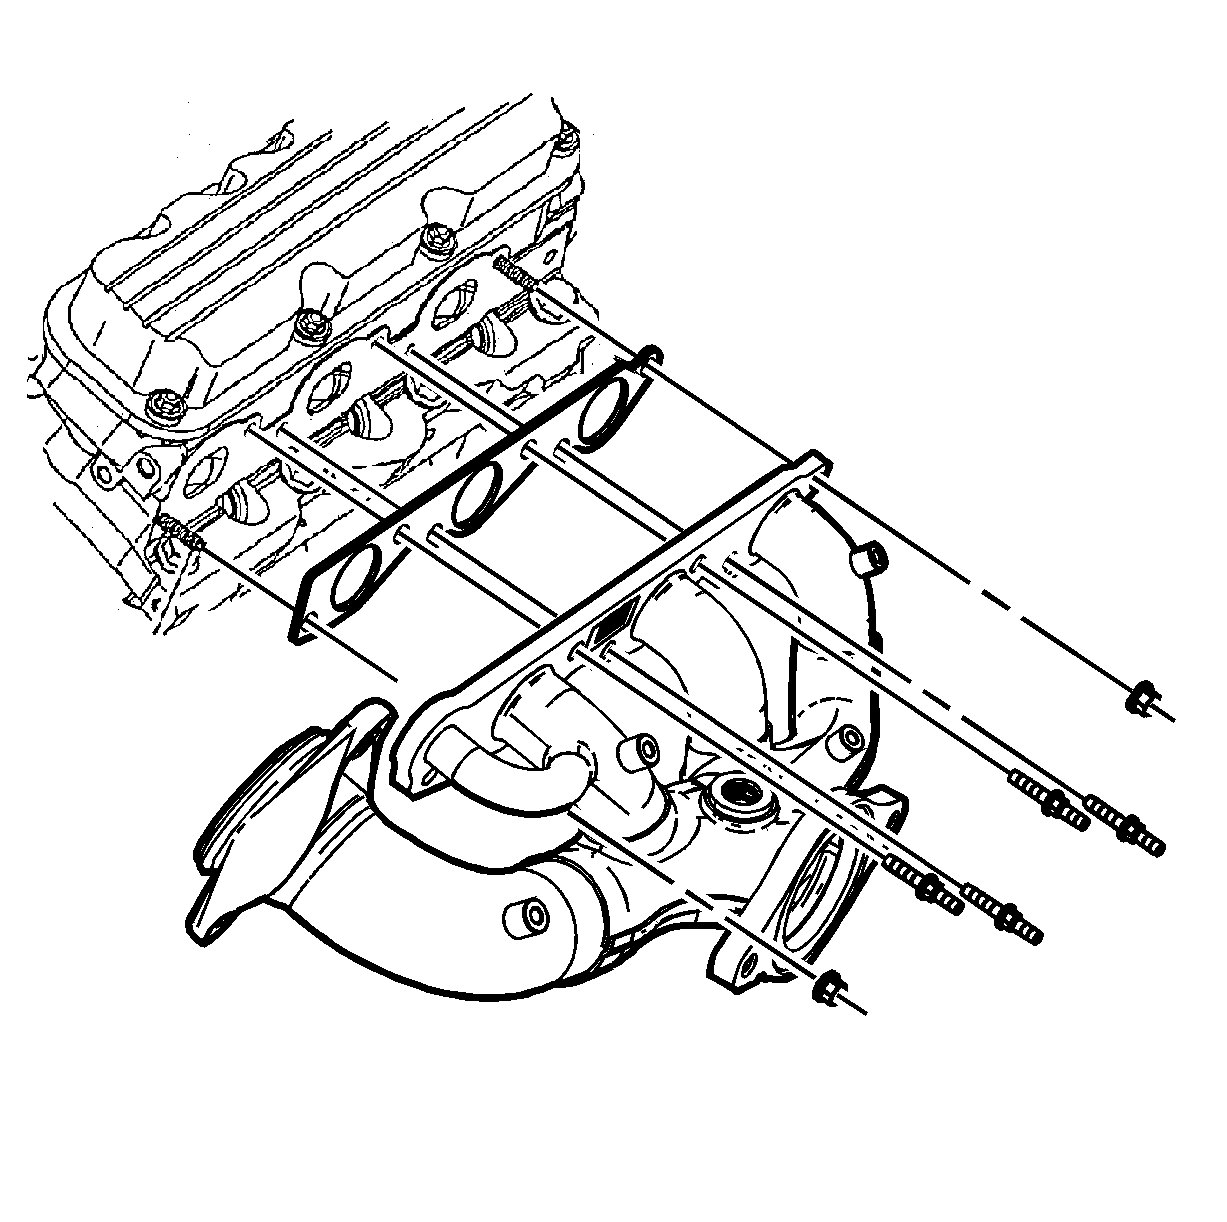
- Install the exhaust manifold gasket.
- Install the exhaust manifold.
- Install the exhaust manifold bolts and nuts.
- Install the right side spark plugs.
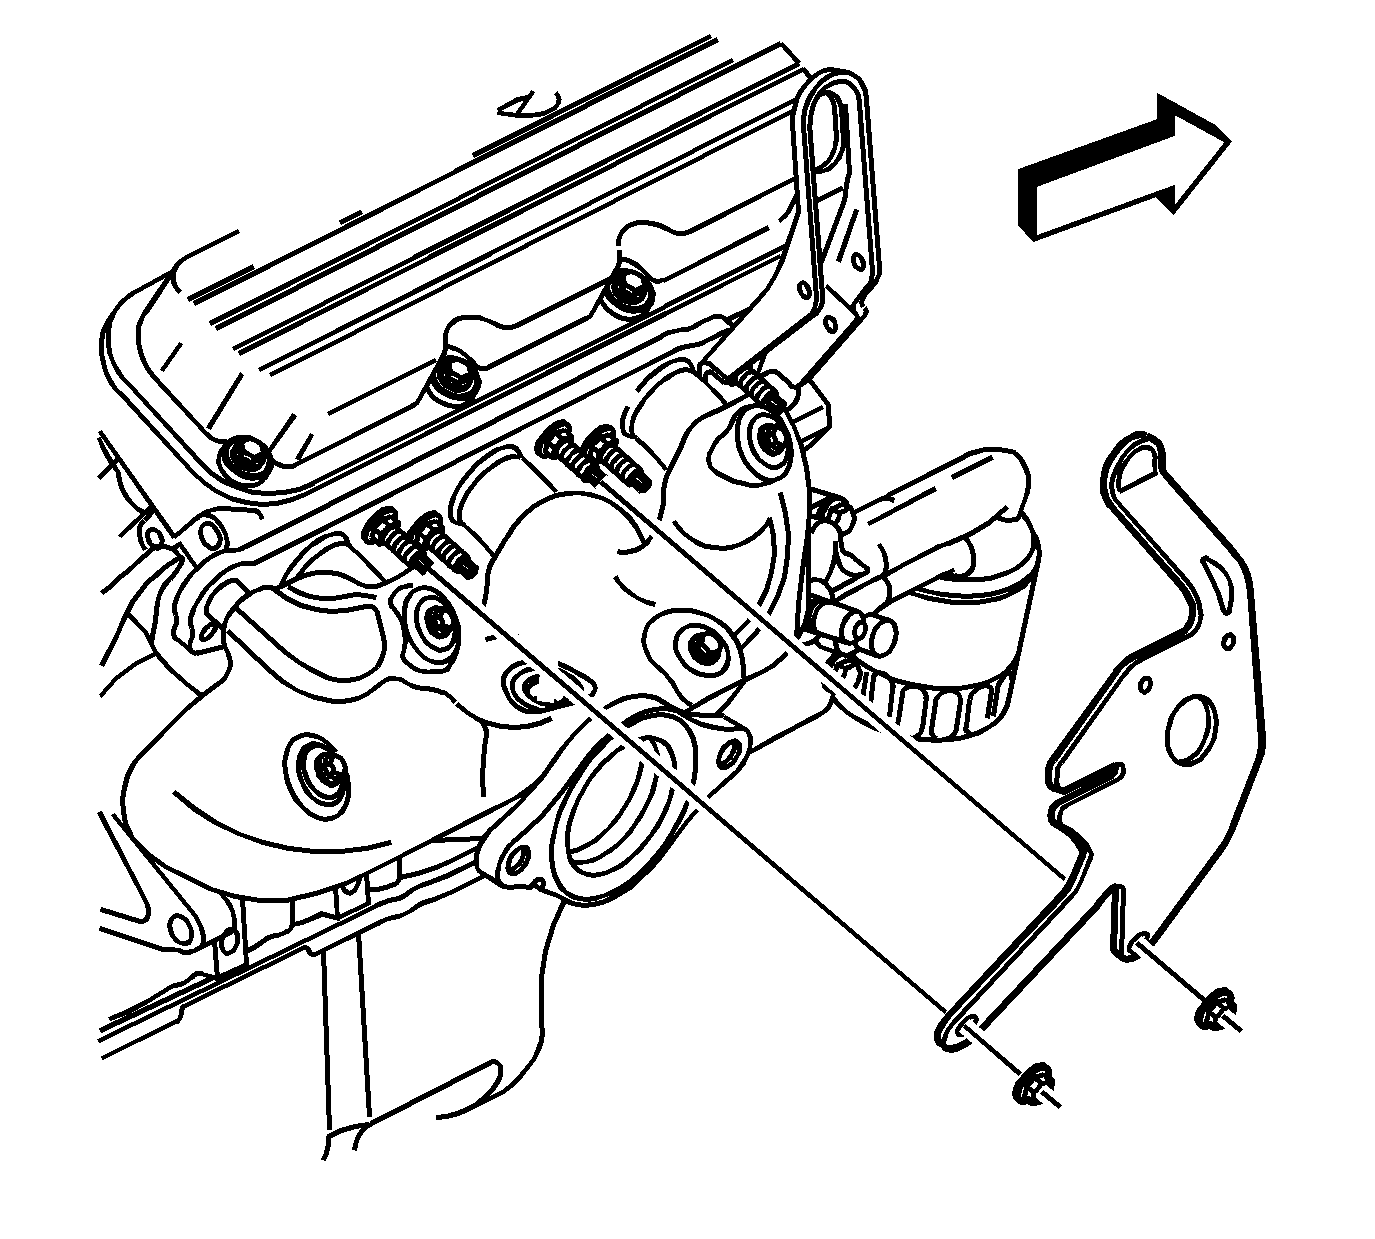
- Install the fuel injector sight shield cover bracket.
- Install the fuel injector sight shield cover bracket nuts.
- Install the right engine lift hook.
- Install the right engine lift hook nut and bolt.
Notice: Use the correct fastener in the correct location. Replacement fasteners must be the correct part number for that application. Fasteners requiring replacement or fasteners requiring the use of thread locking compound or sealant are identified in the service procedure. Do not use paints, lubricants, or corrosion inhibitors on fasteners or fastener joint surfaces unless specified. These coatings affect fastener torque and joint clamping force and may damage the fastener. Use the correct tightening sequence and specifications when installing fasteners in order to avoid damage to parts and systems.
Notice: When replacing the HO2S perform a code clear with a scan tool, regardless of whether or not a DTC is set. Performing a code clear will reset the HO2S resistance learned value. Failure to perform a code clear may result in an HO2S failure.
Tighten
Tighten the exhaust manifold studs to 10 N·m (89 lb in).
Tighten
Tighten the exhaust manifold bolts and nuts to 30 N·m (22 lb ft).
Tighten
Tighten the spark plugs to 15 N·m (11 lb ft).
Tighten
Tighten the fuel injector sight shield bracket nuts to 30 N·m (22 lb ft).
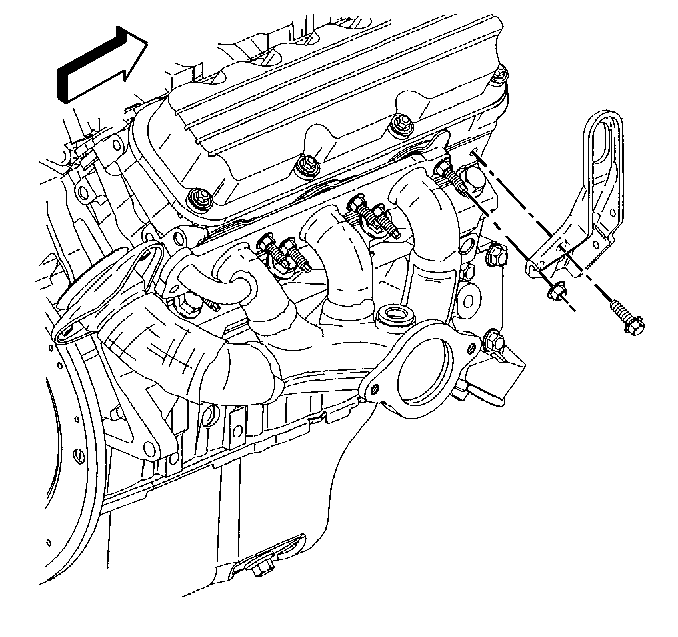
Tighten
Tighten the right engine lift hook nut and bolt to 30 N·m (22 lb ft).
Exhaust Manifold Installation - Right Side With Secondary Air Injection-SAI
- Install the exhaust manifold studs.
- Install the exhaust manifold gasket.
- Install the exhaust manifold.
- Install the exhaust manifold bolts and nuts.
- Install the right side spark plugs.
- Install the fuel injector sight shield cover bracket.
- Install the fuel injector sight shield cover bracket nuts.
- Install the right engine lift hook.
- Install the right engine lift hook nut and bolt.
- If necessary, install the secondary air pipe (644), gasket (647), and bolts (646) and assemble the injection pump (636) onto bracket (648).
- Install gasket (645), secondary air injection pump assembly and nuts (641) onto the engine.
- Install the secondary air injection pump assembly mounting bolts (637, 649).
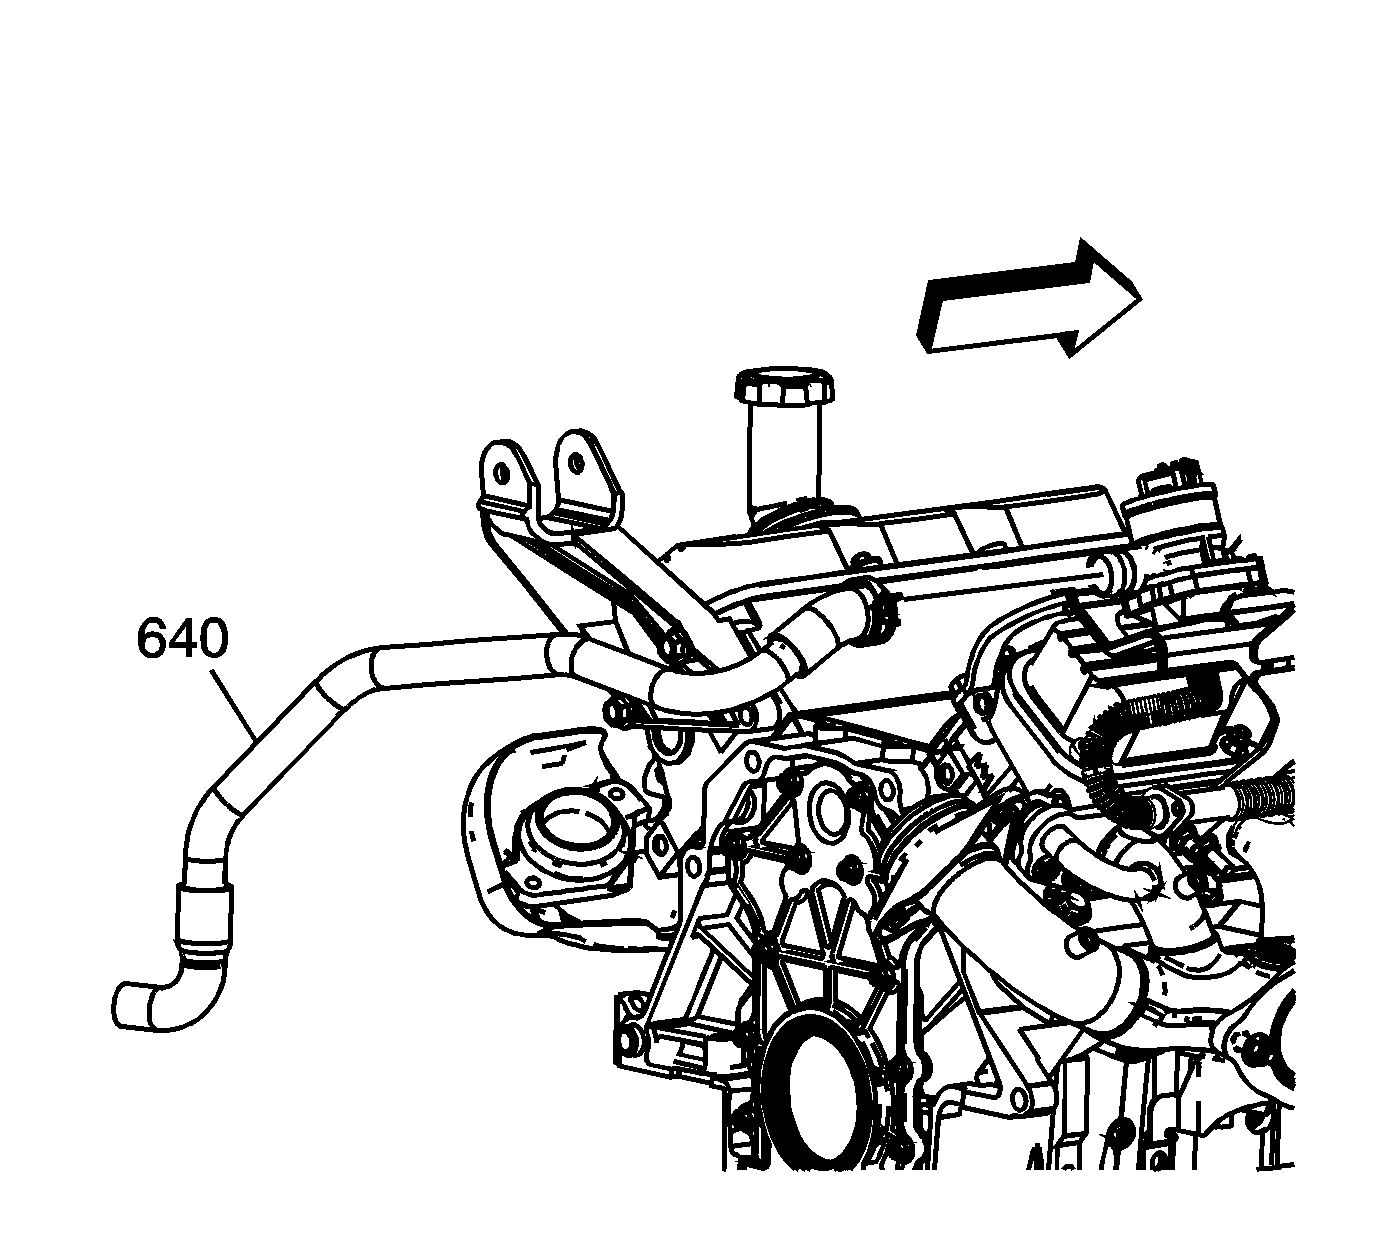
- Loosen the hose clamp and install the secondary air injection pipe (640) onto the valve and reinstall the hose clamp.

Notice: Use the correct fastener in the correct location. Replacement fasteners must be the correct part number for that application. Fasteners requiring replacement or fasteners requiring the use of thread locking compound or sealant are identified in the service procedure. Do not use paints, lubricants, or corrosion inhibitors on fasteners or fastener joint surfaces unless specified. These coatings affect fastener torque and joint clamping force and may damage the fastener. Use the correct tightening sequence and specifications when installing fasteners in order to avoid damage to parts and systems.
Notice: When replacing the HO2S perform a code clear with a scan tool, regardless of whether or not a DTC is set. Performing a code clear will reset the HO2S resistance learned value. Failure to perform a code clear may result in an HO2S failure.
Tighten
Tighten the exhaust manifold studs to 10 N·m (89 lb in).

Tighten
Tighten the exhaust manifold bolts and nuts to 30 N·m (22 lb ft).
Tighten
Tighten the spark plugs to 15 N·m (11 lb ft).

Tighten
Tighten the fuel injector sight shield bracket nuts to 30 N·m (22 lb ft).

Tighten
Tighten the right engine lift hook nut and bolt to 30 N·m (22 lb ft).
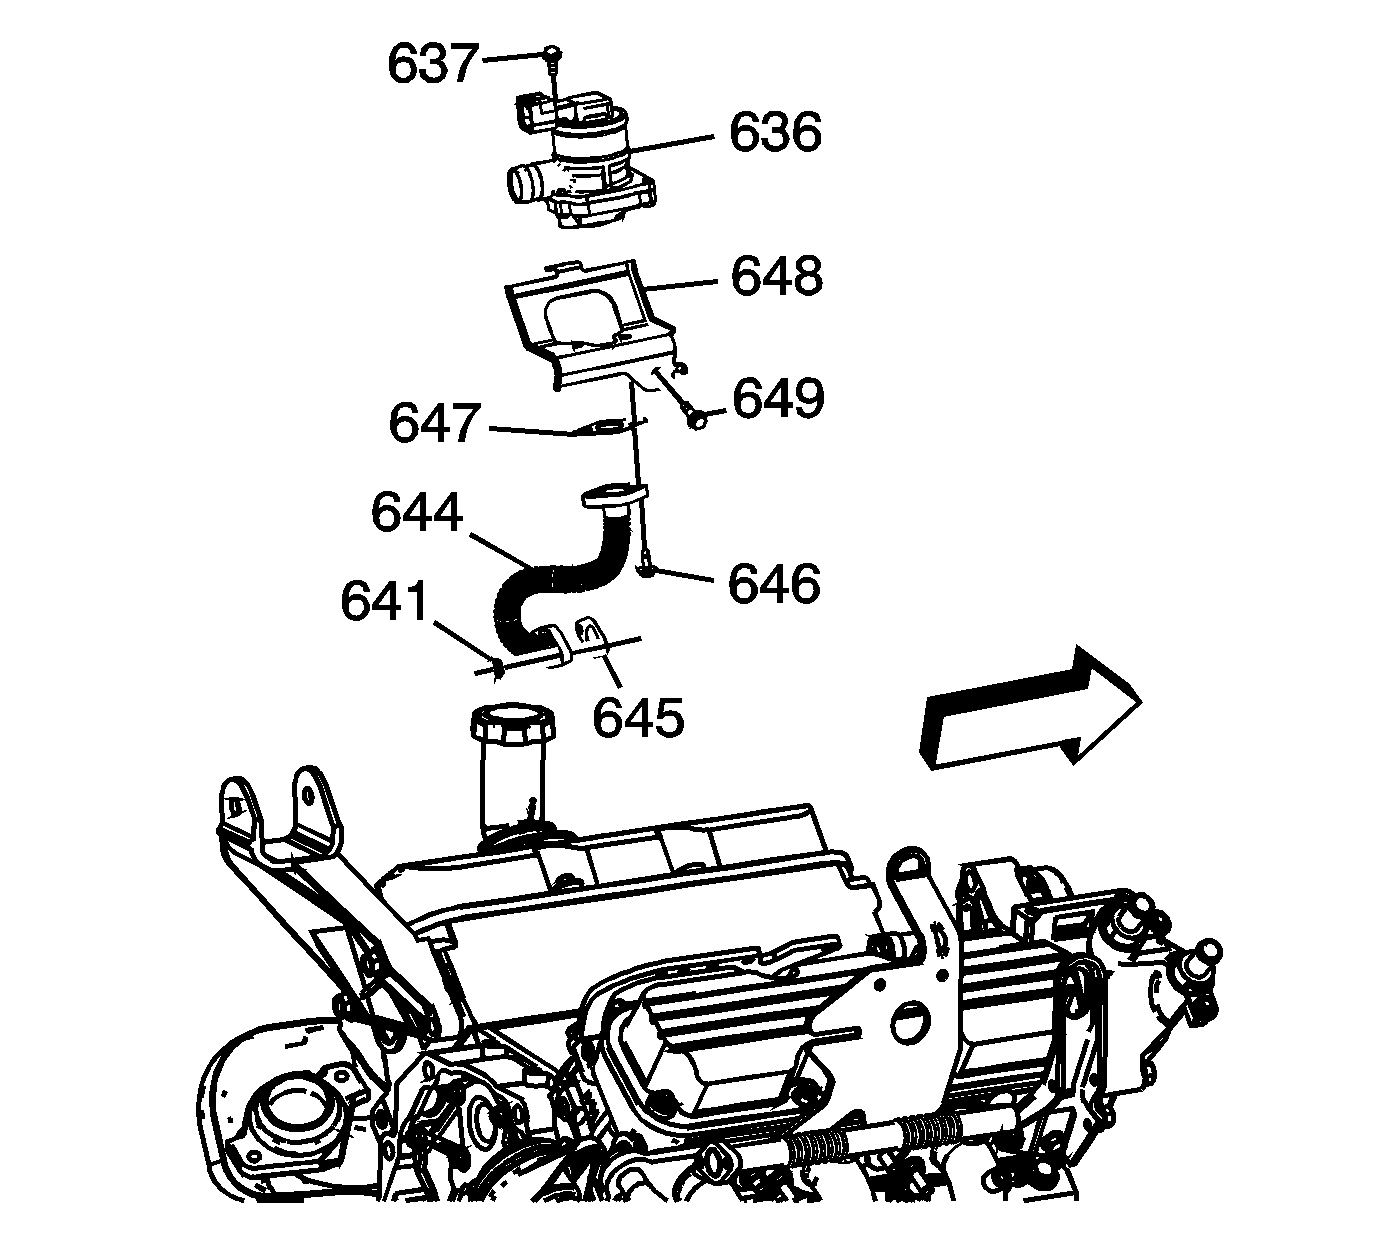
Tighten
Tighten the secondary air injection pump pipe bolts to 10 N·m (89 lb in).
Tighten
Tighten the secondary air injection pump assembly nuts to 10 N·m (89 lb in).
Tighten
Tighten the secondary air injection pump assembly mounting bolts to 10 N·m (89 lb in).
