For 1990-2009 cars only
Removal Procedure
- Apply masking tape to the fender and door edges.
- Open and support the door.
- Clean the area around the hinge and mark the location with a grease pencil.
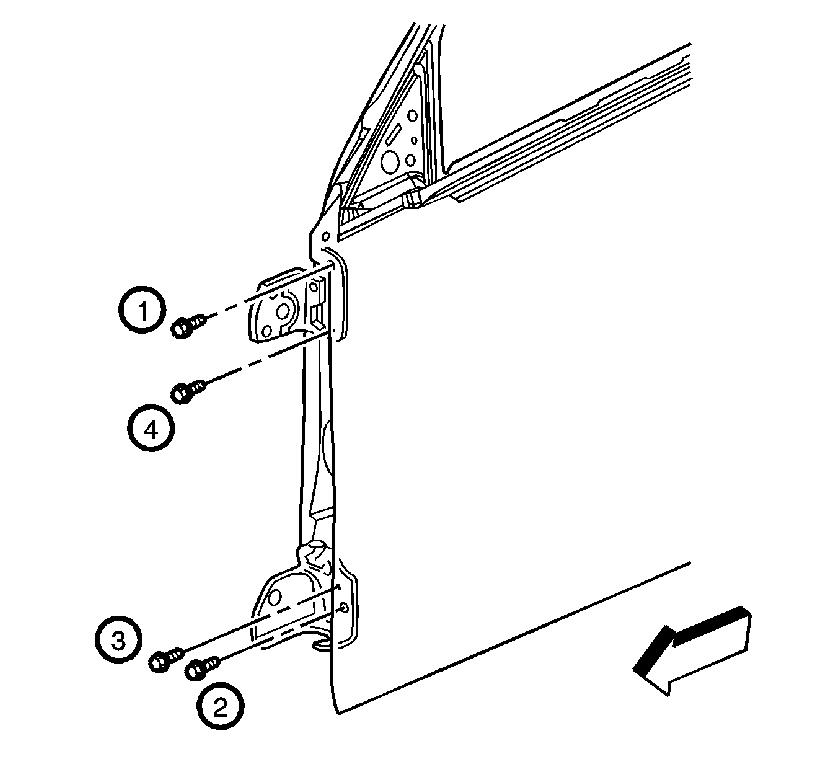
- If the upper hinge is broken, remove the upper hinge bolts from the door side in the specified sequence (1, 4).
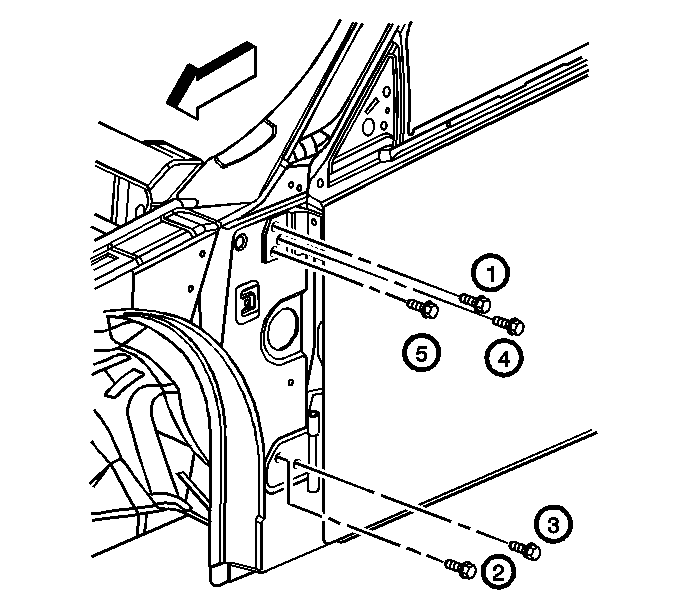
- Remove the upper hinge bolts from the hinge pillar side in the specified sequence (1, 4, 5).
- If the lower hinge is broken, remove the lower hinge bolts from the door side in the specified sequence (3, 2).
- Remove the lower hinge bolts from the hinge pillar side in the specified sequence (3, 2).
- Remove the broken hinge from the door.
Notice: To avoid paint damage, protect the area surrounding the part which you are removing or installing.
Important: Do not remove the door from the vehicle to replace the upper or lower hinges.


Installation Procedure
- Install the new hinge to the door.
- Install the lower hinge bolts to the hinge pillar side in the specified sequence (3, 2).
- Install the lower hinge bolts to the door side in the specified sequence (3, 2).
- Install the upper hinge bolts to the hinge pillar side in the specified sequence (1, 4, 5).
- Install the upper hinge bolts to the door side in the specified sequence (1, 4).
- Remove the support from the door.
- Inspect the door for proper operation.
- Remove the masking tape.
Notice: Refer to Fastener Notice in the Preface section.

Position the hinge to the alignment marks on the hinge pillar and the door.
Tighten
Tighten the bolts to 33 N·m (24 lb ft).

Tighten
Tighten the bolts to 33 N·m (24 lb ft).

Tighten
Tighten the bolts to 33 N·m (24 lb ft).

Tighten
Tighten the bolts to 33 N·m (24 lb ft).
