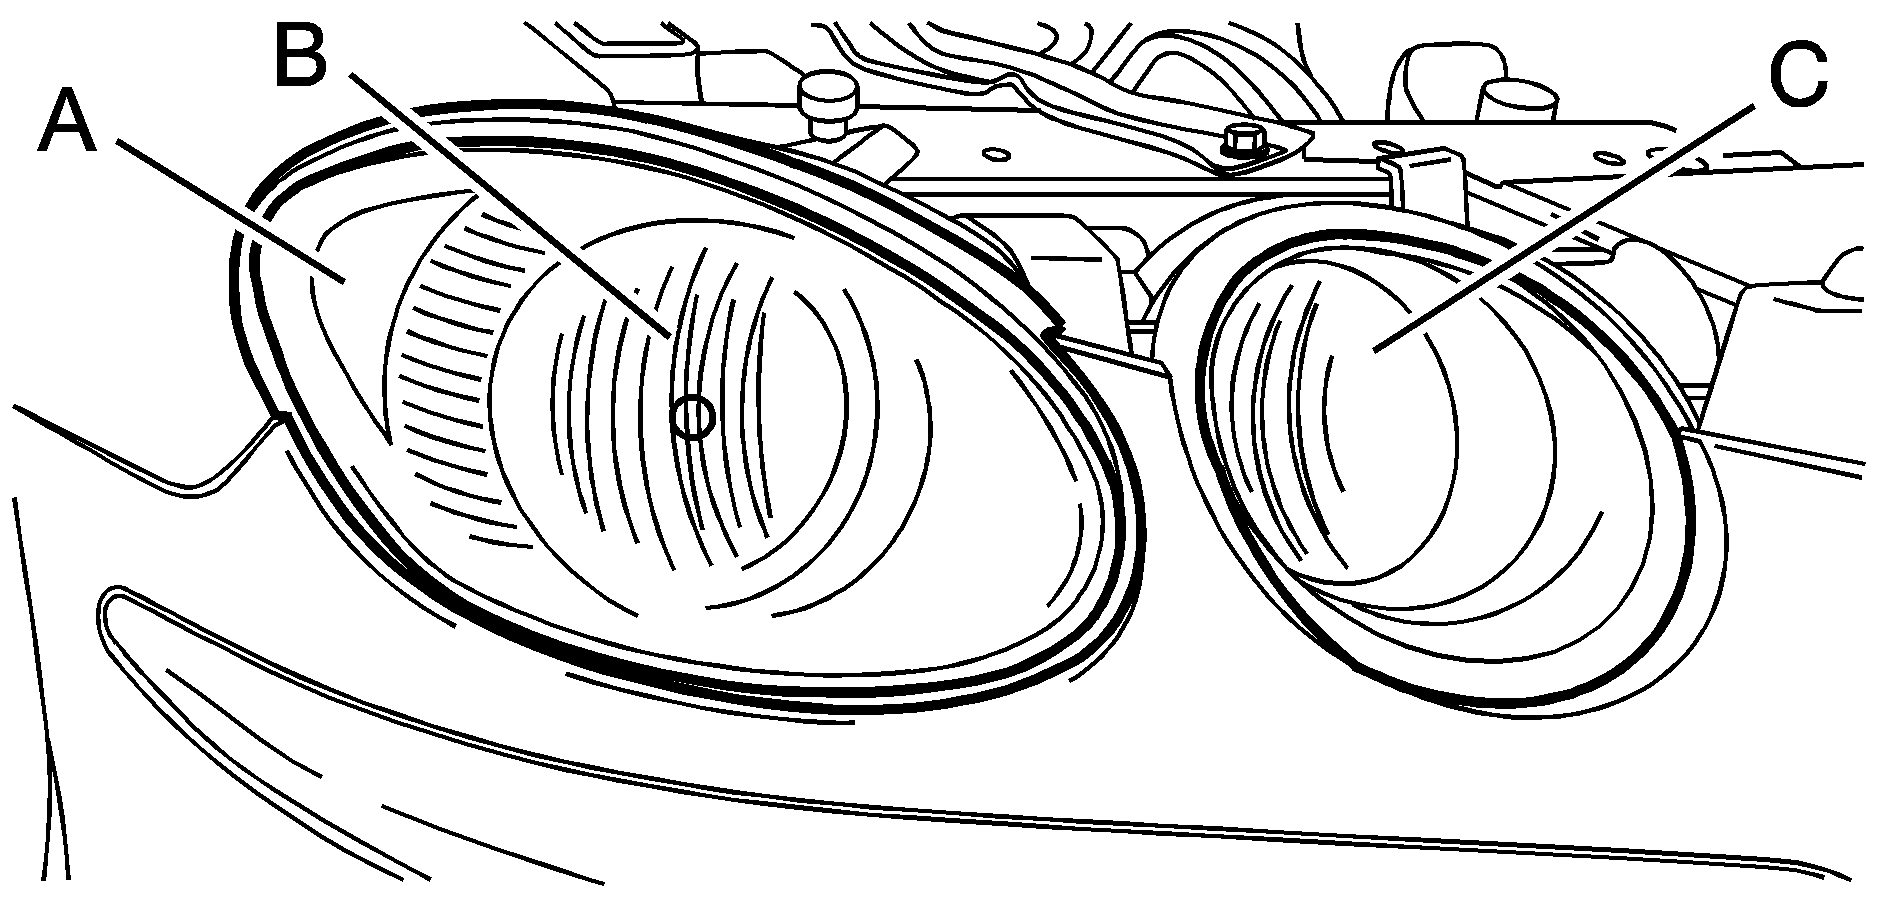
For 1990-2009 cars only
-

Sidemarker Lamp
Low-Beam Headlamp
High-Beam Headlamp
Low-Beam Headlamp and Sidemarker Bulbs
To replace a low-beam headlamp or sidemarker bulb:
- Open the hood. See Hood Release for more information.
- Remove the fastener from the front fascia. The fastener is located inboard of the headlamp assembly, near the high-beam headlamp.
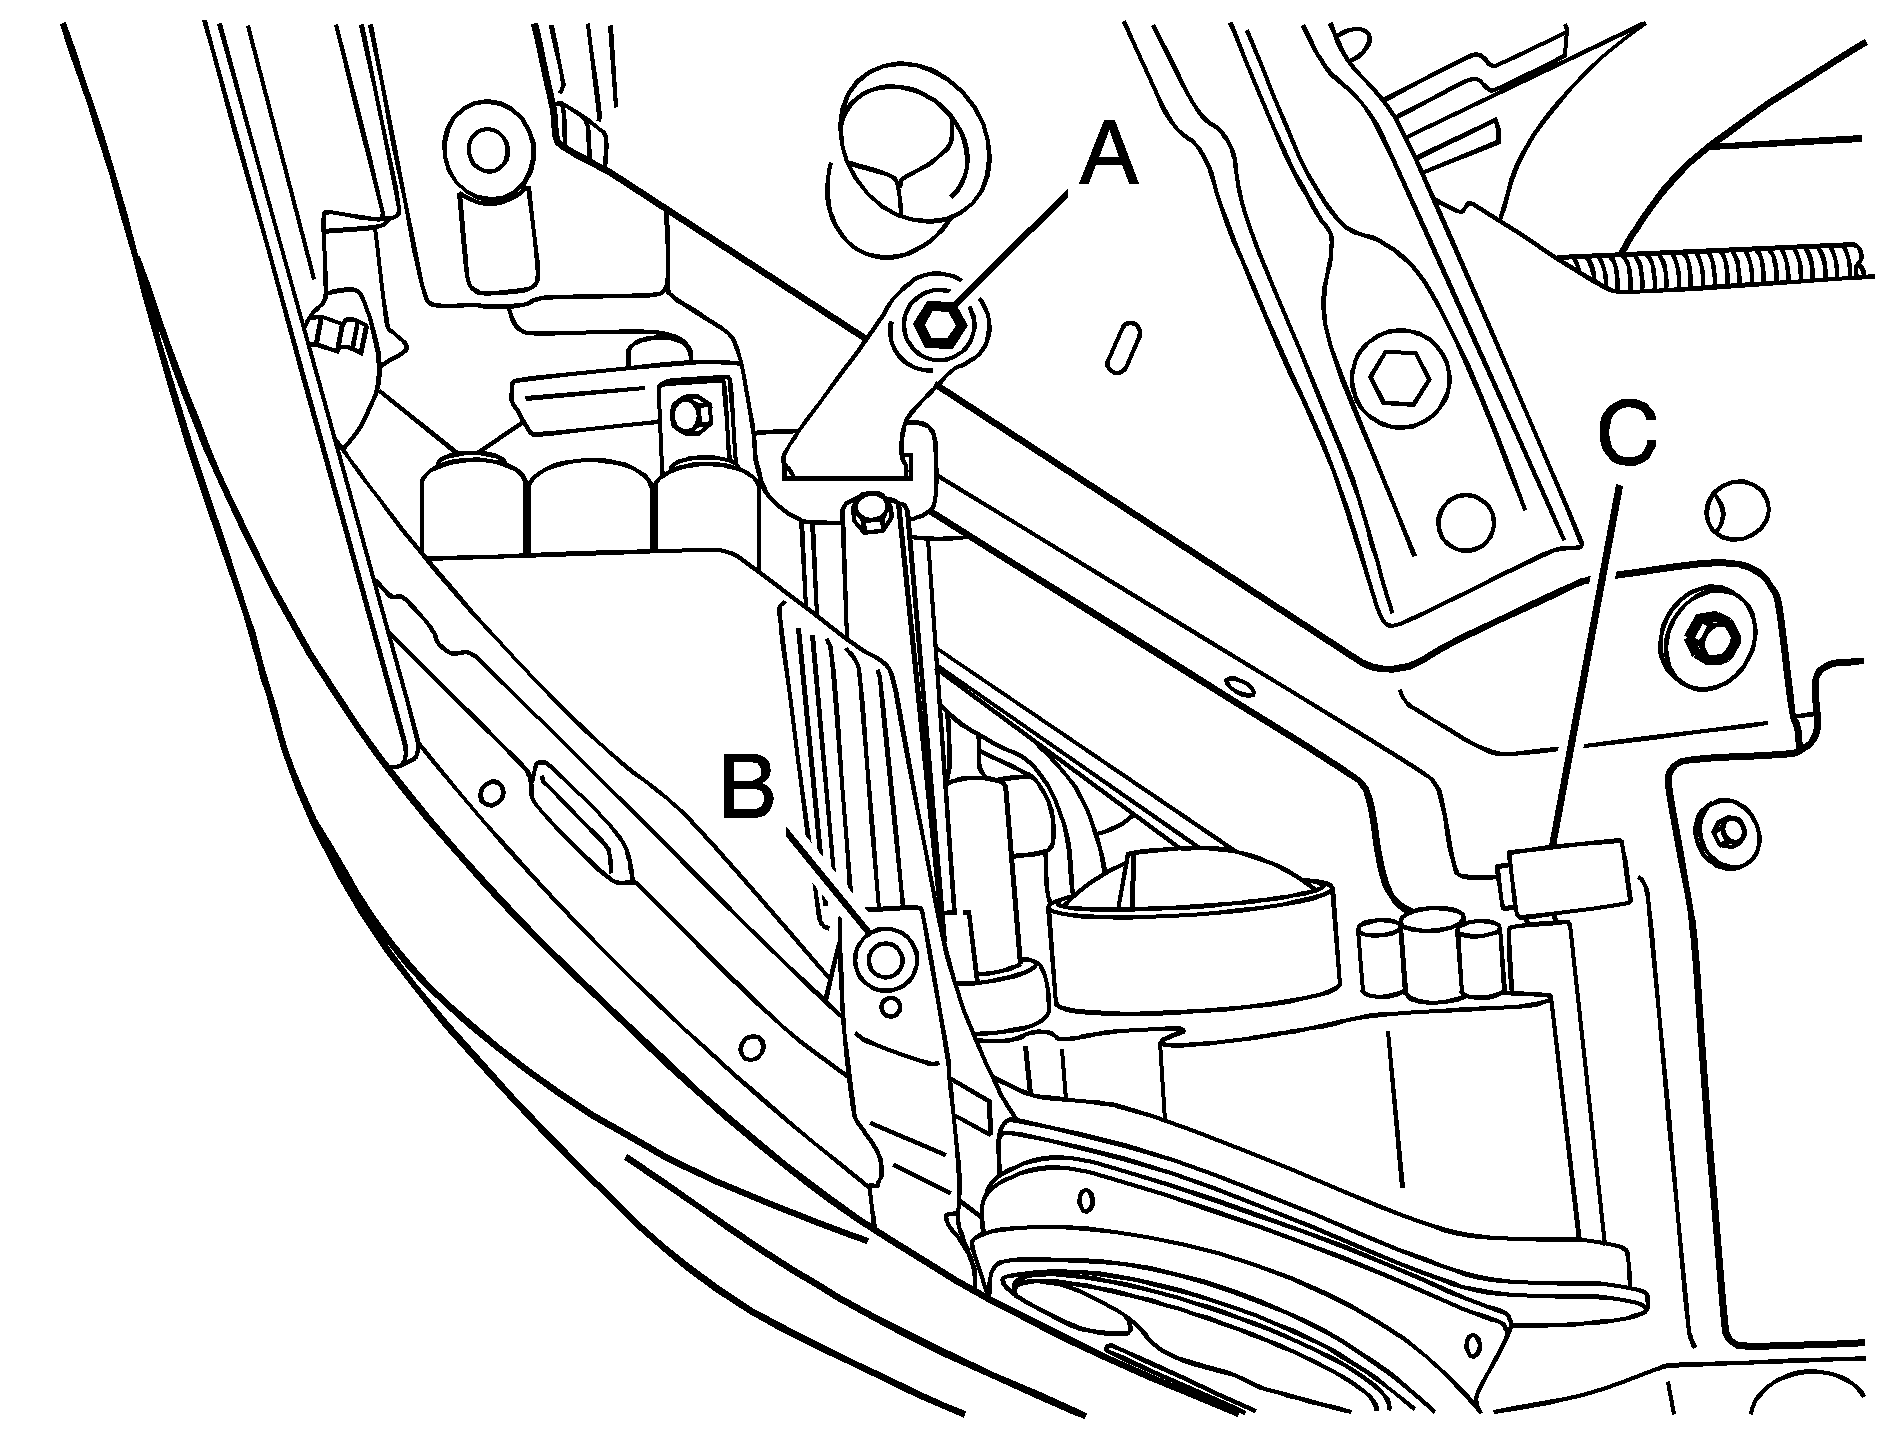
- Pull up on the plastic retaining clip (C) while pushing rearward on the headlamp. Align the square cut-out on the retaining clip with the notch on the headlamp.
- Remove the screw (A) from the metal headlamp retainer to pull up and release the headlamp assembly.
- Remove the push pin (B) retaining the front fascia.
- Pull forward on the front fascia and then pull the headlamp assembly out from the vehicle. Moving the headlamp up and down slightly may help with its removal.
- Remove the access cover from behind the bulb being replaced.
- Turn the bulb socket one-quarter of a turn to remove it from the headlamp assembly.
- Holding the base of the socket, pull the old bulb from the socket.
- Replace with a new bulb.
- Reverse all the steps to reassemble the headlamp assembly.

Someone should assist you with this step.
When replacing the plastic retaining clip, push down on it while pushing rearward on the headlamp, making sure the headlamp assembly is secure.
High-Beam Headlamp Bulbs
To replace the high-beam headlamp bulb:
- Open the hood. See Hood Release for more information.
- Locate the high-beam headlamp bulb socket.
- Remove the access cover from behind the bulb being replaced.
- Turn the bulb socket counterclockwise and pull it from the headlamp assembly.
- Holding the base of the socket, pull the old bulb from the socket.
- Replace with a new bulb.
- Reverse Steps 2 through 4 to reinstall.
