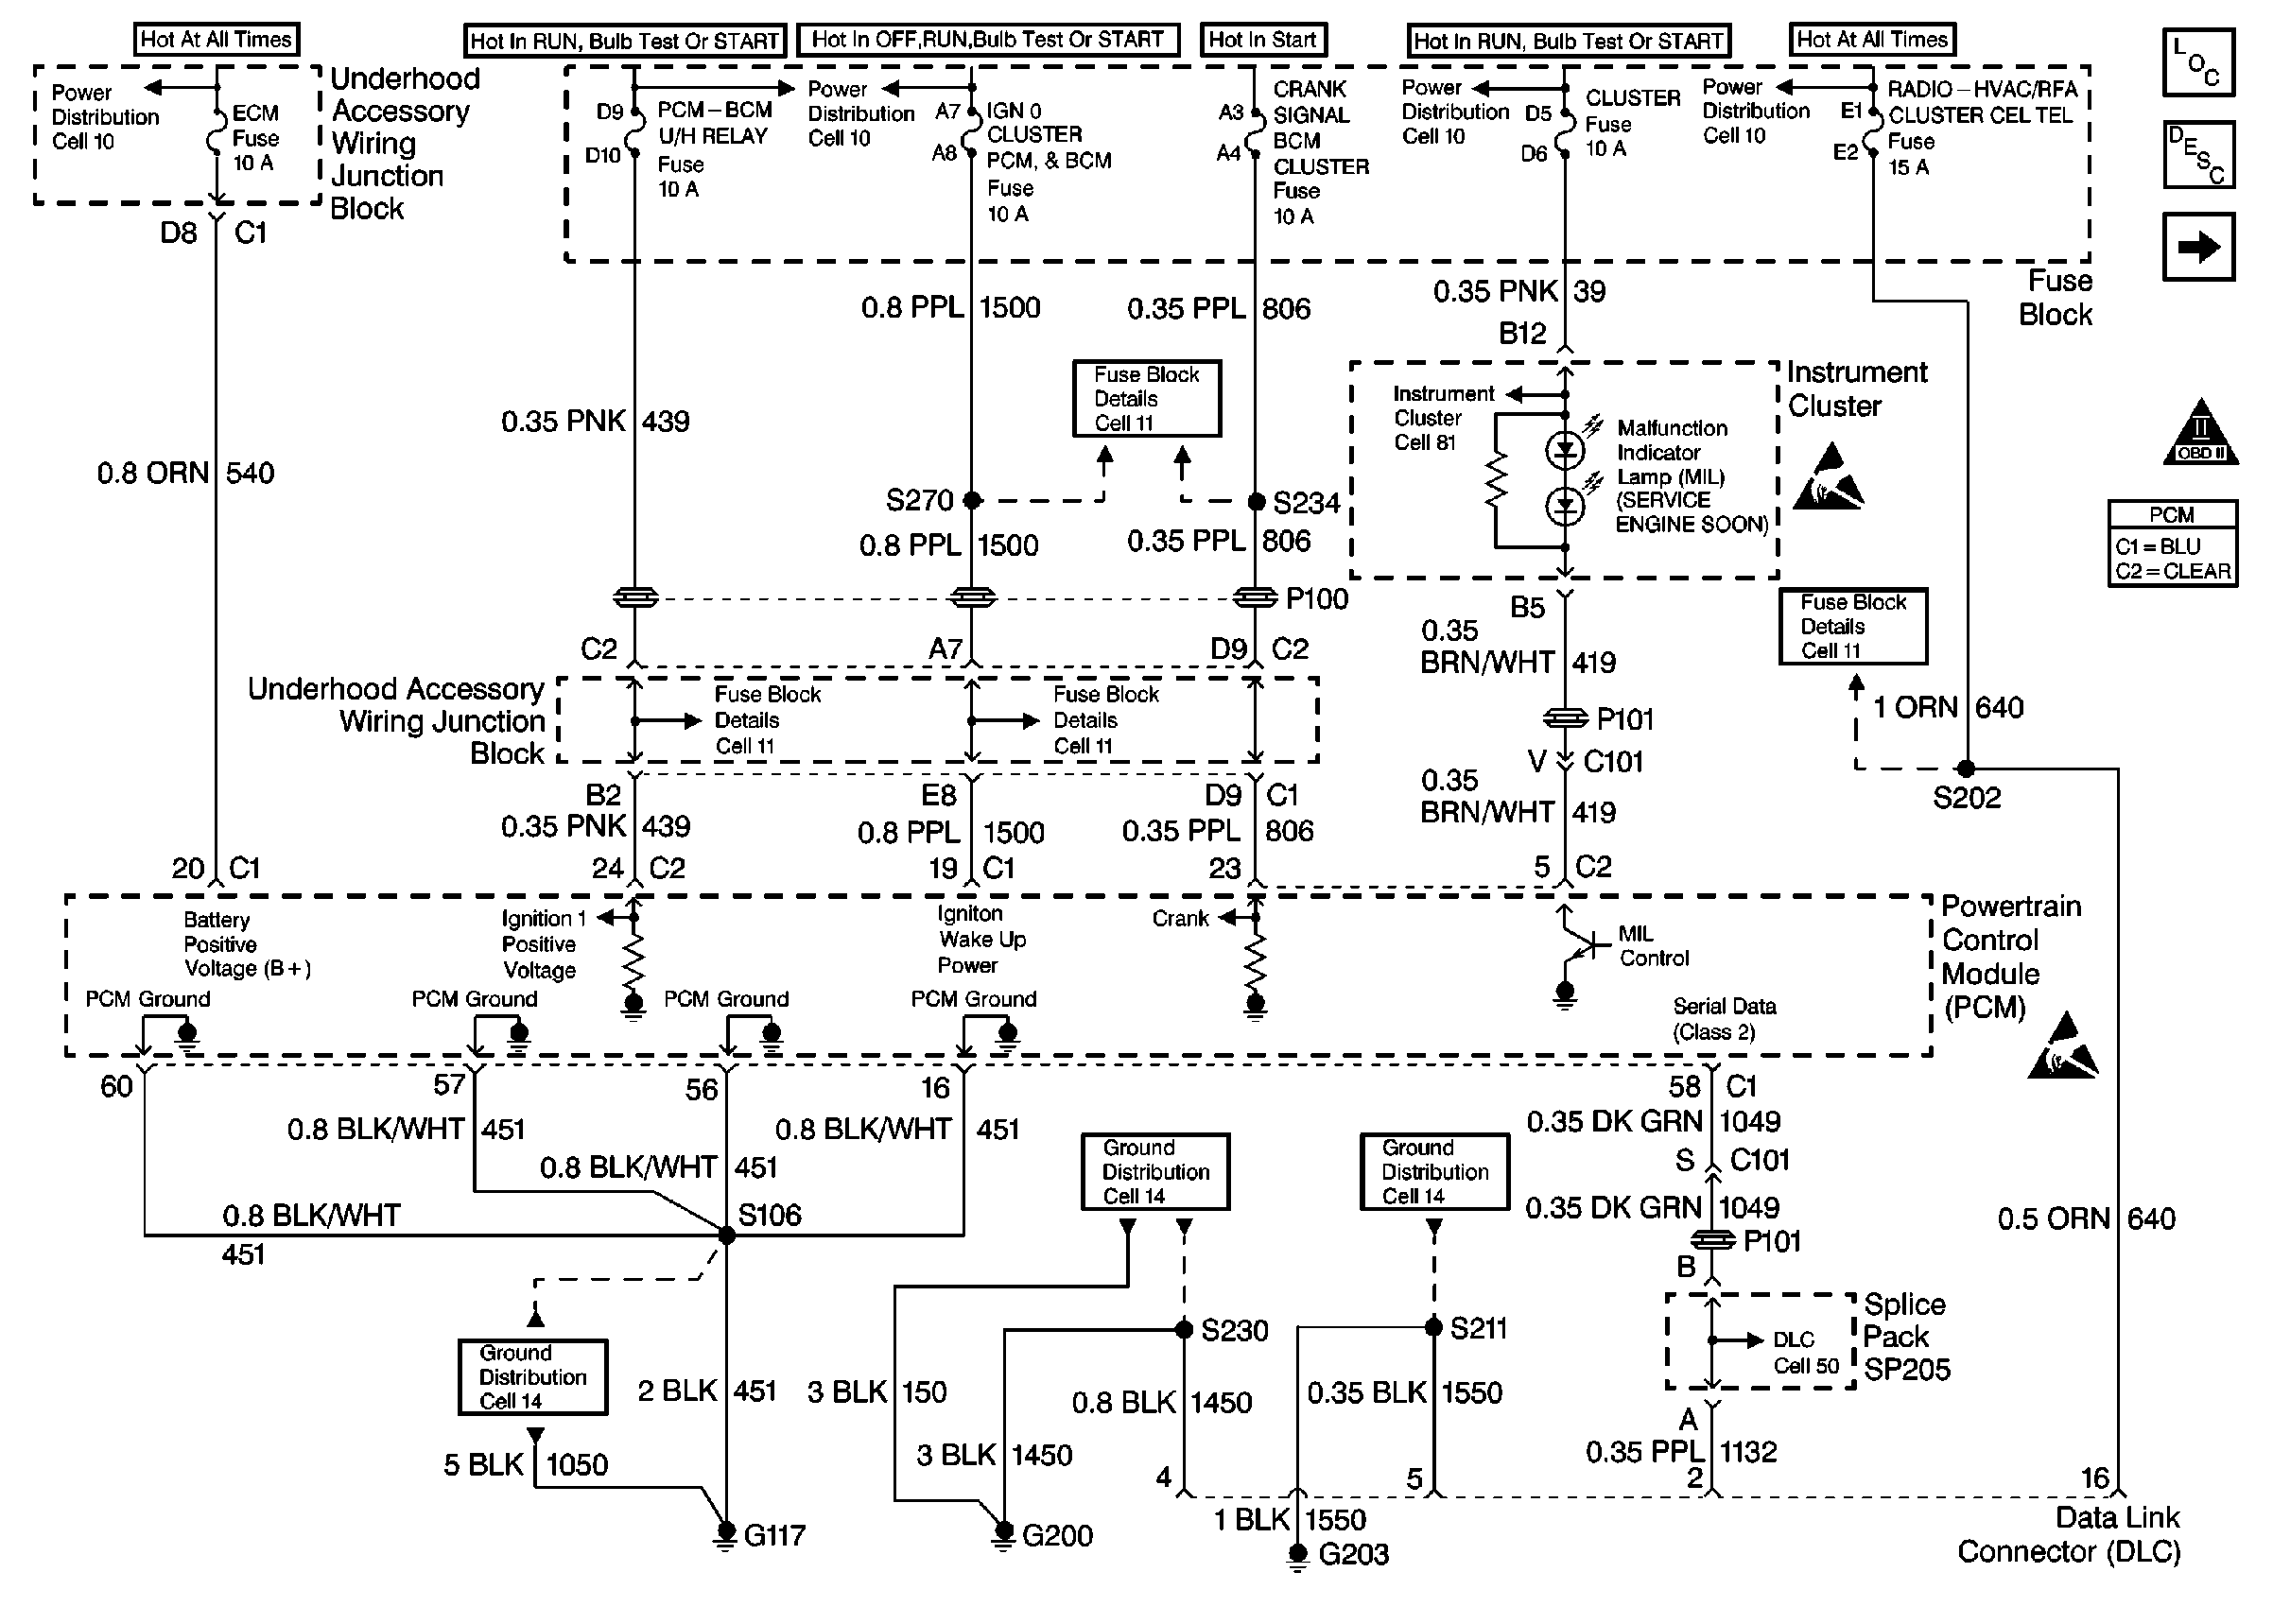
Refer to Engine Controls Schematics
Cell 20: Power, Ground, MIL and DLC
.
Circuit Description
The PCM controls the pulse frequency in relationship to engine RPM, and sends the information class II to the Instrument Cluster.
Diagnostic Aids
Refer to Diagnostic System Check - Instrument Cluster in Instrument Panel, Gauges and Console for additional diagnostic information.
Check for the following conditions:
Important: : Remove any debris from the connector surfaces before servicing a component. Inspect the connector gaskets when diagnosing or replacing a component. Ensure that the gaskets are installed correctly. The gaskets prevent contaminate intrusion.
| • | Poor terminal connection. |
| Inspect the harness connectors for backed out terminals, improper mating, broken locks, improperly formed or damaged terminals, and faulty terminal to wire connection. Use a corresponding mating terminal to test for proper tension. Refer to Intermittents and Poor Connections Diagnosis , and Connector Repairs Wiring Systems. |
| • | Damaged harness. |
| Inspect the wiring harness for damage. If the harness appears to be OK, observe the sensor display on the scan tool while moving connectors and wiring harnesses related to the sensor. A change in the sensor display may indicate the location of the fault. Refer to Wiring Repairs in Wiring Systems. |
| • | Inspect the PCM and the engine grounds for clean and secure connections. |
If the DTC is determined to be intermittent, reviewing the Fail Records can be useful in determining when the DTC was last set.
Step | Action | Values | Yes | No |
|---|---|---|---|---|
1 | Was Instrument Cluster diagnosis performed? | -- | Go to Diagnostic System Check - Instrument Cluster in Instrument Panel, Gauges and Console | |
2 | Was the Powertrain On-Board Diagnostic System Check performed? | -- | ||
3 | Are there any DTCs set? | -- | ||
4 |
Does the scan tool RPM match the Instrument Cluster? | -- | System OK | |
5 | Verify proper operation of scan tool. Connect scan tool to another vehicle and observe the RPM. Does scan tool match vehicle RPM? | -- | Go to Tachometer Inaccurate or Tachometer Inoperative in Instrument Panel, Gauges and Console | System OK |
