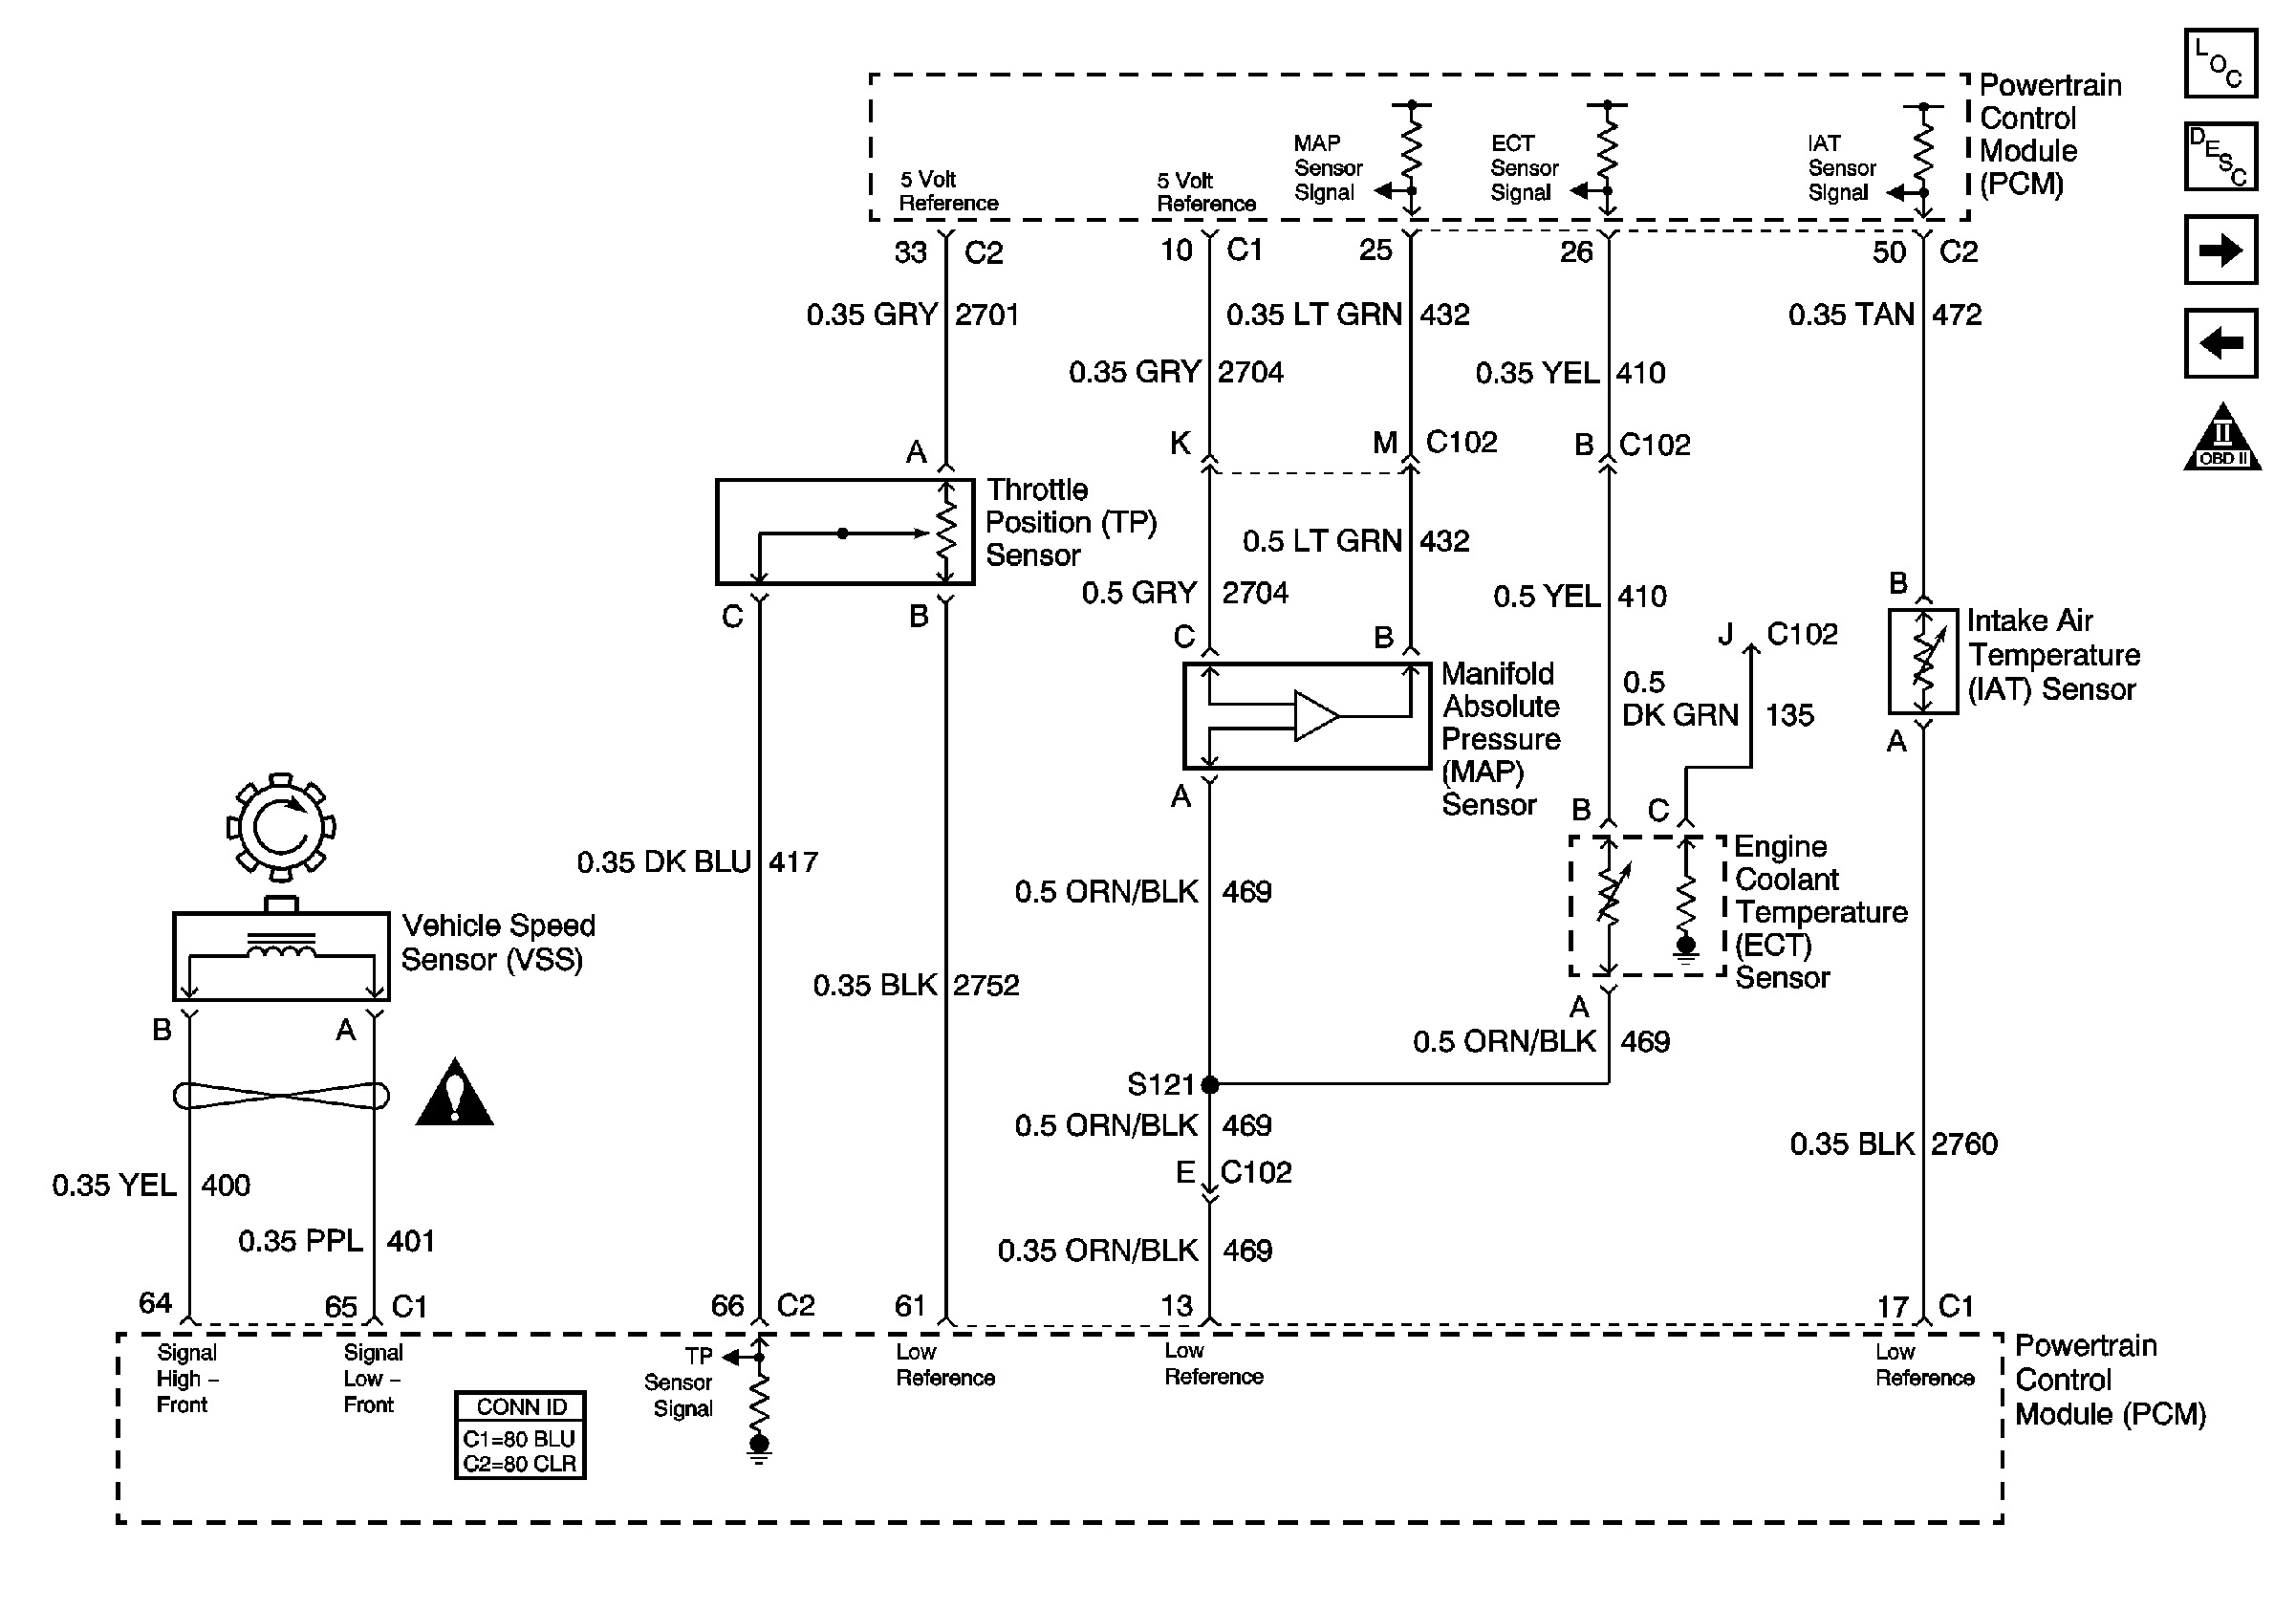
Circuit Description
The manifold absolute pressure (MAP) sensor responds to pressure changes in the intake manifold which gives an indication of the engine load. The MAP sensor has a 5 volt reference circuit, a low reference circuit, and a signal circuit. The PCM supplies 5 volts to the MAP sensor on the 5 volt reference circuit and provides a ground on the low reference circuit. The MAP sensor provides a signal to the PCM on the signal circuit which is relative to the pressure changes in the manifold. With low manifold absolute pressure such as during idle or deceleration, the PCM should detect a low signal voltage. With high manifold absolute pressure such as ignition ON, with the engine OFF or wide-open throttle, the PCM should detect a high signal voltage. Certain vehicle models will also use the MAP sensor in order to calculate the barometric pressure (BARO) when the ignition switch is turned ON, with the engine OFF. The BARO reading may also be updated whenever the engine is operated at wide-open throttle. The PCM monitors the MAP sensor signal for voltage outside of the normal range. If the PCM detects a MAP sensor signal voltage that is excessively high, DTC P0108 will set. IF the PCM detects a MAP sensor signal voltage that is excessively low, DTC P0107 will set.
Diagnostic Aids
Inspect for the following:
| • | Restrictions in the MAP sensor vacuum source |
| • | MAP sensor seal missing or damaged |
| • | Vacuum hoses disconnected, damaged, or incorrectly routed |
| • | Intake manifold vacuum leaks |
| • | Vacuum leaks at the throttle body |
| • | Vacuum leaks at the EGR valve flange and pipes |
Step | Action | Value(s) | Yes | No | ||||
|---|---|---|---|---|---|---|---|---|
Schematic Reference:
| ||||||||
1 | Did you perform the Diagnostic System Check-Engine Controls? | -- | Go to Step 2 | |||||
2 |
Important: In order to determine the correct manifold absolute pressure (MAP) sensor
value of barometric pressure for any elevation, perform either of the following
procedures:
Is the MAP sensor value normal for the altitude? | 3 kPa | Go to Step 3 | Go to Step 7 | ||||
3 |
Does the MAP sensor value change? | -- | Go to Step 4 | Go to Step 7 | ||||
4 |
Did you observe a skip or jump? | -- | Go to Step 13 | Go to Step 5 | ||||
5 | Observe the MAP sensor kPa display with 20 inches Hg of vacuum applied to the sensor. Is the kPa less than the value specified? | 34 kPa | Go to Step 6 | Go to Step 7 | ||||
6 | Disconnect the MAP sensor from the hand held vacuum pump. The MAP sensor display should return to the value specified in step 2. Does the MAP sensor display return to the value recorded earlier? | -- | System OK | Go to Step 13 | ||||
7 |
Is the voltage more than the value specified? | 0.0 V | Go to Step 10 | Go to Step 8 | ||||
8 |
Is the voltage within the value range specified? | 4.7-5.2 V | Go to Step 9 | Go to Step 11 | ||||
9 |
Does the test lamp illuminate? | -- | Go to Step 13 | Go to Step 12 | ||||
10 | Test the signal circuit for a short to voltage. This short will have resistance as a complete short would have set a DTC. Refer to Circuit Testing and Wiring Repairs in Wiring Systems. Did you find and correct the condition? | -- | Go to Step 2 | Go to Step 15 | ||||
11 | Test the 5 volt reference and the signal circuit for high resistance. Refer to Testing for Continuity , Measuring Voltage Drop and Wiring Repairs in Wiring Systems. Did you find and correct the condition? | -- | Go to Step 2 | Go to Step 15 | ||||
12 | Test the MAP sensor low reference circuit for high resistance. Refer to Circuit Testing and Wiring Repairs in Wiring Systems. Did you find and correct the condition? | -- | Go to Step 2 | Go to Step 15 | ||||
13 | Inspect the MAP sensor connector for poor connection or terminal contact. Refer to Testing for Intermittent Conditions and Poor Connections and Connector Repairs in Wiring Systems. Did you find and correct the condition? | -- | Go to Step 2 | Go to Step 14 | ||||
14 | Replace the MAP sensor. Refer to Manifold Absolute Pressure Sensor Replacement . Did you complete the replacement? | -- | Go to Step 2 | -- | ||||
15 | Inspect the PCM for poor connection or terminal contact. Refer to Testing for Intermittent Conditions and Poor Connections and Connector Repairs in Wiring Systems. Did you find and correct the condition? | -- | Go to Step 2 | Go to Step 16 | ||||
16 | Replace the PCM. Refer to Powertrain Control Module Replacement . Did you complete the replacement? | -- | Go to Step 2 | -- | ||||

