For 1990-2009 cars only
Removal Procedure
- Remove the right instrument panel insulator panel. Refer to Instrument Panel Insulator Panel Replacement - Right Side in Instrument Panel, Gages and Console.
- Remove the I/P compartment. Refer to Instrument Panel Compartment Replacement in Instrument Panel, Gages, and Console.
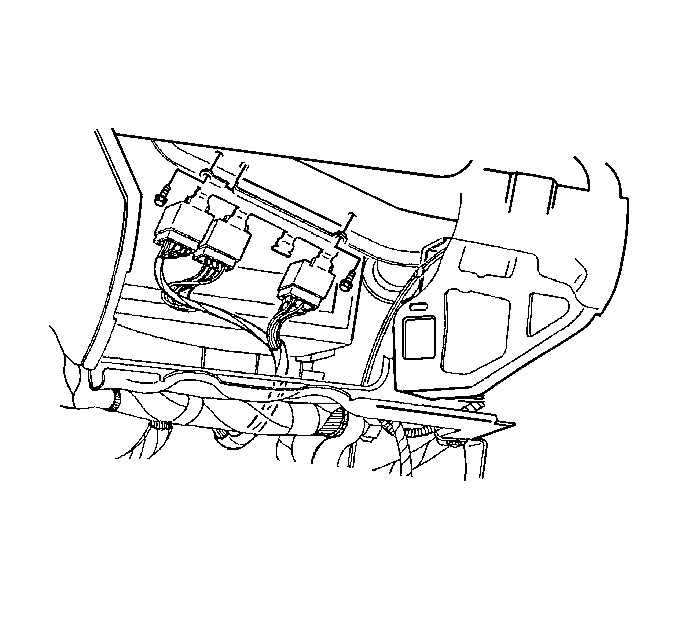
- Remove the relay bracket screws.
- Reposition the relay bracket aside.
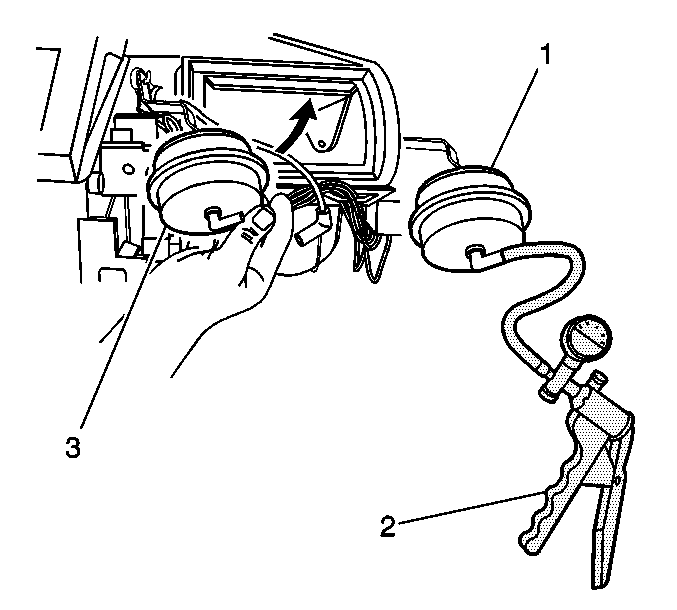
- Disconnect the 2 vacuum lines from the defroster actuator (3).
- Disconnect the orange vacuum line from the recirculation actuator and install a hand vacuum pump (2).
- Remove the defroster actuator from its attachment to the HVAC module case.
- Using the hand vacuum pump (2) open the recirculation actuator door to the full position.
- Rotate the defroster actuator to the right and up into the opening between the back of the dash and the opening into the HVAC module.
- Disconnect the defroster actuator from the defroster door arm.


Installation Procedure
- Install the defroster actuator to the defroster door arm and snap into place on the HVAC module.
- Connect the vacuum line to the actuator.
- Remove the hand vacuum pump (2) and reinstall the vacuum line to the recirculation actuator.
- Install the relay bracket screws.
- Install the I/P compartment. Refer to Instrument Panel Compartment Replacement in Instrument Panel, Gages, and Console.
- Install the right instrument insulator panel. Refer to Instrument Panel Insulator Panel Replacement - Right Side in Instrument Panel, Gages and Console.

Notice: Refer to Fastener Notice in the Preface section.

Tighten
Tighten the screws to 1.0 N·m (89 lb in).
