For 1990-2009 cars only
Removal Procedure
- If the system is equipped with a driver side air bag, disable the SIR system. Refer to SIR Disabling and Enabling in SIR.
- If one side of the seat adjuster is not working, perform the following procedure:
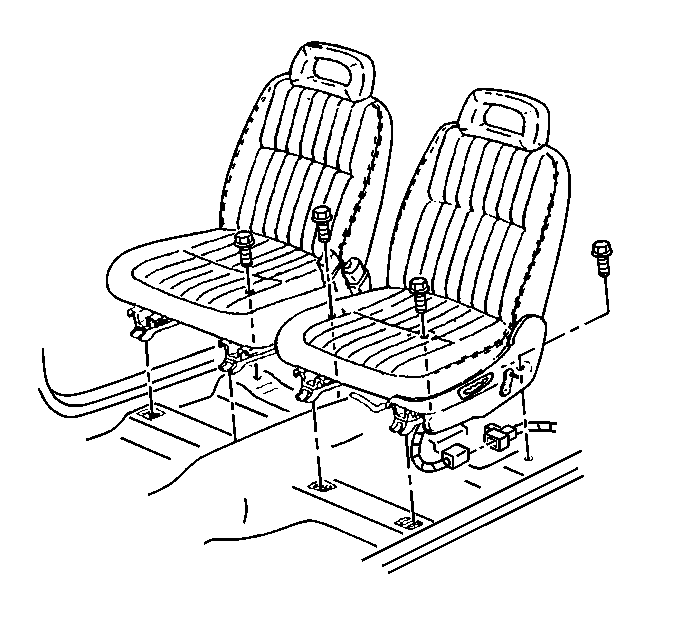
- Remove the front seat bolts.
- Tip the seat forward and disconnect the electrical connector from the seat electrical harness.
- Disengage the seat hook attachments from the floor pan.
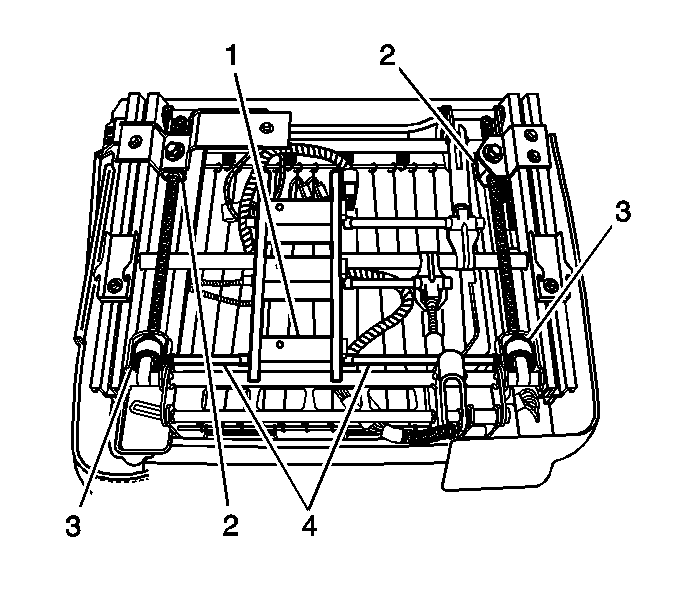
- Tip the seat rearward to expose the horizontal drive cables (4).
- Bend the long flexible cable at the center and pull the cable out of the motor (1) and the drive screw (3).
- Remove the cable from the vehicle.

| 2.1. | The horizontal drive motor (1) and the drive cables (4) are located at the front of the seat. Verify that both cables are straight. If a cable is bent, an end will be pulled out of the drive motor or the drive screw. Straighten the cable. The seat switch may have to be toggled back and forth to get the cable ends to seat properly. |
| 2.2. | Run the seat forward until the seat removal bolts are accessible. |

Important: The short cable is not replaceable.
Installation Procedure
- Insert the end of one cable (4) into the drive screw (3).
- Bend the cable and insert the other end into the motor (1).
- Connect the electrical connector to the seat wire harness and test the seat for proper operation.
- Examine the horizontal drive cables for synchronization. Refer to Seat Adjuster Phase Adjustment .
- Tip the seat forward and engage the seat hook attachments to the floor pan.
- Install the bolts that secure the adjuster to the floor pan.
- Enable the SIR system. Refer to SIR Disabling and Enabling in SIR.

Important: Examine all 4 drive cables to ensure that the cables are straight.

Notice: Refer to Fastener Notice in the Preface section.
Tighten
Tighten the bolts to 42 N·m (31 lb ft).
