Tools Required
J 38185 Hose Clamp Pliers
Removal Procedure
- Remove the battery. Refer to Battery Replacement in Engine Electrical.
- Drain the cooling system. Refer to Cooling System Draining and Filling .
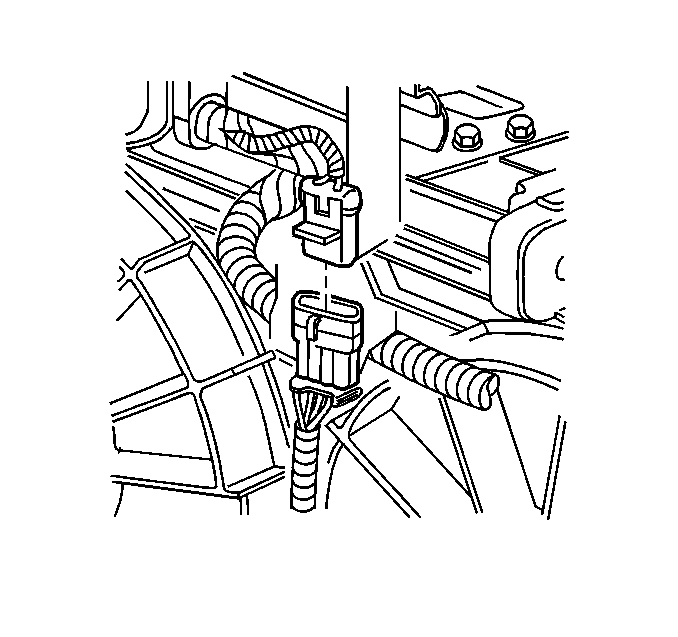
- Disconnect the cooling fan electrical connector.
- Remove the right and left engine mount struts. Refer to Engine Mount Strut Replacement in Engine Mechanical - 3.1L.
- Remove the right and left engine mount strut brackets. Refer to Engine Mount Strut Bracket Replacement - Upper Radiator Support in Engine Mechanical - 3.1L.
- Remove the air cleaner and duct assembly. Refer to Air Cleaner Assembly Replacement in Engine Controls - 3.1L.
- Remove the radiator inlet hose from the radiator.
- Remove the powertrain control module (PCM) harness from the fan shroud clip.
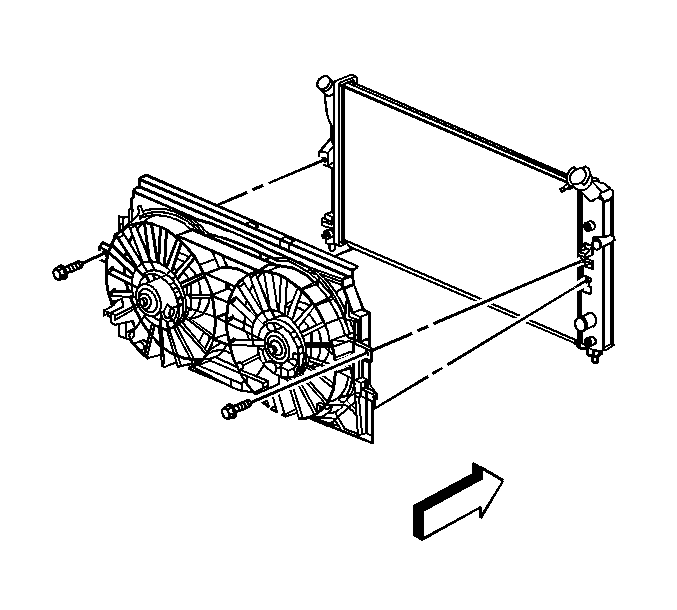
- Remove the cooling fan shroud bolts.
- Raise and support the vehicle. Refer to Lifting and Jacking the Vehicle in General Information.
- Remove the push pin retainer from the lower left side of the fan shroud.
- Remove the transmission oil cooler lines from the retainer clip at the bottom of the cooling fan shroud.
- Remove the lower air deflector. Refer to Radiator Air Lower Baffle and Deflector Replacement .
- Use J 38185 to remove the outlet hose clamp from the radiator.
- Remove the outlet hose from the radiator.
- Lower the vehicle.
- Remove the cooling fan shroud clip from the top of the radiator.
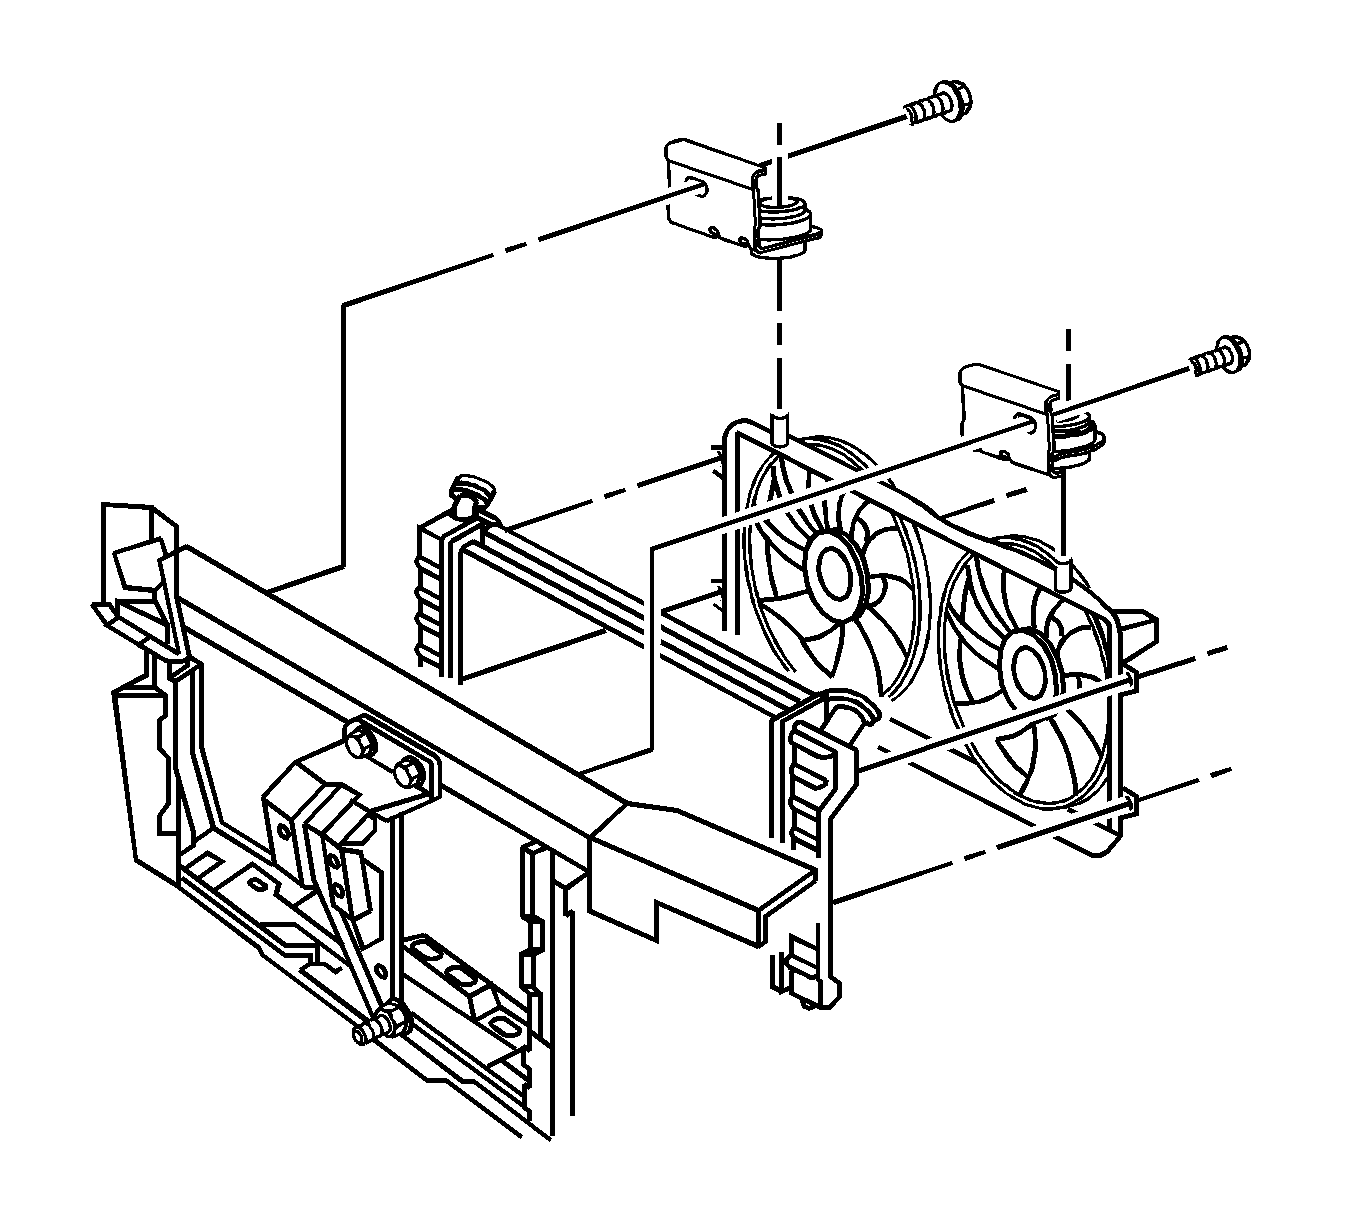
- Remove the radiator upper support brackets that connect to the fan shroud.
- Remove the cooling fan shroud.
- Disconnect the transaxle oil cooler pipes from the radiator. Refer to Transmission Fluid Cooler Hose/Pipe Quick-Connect Fitting Disconnection and Connection in Automatic Transaxle - 4T65-E.
- Remove the coolant reservoir hose from the radiator overflow neck.
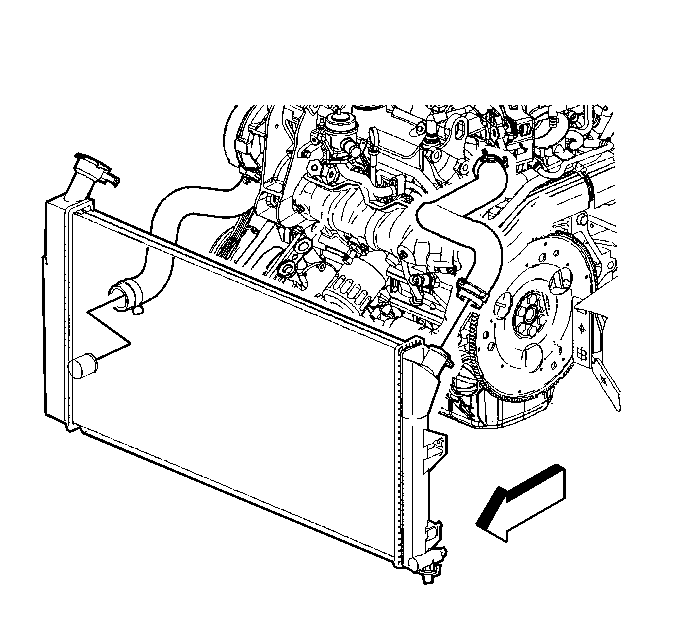
- Remove the radiator.
Caution: Refer to Battery Disconnect Caution in the Preface section.


Installation Procedure
- Install the radiator to the lower mounts.
- Install the coolant reservoir hose to the radiator overflow neck.
- Install the transaxle oil cooler pipes to the radiator. Refer to Transmission Fluid Cooler Hose/Pipe Quick-Connect Fitting Disconnection and Connection in Automatic Transaxle - 4T65-E.
- Install the outlet hose to the radiator.
- Use J 38185 to install the outlet hose clamp to the radiator.
- Install the lower air deflector. Refer to Radiator Air Lower Baffle and Deflector Replacement .
- Install the cooling fan shroud.
- Install the cooling fan shroud bolts.
- Install the cooling fan shroud clip to the top of the radiator and fan shroud. Apply pressure in order to completely engage the clip onto the radiator and fan shroud.
- Raise and support the vehicle. Refer to Lifting and Jacking the Vehicle in General Information.
- Install the push pin retainer to the lower left side of the fan shroud.
- Install the transmission oil cooler lines on to the retainer at the bottom of the cooling fan shroud.
- Lower the vehicle.
- Install the radiator upper support brackets and bolts that hold the fan shroud.
- Connect the cooling fan electrical connector.
- Install the radiator inlet hose to the radiator.
- Install the air cleaner and duct assembly. Refer to Air Cleaner Assembly Replacement in Engine Controls - 3.1L.
- Install the right and left engine mount strut brackets. Refer to Engine Mount Strut Bracket Replacement - Upper Radiator Support in Engine Mechanical - 3.1L.
- Install the right and left engine mount struts. Refer to Engine Mount Strut Replacement in Engine Mechanical - 3.1L.
- Install the PCM harness on to the fan shroud clip.
- Install the battery. Refer to Battery Replacement in Engine Electrical.
- Fill the cooling system. Refer to Cooling System Draining and Filling .
- Adjust the transaxle fluid level.


Notice: Use the correct fastener in the correct location. Replacement fasteners must be the correct part number for that application. Fasteners requiring replacement or fasteners requiring the use of thread locking compound or sealant are identified in the service procedure. Do not use paints, lubricants, or corrosion inhibitors on fasteners or fastener joint surfaces unless specified. These coatings affect fastener torque and joint clamping force and may damage the fastener. Use the correct tightening sequence and specifications when installing fasteners in order to avoid damage to parts and systems.
Tighten
Tighten the bolts to 6 N·m (53 lb in).

Tighten
Tighten the bolts to 10 N·m (89 lb in).

Notice: Do NOT overfill the transaxle. The overfilling of the transaxle causes foaming, loss of fluid, shift complaints, and possible damage to the transaxle.
