Front Floor Console Replacement DO7
Replacement Procedure
Tools Required
J 38778 Door Trim Clip Remover
- Disconnect the battery negative cable. Refer to Battery Negative Cable Disconnect/Connect Procedure in Engine Electrical.
- Remove the LH and RH front bucket seats. Refer to Seat Replacement - Front Bucket in Seats.
- Remove the rear HVAC control assembly. Refer to Control Assembly Replacement in HVAC - Manual.
- Remove the floor console rear bolt covers and retaining bolts.
- Use the J 38778 in order to remove the front console HVAC duct pushpins from the HVAC module.
- Remove the floor console front retaining bolts.
- Pull the front floor console rearward to release it from the instrument panel.
- Disconnect the floor console harness electrical connector.
- Remove the front floor console from the vehicle.
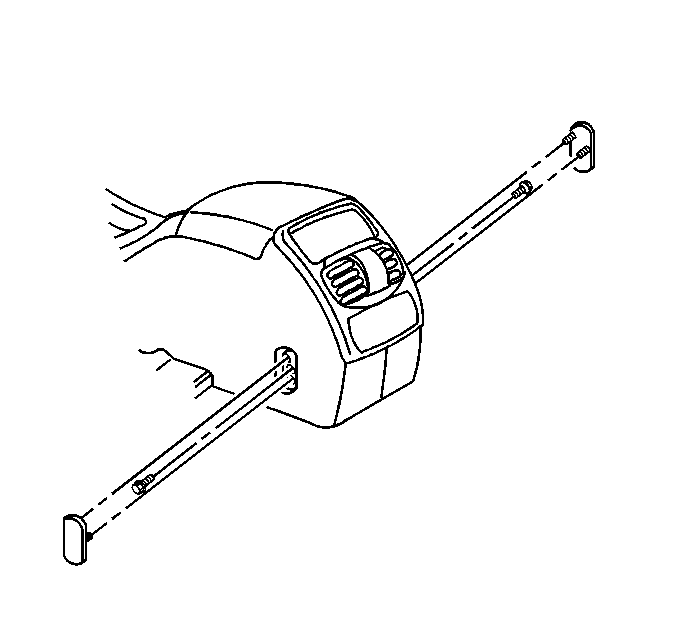
Important: Insert a small flat-bladed tool and gently pry under the rear edge of the bolt covers.
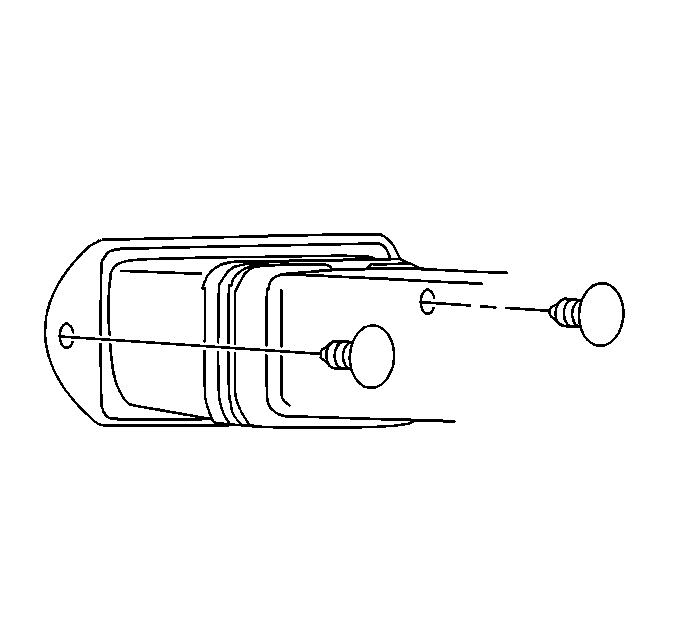
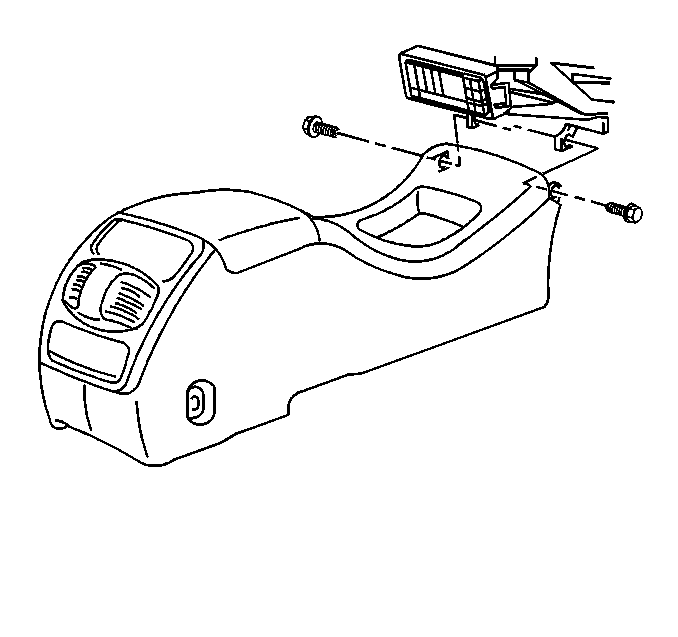
Important: Push inward on the IP console support bracket in order to release the console top guide pins.
Installation Procedure
- Install the front floor console to the vehicle.
- Connect the floor console harness electrical connector.
- Align the front floor console guide pins into the instrument panel support bracket.
- Align the front floor console to the front floor console mounting brackets.
- Install the front floor console front retaining bolts.
- Install the front console HVAC duct pushpins to the HVAC module.
- Install the front floor console rear bolts.
- Install floor console rear bolt covers.
- Install the rear HVAC control assembly. Refer to Control Assembly Replacement in HVAC - Manual.
- Install the LH and RH front bucket seats. Refer to Seat Replacement - Front Bucket in Seats.
- Connect the battery negative cable. Refer to Battery Negative Cable Disconnect/Connect Procedure in Engine Electrical.

Notice: Use the correct fastener in the correct location. Replacement fasteners must be the correct part number for that application. Fasteners requiring replacement or fasteners requiring the use of thread locking compound or sealant are identified in the service procedure. Do not use paints, lubricants, or corrosion inhibitors on fasteners or fastener joint surfaces unless specified. These coatings affect fastener torque and joint clamping force and may damage the fastener. Use the correct tightening sequence and specifications when installing fasteners in order to avoid damage to parts and systems.
Tighten
Tighten the front floor console front bolts to 6 N·m (53 lb in).


Tighten
Tighten the front floor console rear bolts to 6 N·m (53 lb in).
Front Floor Console Replacement GS
Removal Procedure
- Disconnect the battery negative cable. Refer to Battery Negative Cable Disconnection and Connection in Engine Electrical.
- Apply the parking brake.
- Position the transaxle shift lever to the LOW position.
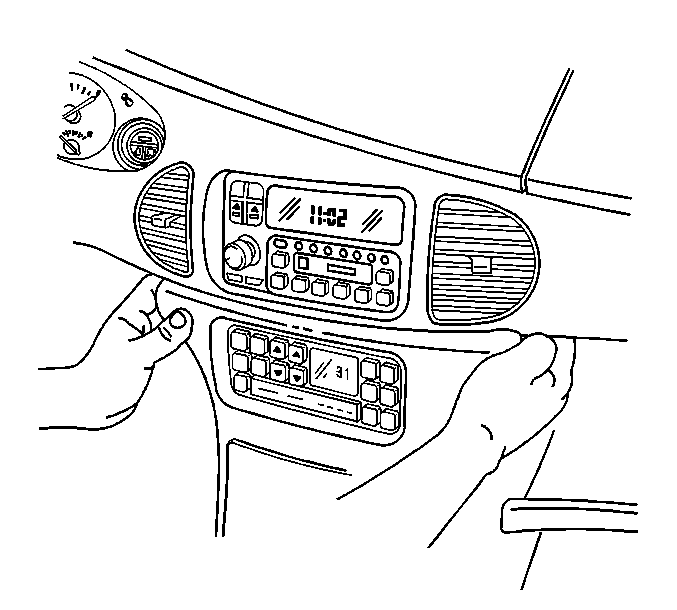
- Remove the front floor console trim plate. Refer to Console Front Trim Plate Replacement .
- Remove the rubber mat from the storage compartment in the front floor console.
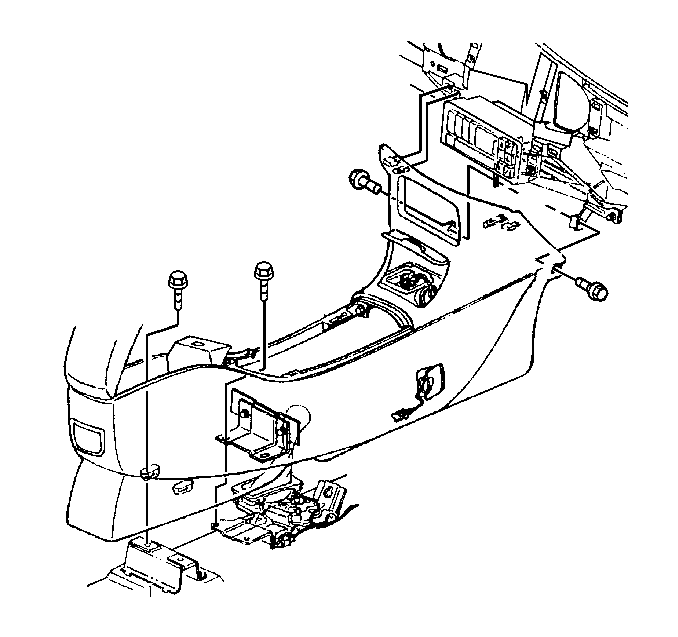
- Remove the bolts from the storage compartment area of the front floor console.
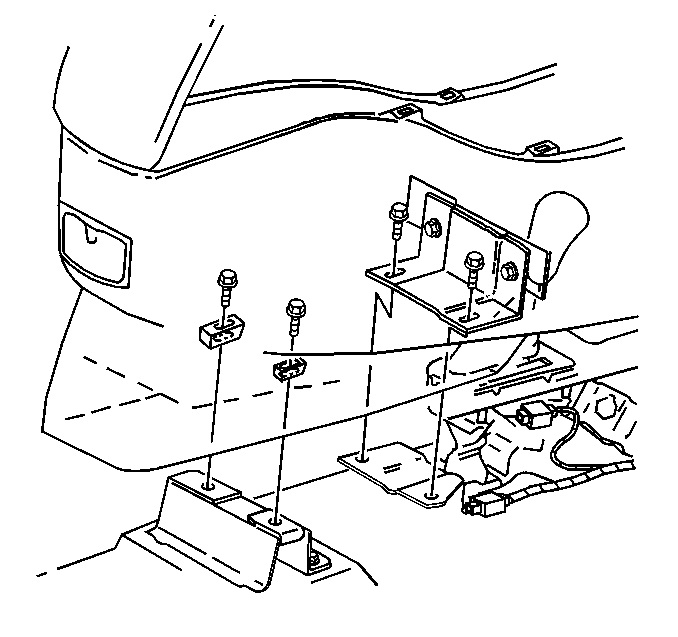
- Remove the bolts from the front floor console mounting bracket at the rear of the transaxle shift lever.
- Remove the bolts from the LH and RH front sides of the front floor console.
- Remove the front floor console power accessory port. Refer to Floor Console Accessory Power Receptacle Replacement .
- Remove the front floor console cigrette lighter. Refer to Console Ashtray/Lighter Replacement .
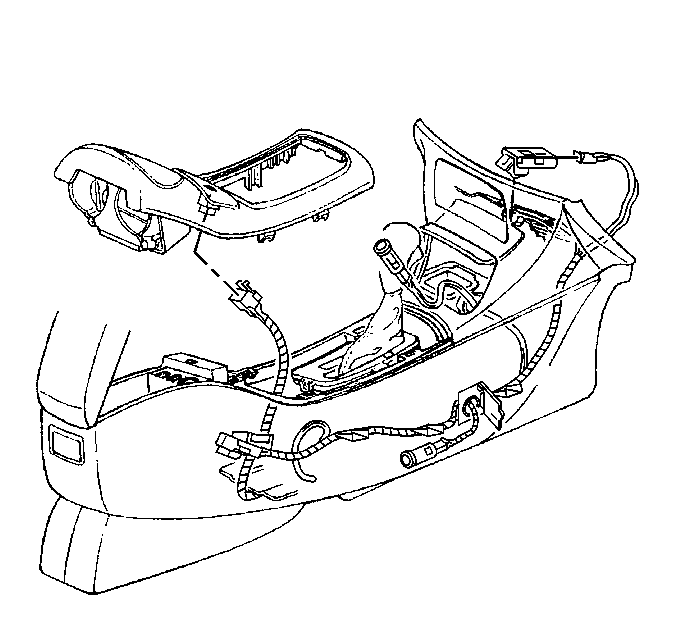
- Disconnect the wiring harness from the front floor console.
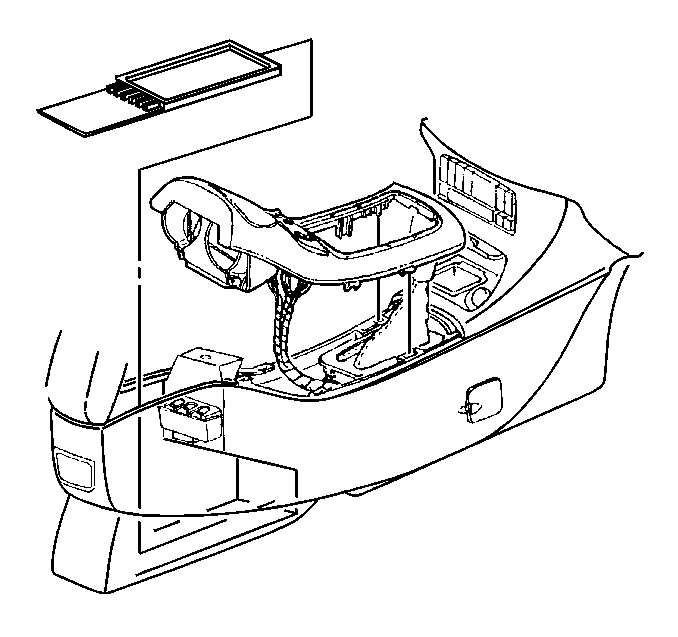
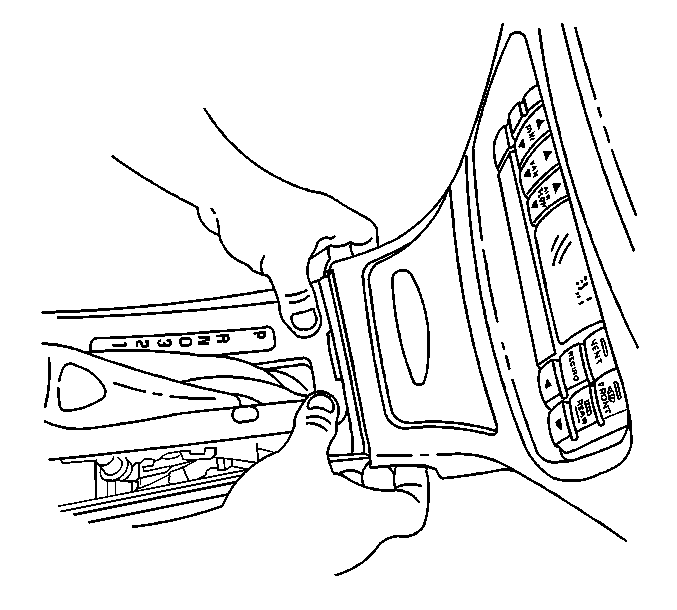
- Pull the front floor console rearward in order to release the retainers from the instrument panel.
- Depress the front edge of the shifter trim plate in order to pull back the front floor console for removal.
- Remove front floor console from the vehicle.
Installation Procedure
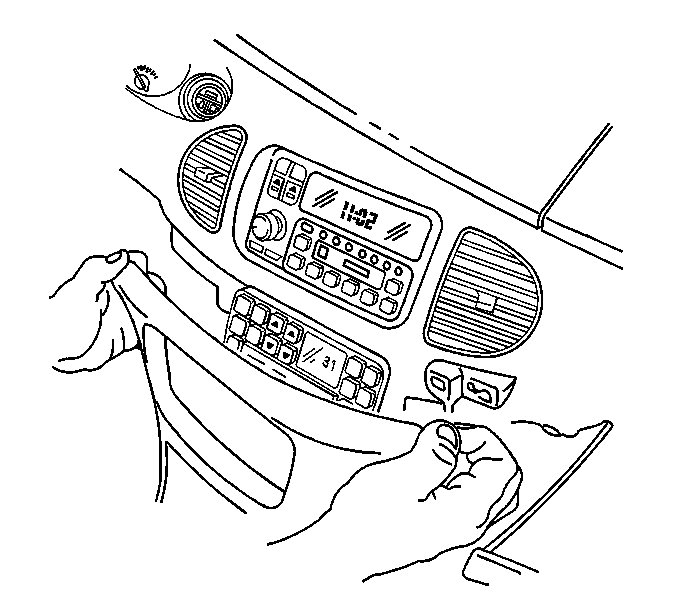
- Position the front floor console into the vehicle.
- Connect the electrical connectors to the front floor console.
- Align the front floor console over the transaxle shifter and position the front floor console retainers to the instrument panel.
- Push the front floor console forward into the retainers in the instrument panel until fully seated.
- Install the bolts to the forward edge of the front floor console.
- Install the bolts into the front floor console mounting bracket at the rear of the transaxle shifter lever.
- Install the bolts to the storage area of the front floor console.
- Install the rubber mat to the storage compartment in the front floor console.
- Install the front floor console trim plate. Refer to Console Front Trim Plate Replacement .
- Install the front floor console power accessory port. Refer to Floor Console Accessory Power Receptacle Replacement .
- Install the front floor console cigrette lighter. Refer to Console Ashtray/Lighter Replacement .
- Reposition the transaxle shift lever to the PARK position.
- Release the parking brake.
- Connect the battery negative cable. Refer to Battery Negative Cable Disconnection and Connection in Engine Electrical.


Tighten
Tighten the front floor console front side bolts to 5 N·m
(44 lb in).

Tighten
Tighten the front floor console bolts to 5 N·m (44 lb in).
Tighten
Tighten the front floor console storage compartment bolts to 5 N·m
(44 lb in).

