GM Service Manual Online
For 1990-2009 cars only

Front Floor Console Replacement Acadia
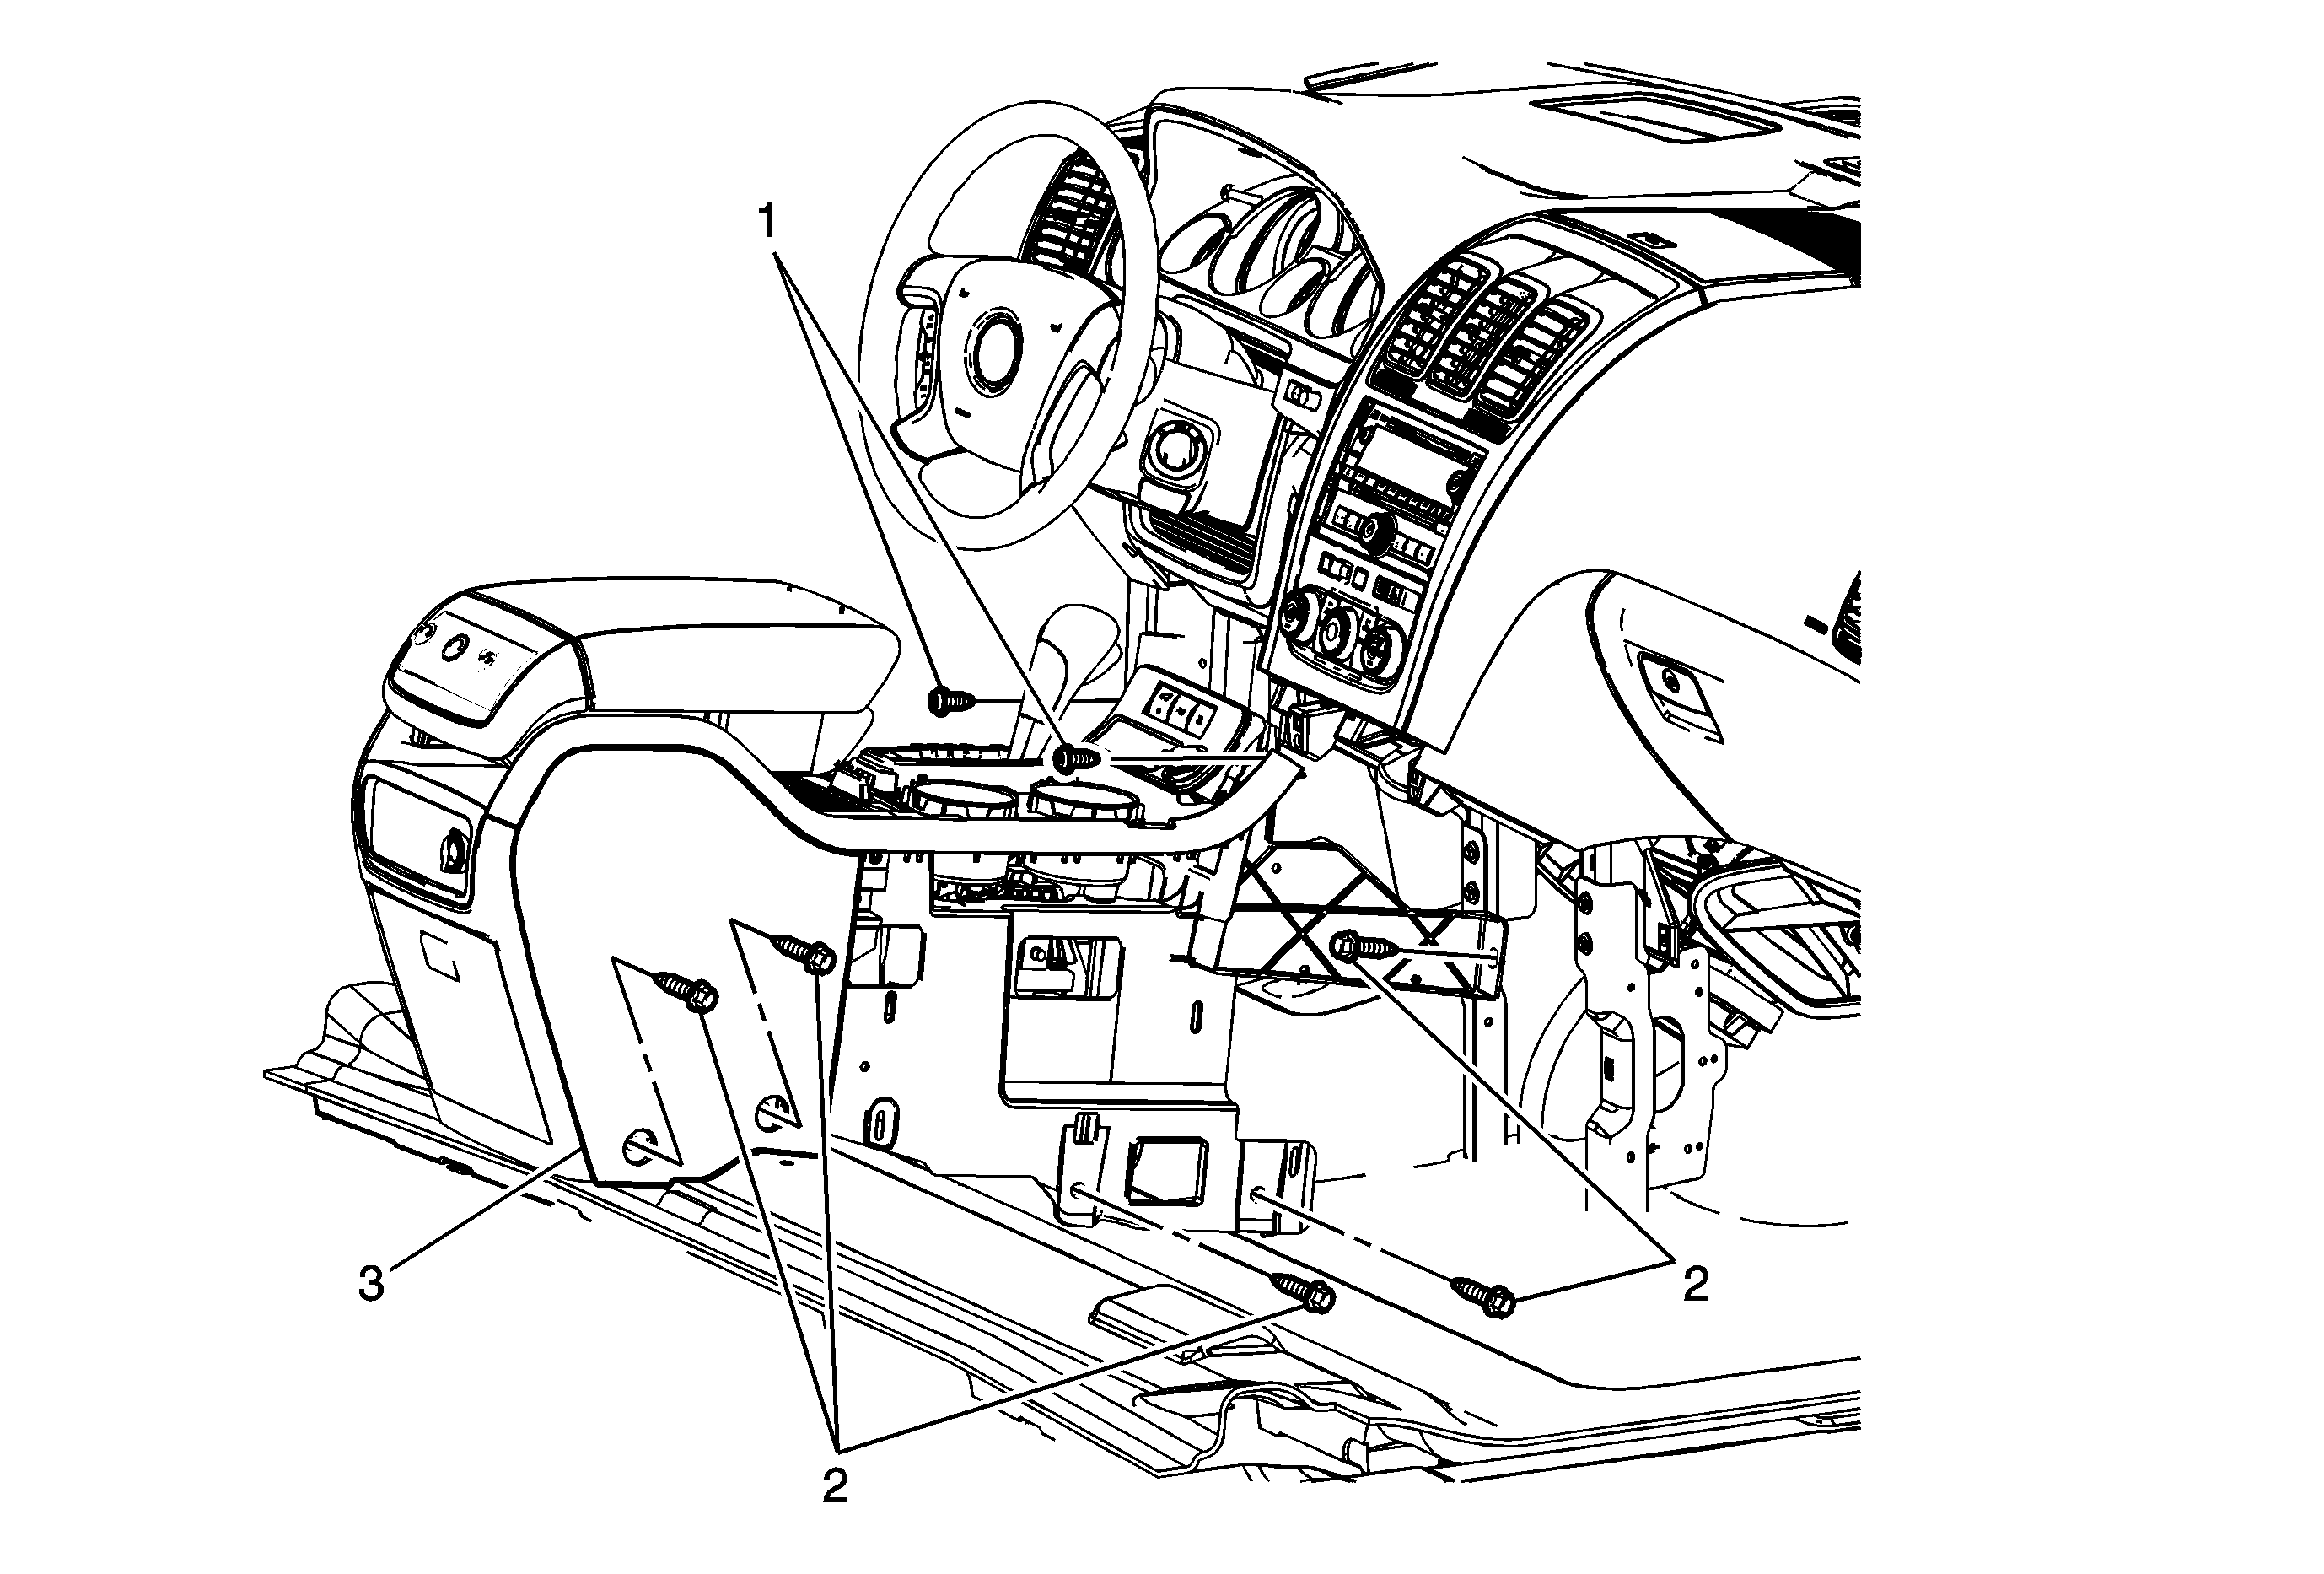

Object Number: 1853988  Size: MF

Callout

Component Name

Preliminary Procedures

  1. Remove the front floor console accessory trim plate. Refer to Front Floor Console Accessory Trim Plate Replacement .
  2. Remove the right and left front floor console extension panels. Refer to Front Floor Console Extension Panel Replacement - Right Side and Front Floor Console Extension Panel Replacement - Left Side .
  3. Disconnect the automatic transmission range selector lever cable. Refer to Range Selector Lever Cable Replacement .

1

Front Floor Console Screw (Qty: 2)

Notice: Refer to Fastener Notice in the Preface section.

Tighten
2 N·m (18 lb in)

2

Front Floor Console Bolt (Qty: 10)

Tip
Before installing the right lower forward bolt, ensure that the console wiring harness is tucked below the fastener location to avoid driving the bolt into the harness.

Tighten
9 N·m (80 lb in)

3

Front Floor Console Assembly

Procedure

  1. Note location and routing of the front floor console wiring harness prior to removal of the front floor console assembly to ensure proper reinstallation.
  2. Disconnect the electrical connectors.
  3. With the aid of an assistant, remove the console assembly from the vehicle.
  4. When replacing the front floor console, transfer all necessary components.

Front Floor Console Replacement Enclave
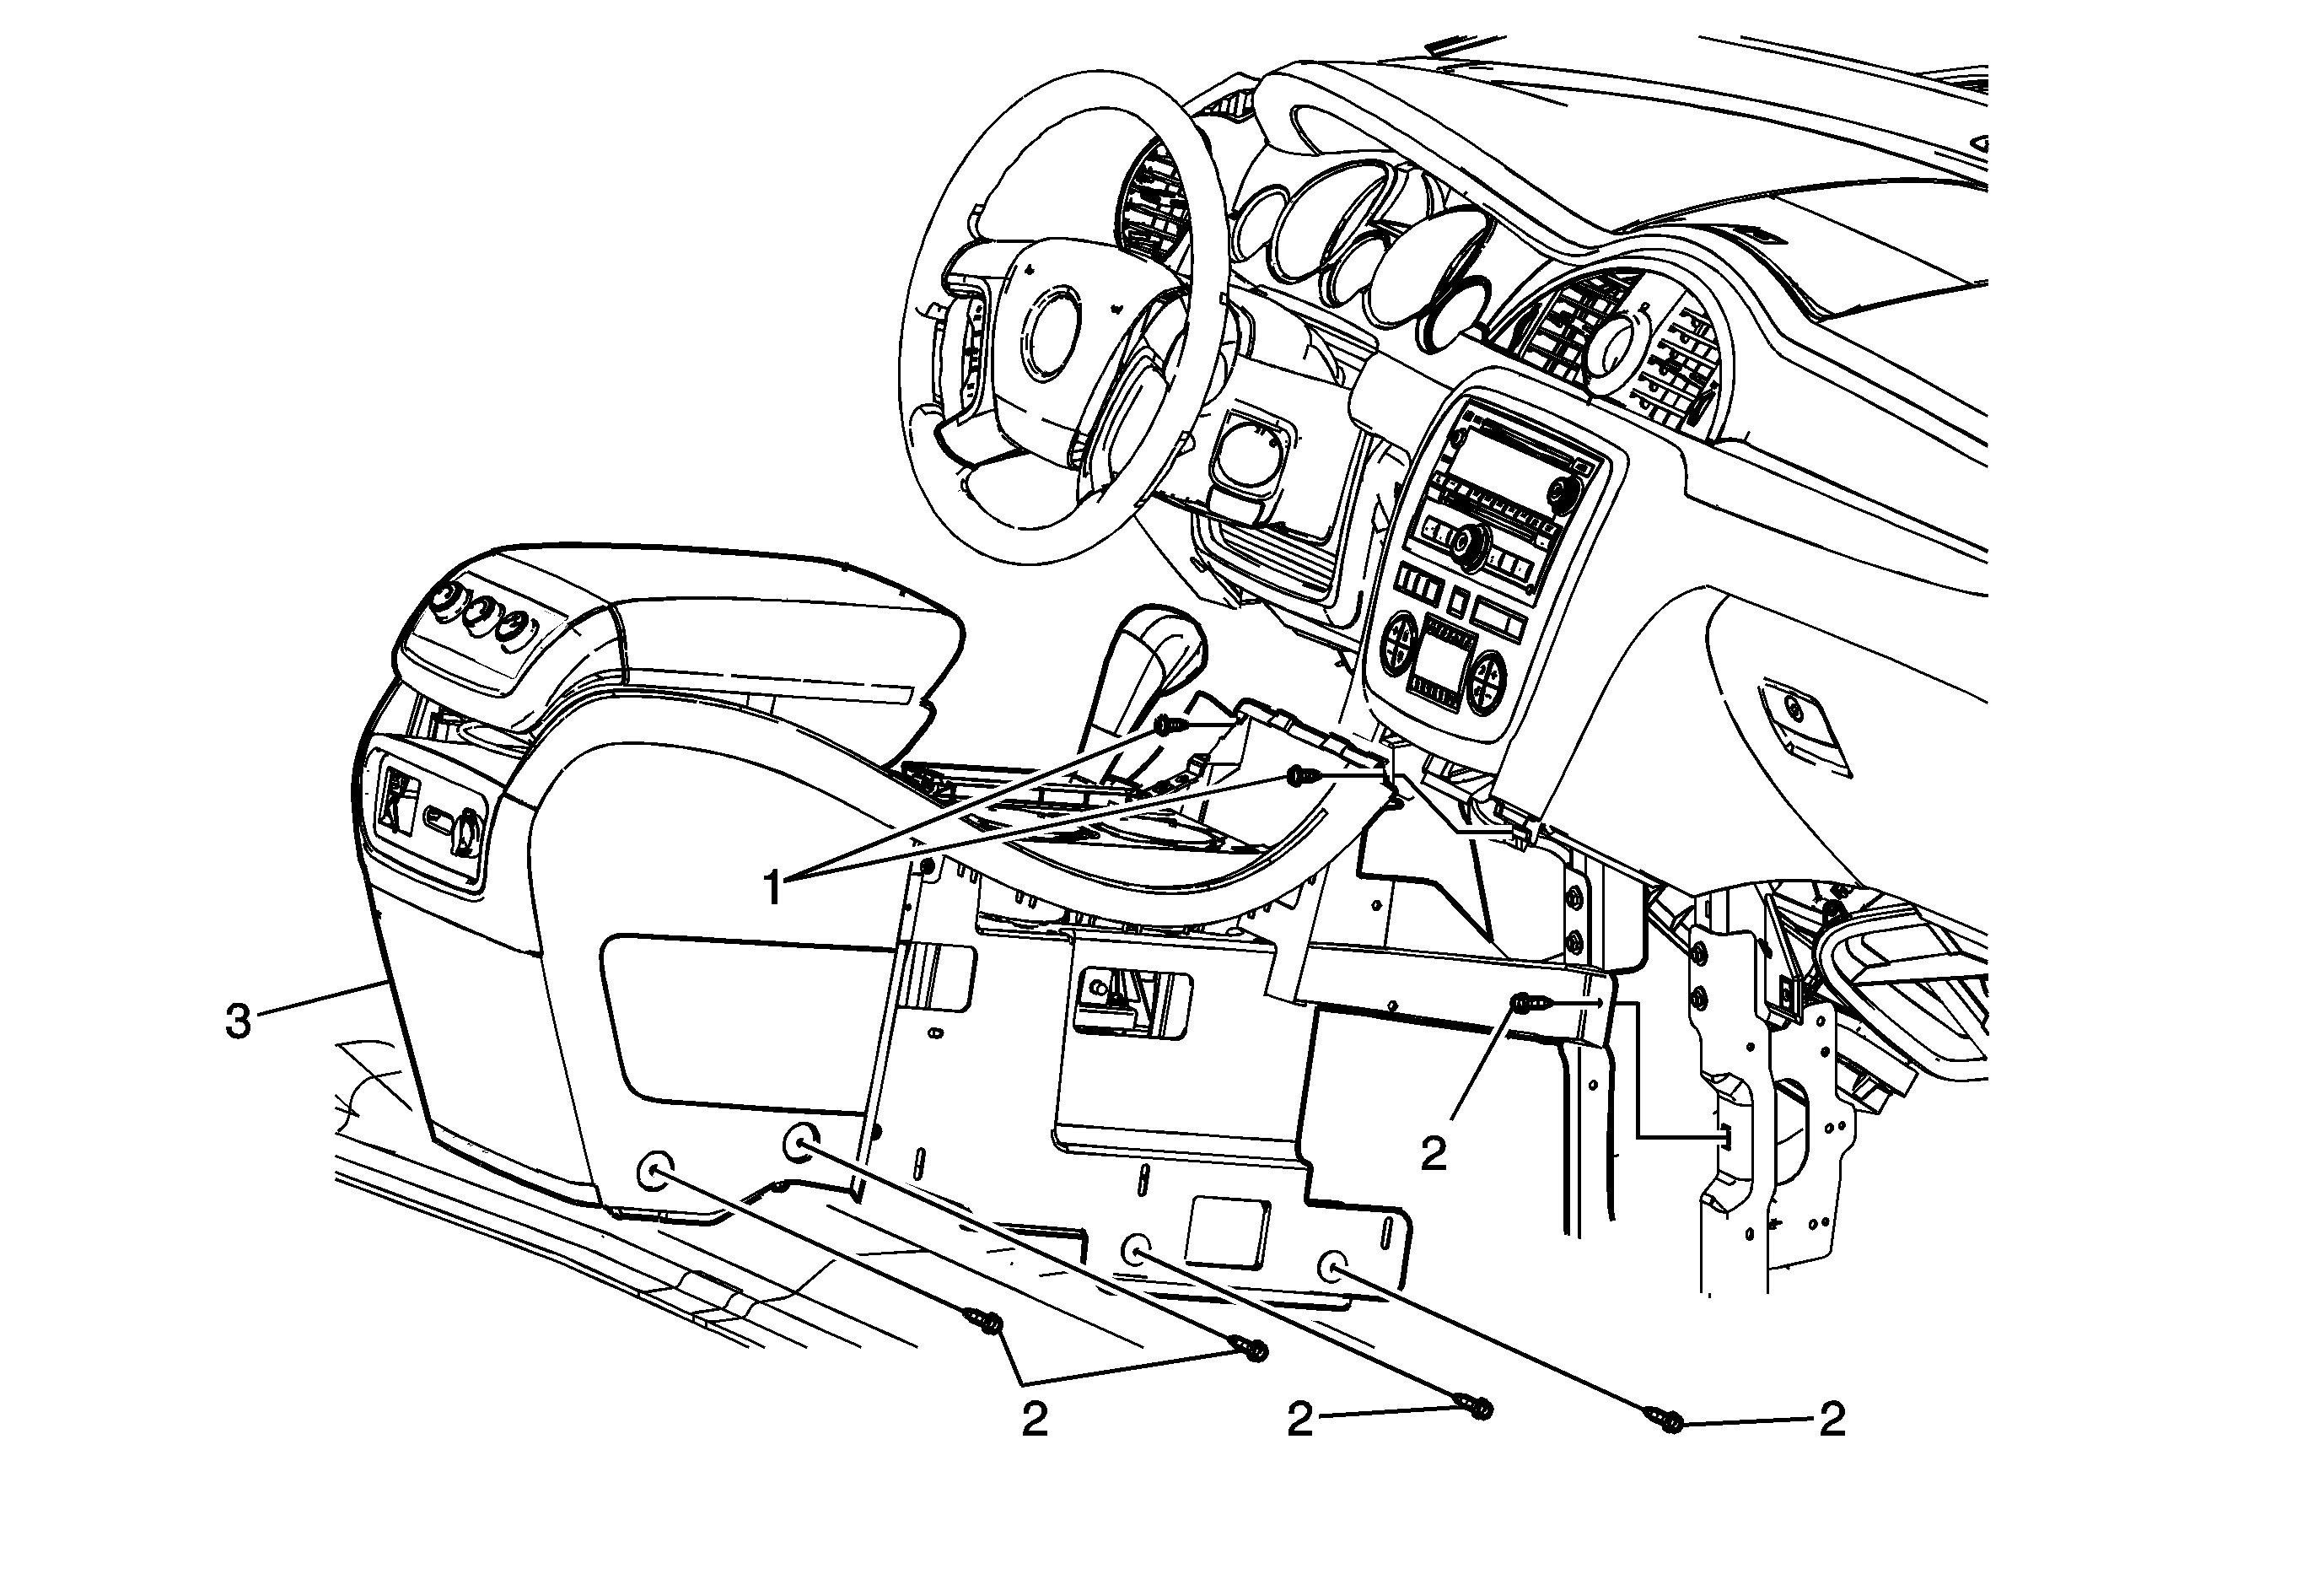

Object Number: 1858392  Size: MF

Callout

Component Name

Preliminary Procedures

  1. Remove the front floor console accessory trim plate. Refer to Front Floor Console Accessory Trim Plate Replacement .
  2. Remove the right and left front floor console extension panels. Refer to Front Floor Console Extension Panel Replacement - Right Side and Front Floor Console Extension Panel Replacement - Left Side .
  3. Disconnect the automatic transmission range selector lever cable. Refer to Range Selector Lever Cable Replacement .

1

Front Floor Console Screw (Qty: 2)

Notice: Refer to Fastener Notice in the Preface section.

Tighten
2 N·m (18 lb in)

2

Front Floor Console Bolt (Qty: 10)

Tip
Before installing the right lower forward bolt, ensure that the console wiring harness is tucked below the fastener location to avoid driving the bolt into the harness.

Tighten
9 N·m (80 lb in)

3

Front Floor Console Assembly

Procedure

  1. Note location and routing of the front floor console wiring harness prior to removal of the front floor console assembly to ensure proper reinstallation.
  2. Disconnect the electrical connectors.
  3. With the aid of an assistant remove the console assembly from the vehicle.
  4. When replacing the front floor console, transfer all necessary components.

Front Floor Console Replacement Outlook
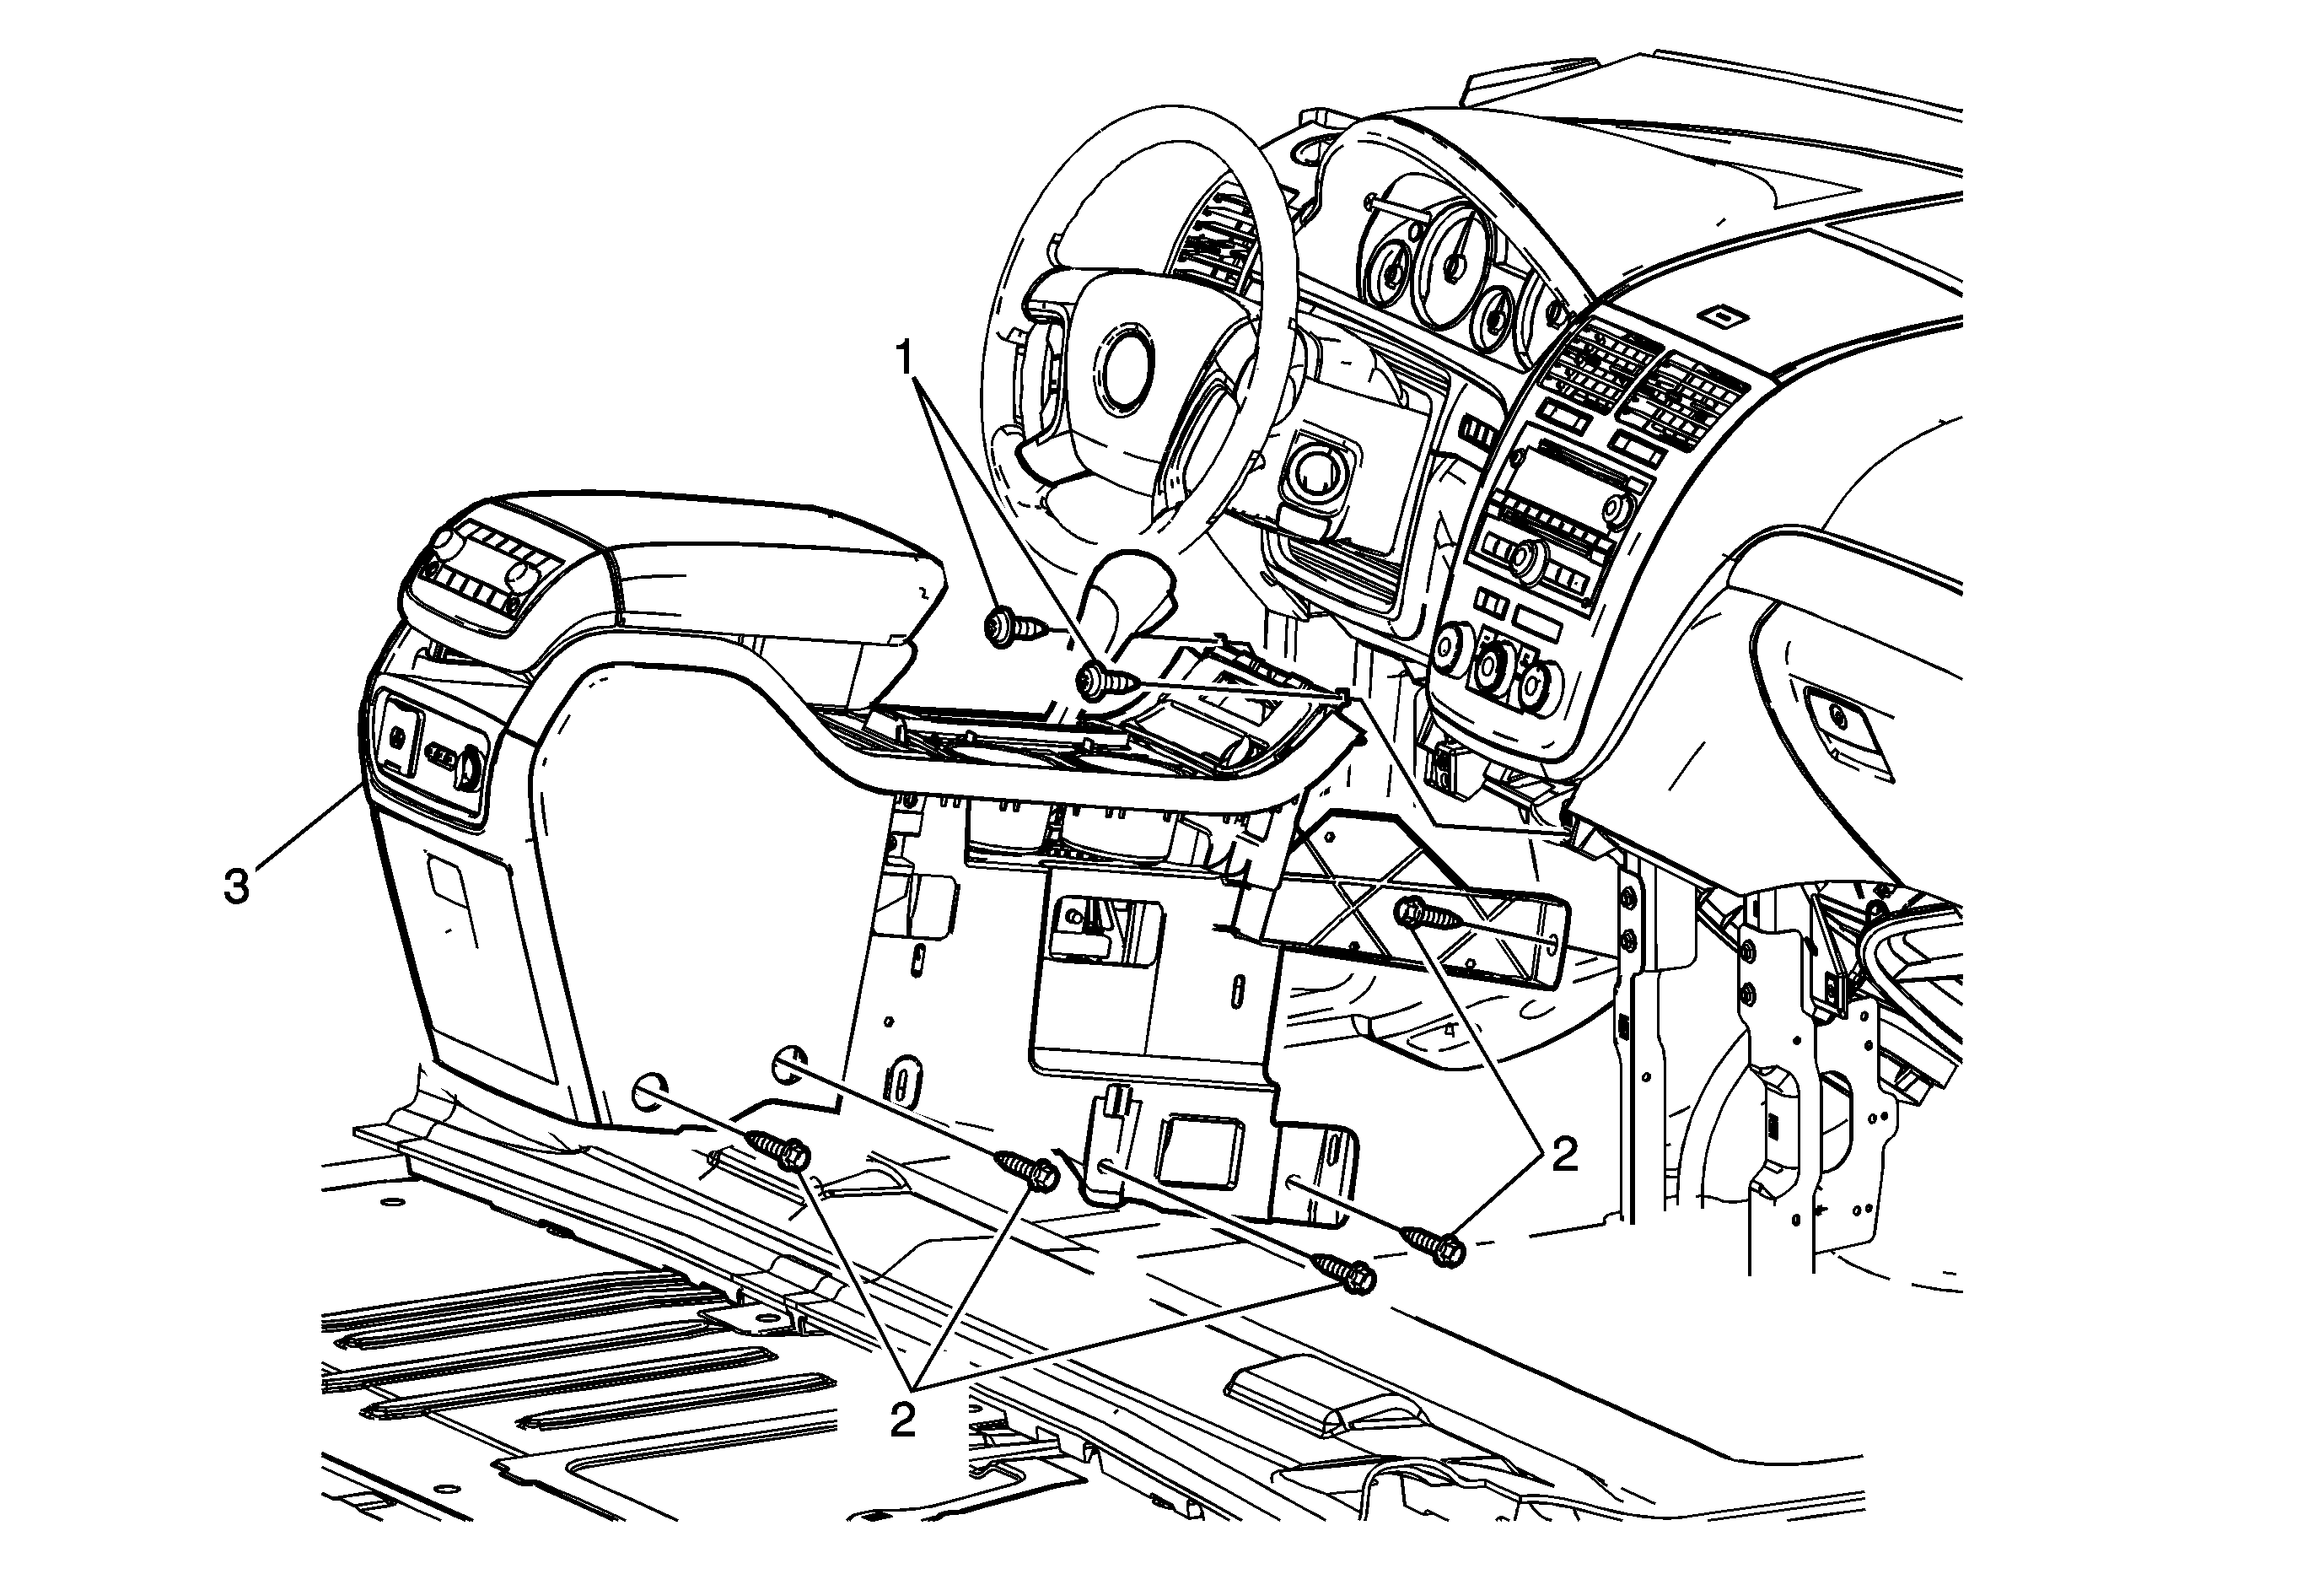

Object Number: 1843940  Size: MF

Callout

Component Name

Preliminary Procedures

  1. Remove the front floor console accessory trim plate. Refer to Front Floor Console Accessory Trim Plate Replacement .
  2. Remove the right and left front floor console extension panels. Refer to Front Floor Console Extension Panel Replacement - Right Side and Front Floor Console Extension Panel Replacement - Left Side .
  3. Disconnect the automatic transmission range selector lever cable. Refer to Range Selector Lever Cable Replacement .

1

Front Floor Console Screw (Qty: 2)

Notice: Refer to Fastener Notice in the Preface section.

Tighten
2 N·m (18 lb in)

2

Front Floor Console Bolt (Qty: 10)

Tip
Before installing the right lower forward bolt, ensure that the console wiring harness is tucked below the fastener location to avoid driving the bolt into the harness.

Tighten
9 N·m (80 lb in)

3

Front Floor Console Assembly

Procedure

  1. Note location and routing of the front floor console wiring harness prior to removal of the front floor console assembly to ensure proper reinstallation.
  2. Disconnect the electrical connectors.
  3. With the aid of an assistant remove the console assembly from the vehicle.
  4. When replacing the front floor console, transfer all necessary components.