For 1990-2009 cars only
Removal Procedure
Note:
• Always use replacement cables that are of the same type, diameter and length of the cables that you are replacing. • Always route the replacement cable the same way as the original cable.
- Disconnect the negative battery cable. Refer to Battery Negative Cable Disconnection and Connection.
- Remove the fuel injector sight shield. Refer to Fuel Injector Sight Shield Replacement.
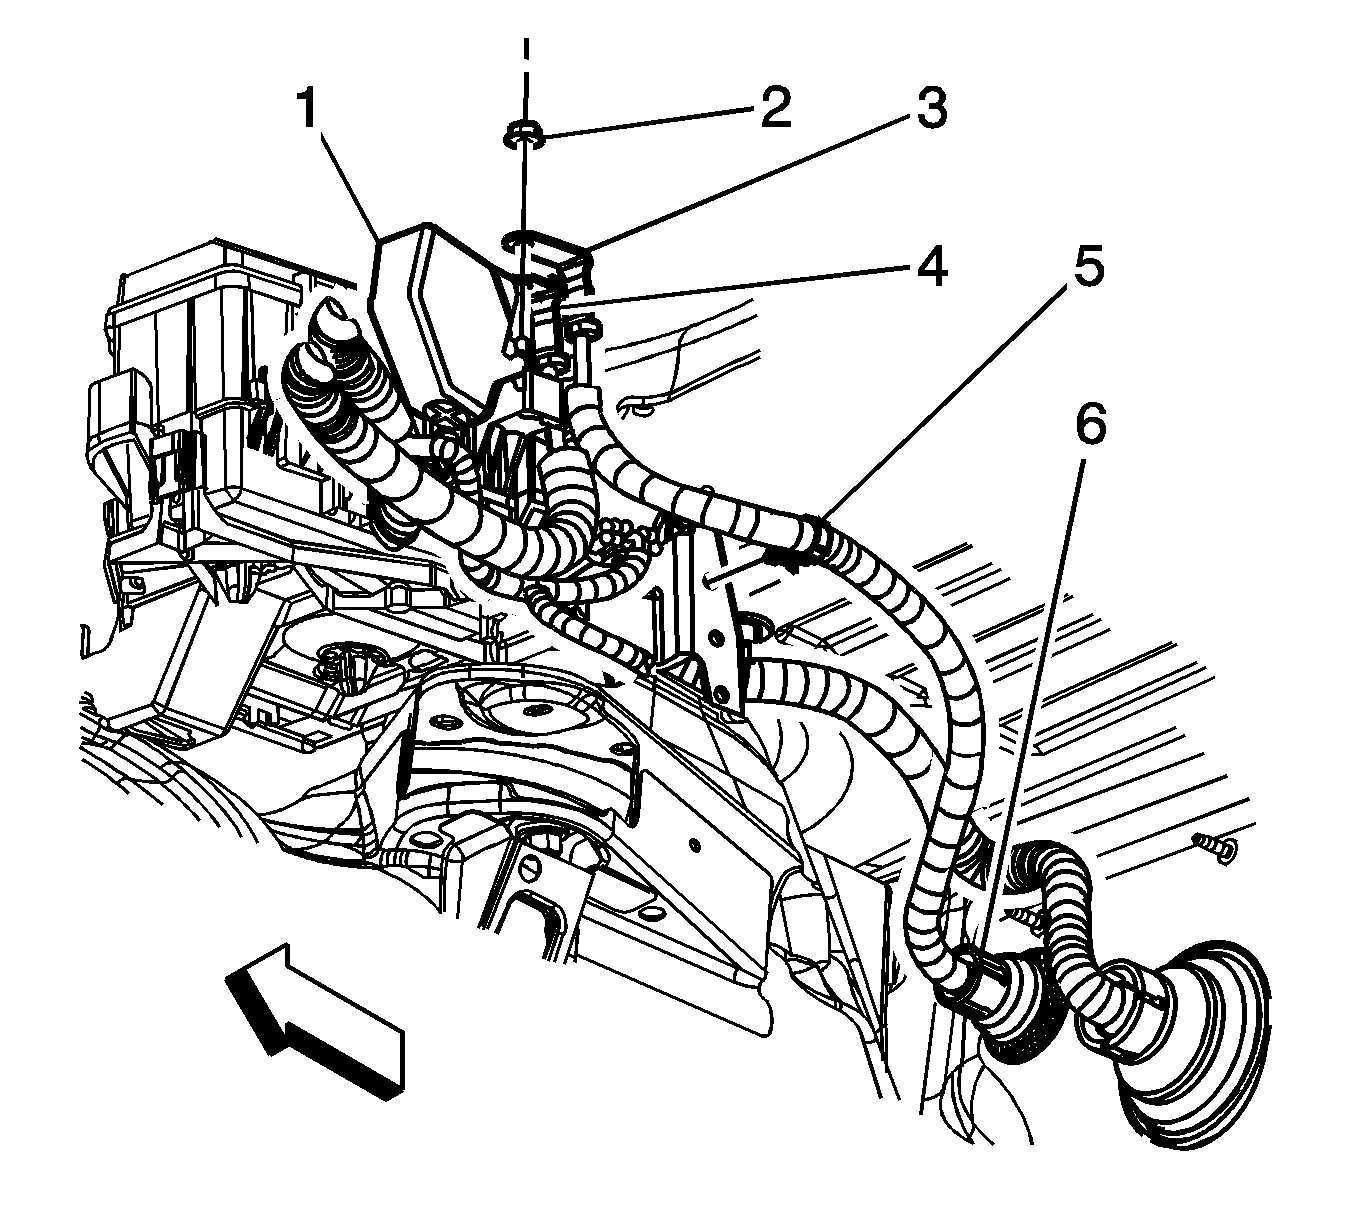
- Open the accessory wiring junction block cover (1).
- Remove the accessory wiring junction block nut (2).
- Remove the positive battery cable terminal (3) from the stud.
- Remove the positive battery cable clip (5) from the multiuse relay bracket.
- Push the positive battery cable grommet (6) in through the dash panel.
- Remove the right side instrument panel insulator panel. Refer to Instrument Panel Insulator Panel Replacement - Right Side.
- Remove the passenger side carpet. Refer to Front Floor Panel Carpet Replacement - Right Side.
- Pull up the passenger side corner of the dash panel sound barrier until the positive battery cable is accessible.
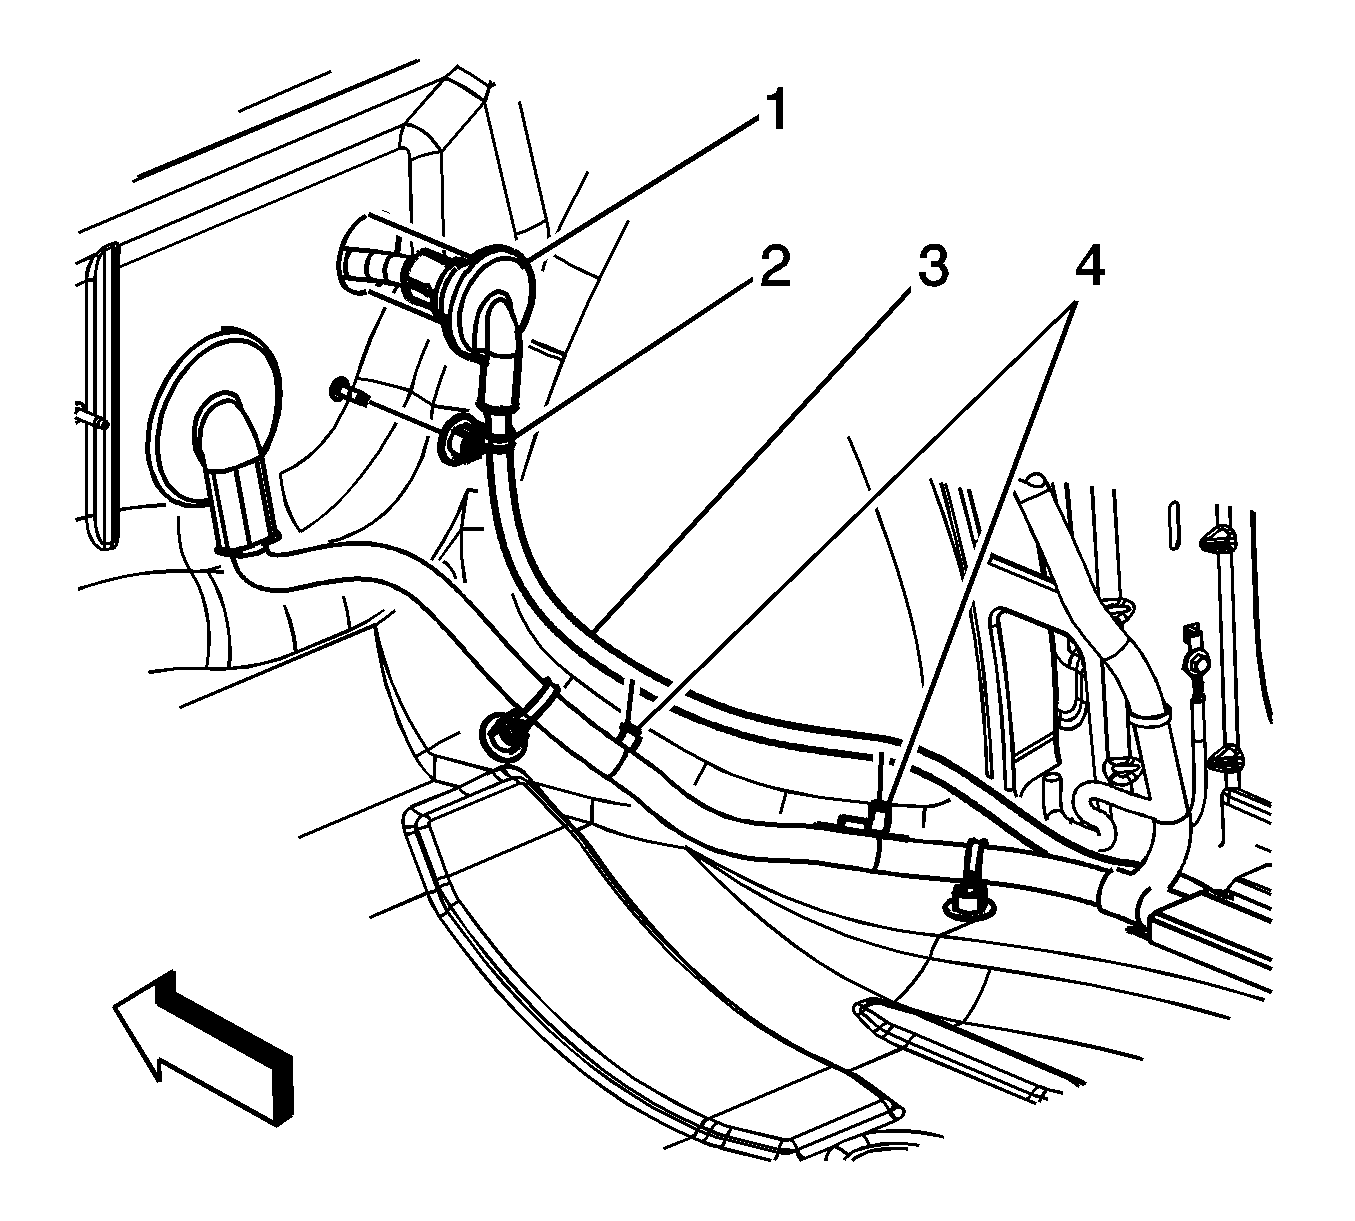
- Remove the positive battery cable clip (2) from the stud on the dash panel.
- Pull the grommet (1) from the dash panel.
- Remove the positive battery cable (3) from the retainers (4) on the body wiring harness.
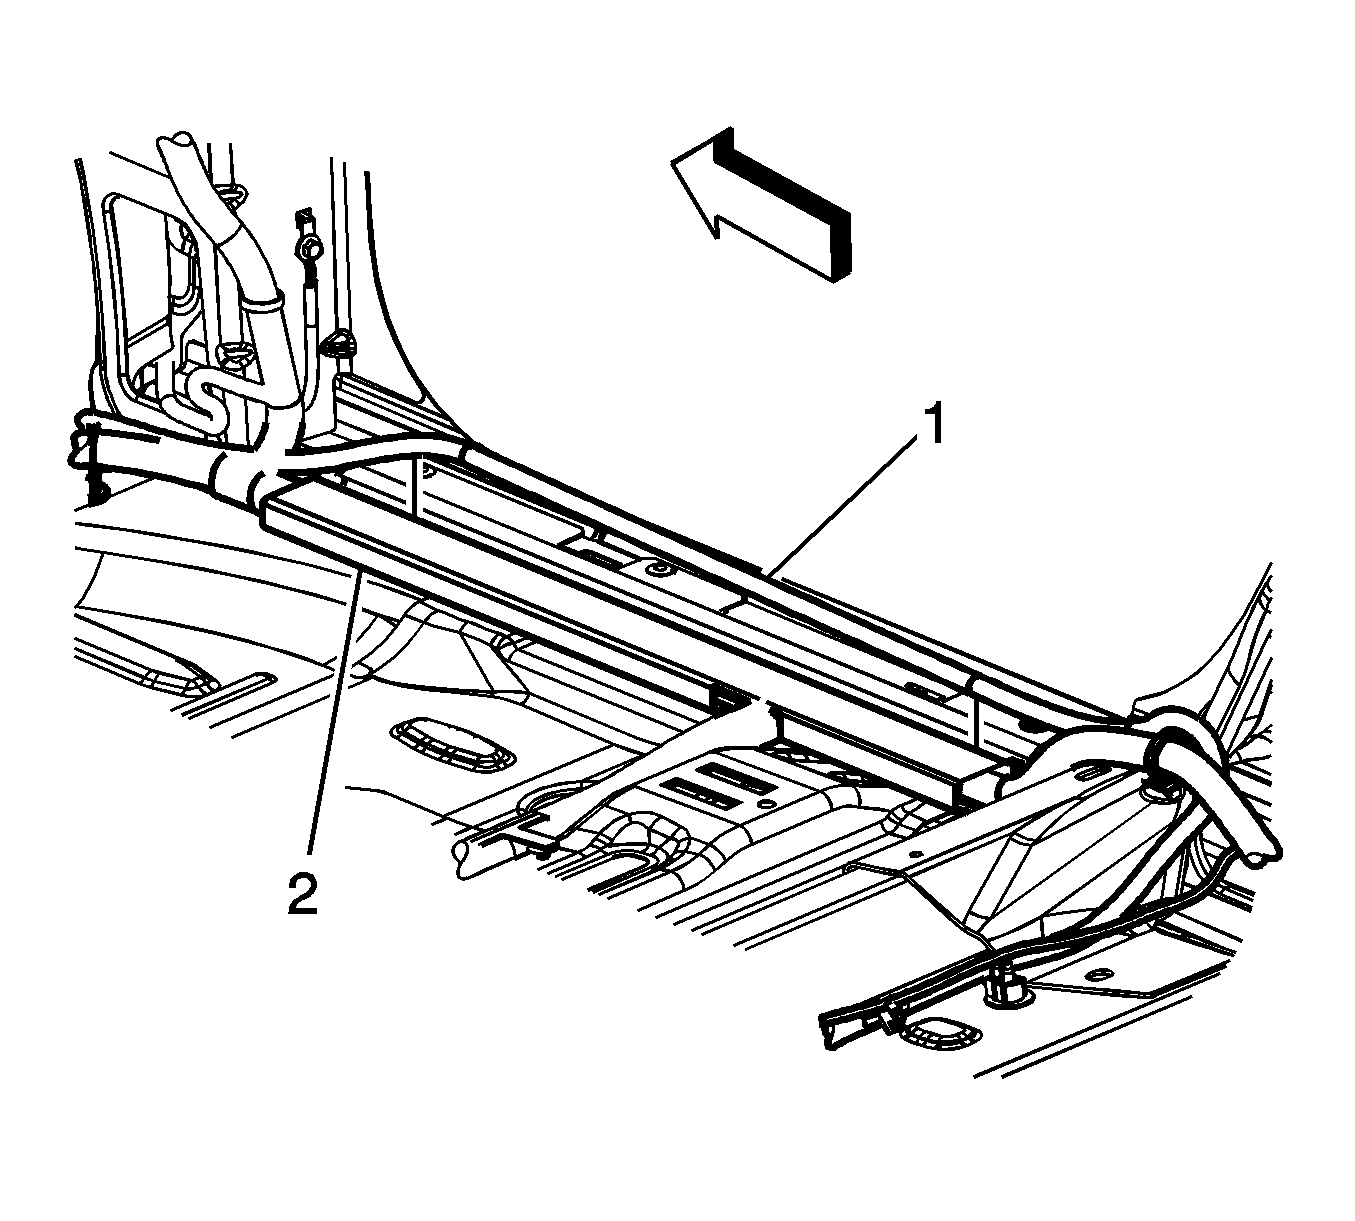
- Remove the positive battery cable (1) from the body wiring harness right front sill plate (2).
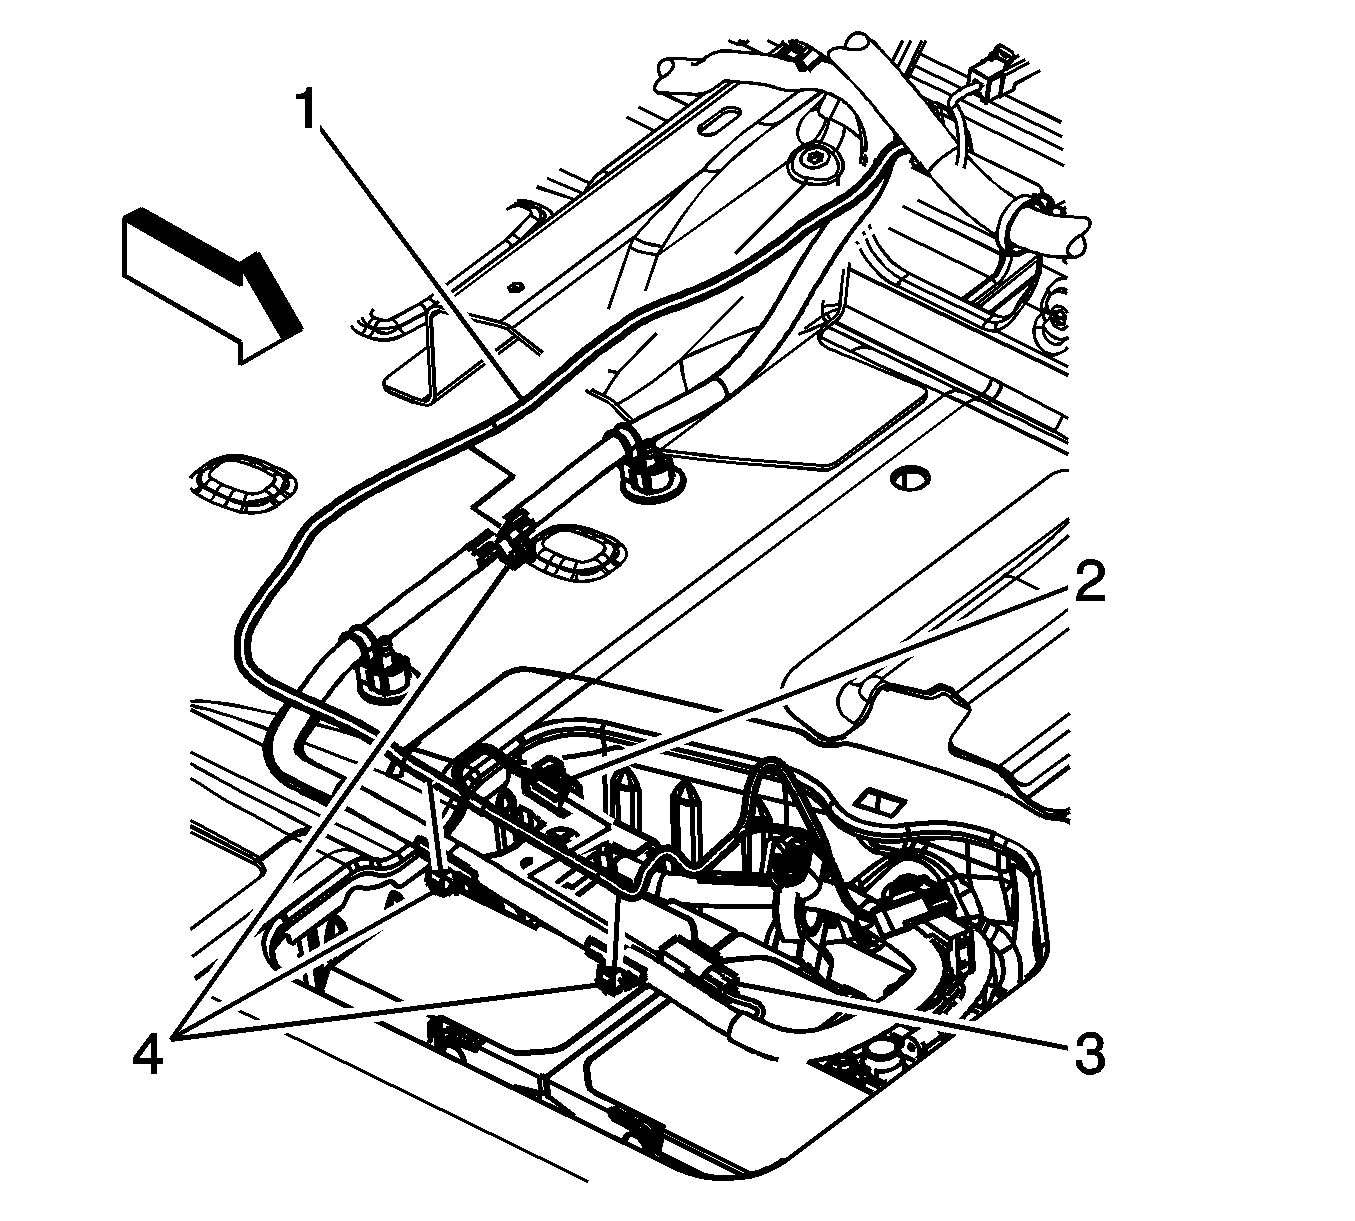
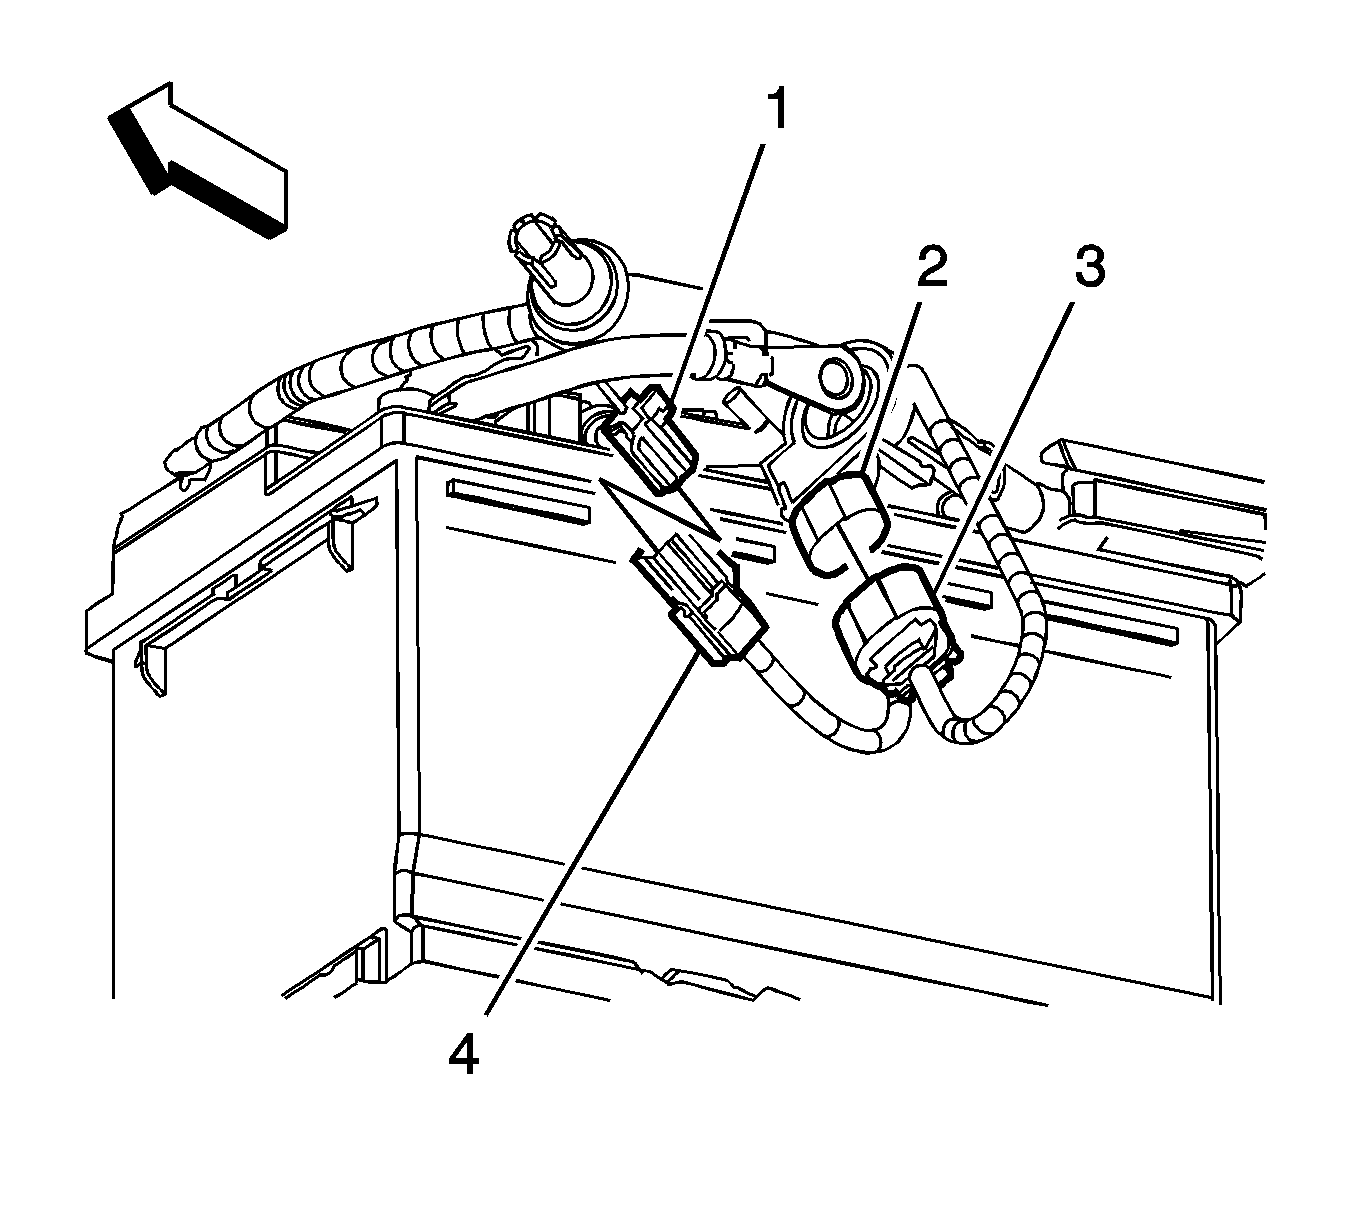
- Remove the body wiring harness (1) from the positive battery cable clips (4).
- If equipped with regular production option (RPO) UE1, disconnect the body wiring harness electrical connector (2) from the battery cable electrical connector (3).
- Disconnect the body wiring harness electrical connector (4) from the negative battery cable electrical connector (1).
- Disconnect the body wiring harness electrical connector (3) from the battery current sensor (2).
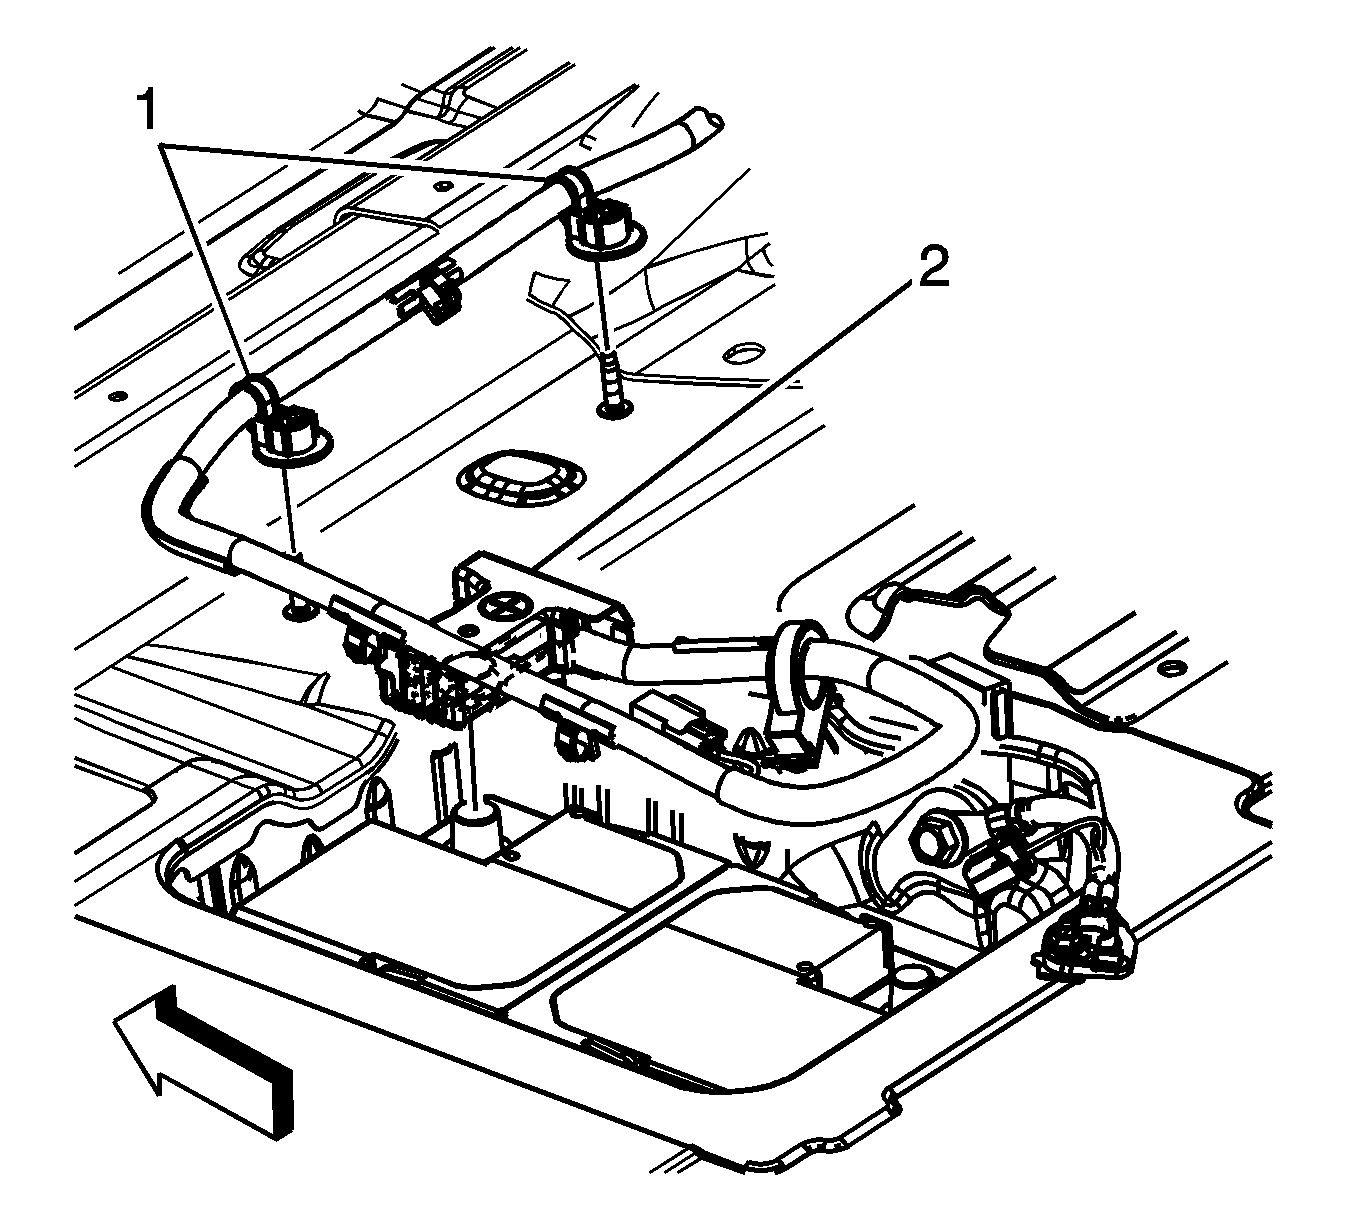
- Remove the positive battery cable clips (1) from the floor panel studs.
- Open the positive battery cable cover (2).
- Loosen the positive battery cable terminal nut.
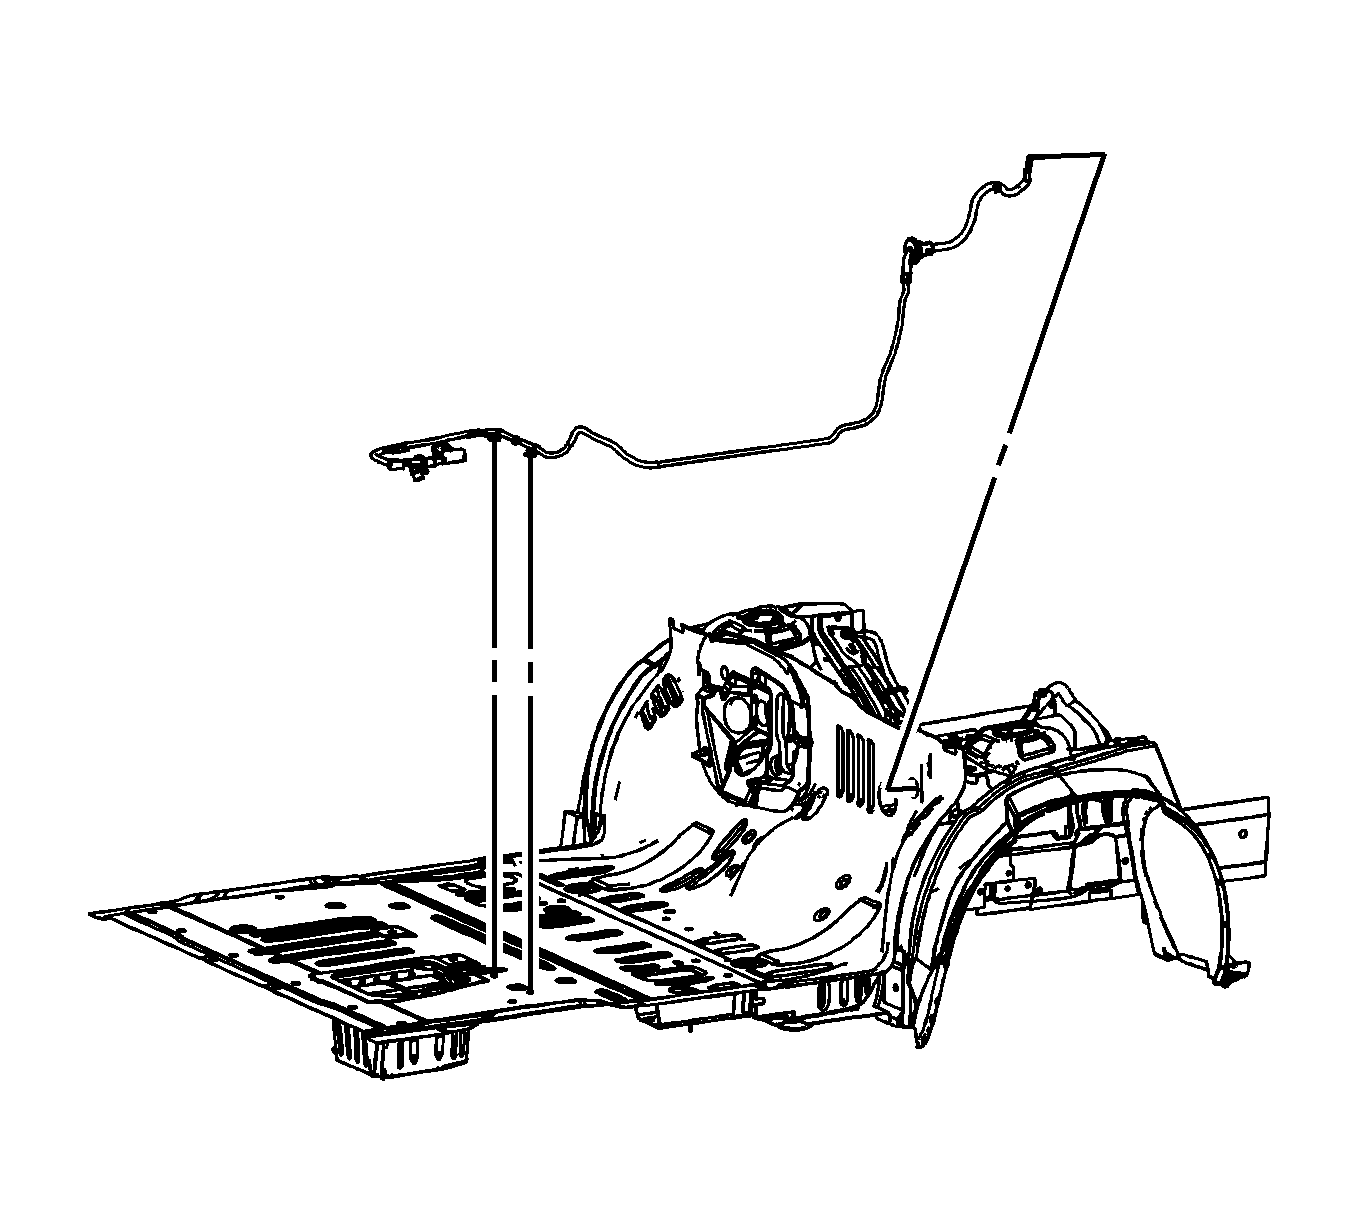
- Remove the positive battery cable out from under the rear carpet and remove the cable from the vehicle.
Installation Procedure
- Route the positive battery cable under the rear carpet and position the cable from the vehicle floor pan.
- Install the positive battery cable clips (1) to the floor panel studs.
- Install the positive battery cable terminal to the battery positive terminal.
- Tighten the positive battery cable terminal nut.
- Close the positive battery cable cover (2).
- Connect the body wiring harness electrical connector (4) to the negative battery cable electrical connector (1).
- Connect the body wiring harness electrical connector (3) to the battery current sensor (2).
- Install the body wiring harness (1) to the positive battery cable clips (4).
- If equipped with RPO UE1, connect the body wiring harness electrical connector (2) to the battery cable electrical connector (3).
- Install the positive battery cable (1) to the body wiring harness right front sill plate (2).
- Push the grommet (1) through the dash panel.
- Install the positive battery cable (3) to the retainers (4) on the body wiring harness.
- Install the positive battery cable clip (2) to the stud on the dash panel.
- Reposition the passenger side corner of the dash panel sound barrier.
- Install the passenger side carpet. Refer to Front Floor Panel Carpet Replacement - Right Side.
- Install the right side instrument panel insulator panel. Refer to Instrument Panel Insulator Panel Replacement - Right Side.
- Ensure that the positive battery cable grommet (6) is completely seated through the dash panel.
- Install the positive battery cable terminal (3) to the junction block stud.
- Install the accessory wiring junction block nut (2).
- Close the accessory wiring junction block cover (1).
- Install the positive battery cable clip (5) to the multiuse relay bracket.
- Install the fuel injector sight shield. Refer to Fuel Injector Sight Shield Replacement.
- Connect the negative battery cable. Refer to Battery Negative Cable Disconnection and Connection.


Caution: Refer to Fastener Caution in the Preface section.
Tighten
Tighten the nut to 9 N·m (80 lb in).


Tighten
Tighten the nut to 22 N·m (16 lb ft).
