Callout
| Component Name
|
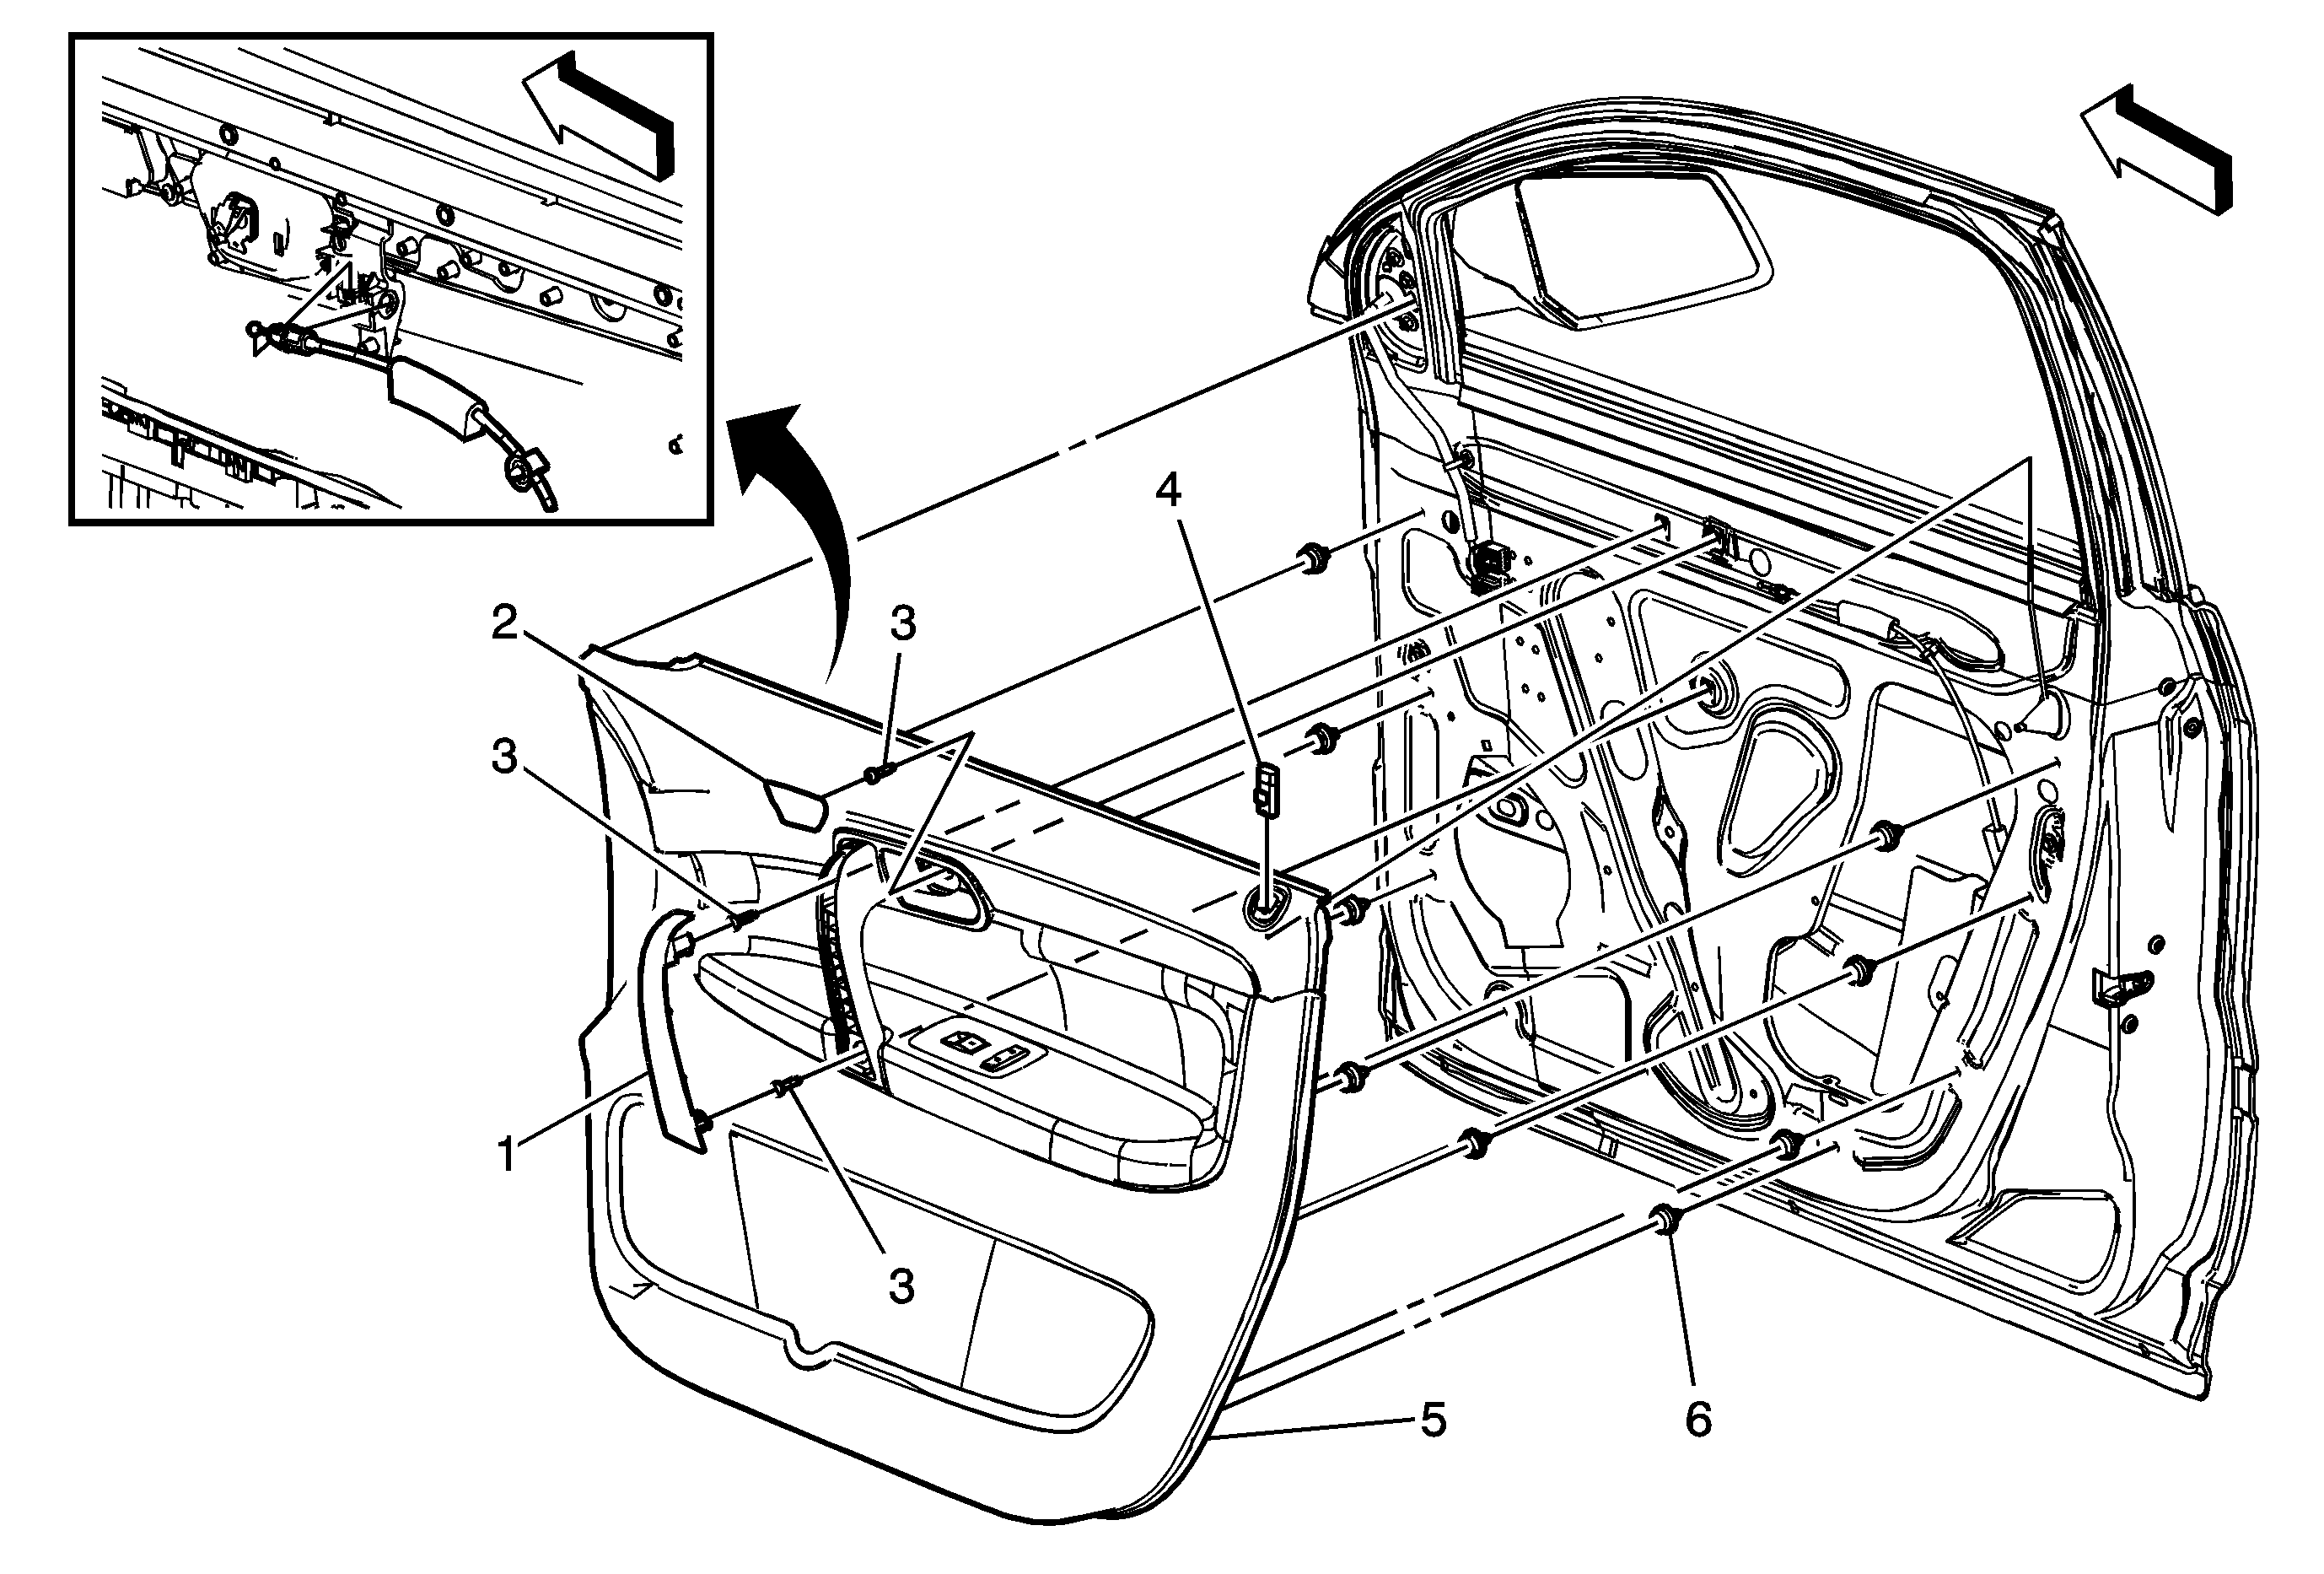
1
| Front Side Door Pull Handle Cover
|
2
| Front Side Door Inside Handle Bezel Finish Cover
Tip
Install the top portion of the pull handle cover first to ensure tabs are lined up and push the cover in firmly. |
3
| Front Side Door Trim Panel Bolt (Qty: 3)
Notice: Refer to Fastener Notice in the Preface section.
Tighten
6 N·m (18 lb in) |
4
| Front Side Door Locking Rod Knob Assembly
Procedure
- Ensure the locking rod is in the unlocked position.
- Use a flat-bladed tool to disengage the detent tab and then remove the knob by pulling upward.
- When re-installing, push the knob down until the detent tab touches the locking rod opening cover.
- Push the detent tab into the lock knob to locking rod.
|
5
| Front Side Door Trim Panel Assembly
Procedure
- Use a door trim pad removal tool, or equivalent, at each of the 9 retainer locations to aid in the removal of the trim panel.
- Disengage the door lock cable.
- Disconnect the electrical connector.
|
6
| Front Side Door Trim Panel Retainer (Qty: 9)
|
Callout
| Component Name
|
Preliminary ProcedureRemove the passenger side power door lock and window switch. Refer to
Door Lock and Side Window Switch Replacement - Passenger Side.
|
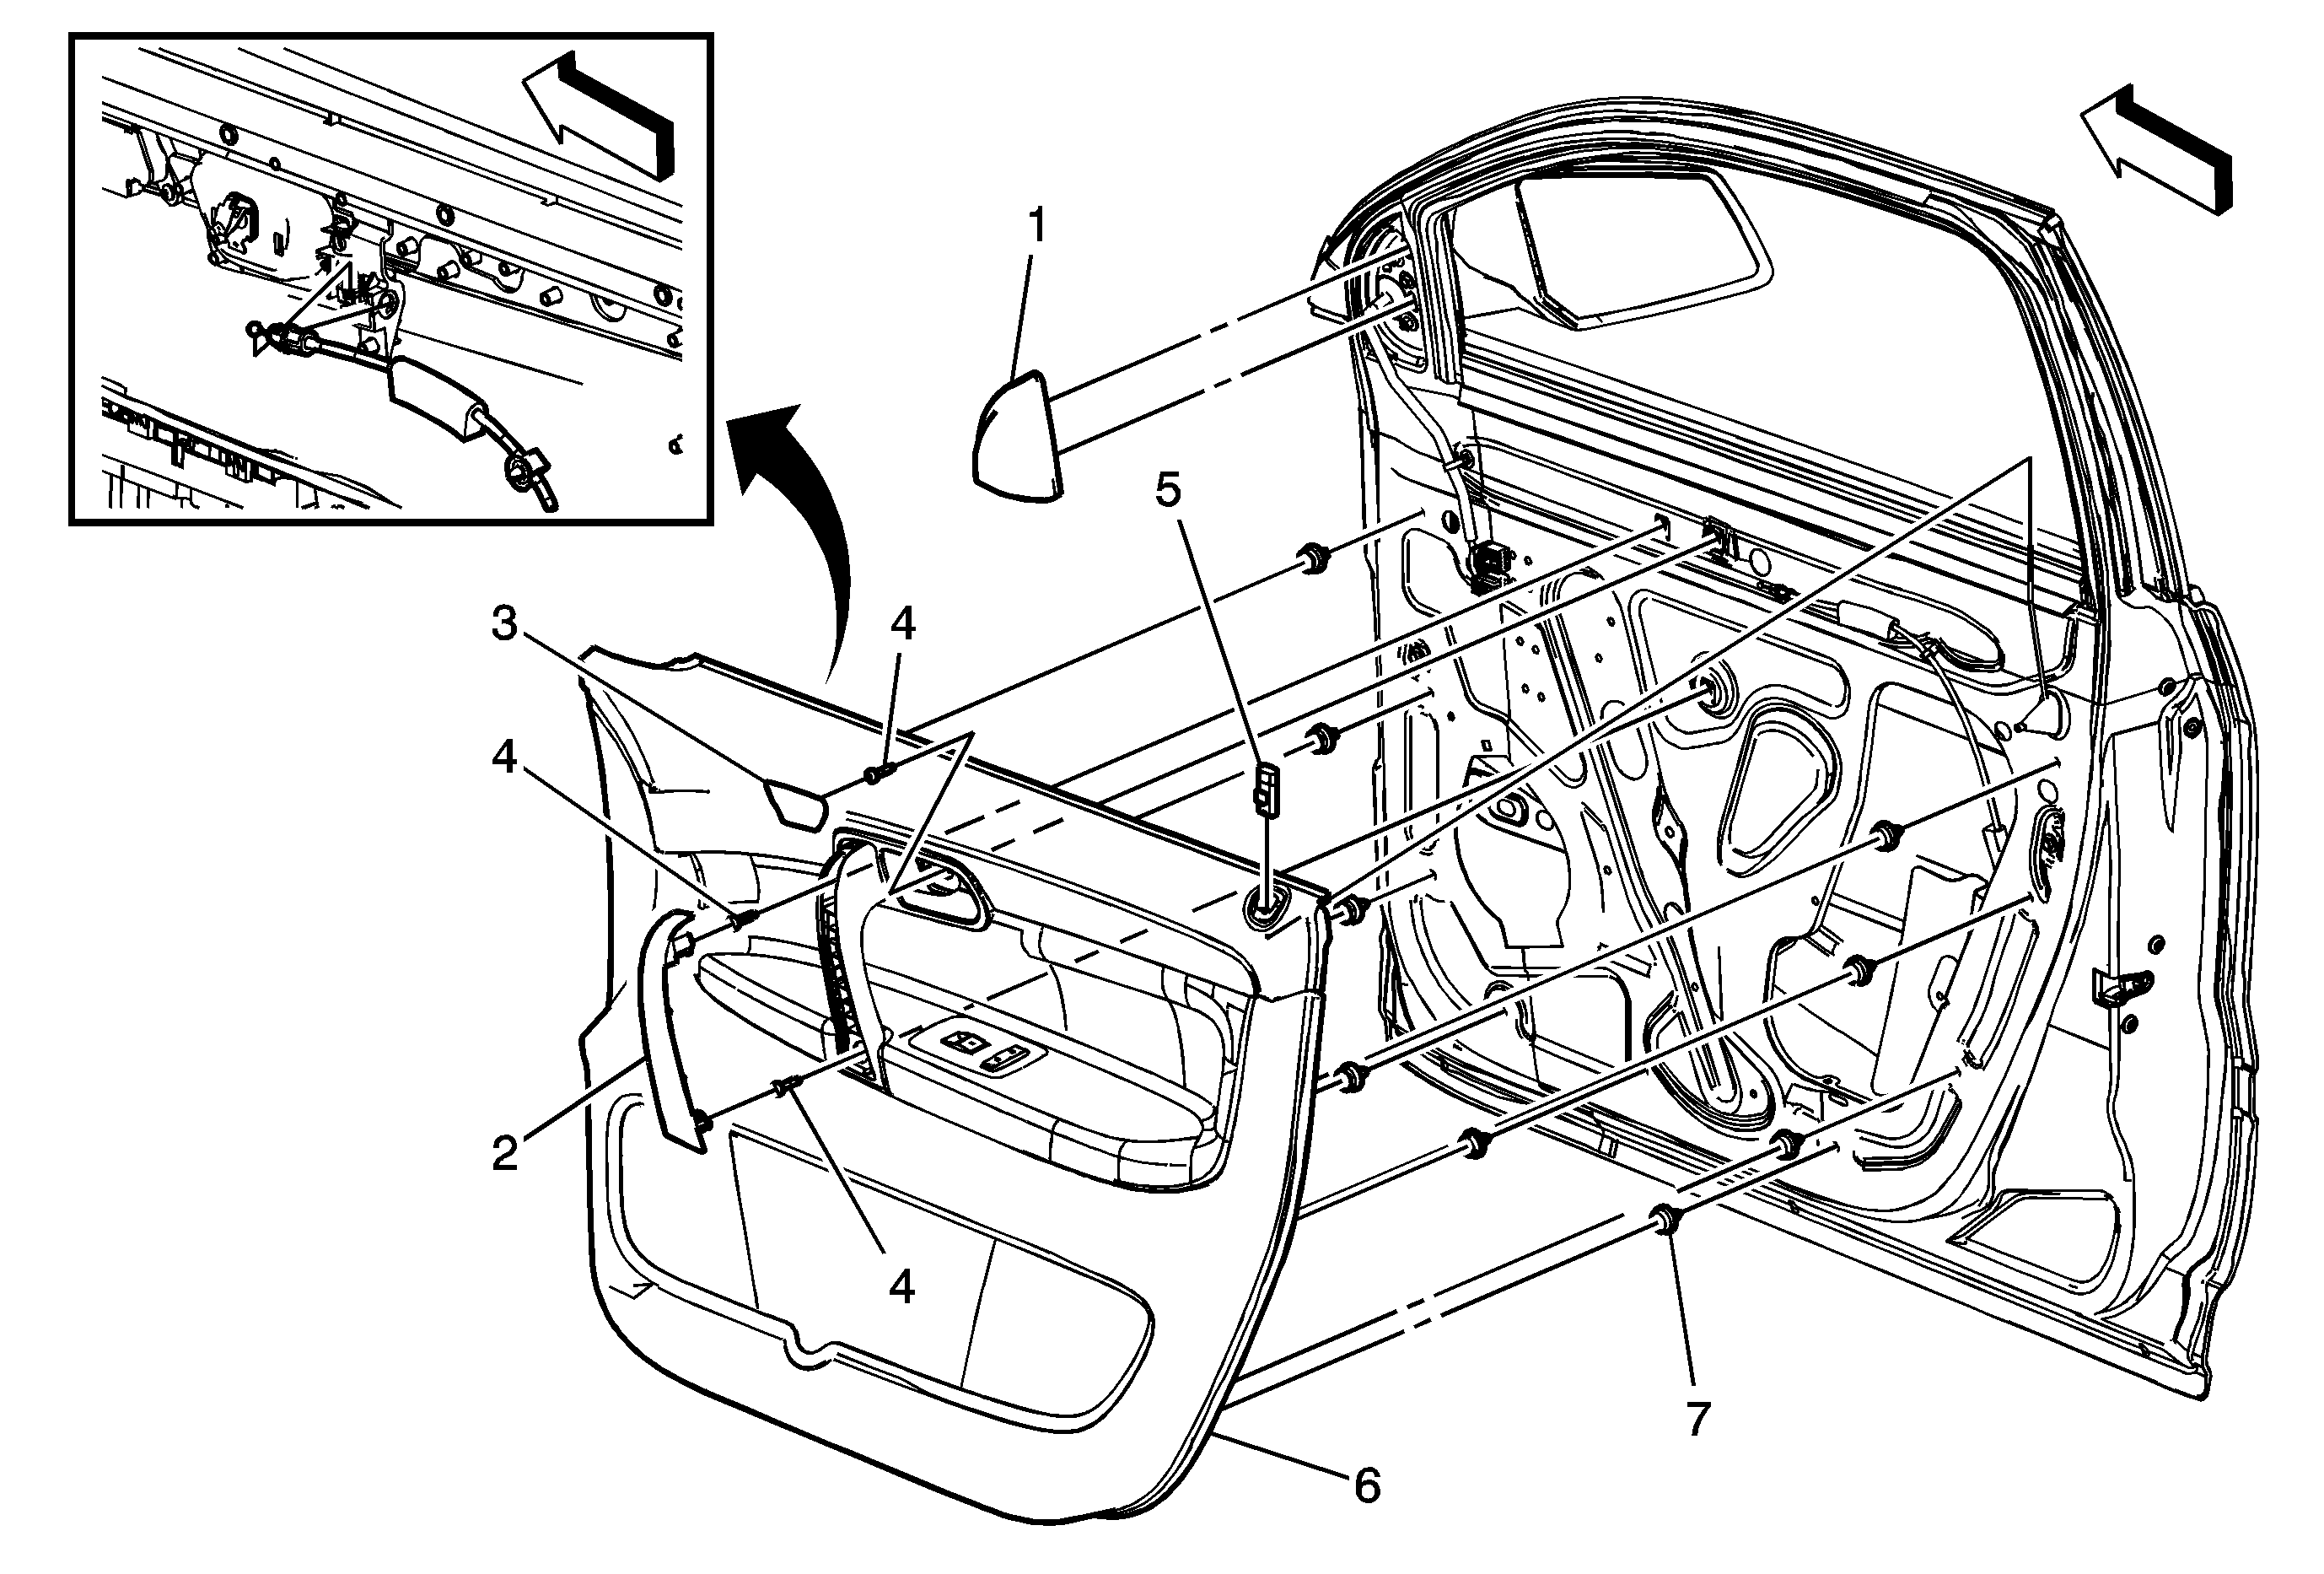
1
| Front Side Door Upper Trim Panel
Tip
Use a plastic trim tool or equivalent to aid in the removal of the trim panel. |
2
| Front Side Door Pull Handle Cover
Tip
Install the top portion of the pull handle cover first to ensure tabs are lined up and push the cover in firmly. |
3
| Front Side Door Inside Handle Bezel Finish Cover
|
4
| Front Side Door Trim Panel Bolt (Qty: 3)
Notice: Refer to Fastener Notice in the Preface section.
Tighten
6 N·m (18 lb in) |
5
| Front Side Door Locking Rod Knob Assembly
Procedure
- Ensure the locking rod is in the unlocked position.
- Use a flat-bladed tool to disengage the detent tab and then remove the knob by pulling upward.
- When re-installing, push the knob down until the detent tab touches the locking rod opening cover.
- Push the detent tab into the lock knob to locking rod.
|
6
| Front Side Door Trim Panel Assembly
Procedure
- Use a door trim pad removal tool, or equivalent, at each of the 9 retainer locations to aid in the removal of the trim panel.
- Disengage the door lock cable.
- Disconnect the electrical connector.
|
7
| Front Side Door Trim Panel Retainer (Qty: 9)
|
Callout
| Component Name
|
Preliminary ProcedureRemove the passenger side power door lock and window switch. Refer to
Door Lock and Side Window Switch Replacement - Passenger Side.
|
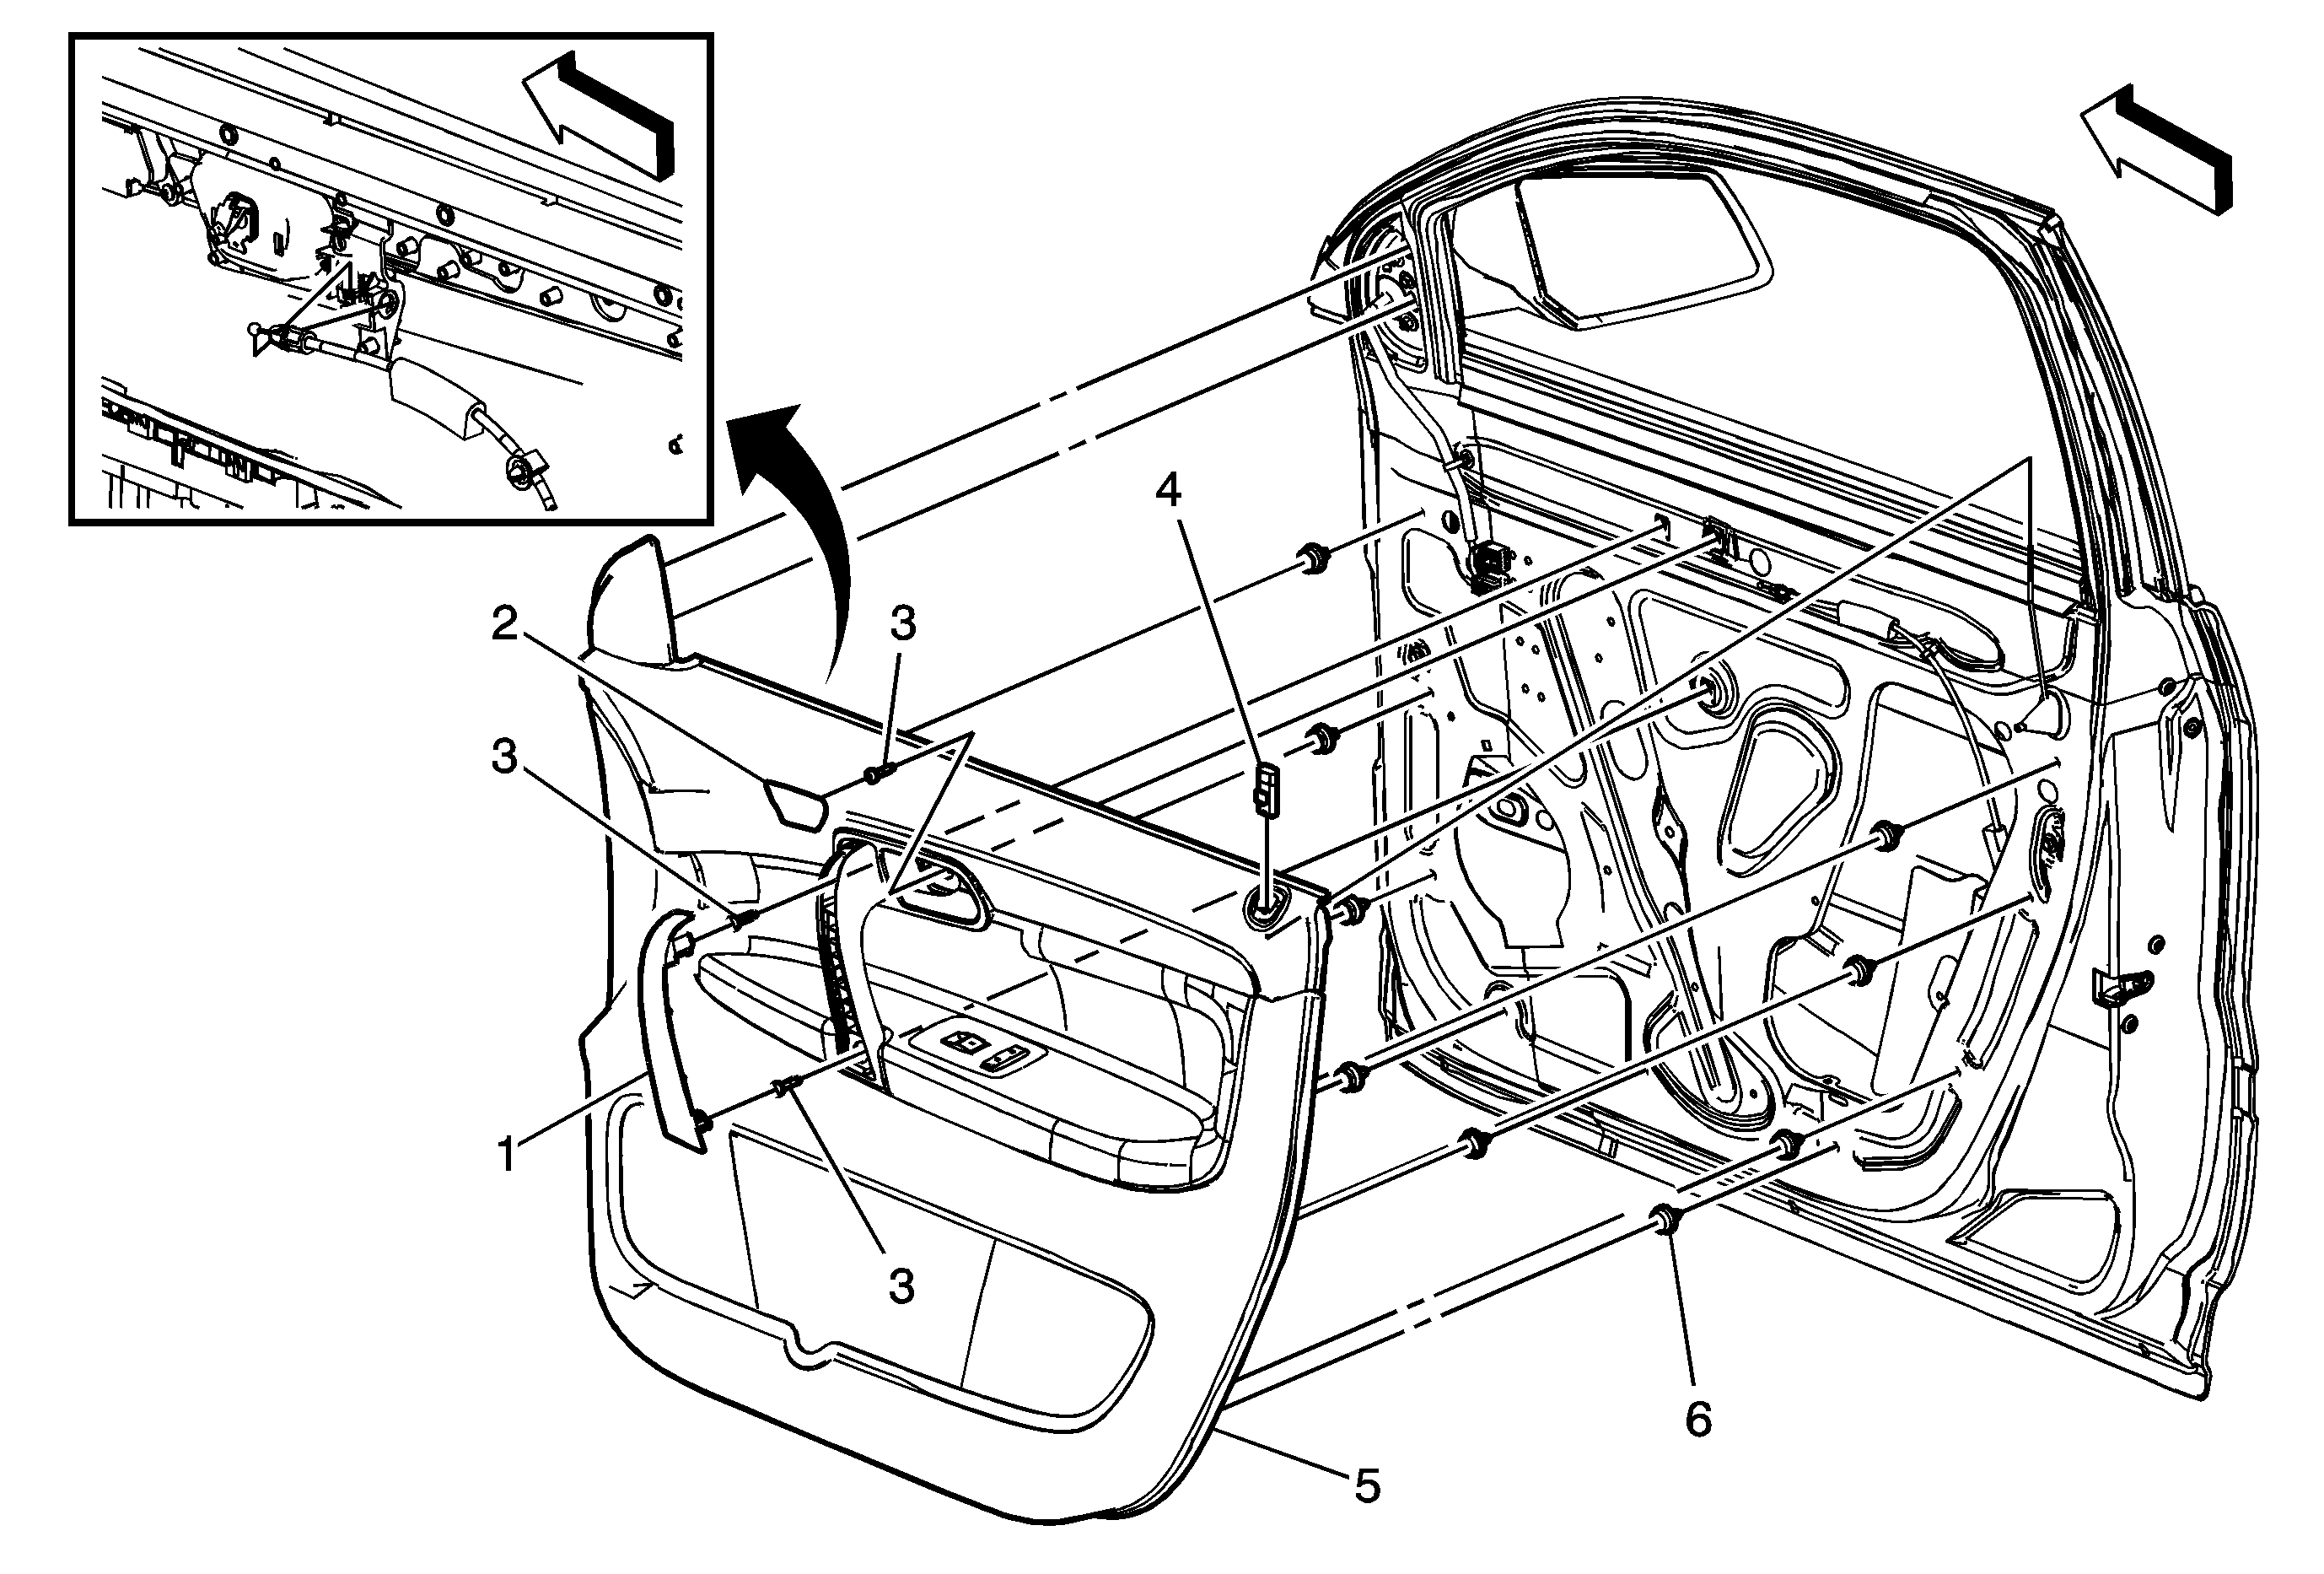
1
| Front Side Door Pull Handle Cover
Tip
Install the top portion of the pull handle cover first to ensure tabs are lined up and push the cover in firmly. |
2
| Front Side Door Inside Handle Bezel Finish Cover
|
3
| Front Side Door Trim Panel Bolt (Qty: 3)
Notice: Refer to Fastener Notice in the Preface section.
Tighten
6 N·m (18 lb in) |
4
| Front Side Door Locking Rod Knob Assembly
Procedure
- Ensure the locking rod is in the unlocked position.
- Use a flat-bladed tool to disengage the detent tab and then remove the knob by pulling upward.
- When re-installing, push the knob down until the detent tab touches the locking rod opening cover.
- Push the detent tab into the lock knob to locking rod.
|
5
| Front Side Door Trim Panel Assembly
Procedure
- Use a door trim pad removal tool, or equivalent, at each of the 9 retainer locations to aid in the removal of the trim panel.
- Disengage the door lock cable.
- Disconnect the electrical connector.
|
6
| Front Side Door Trim Panel Retainer (Qty: 9)
|


