All seating positions in the vehicle have a lap-shoulder belt.
If you are using a rear seating position with a detachable safety belt and the safety belt is not attached, see Third Row Seatsfor instruction on reconnecting the safety belt to the mini-buckle.
The following instructions explain how to wear a lap-shoulder belt properly.
- Adjust the seat, if the seat is adjustable, so you can sit up straight. To see how, see "Seats" in the Index.
- Pick up the latch plate and pull the belt across you. Do not let it get twisted.
- Push the latch plate into the buckle until it clicks.
- Pull up on the latch plate to make sure it is secure. If the belt is not long enough, see Safety Belt Extender.
- If equipped with a shoulder belt height adjuster, move it to the height that is right for you. See "Shoulder Belt Height Adjustment" later in this section for instructions on use and important safety information.
- To make the lap part tight, pull up on the shoulder belt.
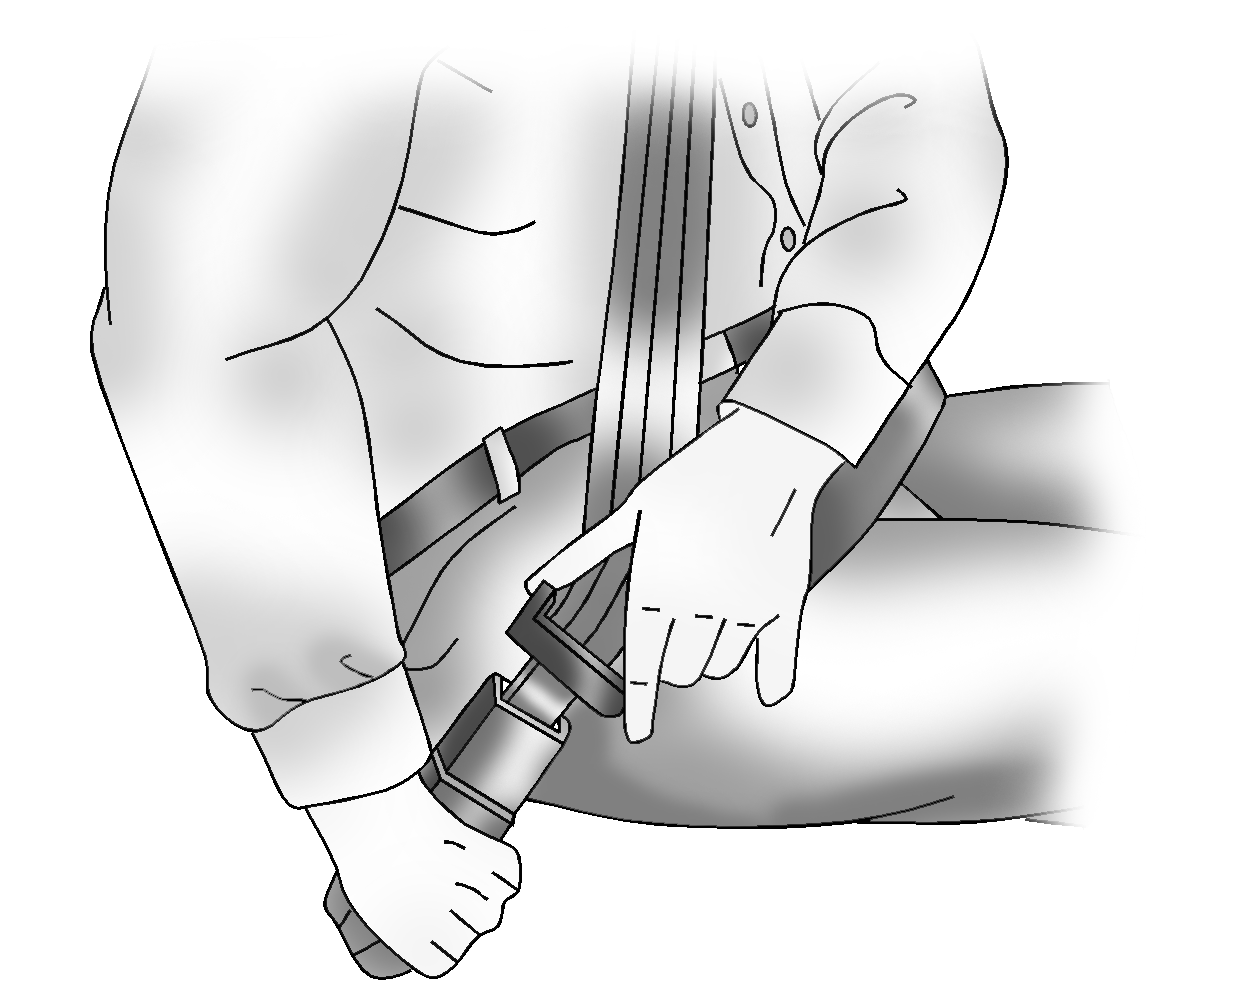
The lap-shoulder belt may lock if you pull the belt across you very quickly. If this happens, let the belt go back slightly to unlock it. Then pull the belt across you more slowly.
If the shoulder portion of a passenger belt is pulled out all the way, the child restraint locking feature may be engaged. If this happens, let the belt go back all the way and start again.
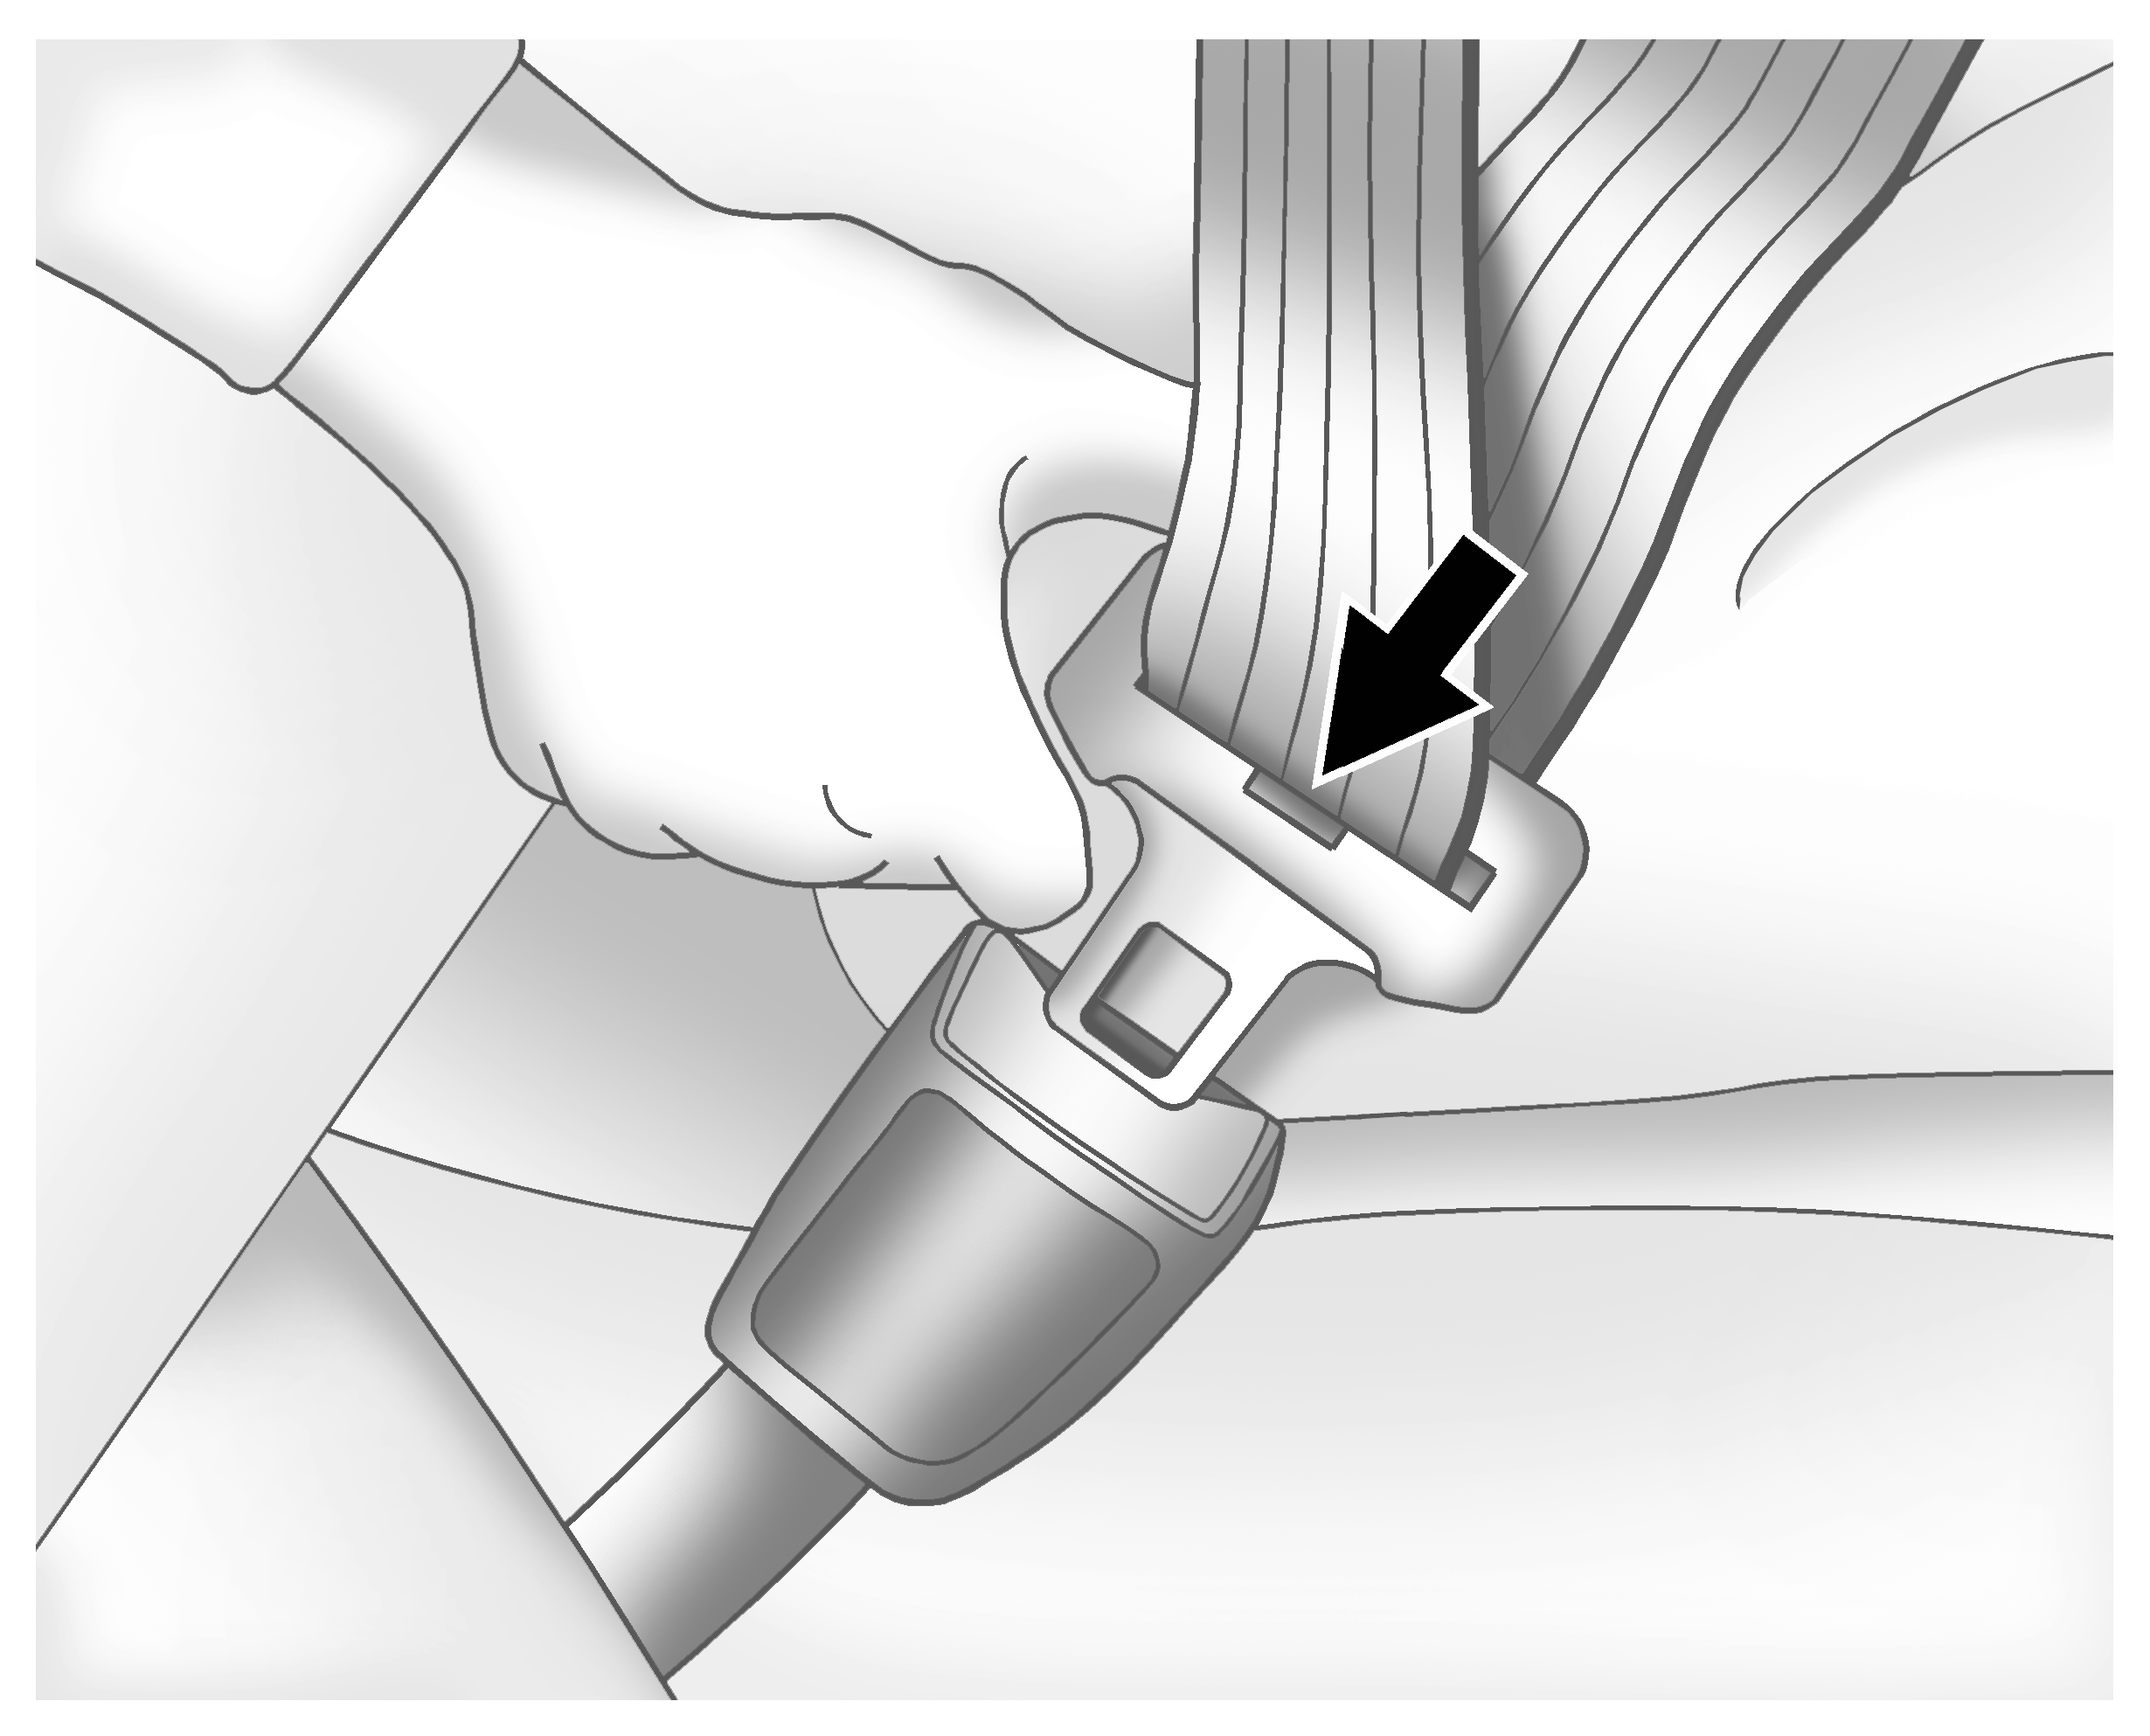
Position the release button on the buckle so that the safety belt could be quickly unbuckled if necessary.
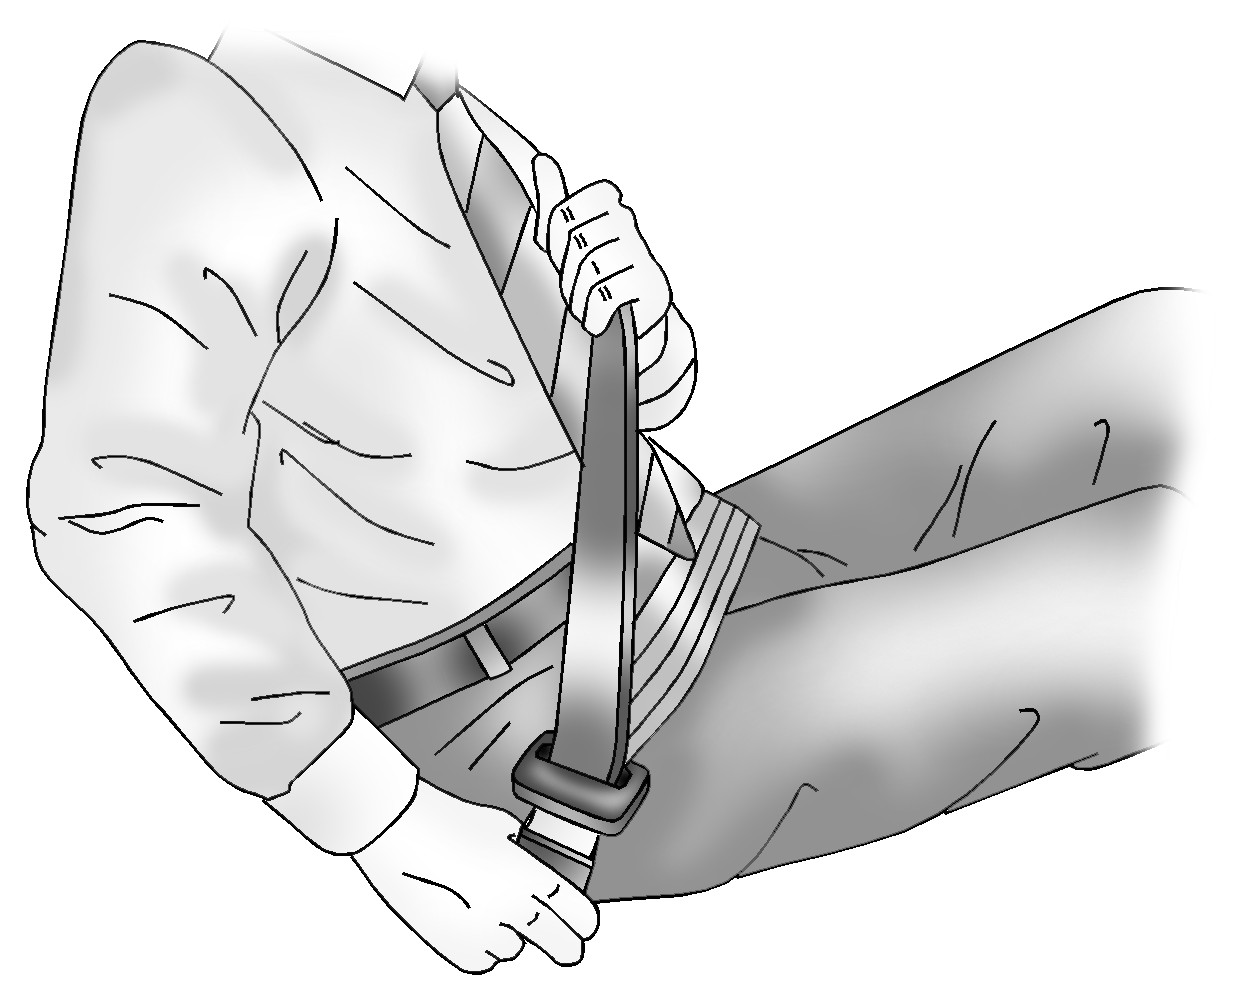
It may be necessary to pull the stitching on the safety belt through the latch plate to fully tighten the lap belt on smaller occupants.
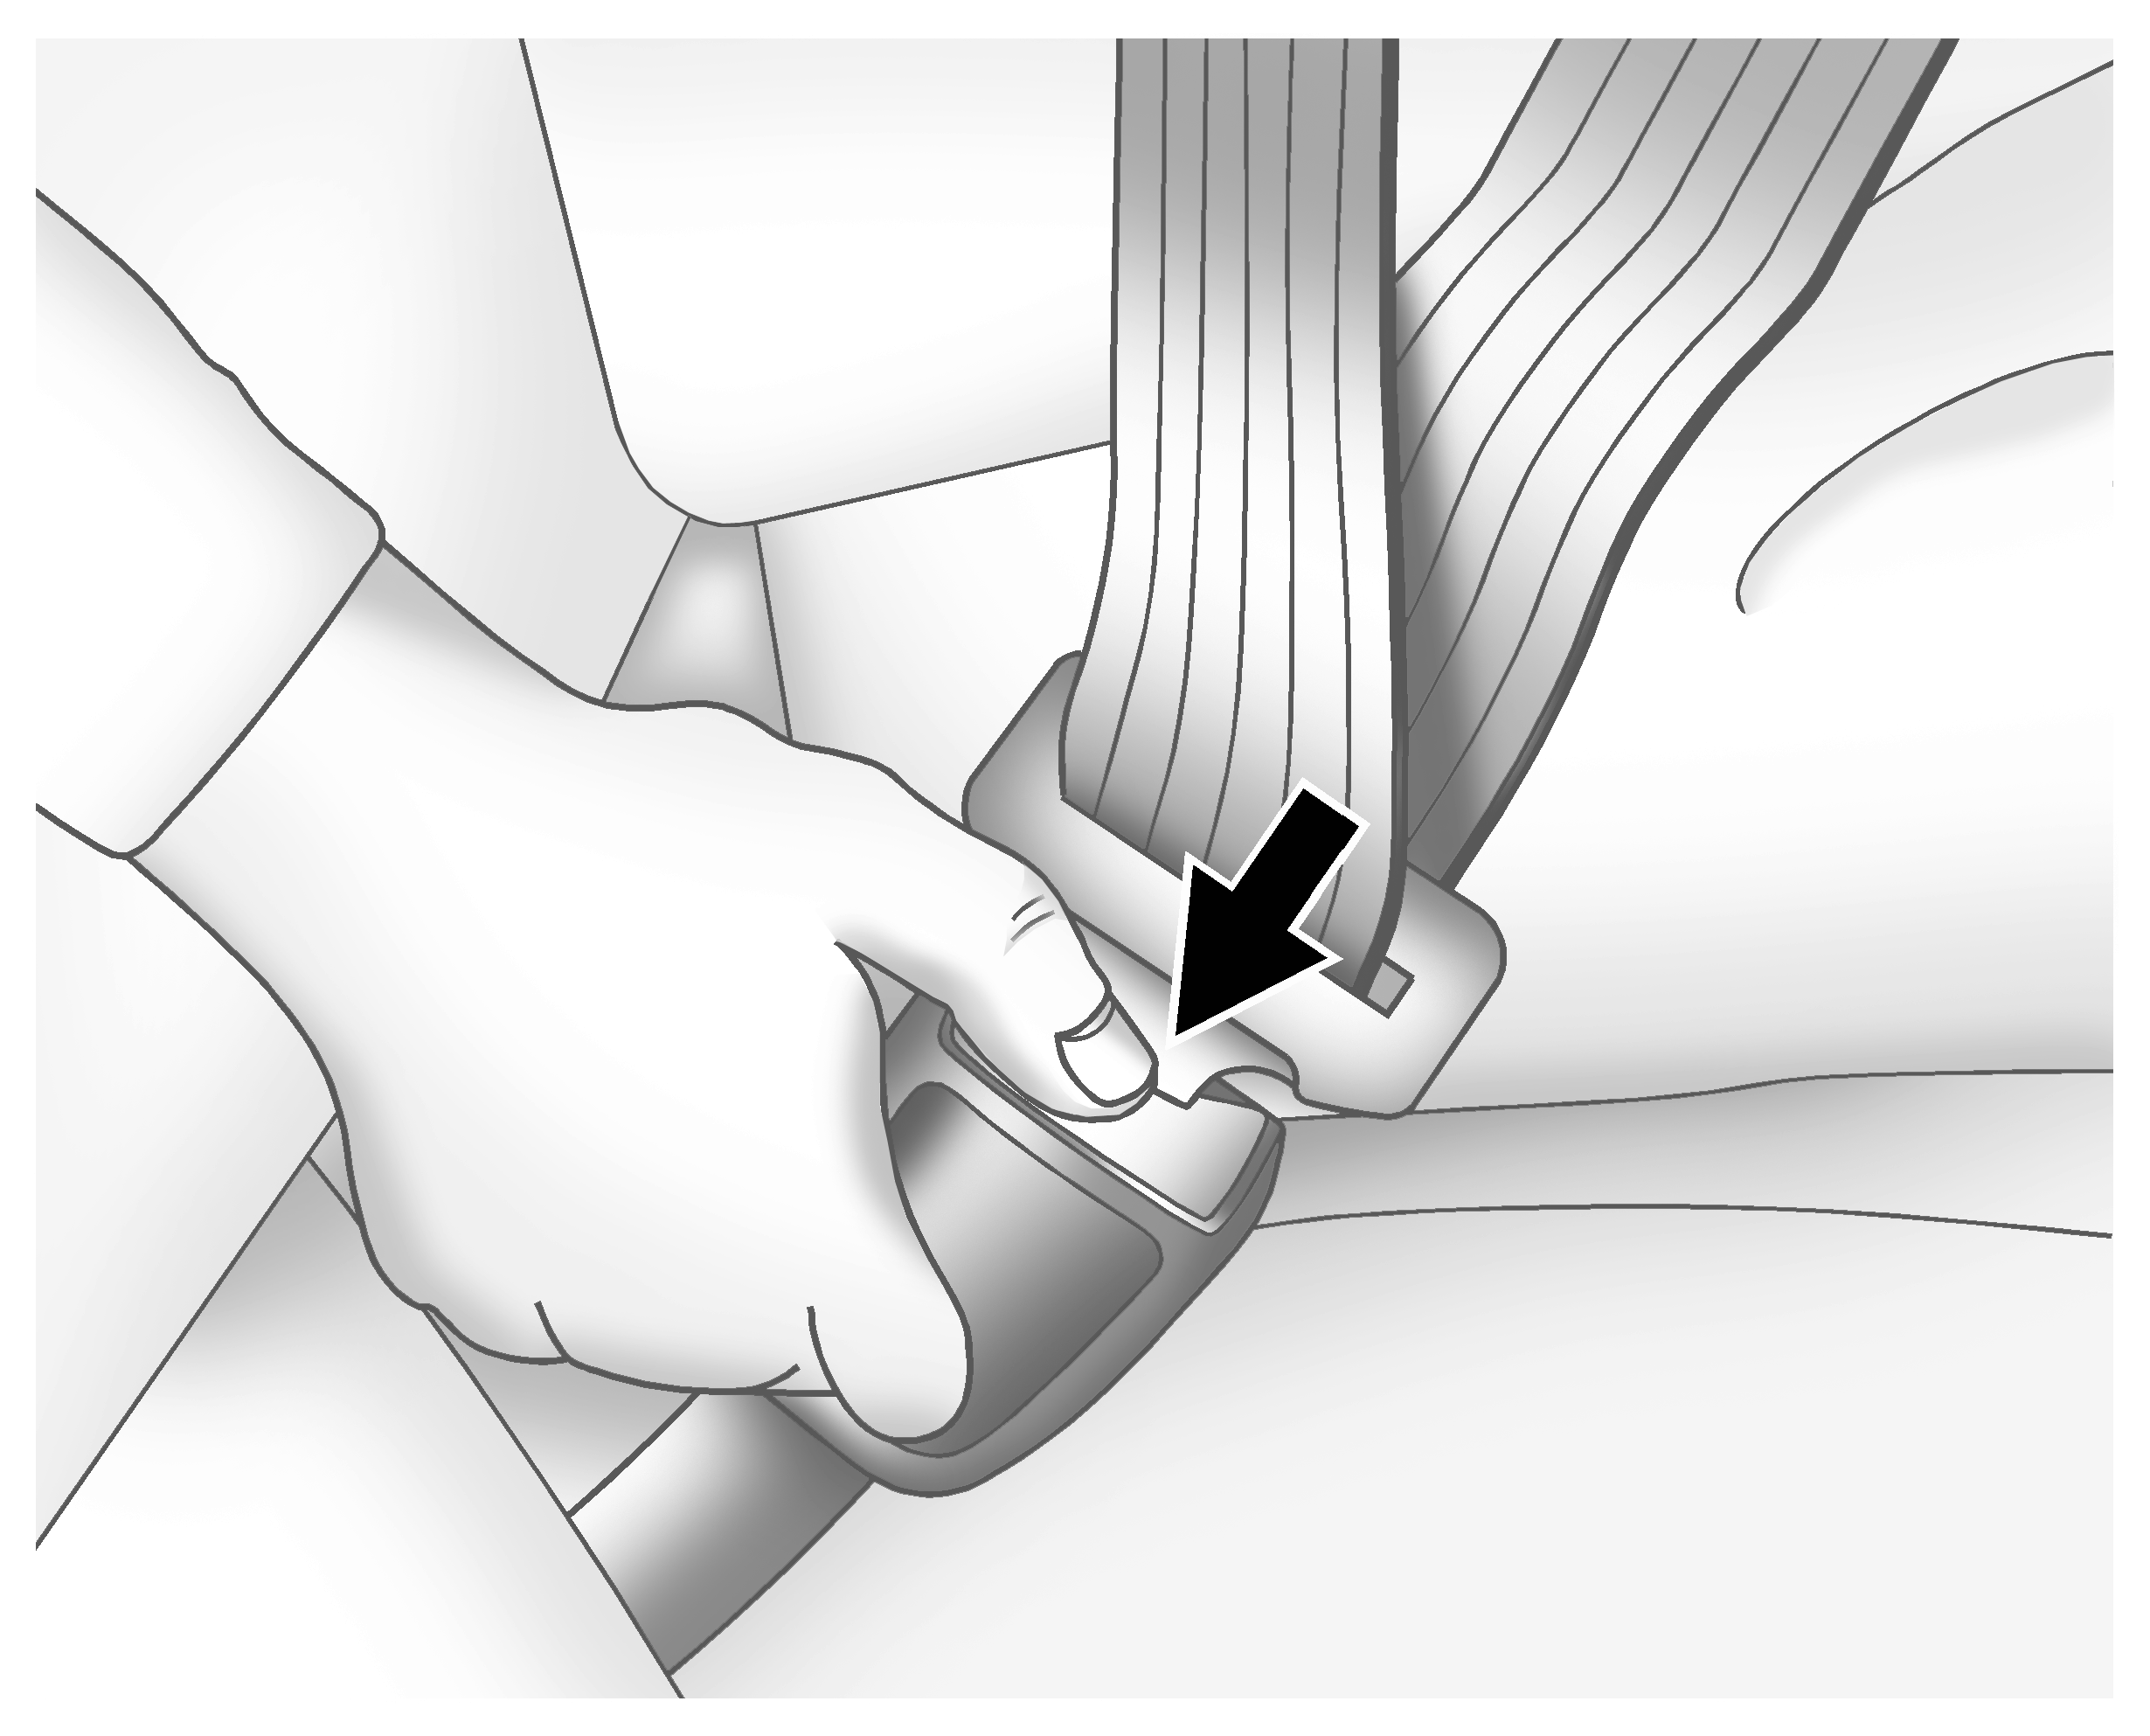
To unlatch the belt, push the button on the buckle. The belt should return to its stowed position. Slide the latch plate up the safety belt webbing when the safety belt is not in use. The latch plate should rest on the stitching on the safety belt, near the guide loop on the side wall.
Before a door is closed, be sure the safety belt is out of the way. If a door is slammed against a safety belt, damage can occur to both the safety belt and the vehicle.
Shoulder Belt Height Adjuster
The vehicle has a shoulder belt height adjuster for the driver and right front passenger seating positions.
Adjust the height so that the shoulder portion of the belt is centered on the shoulder. The belt should be away from the face and neck, but not falling off of the shoulder. Improper shoulder belt height adjustment could reduce the effectiveness of the safety belt in a crash.
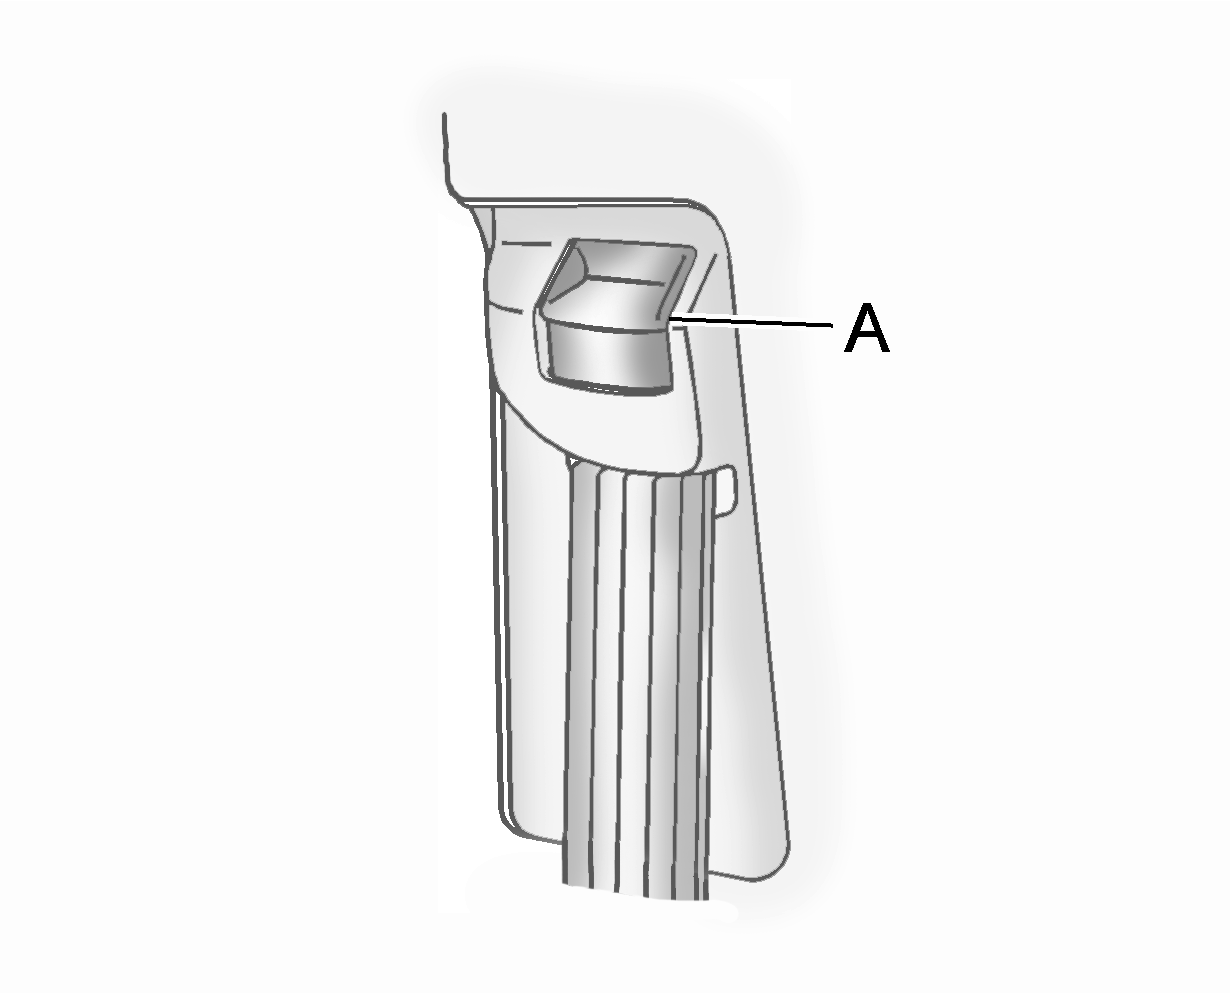
To move it down, push down on the button (A) and move the height adjuster to the desired position. You can move the height adjuster up by pushing up on the shoulder belt guide.
After the adjuster is set to the desired position, try to move it down without pushing the button to make sure it has locked into position.
Safety Belt Pretensioners
This vehicle has safety belt pretensioners for the front outboard occupants. Although the safety belt pretensioners cannot be seen, they are part of the safety belt assembly. They can help tighten the safety belts during the early stages of a moderate to severe frontal, near frontal, or rear crash if the threshold conditions for pretensioner activation are met. And, for vehicles with side impact airbags, safety belt pretensioners can help tighten the safety belts in a side crash or a rollover event.
Pretensioners work only once. If the pretensioners activate in a crash, they will need to be replaced, and probably other new parts for the vehicle's safety belt system. See Replacing Restraint System Parts After a Crash.
Rear Safety Belt Comfort Guides
Rear shoulder belt comfort guides may provide added safety belt comfort for older children who have outgrown booster seats and for some adults. When installed on a shoulder belt, the comfort guide positions the shoulder belt away from the neck and head.
There is a guide for each outboard passenger position in the second row seat and all passenger positions in the third row. Here is how to install a comfort guide to the safety belt:
- For the outboard positions, remove the guide from its storage clip on the interior body.
- Pull the comfort guide out of its storage location and then return the headrest to its upright position.
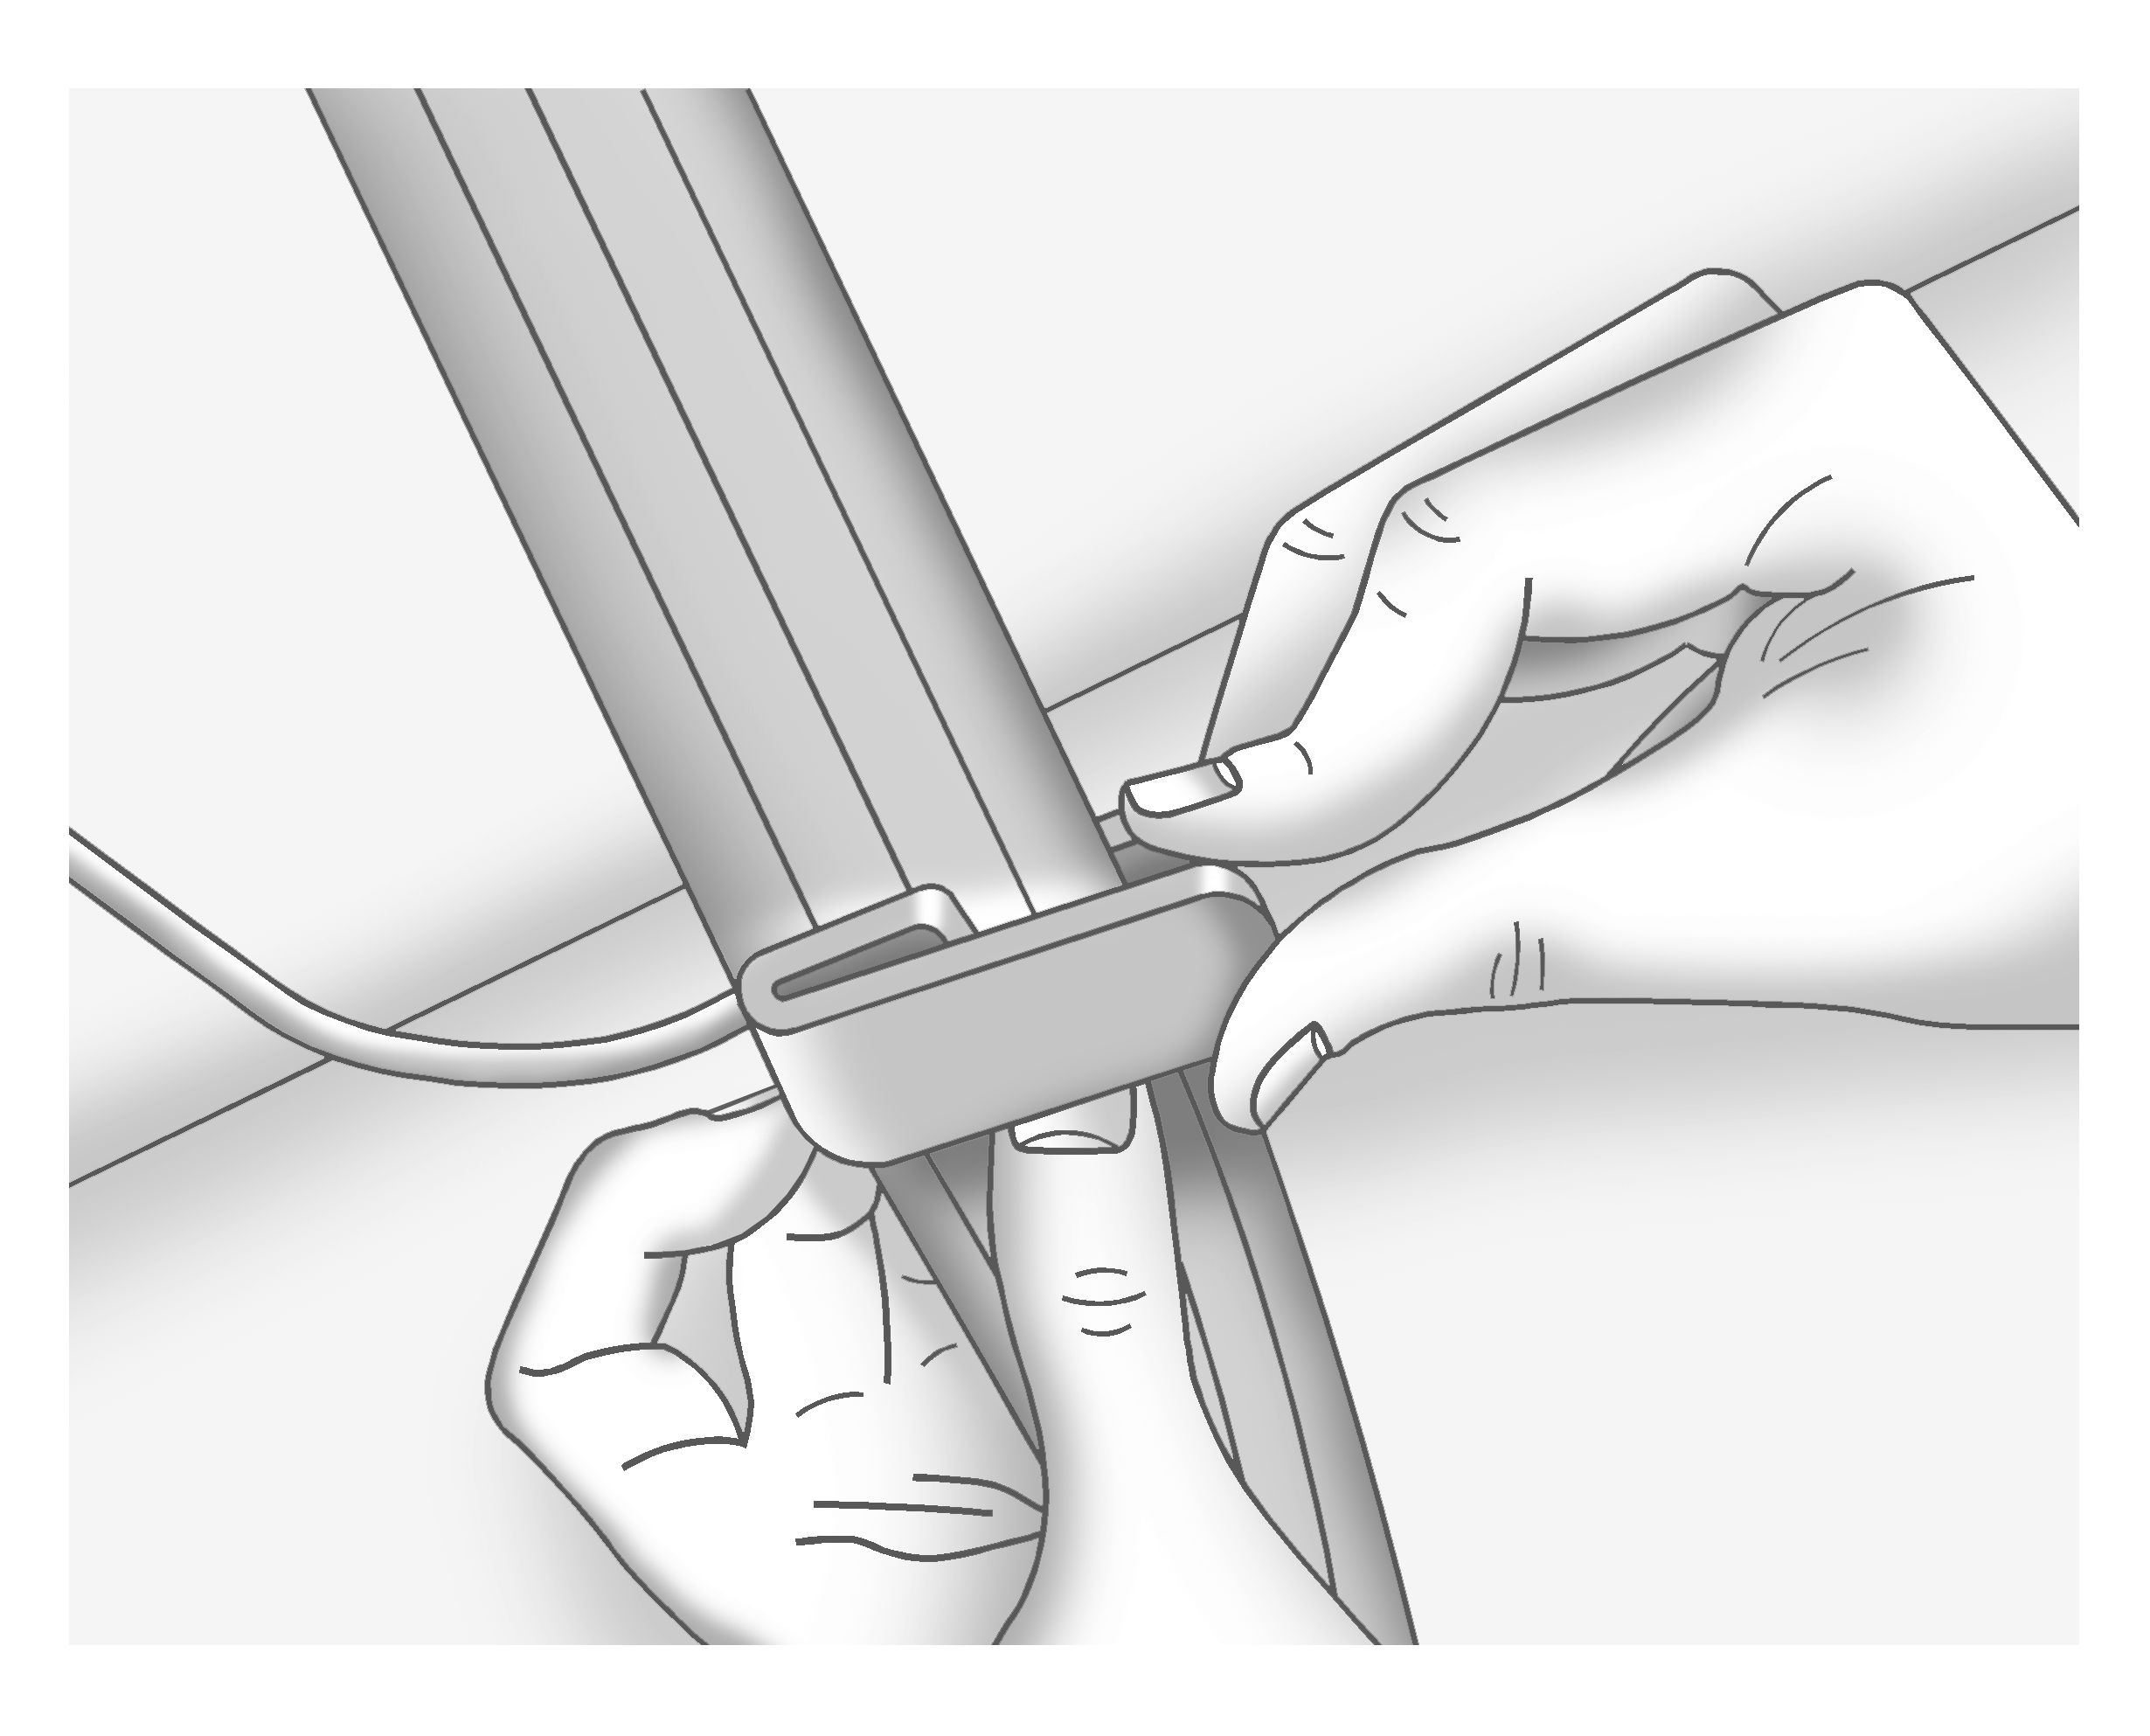
- Place the guide over the belt and insert the two edges of the belt into the slots of the guide.
- Be sure that the belt is not twisted and it lies flat. The elastic cord must be under the belt and the guide on top.
- Buckle, position, and release the safety belt as described previously in this section. Make sure that the shoulder belt crosses the shoulder.
Outboard Positions
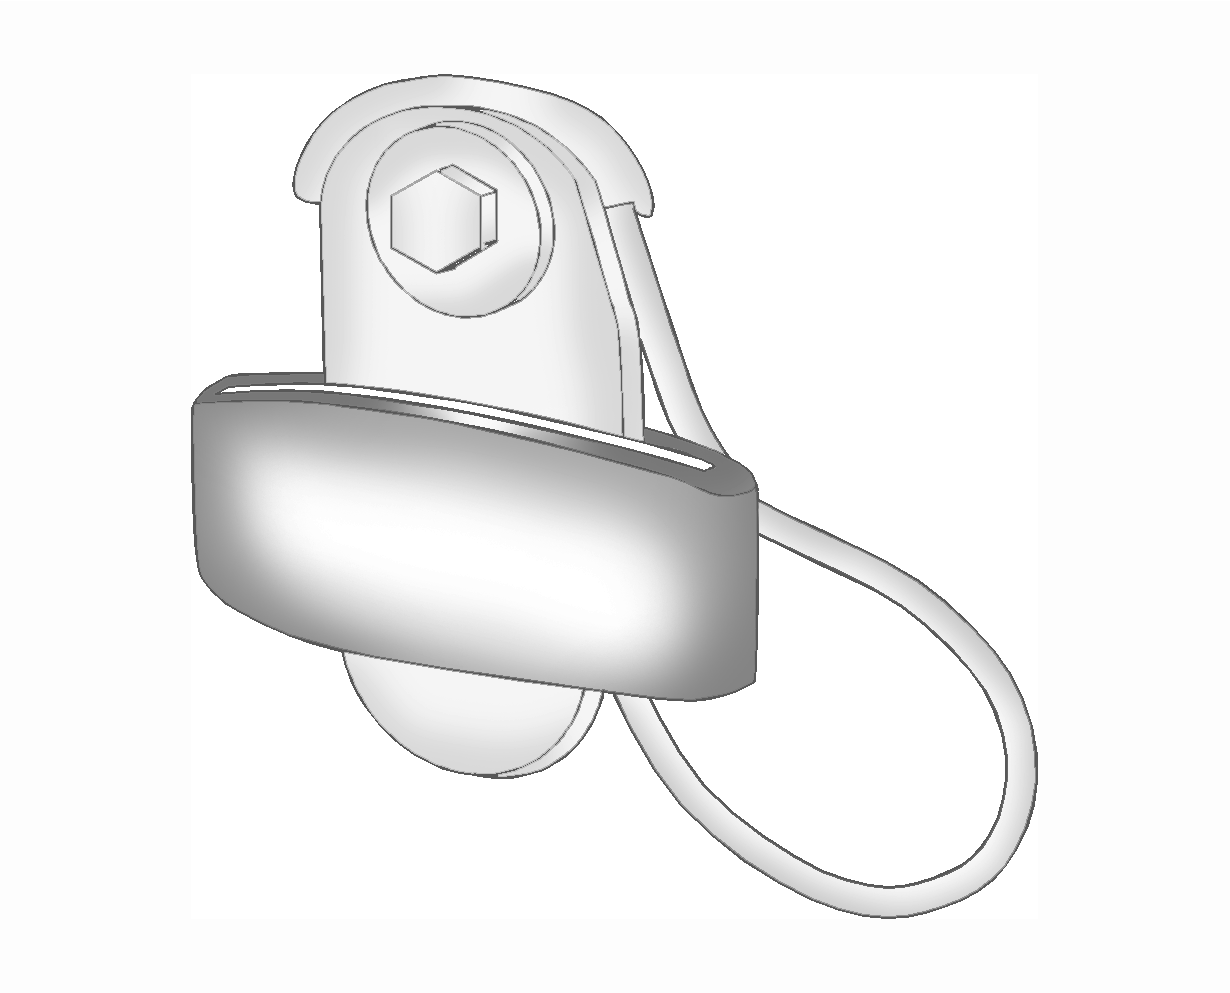
For the third row center position, locate the comfort guide which is located in a storage pocket, at the top of the seat, under the headrest on the driver's side of the vehicle. To access the comfort guide, you will first need to move the headrest forward by pulling on the handle behind the seatback. The comfort guide will now be accessible.
Third Row Center Position
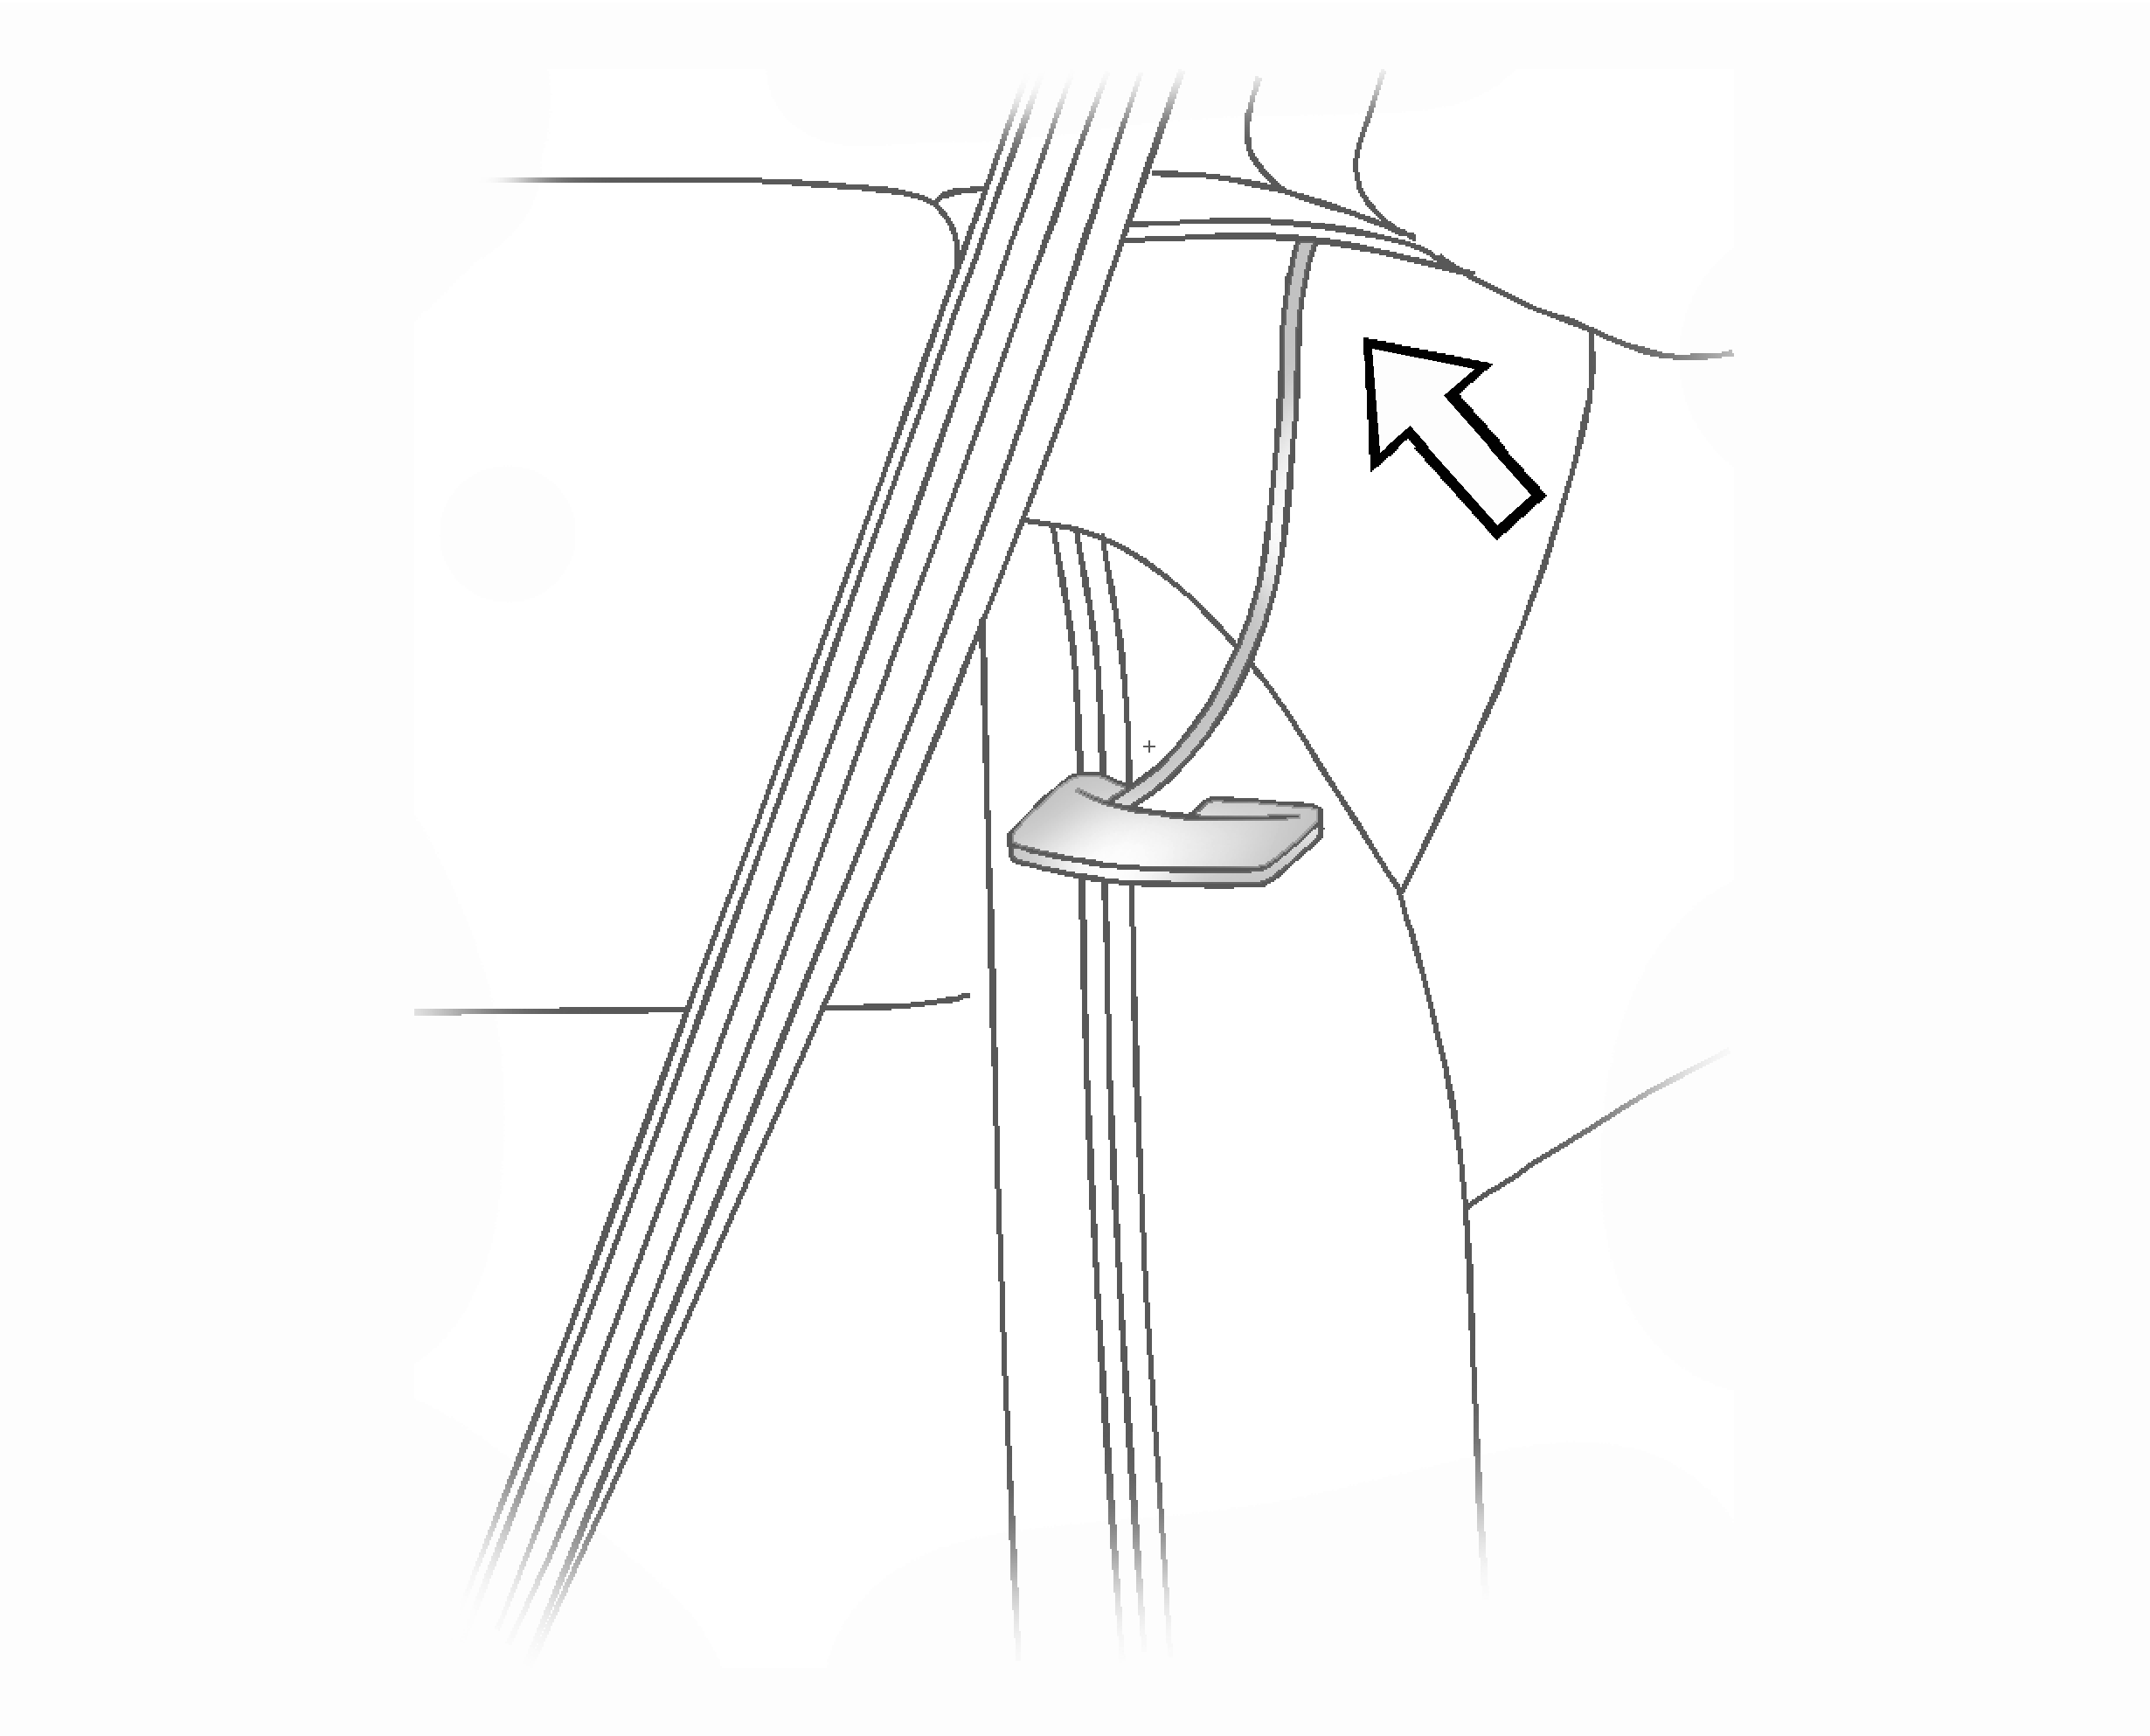
The elastic cord on the comfort guide is adjustable. You can make it longer or shorter by squeezing both ends of the plastic adjuster.
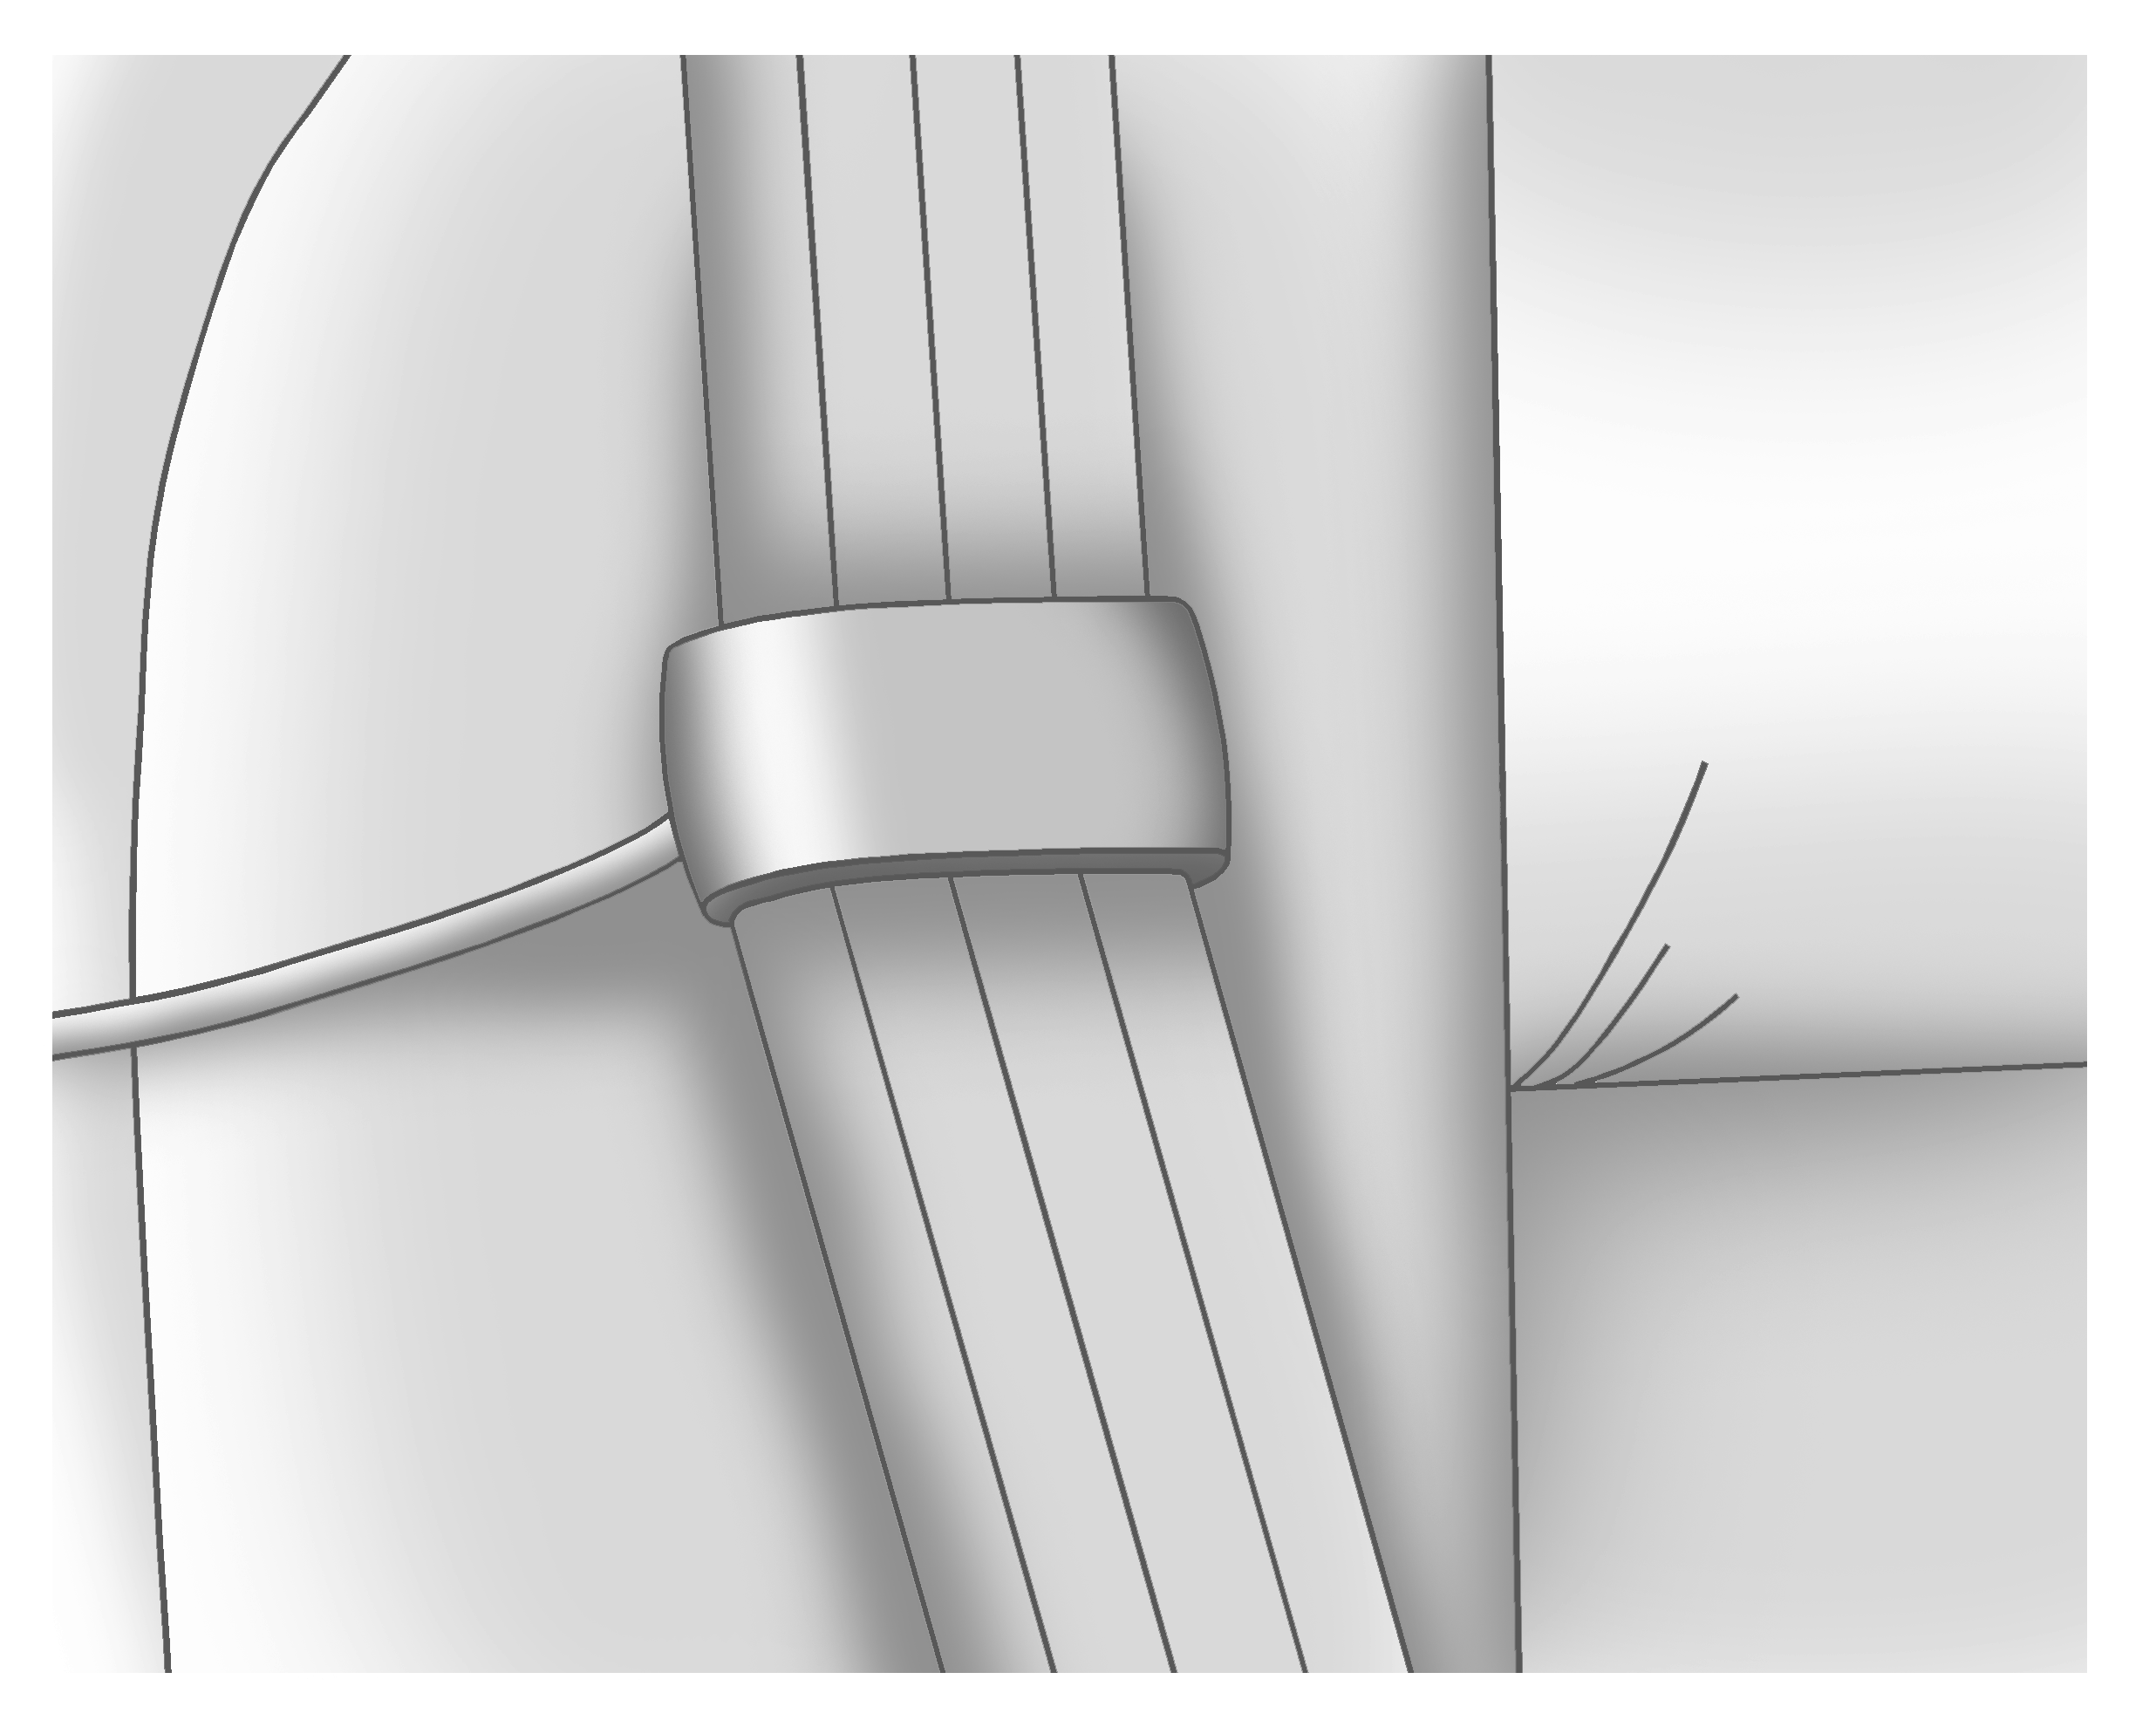
Caution: A safety belt that is not properly worn may not provide the protection needed in a crash. The person wearing the belt could be seriously injured. The shoulder belt should go over the shoulder and across the chest. These parts of the body are best able to take belt restraining forces.
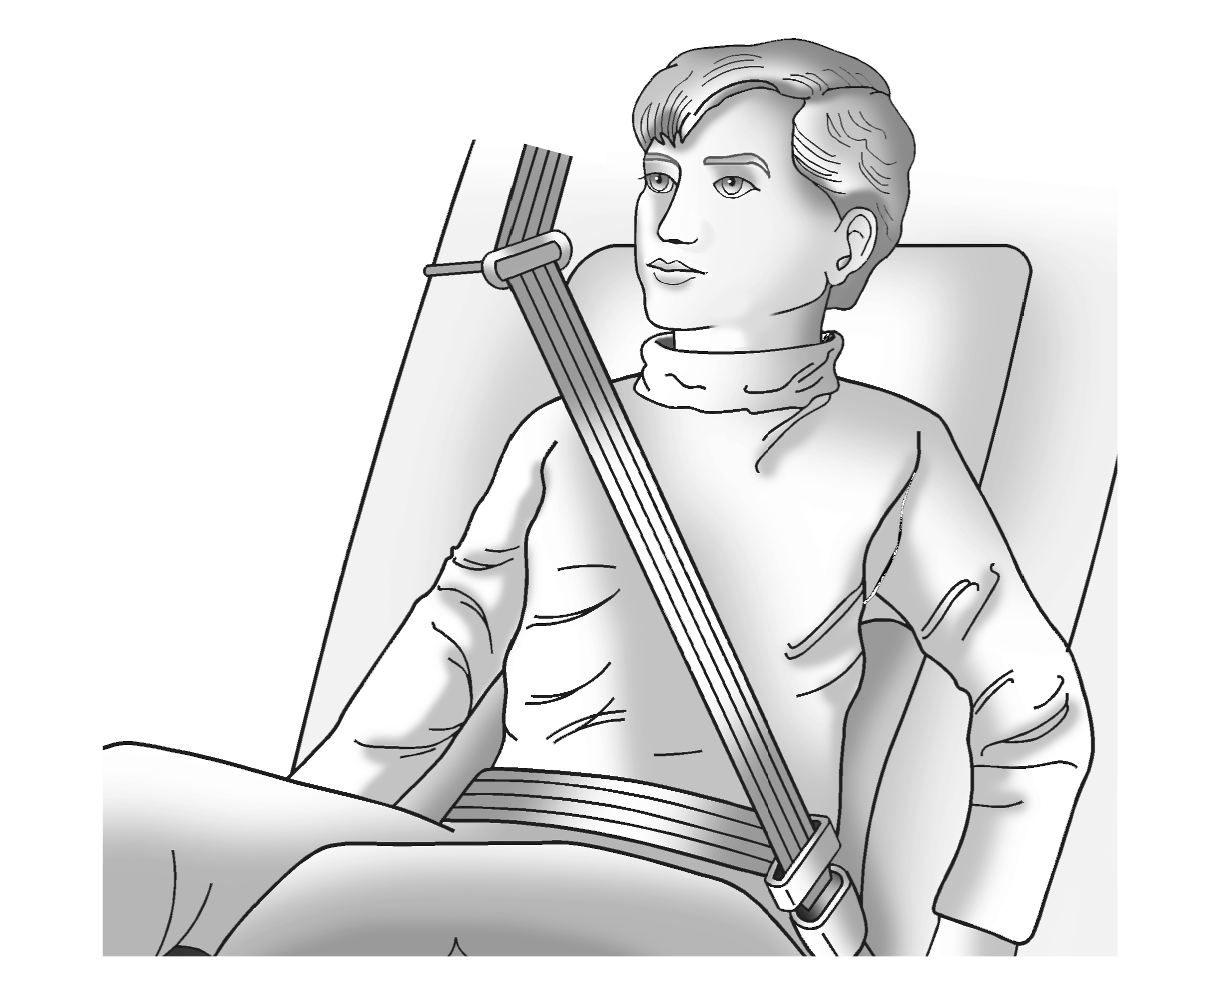
To remove and store the comfort guide, squeeze the belt edges together so that the safety belt can be removed from the guide. Slide the guide into its storage location or on its storage clip.
