For 1990-2009 cars only
Removal Procedure
- It is only necessary to lower the headliner. Only do those step in headliner replacement that will lower the headliner enough to gain access to the part. Refer to Headlining Trim Panel Replacement .
- Disconnect the electrical connector from the motor/actuator.
- Remove the motor/actuator. Refer to Sunroof Motor/Actuator Replacement .
- Remove the sunroof window. Refer to Sunroof Window Replacement .
- Manually slide the mechanism forward in the track until the mechanism reaches the hard stop.
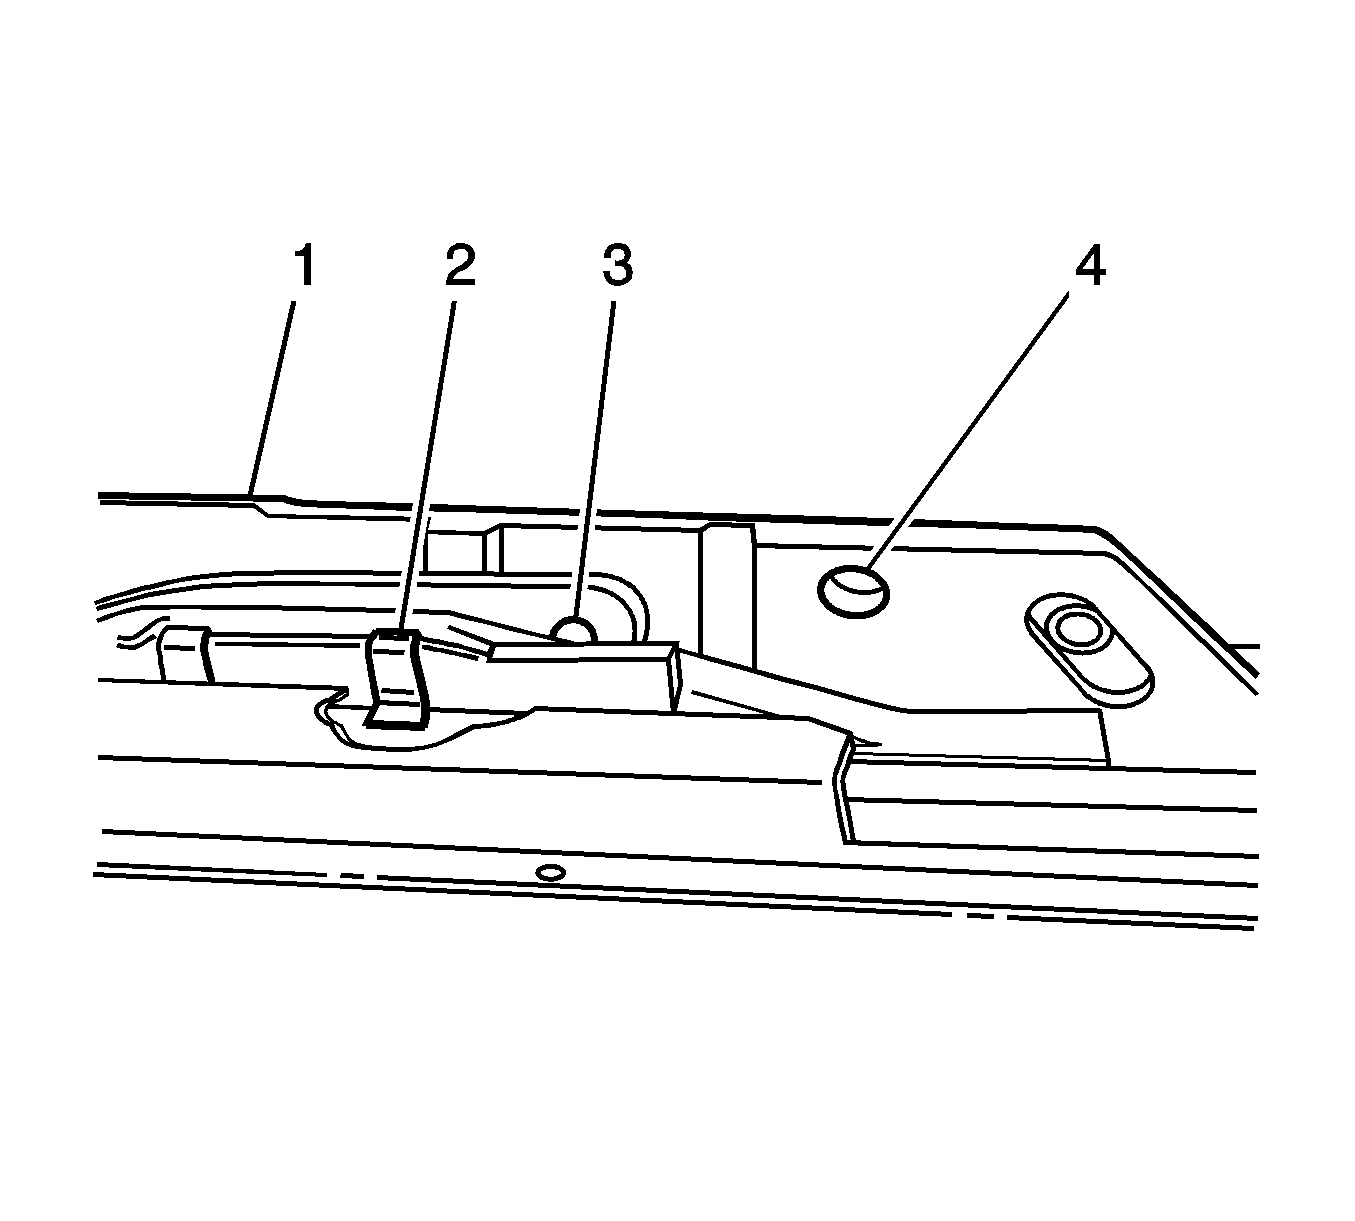
- Push the cam assembly (2) forward until the timing hole (3) in the cam is aligned with the timing hole (4) in the lifter arm (1).
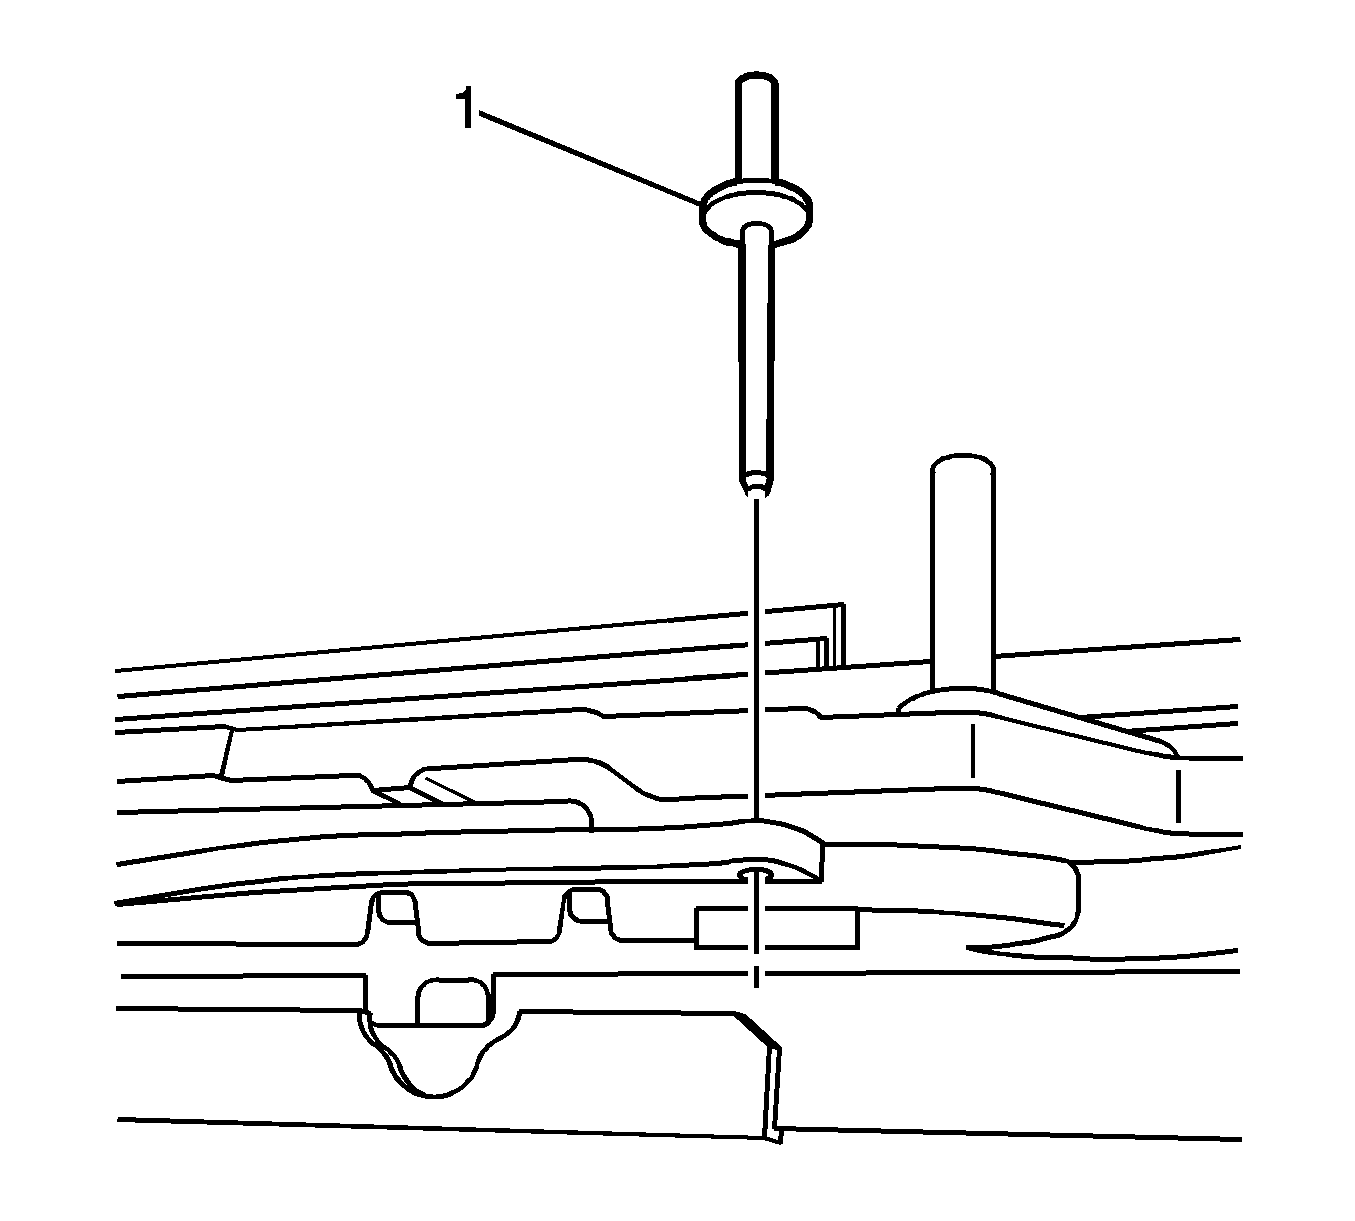
- Insert a pin (1) in the holes to hold the position while installing the drive motor.
- Repeat this procedure for the opposite side.


Important: Both mechanisms should now be in the closed position.
Installation Procedure
- Install the sunroof window. Refer to Sunroof Window Replacement .
- Install the motor/actuator. Refer to Sunroof Motor/Actuator Replacement .
- Connect the electrical connector to the motor/actuator.
- Remove the pin (1) from the holes that held the position while installing the drive motor.
- Install the headliner. Refer to Headlining Trim Panel Replacement .
- Perform the Initialization/Teach Procedure. Refer to Sunroof Motor/Actuator Initialization/Teach Process .
- Verify the operation of the sunroof.
Notice: Refer to Fastener Notice in the Preface section.
Tighten
Tighten the screws to 4 N·m (35 lb in).
Tighten
Tighten the motor attachment screws to 3.5 N·m (31 lb in).

