A/C DISCHARGE LINE BREAKAGE AND/OR REPEAT FAILURE

SUBJECT: A/C DISCHARGE LINE BREAKAGE AND/OR REPEAT FAILURE (NEW PART)
VEHICLES AFFECTED: 1986-88 C AND H WITH 3.8L ENGINES (VIN CODE B OR 3)
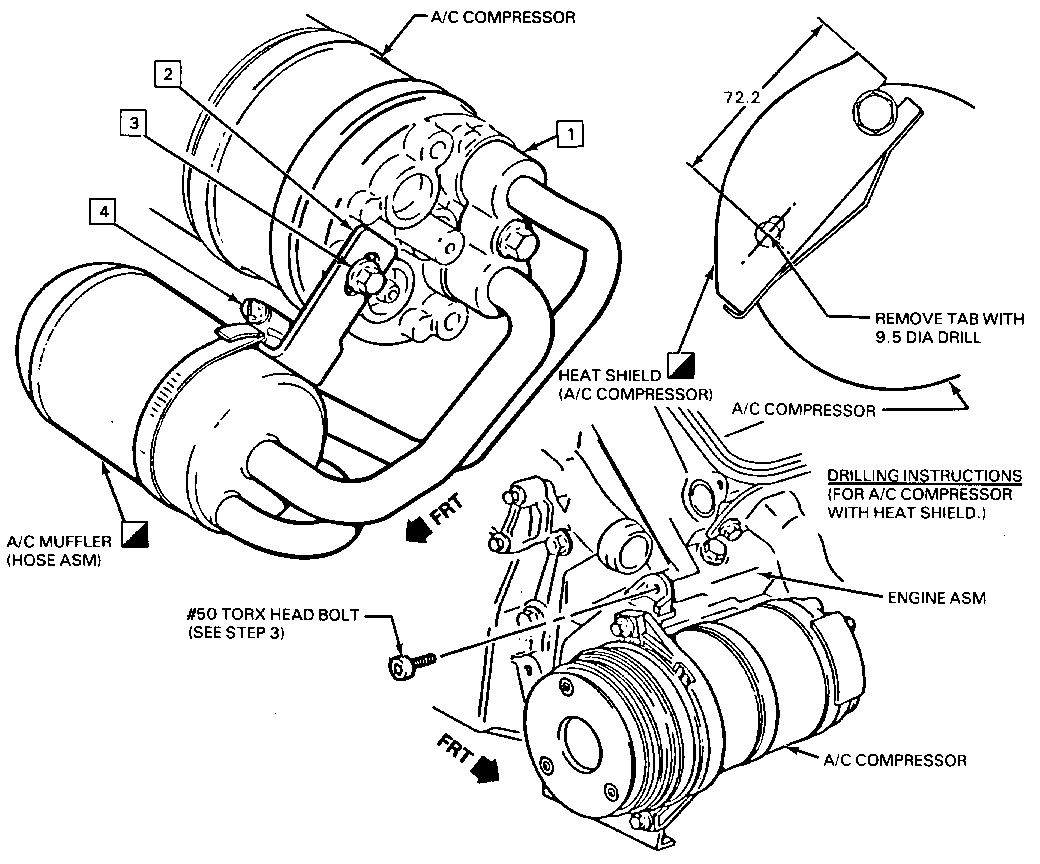
If a repeat failure or cracking of the A/C discharge pipe at the rear of the compressor is encountered on the subject vehicle, install kit 25537148 and follow instructions below:
1. Replace hose.
2. Torque all compressor to mount bolts to 55.0 N.m.
3. Remove and clean indicated #50 Torx head bolt. Add Loctite or equivalent to #50 Torx head bolt, reinstall and torque to 55.0 N.m
4. Add Loctite or equivalent to bolt/screw (Item 3) and install bracket (Item 2) loosely to back of compressor as shown. (See drilling instructions view if A/C compressor has heat shield).
5. Install hose assembly, kit 25537148.
6. Position bracket (Item 2) to ensure good fit to A/C muffler.
7. Tighten bolt/screw (Item 3) while limiting bracket rotation - torque to 55.0 N.m.
8. Recheck position of bracket and adjust if necessary to ensure good contact against A/C muffler.
9. Install clamp (Item 4) and tighten to 5.6 N.m.
IMPORTANT: After installation is completed, check engine/ transmission mounts for separation and check engine for excessive vibration in the 1200 to 1500 rpm range. Correct as required.

General Motors bulletins are intended for use by professional technicians, not a "do-it-yourselfer". They are written to inform those technicians of conditions that may occur on some vehicles, or to provide information that could assist in the proper service of a vehicle. Properly trained technicians have the equipment, tools, safety instructions and know-how to do a job properly and safely. If a condition is described, do not assume that the bulletin applies to your vehicle, or that your vehicle will have that condition. See a General Motors dealer servicing your brand of General Motors vehicle for information on whether your vehicle may benefit from the information.
