I/P UPPER TRIM WAVY APPEARANCE (RE-WORK OR ADJUST)

SUBJECT: INSTRUMENT PANEL UPPER TRIM PANEL WAVY APPEARANCE (NEW PROCEDURE)
MODELS AFFECTED: 1991-92 PARK AVENUE/ULTRA 1992 LESABRE
CONDITION:
---------- Some of the subject vehicles may exhibit a wavy or warped appearing instrument panel upper trim panel.
Following are the various causes and their corrections:
WARRANTY INFORMATION:
To repair for Condition 1: Labor Operation No.: T5274 Labor Time: .3 hr.
To repair for Condition 2 or 3: Labor Operation No.: T5275 Labor Time: .3 hr.
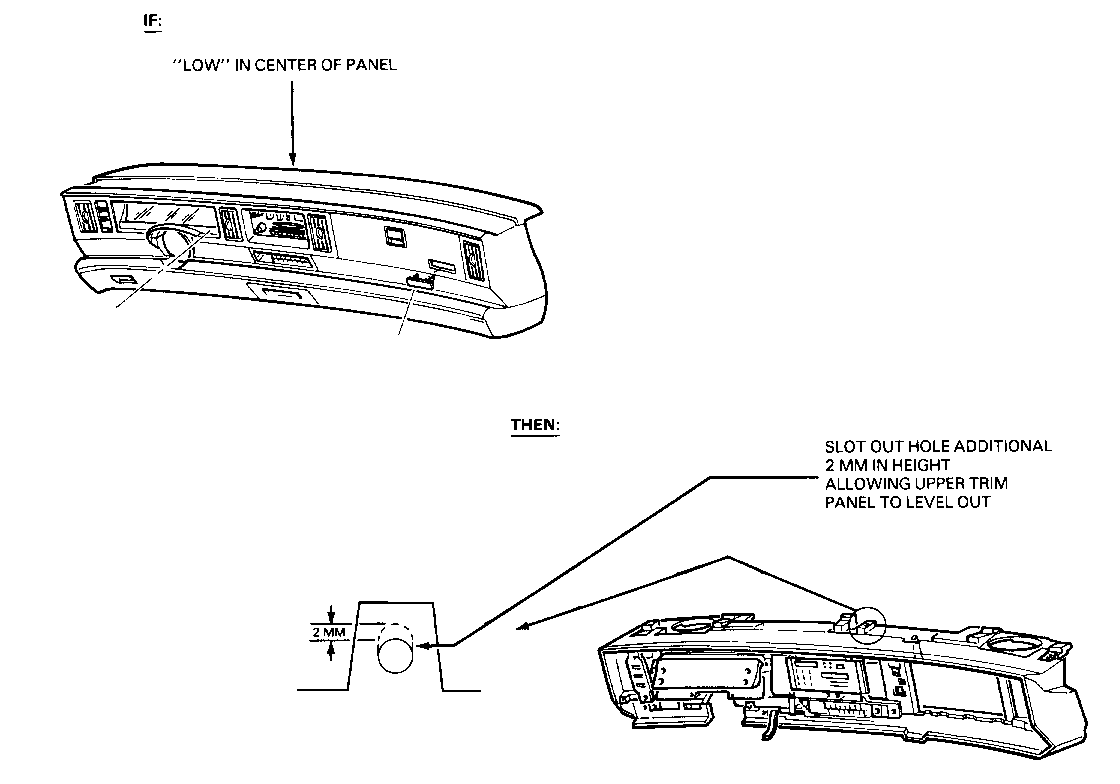
1. Condition: Localized dip in the center of upper trim panel at forward edge.
Repair Method:
- Remove upper trim panel
- Rework center-forward locating hole on I/P carrier appropriate amount to level upper trim panel
- Replace panel if waviness set has been taken
- Reattach upper trim panel
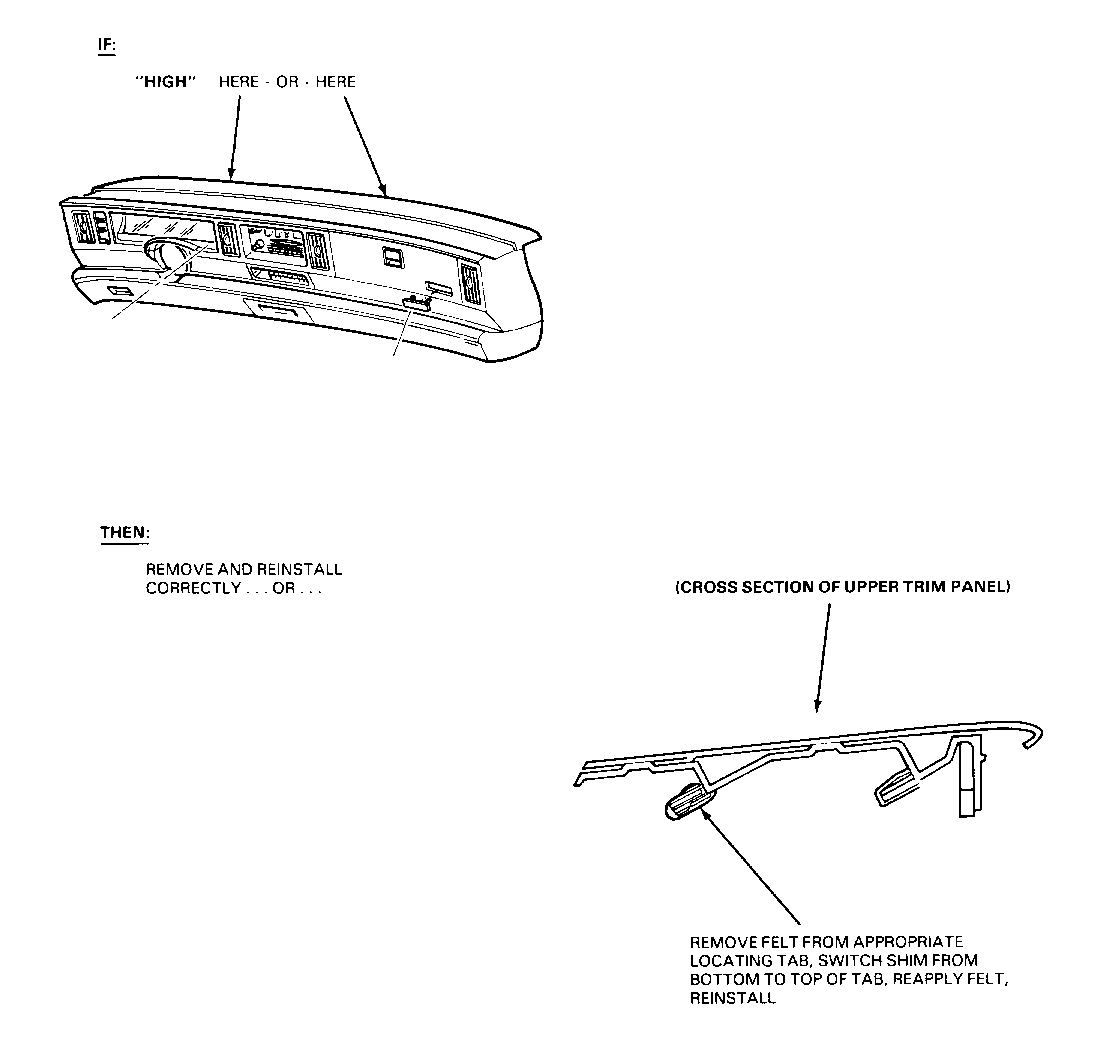
2. Condition: Upper trim panel high at forward edge.
Repair Method:
- Remove upper trim panel
- Evaluate if panel was installed correctly (with tabs on upper trim panel properly inserted into slots of I/P carrier)
- If incorrect assembly: Re-install panel correctly and fasten down
- If assembly was correct: Remove felt wrap from locating tab, remove shim located on tab, reattach shim to top side of tab, recover with felt, reinstall panel to I/P
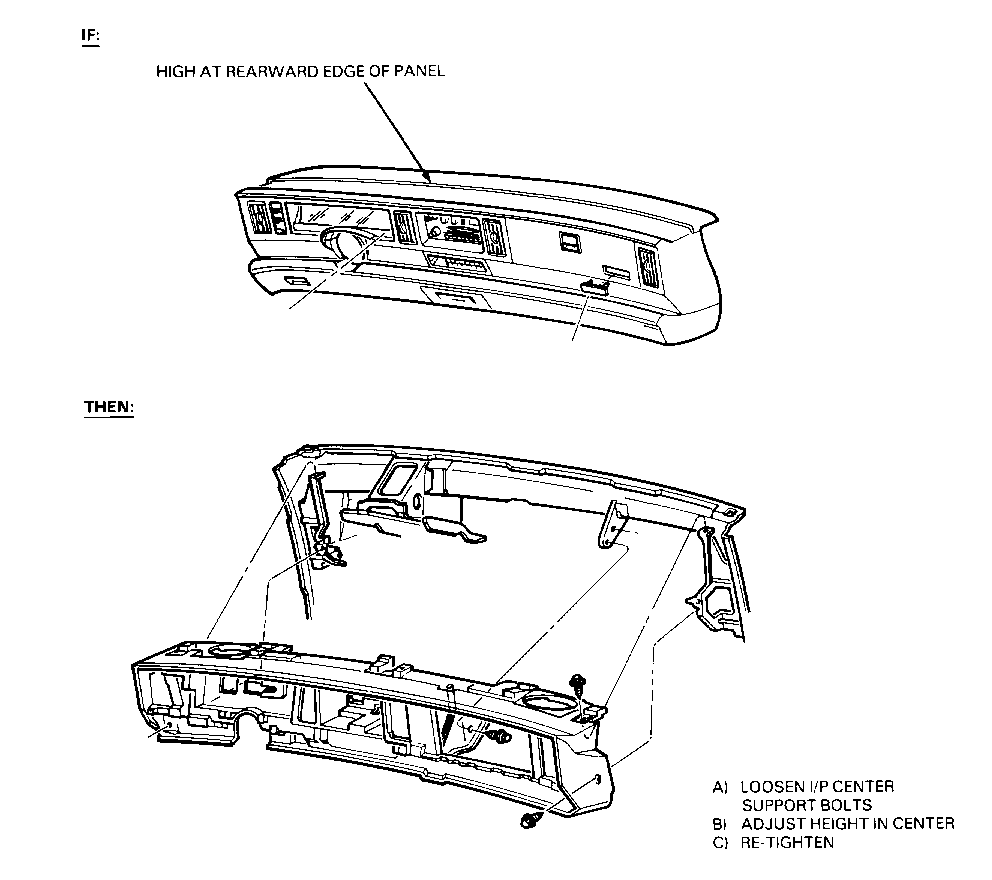
3. Condition: Rearward edge of upper trim panel high to I/P right of center
Repair Method:
- Remove glove box assembly
- Loosen I/P center support bolts
- Adjust I/P height in center to give good appearance to upper trim panel
- Re-tighten fasteners


General Motors bulletins are intended for use by professional technicians, not a "do-it-yourselfer". They are written to inform those technicians of conditions that may occur on some vehicles, or to provide information that could assist in the proper service of a vehicle. Properly trained technicians have the equipment, tools, safety instructions and know-how to do a job properly and safely. If a condition is described, do not assume that the bulletin applies to your vehicle, or that your vehicle will have that condition. See a General Motors dealer servicing your brand of General Motors vehicle for information on whether your vehicle may benefit from the information.
