Removal Procedure
Tools Required:
J 28467-360
- Raise the hood.
- Disconnect the negative battery cable. Refer to
Caution: Unless directed otherwise, the ignition and start switch must be in the OFF or LOCK position, and all electrical loads must be OFF before servicing
any electrical component. Disconnect the negative battery cable to prevent an electrical spark should a tool or equipment come in contact with an exposed electrical terminal. Failure to follow these precautions may result in personal injury and/or damage to
the vehicle or its components.
in General Information.
- Remove the cross brace to strut towers. Complete the following
steps:
| 3.1. | Loosen the bar assembly through-bolts |
| 3.2. | The inboard strut nuts |
| 3.4. | Reinstall inboard strut nuts |
- Remove the air intake duct.
- Remove the cruise control cable at the throttle body.
- Remove the shift control linkage at the following locations:
| • | Mounting bracket at the transmission |
| • | Lever at the manual shaft |
- Remove the wiring connectors at the following locations:
| • | Transmission electrical connector |
- Remove the fuel pipe retainers.
- Remove the vacuum modulator hose at the modulator.

- Remove the three top transmission to engine
bolts.
Important: Load the support fixture by tightening the wing-nuts several turns
in order to relieve the tension on the frame and on the mounts.
- Install the J 28467-360
- Turn the steering wheel to the full left position.
- Raise the vehicle. Support the vehicle. Refer to General Information.
- Remove the front tire and wheel assemblies. Refer to Wheel Removal
in Tires and Wheels.
- Remove the right and the left front ball joint nuts. Refer to
Ball Joint in Front Suspension.
- Separate the right and the left control arms from the steering
knuckle. Refer to Control Arm in Front Suspension.
- Remove the right drive axle from the transmission only. Do not
remove the drive axle from the hub/knuckle assembly. Refer to Drive Axle in
Drive Axle On-Vehicle Service.
Important: Carefully guide the output shaft past the lip seal. Do not allow the
shaft splines to contact any portion of the lip seal surface, otherwise damage
to the seal will occur.
- Remove the left drive axle from both the transmission and the hub/knuckle
assembly. Refer to Drive Axle in Drive Axle On-Vehicle Service.
- Support the transmission with the jackstand. Adjust the jackstand
as necessary throughout the procedure.
- Remove the left front transmission mount.
- Remove the torque strut bracket from the transmission.
- Remove the right transmission mount to transmission bolts.
- Remove the transmission brace from the engine bracket.
- Remove the stabilizer shaft link to control arm bolt.
- Remove the flywheel cover bolts and the flywheel cover.
Important: Mark the flywheel to converter relationship in order to ensure proper
reassembly.
- Remove the flywheel to converter bolts.
- Remove the bolts attaching the rear frame member to the front
frame.
- Remove the front left frame-to-body attaching bolts.
- Remove the front frame to right frame member bolts.
- Remove the frame assembly by swinging aside and supporting with
a suitable stand.

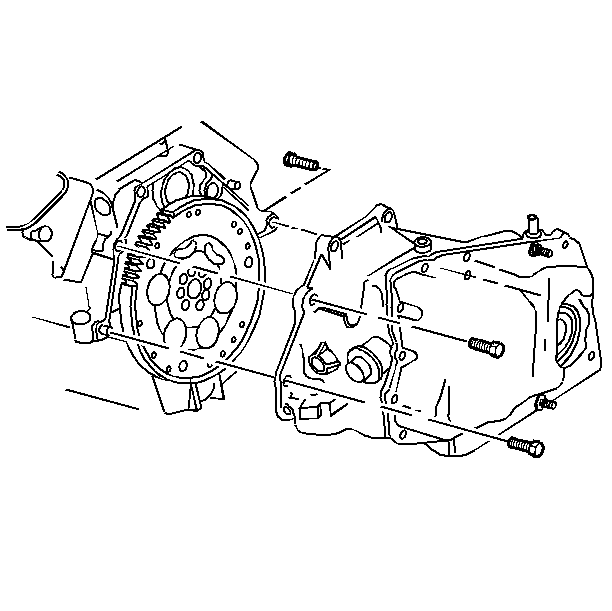
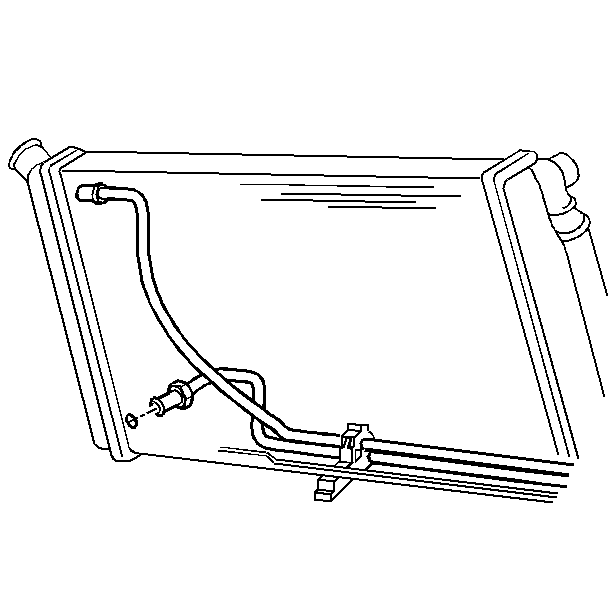
- Remove the cooler pipes at the transmission.
Important: One bolt is located between the transmission case and the engine block.
Install the bolt in the opposite direction.

- Remove the remaining lower transmission to engine
block bolts.
Important: Use care to avoid damaging the right hand output shaft, shaft seal,
hoses, lines and wiring.
- Remove the lower transmission assembly away from the vehicle.
Installation Procedure
Tools Required:
J 37292-B
- Raise the transmission assembly into the vehicle.

- Install the lower transmission to engine
block bolts.

- Install the cooler pipes at the transmission.
- Install the frame assembly.
- Install the front frame to right frame member bolts.
- Install the front left frame-to-body attaching bolts.
- Install the bolts attaching the rear frame member to the front
frame.
Important: The torque converter to flywheel bolts should always be tightened twice.
- Install the flywheel to converter bolts.
Tighten
Tighten the bolts to 62 N·m (46 lb ft).
Important: Line up the flywheel to torque converter marks made at disassembly.
- Install the flywheel cover bolts and the flywheel cover.
- Install the stabilizer shaft link to the control arm bolt.
Important: When installing the transmission to engine block brace, tighten the
brace to engine bolts first and the brace to transmission case last in order
to avoid pulling the transmission case out of line.
- Install the transmission brace to the engine bracket.
- Install the right transmission mount to transmission bolts.
- Install the torque strut bracket to the transmission.
- Install the left front transmission mount.
- Remove the jackstand.
- Install the left drive axle to the transmission and the hub/knuckle
assembly. Refer to Drive Axle in Drive Axle On-Vehicle Service.
Important:
| • | Install the J 37292-B
,
before installing the right side drive axle. |
| • | Use care when installing the right side drive axle into the transmission
case. The splined shaft can easily damage the seal. |
- Install the right drive axle to the transmission. Refer to Drive Axle
in Drive Axle On-Vehicle Service.
- Connect the right and left control arms to the steering knuckle.
Refer to Control Arm in Front Suspension.
- Install the right and left front ball joint nuts. Refer to Ball
Joint in Front Suspension.
- Install both front tire and wheel assemblies. Refer to Wheel Installation
in Tires and Wheels.
- Lower the vehicle.
- Remove the engine support fixture.

- Install the three top transmission to
engine bolts.
- Install the vacuum modulator hose at the modulator.
- Install the fuel pipe retainers.
- Install the wiring connectors at the following locations:
| • | Transmission electrical connector |
| • | Park/neutral position switch |
Important: Check the adjustment of the shift cables. Readjust as needed.
- Install the shift control linkage. Complete the following steps:
| • | Install the lever at the manual shaft |
| • | Install the mounting bracket at the transmission |
- Install the cruise control cable at the throttle body.
- Install the air intake duct.
- Install the cross brace to strut towers. Complete the following
steps:
| • | Remove the inboard strut nuts. |
| • | Install the brace assembly. |
| • | Install the inboard strut nuts. |
Tighten
Tighten the nuts to 24 N·m (18 lb ft).
| • | Tighten the bar assembly through-bolts. |
Tighten
Tighten the bolts to 28 N·m (21 lb ft).
- Connect the negative battery cable.
- Lower the hood.
- Check and adjust the fluid level as needed.
- Road test the vehicle and check for leaks.


