Removal Procedure
Caution: Do not pry EBCM/EBTCM. Be careful not to damage seal (if reusing module). If seal is damaged during removal, repair damaged area using GM P/N 123456739 silicone sealer or replace EBCM/EBTCM.
Important: You cannot repair the EBCM/EBTCM. If the assembly is faulty, replace the EBCM/EBTCM as an assembly.
- Turn the ignition switch to the Off position.
- Remove the air cleaner assembly and the PCM cover. Refer to Air Cleaner Assembly Replacement in Engine Controls - 3.8L.
- Remove the EBCM/EBTCM harness connector.
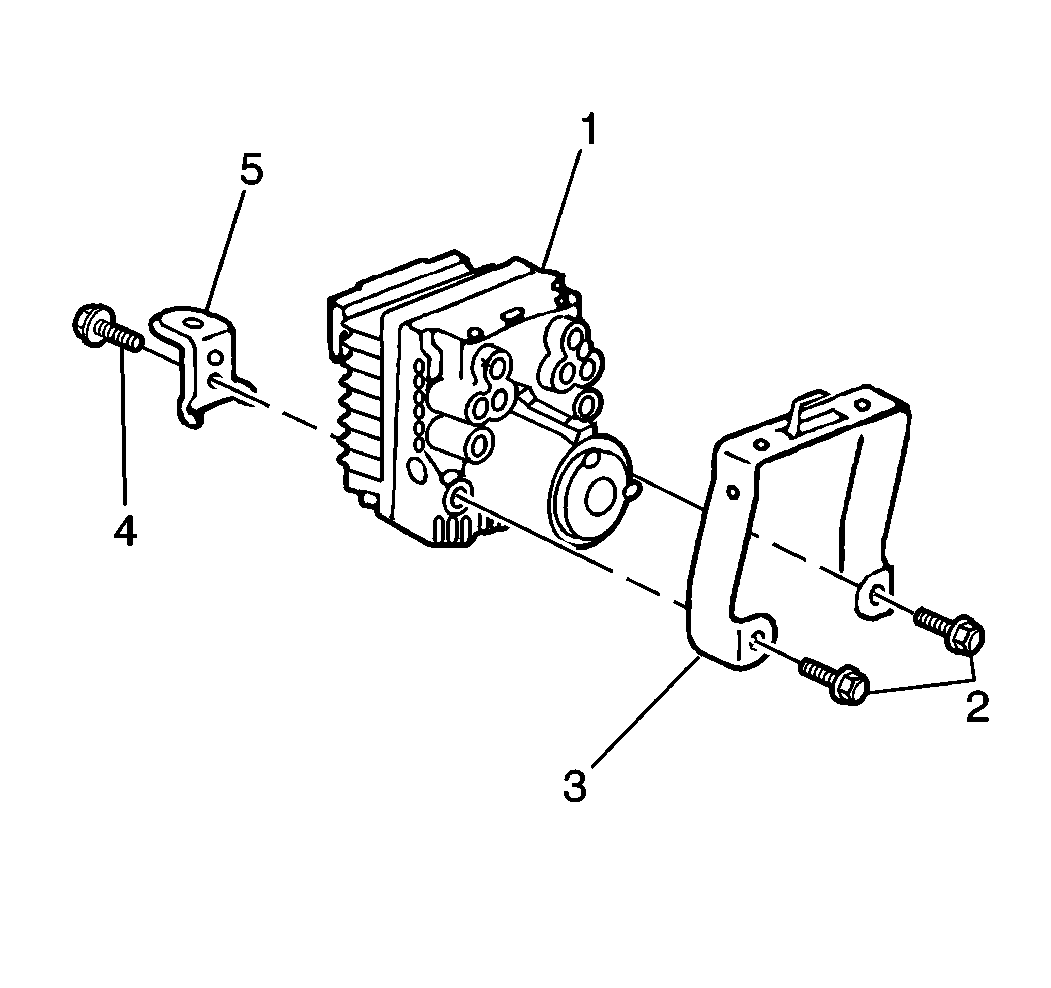
- Remove the front EBCM/EBTCM bracket from the vehicle (5).
- Remove the EBCM/EBTCM center bracket mounting bolt (4).
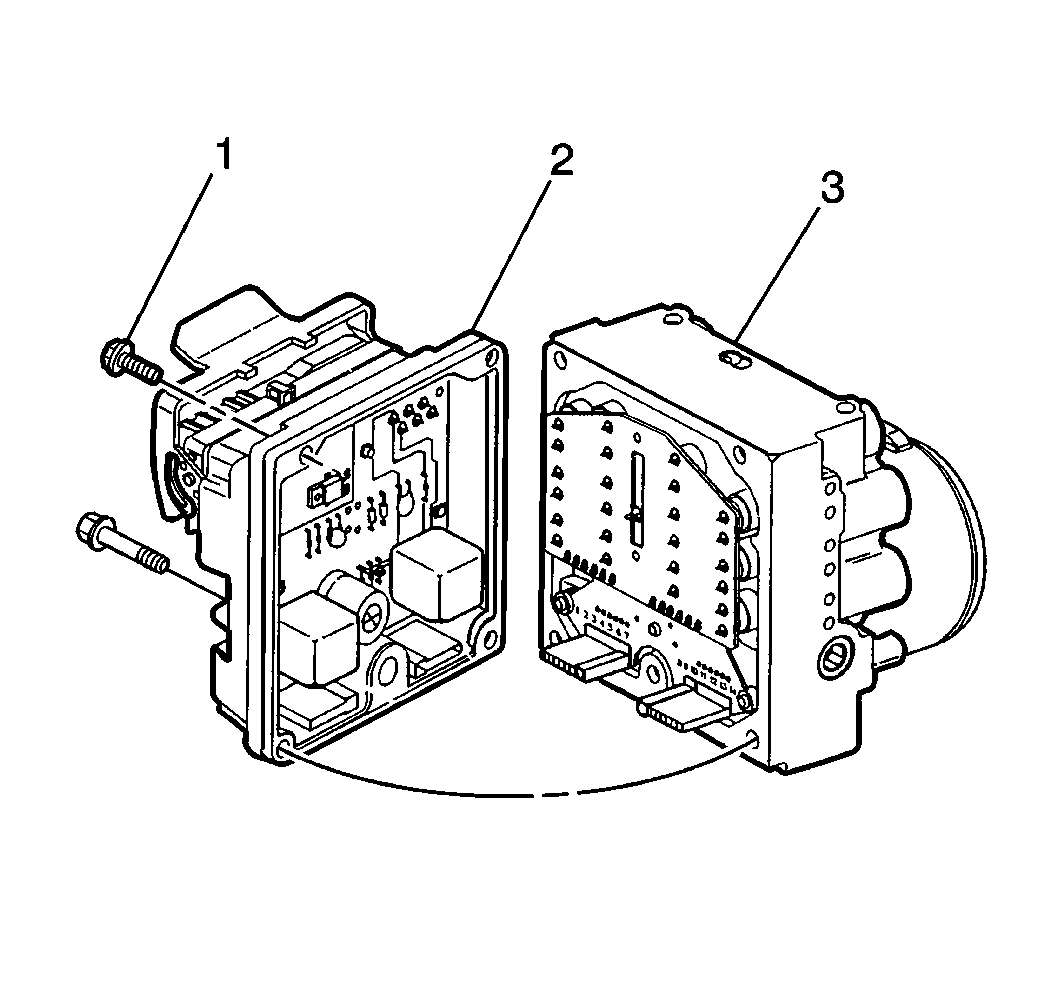
- Remove the four EBCM/EBTCM to BPMV bolts (1).
- Remove the EBCM/EBTCM by pulling rearward until the internal connector disengages. Do not twist the assembly.


Installation Procedure
Notice: Be sure to reconnect all harness retaining clips that may have been disconnected during the removal procedure in their original positions. Then perform a visual inspections of the entire harness checking to make sure all retaining clips are properly connected.
Important: When replacing the EBCM/EBTCM, you must recalibrate the Magnasteer®. Refer to Variable Effort Steering Programming in Variable Effort Steering.
- Clean the EBCM/EBTCM seal and BPMV gasket surface with alcohol.
- Install 4 bolts.
- Install the front EBCM/EBTCM bracket (5).
- Install the EBCM/EBTCM harness connector.
- Install the air cleaner assembly and the PCM cover. Refer to Air Cleaner Assembly Replacement in Engine Controls - 3.8L.
- Turn the ignition switch to the RUN position, engine Off.
- Perform the Diagnostic System Check. Refer to Diagnostic System Check .

Notice: Use the correct fastener in the correct location. Replacement fasteners must be the correct part number for that application. Fasteners requiring replacement or fasteners requiring the use of thread locking compound or sealant are identified in the service procedure. Do not use paints, lubricants, or corrosion inhibitors on fasteners or fastener joint surfaces unless specified. These coatings affect fastener torque and joint clamping force and may damage the fastener. Use the correct tightening sequence and specifications when installing fasteners in order to avoid damage to parts and systems.
Tighten
Tighten the four EBCM/EBTCM to BPMV bolts(1) to 6 N·m (53 lb lb).

Tighten
Tighten the EBCM/EBTCM center bracket mounting bolt (4) to 14 N·m
(10 lb ft).
