Removal Procedure
- Remove the case side cover. Refer to
Control Valve Body Cover Replacement
.

- Disconnect the wiring
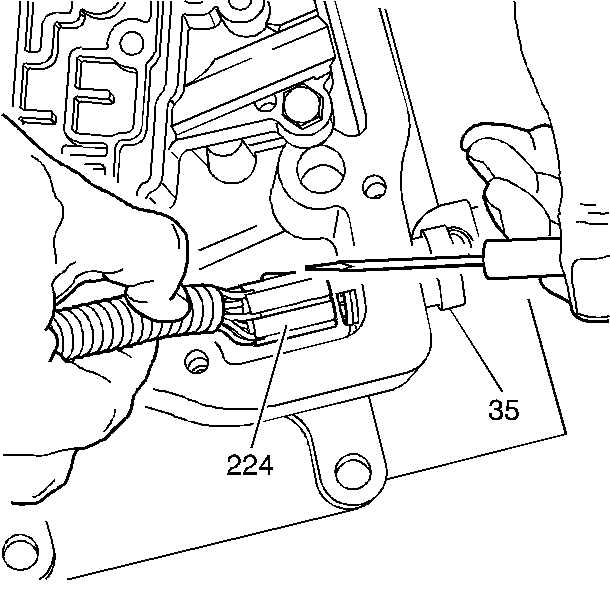
harness assembly (224) from the electrical connector (35) in the case.

- Disconnect the wiring
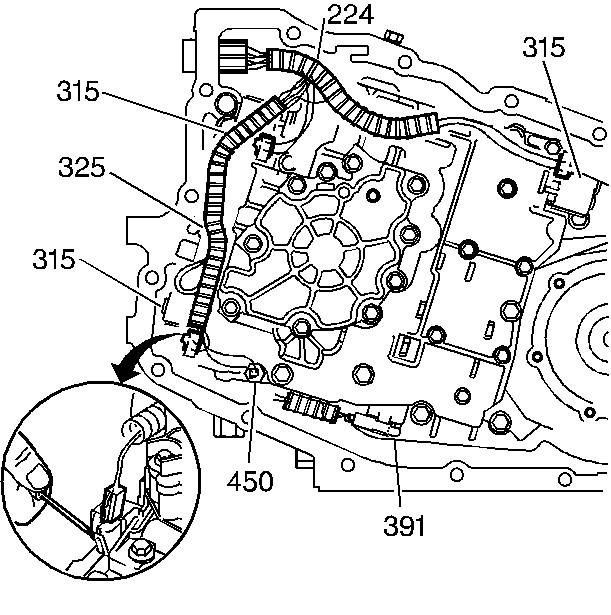
harness assembly (224) from the following components:
| • | The 1-2 shift solenoid (315) |
| • | The 2-3 shift solenoid (315) |
| • | The torque converter clutch solenoid (315) |
| • | The torque converter clutch PWM solenoid (325) |
| • | The wiring harness clip |
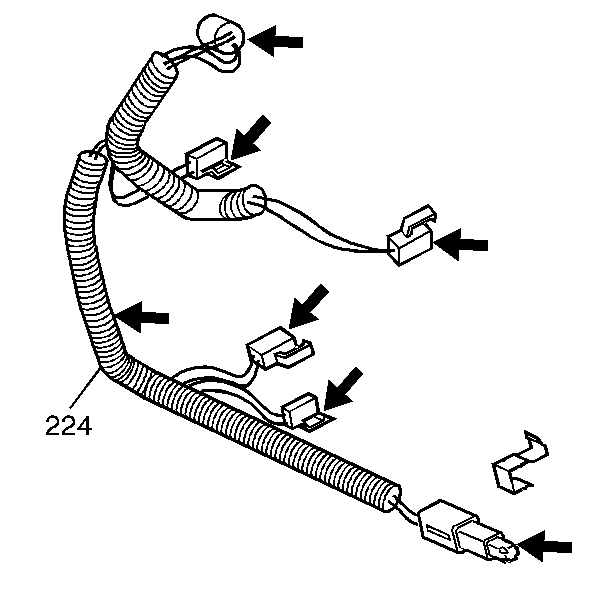
- Remove the wiring harness assembly with fluid temperature sensor.

- Inspect the wiring harness assembly (224) for the following:
| • | Bent or broken electrical connectors |
Installation Procedure
- Install the wiring harness assembly with fluid temperature sensor.

- Connect the wiring harness
assembly (224) to the following components:
| • | The 1-2 shift solenoid (315) |
| • | The 2-3 shift solenoid (315) |
| • | The torque converter clutch solenoid (315) |
| • | The torque converter clutch PWM solenoid (325) |
| • | The wiring harness clip |

- Connect the wiring harness
assembly (224) to the electrical connector (35) in the case.
- Install the case side cover. Refer to
Control Valve Body Cover Replacement
.


