Front Side Door Trim Panel Replacement early-before VIN YU314737, Y4272437
Removal Procedure
Tools Required
| • | J 36796 Clip Zip Tool |
| • | J 38778 Door Trim Pad and Garnish Clip Remover |
- Remove the inside door handle bezel. Refer to Door Inside Handle Bezel Replacement .
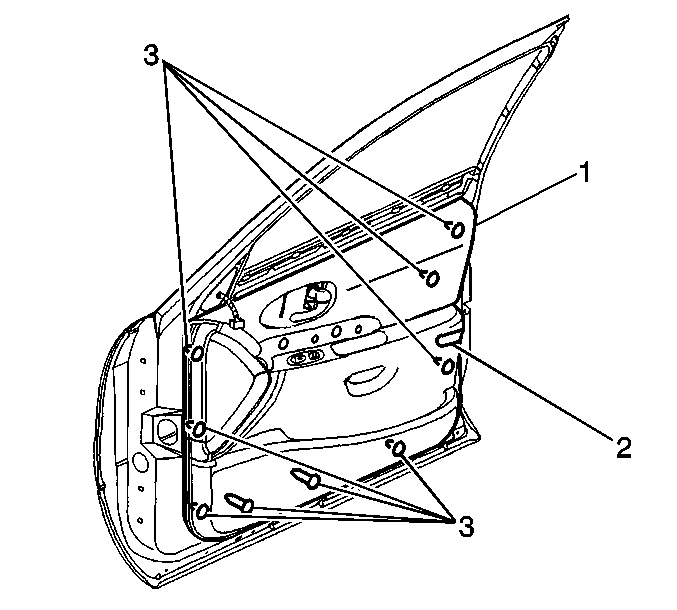
- Remove the upper door trim panel (1).
- Remove the door lamp or reflector. Refer to Door Lamp Replacement in Lighting Systems.
- Remove the fastener located at the rear of the door lamp or reflector opening.
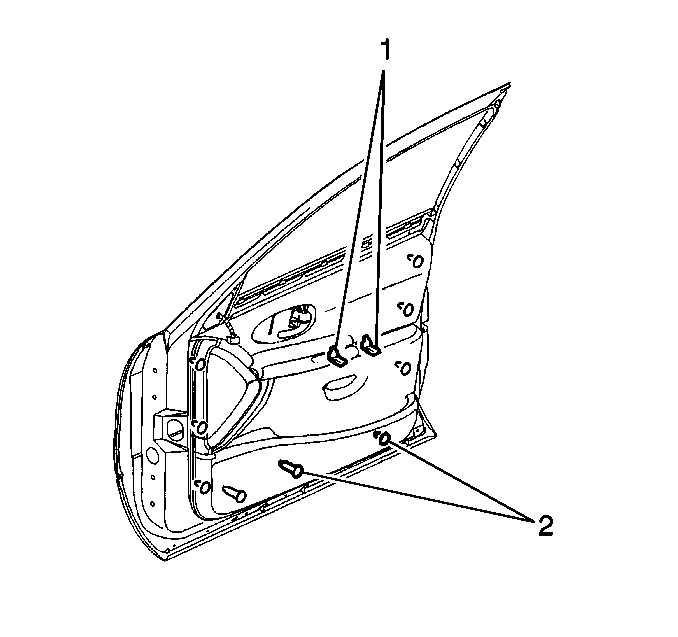
- Use the J 36796 or the J 38778 in order to release the retainers (2) around the outside edges of the door trim panel.
- Use theJ 38778 in order to disengage the male portion of the two piece fasteners from the cages on the door trim panel.
- Slide the door trim panel upwards approximately 30.0 mm (1.17 in) in order to release the door trim panel from the retainers.
- Disconnect the door trim panel wiring harness.
- Remove the door trim panel from the vehicle.
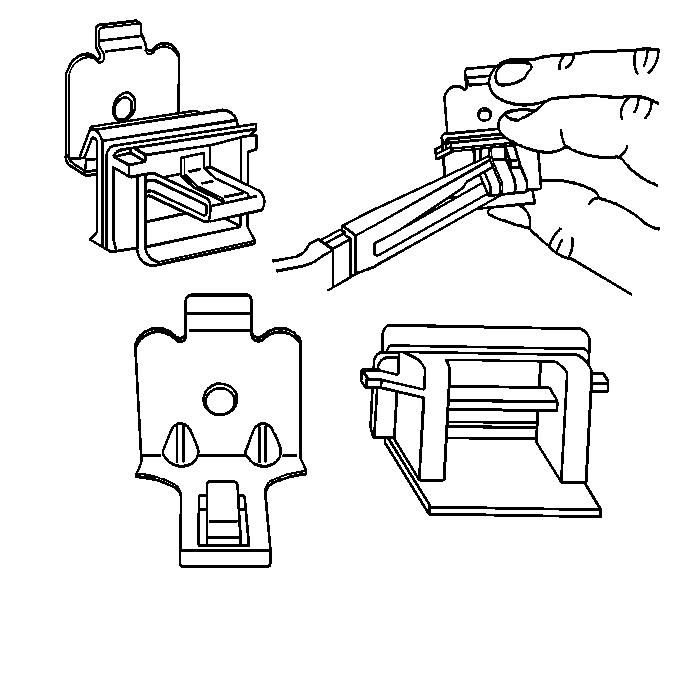
- Use long needle nose pliers in order to depress the tabs on the spring clips.
- Slide the black plastic retainers off of the spring clips.
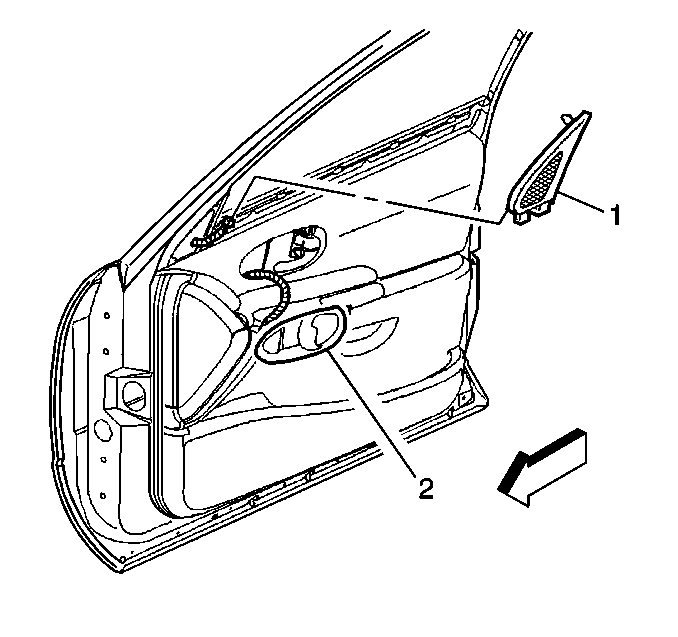
| 2.1. | Use the J 38778 in order to release the push in retainer at the top of the upper door trim panel (1). |
| 2.2. | Lift upwards in order to remove. |
| 2.3. | Disconnect the wire harness to the tweeter. |
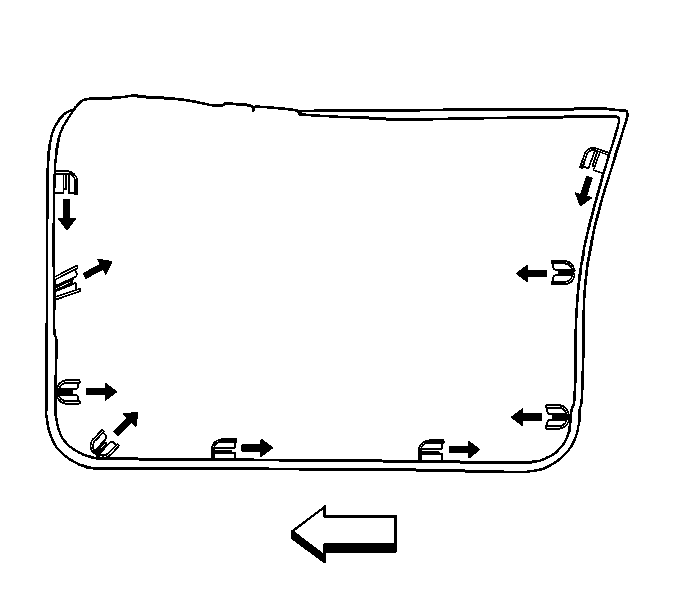
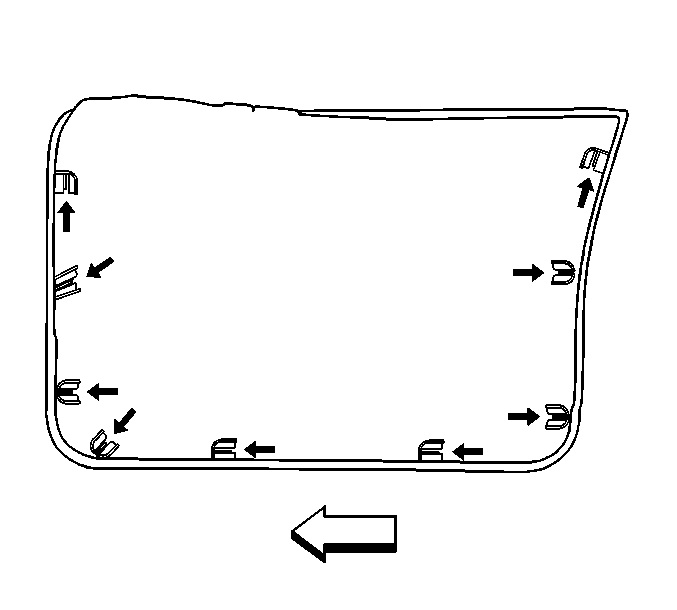
| 6.1. | Push each fastener in the direction of the arrows. |
| 6.2. | Allow the fasteners to fall into the inside of the door trim panel. |
Installation Procedure
- If installing a late production door trim panel to a early production door, proceed to step 11.
- Install the male portion of the door trim fasteners into the cages on the door trim panel.
- Connect the door wiring harness to the door trim panel wiring harness.
- Align the door trim panel to the armrest pull cup retainers (1).
- Snap in the retainers in order to secure the center of the door trim panel to the inner door panel.
- Pull on the armrest in order to ensure proper fit.
- Install the door trim panel with the 3 load assist fasteners at the lower edge of the door panel.
- Secure the door trim panel around the outside edges with the retainers (2).
- Press outboard midway between the top of the door trim panel and the armrest in order to secure the top rail on the door trim panel to the window inner belt seal strip.
- Go to step 19.
- Begin the installation procedure here if replacing an early production door trim panel with a late production door trim panel.
- Install a small section of sound deadening material such as 3M® Silencer Strips, P/N 08585, or the equivalent over each of the two armrest push-in nuts (5).
- Remove the two locator pins (4) from the late design door trim panel assembly.
- Align the door trim panel to the door.
- Ensure all nine door trim panel retainers (3) are in position.
- Push in both sides of the door trim panel starting at the upper corners, down to the lower corners and then along the bottom of the panel.
- Press outboard midway between the top of the door trim panel and the armrest in order to secure the top rail on the door trim panel to the window inner belt seal strip.
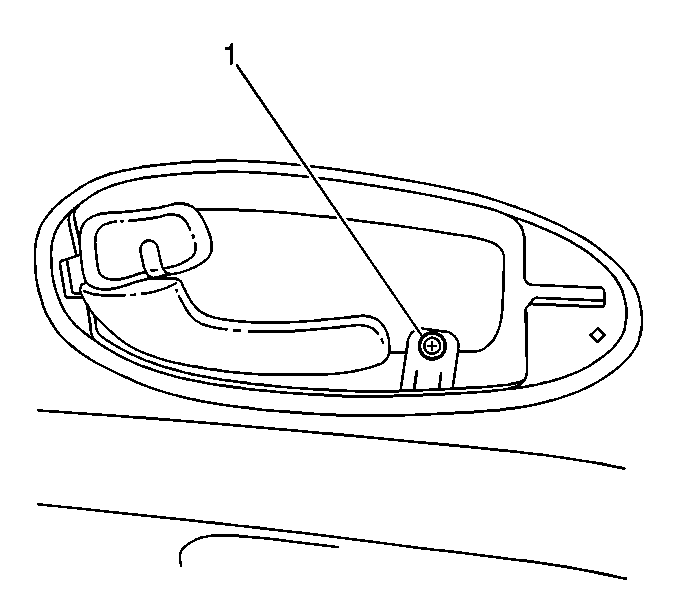
- Install a self piercing sheet metal screw, M4.2 x 19 mm (#8 x ¾ in), through the trim panel bracket in the inside door handle opening to the door.
- Install the fastener at the rear of the door lamp opening (2).
- Install the door lamp. Refer to Door Lamp Replacement in Lighting Systems.
- Install the inside door handle bezel. Refer to Door Inside Handle Bezel Replacement .
- Install the upper door trim panel (1).
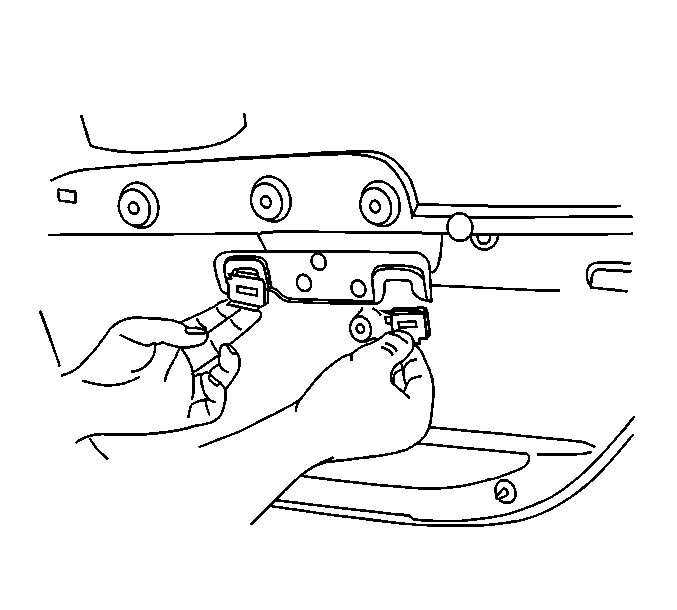
Insert the black plastic retainers into the mounting bracket on the inside of the door trim panel.

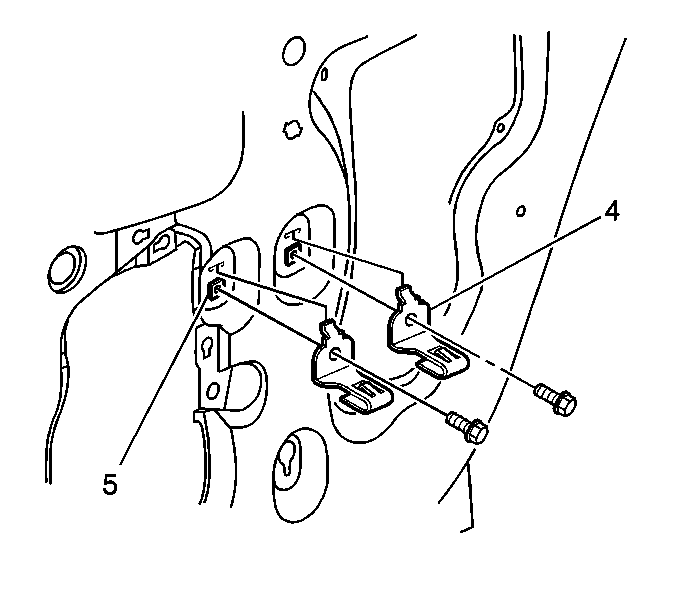
Remove both armrest retaining clips (4) from the door assembly.
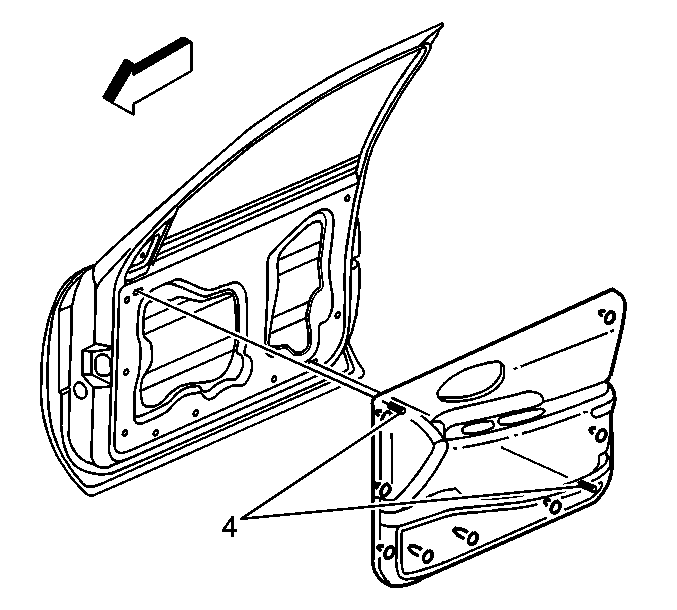
Use a pair of diagonal cutters to cut off the two locator pins (4) as close to the panel assembly as possible.

Tighten
Tighten the fastener (2) to 2 N·m(18 lb in).
Important: Use a new push in fastener when reinstalling the upper door trim panel (1). This prevents the upper door trim panel from rattling against the door frame.

| 22.1. | Connect the wire harness to the tweeter. |
| 22.2. | Insert the tabs into the slots on the door trim panel. |
| 22.3. | Insert the push in retainer into the hole in the door frame. |
Front Side Door Trim Panel Replacement late-after VIN YU314736, Y4272436
Removal Procedure
Tools Required
| • | J 36796 Clip Zip Tool |
| • | J 38778 Door Trim Pad and Garnish Clip Remover |
- Remove the upper door trim panel (1).
- Remove the inside door handle bezel. Refer to Door Inside Handle Bezel Replacement .
- Remove the fastener (1) located in the inside door handle opening.
- Remove the door lamp or reflector. Refer to Door Lamp Replacement in Lighting Systems.
- Remove the fastener located at the rear of the door lamp or reflector opening (2).
- Use the J 36796 or the J 38778 in order to release the retainers (3) around the outside edges of the door trim panel (1).
- Slide the door trim panel upwards approximately 30.0 mm (1.17 in) in order to disengage the door trim panel from the window inner belt seal strip.
- Disconnect the door trim panel wiring harness.
- Remove the door trim panel from the vehicle.

| 1.1. | Use the J 38778 in order to release the push in retainer at the top of the upper door trim panel (1). |
| 1.2. | Lift upwards in order to remove. |
| 1.3. | Disconnect the wire harness to the tweeter. |


Installation Procedure
- Connect the door wiring harness to the door trim panel wiring harness.
- Align the two locator pins (4) on the door trim panel to the door.
- Ensure all nine door trim panel retainers (3) are in position.
- Push in both sides of the door trim panel starting at the upper corners, down to the lower corners and then along the bottom of the door trim panel.
- Press outboard midway between the top of the door trim panel and the armrest in order to engage the top rail over the window inner belt seal strip.
- Install the fastener at the rear of the door lamp or reflector opening (2).
- Install the door lamp or reflector. Refer to Door Lamp Replacement in Lighting Systems.
- Install the fastener (1) in the inside door handle opening.
- Install the inside door handle bezel. Refer to Door Inside Handle Bezel Replacement .
- Install the upper door trim panel (1).


Tighten
Tighten the fastener to 2 N·m (18 lb in).

Tighten
Tighten the fastener (1) to 2 N·m (2 lb in).
Important: Use a new push in fastener when reinstalling the upper door trim panel (1). This prevents the upper door trim panel from rattling against the door frame.

| 10.1. | Connect the wire harness to the tweeter. |
| 10.2. | Insert the tabs into the slots on the door trim panel. |
| 10.3. | Insert the push in retainer into the hole in the door frame. |
