General Wind Noise/Wind Rush (Install Sealer)

| Subject: | General Wind Noise/Wind Rush (Install Sealer) |
| Models: | 2000 Buick LeSabre |
This bulletin contains information on several conditions.
Notice: The following procedure must be followed to remove the door trim panel or door panel breakage will occur. If door panel breakage occurs, refer to Corporate Bulletin Number 99-08-110-007.
Door Trim Removal Procedure
- Remove the inside door handle bezel and electrical connector.
- Remove the door speaker bezel (mirror patch) at the top of the door, using J38778. The bezel is attached with one push-in fastener.
- Remove the fastener in the trim panel at the bottom rear corner of the door or behind the reflector at the rear of the door.
- Insert J38778 between the door and the lower edge of the trim panel. Center the trim panel plastic pin in the groove of the tool and pop the pin from the door. Refer to Figure 1 for location of the pins.
- After detaching the bottom edge, hold the panel away from the door about an inch to help release the front and rear edge pins.
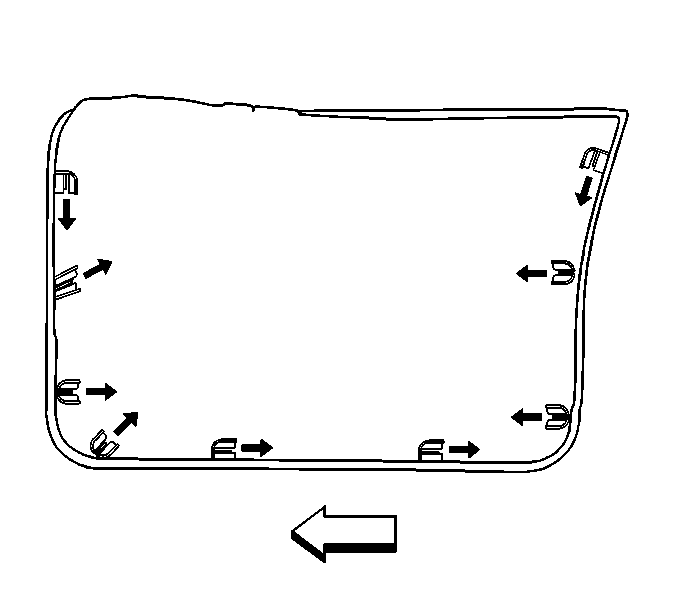
- After popping the pins, slide each from its cage. Refer to Figure 2 for direction of pin removal.
- To remove the trim panel, pull upward. Detach the electrical connector and set the panel aside.
- Use needle nose pliers to depress the door mounted spring clip metal tabs. Slide the black plastic retainers from the spring clips.
- Slide the push-pins in their cages with the three long pins at the bottom of the trim panel.
- Insert the black plastic retainers into the trim panel metal retainers.
- Connect the door wiring harness and the routing clip to the door module.
- With all the pins aligned, push the three lower pins to the door. This automatically aligns the metal clips to the plastic retainers.
- Push on the upper edge to engage the top rail over the window inner belt strip. Tap on the door panel at the remaining retainers.
- Reinstall the speaker bezel.
- Reinstall the door handle bezel.
- Reinstall the fastener behind the door reflector or at the bottom rear corner of the door.
Figure 1
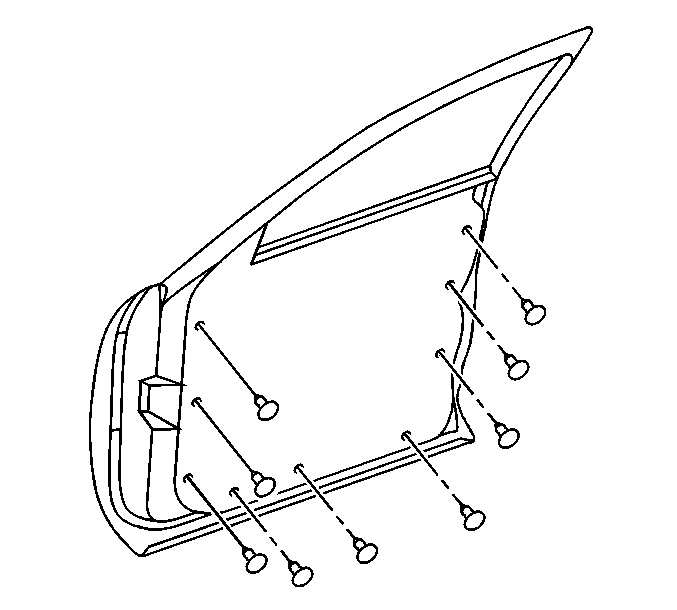
Figure 2
Condition # 1
Some customers may comment on wind noise around the mirror.
Cause
Figure 3
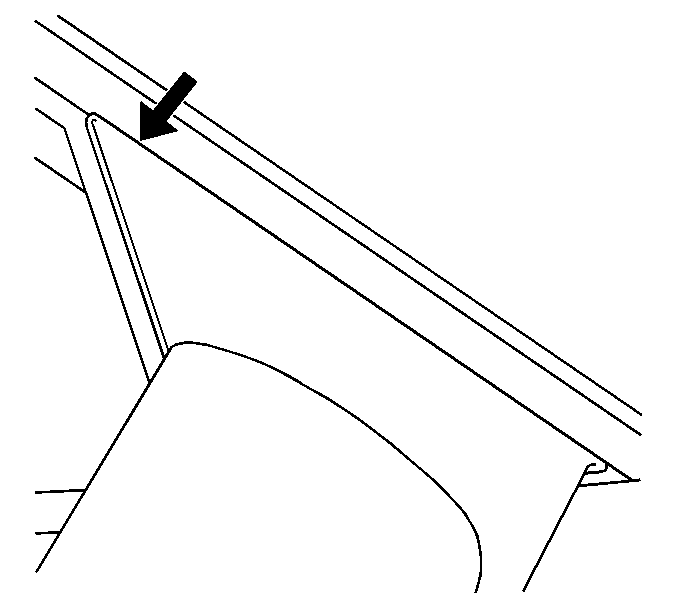
The mirror may not be seated along the top edge. Refer to Figure 3 for location.
Correction
- Roll glass full down.
- Pull mirror patch bezel down off the garnish molding and push the mirror patch bezel inboard until it snaps under the garnish molding.
Condition # 2
Important: See door trim removal procedure at the beginning of this bulletin.
Some customers may comment on wind noise around the mirror patch.
Cause
There may be voids in the sheet metal around the mirror patch.
Correction
Complete the following three correction procedures (Correction A, B, and C).
Correction A
- Remove the mirror.
- Remove the reveal molding screw behind the mirror patch.
- Lift up on the front lower portion of the reveal molding and fill the void with thumb grade sealer. Refer to Figure 4.
Figure 4
Correction B
Figure 5
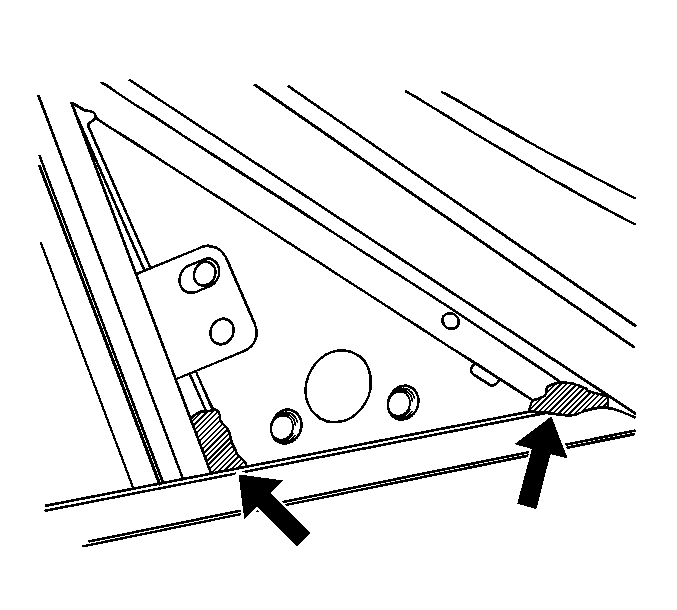
Fill the holes in the front and rear corners of the mirror patch with thumb grade sealer. Refer to Figure 5.
Correction C
Figure 6
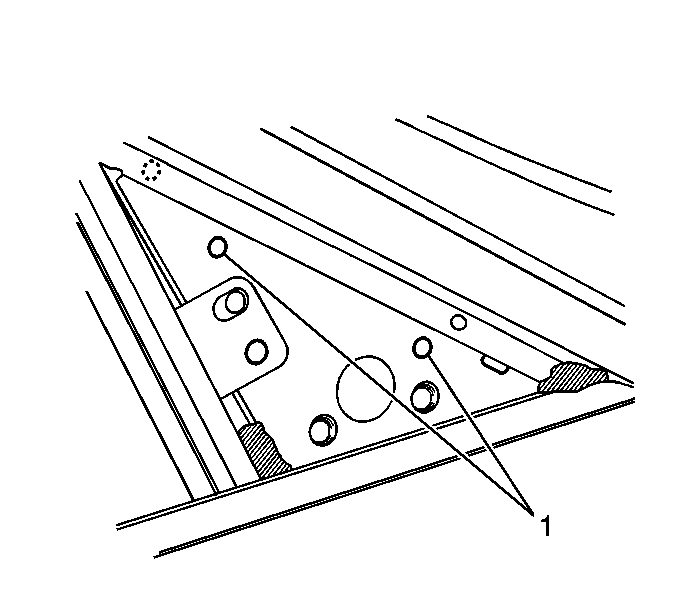
Cover gage holes in the sheet metal with duct tape or equivalent. Refer to (1) in Figure 6.
Condition #3
Some customers may comment on wind noise at the top of the division post.
Cause
Figure 7
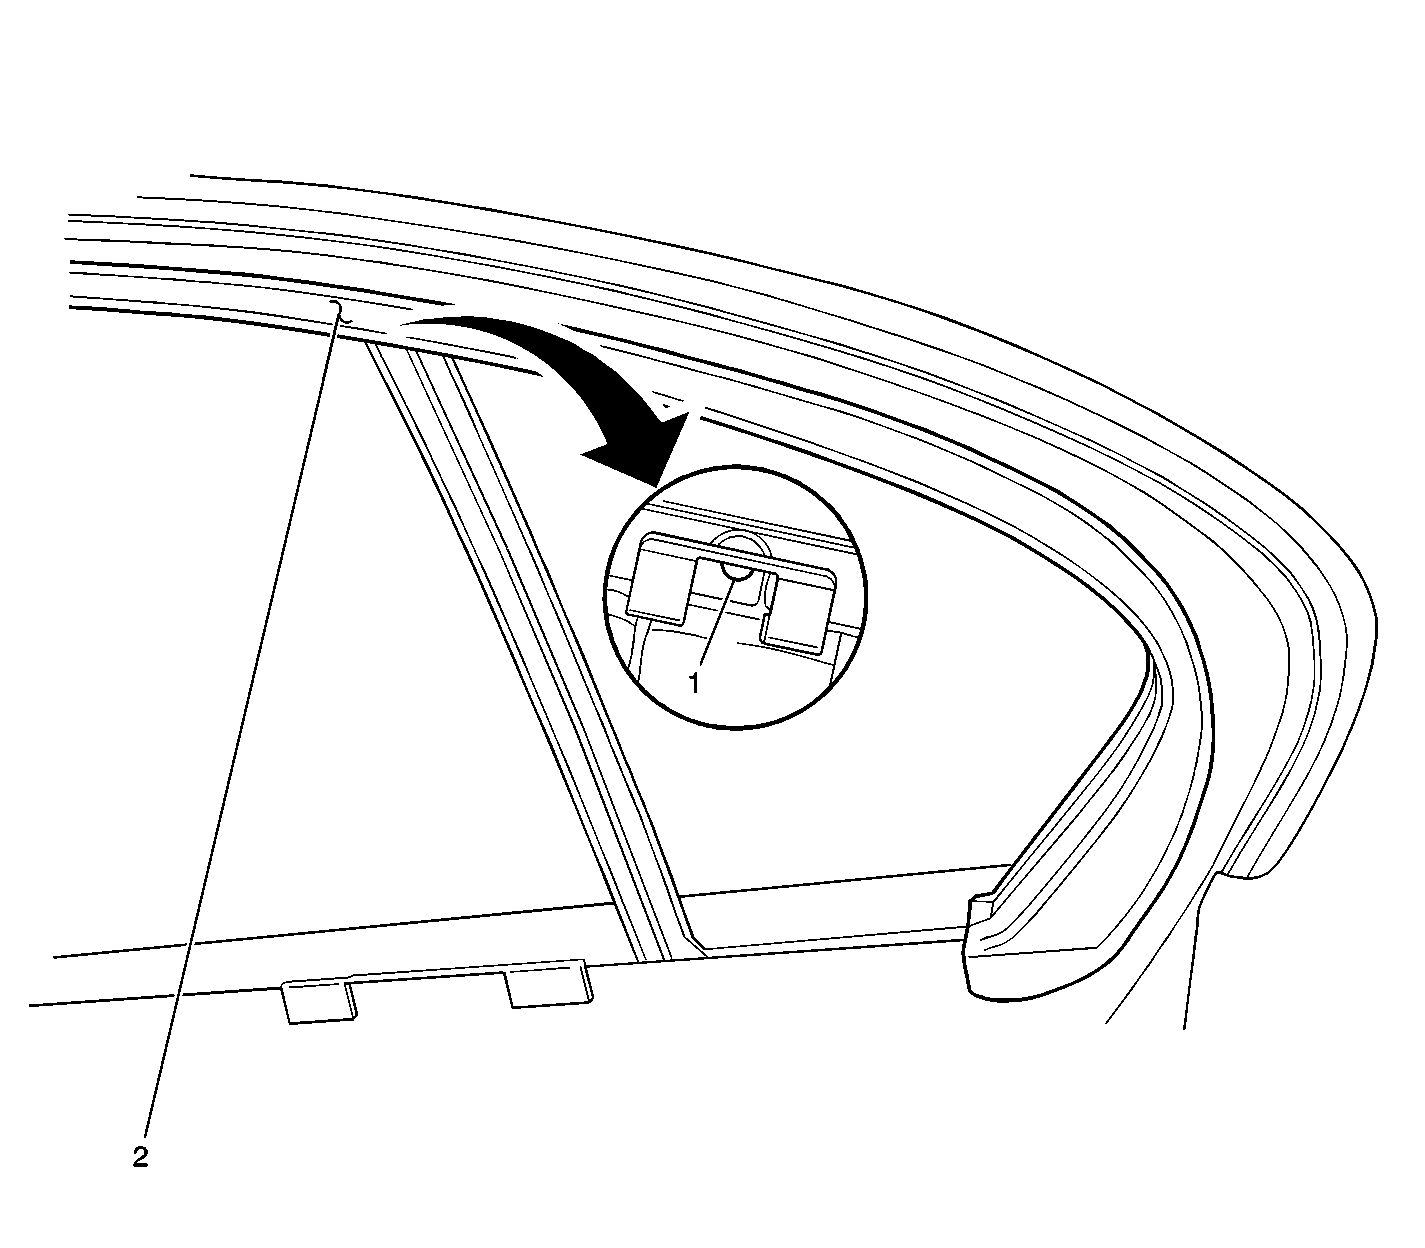
- The division post is not seated properly. Refer to (1) in Figure 7.
- The glass run channel lip does not seat properly against the door sheet metal at the top of the division post. Refer to (2) in Figure 7.
Correction A
Important: See door trim removal procedure.
- With the door trim removed, take off the plastic cap below the division post.
- Remove the lower division post attaching bolt.
- Move the division post until seated properly. On the backside of the retaining clip, at the top of the division post, there is a round portion of the clip that fits into the door sheet metal when seated properly. Refer to (1) in Figure 7.
Correction B
Pull the glass run channel lip down at the top of the division post and apply a piece of butyl to the division post retaining clip and seat the glass run channel lip to the door panel. Refer to (2) in above Figure 7.
Condition # 4
Some customers my comment on road noise at the base of the rear door quarter glass.
Correction
- Remove the door trim and the inner belt strip.
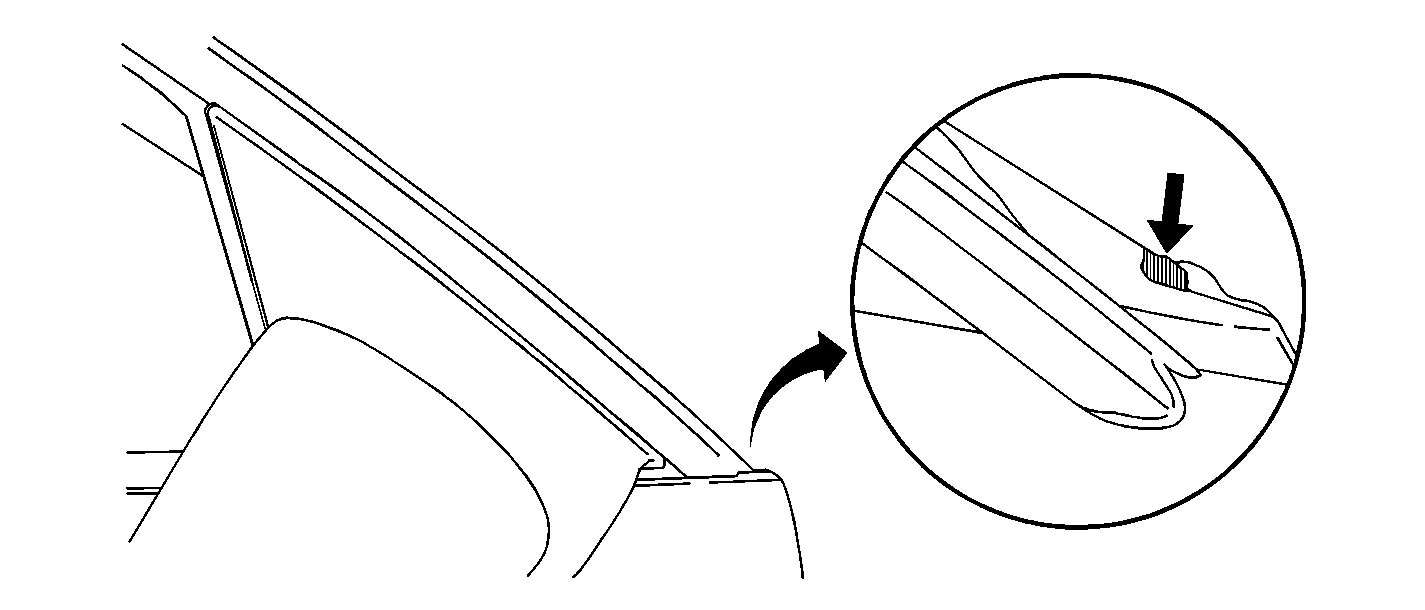
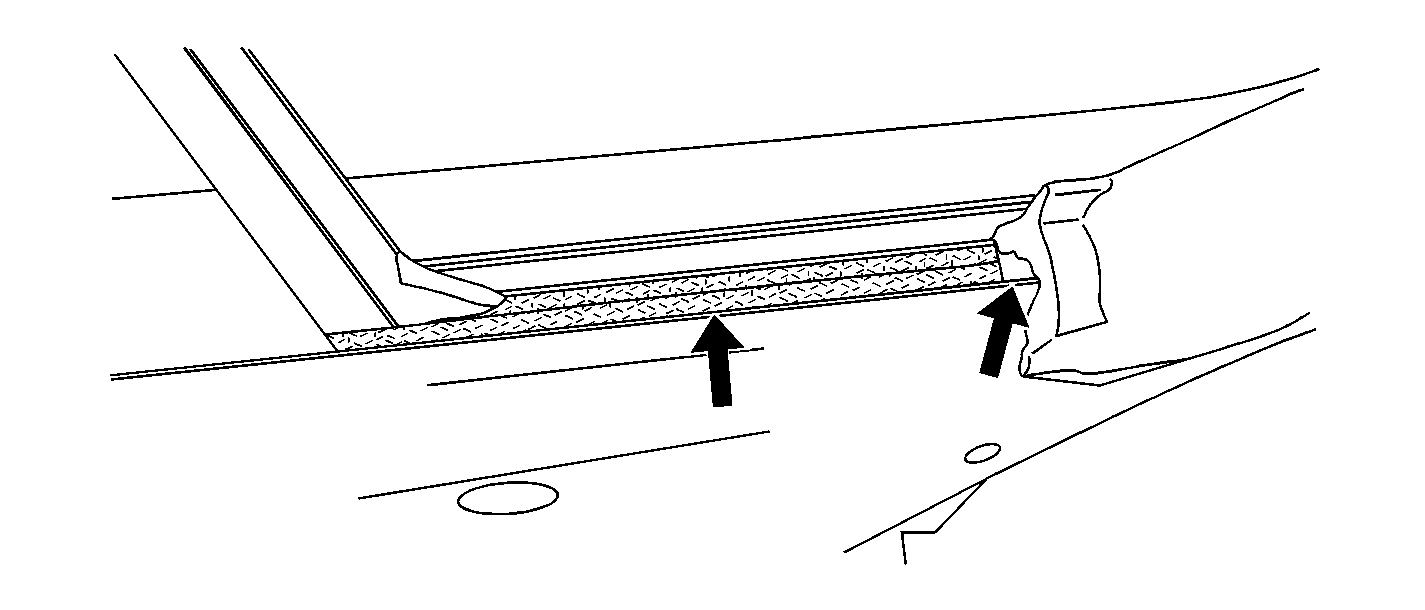
- Using two layers of *Kent sponge rubber weatherstripping Stock No. 470, P/N 46505, fill the void between the vent glass and the inner door panel. Refer to Figure 8.
- With the two layers installed at the base of the quarter glass, fill the void at the rear of the vent glass with approximately a 25 mm (1 in) long piece of foam. See arrow at the rear of the quarter glass in Figure 8.
Figure 8
Condition # 5
Some customers may comment on wind noise/wind rush at the rear of the quarter glass.
Cause
Figure 9
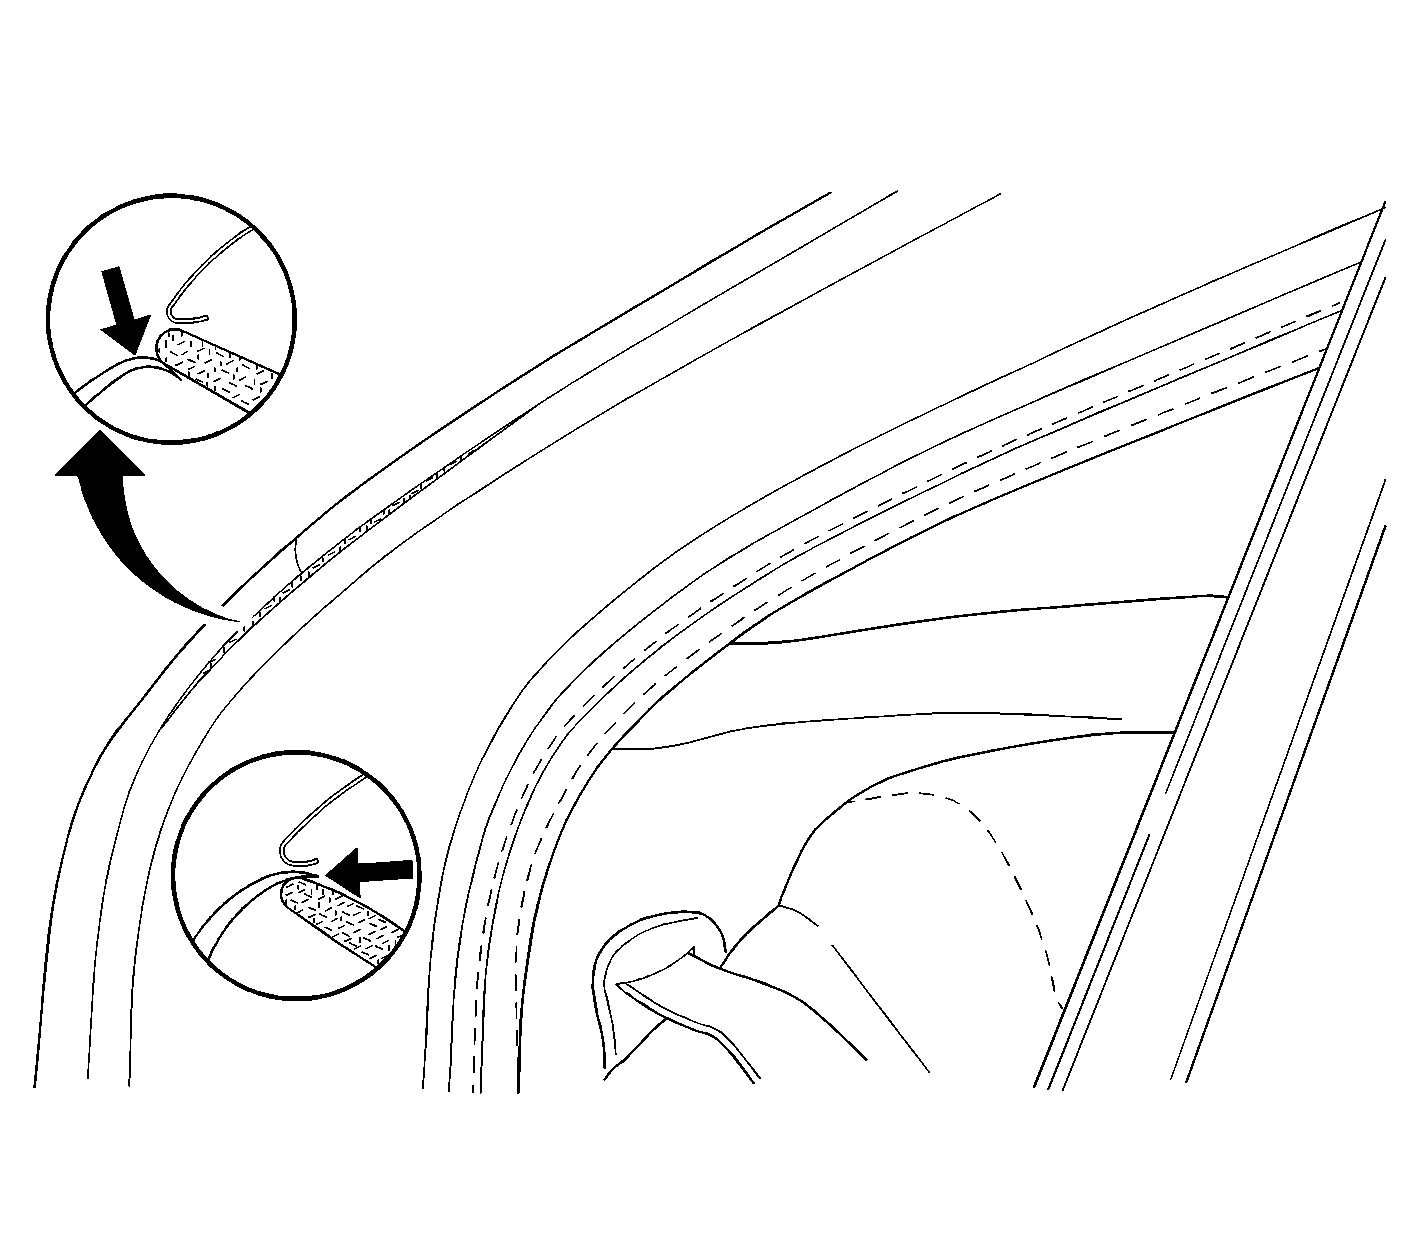
The vent glass molding may not be positioned properly and the garnish molding lip may be tucked under the foam. Refer to top arrow in Figure 9.
Correction
Using a six inch scale, insert the scale between the rubber lip and the foam and fold the garnish molding lip outboard so the lip sits on top of the foam. Refer to lower arrow in Figure 9.
Condition # 6
Some customers may comment of wind noise around the perimeter of the vent glass.
Cause
The vent glass retaining lip may not be seated around the perimeter of the door frame.
Correction
Figure 10
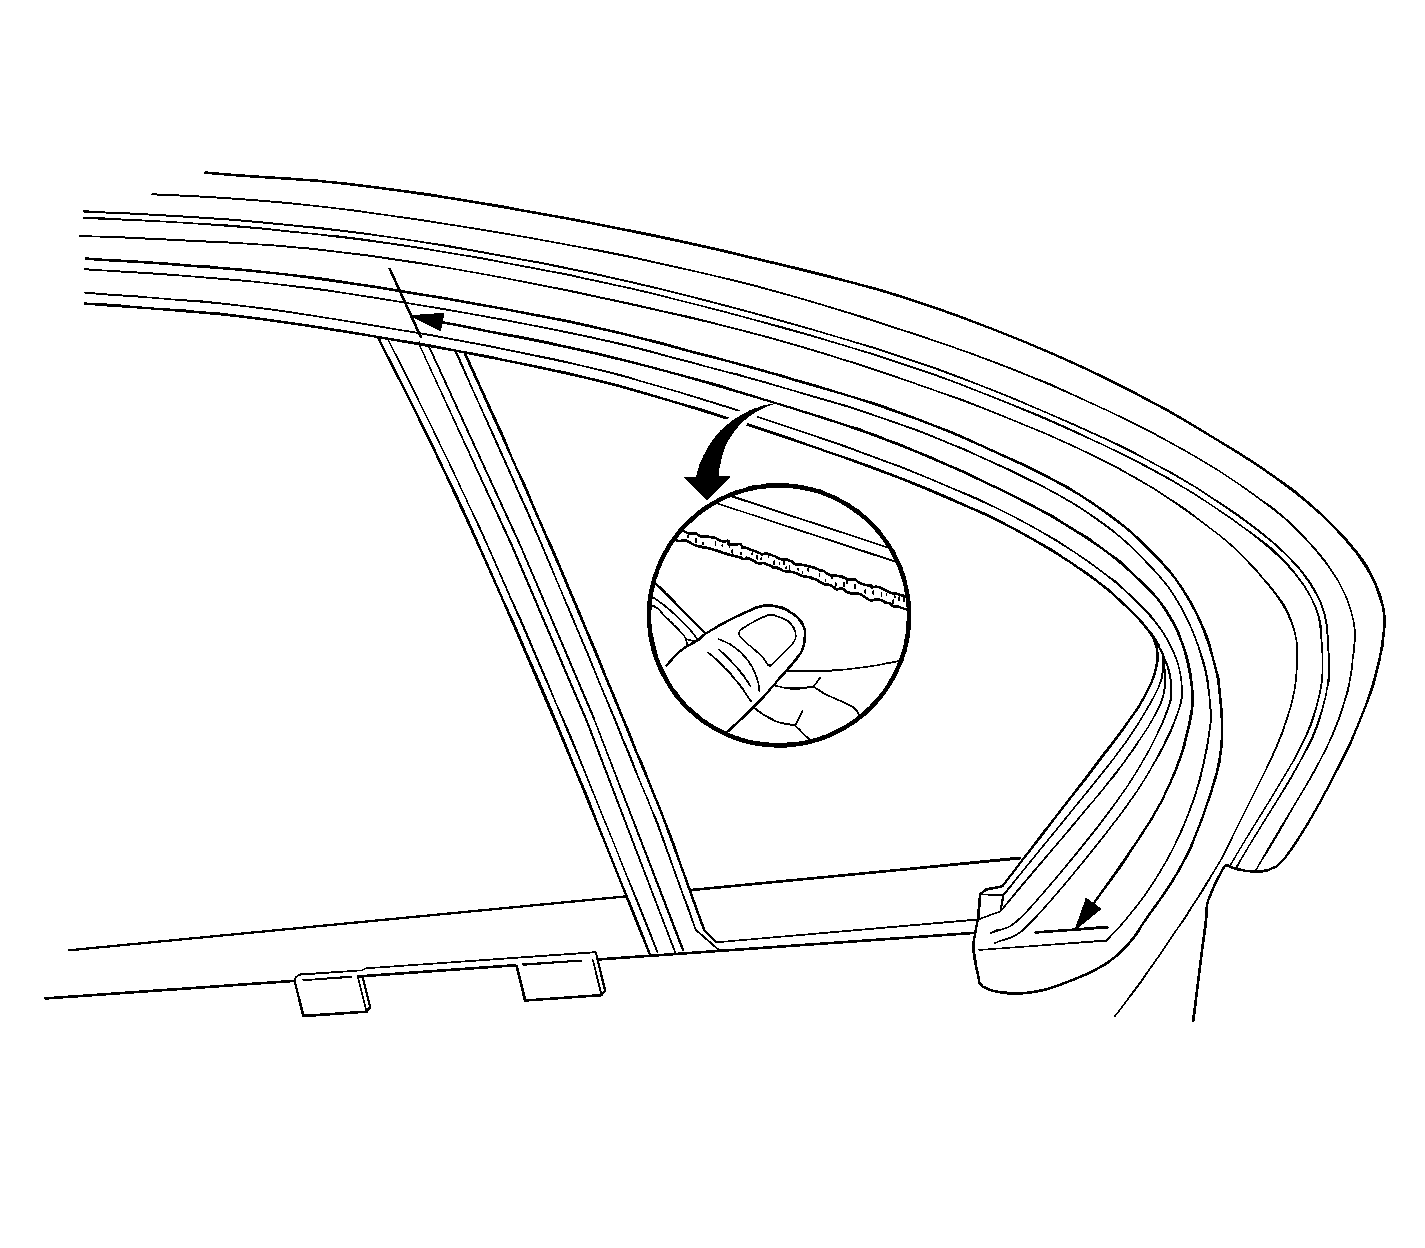
Pull down on the vent glass retainer and apply *3M™ Bedding and Glazing Compound from the top of the division post to the bottom of the quarter glass. Refer to the location shown in Figure 10.
Condition # 7
Some customers may comment on wind noise at the top rear corner of the front door or top front corner of the rear door.
Cause
The run channel may not be seated to the door frame.
Correction
- Pull the run channel from the door frame.
- Squeeze the run channel together for better retention.
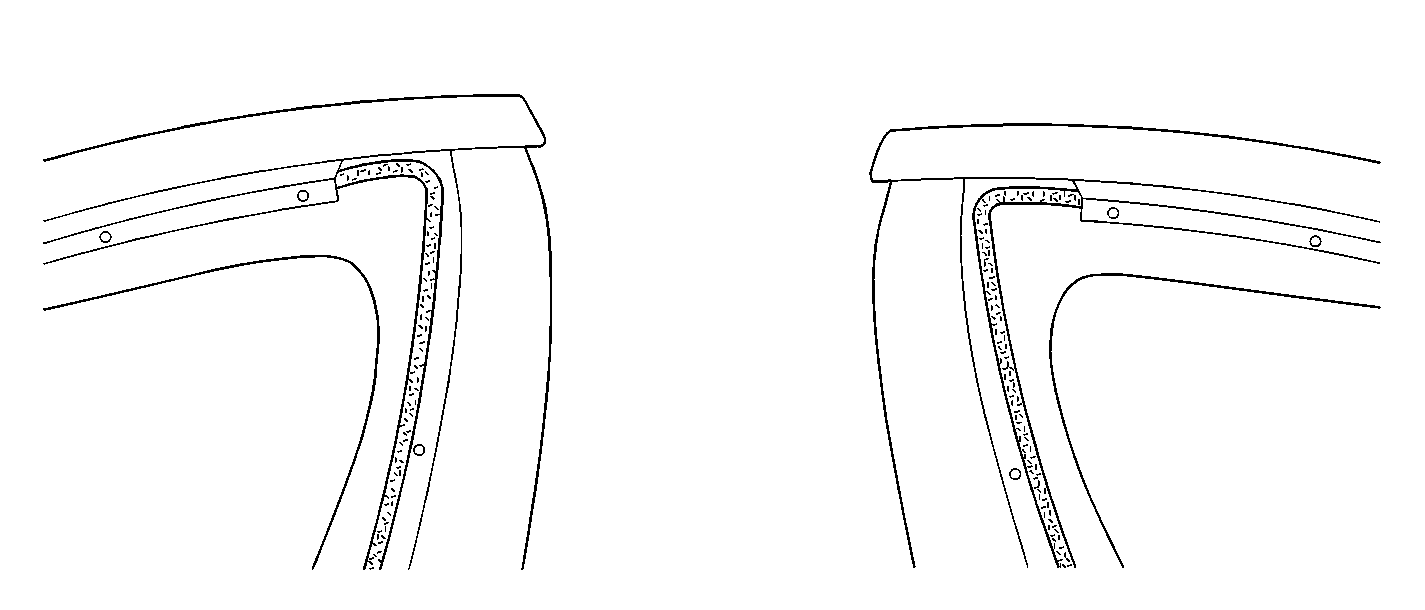
- Apply a small bead of *3M™ Bedding and Glazing Compound to the top 76.2 mm (3 in) of the door to the corner and down the rear portion of the door approximately 254 mm (10 in). Refer to Figure 11.
- Reinstall the run channel starting in the corner, then the rear edge and then the top of the run channel.
Figure 11
*We believe these sources and their materials to be reliable. There may be additional manufacturers of such materials. General Motors does not endorse, indicate any preference for or assume any responsibility for the products from these firms or for any such items which may be available from other sources.
Warranty Information
For vehicles repaired under warranty, use:
Labor Operation | Description | Labor Time |
|---|---|---|
B4805 | Front/Rear Door Wind Noise - All Four Doors | 1.6 hrs |
